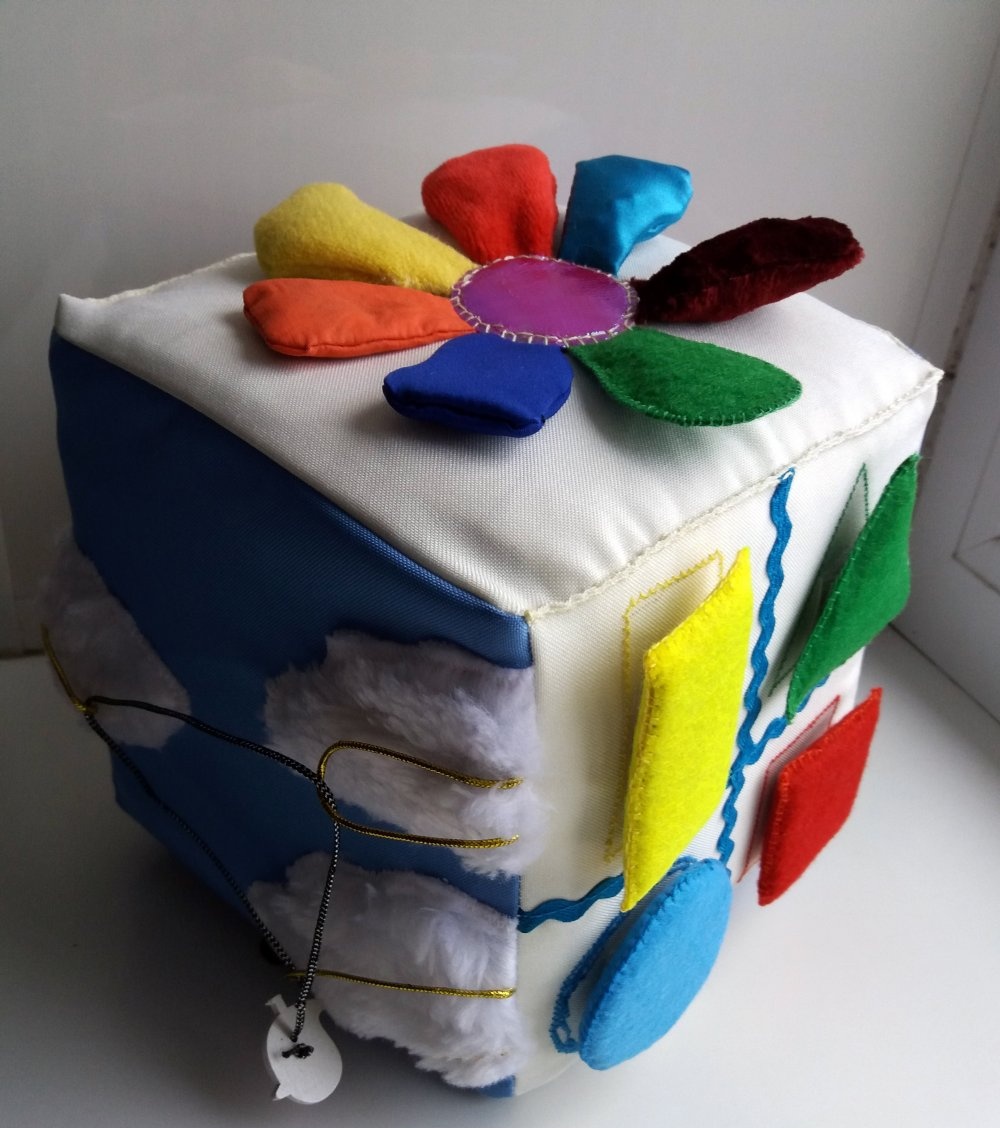
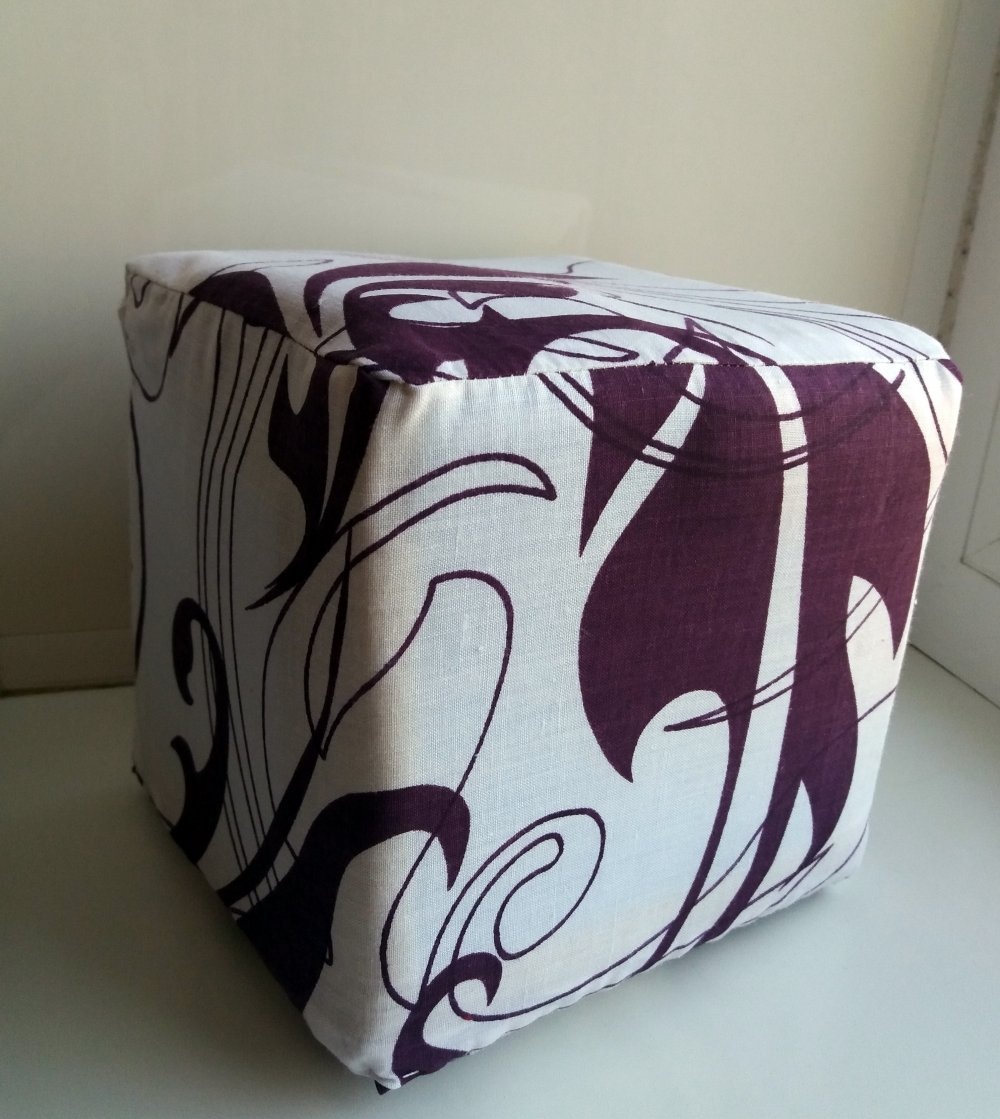
The edge of this cube is 15 cm in size.
First you need to make a dense base: ideally it is a cube of foam rubber. If you do not find large pieces of foam rubber, you can glue a cube from small pieces. Holofiber, synthetic wool, etc. are also suitable as fillers. But in this case, the cube will be softer and will hold its shape less well.
The base can be additionally covered with a fabric cover for strength.
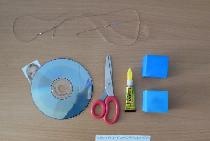
Now you need to cut 6 squares measuring 17x17 cm (including 1 cm allowances) from thick fabric - in this case it is gabardine.
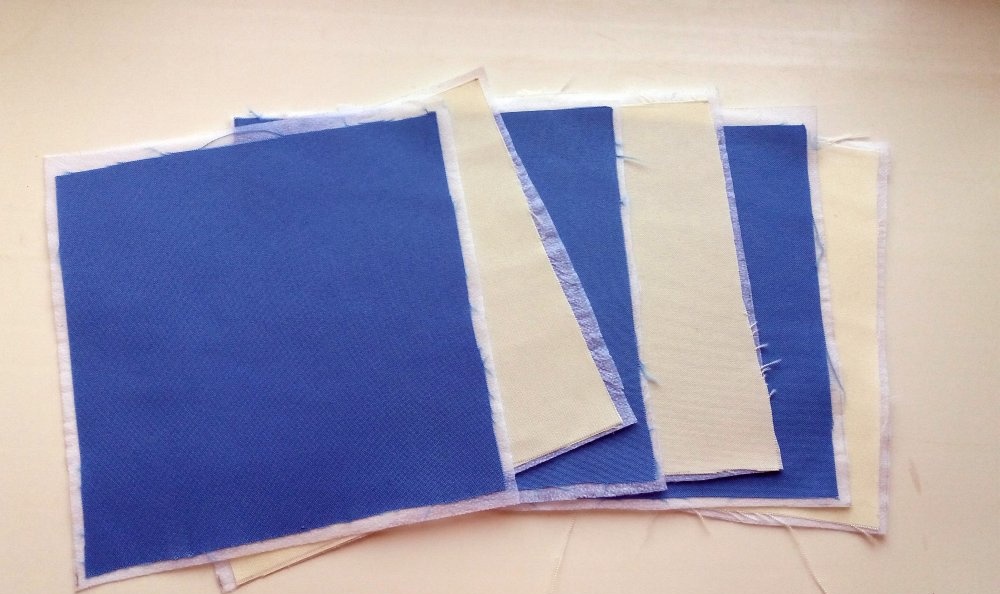
Glue the fabric with non-woven fabric for greater density.
That's it, you can start creating each side of the cube.
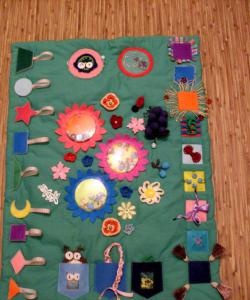
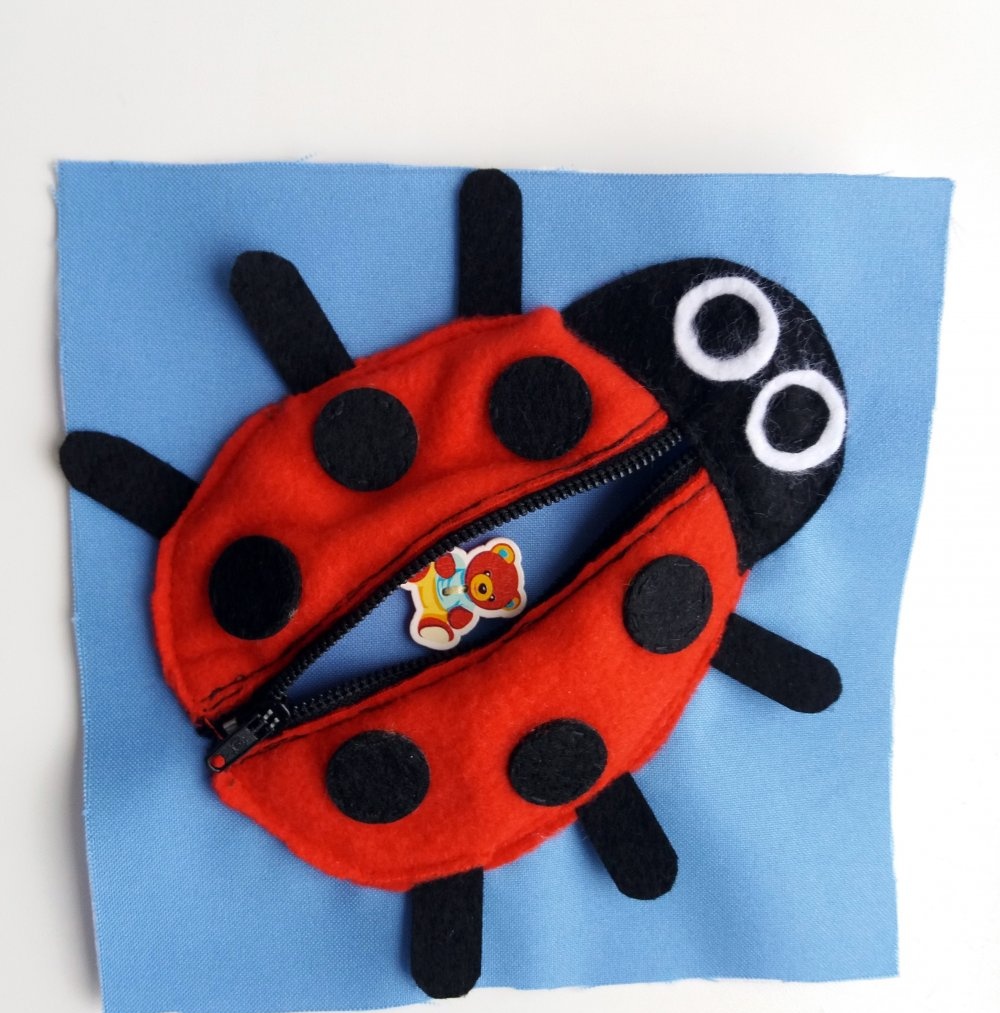
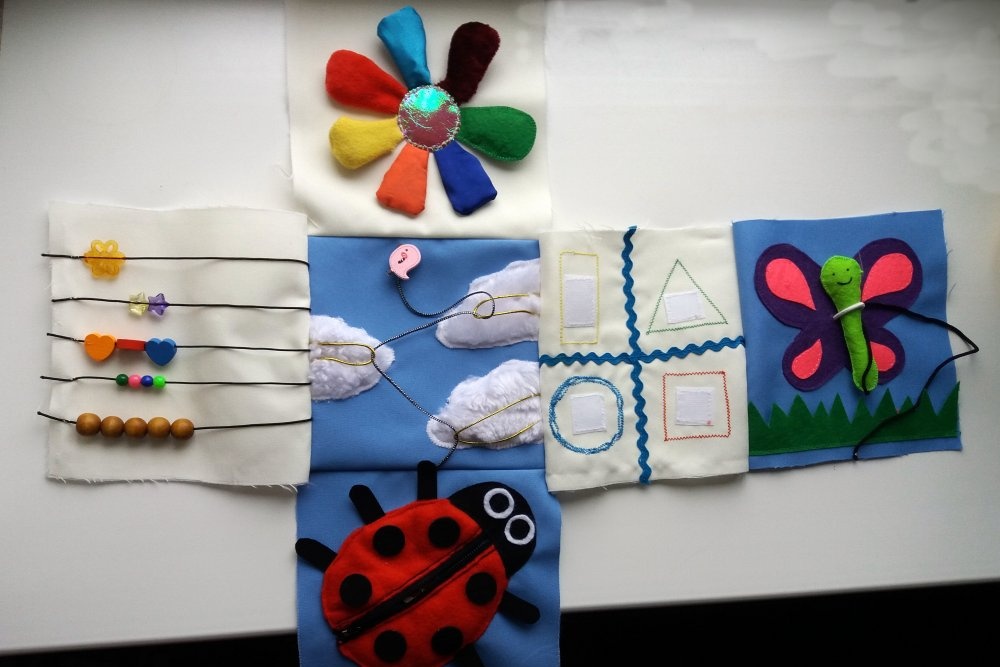
Ladybug Side
Such a plot will certainly interest the baby: you can unfasten the ladybug - a bear button is hidden inside, and you can also pull the paws and count the spots on the back.
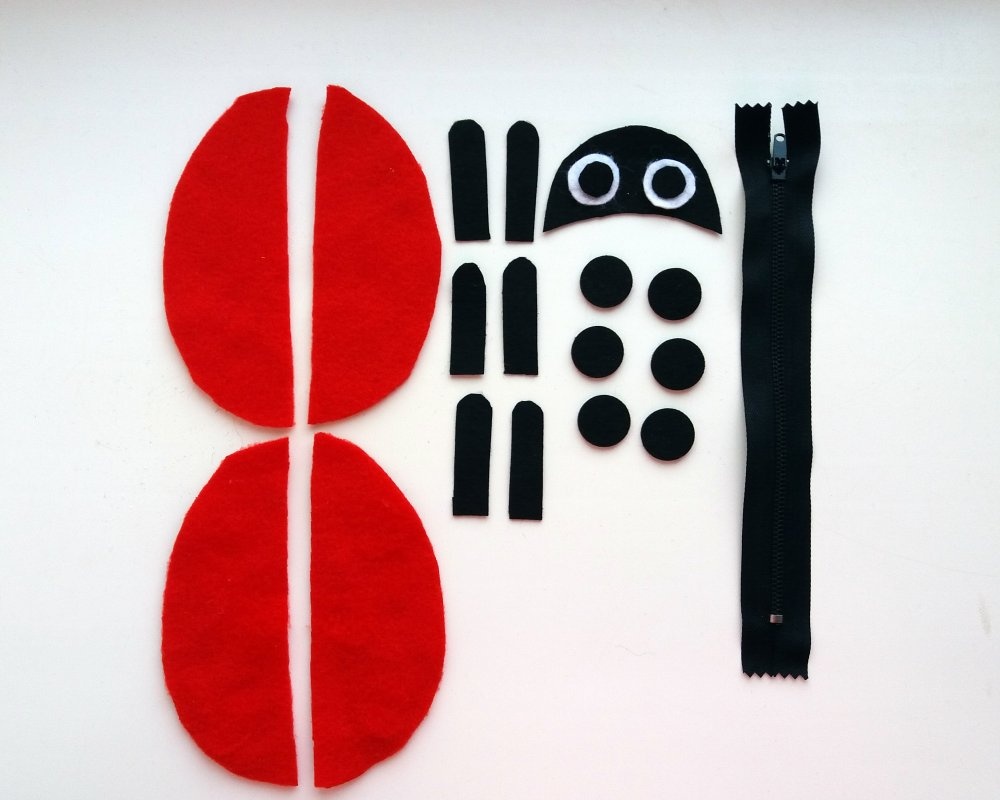
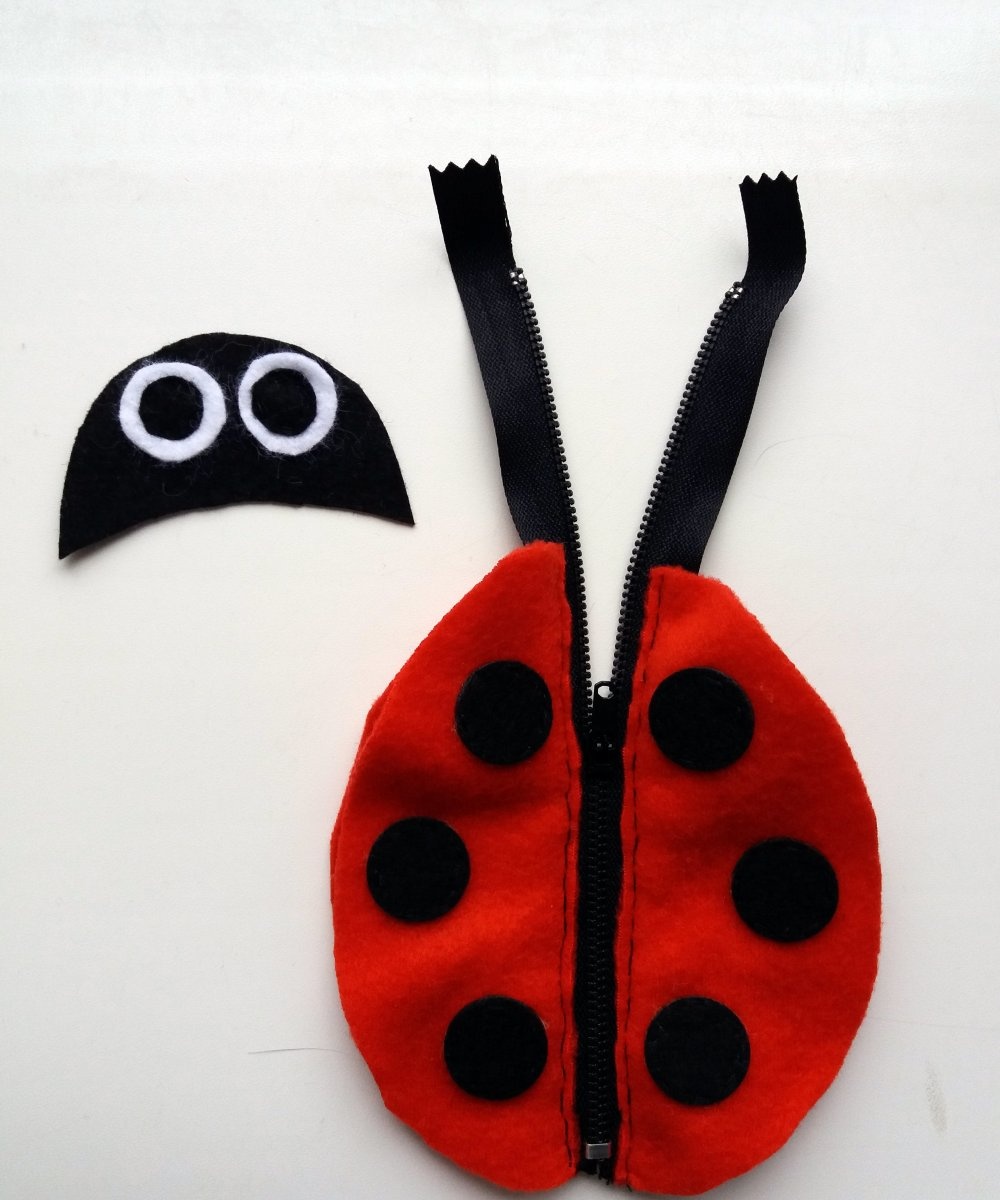
Cut out 4 pieces from red fleece (or other suitable fabric), 6 legs and spots from black felt, and a head and eyes from felt. Sew the eyes to the head, spots to 2 red parts. Carefully sew (or machine stitch) the zipper, placing each edge between two red pieces. Cut off the excess part of the zipper and sew the head to the back.
Baste the legs, placing their ends between the parts of the body, and sew the ladybug to the base fabric. Sew the button tightly inside.
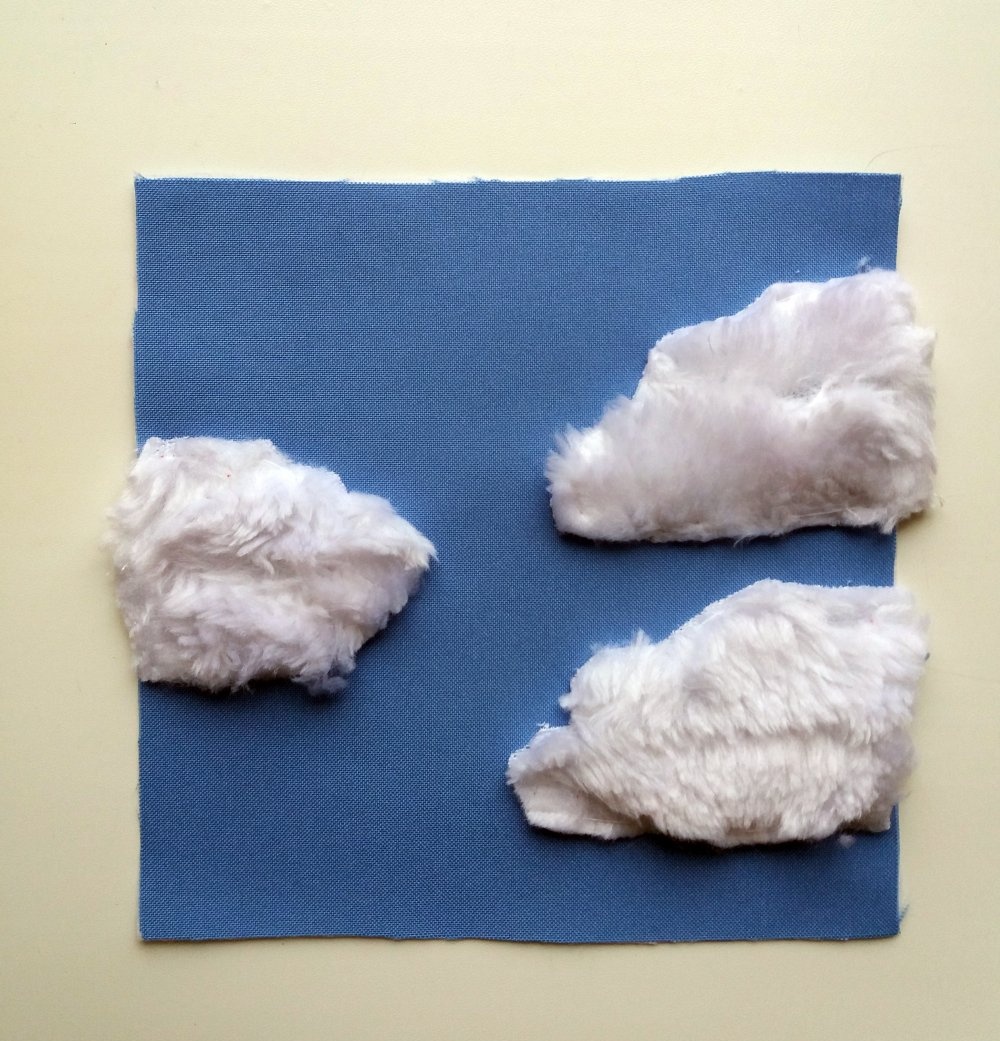
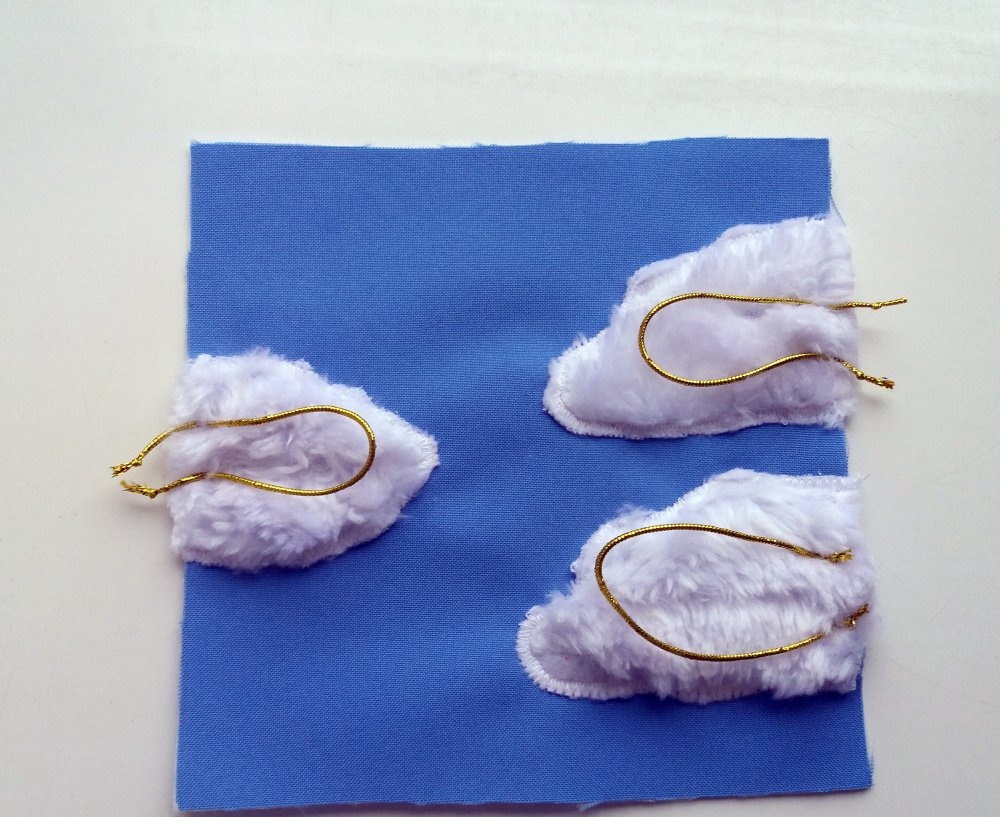
"Cloud" side
Your child will love petting these fluffy clouds, and this design also features a lace-up design with a bird button.
Cut clouds from white synthetic fur and sew to the base fabric. Baste small pieces of golden cord on the sides of each cloud (then, when sewing the sides of the cube together, they will be securely fastened). At the bottom, secure the cord with a tied button at the end with a few stitches.

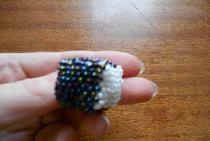
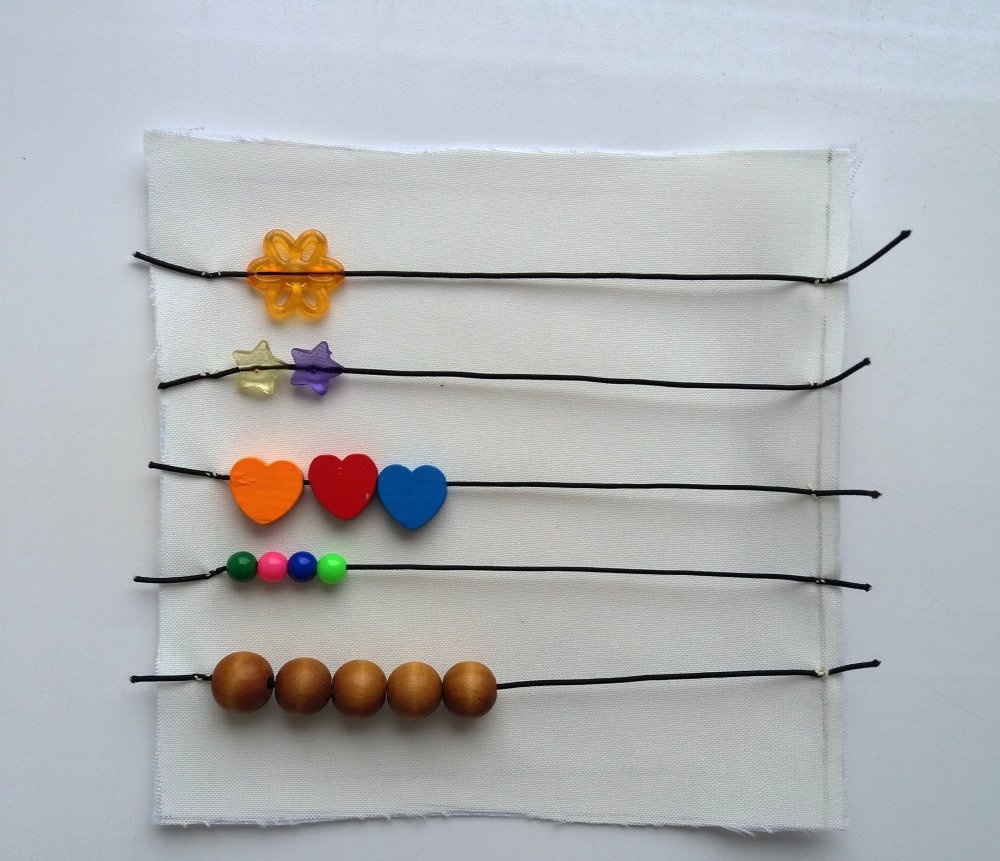
Beads side
Bright beads strung on an elastic cord will allow your child to move and tug with enthusiasm. There are 5 rows in total, with the number of beads from 1 to 5. It is better to take beads of different colors and from different materials.
Cut the elastic into 17 cm long pieces, baste each piece to the base one by one, string the beads, then baste to the opposite side.
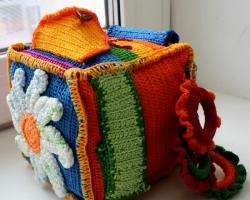
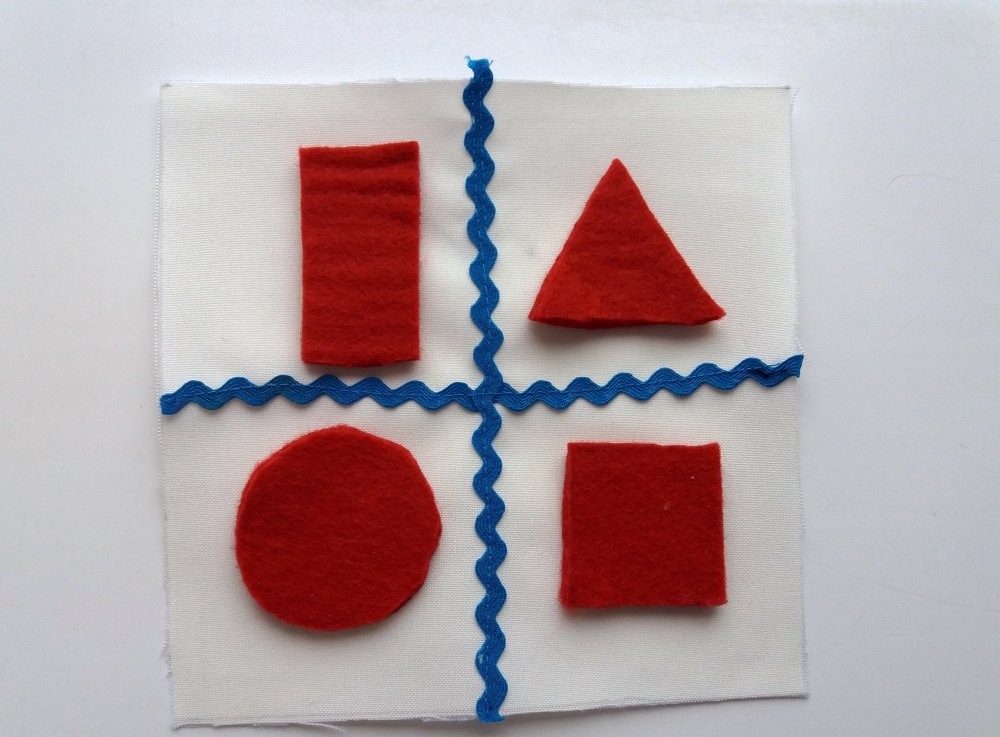
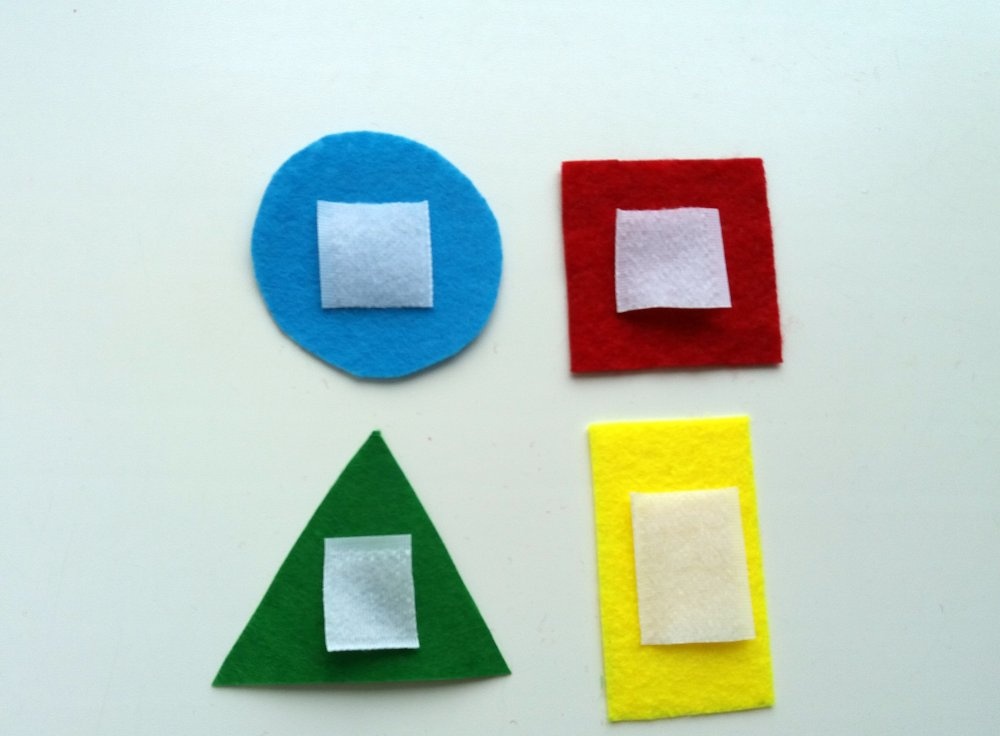
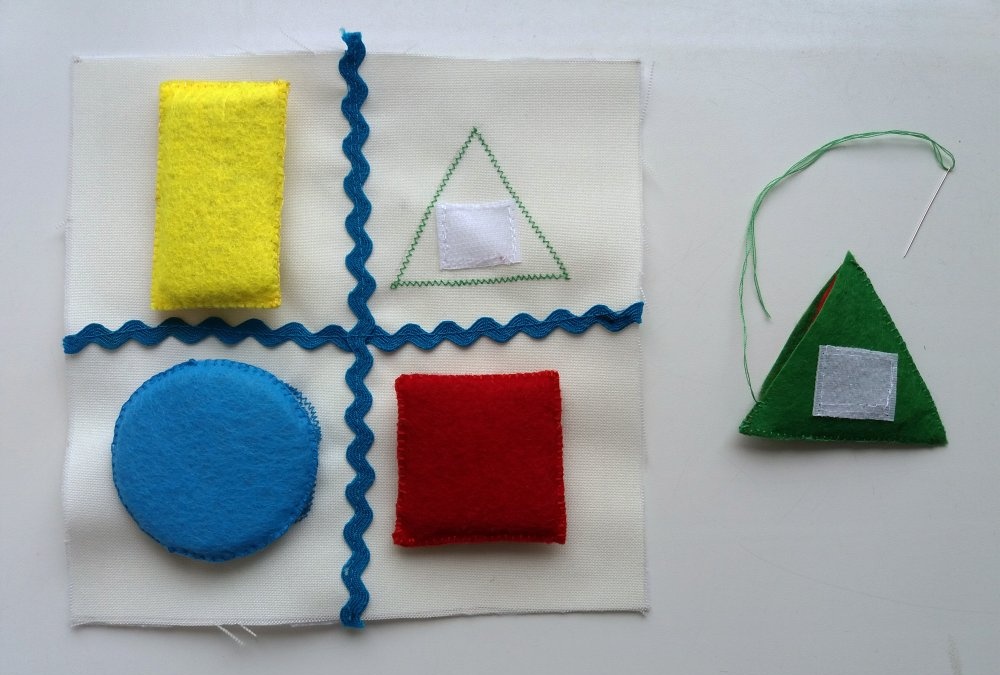
Side "Geometric Shapes"
Thanks to this side of the cube, the baby will become familiar with simple geometric shapes. They are multi-colored and attached with Velcro. Each figure has its own “place” on the base fabric, embroidered with threads of the same color.
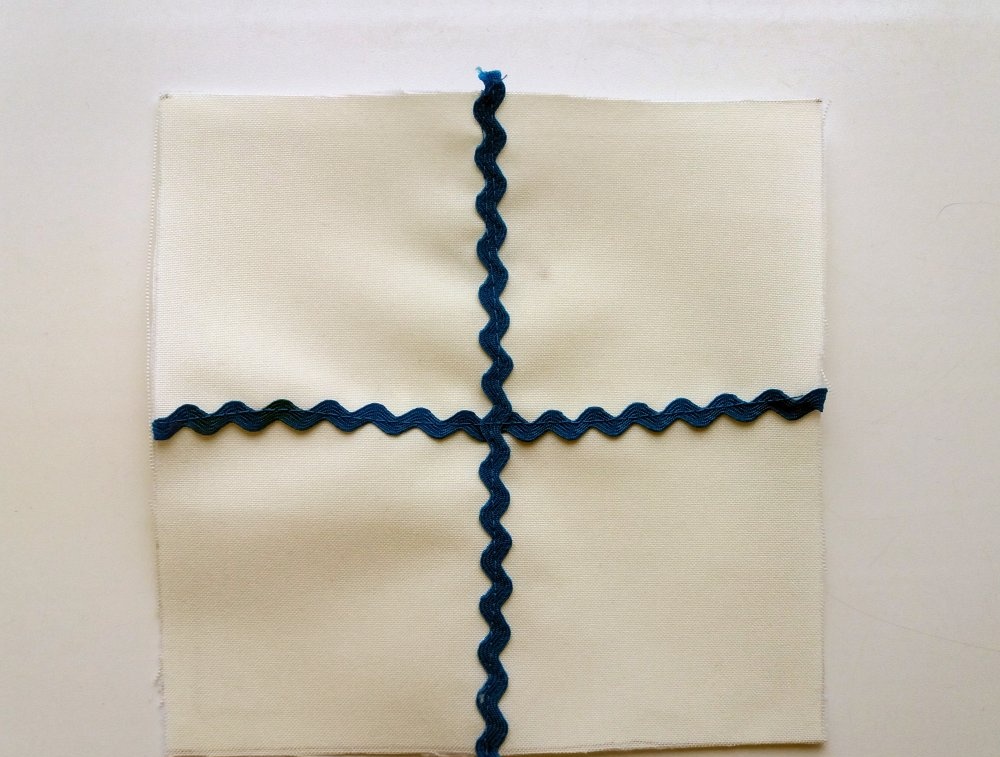
First, cross-sew a zigzag braid to the base fabric.
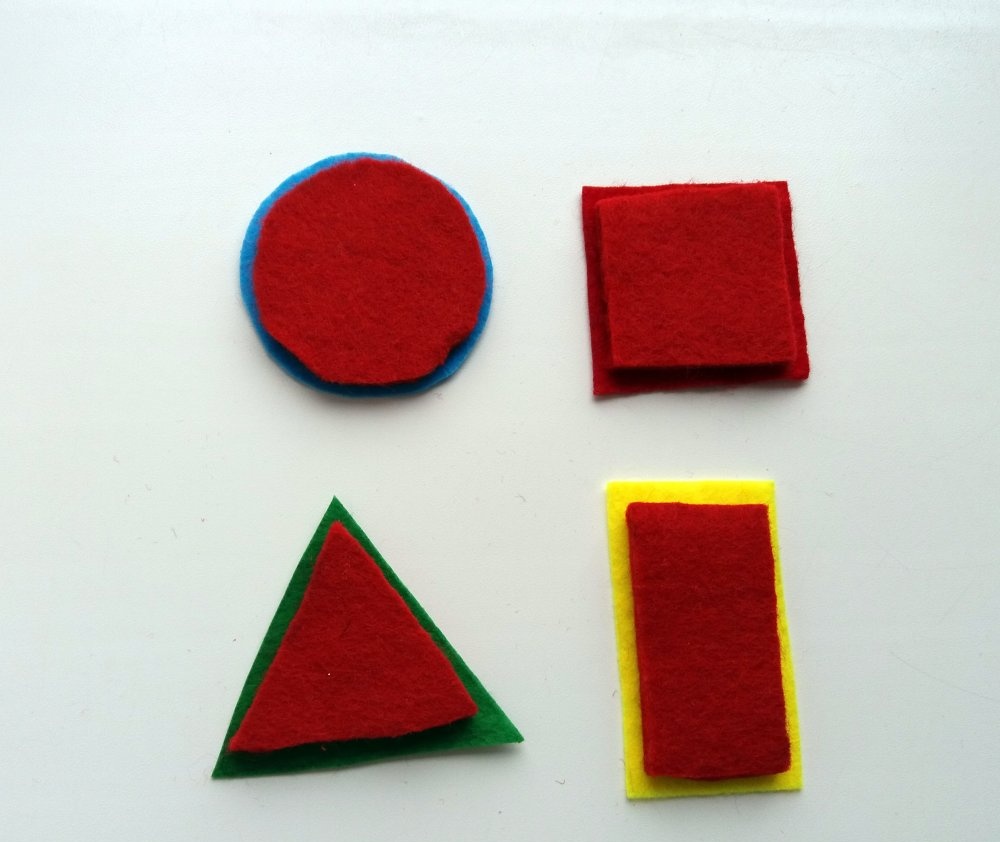
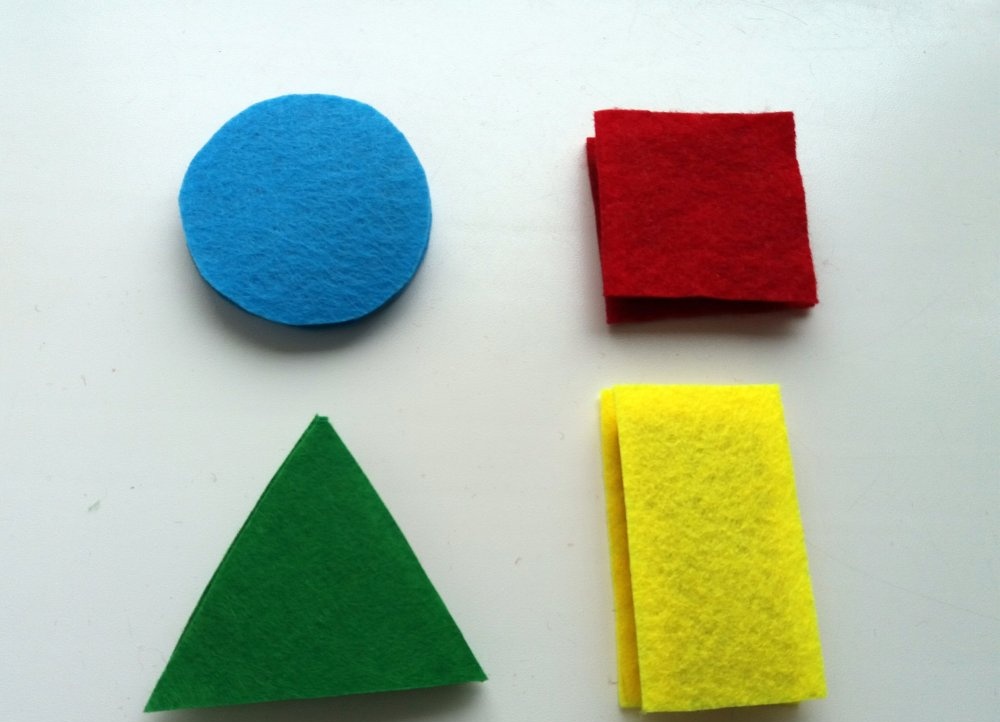
Cut out a square, a circle (4.5 cm in diameter), a triangle and a rectangle from dense material (felt, felt).
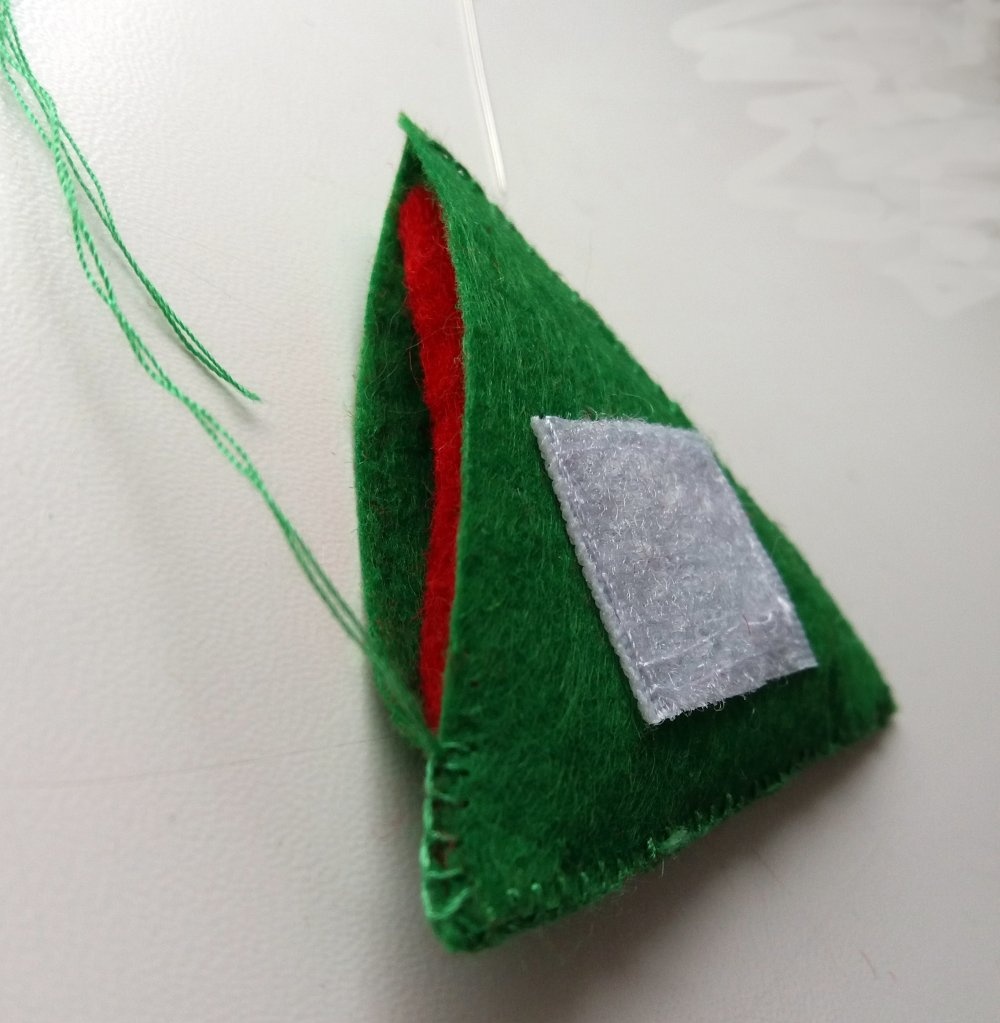
Then cut out “covers” for them from felt - 2 pieces each with seam allowances (0.5 cm each). Sew Velcro onto one of the two sides (the soft side).
Sew felt “covers” in pairs by hand, placing a thick piece inside.
On the base fabric, sew with a narrow zigzag (or embroider by hand) the outlines of each shape using threads of the same color. Sew the hard sides of the Velcro into the centers.
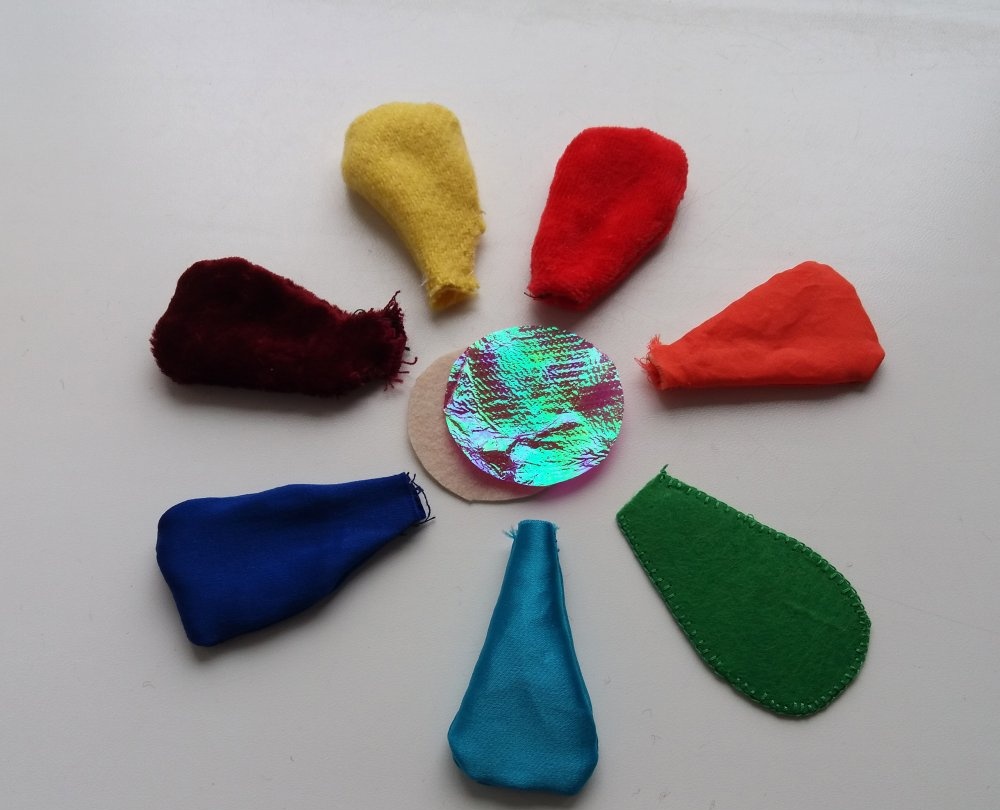
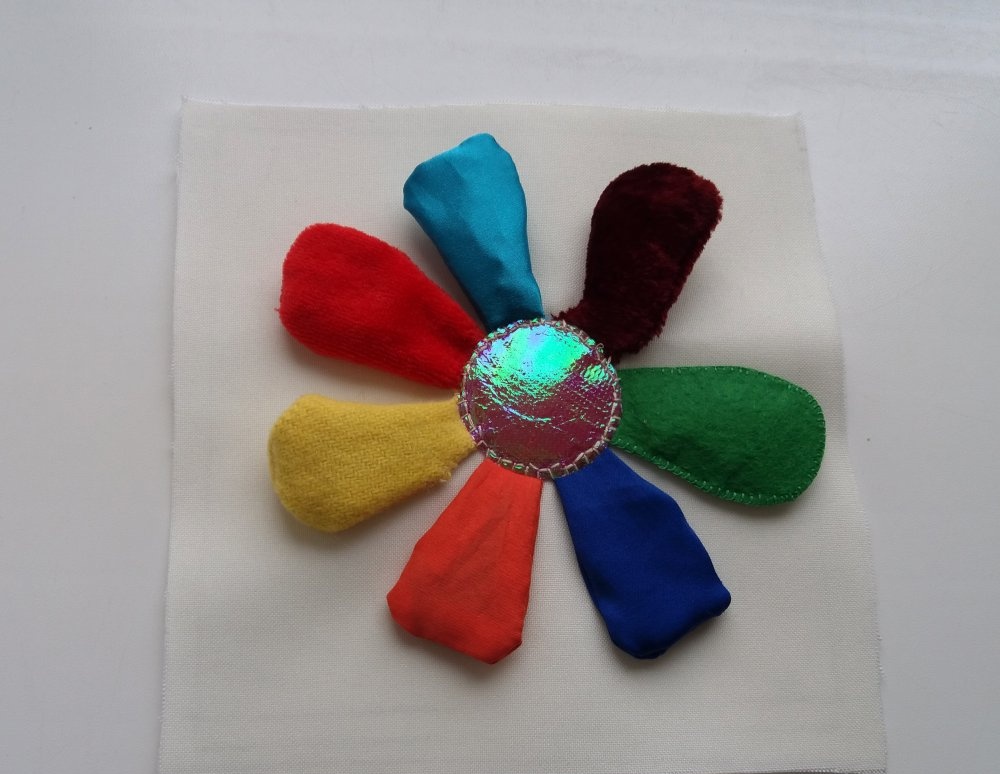
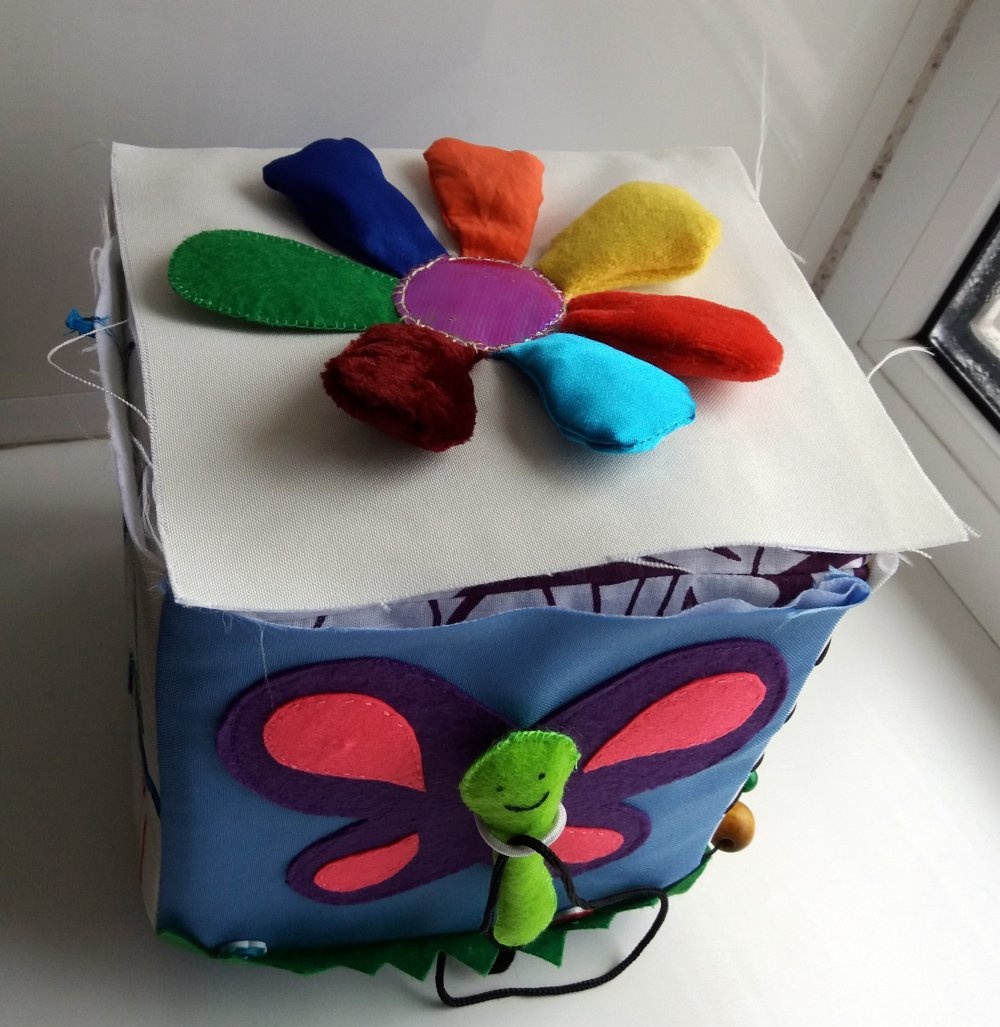
Side "Flower-seven-flowered"
The petals of this bright flower are made from fabrics with different textures, each petal has its own filling, which will undoubtedly interest the child.
Cut petals approximately 6 cm long from fabrics of different colors, adding 0.5 cm seam allowances, 2 pieces each. Sew them from the wrong side, leaving a hole at the base of the petal, turn them right side out and stuff them. Fillings can be the following: beads and seed beads of different sizes, rustling cellophane, small ringing bells, padding polyester, etc.
Sew up the hole left in each petal and sew it onto the base fabric. On top, sew the middle of a flower made of shiny or simply bright material.
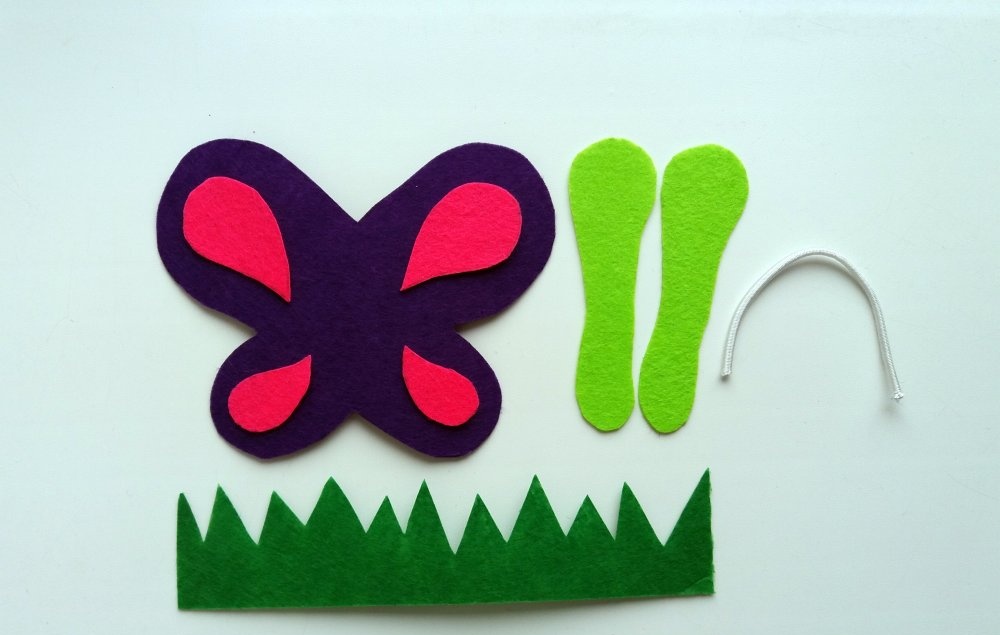
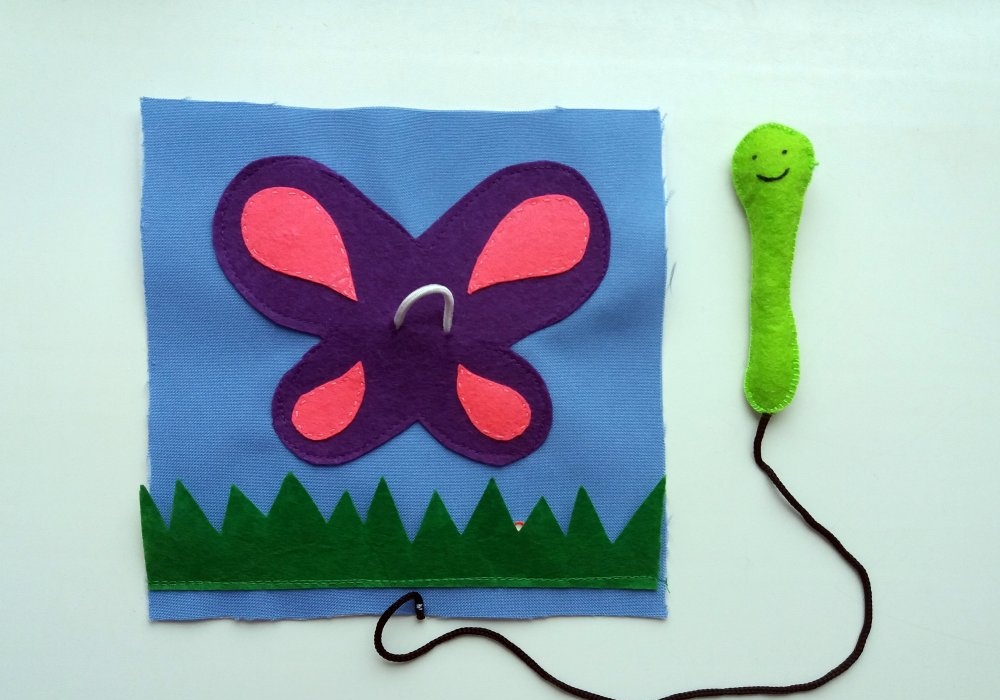
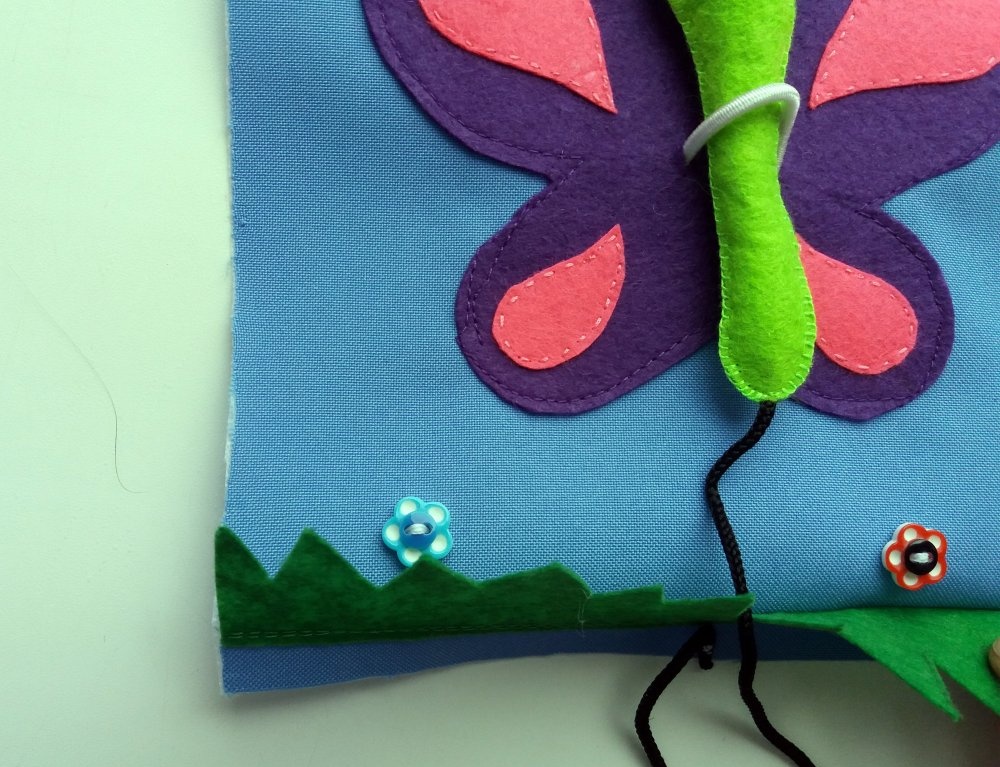
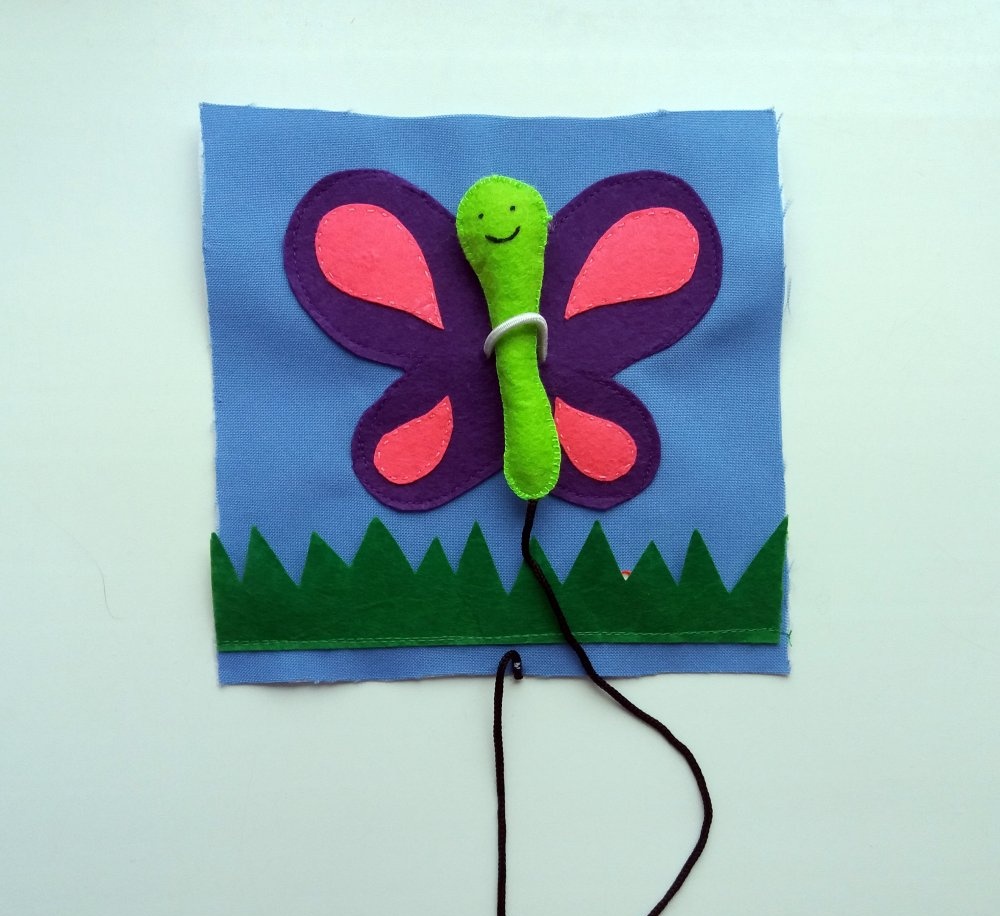
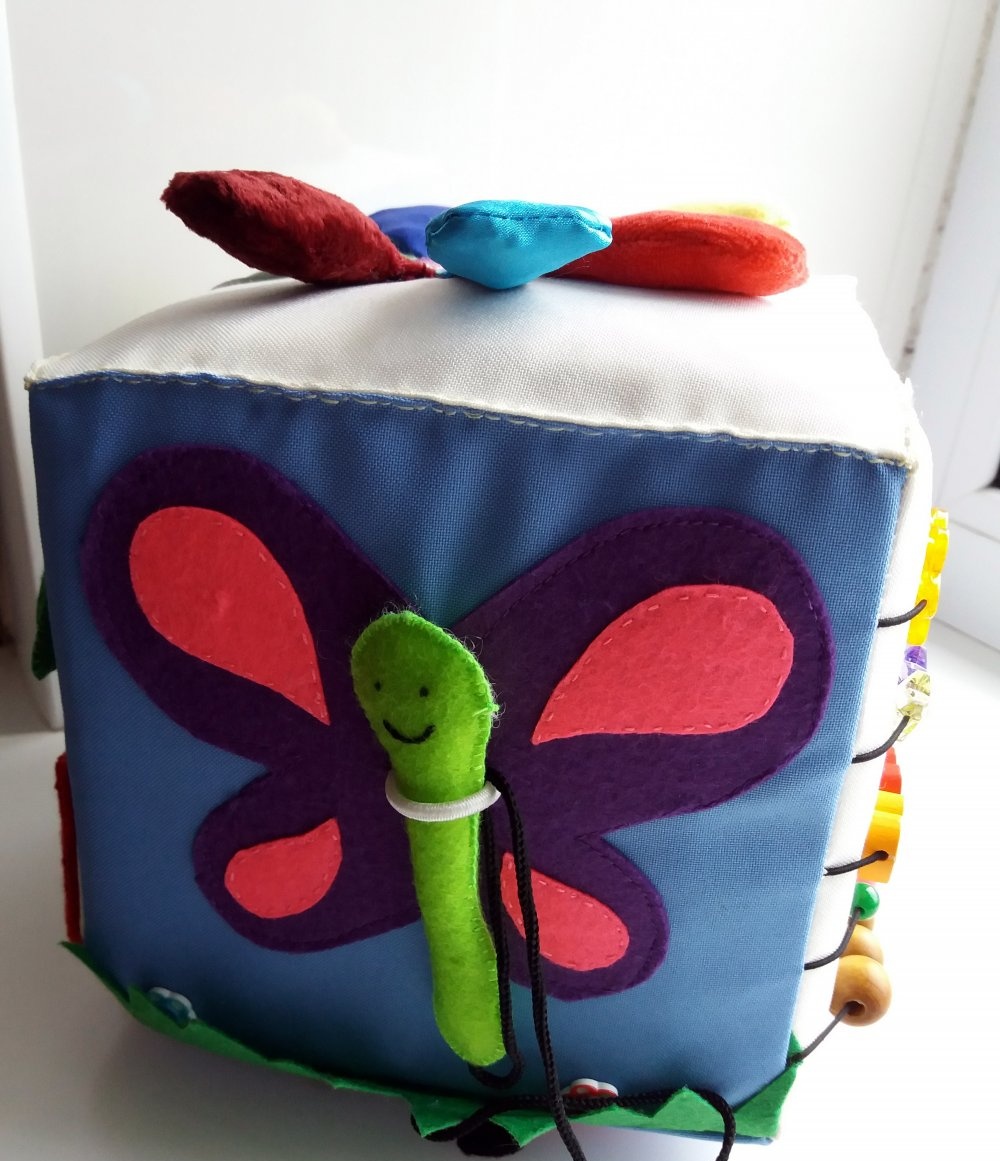
Butterfly Side
A child will surely enjoy playing with a caterpillar on a string: it eats grass and then turns into a butterfly. Bright flower buttons are also hidden in the grass.
For this plot you will need felt, a thick elastic band and a piece of strong thin cord.
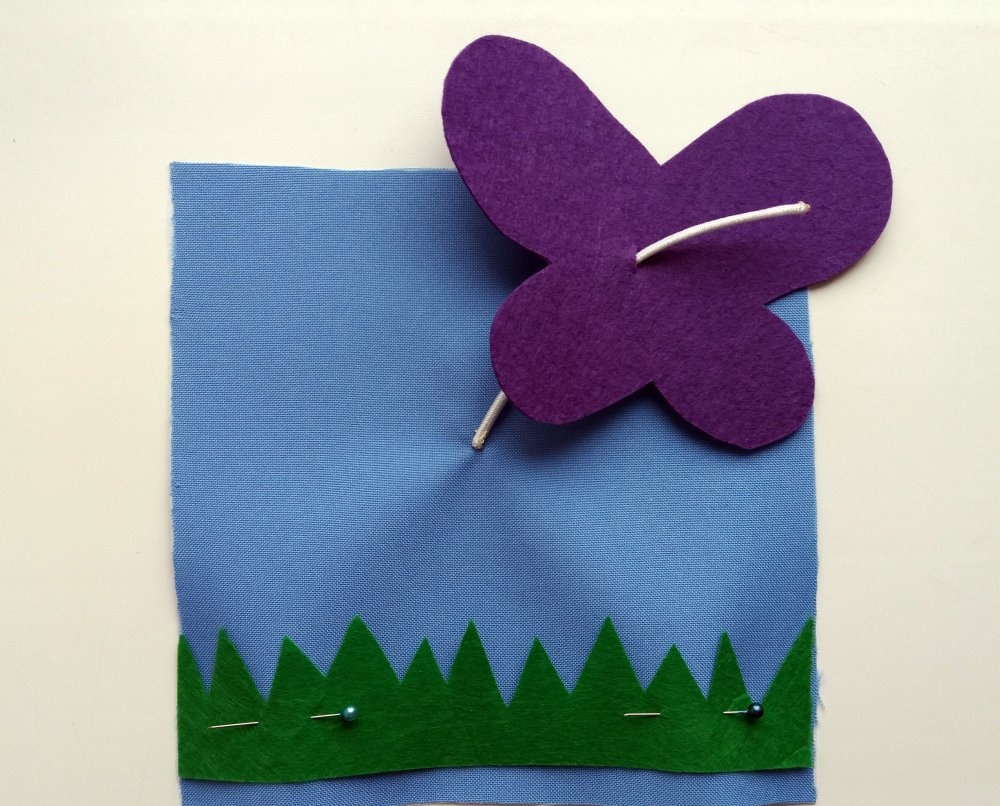
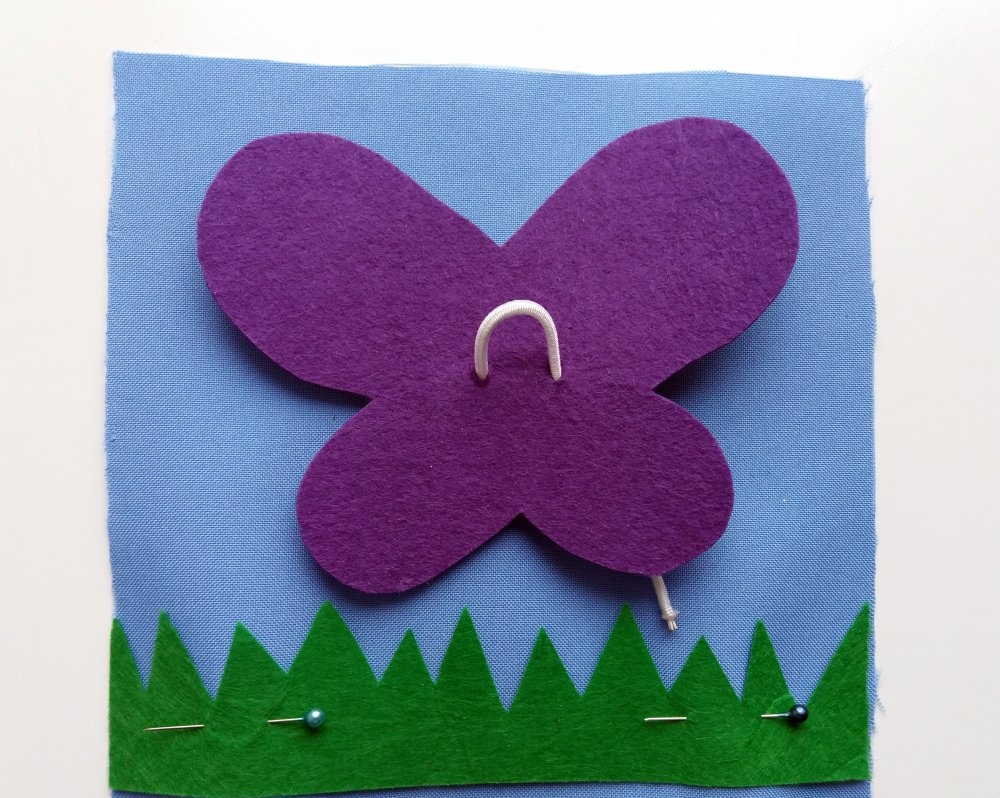
Cut out parts from felt - a caterpillar (2 parts), butterfly wings and grass. Embroider eyes and a mouth on one part of the caterpillar. Pin the grass on the bottom of the base fabric and stitch it. In the large wing piece, make 2 holes for threading the elastic.Sew the end of the elastic onto the base, thread the second one through the holes in the wings and secure it to the fabric. The wings can be decorated with contrasting pieces of felt.
Sew the caterpillar by stuffing it with synthetic wool and securing the cord inside. Sew the other end of the cord to the base fabric. Sew the flower buttons tightly into the “grass.”
Assembling the cube
First, sew the sides open (see photo). Make all seams from the wrong side. Leaving 3 sides of the top edge with the flower unsewn (that is, the “lid” should remain), place the filler cube inside. Carefully sew the remaining sides together by hand using a blind stitch.


The educational cube is ready!