Do it yourself
Life hacks, master classes, useful tips, recipes.
home » Homemade cars » Automatic 12V charger
This is a very simple attachment circuit for your existing charger. Which will control the battery charge voltage and, when the set level is reached, disconnect it from the charger, thereby preventing the battery from overcharging.
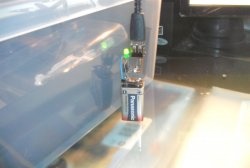
This device has absolutely no scarce parts. The entire circuit is built on just one transistor. It has LED indicators that indicate the status: charging in progress or the battery is charged.

Who will benefit from this device?


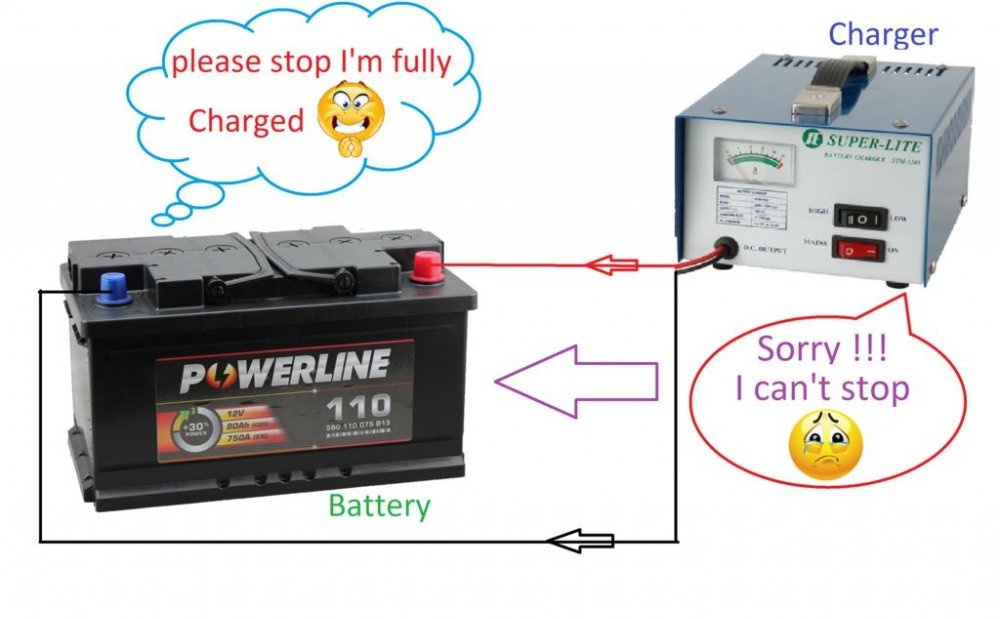
This device will definitely come in handy for motorists. For those who do not have an automatic charger. This device will turn your regular charger into a fully automatic charger. You no longer have to constantly monitor the charging of your battery. All you need to do is put the battery on charge, and it will turn off automatically only after it is fully charged.
Automatic 12V charger

Automatic charger circuit


Automatic 12V charger

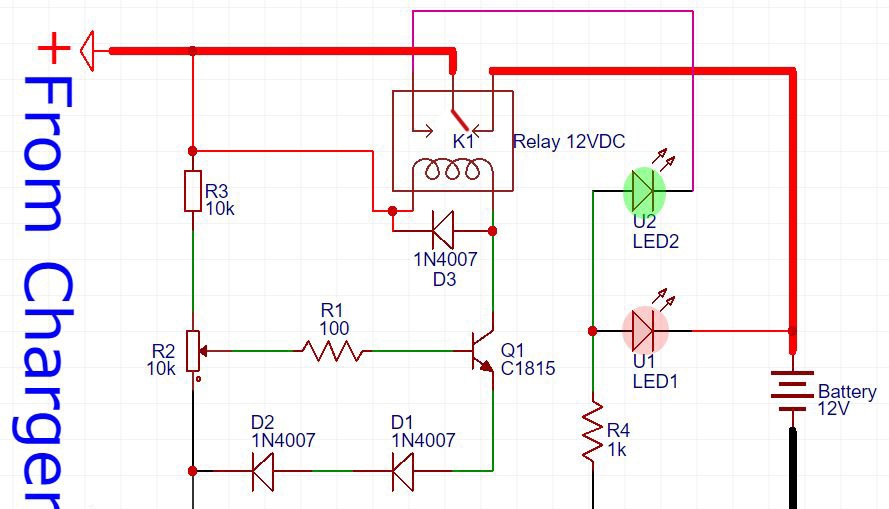
Here is the actual circuit diagram of the machine. In fact, it is a threshold relay that is activated when a certain voltage is exceeded.The response threshold is set by variable resistor R2. For a fully charged car battery, it is usually equal to - 14.4 V.
You can download the diagram here - http://www.mediafire.com/file/0ldtxs4ma6mt2q2/12V-Auto-Cut-Off-Charger_circuit_By_hokar_Fariq.pdf Source: https://enn.washerhouse.com/?do=lastcomments

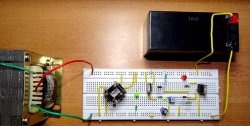
Printed circuit board


Automatic 12V charger

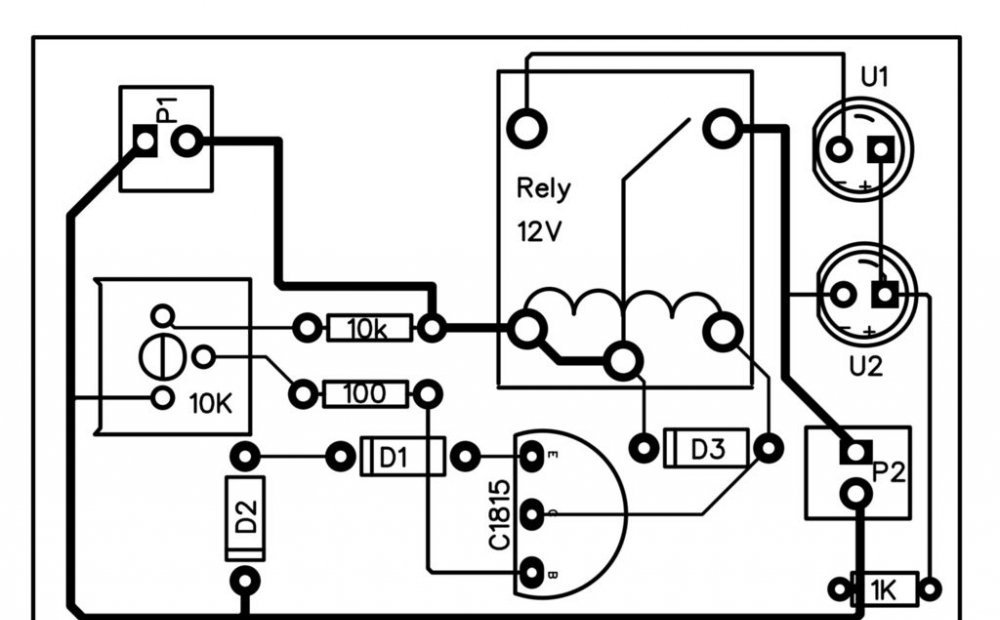
How to make a printed circuit board is up to you. It is not complicated and therefore can easily be laid out on a breadboard. Well, or you can get confused and make it on textolite with etching.

Settings


If all the parts are in good working order, setting up the machine is reduced only to setting the threshold voltage with resistor R2. To do this, we connect the circuit to the charger, but do not connect the battery yet. We move resistor R2 to the lowest position according to the diagram. We set the output voltage on the charger to 14.4 V. Then slowly rotate the variable resistor until the relay operates. Everything is set.
Let's play with the voltage to make sure that the console works reliably at 14.4 V. After this, your automatic charger is ready for use.

Watch a video of the charger working


In this video you can watch in detail the process of all assembly, adjustment and testing in operation.
Original article in English
come back
Comment
  • bowtiesmilelaughingblushsmileyrelaxed relaxedsmirk
    heart_eyeskissing_heartkissing_closed_eyesflushedrelievedsatisfiedgrin
    winkstuck_out_tongue_winking_eyestuck_out_tongue_closed_eyesgrinningkissingstuck_out_tonguesleeping
    worriedfrowninganguishedopen_mouthgrimacingconfusedhushed
    expressionlessunamusedsweat_smilesweatdisappointed_relievedwearypassive
    disappointedconfoundedfearfulcold_sweatperseverecrysob
    joyastonishedscreamtired_faceangryragetriumph
    sleepyyummasksunglassesdizzy_faceimpsmiling_imp
    neutral_faceno_mouthinnocent
4 minus one =
Comments (13)
  1. Alexander
    #1 Alexander Guests February 6, 2018 00:52
    27
    If LEDs unfold it, it will even glow!
  2. Dmitriy
    #2 Dmitriy Guests 6 February 2018 18:11
    12
    14.4 volts is approximately 80% charge. You need at least 15.3 volts for most batteries.
  3. Marat
    #3 Marat Guests 11 February 2018 09:22
    12
    I understand the article has been rewritten, but I would like to know whether the circuit saves you from polarity reversal?
  4. Hawkar fariq
    #4 Hawkar fariq Guests 13 February 2018 23:03
    2
    Thanks for sharing my video.
    You can download the diagram here

    http://www.mediafire.com/file/0ldtxs4ma6mt2q2/12V-Auto-Cut-Off-Charger_circuit_By_hakar_Fariq.pdf
    1. feelloff
      #5 feelloff Guests 14 February 2018 07:24
      2
      Thank you! A link has been added to the text of the article.
  5. Guest Igor
    #6 Guest Igor Guests 26 February 2018 21:05
    5
    For some reason the output voltage is 6 volts and the input is 14.6. The relay rattles at the moment of switching, there are no clear clicks. LEDs installed correctly. Who knows about this problem?
    1. Guest Vlad
      #7 Guest Vlad Guests 16 October 2018 20:33
      4
      And it will rattle due to the lack of a voltage stabilizer.
  6. rybakov.anatoliy
    #8 rybakov.anatoliy Guests 13 December 2018 19:09
    8
    The circuit must be connected to the battery (i.e. after the contacts). Then the relay will not rattle, and the charger will not only be turned off, but also connected when the voltage on the battery drops. Between “plus” and “minus” (after the rectifier) ​​you need to connect an electrolytic capacitor with a capacity of at least 100 microfarads. At the same time, my voltage increased to 18 V.
  7. 13007
    #9 13007 Guests 21 May 2019 21:53
    7
    Wouldn’t it be more reliable to implement the circuit not on a relay, but on a thyristor?
  8. RLC
    #10 RLC Guests 8 November 2019 21:43
    6
    I put together this diagram... Actually a hat. I don't recommend it.
  9. Ivan
    #11 Ivan Guests 4 September 2020 17:19
    3
    Why are the designations on the diagram not Russian? These designations were used in the old days and are still used by Americans.
    1. Vitaly
      #12 Vitaly Guests December 7, 2021 10:07
      3
      Because in twenty years the entire production of radio-electronic components has been successfully destroyed. Thanks to the Chinese for taking it all into their own hands - accordingly, the names are all foreign.
  10. Igor
    #13 Igor Guests 1 August 2021 15:19
    4
    The circuit does not work, the setup is not clear.

15 methods to boost your router's Wi-Fi signal

Are you laying tiles? Make a device that will save time 2 times

Painting "Pregnant" | Do it yourself

Electric cold smoked smokehouse from a barrel

«Do it yourself - with your own hands» - a site of interesting homemade products made from scrap materials and items at home. Step-by-step master classes with photos and descriptions, technologies, life hacks - everything a real master or just a craftsman needs for needlework. Crafts of any complexity, a large selection of directions and ideas for creativity.

We recommend reading

Washing machine error codes