Do it yourself
Life hacks, master classes, useful tips, recipes.
home » Electronics » DIY electronics » Homemade super bright mini LED flashlight 3 W
LEDs Today they are built into everything - into toys, lighters, household appliances and even stationery. But the most useful invention with them is, of course, a flashlight. Most of them are autonomous and produce a powerful glow from small batteries. You won’t get lost in the dark with it, and when working in a dimly lit room, this tool is simply irreplaceable.
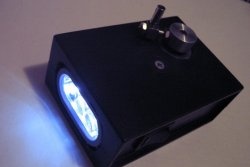
Small copies of a wide variety of LED flashlights can be bought in almost any store. They are inexpensive, but the build quality can sometimes be disappointing. Or maybe it’s homemade devices that can be made using the simplest parts. It is interesting, educational and has a developing effect on those who love to make things.
Homemade super bright mini LED flashlight

Today we will look at another homemade product - an LED flashlight, made literally from scrap parts. Their cost is no more than a few dollars, and the efficiency of the device is higher than that of many factory models. Interesting? Then do it with us.
Homemade super bright mini LED flashlight

How the device works


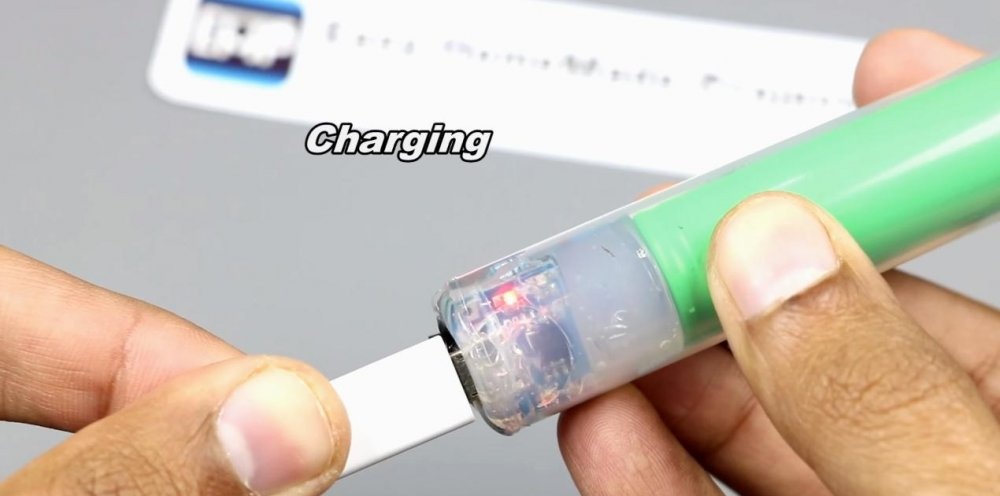
This time Light-emitting diode connected to the battery only through a 3 ohm resistor.Since it contains a ready source of energy, it does not require a storage thyristor and transistor to distribute the voltage, as is the case with the Faraday Eternal Flashlight. An electronic charging module is used to charge the battery. A tiny micromodule provides protection against voltage surges and prevents the battery from overcharging. The device is charged from a USB connector, and on the module itself there is a micro USB connector.

Required Parts


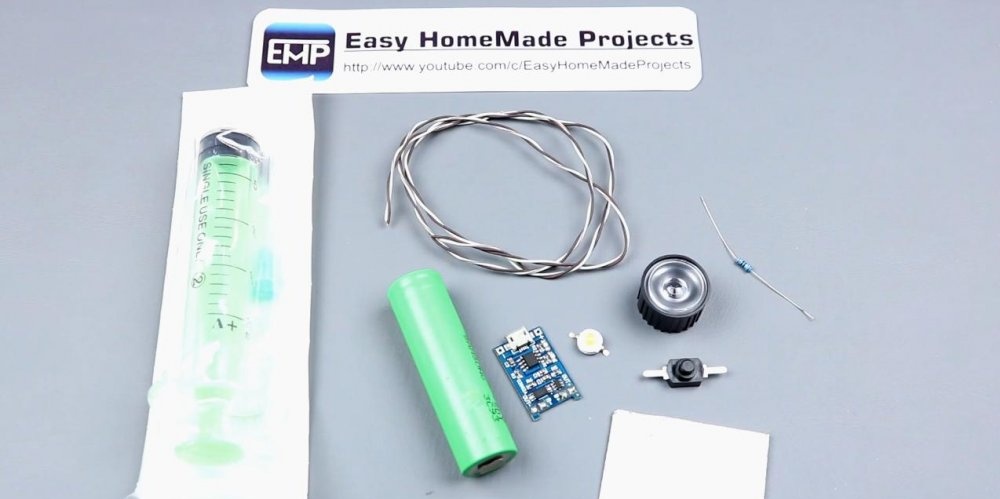
  • Plastic syringe 20 ml;
  • 3.4V/3W LED;
  • Lenses for LED flashlight with housing;
  • Micro button switch;
  • 3 Ohm/0.25 W resistor;
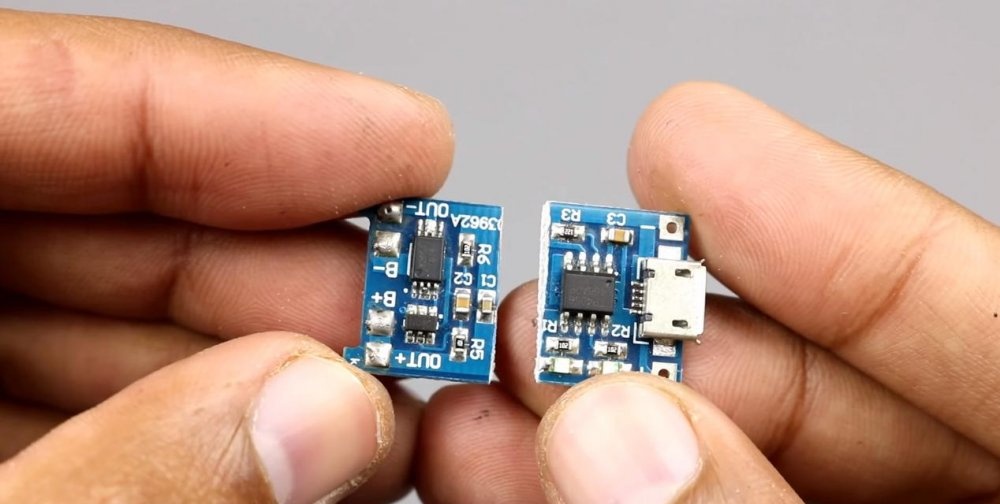
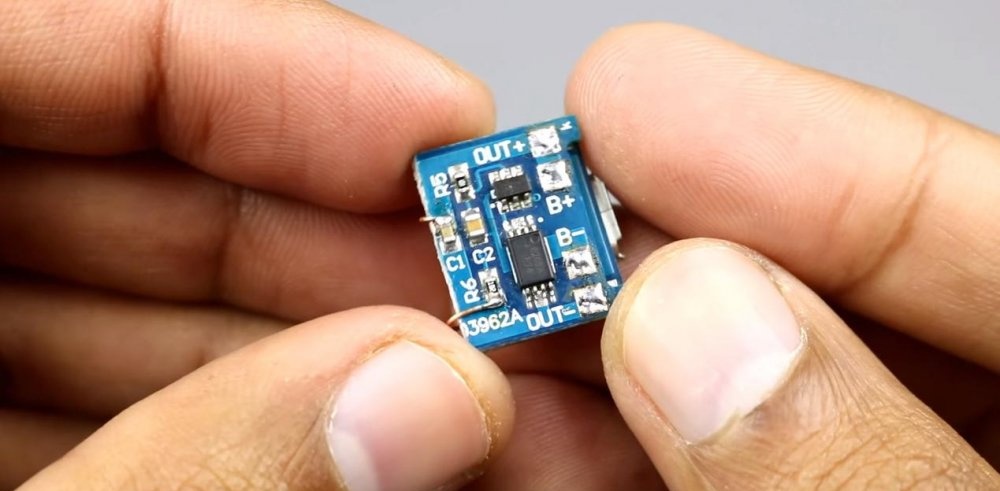
  • Micro charging module TP4056;
  • A piece of aluminum plate for the radiator;
  • Several copper wires;
  • 3.7 V battery;
  • Superglue, epoxy resin or liquid nails.

The tools you will need are: a soldering iron with flux, a glue gun, a drill, a lighter and a painting knife.
Homemade super bright mini LED flashlight

Assembling a powerful LED flashlight


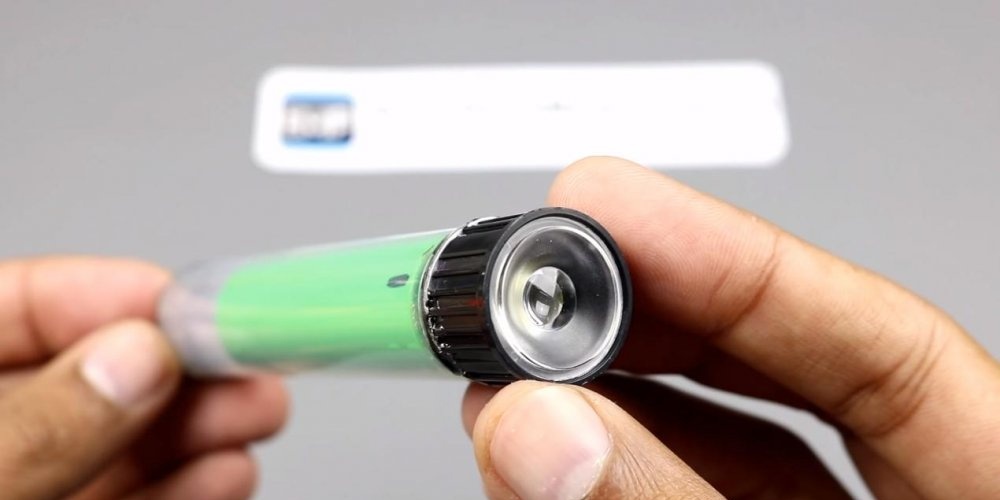
Preparing an LED with lenses


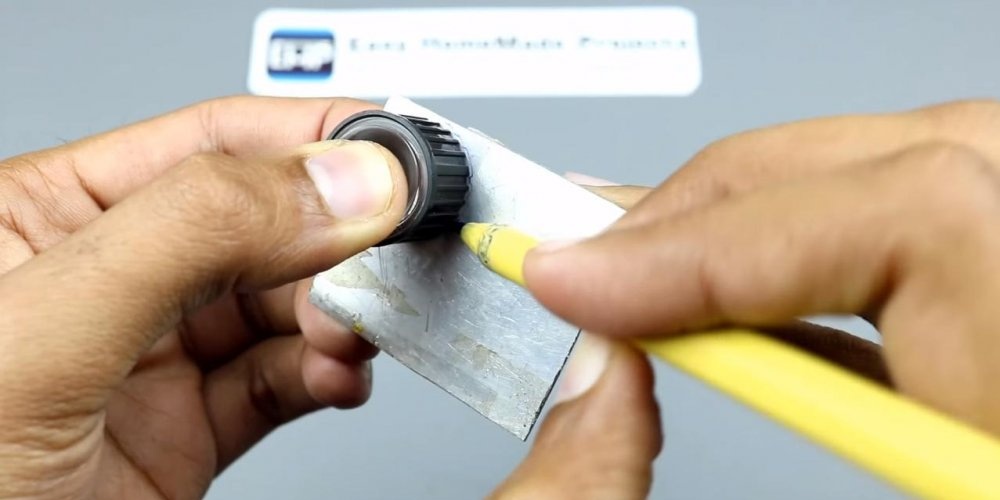
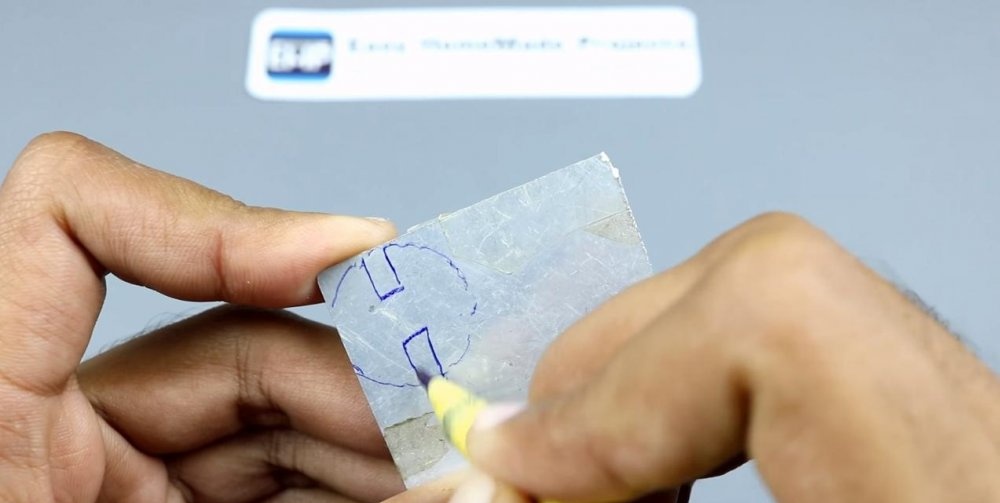
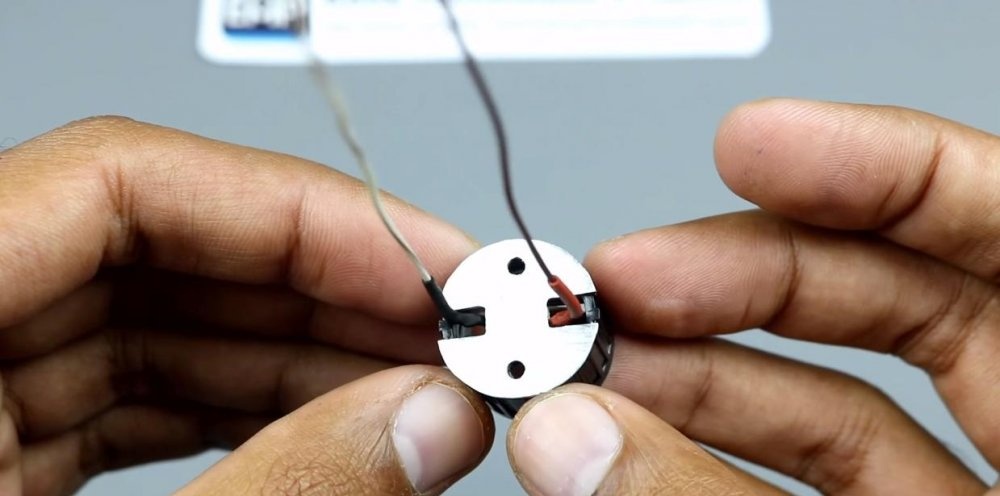
We take a plastic cap with lenses and mark the circumference of the radiator. It is needed for cooling LED. We mark the mounting grooves and holes on the aluminum plate and cut out the radiator according to the markings. This can be done, for example, using a drill.
Homemade super bright mini LED flashlight

Homemade super bright mini LED flashlight

Homemade super bright mini LED flashlight

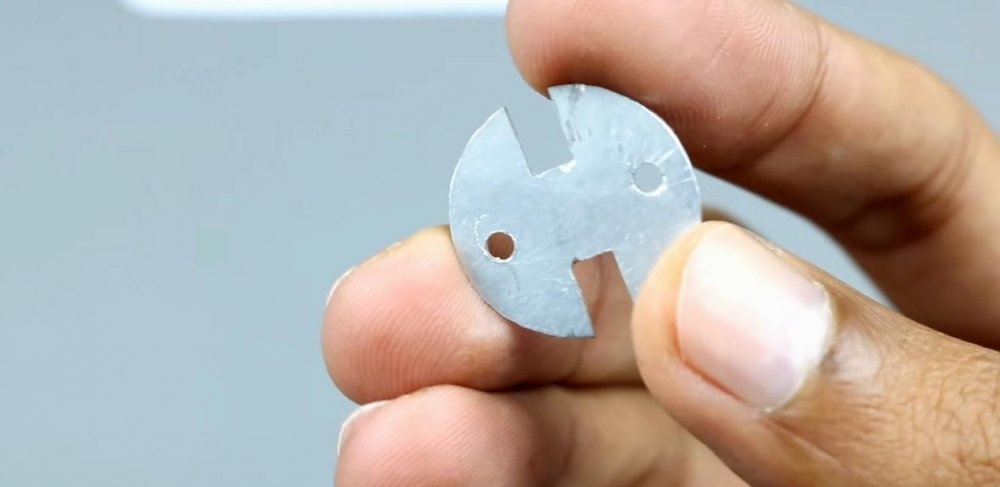
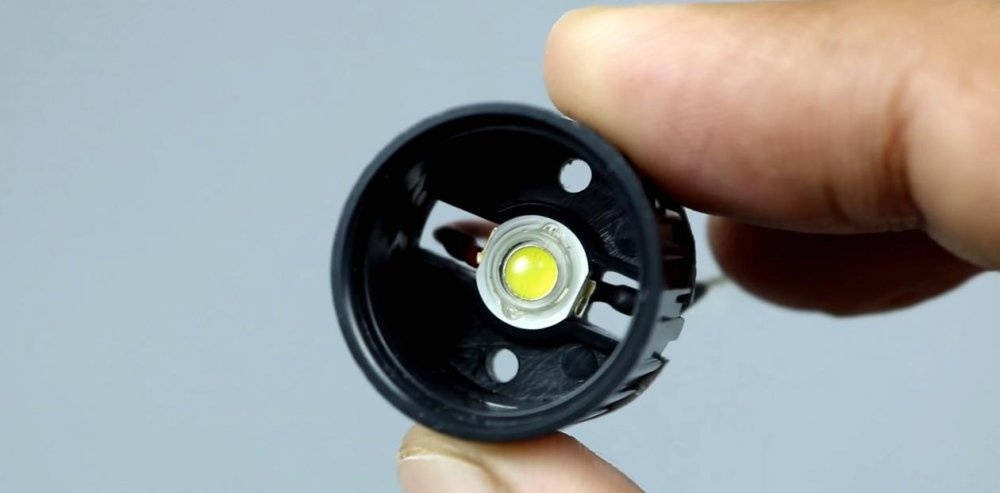
We take out the magnifying lenses for a while, they won’t be needed now. Glue the radiator plate onto the back of the cap with superglue. The holes and grooves in the cap and radiator must match.
Homemade super bright mini LED flashlight

Homemade super bright mini LED flashlight

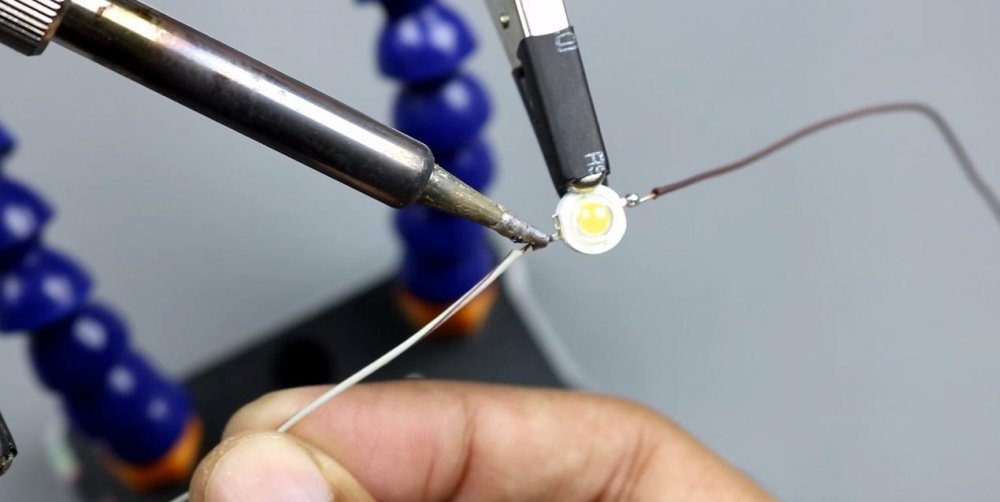
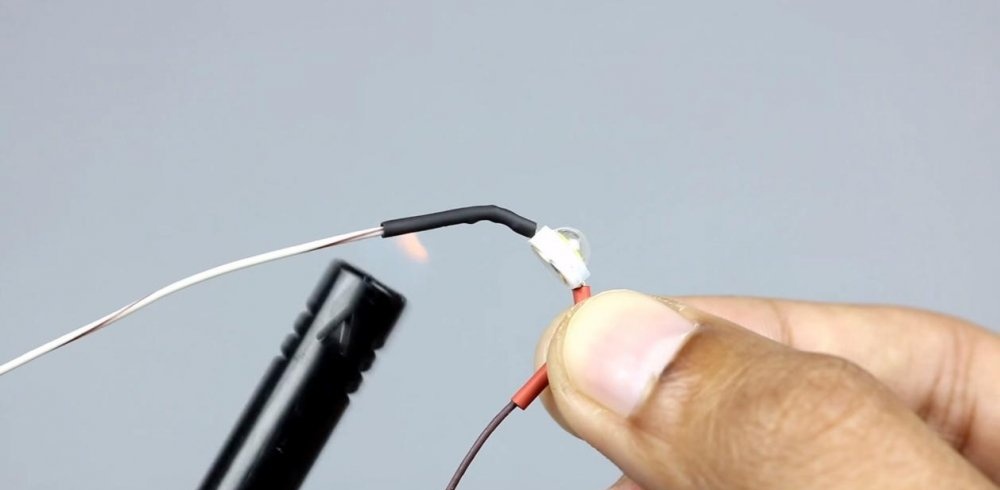
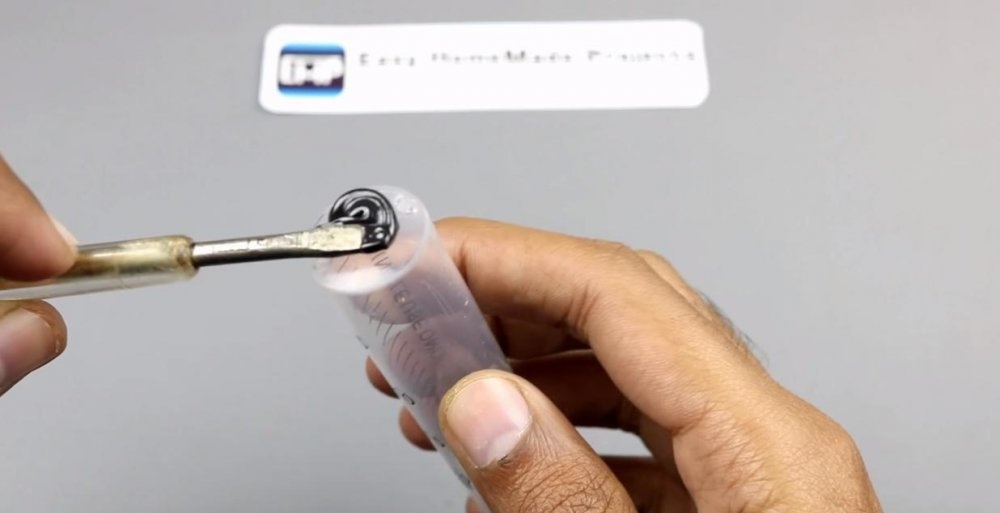
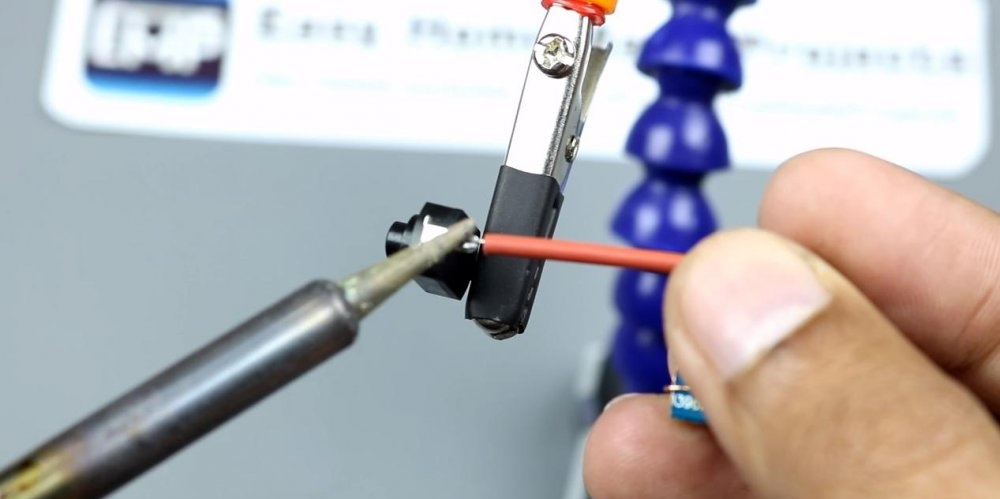
Contacts LED Tin and solder with copper wiring. We protect the contacts with heat-shrinkable casings and warm them up with a lighter. Insert from the front side of the cap Light-emitting diode with wiring.
Homemade super bright mini LED flashlight

Homemade super bright mini LED flashlight

Homemade super bright mini LED flashlight

Homemade super bright mini LED flashlight

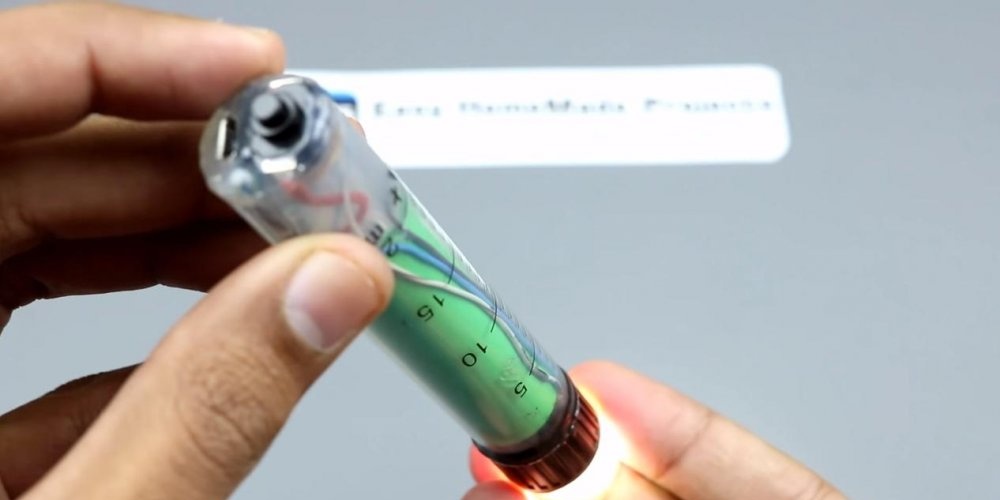
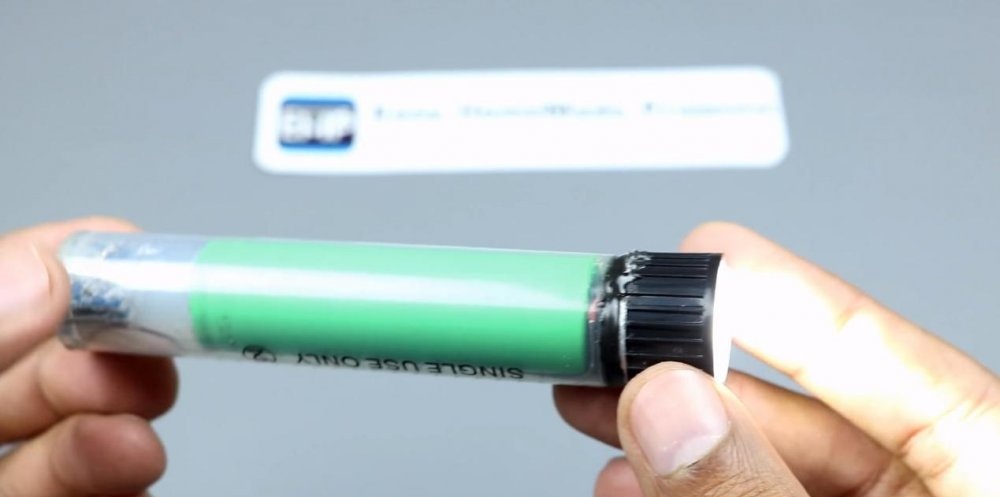
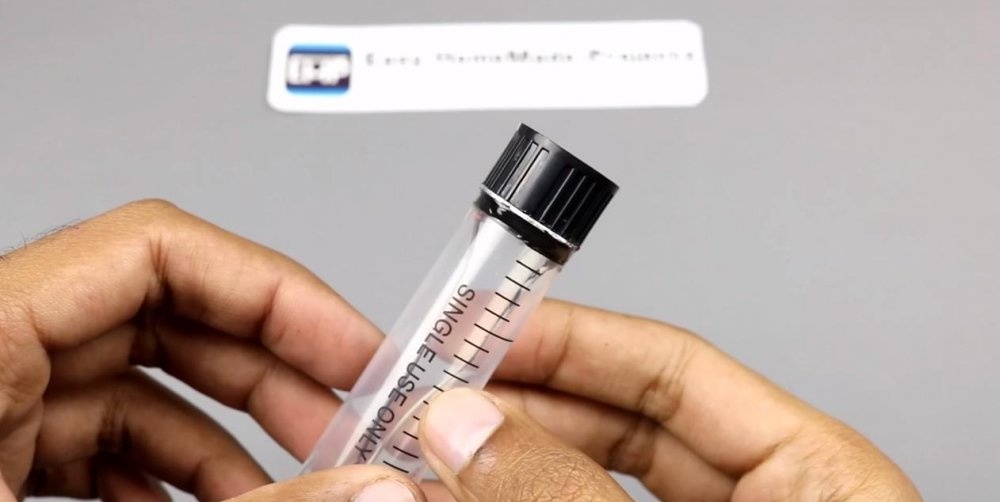
Processing the flashlight body from a syringe


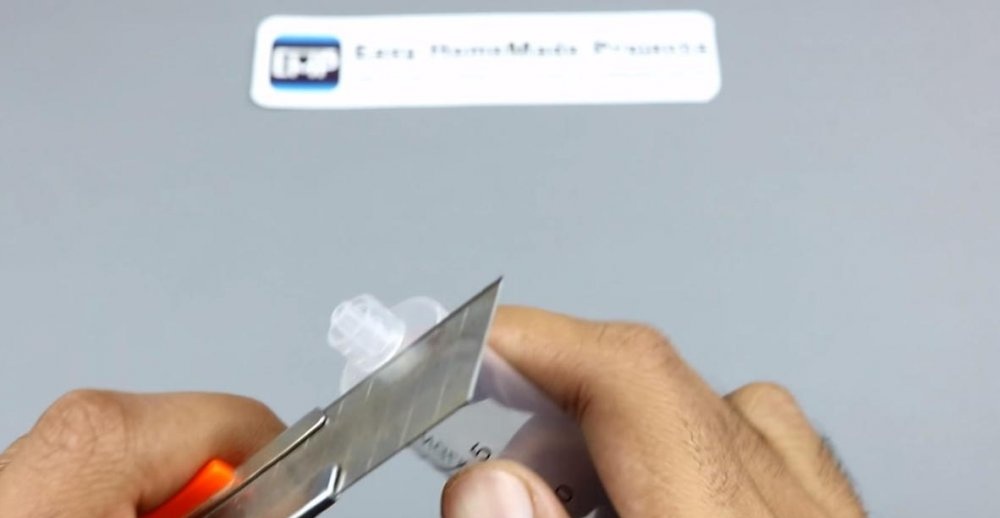
We unlock the piston with the handle of the syringe; we will no longer need them.We cut the needle cone with a painting knife.
We completely clean the end of the syringe, making holes in it for the LED contacts of the flashlight.
We attach the lantern cap to the end surface of the syringe using any suitable glue, for example, epoxy resin or liquid nails. Don’t forget to place the LED contacts inside the syringe.
Homemade super bright mini LED flashlight

Homemade super bright mini LED flashlight

Homemade super bright mini LED flashlight

Homemade super bright mini LED flashlight

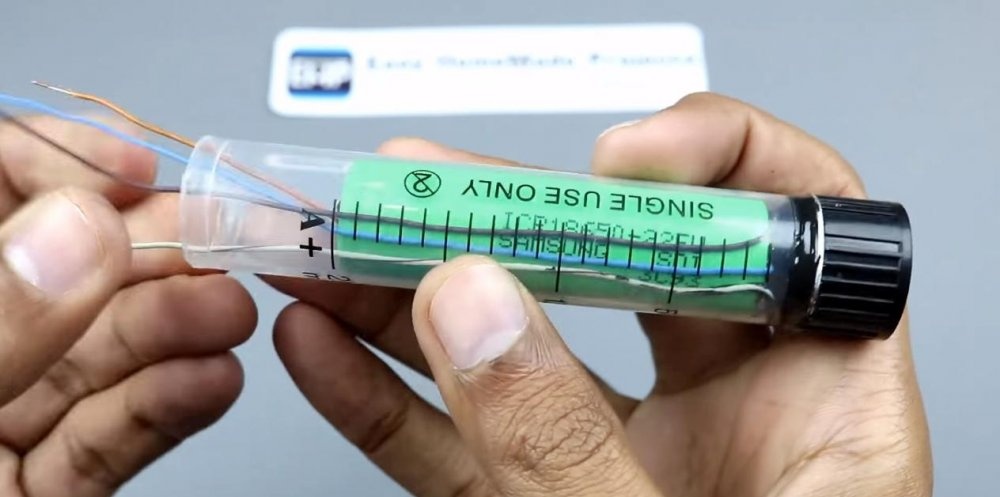
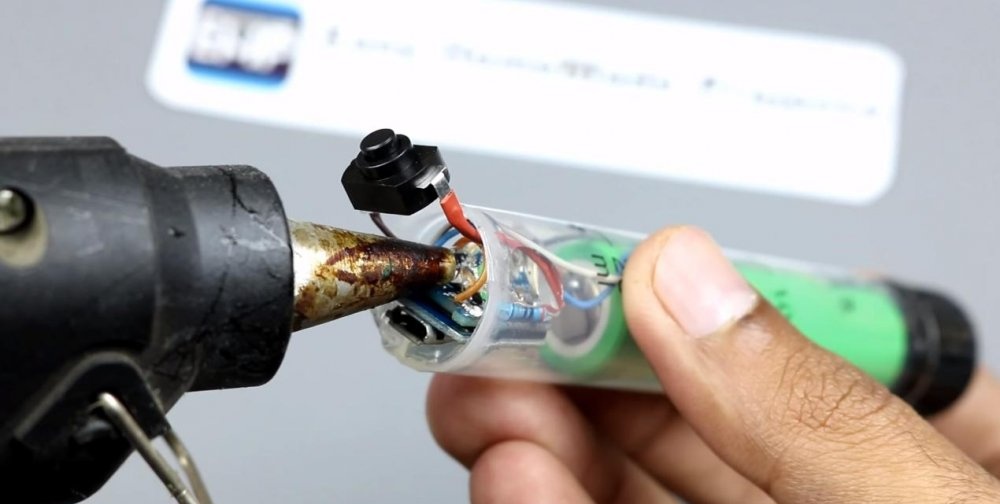
Connecting the charging micromodule and battery


We attach terminals with contacts to the lithium battery and insert it into the syringe body. We tighten the copper contacts to clamp them with the battery body.
Homemade super bright mini LED flashlight

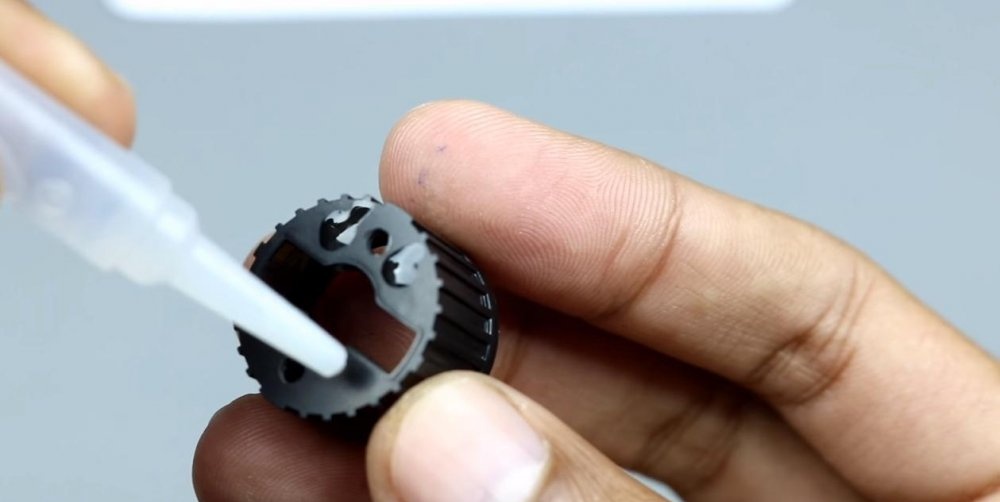
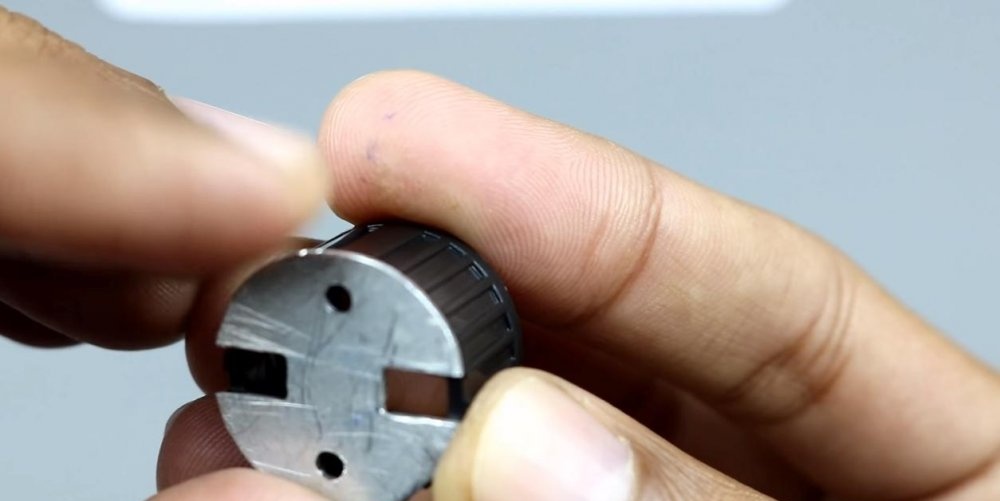
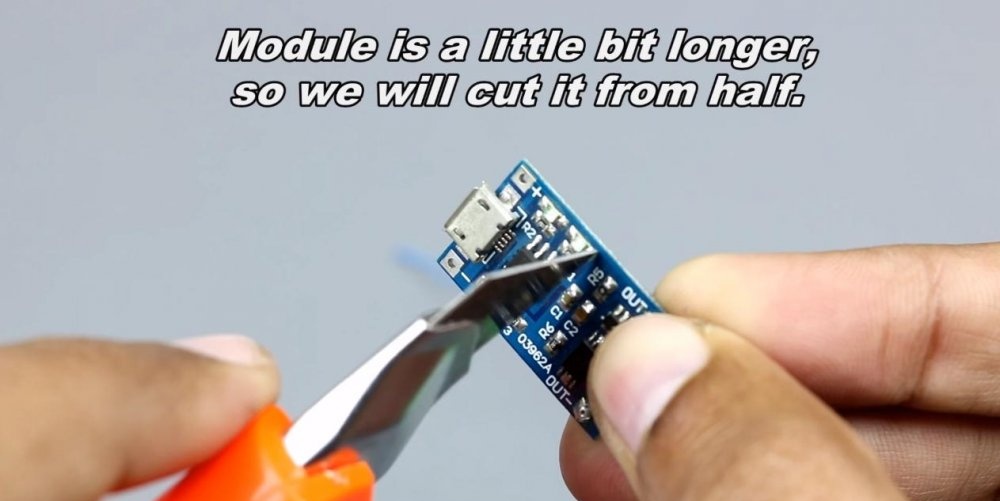
The syringe has only a few centimeters of free space, which is not enough for the charging module. Therefore, it will have to be divided into two parts.
We run a paint knife in the middle of the module board and break it along the cut line. Using double tape we connect both halves of the board together.
Homemade super bright mini LED flashlight

Homemade super bright mini LED flashlight

Homemade super bright mini LED flashlight

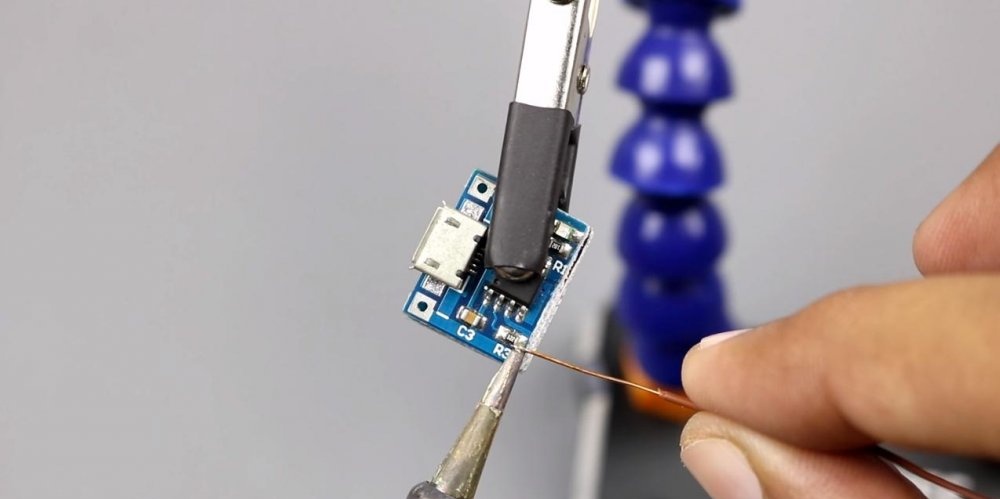
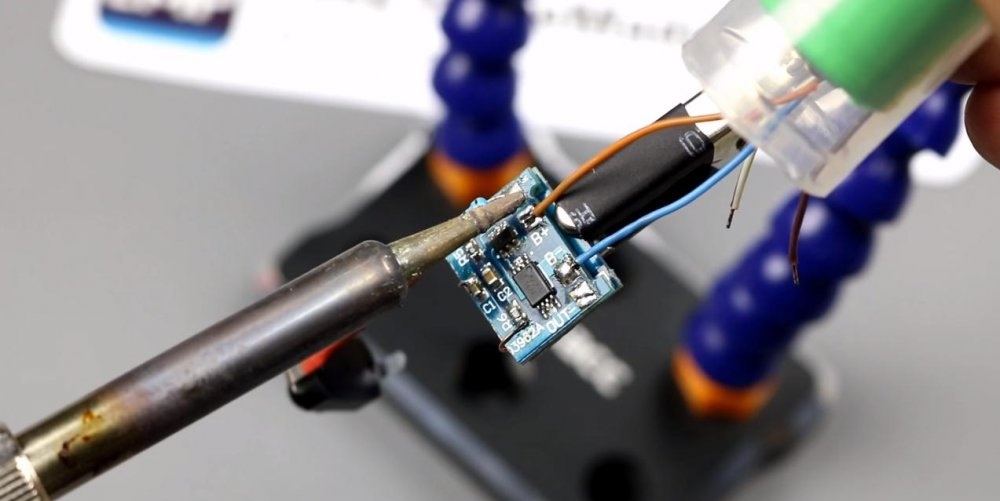
We tin the open contacts of the module and solder them with copper wiring.
Homemade super bright mini LED flashlight

Homemade super bright mini LED flashlight

Final assembly of the flashlight


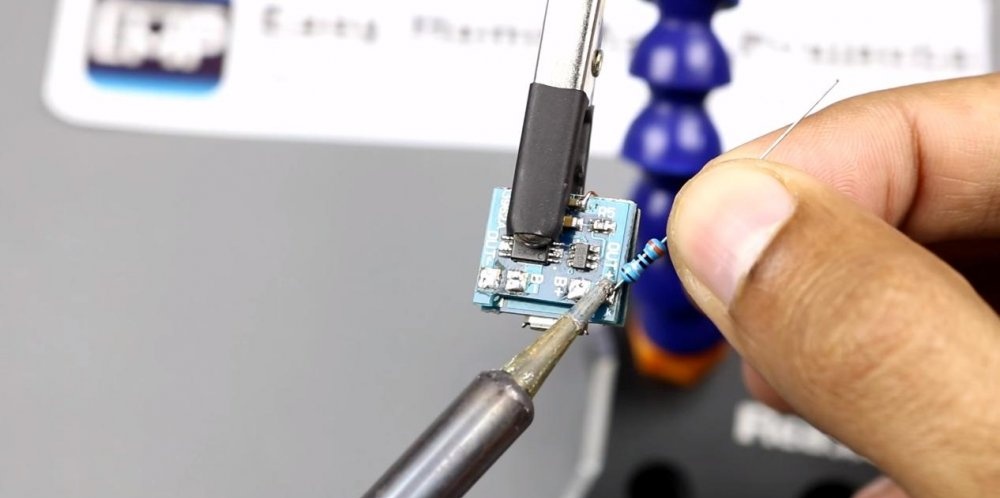
We solder a resistor to the module board and connect it to the micro-button, insulating the contacts with heat shrink.
Homemade super bright mini LED flashlight

Homemade super bright mini LED flashlight

We solder the remaining three contacts to the module according to its connection diagram. We connect the micro button last, checking the operation of the LED.
Homemade super bright mini LED flashlight

Homemade super bright mini LED flashlight

Homemade super bright mini LED flashlight

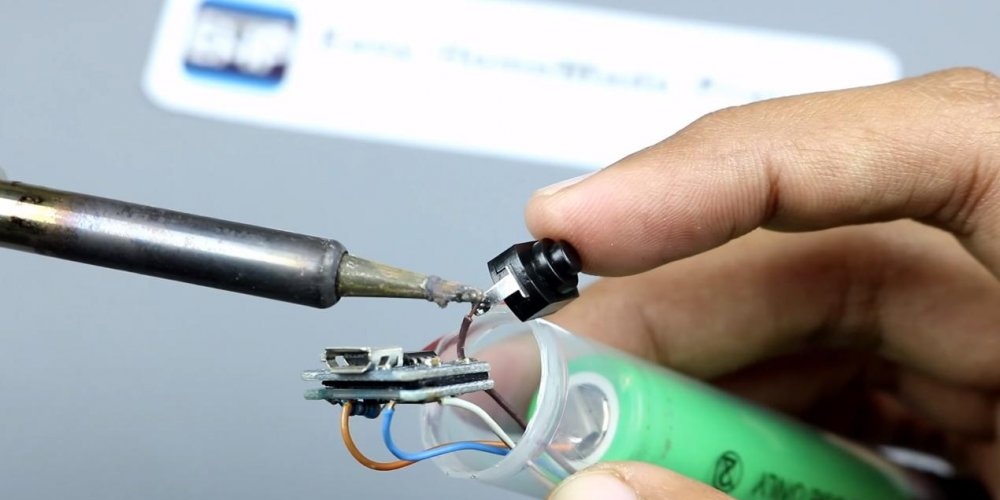
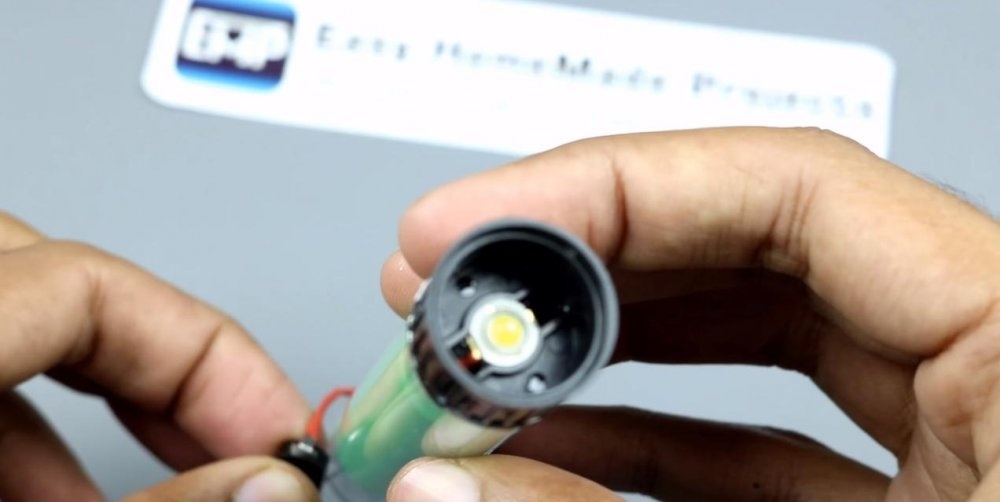
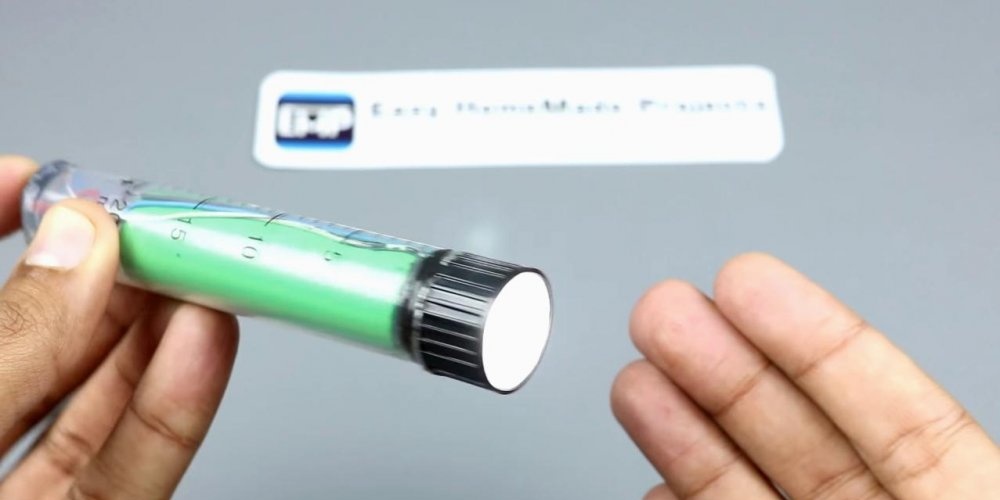
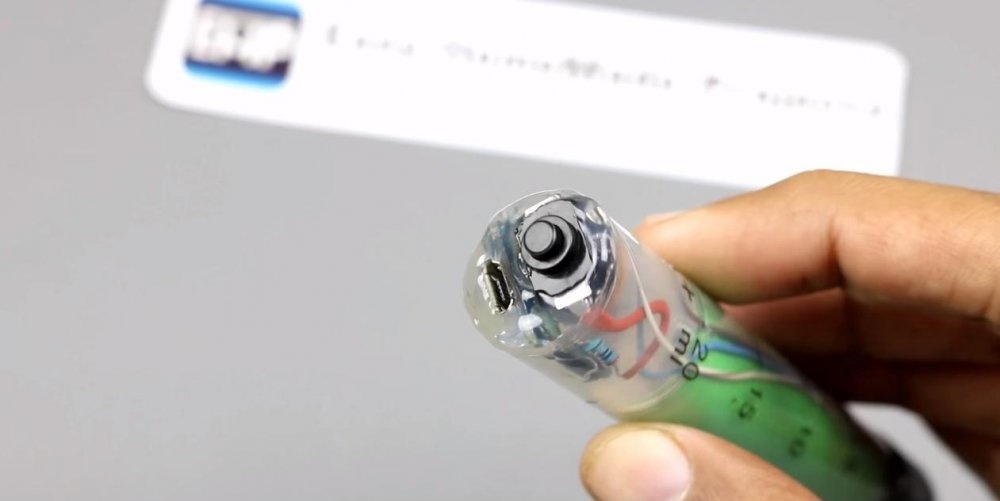
We place the electronic content of our device in the body of the syringe so that the micro USB connector and micro button remain on the surface. We insulate the rest of the space with hot glue. We install the LED lenses back into their place on the front side of the cap.
Homemade super bright mini LED flashlight

Homemade super bright mini LED flashlight

Homemade super bright mini LED flashlight

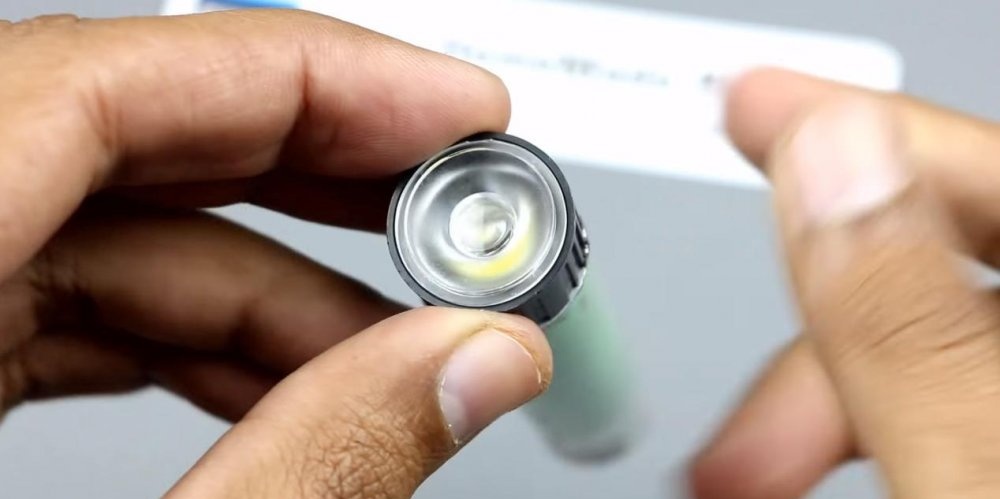
We put the battery on charge, and after a while the LED on the charging module will let you know that our flashlight can already be used. By the way, according to the author, such a flashlight can work for about 10 hours on one charge!
Homemade super bright mini LED flashlight

Homemade super bright mini LED flashlight

Homemade super bright mini LED flashlight

Homemade super bright mini LED flashlight

Homemade super bright mini LED flashlight

Watch the video


come back
Comment
  • bowtiesmilelaughingblushsmileyrelaxed relaxedsmirk
    heart_eyeskissing_heartkissing_closed_eyesflushedrelievedsatisfiedgrin
    winkstuck_out_tongue_winking_eyestuck_out_tongue_closed_eyesgrinningkissingstuck_out_tonguesleeping
    worriedfrowninganguishedopen_mouthgrimacingconfusedhushed
    expressionlessunamusedsweat_smilesweatdisappointed_relievedwearypassive
    disappointedconfoundedfearfulcold_sweatperseverecrysob
    joyastonishedscreamtired_faceangryragetriumph
    sleepyyummasksunglassesdizzy_faceimpsmiling_imp
    neutral_faceno_mouthinnocent
3+three=
Comments (4)
  1. Alexander Volk
    #1 Alexander Volk Guests April 3, 2018 09:03
    5
    Amazing! Just WHY is all this??? Such flashlights are on sale, like mud, they are inexpensive. Why fence a garden? Out of boredom or idleness?
  2. Guest Oleg
    #2 Guest Oleg Guests 5 April 2018 22:13
    3
    Everything would have been a disaster, but the author took an unsuccessful model of the switch. These buttons (the only moving part in the flashlight) usually withstand 500-1000 cycles and become unsuitable for adequate switching on and off; you have to press them many times to make them work. There is also a great chance to “enlighten” your own pocket until the battery is completely discharged due to accidental pressing in it. For those who want to repeat this homemade product, I suggest turning your attention towards miniature slide switches.
  3. Guest Mikhail
    #3 Guest Mikhail Guests 7 March 2019 17:38
    4
    super good, very cool. must be repeated. thanks to the author.
  4. Gefallen
    #4 Gefallen Guests 31 January 2020 23:21
    0
    storage thyristor????? This is disgusting demonic black magic.

Crafts - Do it yourself, step-by-step master classes | Page 46

How to make a simple chicken feeder from a PET bottle

Electronics | Page 19 | Do it yourself

Ice candlestick | Do it yourself

«Do it yourself - with your own hands» - a site of interesting homemade products made from scrap materials and items at home. Step-by-step master classes with photos and descriptions, technologies, life hacks - everything a real master or just a craftsman needs for needlework. Crafts of any complexity, a large selection of directions and ideas for creativity.

We recommend reading

Washing machine error codes