Do it yourself
Life hacks, master classes, useful tips, recipes.
home » Electronics » DIY electronics » How to tin a soldering iron

Almost everyone has the most common soldering iron with a copper tip. This simple and useful tool is needed not only by specialists involved in radio electronics. It is also often needed on the farm, for example, to solder two wires or to repair some simple household appliance with your own hands.

However, not all novice users succeed in even the simplest operation - tinning a soldering iron.

Why tin the soldering iron?

The answer to this question is that during the soldering process it becomes necessary to pick up solder (an alloy of lead and tin) with a heated tip, which is then transferred to the joint. But if it is not tinned, then this procedure becomes impossible. The solder does not stick to the soldering iron, so it is impossible to take the required amount of alloy and transfer it to the soldering site.

Why is this happening? When a heated tip comes into contact with solder, the latter melts and sticks to the surface. But only when there is a layer of tin on it, which is what is called a “tinned soldering iron.”Accordingly, if it is stained with rosin, flux or plastic, the specified interaction does not occur. The solder simply melts, drops of metal are formed, but the whole thing does not stick to the tip.

A properly tinned soldering iron is a tool whose working part is covered with a thin layer of solder. Tin readily sticks to such a surface, and it can be easily transferred to a conductor, board, radio component, and so on.

Soldering iron tinning materials

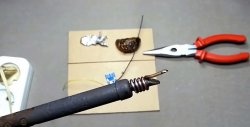
To properly tin a soldering iron with a copper tip, you will need a minimum set of materials:
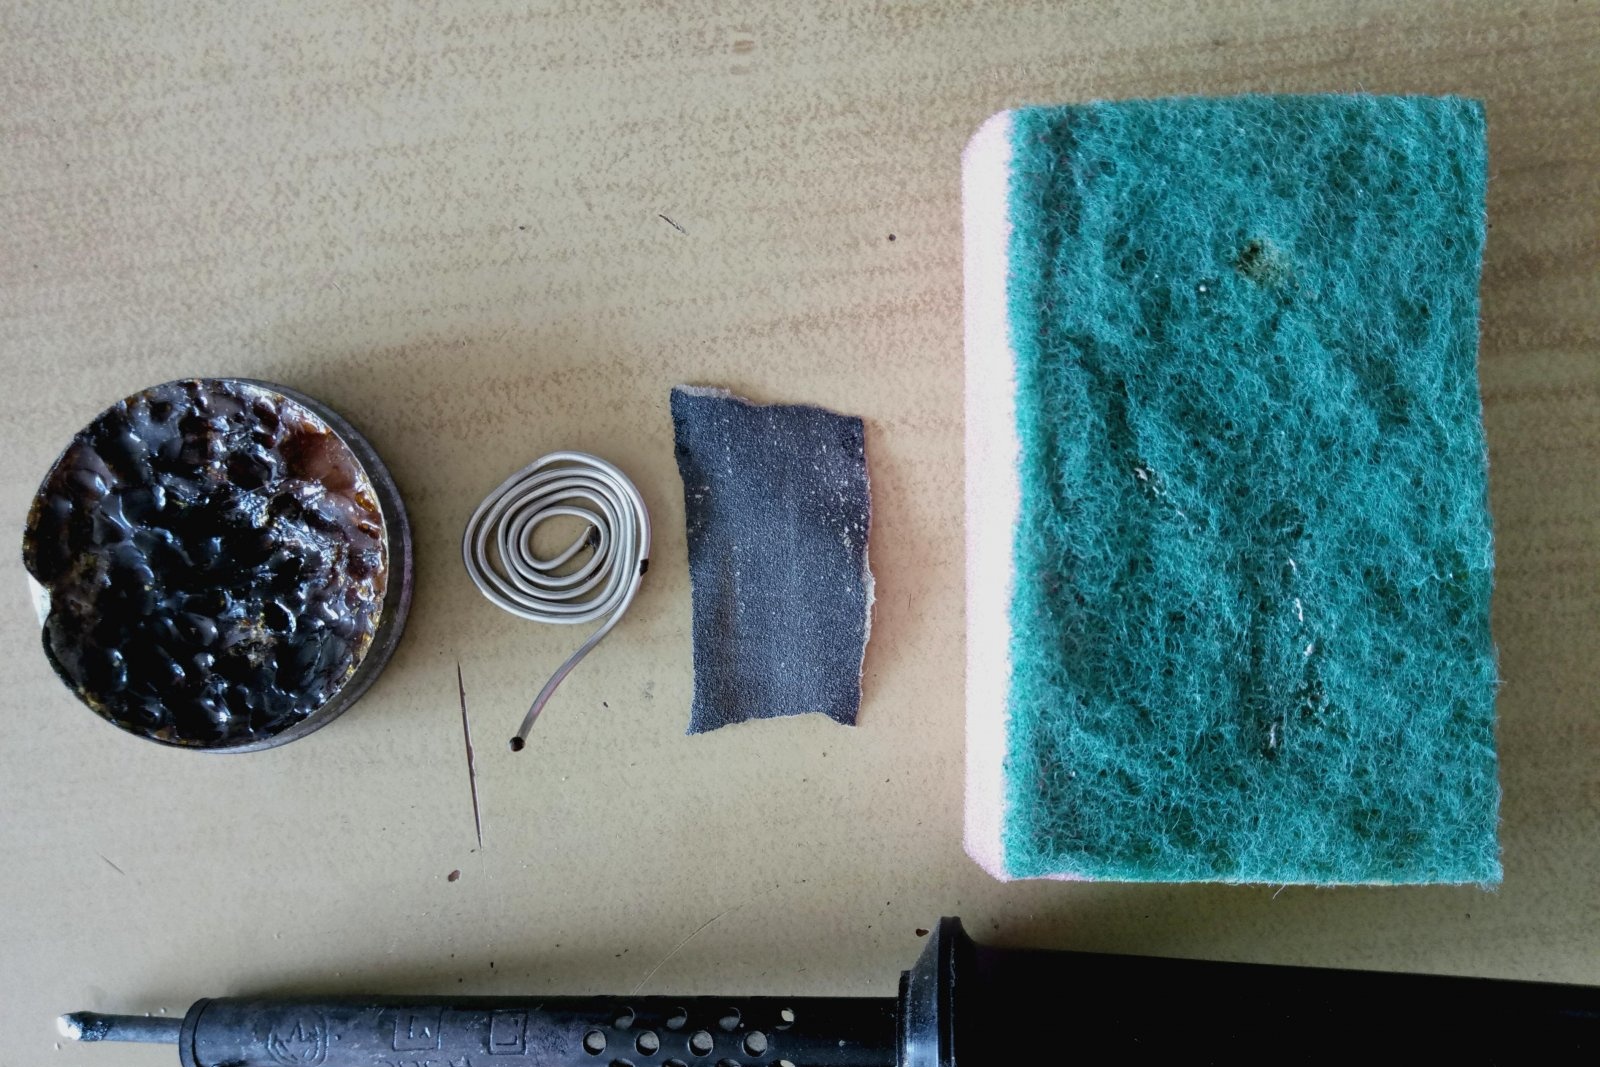
  • pine rosin;
  • solder;
  • sandpaper;
  • sponge for washing dishes.

The result will be much better if you listen to the recommendations outlined below.

Do not use rosin that has expired. It is also better not to take anything that has become darkened or contaminated with foreign substances. As a rule, standard rosin is suitable for use within two years from the date of manufacture.

It is recommended to buy solder that has the lightest possible shade. This means that the alloy contains more tin and, accordingly, less lead. This solder melts better and is easier for a novice user to handle.

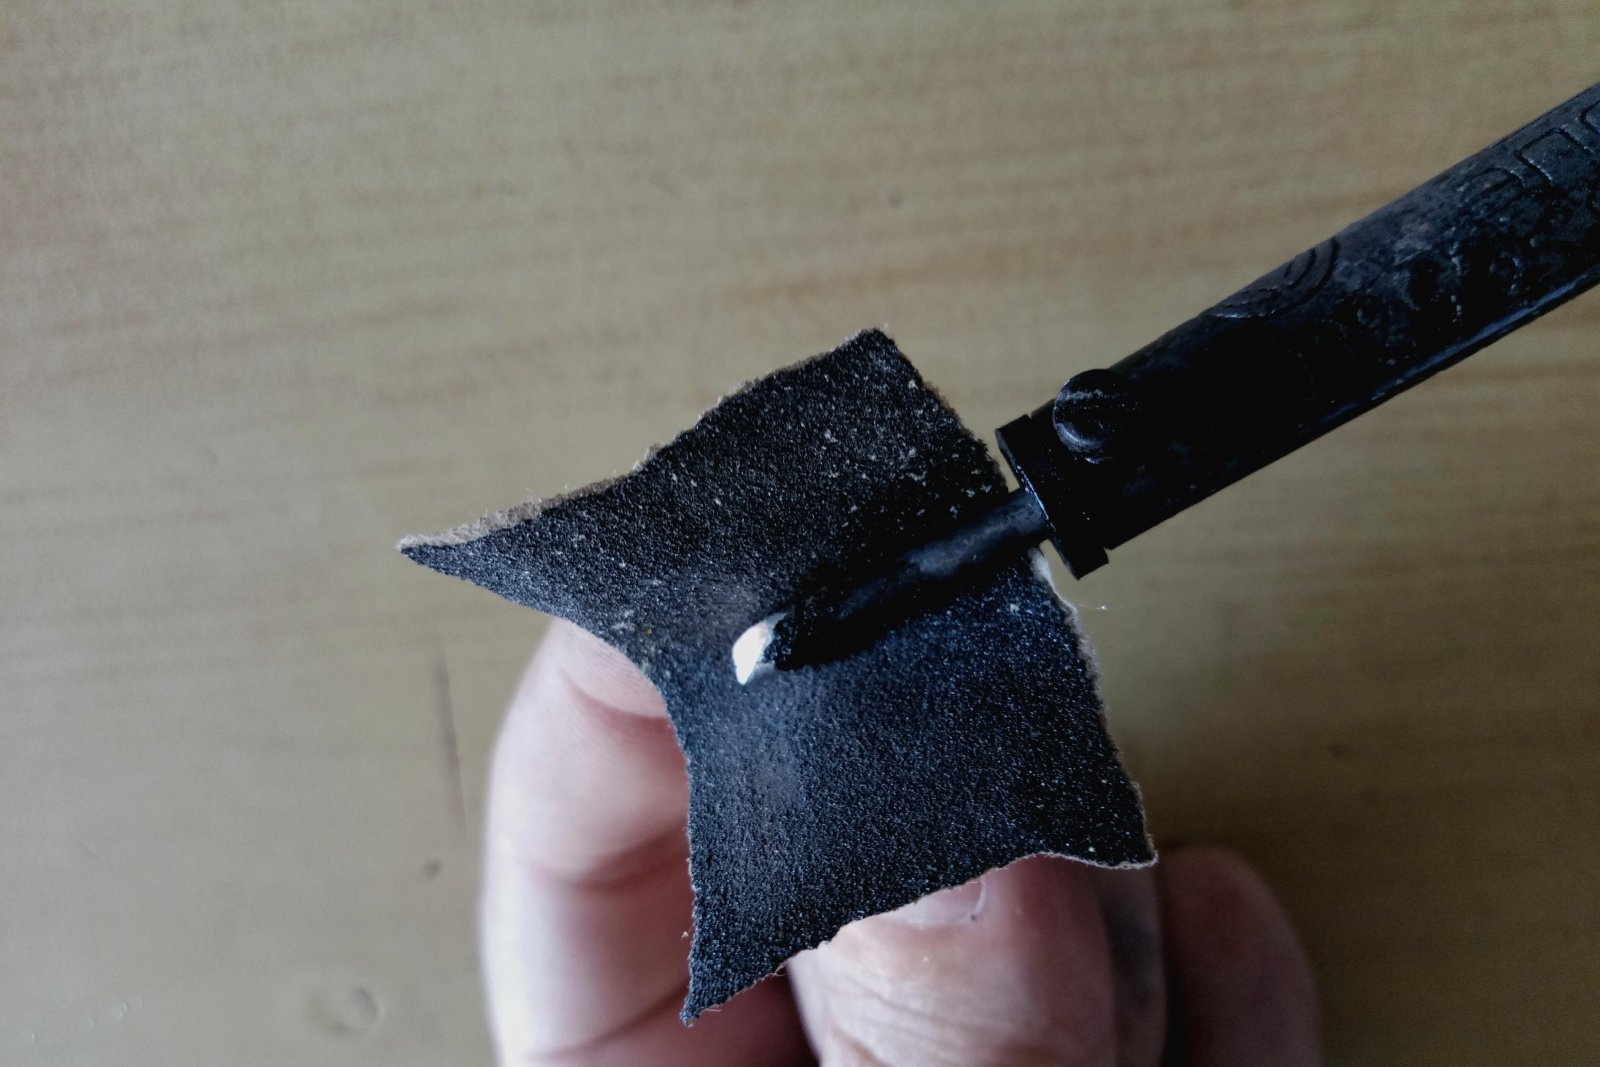
The sandpaper should be such that after its use there are no deep grooves left on the copper tip. For the same reason, you should never use sharpening stones for cleaning. Excellent results are achieved using P150 grit sandpaper.

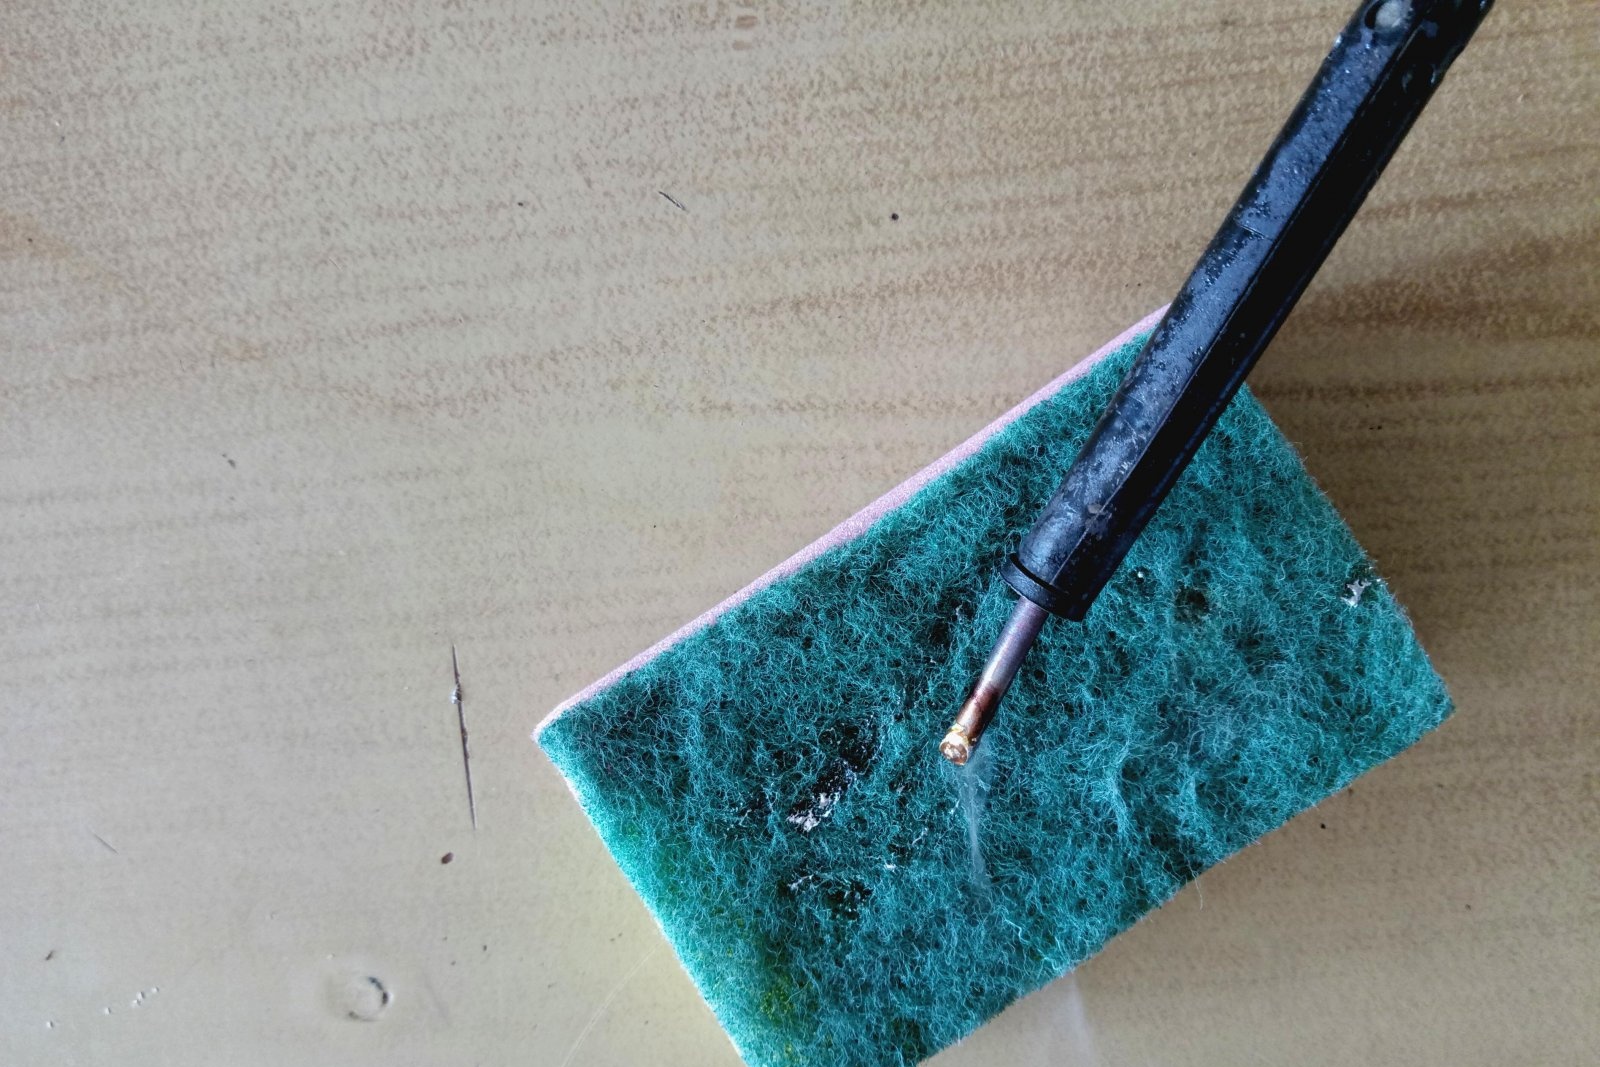
A sponge for washing dishes must have a hard pad, since this is the side that is used for work. It can be replaced with almost any felt materials. There are also special sponges for cleaning the soldering iron.

The process of tinning a soldering iron with a copper tip

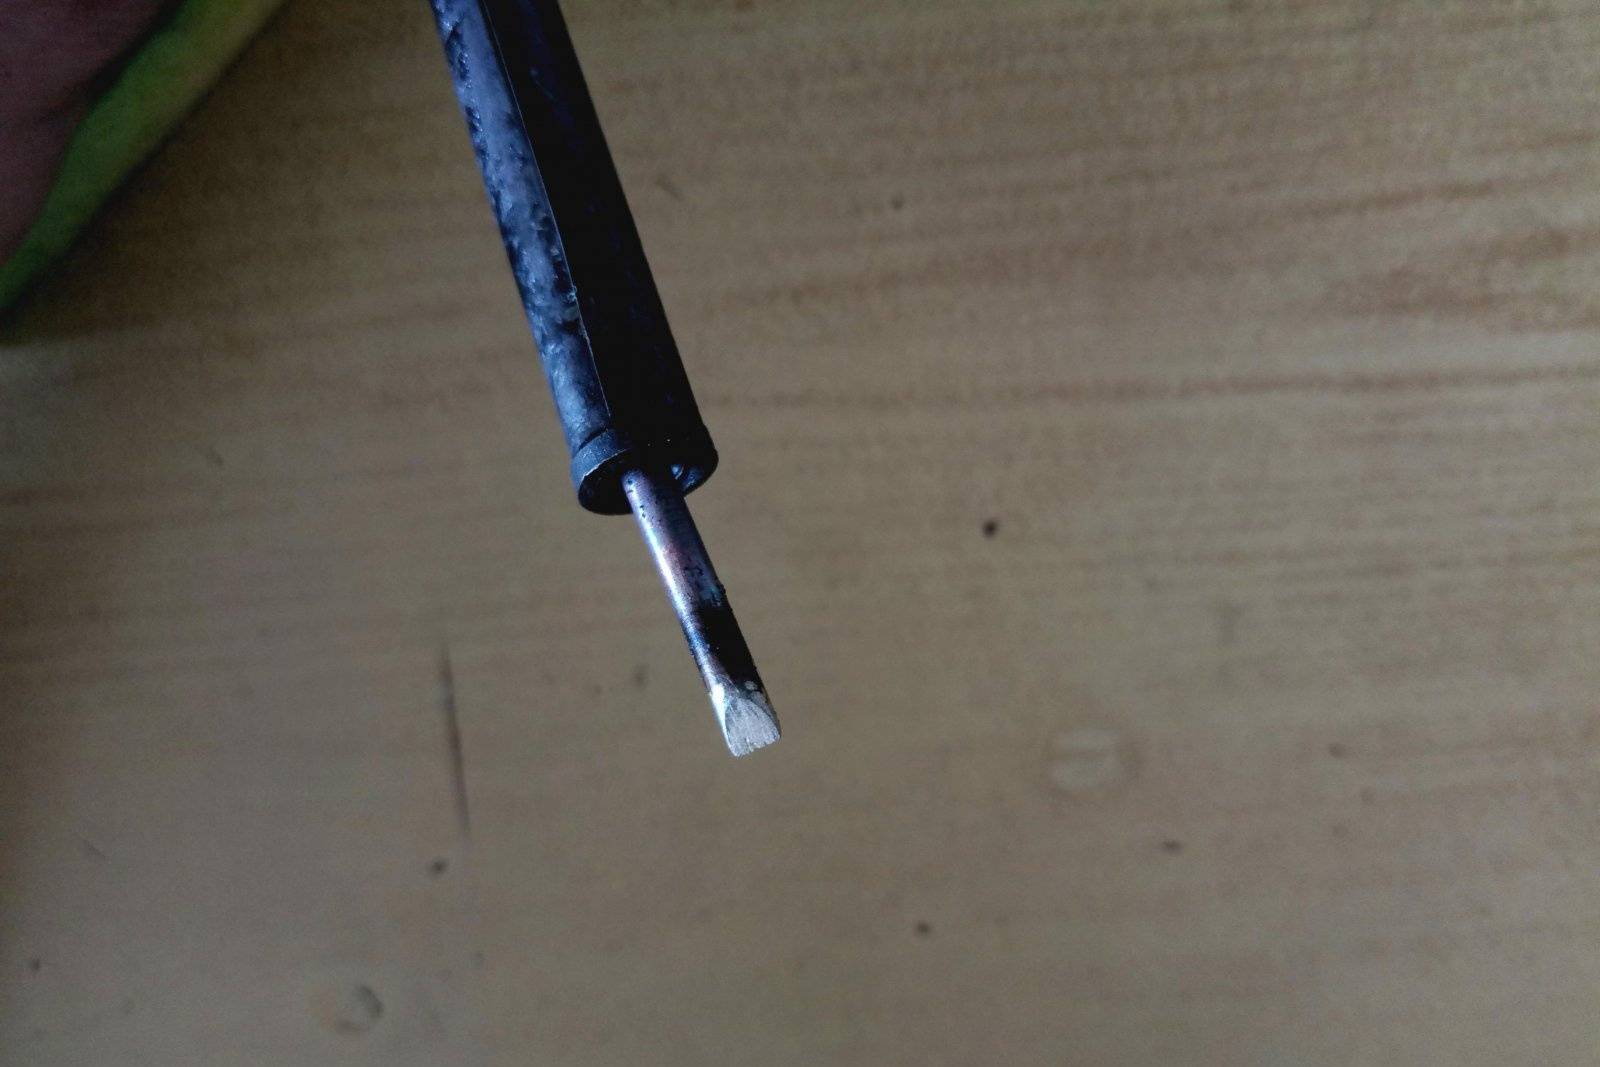
It is immediately worth noting that using the method described below you can only tin soldering irons with a copper tip. If you treat a ceramic tip with sandpaper, it will irrevocably lose its properties, and all you have to do is throw away the expensive attachment.

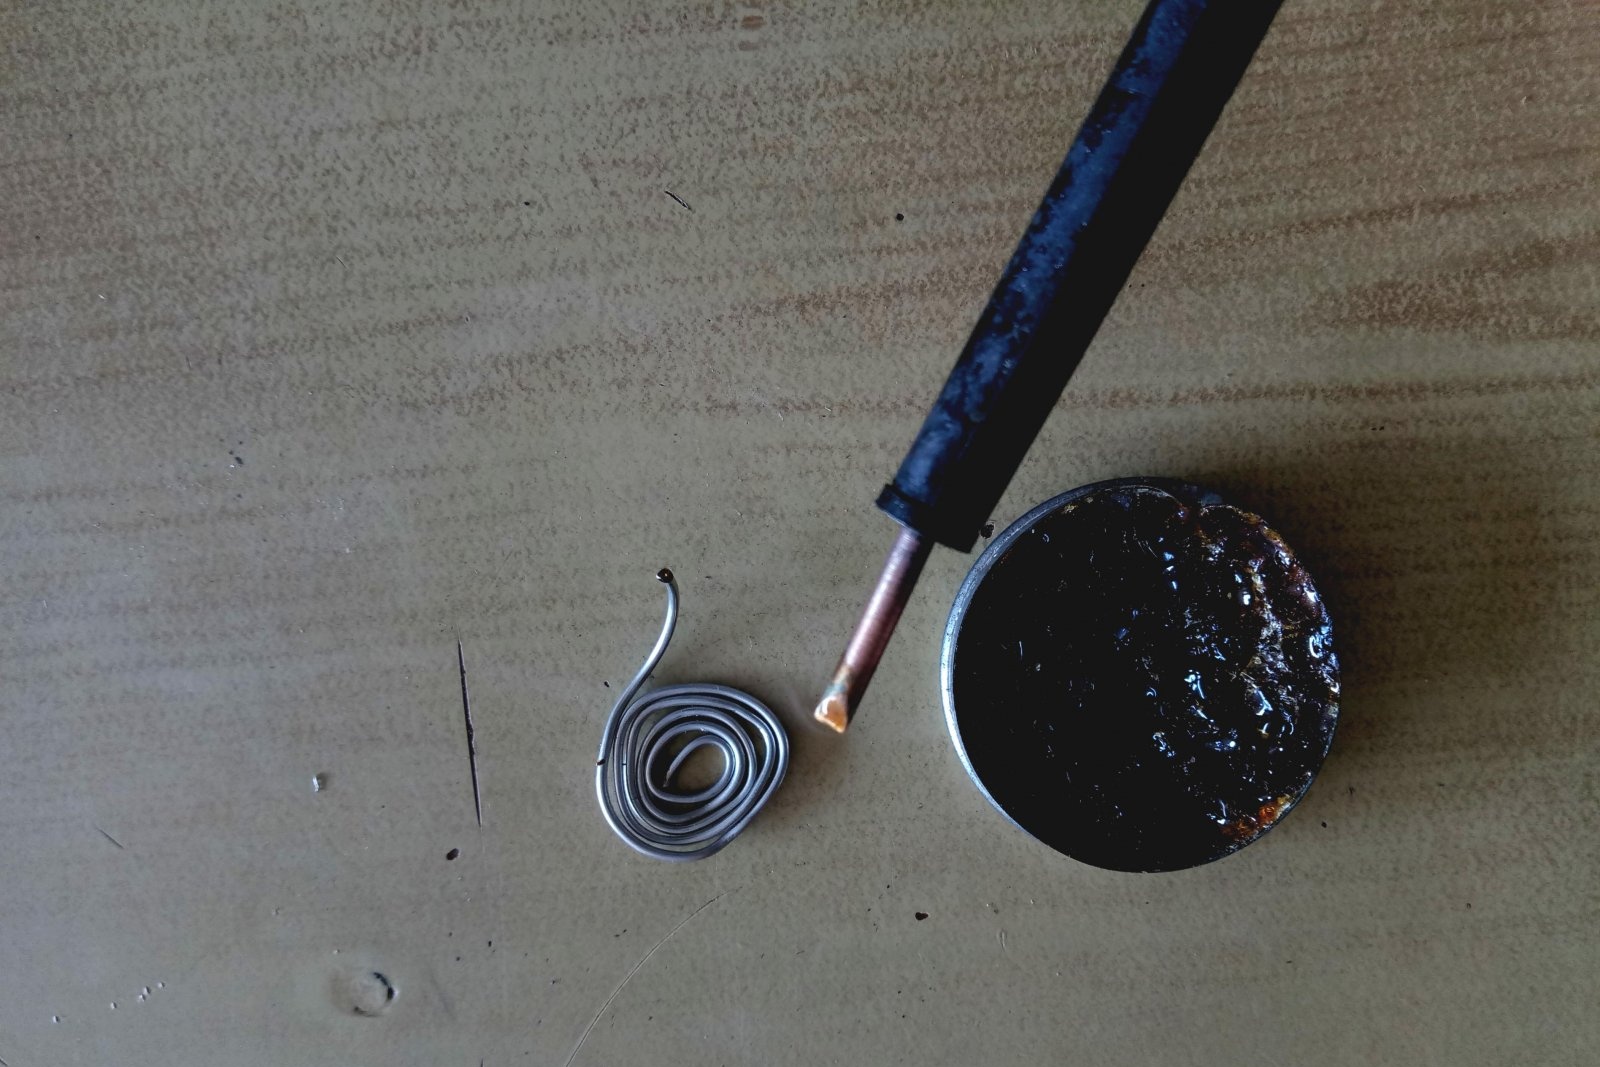
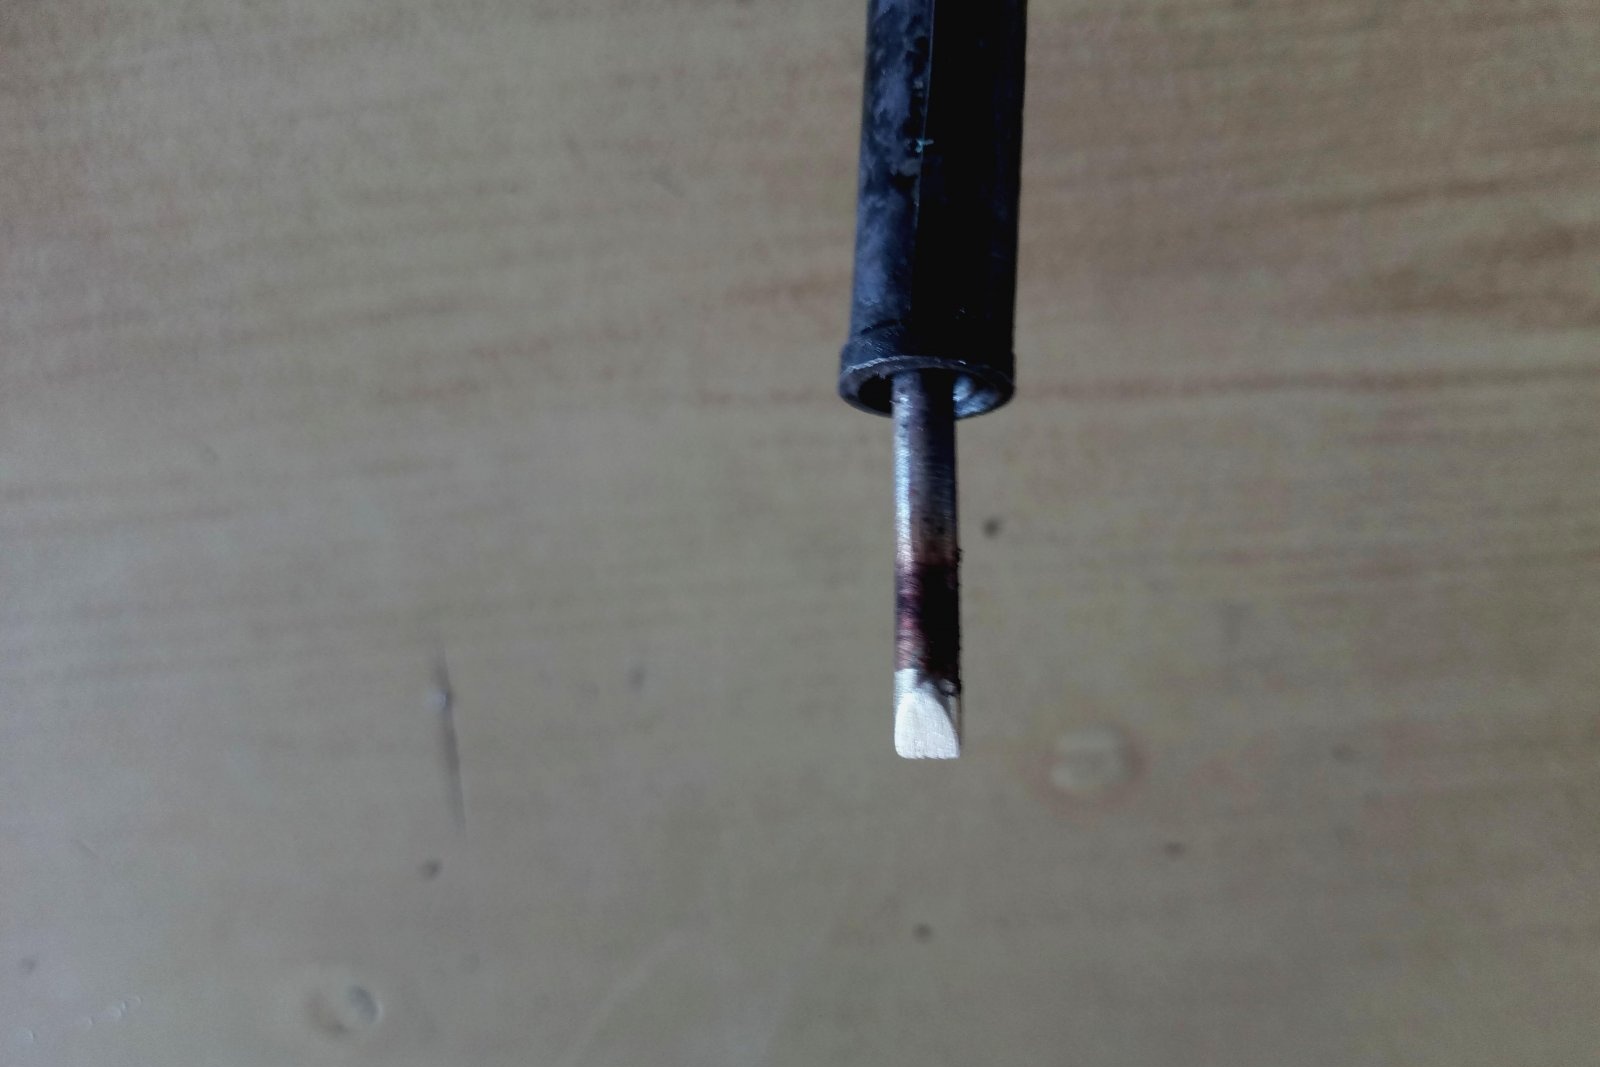
If frozen tin remains on the working surface of the tip, it can be removed as follows. The soldering iron must first be warmed up. Then the tip is dipped in rosin and cleaned on stranded copper wire dipped in flux.

Next, the working part of the tool must be cleaned of carbon deposits. This is done using sandpaper. There is no need to be particularly zealous, since copper is a fairly soft metal.

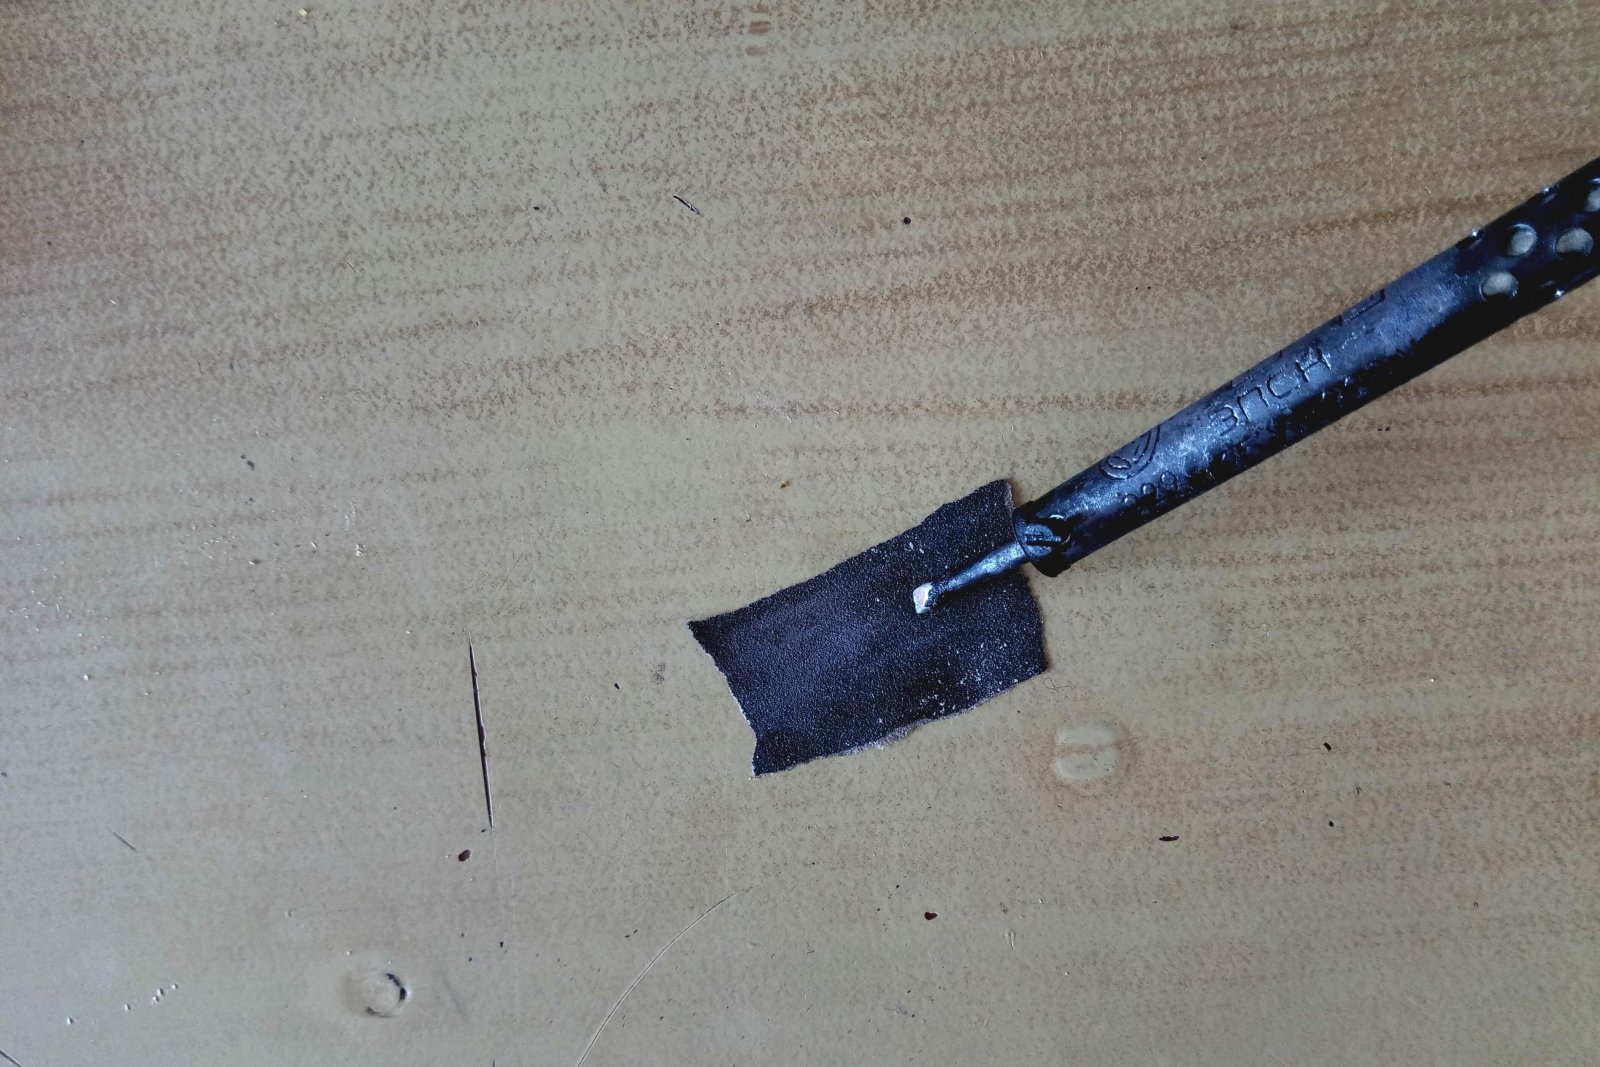
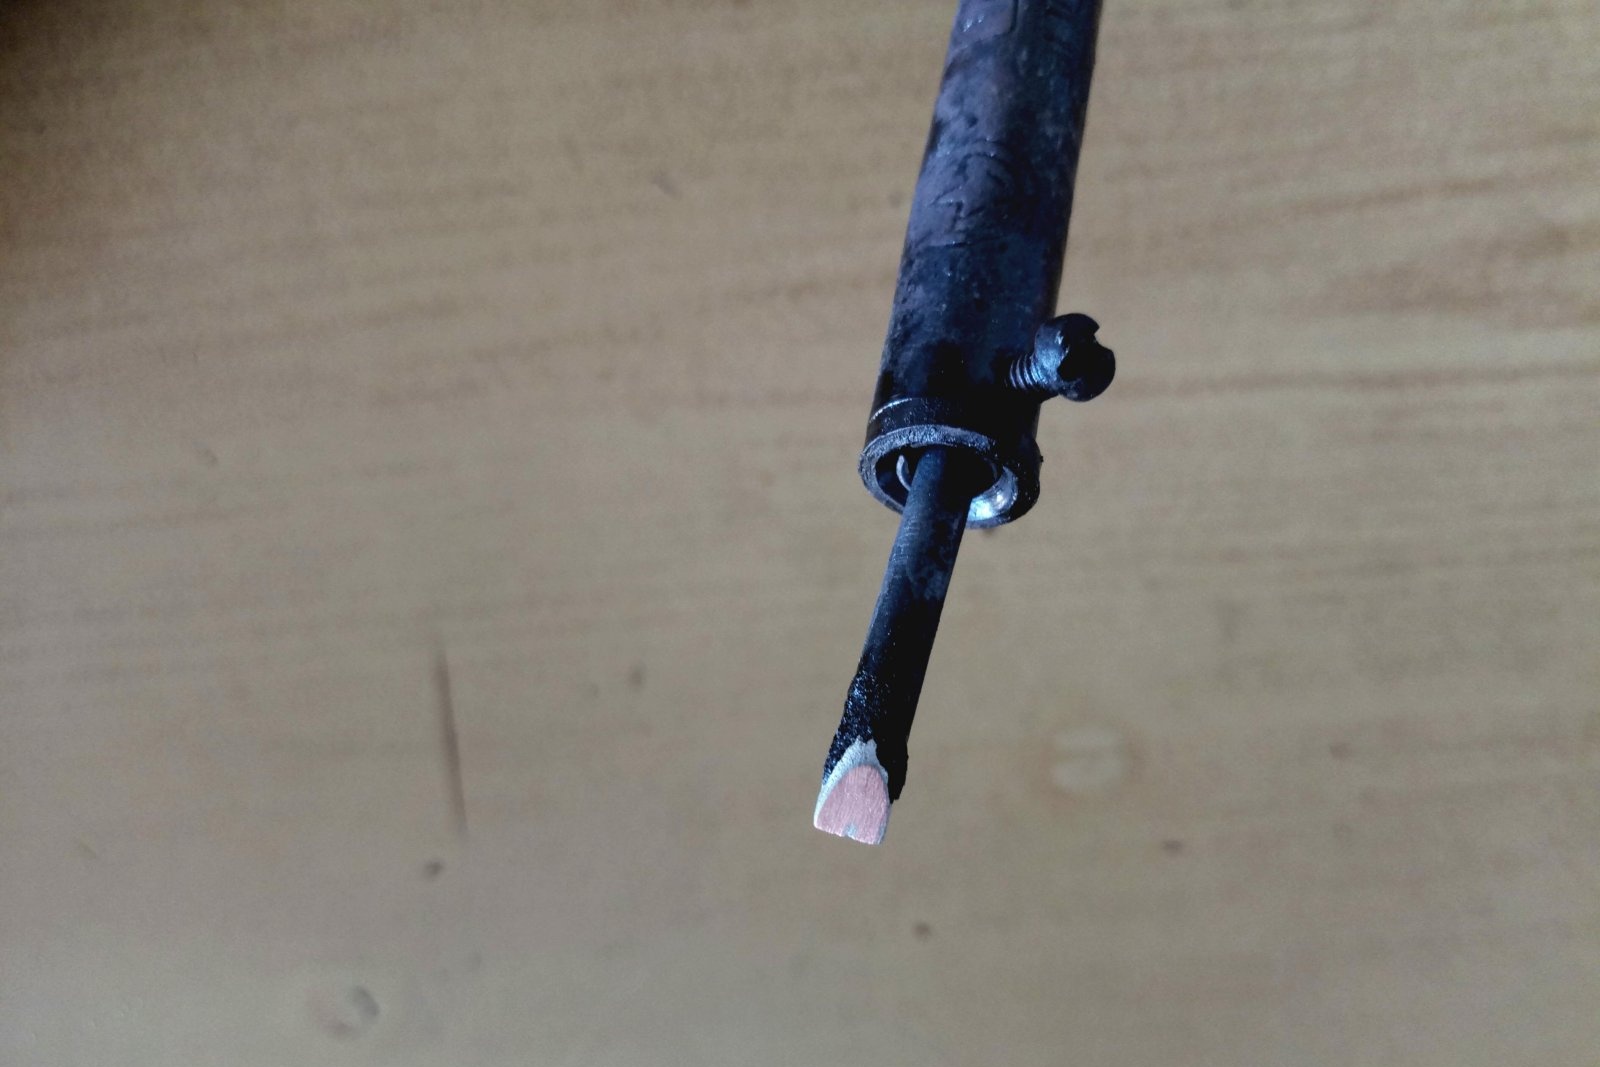
Particular attention is paid to the part of the tip that is used for soldering.

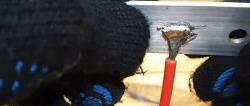
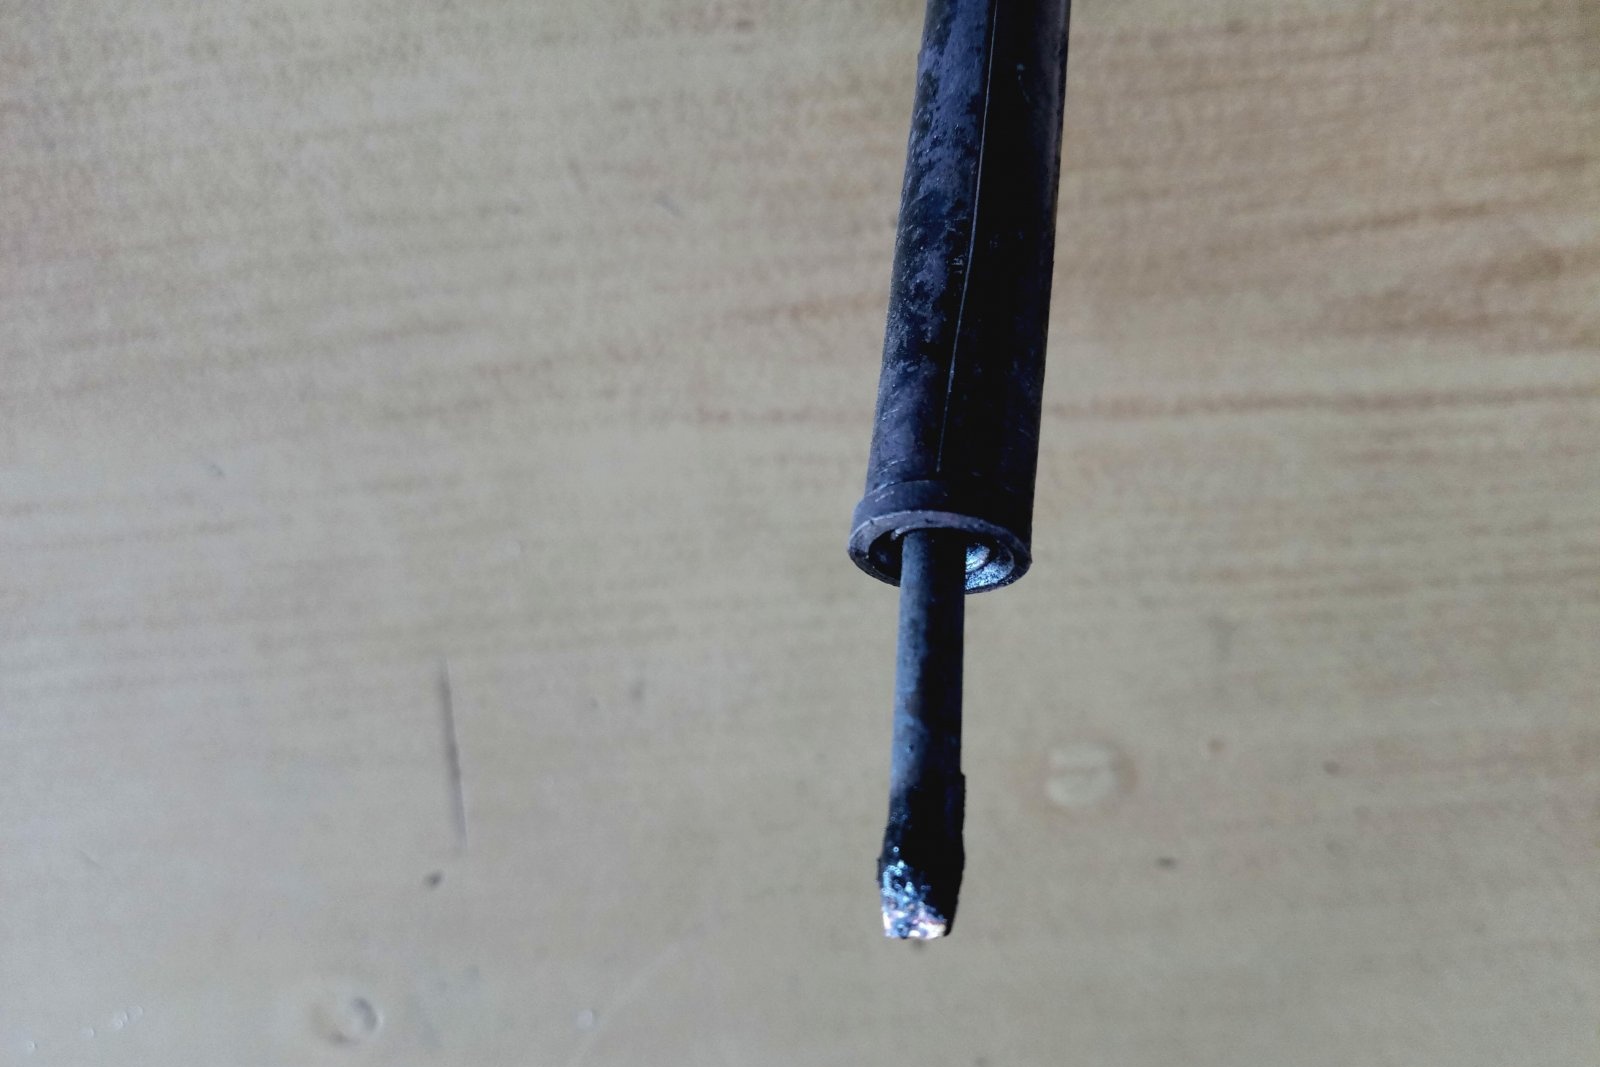
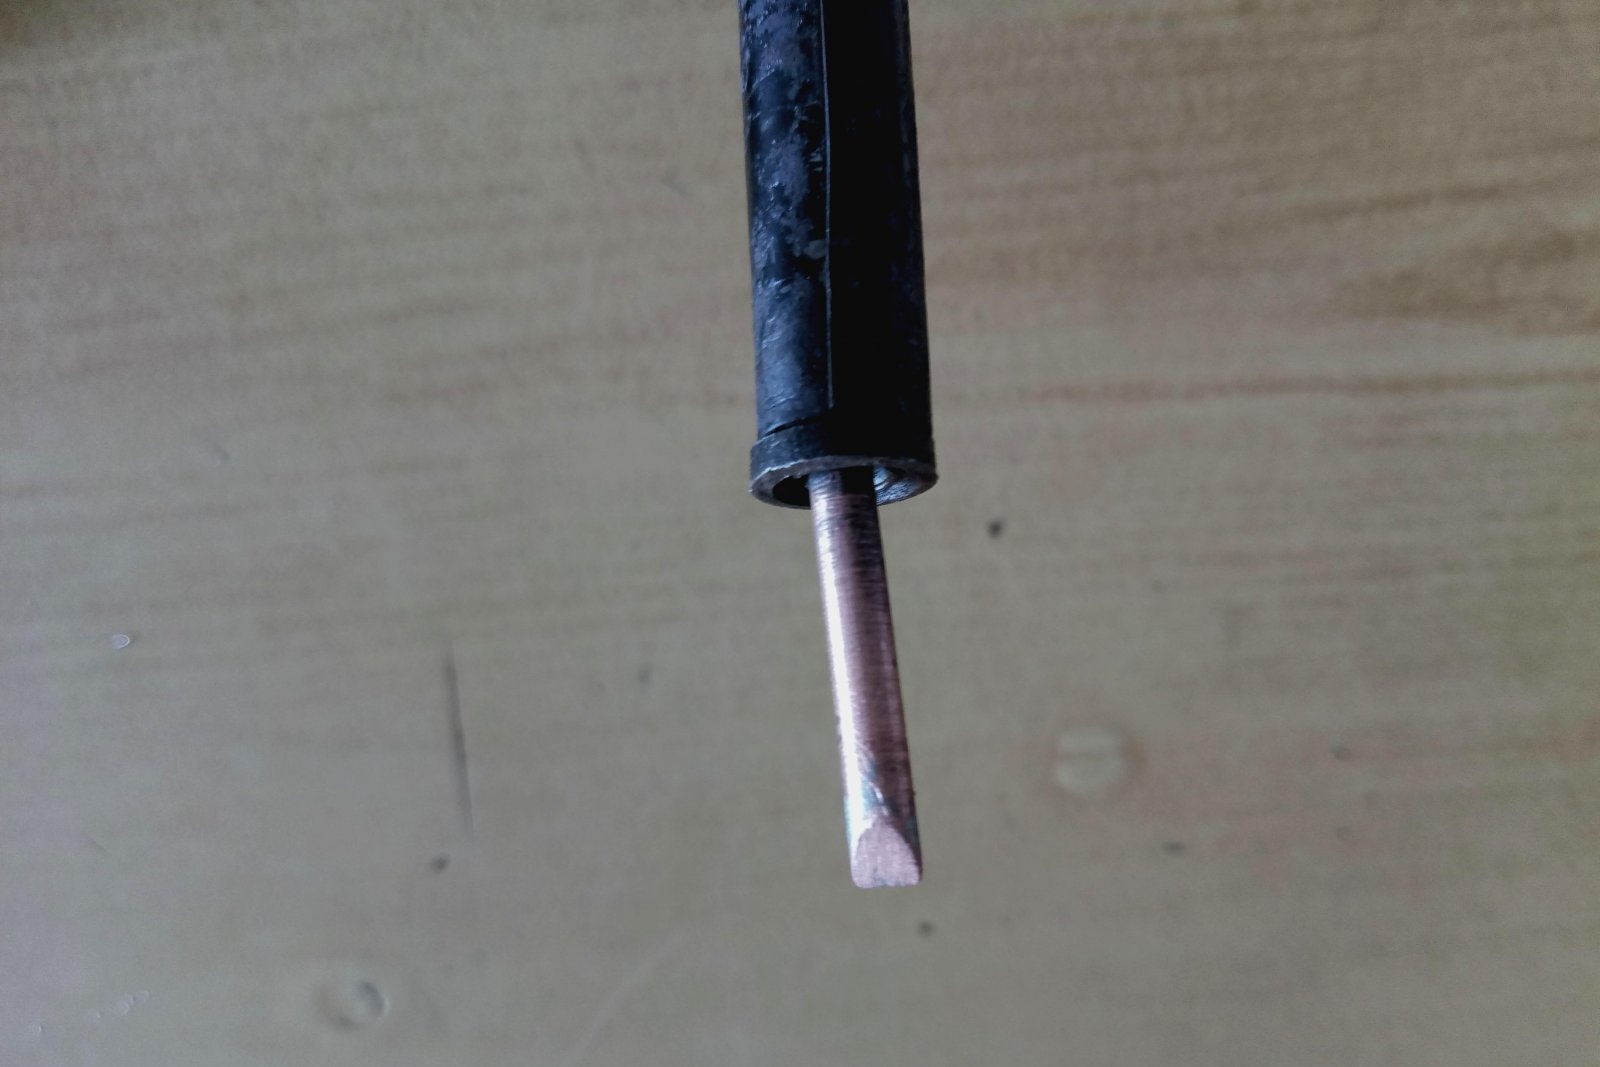
Immediately after cleaning, the soldering iron is turned on and warmed up to operating temperature. Since copper oxidizes very quickly, it is recommended to dip the tip into rosin during the heating process. This limits the access of oxygen, and the surface will not become covered with oxide in a matter of seconds. At high temperatures this process accelerates significantly.

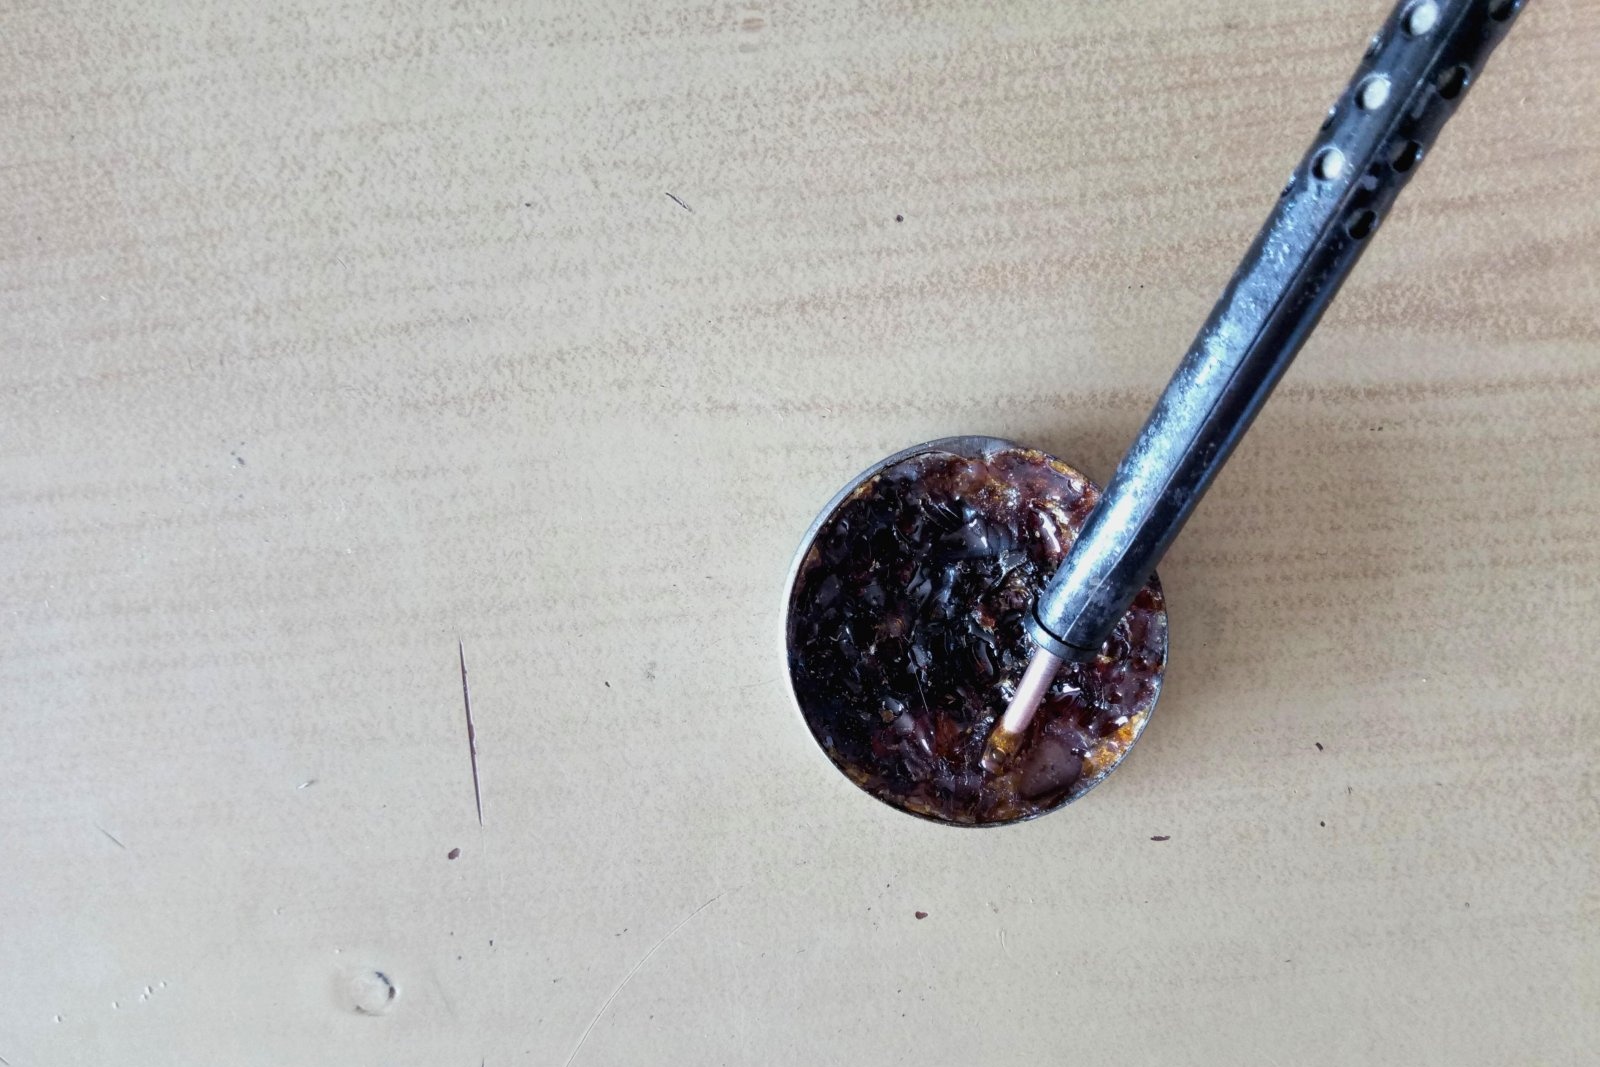
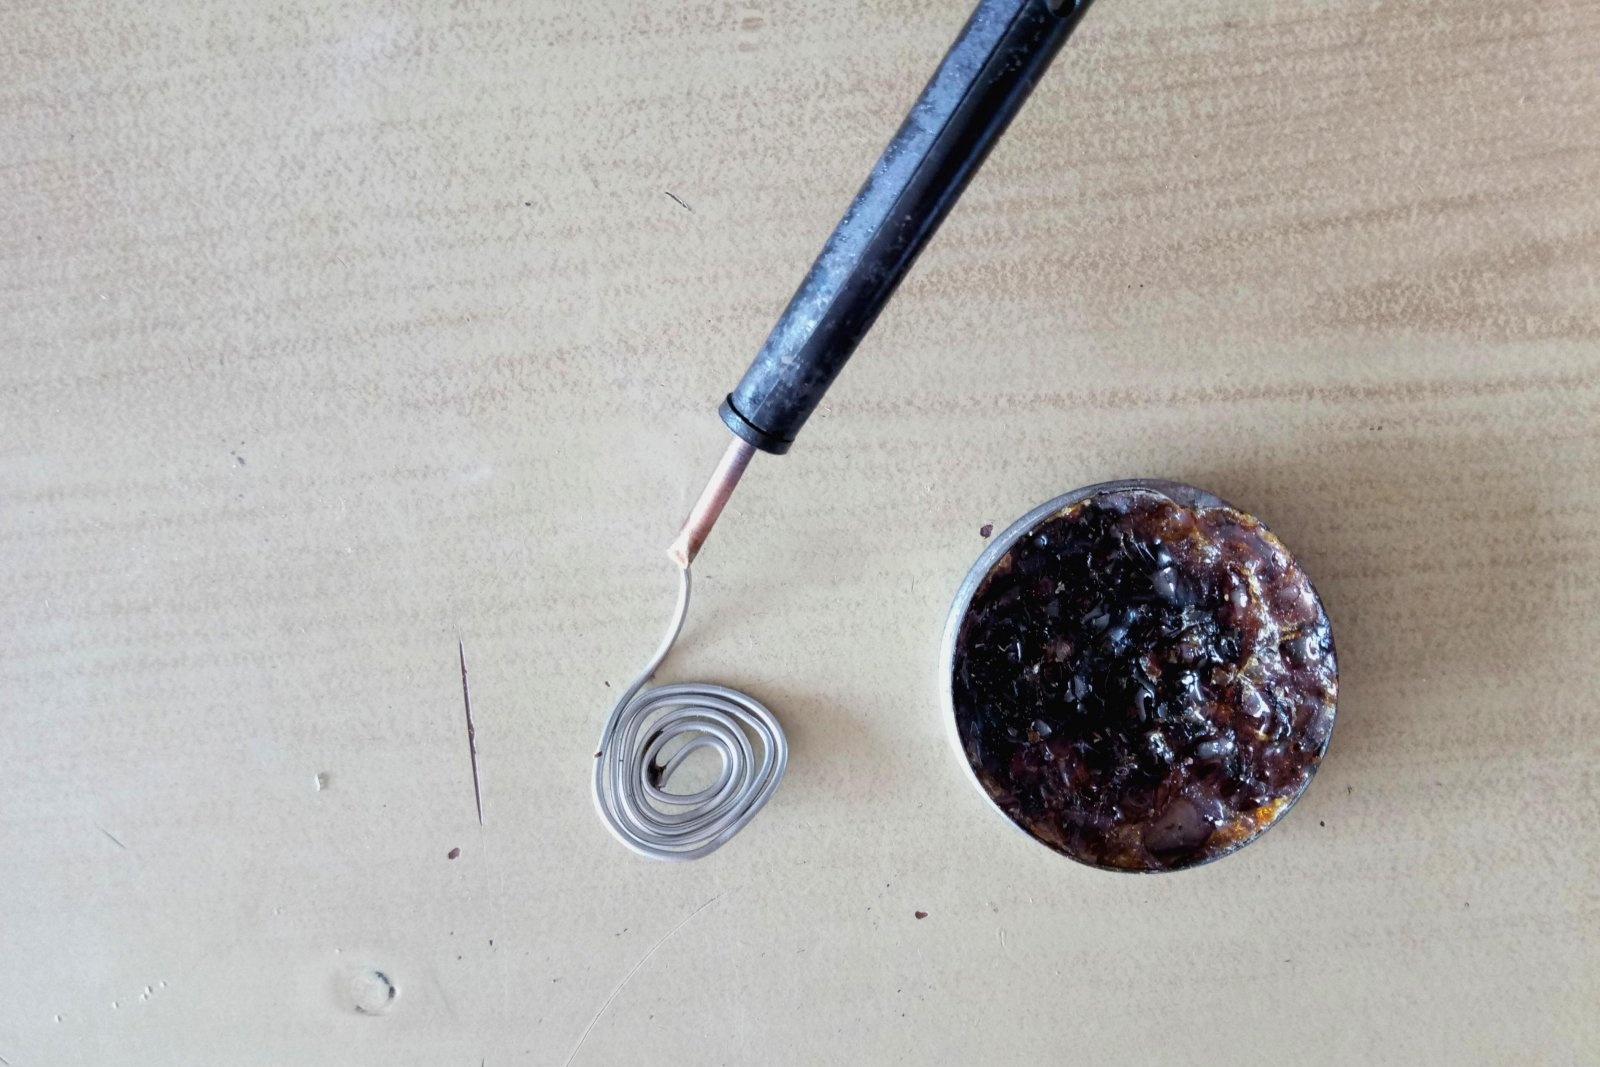
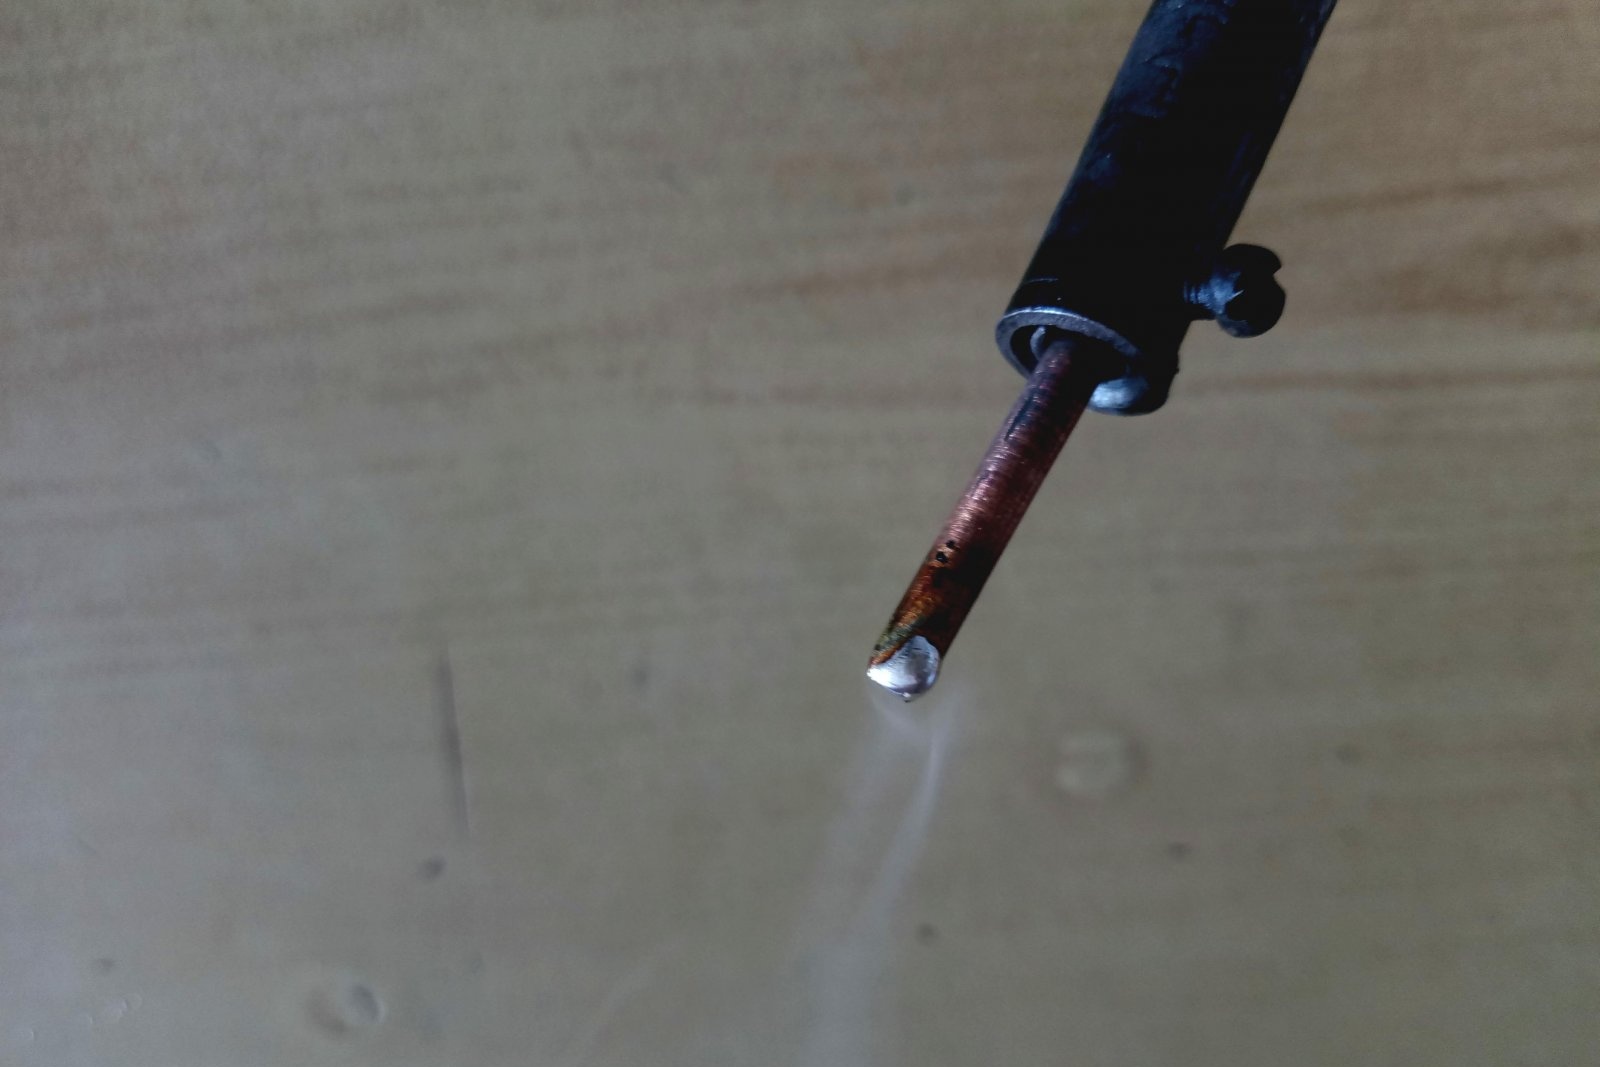
When the soldering iron is properly heated, it is removed from the rosin and brought to the solder. Having collected a sufficient amount of alloy (tin should stick perfectly to the cleaned surface), the tip must be immersed in rosin again several times. Due to the high surface tension, the tin will spread evenly over the working surface of the soldering iron.

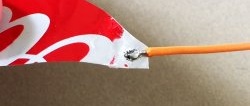
You can improve the result by using cardboard pre-coated with rosin. If you move a tip with solder over such a surface, the tin will be better distributed and will form a thinner layer.

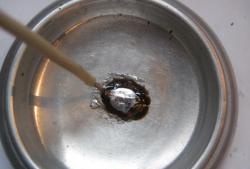
Next, you need to clean the soldering iron from excess molten metal.To do this, you need to run the tinned tip over the damp sponge several times. At this stage, you should be careful not to re-stain the instrument. Immediately after cleaning, the tip is dipped into rosin to protect the applied coating.

The result of the above procedure should be a perfectly tinned soldering iron with the thinnest layer of tin on the working surface. If everything is done correctly, the subsequent soldering process will be simple even for a novice user.

come back
Comment
  • bowtiesmilelaughingblushsmileyrelaxed relaxedsmirk
    heart_eyeskissing_heartkissing_closed_eyesflushedrelievedsatisfiedgrin
    winkstuck_out_tongue_winking_eyestuck_out_tongue_closed_eyesgrinningkissingstuck_out_tonguesleeping
    worriedfrowninganguishedopen_mouthgrimacingconfusedhushed
    expressionlessunamusedsweat_smilesweatdisappointed_relievedwearypassive
    disappointedconfoundedfearfulcold_sweatperseverecrysob
    joyastonishedscreamtired_faceangryragetriumph
    sleepyyummasksunglassesdizzy_faceimpsmiling_imp
    neutral_faceno_mouthinnocent
5+two=
Comments (9)
  1. Guest Nikolay
    #1 Guest Nikolay Guests 1 June 2018 21:02
    3
    Apparently the age of literacy in Russia has passed. You need a soldering iron. not to tin, but to tin, despite all the modern dictionaries.
    1. Mazay
      #2 Mazay Guests 2 June 2018 20:06
      2
      However, I think everyone understood the meaning.
      1. Radio operator
        #3 Radio operator Guests 3 June 2018 14:59
        2
        I will add that most often the half-dead comes off due to overheating of the soldering iron. You should keep the soldering iron tip in the radiator to remove heat or turn on a 60 W incandescent lamp in series with the soldering iron power supply. You will be served 20 times less often.
    2. Guest Sergey
      #4 Guest Sergey Guests 3 June 2018 14:44
      0
      As people search on the Internet (enter a query into the search), we write))
  2. Guest Alexander
    #5 Guest Alexander Guests 3 June 2018 15:11
    3
    Yuri Ivanovich Balanev (Irkutsk Aviation College, 1972) taught me how to tin a soldering iron in practice.
    1 tip on the anvil is given the desired configuration (like a chisel), the tip becomes denser and serves for a long time without the formation of shells. I don't recommend sandpaper.
    2 after forging the tip, you need to remove the burrs using the blunt side of the knife (just scrape it off).
    3 Then we begin to serve.
  3. Timur Rakhmatullaev
    #6 Timur Rakhmatullaev Guests June 5, 2018 00:44
    1
    After processing with sandpaper, it is necessary to treat the working area of ​​the tip with a knife, bringing it to a “mirror” state, since the sandpaper leaves small grooves and the solder does not completely wet the copper, which leads to fairly rapid oxidation of the tip.
  4. radar
    #7 radar Guests 13 March 2019 14:48
    2
    The last photo shows that the soldering iron is not tinned correctly. Only work surfaces should be tinned. I usually clean the tip after forging from all sides, warm it up and dip it in alcohol for a second, this dissolves the oxide film. Then the soldering iron is kept turned on until the tip is uniformly oxidized (blackened). Then, while hot, use a medium-sized file to remove a thin film of oxide on the working surface, directly into the rosin-solder. Oxide on the side non-working surfaces protects them from damage. It makes an excellent sting.
    You can also use a brass tip; it requires tinning much less often; cavities on it from dissolution in solder practically do not form.
  5. Guest Yuri
    #8 Guest Yuri Guests 21 March 2019 17:02
    0
    The soldering iron tip should, indeed, be beaten with a hammer, giving it the desired shape (whatever you like, taste and color...). This way it is compacted and lasts a long time. You can clean it up with a needle file. If the tip has been used, it must be cleaned to avoid driving scale into the copper. It is important to remember that such soldering irons usually overheat terribly. Therefore, a power regulator is needed. You can use a dimmer for lamps. You can buy a scarf on Ali for embedding in night lights, etc. - cheap and gluttonous. We take a double extension, cut out half of the contact part, and place the regulator in the free space. Another option is to buy a power cord with a regulator installed on it. It is good to have a tester with a thermocouple included, you can accurately set the temperature. Because The tip in such soldering irons is much more massive than in the station, the temperature during soldering remains quite stable.
  6. radar
    #9 radar Guests 30 April 2019 13:25
    0
    The last photo shows that the soldering iron is not tinned correctly. Only work surfaces should be tinned. I usually clean the tip after forging from all sides, warm it up and dip it in alcohol for a second, this dissolves the oxide film. Then the soldering iron is kept turned on until the tip is uniformly oxidized (blackened). Then, while hot, use a medium-sized file to remove a thin film of oxide on the working surface, directly into the rosin-solder. Oxide on the side non-working surfaces protects them from damage. It makes an excellent sting.
    You can also use a brass tip; it requires tinning much less often; cavities on it from dissolution in solder practically do not form.

Do-it-yourself budget anti-freeze

Decorative topiary | Do it yourself

Crafts - Do it yourself, step-by-step master classes | Page 9

Turning the load on and off with one button with your own hands

«Do it yourself - with your own hands» - a site of interesting homemade products made from scrap materials and items at home. Step-by-step master classes with photos and descriptions, technologies, life hacks - everything a real master or just a craftsman needs for needlework. Crafts of any complexity, a large selection of directions and ideas for creativity.

We recommend reading

Washing machine error codes