If two pipes of the same diameter are to be inserted, then on the inserted one we perform the so-called. “pants” are segments that, in their largest part, should have a size three times smaller than the diameter.
Below we will consider the most difficult case in terms of cutting, when the diameter of the inserted pipe is slightly smaller than the main one, for example, 89 mm or 76 mm and 100 mm, respectively.
Will need
In order to cut and weld an insert of two metal pipes of different diameters, we must have:
- pipe blanks of two different diameters;
- grinder with cutting and grinding wheel;
- marker;
- ruler, square;
- welding machine;
- hammer.
Algorithm for the process of inserting round pipes
We will use the widely used collar cutting technology, where the edge of a round pipe being cut in perpendicular to the main pipe is formed.We will follow the following order when implementing this method.
We cut the edge of the welded pipe at a right angle.
We mark four points on it with a marker, which are the intersection of two mutually perpendicular diameters and the end of the pipe. If everything is done correctly, then these points are located evenly in a circle at 90 degrees.
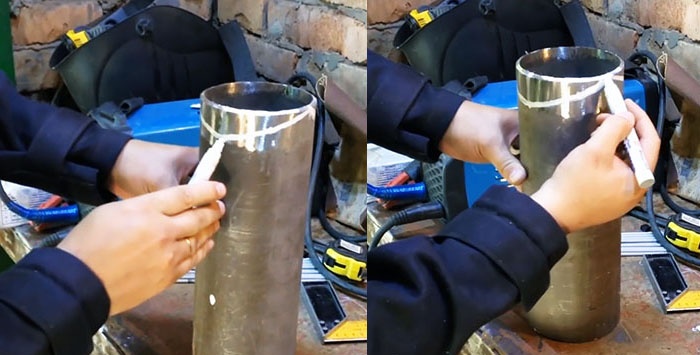
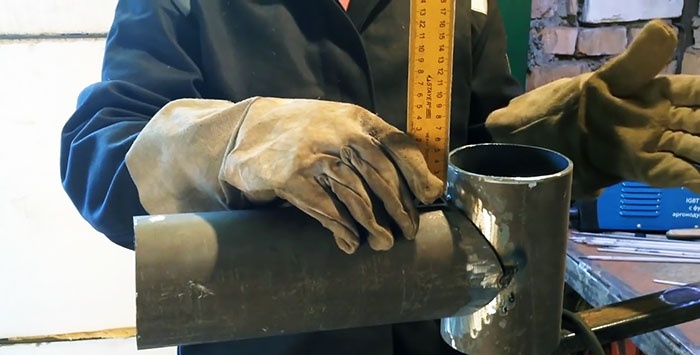
We place the pipe with the marked end against the side surface of the main one and use a metal ruler or tape measure to measure the largest gap between the end of the first and the generatrix of the second. In our case it turned out to be 30 mm.
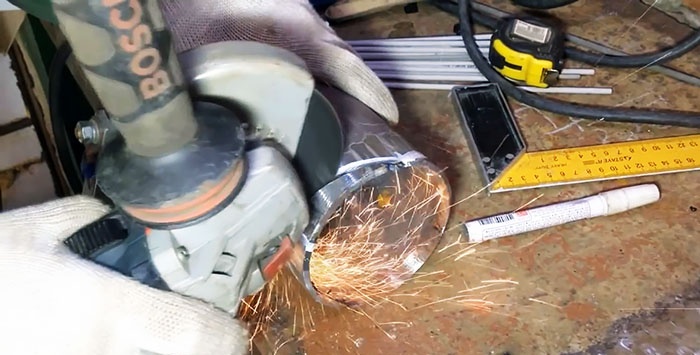
From two opposite points at the ends we lay down 30 mm along the generatrix. Using a marker, we draw two smooth lines on the side surface of the pipe, emanating from one adjacent point at the end, in opposite directions, so that they pass through the lower marks and converge at the second point at the end.
According to the markings made, using a grinder with a cutting disc, we cut out fragments in the form of two identical rounded segments. We clean the figured cutouts at the end of the pipe so that there are no burrs or irregularities left.
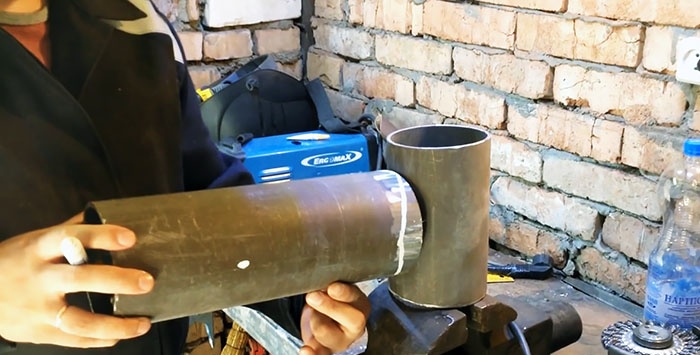
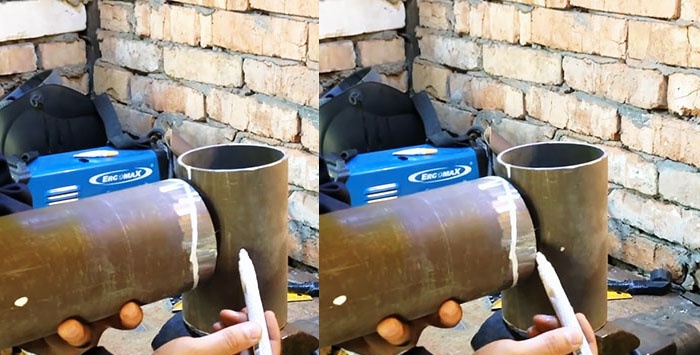
We try on the pipe in place and, if there is insufficient fit, we correct these places with a grinder and achieve a more accurate match of the surfaces of the pipes.

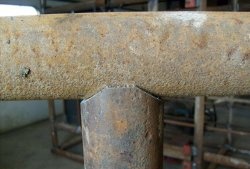
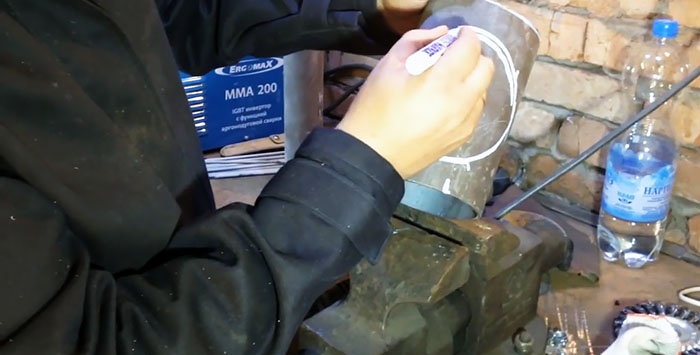
Using a marker, transfer the outer contour of the welded pipe to the side surface of the main one. Inside the resulting closed line we build a congruent line, retreating from the outer one by the thickness of the pipe wall. It is along the new line that we will make the cut.
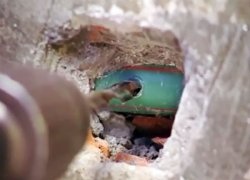
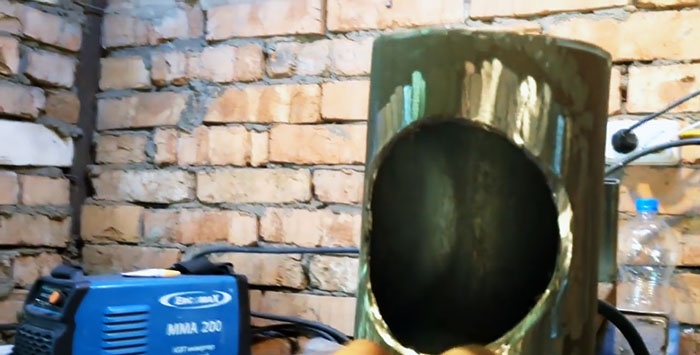
Using a grinder, we cut out a circle in the pipe according to the markings and process the edges to remove burrs and round the edges for welding.
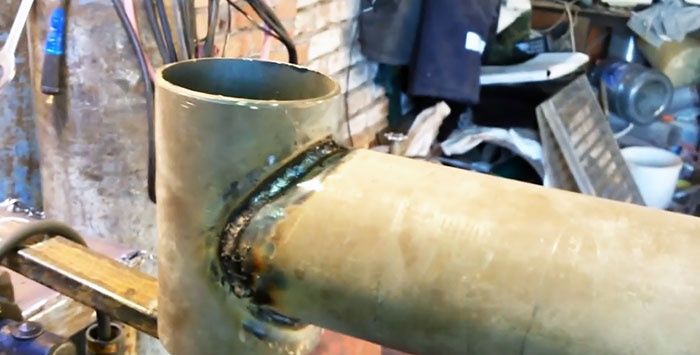
Before starting welding work, use a square to check the perpendicularity of the pipes. The angle between the generators should be 90 degrees.We make tacks in two or three places.
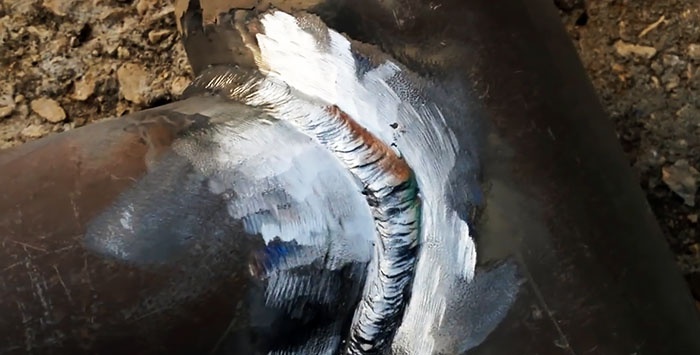
We start welding from the lower point of contact and carry out two passes using a thread seam: root and facing. This will ensure the best quality of the welded joint.
When welding, it is important to choose the right current strength, which depends on the quality of the supplied electricity and, in particular, the voltage. Usually we are talking about 70-80 A. We cook with a three-millimeter electrode UONI-13-55, trying to prevent the slag from getting into the metal.
Having passed from the bottom point to the top, we stop and beat off the slag with a hammer. The detected deficiencies are not critical, since they can be eliminated during the second pass - the facing one.
We weld the other half of the joint between the pipe surfaces in the same way. Then we lightly process the first seam, removing large beads and slag.
We begin to apply the facial seam from the bottom, holding the electrode at an angle of 45 degrees along the way, and moving it transversely to the first seam, or “herringbone”. Next, we weld the seam, holding the electrode almost vertically to the surface, and finish the first half, placing the electrode again at 45 degrees along the way, and making circular movements.
We also begin to apply the front seam from the bottom point and bring it to the top, after which we beat off the slag from the seam with a hammer.
We weld the front seam in the same way on the second half of the contact of the pipes. As we move upward, we slow down the welding speed so that the seam is the same everywhere.
We also beat off the slag and clean the seam using a grinder. The result is a neat and reliable weld.