But you can forget about marking forever if you make a simple device that will allow you to drill holes along the line of symmetry of the workpieces with a drill, which is very convenient, especially if you have to do this kind of thing regularly.
Will need
Let's prepare some materials for work:
- two steel rods;
- four compression springs;
- two wooden blocks;
- a small piece of steel wire;
- wooden rectangular blank of small thickness;
- round head bolt, washer and nut;
- wood glue
To manufacture the elements of the centering device and assemble them, you cannot do without the following tools and devices: clamps and clamps; drilling device with ring and spiral drills; bench vice; hacksaws for metal; pliers and pliers; measuring square, ruler and pencil; hammer and wrench.
The procedure for working on the device
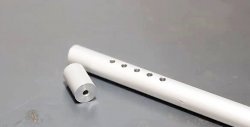
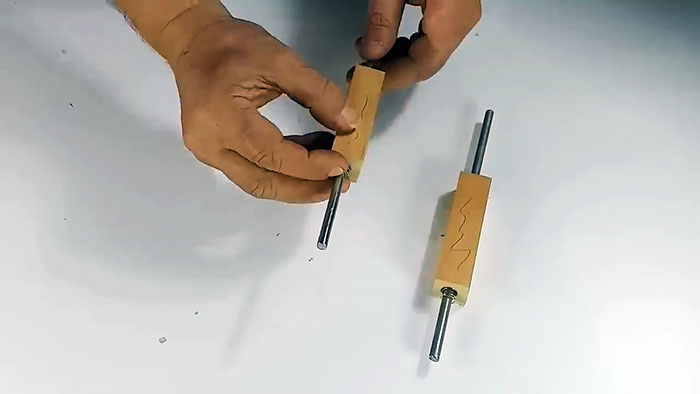
In the wooden blocks, we drill holes for steel rods from one end to the middle, and on the other side, holes of larger diameter for rods with springs put on them.
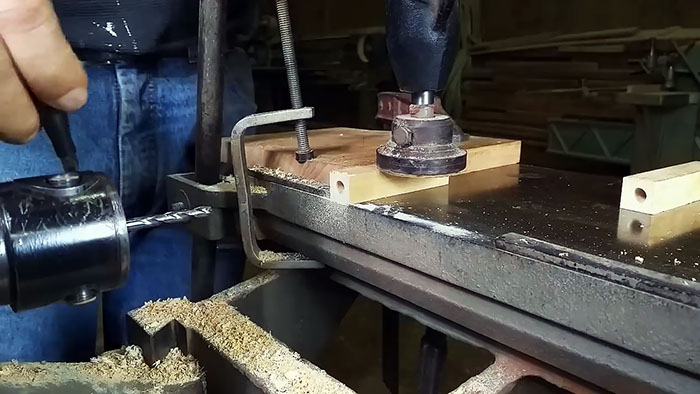
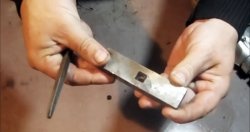
We clamp the rods one by one in a vice and use a hacksaw for metal to make a circular groove exactly in the center.
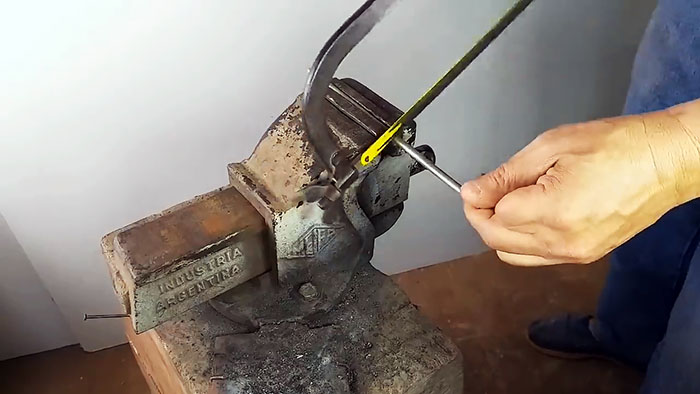
We wind the wire into the groove along the ring in one turn and cut off the resulting wire ring with pliers.

Using pliers, we press the wire rings into the grooves. The ends of the double springs will rest against them.
We insert rods with springs into the larger diameter holes in the wooden blocks and set them aside for now.

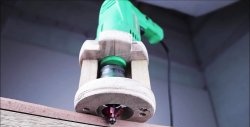
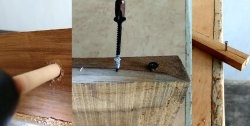
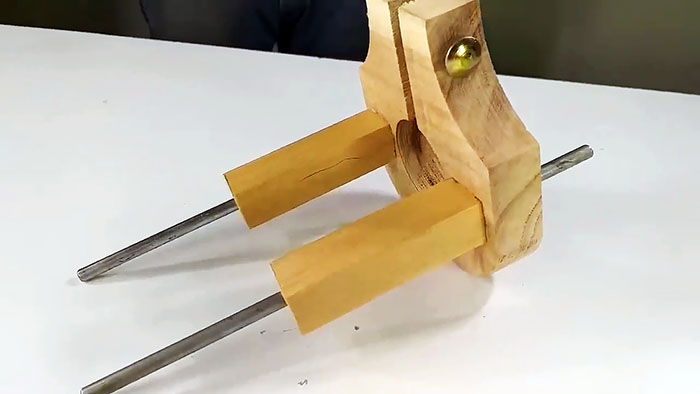
We mark a rectangular wooden blank for a large central circular cutout, two side recesses horizontally and symmetrical relative to the center of the large cutout, as well as its outer contour.

We secure the marked workpiece with a clamp and clamps vertically and use a ring drill to make a central cutout.

Using a spiral drill, we make two recesses on the sides and, using a drill in the center of the recesses, we drill through holes for the exit of the rods.
At the bottom of the workpiece we draw two vertical lines from the central hole to the edge of the workpiece at some distance from each other and symmetrical to the center of the circle.
Using the markings, we form the outer contour of the workpiece and make a slot. Perpendicular to the slot, we drill a through hole for the coupling bolt closer to the edge of the workpiece.

We give one end of the wooden blocks to the depth of the blind holes in the flat workpiece a cylindrical shape that matches their diameter.
We apply glue to the cylindrical part of the bars, insert the rods with springs into place and install them in the blind holes in the flat workpiece. Remove excess glue using a napkin.

We press on the rods with our fingers and make sure that they are securely spring-loaded and move freely in the holes.
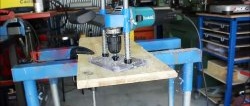
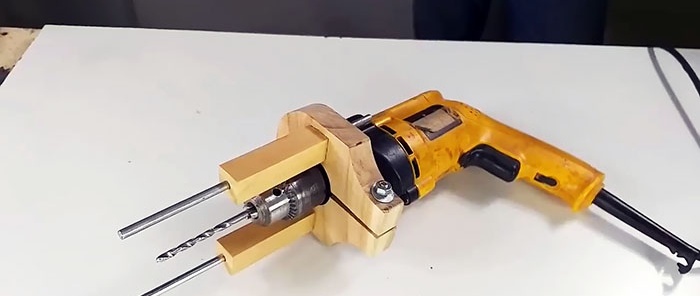
We insert the drill all the way into the central hole in the fixture so that the chuck is between the rods, and tighten the coupling bolt. As a result, the centering device is firmly and rigidly fixed to the cylindrical part of the drill body.
The presence of such a device allows you to drill holes in workpieces of any width (within the distance between the rods) exactly in the center without marking. The main thing is that the rods come into contact with the sides of the workpieces.