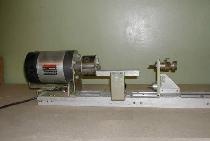
A practical and very simple machine based on an electric drill. It is designed for processing wood and plastics: it allows you to cut bars, boards, plywood, plexiglass and textolite, saw slats and shaped strips, mill grooves, turn wooden products, polish surfaces, drill holes, sharpen drills, chisels and other cutting tools. The small dimensions and weight of the machine, ease of design and use make it suitable for school classrooms and carpentry workshops, laboratories for children's technical stations and creativity centers.
The machine consists of a wooden base, a U-shaped bed, fixed front and movable tailstocks. It is driven by an industrially produced electric drill IE1032-1 with a chuck for securing drills with a diameter of up to 9 mm. The electric motor of the drill is powered from a 220 V mains voltage and develops about 940 rpm.
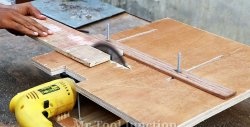
The machine is converted into a circular saw as follows. An electric drill is secured in the bracket of the fixed headstock. One end of the mandrel is clamped in its chuck, and the other is secured using a tailstock and a rotating center. A lifting table is installed along with a movable ruler and a protective guard.
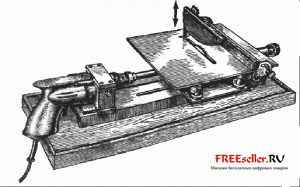
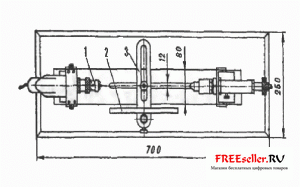
Fig. 1 External view of the drill machine - with a circular saw.
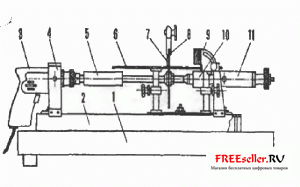
Rice. 2.Structure of a drill machine with a circular saw:
1 - wooden stand, 2 - U-frame bed, 3 - electric drill, 4 - fixed head, 5 - foam mandrel, 6 - lifting table, 7 - saw, 8 - safety guard, 9 - bracket with ruler, 10 - rotating center , 11 - tailstock.
The presence of a movable and rotating ruler ensures the production of rectangular and oblique slats and bars. The lifting table facilitates the production of corners, as well as slots and grooves in the bars. The machine can cut slats with a thickness from 2 to 50 mm and a width from 2 to 120 mm, both from wood and plastics.
In the latter case, a milling cutter with a fine tooth is used as a saw.
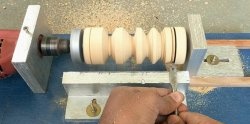
A circular saw can be easily converted into a wood lathe. To do this, remove the table and mandrel, clamp the mandrel with teeth into the drill chuck, and attach a support for knives or chisels to the bed. In this case, make sure that the upper part of the support angle is at the level of the center of the tailstock.

Fig. 3 External view of a drill lathe.
Rice. 4. Construction of a lathe from a drill:
1 - toothed mandrel, 2 - support angle, 3 - bracket.
After setting up the machine, a wooden workpiece is firmly clamped between the gear mandrel and the rotating center, which is first prepared by grinding with a semicircular chisel, and then processed with a tool with a beveled cutting part. During work, make sure that the distance between the support and the part does not exceed 5 mm for ease of working with the tool.
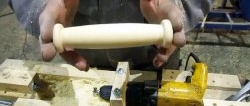
As a lathe, it allows you to produce, for example, tool handles, as well as turned parts of various configurations.
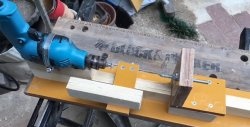
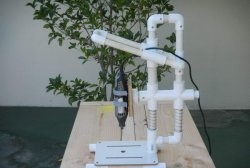
And finally, another transformation of the machine - into a drilling machine.To do this, it is necessary to remove the supporting movable angle, the center and the gear mandrel; Clamp the drill bit into the drill chuck, and insert a fungus into the tailstock instead of the center. The installation distance between the tailstock with the fungus and the drill must correspond to the thickness of the part.
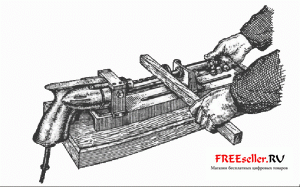
Fig.5. Appearance of a drilling machine from a drill.
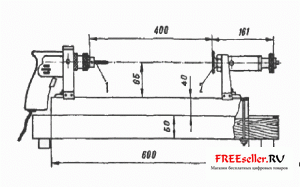
Fig.6. The device of a drilling machine from a drill:
1- drill, 2- fungus.