You will need:
- Plywood 12 mm thick.
- Thick board (40-50 mm).
- Hardware.
- PVA glue.
Manufacturing process
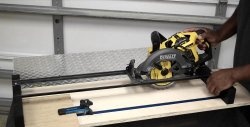
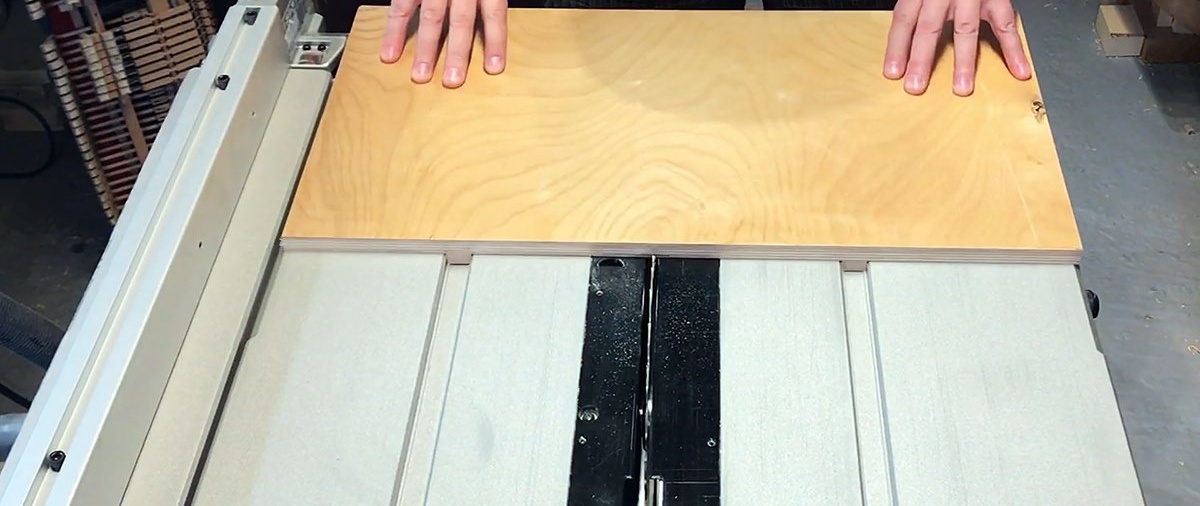
Using a jigsaw or a circular saw, we cut out the base of the carriage from plywood with a width the size of the circular saw table and a depth of about 40 cm. We make guides from hardwood (in this case beech) to the size of the grooves of the circular saw table and fix them with glue and self-tapping screws.

We adjust the width of the runners to the grooves so that the base of the carriage slides freely, but without transverse play. To do this, initially the runners can be made exactly according to the width of the grooves, and then using sandpaper to achieve smooth sliding.
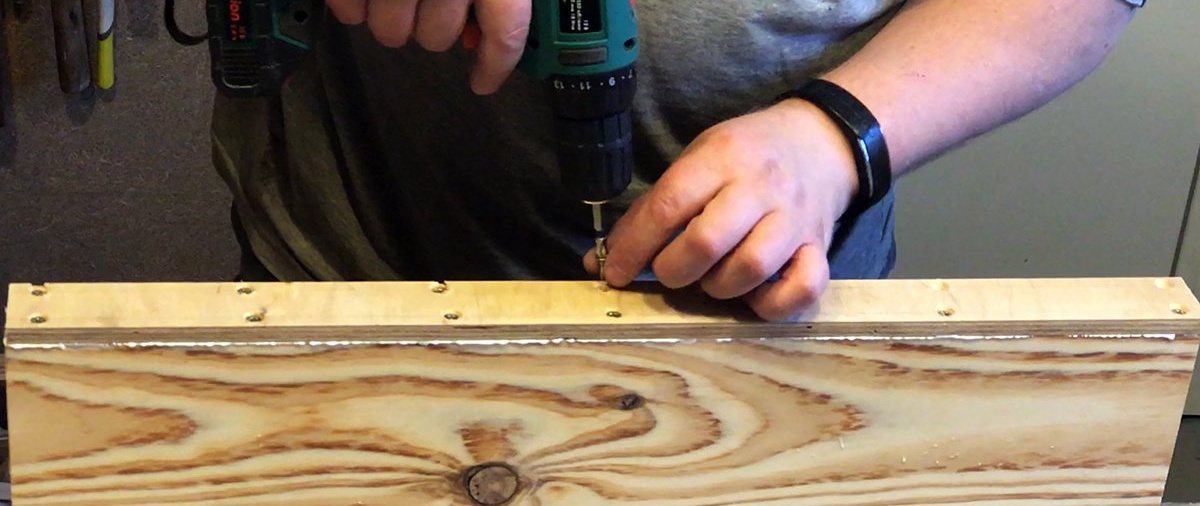
Now you need to make the front and back slats of the carriage. We make a back plank from a board or plywood glued in half (the width is along the base, the height is arbitrary).It has a purely mechanical function and does not require particularly precise fastening. We fix it from below with glue and screws and make the first INCOMPLETE cut, not bringing it to the front edge by a few centimeters.

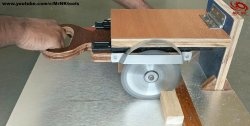
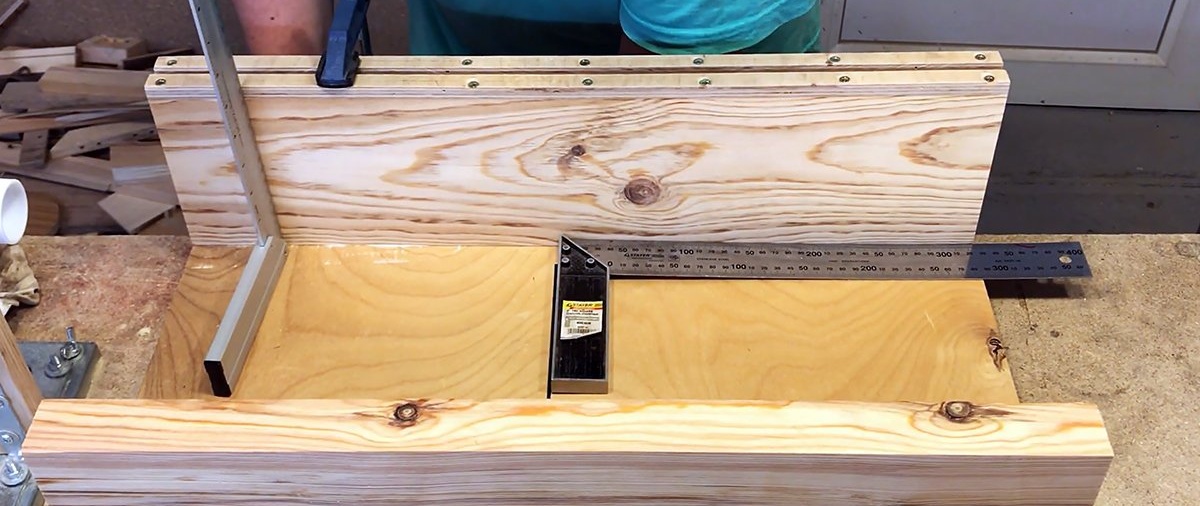
We make a front plank from a thick board or double-glued plywood (width along the base, height 15 cm). Its peculiarity is that we make a T-shaped groove on top for the head of the M8 bolt. To do this, first make a blind cut on a circular saw. Its depth should be slightly greater than the height of the bolt head, and its width should be slightly greater than the distance between the two parallel faces of the hexagon of the bolt head. In this case, we also make the carriage for the circular saw on a circular saw, without the help of a router.

Then we mount a plywood strip on top of the resulting groove using glue and screws.
And we make a cut in it 8 mm wide - just for the diameter of the M8 bolt.

Attach the front strip to the base using glue and self-tapping screws.
ATTENTION: we ensure that right angles are maintained relative to the previously made cut and relative to the plane of the base of the carriage!
Now the base of the carriage can be sawed to the end. And as a safety element, we make a fence from plywood scraps where the saw blade will go when making cuts.

The carriage itself is ready. You need to make two hinged stops, a shuttle and a gauge.
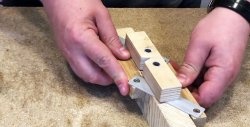
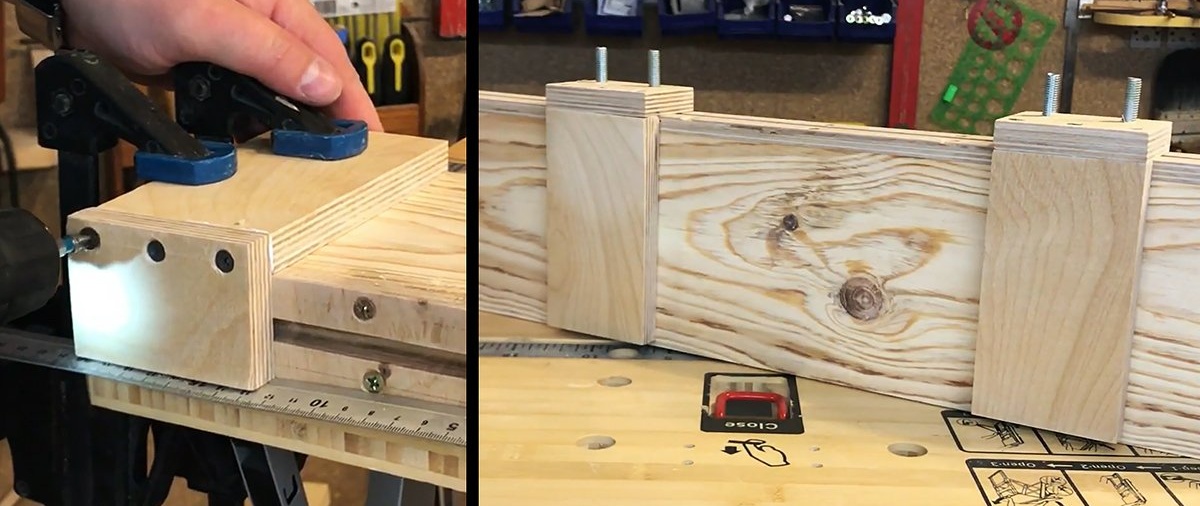
The stop consists of two pieces of plywood, assembled with glue and screws at right angles. It is convenient to mount the stop using the front bracket of the carriage as a base with an angle of 90 degrees. In this case, the installation area must first be covered with tape so that the stop parts do not stick to the carriage bar. After drying, the tape must be removed. In this way we make two stops and drill two holes in their upper part for M8 bolts.
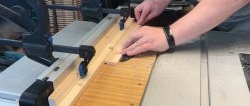
We make a shuttle measuring 25x15 cm from double-glued plywood and a wooden strip 16 mm wide, 5 mm high and of arbitrary length, in this example about 80 mm. We glue the strip flush with the bottom edge of the shuttle into the pre-selected groove.
We make the gauge from the same strip 16 mm wide and 5 mm high. On one side we leave the width 16 mm, and on the other it is reduced by the cutting width h.

Everything is ready to test the production of the box joint. First, we set the shuttle so that the edge of the tongue is located from the saw blade at a distance of a caliber 16 mm wide. Thus, we set the parameters for the future tongue-and-groove connection: the width of the tenon will be 16 mm, and the size of the groove will also be 16 mm. We move stop B towards the shuttle and fix it with wing nuts.
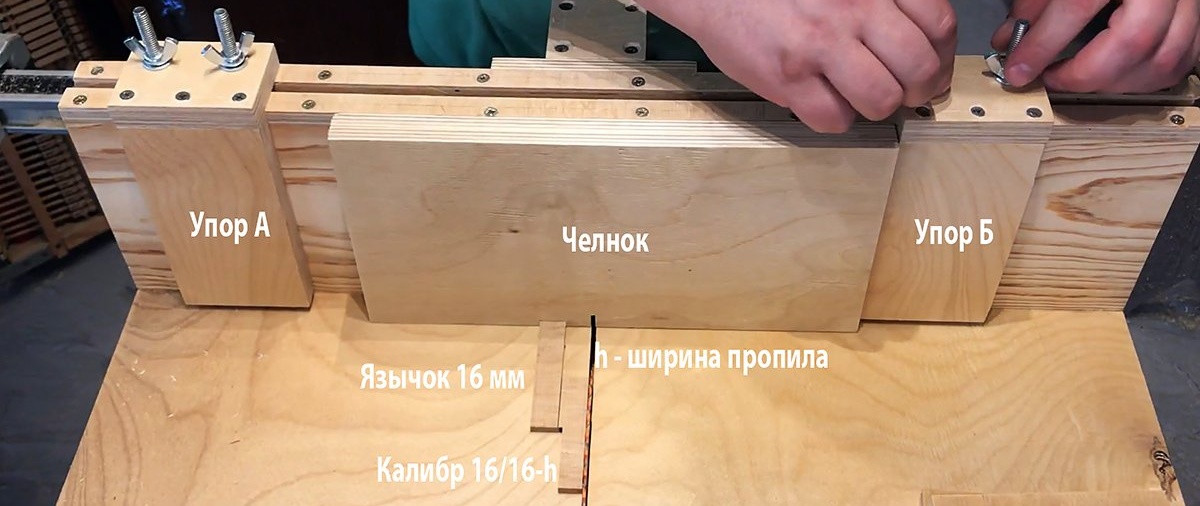
To find the position for stop A, we use the second side of the gauge, which has the width of the tongue reduced by the thickness of the cut of the saw blade. We fix stop A.

We release the saw blade to the height of the material used. In this example, pieces of plywood 10 mm thick are taken. That is, we raise the saw blade above the base of the carriage by 10 mm. We move the shuttle close to stop B, rest the workpiece against the tongue and make the first outer cut.
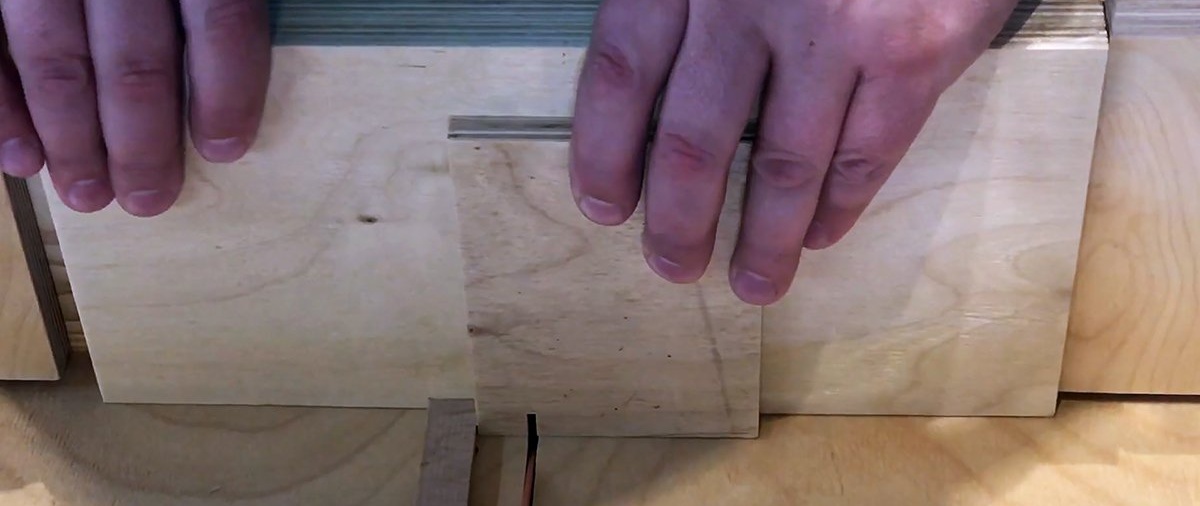
We move the shuttle to stop A, rest the workpiece against the tongue and make the second outer cut.

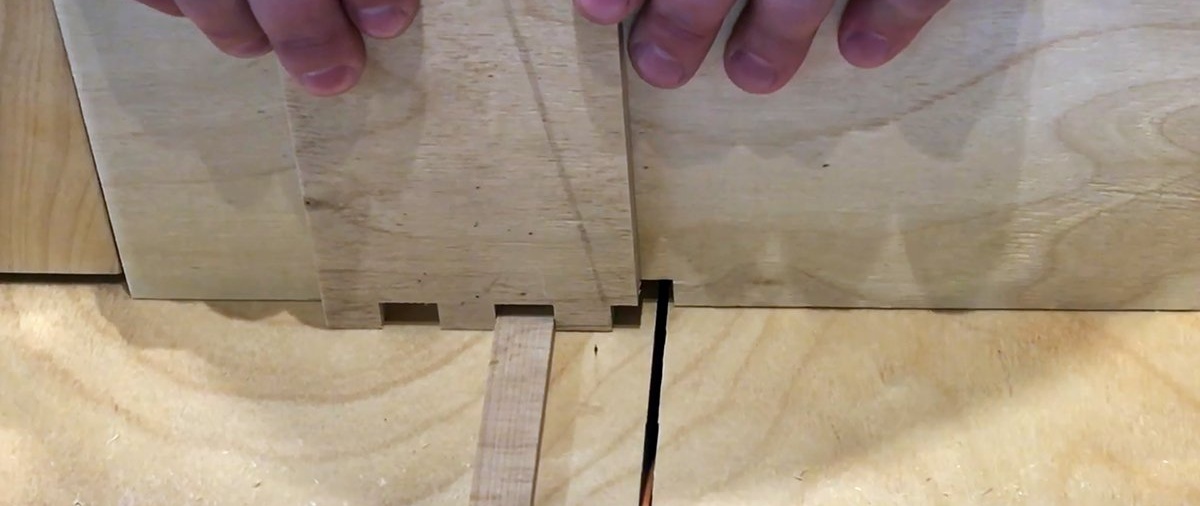
Then we gradually move the shuttle and select the wood between the outer cuts.

This creates a groove 10 mm deep and 16 mm wide. We throw the workpiece with a groove onto the tongue of the shuttle, and repeating the steps of forming the outer cuts and selecting wood between them, we make a second groove and subsequent grooves up to the end of the workpiece. If the last groove is not a multiple of the length of the workpiece, it’s okay.
We turn the workpiece 180 degrees, place the first whole groove on the tongue, move the shuttle to stop B, insert the second mating piece of plywood and make the first cut.

We remove the first part and make grooves on the second, as described above.

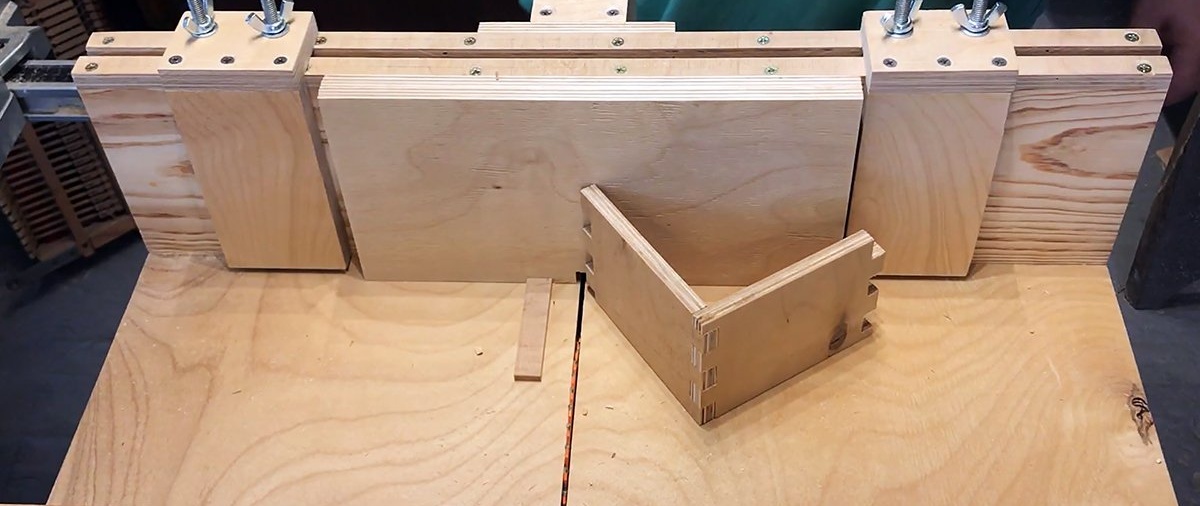
We match the resulting parts and make sure that the box connection is made correctly.
Conclusion
The result is a convenient universal carriage that can successfully replace a miter saw. Also, using this carriage, you can make a tongue-and-groove box connection or make decorative grilles.