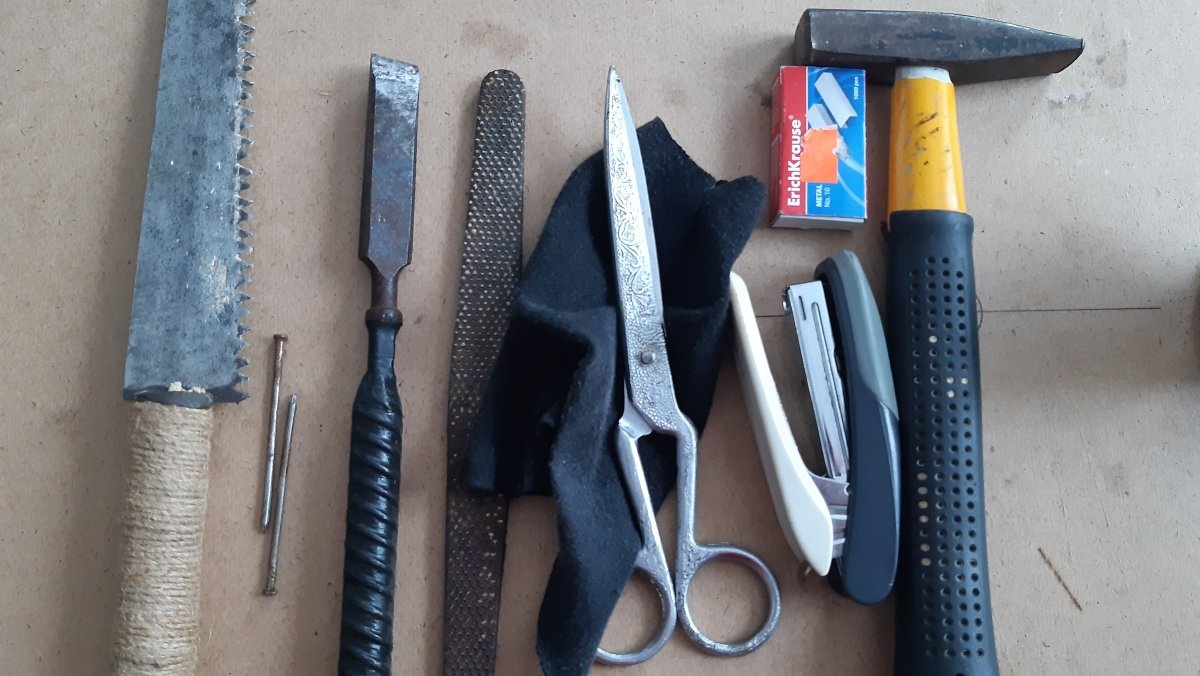
Do it yourself
Life hacks, master classes, useful tips, recipes.
home » Useful and interesting » How to make a device for removing dirty shoes without using your hands
Winter this year does not particularly please us with frosty days. Especially in the southern regions. Slush and dirt on roads and sidewalks have not disappeared this year since the beginning of autumn. After a walk, or coming home from work, in warm weather, the shoes become covered with mud. I don’t really want to grab it with my hands to pull it off my legs, especially if my back hurts after work. But it happens that you are simply too lazy to bend over, and some people (most often these are children) take it off, resting the toe of one shoe on the heel of the other, and thus pull the foot out of the shoe. But this method quickly renders the shoe unusable - you can easily tear off the heel if the shoe fits too tightly on the foot. Well, or, you can break the tightness of the seam, which will lead to wet feet in wet weather, and there will be even more sad consequences in the form of tasteless pills and nasty potions... But you can pull off the shoes from your feet without harming them harm. To do this, you will only need one small plank, from which we will make some kind of device that will help pull the shoes off your feet without touching them.And without even bending down!
How to make a hands-free shoe remover

Will need


  • Board, approximately 400x150x25 mm.
  • Bar, 150×50×50 mm.
  • Two nails, 60 mm.
  • Hammer.
  • Hacksaw or electric jigsaw.
  • Chisel.
  • Wood file.
  • Sandpaper (or cloth) for wood.
  • A piece of thick fabric, such as jeans, 500×200 mm (color at your discretion).
  • Scissors.
  • Stipler.

How to make a hands-free shoe remover

Making a fixture


The first step is to cut the board to the required size. The most optimal size for such a device, in my opinion, is 400x150mm. The thickness should also not be too large - an ordinary inch will do just fine. They cut it off.
How to make a hands-free shoe remover

How to make a hands-free shoe remover

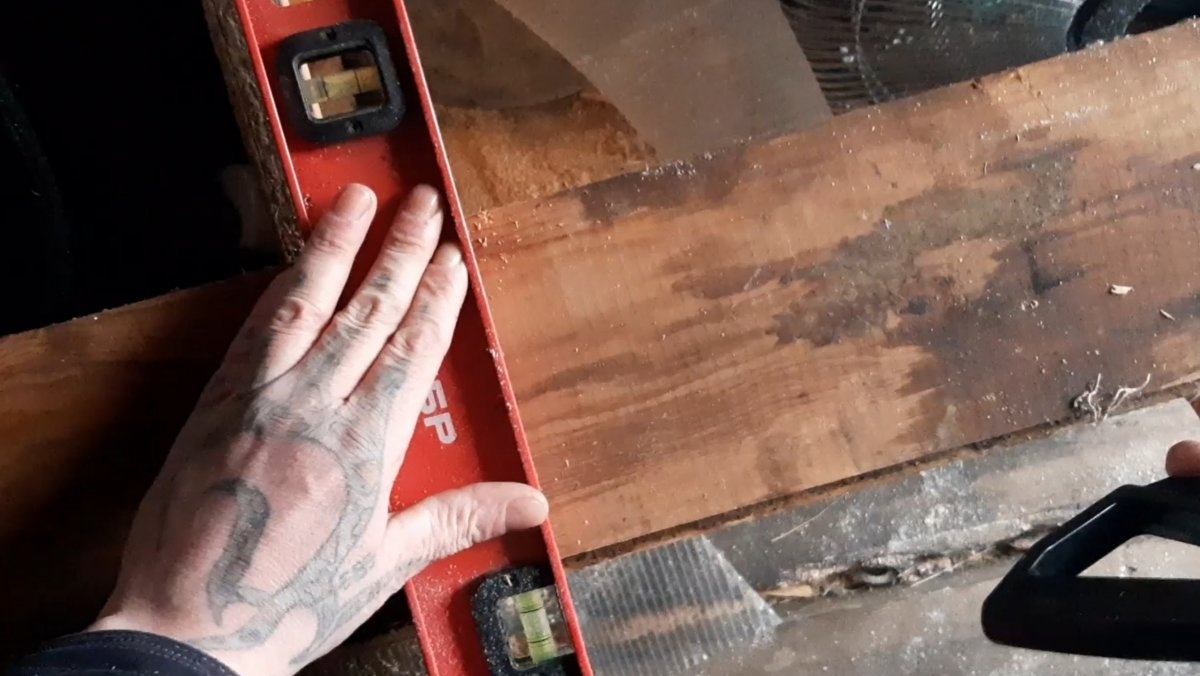
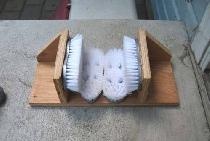
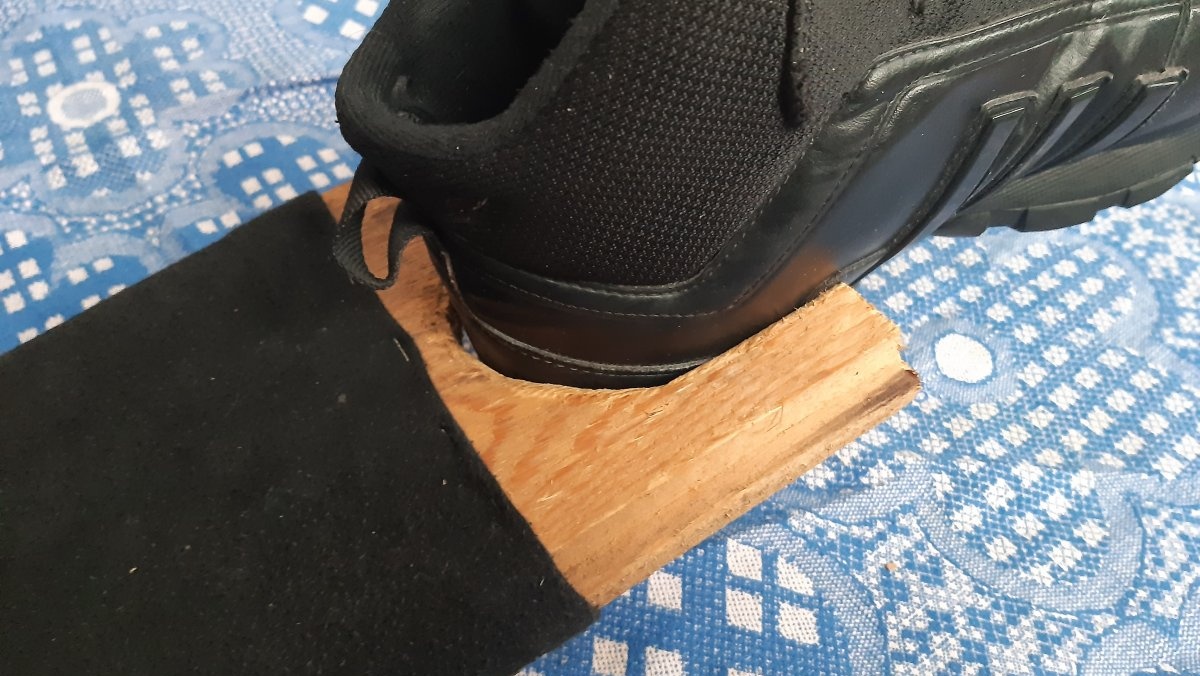
Now, from one end of the board, having previously made markings for the sole of the shoe, we make two longitudinal cuts, 5-6 cm long. But the cuts should be 1-1.5 cm closer to each other than the measured width of the sole. A smaller width between the notches is needed so that when removing shoes, the ends of the board catch the shoe on the heel itself, and not on the heel, thereby loosening it. Otherwise there would be no point in doing all this... So, we made the cuts. Next, from the ends of both cuts, we draw a semicircular line and cut along it with an electric jigsaw. I worked with a chisel, in the absence of a jigsaw. The result was a semicircular, slightly elongated neckline. Like this:
How to make a hands-free shoe remover

Under the heel of your shoes. To avoid scratching the shoes when using the device, we will process all the corners and cuts, first with a coarse file, then with sandpaper.
How to make a hands-free shoe remover

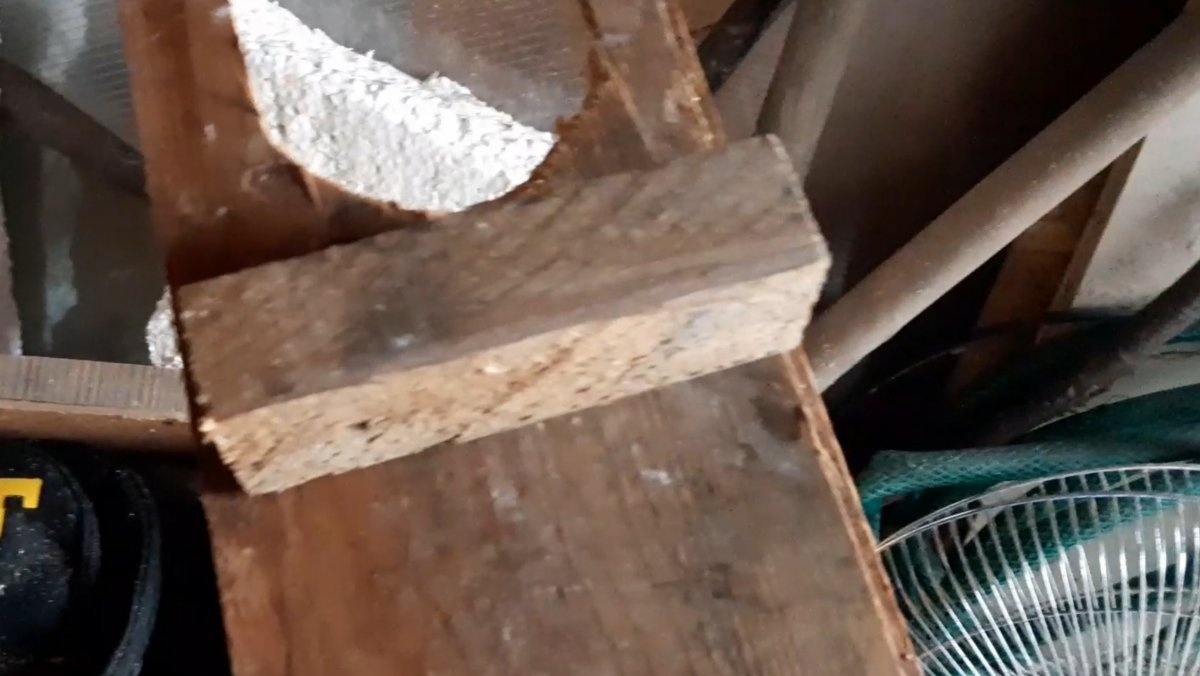
Next, you need to nail the leg to the bottom of the device using a hammer and nails. We saw off a piece from a thick block, equal in length to the width of the board, and nail it a couple of centimeters below the cutout.
How to make a hands-free shoe remover

The main part of the work is finished.Now, using a stapler, we attach the thick fabric to the lower, outer part of the product. Simply put, we sheathe it. Like this:
How to make a hands-free shoe remover

How to make a hands-free shoe remover

Well, there you go! Nothing complicated. Half an hour of work. Due to the fact that we cut out a semicircle slightly smaller than the heel, when removing shoes, the device clings not to the heel itself, but to the heel, without causing damage to the seams.
How to make a hands-free shoe remover

How to make a hands-free shoe remover

How to make a hands-free shoe remover

True, there is one “but” - it is better to use this device for people with approximately the same shoe size (plus or minus one size). But again, the board has two ends, so on the other hand, for other family members, you can make the same cutout, but smaller. Or vice versa, more. And in this case, the leg block should be nailed strictly in the middle of the board so that it can be used on both sides. The thing turned out to be simple, but reliable.
How to make a hands-free shoe remover

Watch the video


come back
Comment
  • bowtiesmilelaughingblushsmileyrelaxed relaxedsmirk
    heart_eyeskissing_heartkissing_closed_eyesflushedrelievedsatisfiedgrin
    winkstuck_out_tongue_winking_eyestuck_out_tongue_closed_eyesgrinningkissingstuck_out_tonguesleeping
    worriedfrowninganguishedopen_mouthgrimacingconfusedhushed
    expressionlessunamusedsweat_smilesweatdisappointed_relievedwearypassive
    disappointedconfoundedfearfulcold_sweatperseverecrysob
    joyastonishedscreamtired_faceangryragetriumph
    sleepyyummasksunglassesdizzy_faceimpsmiling_imp
    neutral_faceno_mouthinnocent
3+three=
Comments (0)

Do it yourself - crafts and master classes | Page 246

Hair decorations "Poppies" | Do it yourself

How to make a stove for working in a garage in just 1 hour

Laying infrared film flooring | Do it yourself

«Do it yourself - with your own hands» - a site of interesting homemade products made from scrap materials and items at home. Step-by-step master classes with photos and descriptions, technologies, life hacks - everything a real master or just a craftsman needs for needlework. Crafts of any complexity, a large selection of directions and ideas for creativity.

We recommend reading

Washing machine error codes