Do it yourself
Life hacks, master classes, useful tips, recipes.
home » Useful and interesting » Lifehacks and useful tips » Fix a crack in a plastic bucket in 1 minute
A common damage to plastic buckets and pots is a cracked bottom because the plastic is less elastic and breaks when impacted. As a result, water leaks out through the crack, although the container itself does not fall apart and can still be used for carrying dry goods. If desired, the crack can be sealed in literally 1 minute, making the bucket airtight again.
Filling a crack in a plastic bucket in 1 minute

What you will need:


  • old toothbrush;
  • lighter or candle.

Plastic bucket repair process


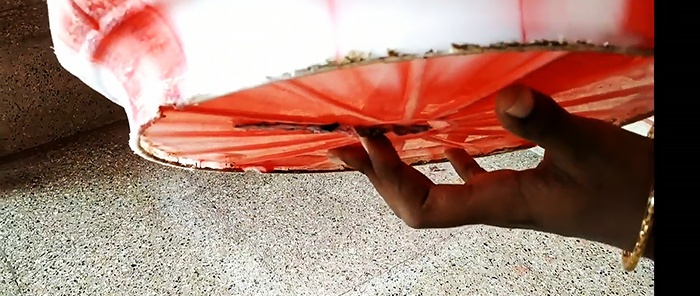
The best solution for sealing a crack in a bucket or pot is to solder it. To do this, you need to clean the surface of the plastic around the crack from dirt.
Filling a crack in a plastic bucket in 1 minute

After this, a toothbrush is taken and the edge of its handle is melted over a candle or lighter.
Filling a crack in a plastic bucket in 1 minute

Filling a crack in a plastic bucket in 1 minute

Molten plastic from the set fire handle will begin to flow down. Immediately after this, you need to put out the flame and wipe the crack with the melted handle.
Filling a crack in a plastic bucket in 1 minute

Filling a crack in a plastic bucket in 1 minute

Filling a crack in a plastic bucket in 1 minute

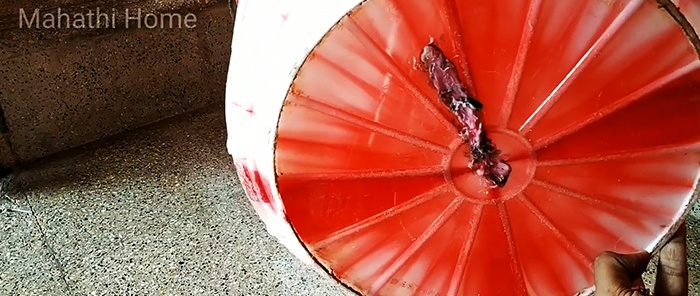
Its viscous plastic will serve as an adhesive that will stick firmly to the bucket and seal it. The method works with almost all toothbrushes with rare exceptions.
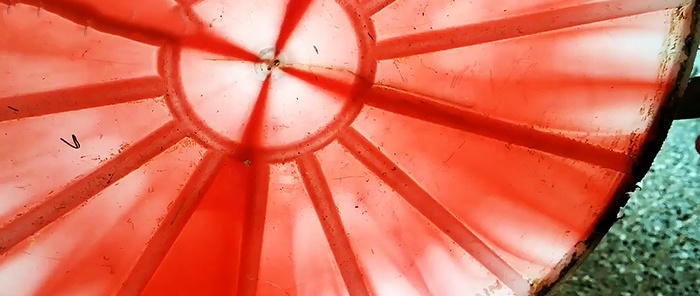
After this repair, the bucket will no longer leak.
Filling a crack in a plastic bucket in 1 minute

Filling a crack in a plastic bucket in 1 minute

Watch the video


come back
Comment
  • bowtiesmilelaughingblushsmileyrelaxed relaxedsmirk
    heart_eyeskissing_heartkissing_closed_eyesflushedrelievedsatisfiedgrin
    winkstuck_out_tongue_winking_eyestuck_out_tongue_closed_eyesgrinningkissingstuck_out_tonguesleeping
    worriedfrowninganguishedopen_mouthgrimacingconfusedhushed
    expressionlessunamusedsweat_smilesweatdisappointed_relievedwearypassive
    disappointedconfoundedfearfulcold_sweatperseverecrysob
    joyastonishedscreamtired_faceangryragetriumph
    sleepyyummasksunglassesdizzy_faceimpsmiling_imp
    neutral_faceno_mouthinnocent
5+two=
Comments (5)
  1. Leo Boniface
    #1 Leo Boniface Guests 8 June 2020 15:59
    4
    Isn’t it fate to use a glue gun?
    It's the 21st century, and you're melting brushes.
    1. TIhon
      #2 TIhon Guests 10 June 2020 16:27
      2
      ...Leva Bonifatsievich....Lyovushka....if during “scraping” (I hope you know what this action is) “curly” shavings come from the body of the bucket, then YES (“Glue gun” melting rod “M” - silicone), and if the tiny whitish “waxy” one...then it’s simply “not a good idea” to do it with a “glue gun”...Paragraph! ....TIhon
  2. Valentina
    #3 Valentina Guests 9 June 2020 10:25
    3
    I sealed it with simple plasticine and have been using it for several years without any problems.
  3. Vlad
    #4 Vlad Guests July 4, 2020 11:19
    3
    Run a hot soldering iron over the crack. AND ALL!!!
  4. Lion Nord
    #5 Lion Nord Guests 10 September 2020 14:43
    0
    I tried it with a regular toothbrush. It burns, melts, and the output is fragile, soft plastic with all the signs of PARAFFIN. Doesn't hold the load, a gap immediately appears. It really sticks quite well.

Foam cactus - pincushion | Do it yourself

Knitted dress for girls | Do it yourself

How to make a cool lounge chair with simple tools

Electrophore machine made from CD | Do it yourself

«Do it yourself - with your own hands» - a site of interesting homemade products made from scrap materials and items at home. Step-by-step master classes with photos and descriptions, technologies, life hacks - everything a real master or just a craftsman needs for needlework. Crafts of any complexity, a large selection of directions and ideas for creativity.

We recommend reading

Washing machine error codes