Do it yourself
Life hacks, master classes, useful tips, recipes.
home » Homemade cars » How to install a motor from a lawn mower to a bicycle
To forever forget about the need to rotate the pedals when riding a bicycle, it must be equipped with an electric or gasoline drive. For long trips, of course, a gasoline engine is better, since when using it you do not need to make long stops of 6-10 hours to recharge. The most budget-friendly and simplest solution possible is to install a motor from a lawn mower on a bicycle. It has a standard tank, gas handle, and clutch, which greatly simplifies the conversion.
How to install a motor from a brush cutter to a bicycle

Materials:


  • brush cutter;
  • Sheet steel;
  • profile pipe 20x20 mm;
  • driven and driven bicycle stars;
  • roller chain;
  • bearings of different sizes;
  • steel pipes 20 mm, 32 mm and 50 mm.

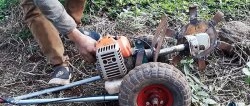
Motor installation process


Remove the left pedal from the bicycle.
How to install a motor from a brush cutter to a bicycle

A platform for mounting the engine is welded from sheet steel and screwed to the bicycle frame. Eyes are made on it with holes for standard bolts for fastening the gas tank so that the motor shaft comes out on the opposite side of the cassette with the drive sprockets.
How to install a motor from a brush cutter to a bicycle

How to install a motor from a brush cutter to a bicycle

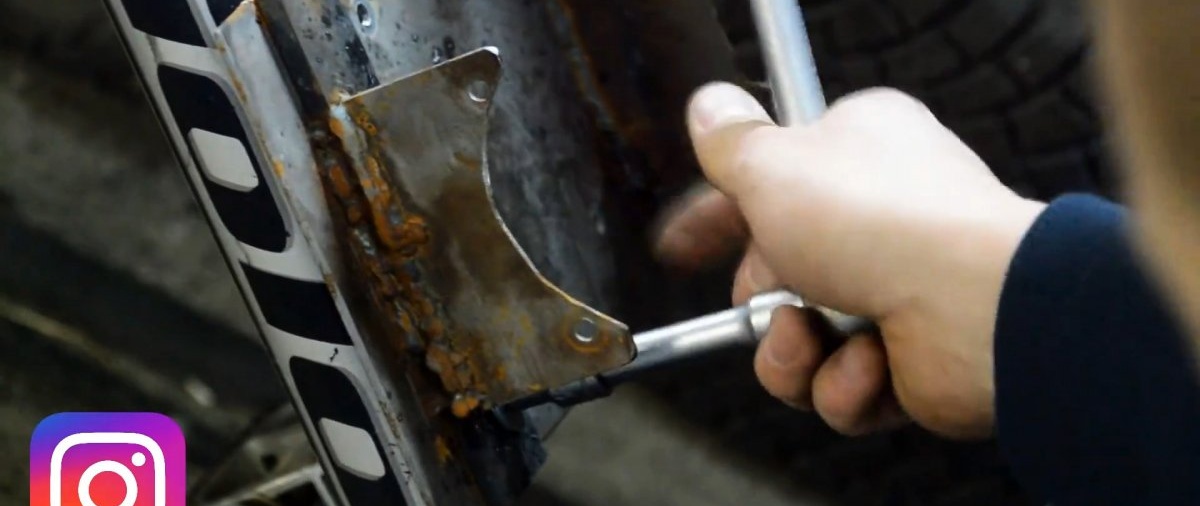
To securely fasten the plate, you need to tie it to the top of the frame.To do this, a U-shaped arc is welded from 3 pieces of profile pipe.
How to install a motor from a brush cutter to a bicycle

It is welded to the plate at the bottom, and to the bicycle frame at the top to a clamped homemade pipe clamp.
How to install a motor from a brush cutter to a bicycle

This way, nothing is welded to the bike itself. The bend of the arc should allow the engine to be installed without obstruction.
How to install a motor from a brush cutter to a bicycle

How to install a motor from a brush cutter to a bicycle

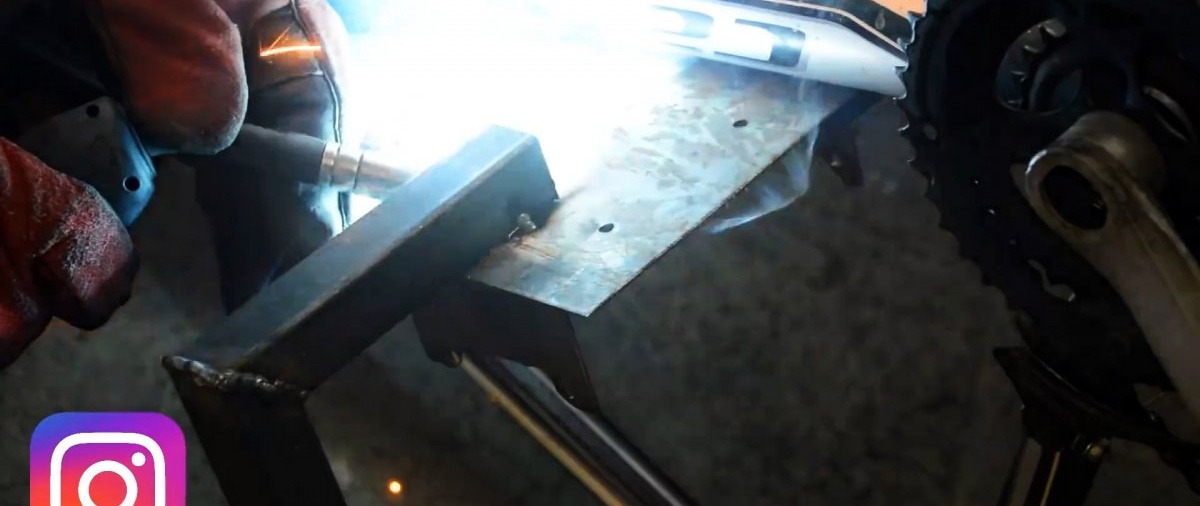
Next, install the motor without a rod with a short-cut shaft.
How to install a motor from a brush cutter to a bicycle

A piece of strip for attaching the tank is welded to the plate. It is advisable to place the tank so that the filler neck is higher and it is convenient to pour fuel into it.
How to install a motor from a brush cutter to a bicycle

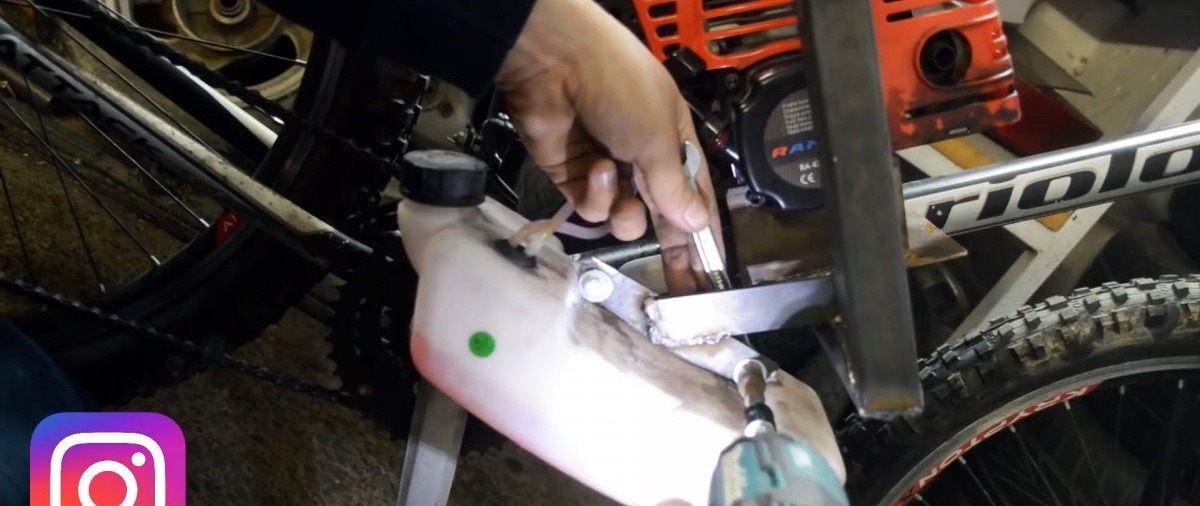
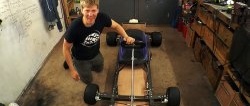
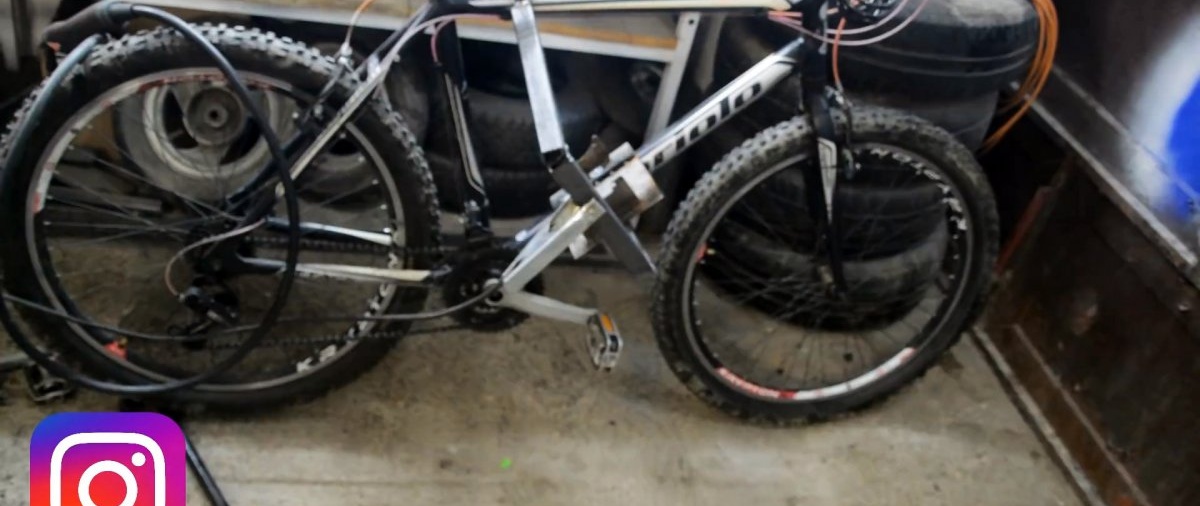
2 bearings are installed on the motor shaft and pressed with a clamp to secure the rod. This will remove its play at speed.
How to install a motor from a brush cutter to a bicycle

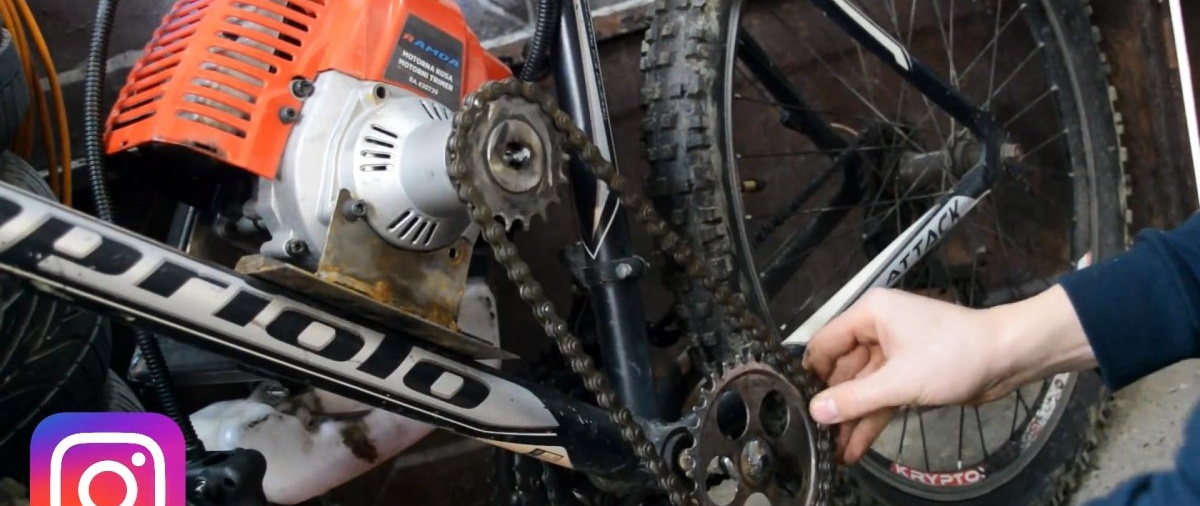
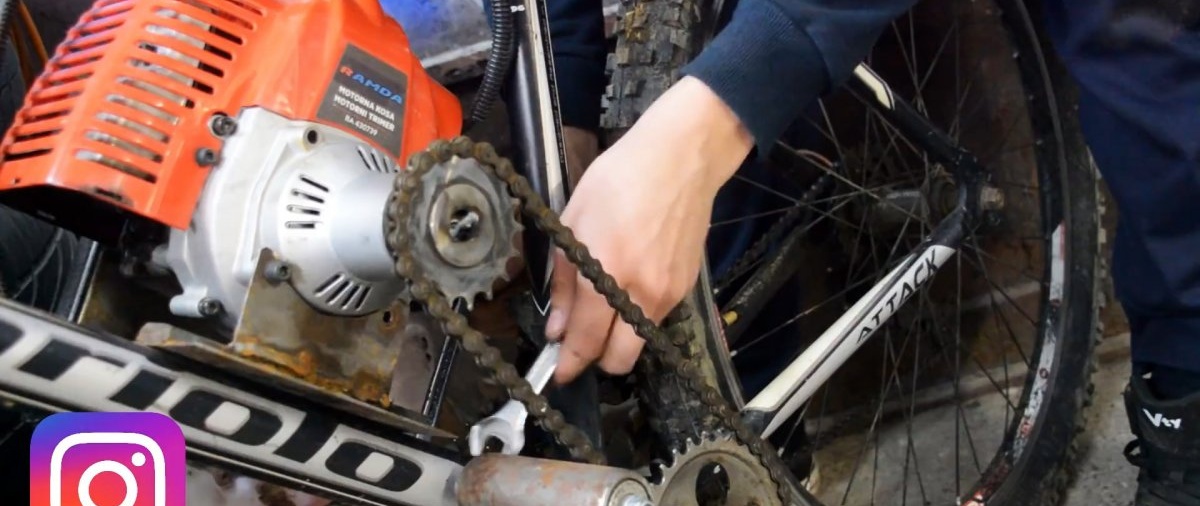
Then a drive sprocket from an old bicycle is welded onto the shaft.
How to install a motor from a brush cutter to a bicycle

How to install a motor from a brush cutter to a bicycle

How to install a motor from a brush cutter to a bicycle

How to install a motor from a brush cutter to a bicycle

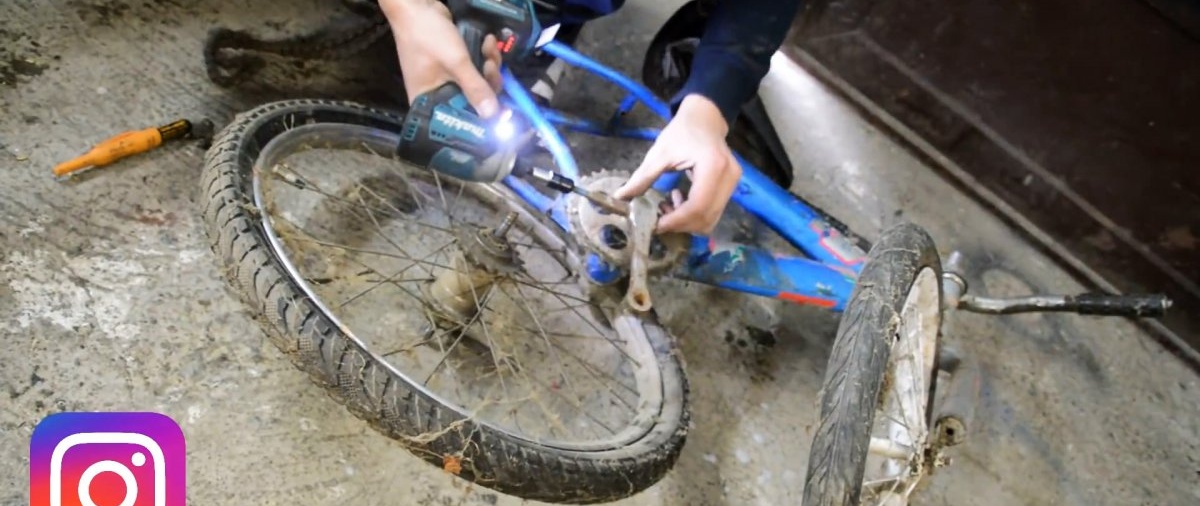
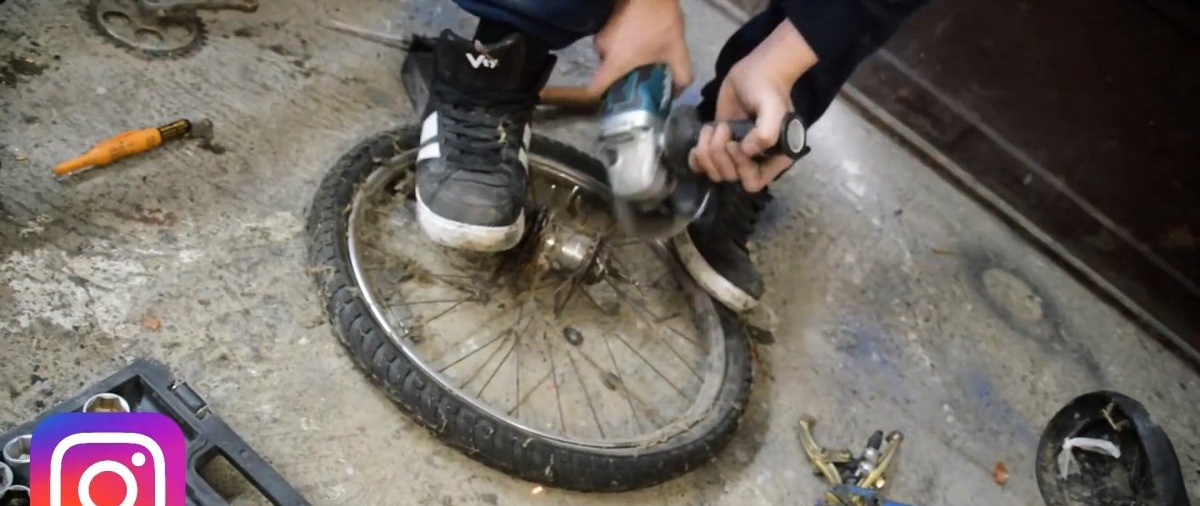
The driven star is welded onto a pin screwed in instead of the left pedal. The right pedal is also removed.
How to install a motor from a brush cutter to a bicycle

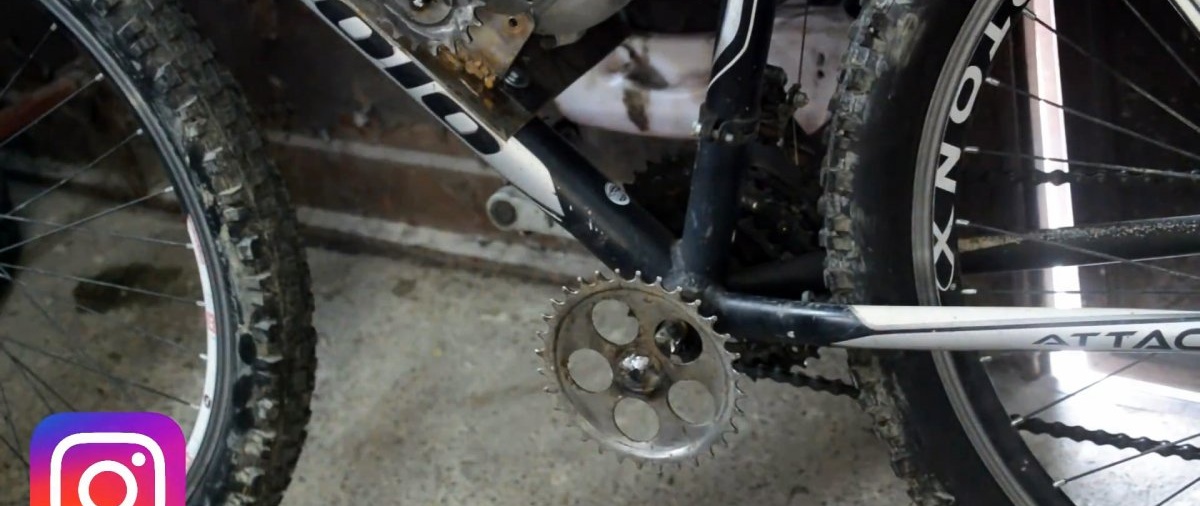
The stars are connected by a chain. To tension them, a roller is screwed to the bicycle frame. It is a long pin with two bearings on which a steel pipe is mounted.
How to install a motor from a brush cutter to a bicycle

How to install a motor from a brush cutter to a bicycle

Then, instead of the rear axle mounting nuts, tubes with nuts welded or pressed into the ends are screwed in. This will allow you to simultaneously hold the wheel and create supports for your feet, since there will be no pedals on the bicycle.
How to install a motor from a brush cutter to a bicycle

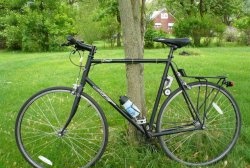
The throttle handle from the engine can be secured with clamps in a convenient place on the steering wheel. Before testing, it is imperative to check the brakes and, if necessary, replace them, since the load on them will increase when driving with a motor.
How to install a motor from a brush cutter to a bicycle

Watch the video


come back
Comment
  • bowtiesmilelaughingblushsmileyrelaxed relaxedsmirk
    heart_eyeskissing_heartkissing_closed_eyesflushedrelievedsatisfiedgrin
    winkstuck_out_tongue_winking_eyestuck_out_tongue_closed_eyesgrinningkissingstuck_out_tonguesleeping
    worriedfrowninganguishedopen_mouthgrimacingconfusedhushed
    expressionlessunamusedsweat_smilesweatdisappointed_relievedwearypassive
    disappointedconfoundedfearfulcold_sweatperseverecrysob
    joyastonishedscreamtired_faceangryragetriumph
    sleepyyummasksunglassesdizzy_faceimpsmiling_imp
    neutral_faceno_mouthinnocent
5+two=
Comments (2)
  1. Guest Vladimir
    #1 Guest Vladimir Guests 18 June 2020 04:48
    2
    For some reason, everyone.. or most of them are trying to make the drive on the rear wheel.. I.. just put an electric motor on the front... the battery is located in front.. right at the steering wheel... And then.. with this arrangement it turned out to be on the front wheel 30 % weight... rear... resp. 70%... This is when I'm sitting... naturally..
    And here they are still trying to increase weight on the backside...
  2. User
    #2 User Guests 6 June 2023 22:43
    0
    Guest Vladimir, I assume, for better handling. When necessary, I rode a regular bicycle with a front loaded rack. The pleasure is so-so.

Laying floor tiles | Do it yourself

Piece of felt cake | Do it yourself

How to lay laminate flooring yourself | Do it yourself

Painting using isothread technique “Birds in the Sun” | Do it yourself

«Do it yourself - with your own hands» - a site of interesting homemade products made from scrap materials and items at home. Step-by-step master classes with photos and descriptions, technologies, life hacks - everything a real master or just a craftsman needs for needlework. Crafts of any complexity, a large selection of directions and ideas for creativity.

We recommend reading

Washing machine error codes