Do it yourself
Life hacks, master classes, useful tips, recipes.
home » Furniture » How to make an amazing anti-gravity table
Today I will show you how I made an unusual, anti-gravity coffee table. I built it according to the Tensegrity principle. The striking appearance of this table levitating in the air will definitely surprise your guests.
How to Make an Amazing Anti-Gravity Table

Will need


For this project I used:
  • - Round tabletop, diameter 300 mm - 2 pcs.
  • - Pine board 18*30*2000mm - 2 pcs.
  • - Steel cable, silicone braided, diameter 2 mm.
  • - Hooks 6*30 mm - 10 pieces.
  • - Paper clips.
  • - Wood glue.

How to Make an Amazing Anti-Gravity Table

Making a levitating table


On a piece of wallpaper I drew a drawing in a 1:1 ratio. It is very convenient to try on parts and take accurate measurements.
How to Make an Amazing Anti-Gravity Table

We need to make 2 such parts. Later we will connect them together.
How to Make an Amazing Anti-Gravity Table

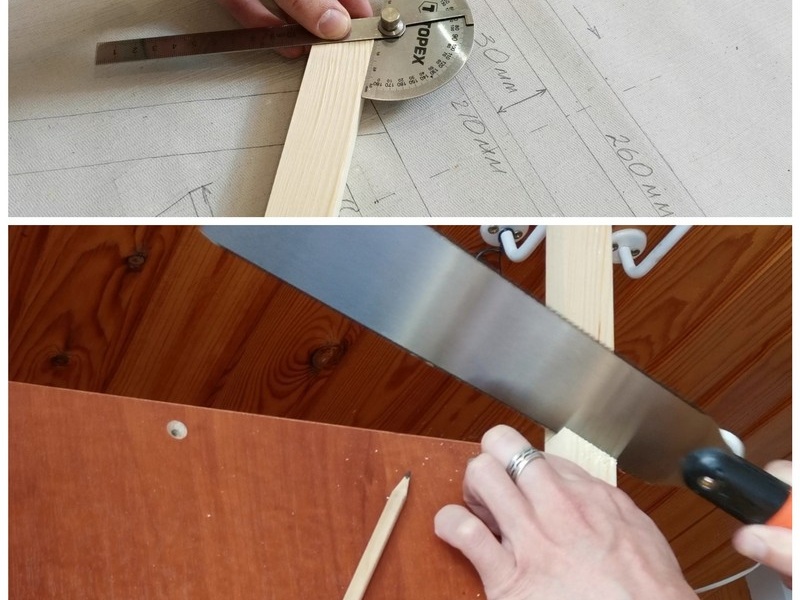
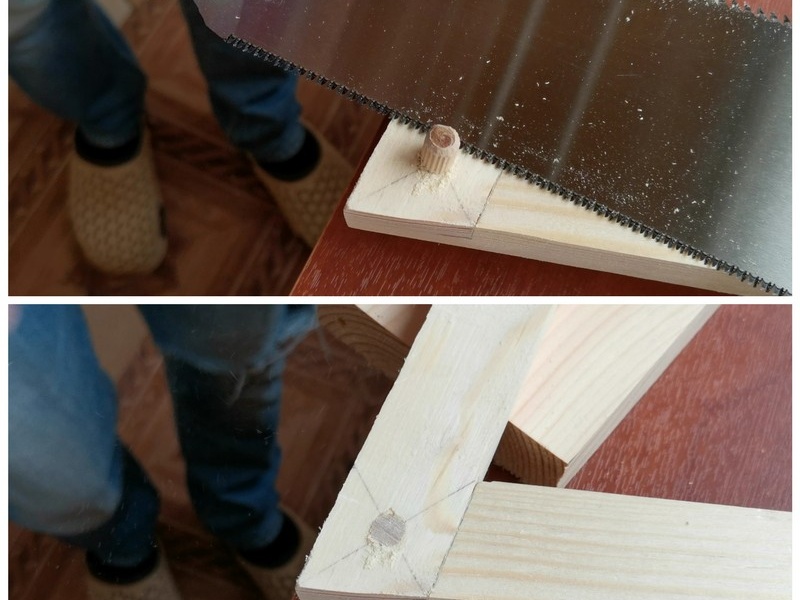
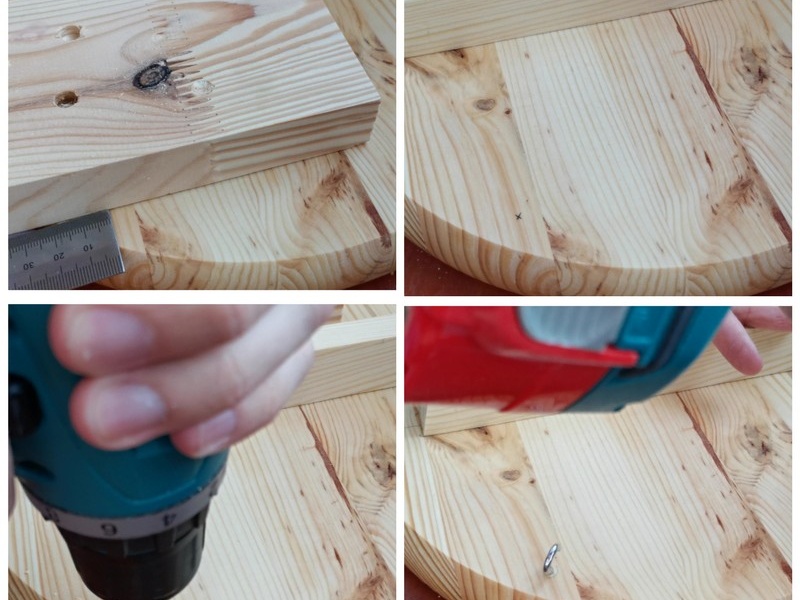
I set the angles using a protractor and sawed with a Japanese saw. I really like working with her because... She makes a very precise and neat cut. After sawing off one part, I put it on the drawing and cut off the next one.
How to Make an Amazing Anti-Gravity Table

How to Make an Amazing Anti-Gravity Table

How to Make an Amazing Anti-Gravity Table

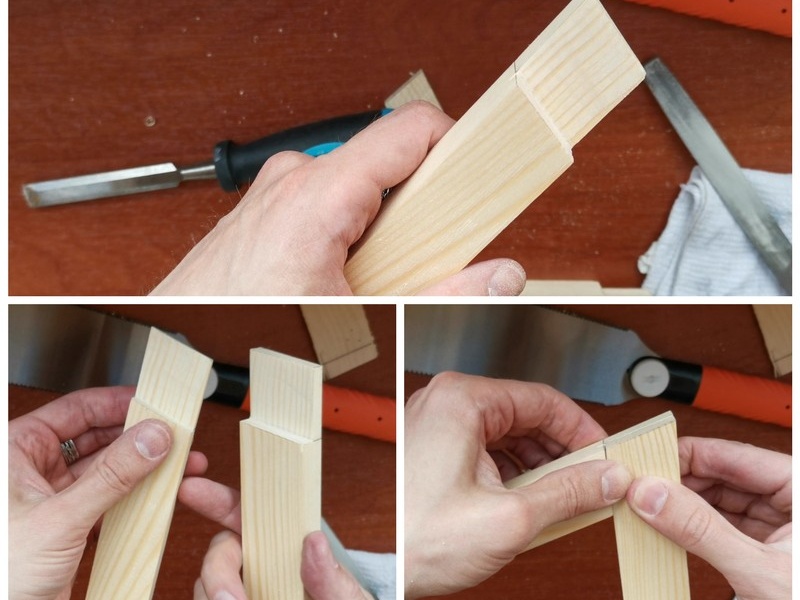
The parts were connected with an overlay; for this purpose, I selected wood up to half of the plank. Then he applied glue and pressed it with clamps until the glue dried completely.
How to Make an Amazing Anti-Gravity Table

Once the glue had dried, I marked and drilled holes for the dowels. I used 8mm furniture dowels. I also added wood glue and left it to dry for a few hours.
How to Make an Amazing Anti-Gravity Table

After the glue had dried, I cut the dowels with a saw.
How to Make an Amazing Anti-Gravity Table

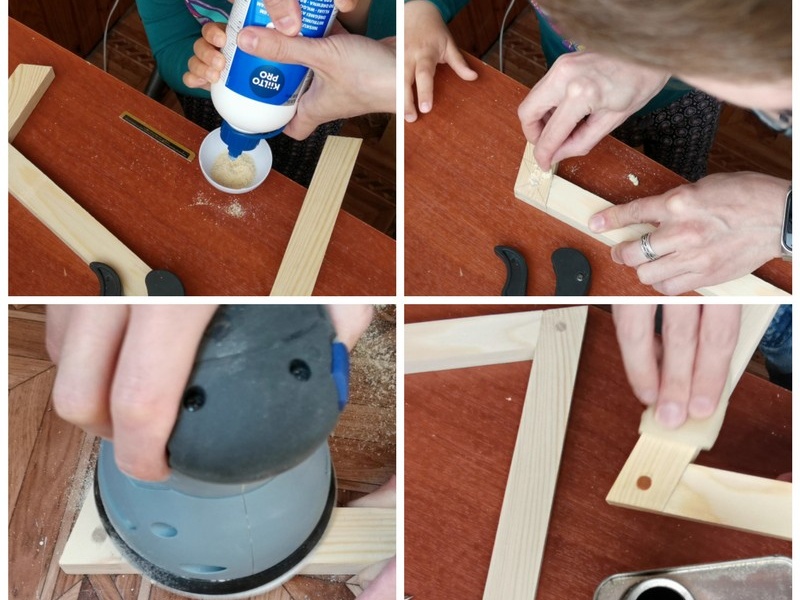
To get rid of minor defects, I mixed PVA glue and wood dust/sawdust. It turned out to be an excellent wood putty. After the putty had dried, I sanded the parts and coated them with linseed oil.
How to Make an Amazing Anti-Gravity Table

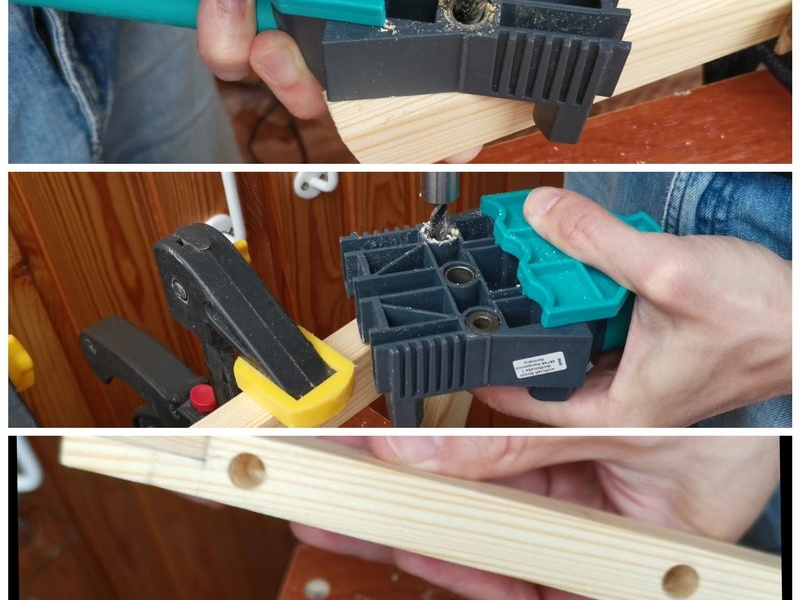
I decided to attach the legs to the tabletops with dowels so that the fastening elements would not be noticeable. Using a jig, I drilled the holes.
How to Make an Amazing Anti-Gravity Table

Marked and drilled matching holes in the countertop.
How to Make an Amazing Anti-Gravity Table

I installed the dowels, added wood glue and left it under pressure until completely dry. The second half of the table is done in the same way.
How to Make an Amazing Anti-Gravity Table

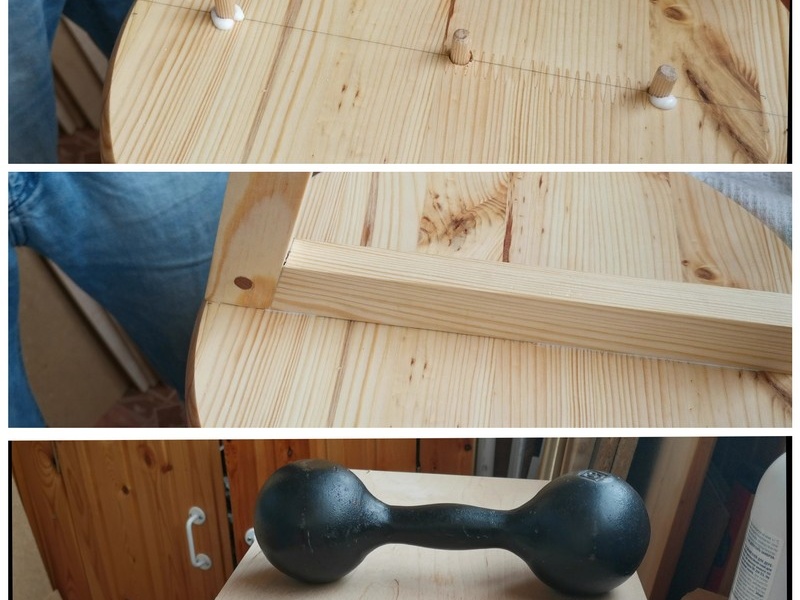
I drilled a hole for the hook at the bottom of the leg. It is important to make the holes on both legs as accurately and symmetrically as possible, otherwise the entire structure will be distorted in the future.
How to Make an Amazing Anti-Gravity Table

I also marked the holes for the hooks in the tabletops.
How to Make an Amazing Anti-Gravity Table

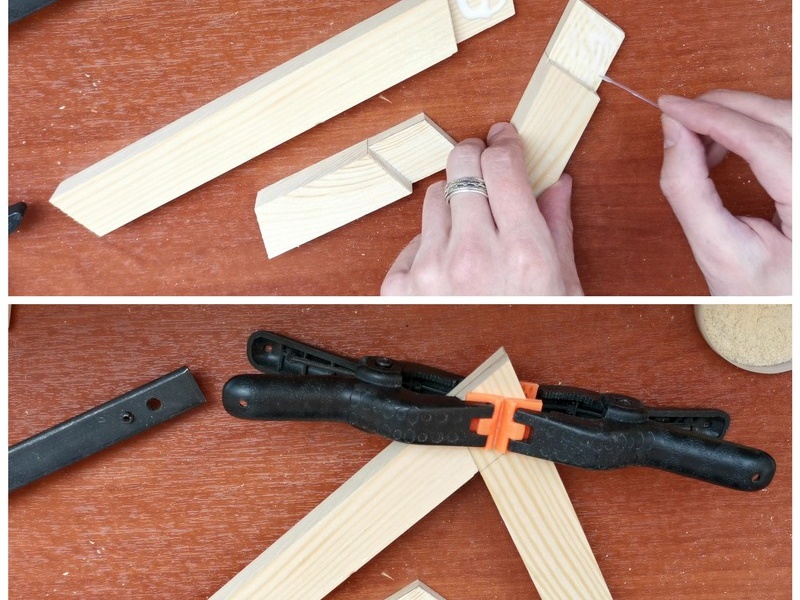
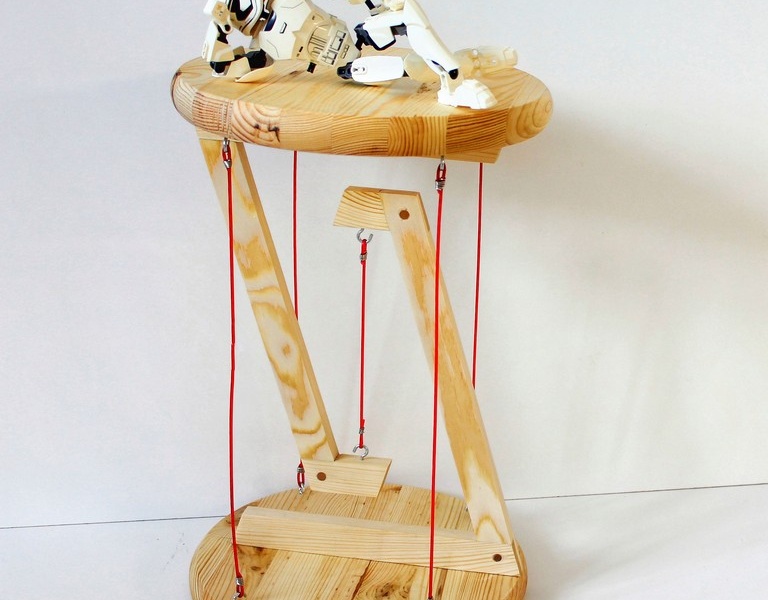
Now I’m starting to make the cables that will hold the two parts of the table. I used steel cable wrapped in red silicone. For a greater “levitation effect”, it is better to use a cable with a transparent winding.
You need to make small “ears” at each end of the cables. For this I used regular paper clips.
How to Make an Amazing Anti-Gravity Table

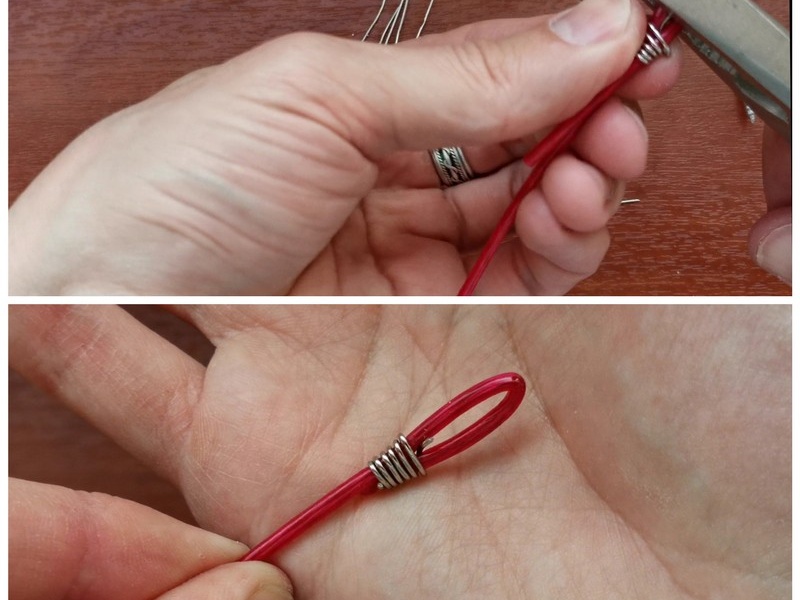
I make a small loop and wrap it with a paper clip. I cut off all the excess. You can also use small plastic clamps.
How to Make an Amazing Anti-Gravity Table

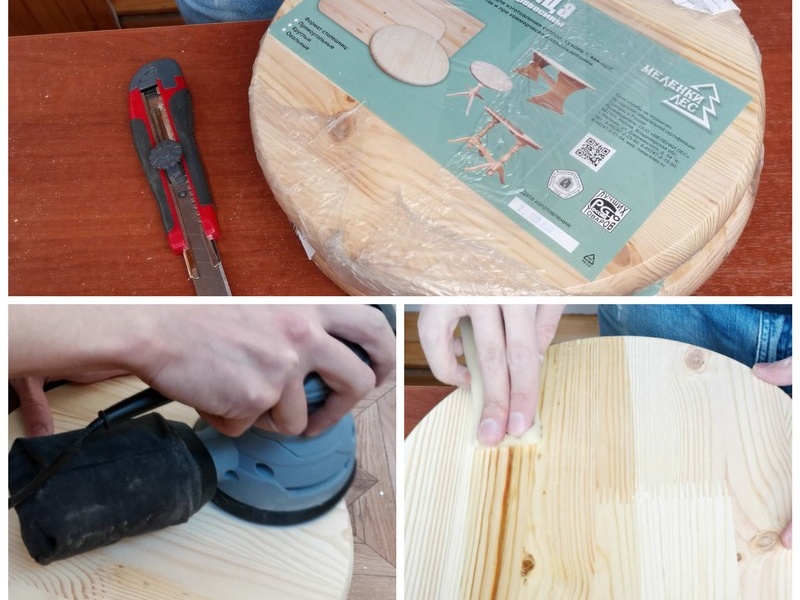
The countertops were sanded and also coated with linseed oil.
How to Make an Amazing Anti-Gravity Table

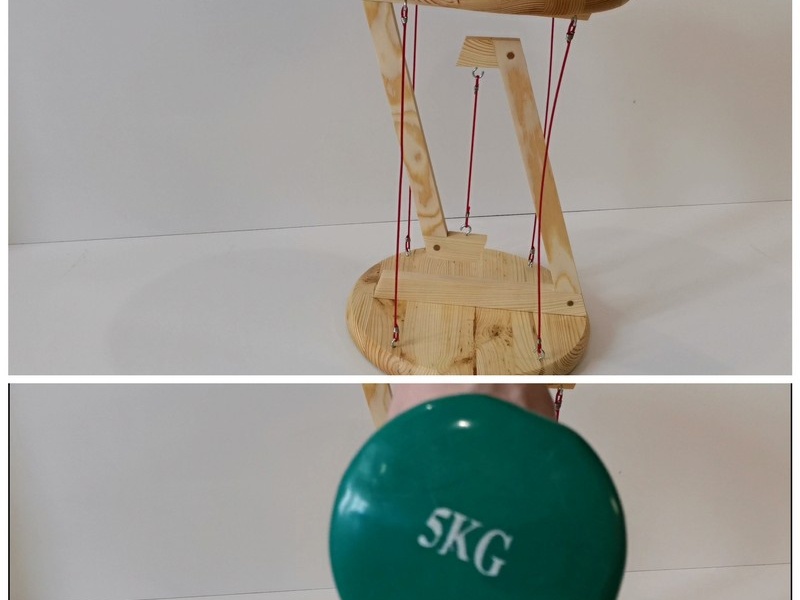
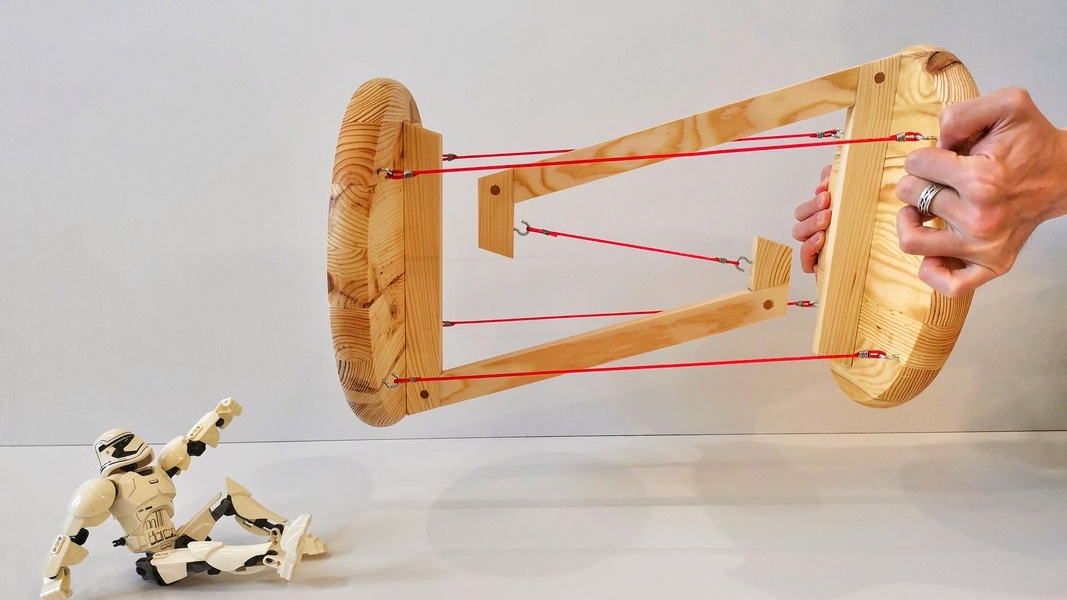
I put everything together and tested it for strength. The table withstood a load of 5 kg. I didn’t dare to do more.
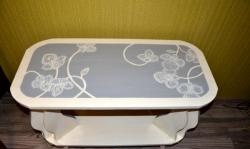
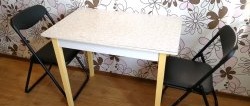
How to Make an Amazing Anti-Gravity Table

Final results.
How to Make an Amazing Anti-Gravity Table

How to Make an Amazing Anti-Gravity Table

How to Make an Amazing Anti-Gravity Table

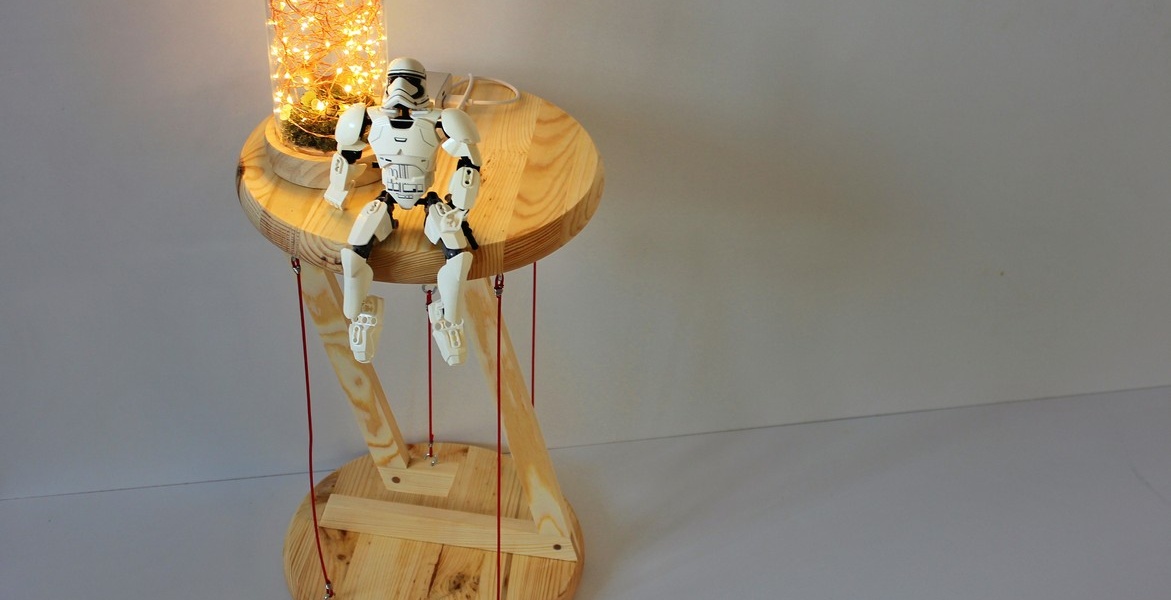
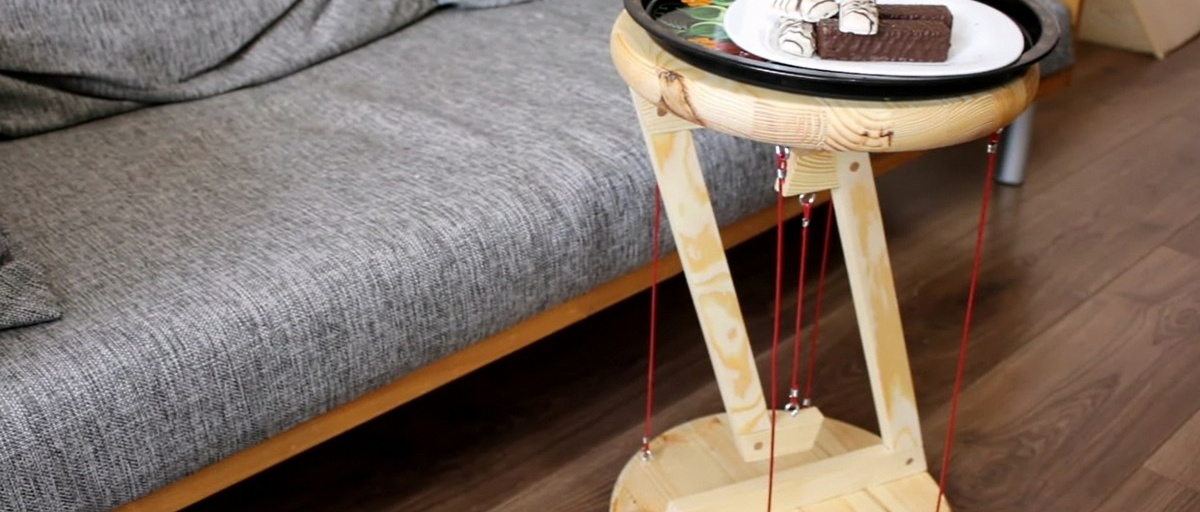
This is the unusual table I came up with.Thank you for your attention and see you again!

Watch the video


come back
Comment
  • bowtiesmilelaughingblushsmileyrelaxed relaxedsmirk
    heart_eyeskissing_heartkissing_closed_eyesflushedrelievedsatisfiedgrin
    winkstuck_out_tongue_winking_eyestuck_out_tongue_closed_eyesgrinningkissingstuck_out_tonguesleeping
    worriedfrowninganguishedopen_mouthgrimacingconfusedhushed
    expressionlessunamusedsweat_smilesweatdisappointed_relievedwearypassive
    disappointedconfoundedfearfulcold_sweatperseverecrysob
    joyastonishedscreamtired_faceangryragetriumph
    sleepyyummasksunglassesdizzy_faceimpsmiling_imp
    neutral_faceno_mouthinnocent
3+three=
Comments (1)
  1. Guest Vitaly
    #1 Guest Vitaly Guests 20 June 2020 16:18
    1
    These tables swing easily to the sides. You can do it for fun, but it’s not suitable for its intended use.

Device for unscrewing lids on jars

How to make a perfect bend in a corner or profile pipe by trimming without bending

Christmas tree made of satin ribbon | Do it yourself

How to cover a car radiator grill with insulation with your own hands

«Do it yourself - with your own hands» - a site of interesting homemade products made from scrap materials and items at home. Step-by-step master classes with photos and descriptions, technologies, life hacks - everything a real master or just a craftsman needs for needlework. Crafts of any complexity, a large selection of directions and ideas for creativity.

We recommend reading

Washing machine error codes