Materials:
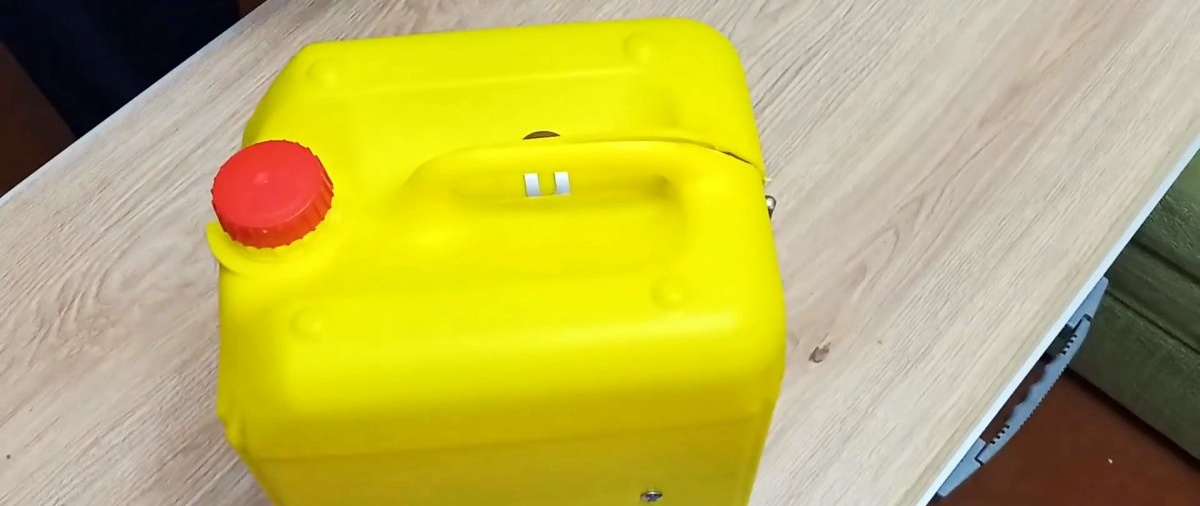
- plastic canister;
- window hinges – 2 pcs.;
- blind rivets;
- fastener latch;
- brackets for fastening plastic pipes;
- sewer pipe with a diameter of up to 50 mm.
Case manufacturing process
The canister is marked along the seam into 2 halves. Next, it is cut according to the markings.
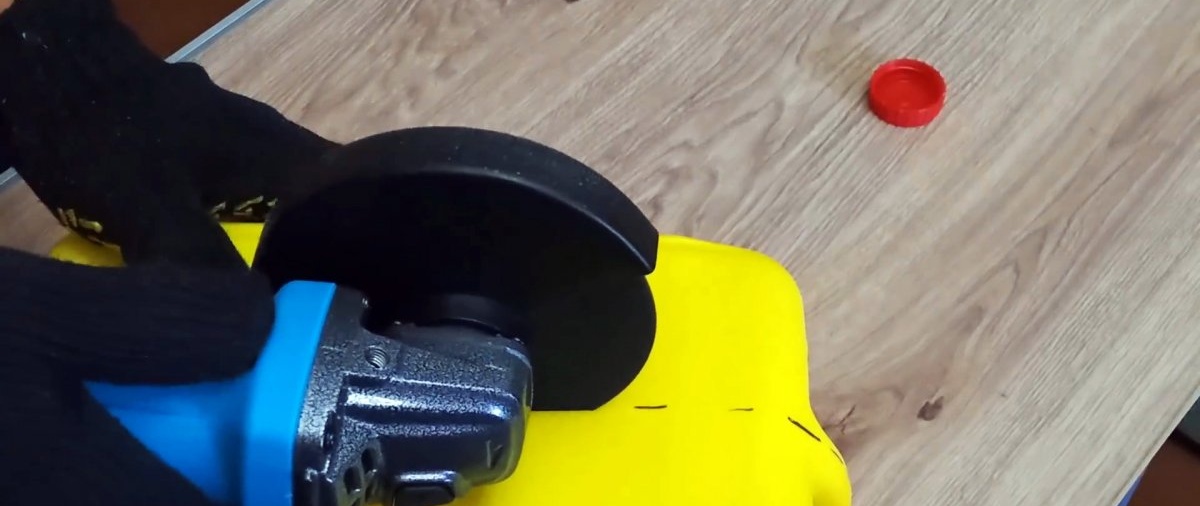
First you need to make a cut along the side, then place window hinges between the halves and install them on the rivets.
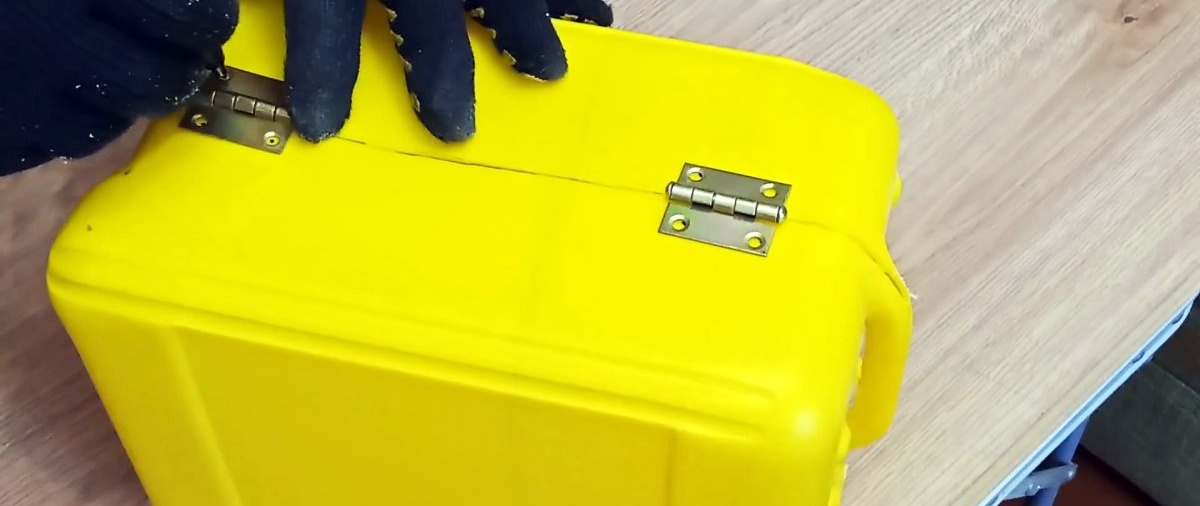
Before this, you will need to make holes for the rivets with a heated nail or drill them with a drill.
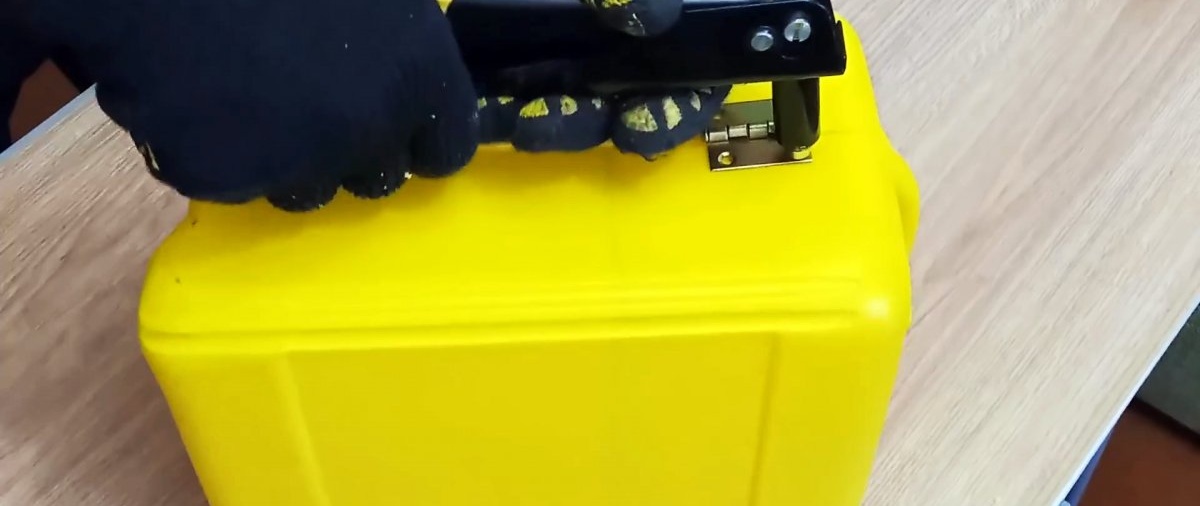
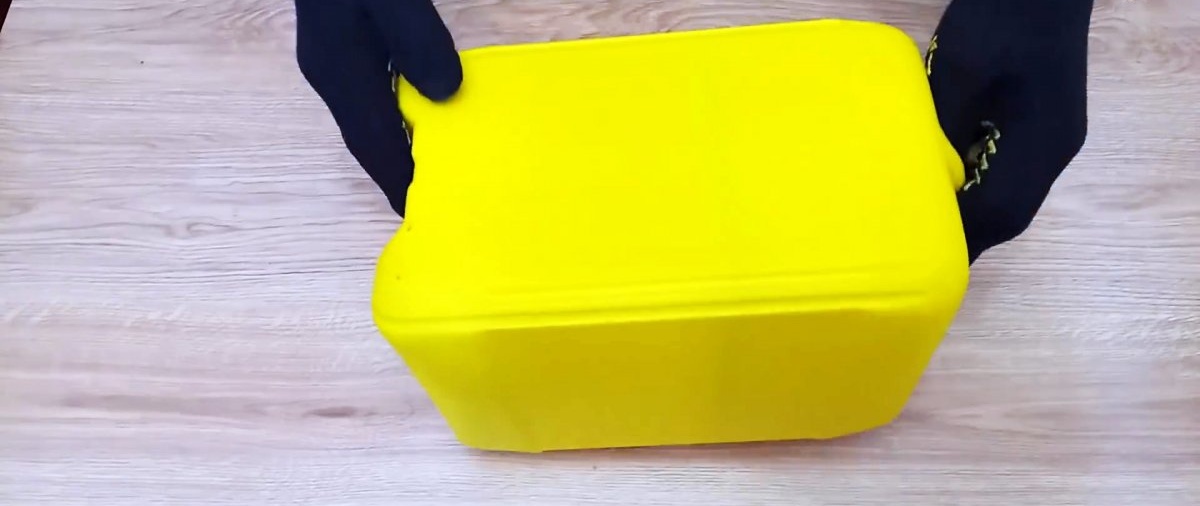
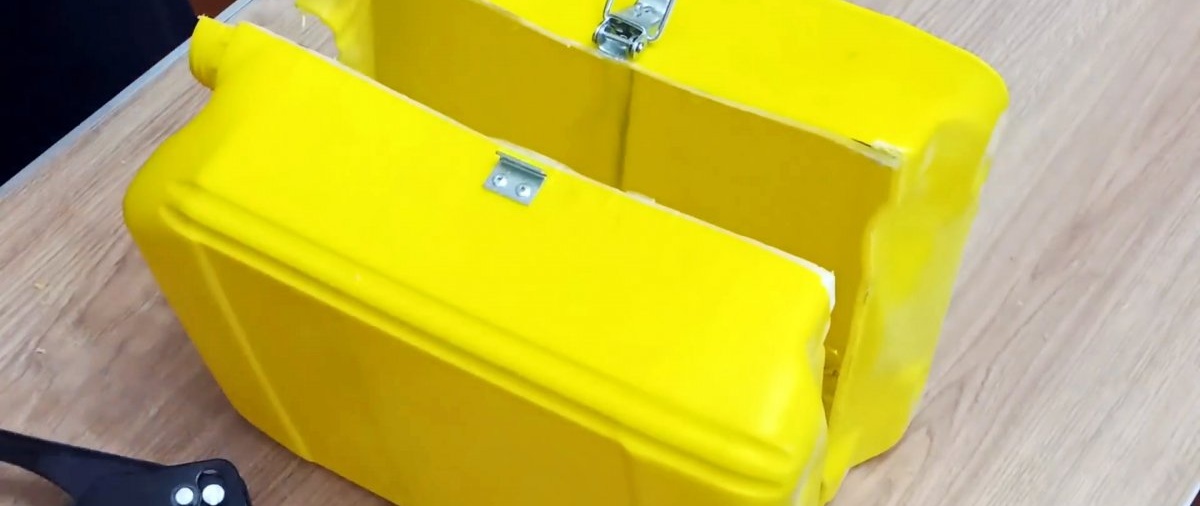
After installing the hinges, the canister is cut to the end. If you initially dissolve it completely, then in the future it will be difficult to join the halves in order to place the loops evenly.A fastener latch is also installed on the side of the canister opposite the hinges with rivets. It is important that if the walls of the canister are thin or soft, then you need to place washers of a suitable size on the opposite ends of the rivets before tightening. In this case, the mount will definitely not be able to break out of the plastic if the case is overloaded.
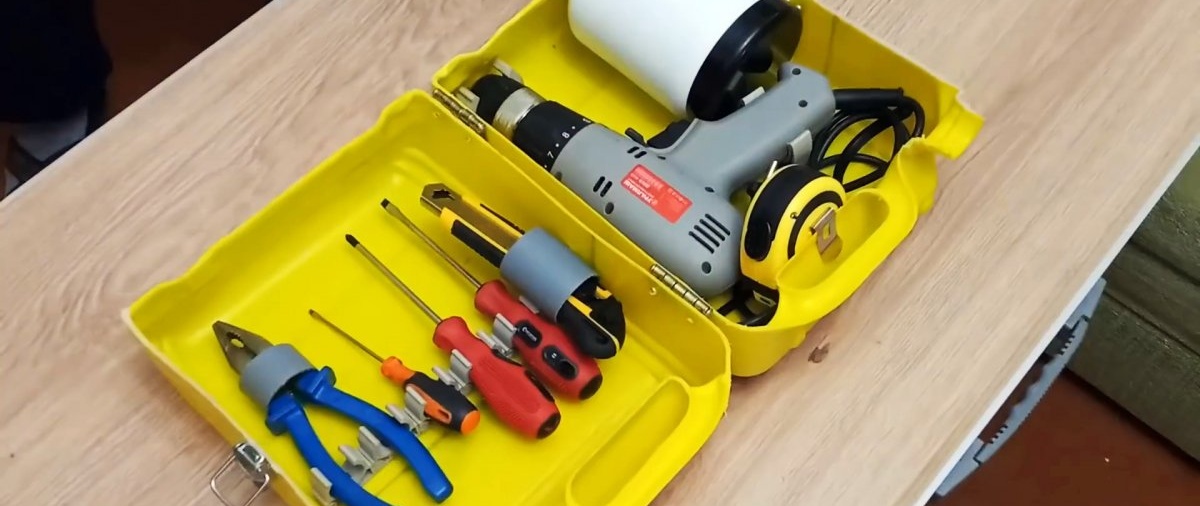
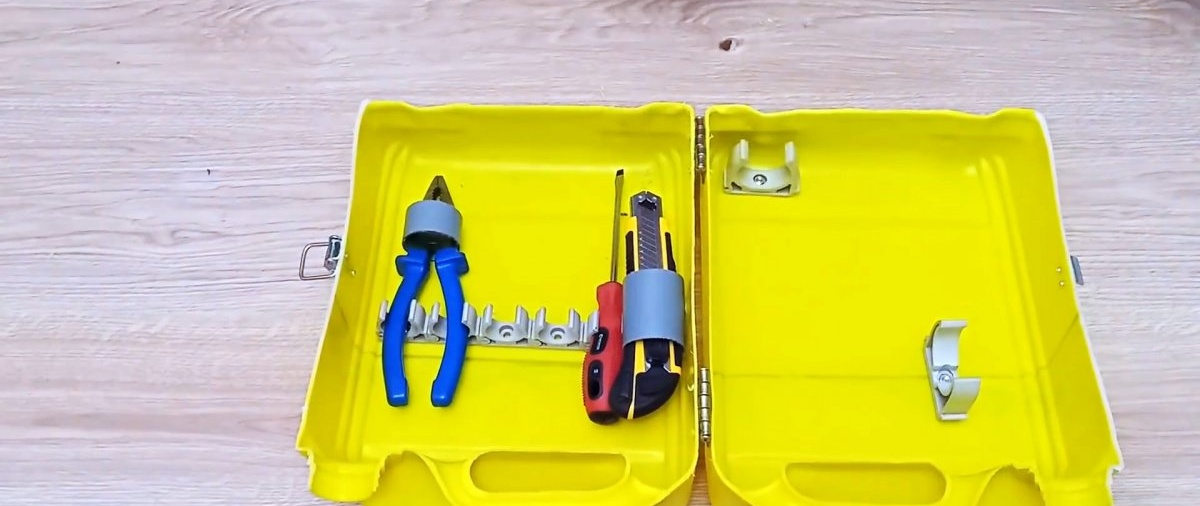
Next, you need to equip the resulting case with mounts for tools so that they do not lie around in bulk. To do this, you need to attach clips and rings made of plastic pipes to its walls. They are placed so that it is possible to insert existing tools into them.
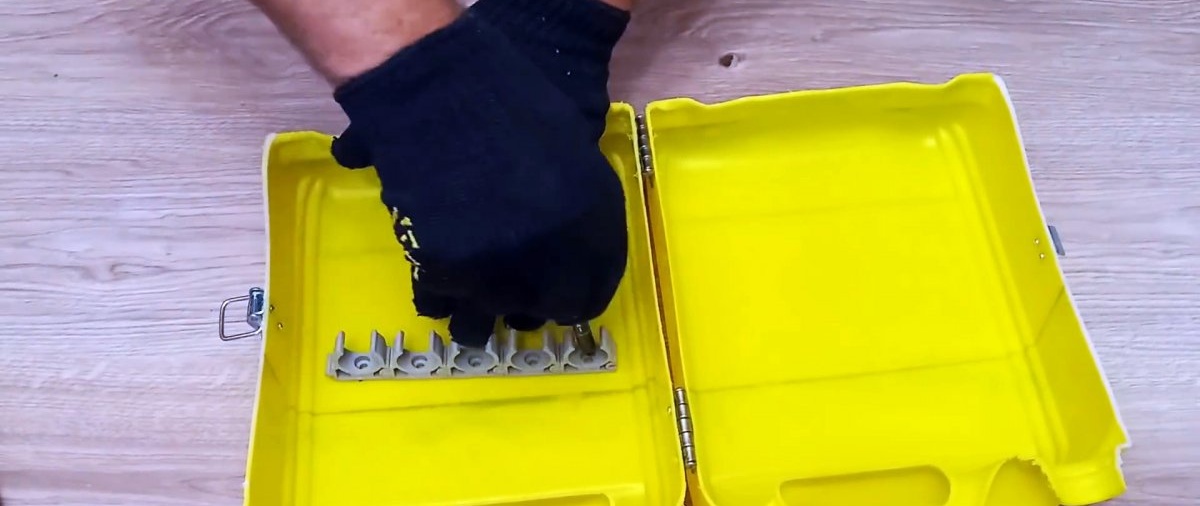
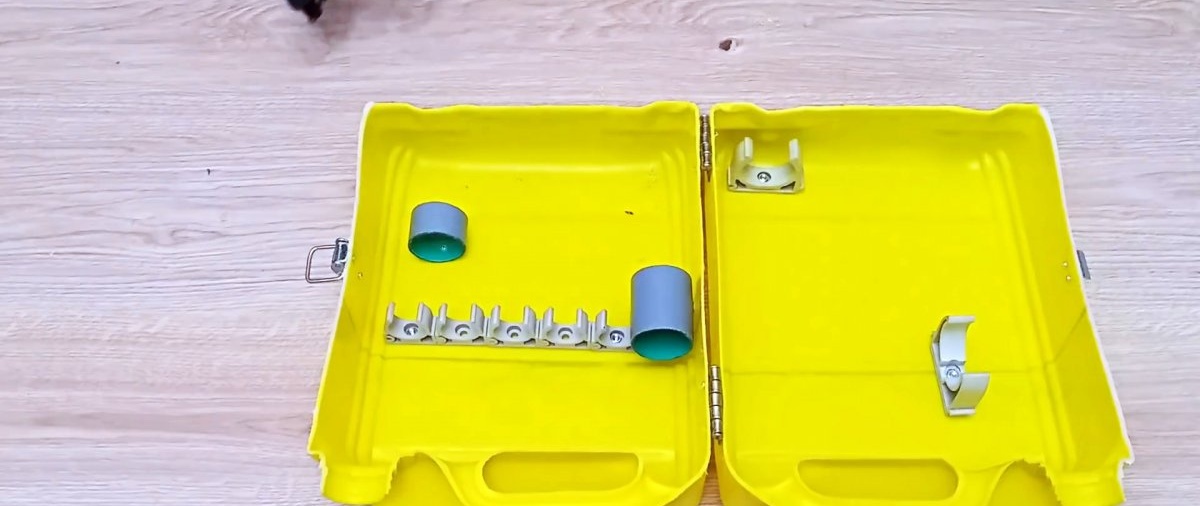
For example, the width of the staples for plastic pipes is sufficient to clamp the handles of screwdrivers, hammers, chisels, chisels, etc. Two staples can be used to secure pliers, side cutters, and metal scissors. Using staples of different diameters, it is possible to secure instruments of almost any size in the case. Rings made from plastic sewer pipes can be used to hold larger tools, for example, fixing a screwdriver chuck, the nose of a glue gun, or a mounting knife.
When closing the case, in addition to the clamp latch, you should screw the lid onto the canister, which will definitely prevent accidental opening.