Do it yourself
Life hacks, master classes, useful tips, recipes.
home » Handicraft techniques » Sewing » Cutting and sewing » How to weave a bauble from floss threads?
In ancient times, baubles were considered a symbol of friendship and respect. The Indians were the first to make them. There are many variations of color combinations. Some of them carry no meaning, being simply beautiful trinkets. Others, on the contrary, have a deep meaning. For example, the combination of white and red colors is a symbol of free love. There are an incredible variety of types of weaving friendship bracelets, but some of them can only be woven by a true professional in this matter.

How to weave a bauble from floss threads?


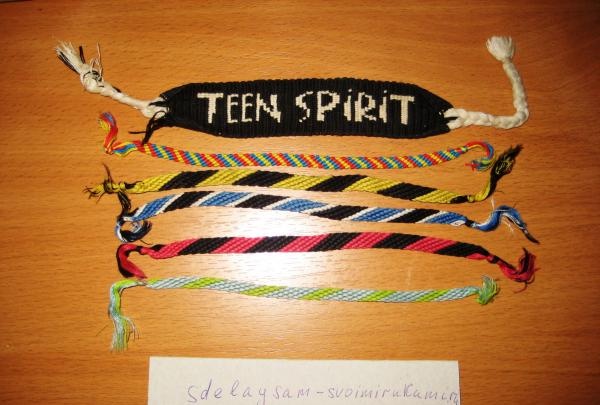
Let's consider the simplest option for weaving bracelets from floss threads. The process itself is quite monotonous, but if you are patient, you will get a very beautiful bauble.
What will you need?
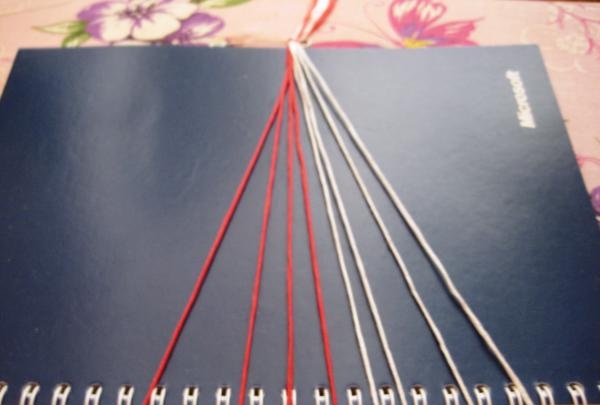
• Floss threads in two different colors (4 of each color)
• Pin (can be tape)
• Scissors
Sequencing:
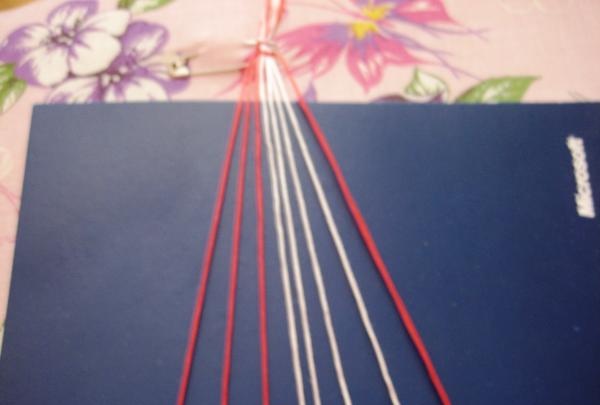
• Cut threads about 50 centimeters long. This makes eight threads, four for each color.
• Put them together and tie a knot
• We fasten them by a knot with a pin to the pillow or tape to the table
• Lay out.First all the threads come of one color, after them - of another


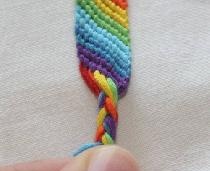
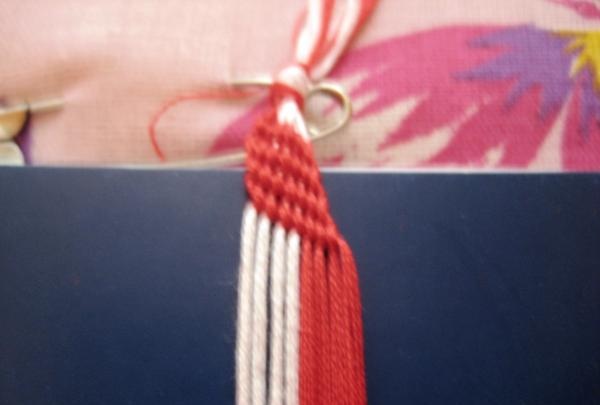
• We start weaving from the left edge. We take the outermost thread and draw it over the adjacent right thread. Next we make a loop, as in the photo


• Tighten the knot and repeat the procedure on the same thread
• Then we also make two knots on the remaining threads in the order they appear. Attention, the knots are made with the same (leftmost) thread that we started weaving with from the very beginning. As a result, she will become far right


• Next, we again take the leftmost thread and perform similar procedures. After the first four threads of the same color are used, you should get:


• We continue to do the same thing, only with threads of a different color, which are now located on the left side
A few hours of this work and the bauble will be ready. Of course, the first time it may turn out a little uneven and twisted, but everything comes with experience!
come back
Comment
  • bowtiesmilelaughingblushsmileyrelaxed relaxedsmirk
    heart_eyeskissing_heartkissing_closed_eyesflushedrelievedsatisfiedgrin
    winkstuck_out_tongue_winking_eyestuck_out_tongue_closed_eyesgrinningkissingstuck_out_tonguesleeping
    worriedfrowninganguishedopen_mouthgrimacingconfusedhushed
    expressionlessunamusedsweat_smilesweatdisappointed_relievedwearypassive
    disappointedconfoundedfearfulcold_sweatperseverecrysob
    joyastonishedscreamtired_faceangryragetriumph
    sleepyyummasksunglassesdizzy_faceimpsmiling_imp
    neutral_faceno_mouthinnocent
4 minus one =
Comments (1)
  1. Victoria
    #1 Victoria Guests 31 January 2014 17:23
    0
    And how to do it can be shown on video or pictures (photos?

Windmill from cooler | Do it yourself

How to clean a window sill from dirt

How to connect PVC pipes without a connector

Black Lagoon Hot Glue Bracelet | Do it yourself

«Do it yourself - with your own hands» - a site of interesting homemade products made from scrap materials and items at home. Step-by-step master classes with photos and descriptions, technologies, life hacks - everything a real master or just a craftsman needs for needlework. Crafts of any complexity, a large selection of directions and ideas for creativity.

We recommend reading

Washing machine error codes