How to make a heated floor in a shower room at home
I started installing heated floors by dismantling old wooden floors. I removed the old wooden boards, then removed the joists.

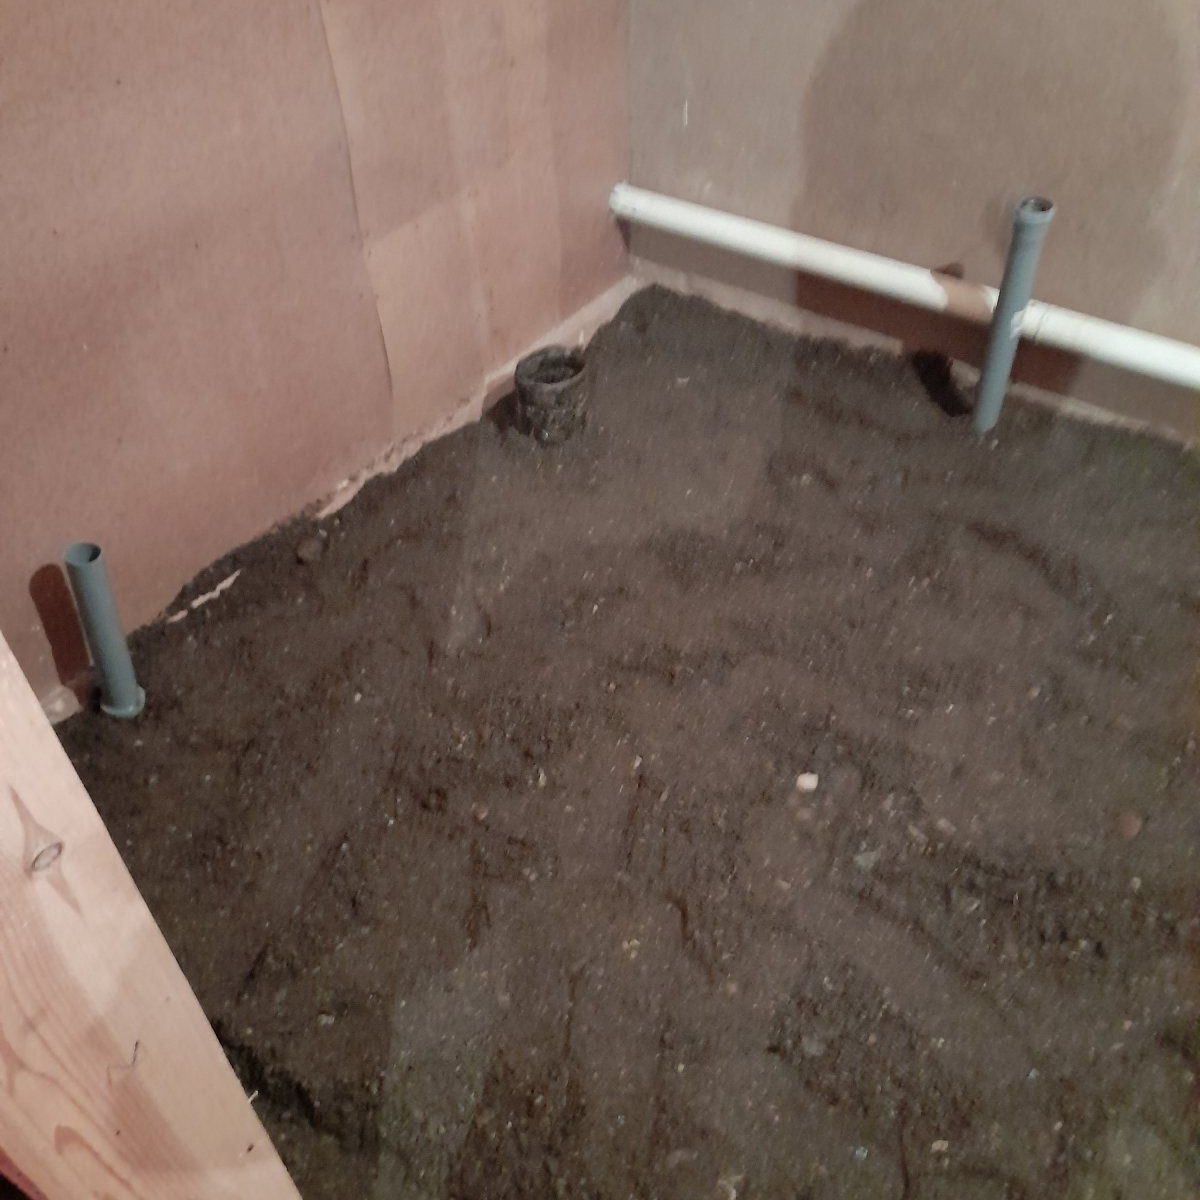
After I removed the logs, I began to bring in soil. (clay), since under the floors it was empty. I poured the clay 45 cm below the general floor level in the house. You may ask, why is it lower than the general floor level in the house? This is done in order to lay communications, pillows, screeds, tiles and reach the same level. But first things first. After backfilling, it is necessary to compact the earth (clay) so that later the bulk soil (earth, clay) does not form sediment. It is advisable to water the soil with a little water before compacting. But I didn’t do this, because it was already autumn outside and the soil would not dry out properly. But in summer you can water it for better results.

I compacted it with a block of 20*20cm and a height of 1.5 m and it turned out pretty well. I compacted the soil over an area of five square meters for about one hour. After everything was compacted, I began laying PVC pipes. The drain from the toilet is a 100mm pipe. From the shower and sink with a diameter of 50mm. The slope of the pipe is 4 cm per m.p. I set the slope of a pipe with a diameter of 50 mm on bricks, and I laid the main pipe with a diameter of 100 mm on compacted soil. When all the PVC pipes were connected and laid along the edges of these pipes, I added more earth. This is to prevent the pipes from moving out of place. After that, I made a pillow from ASG (sand, gravel, mixture), the pillow came out about 30 cm thick.


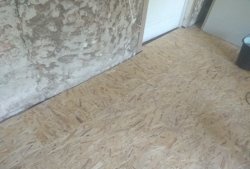
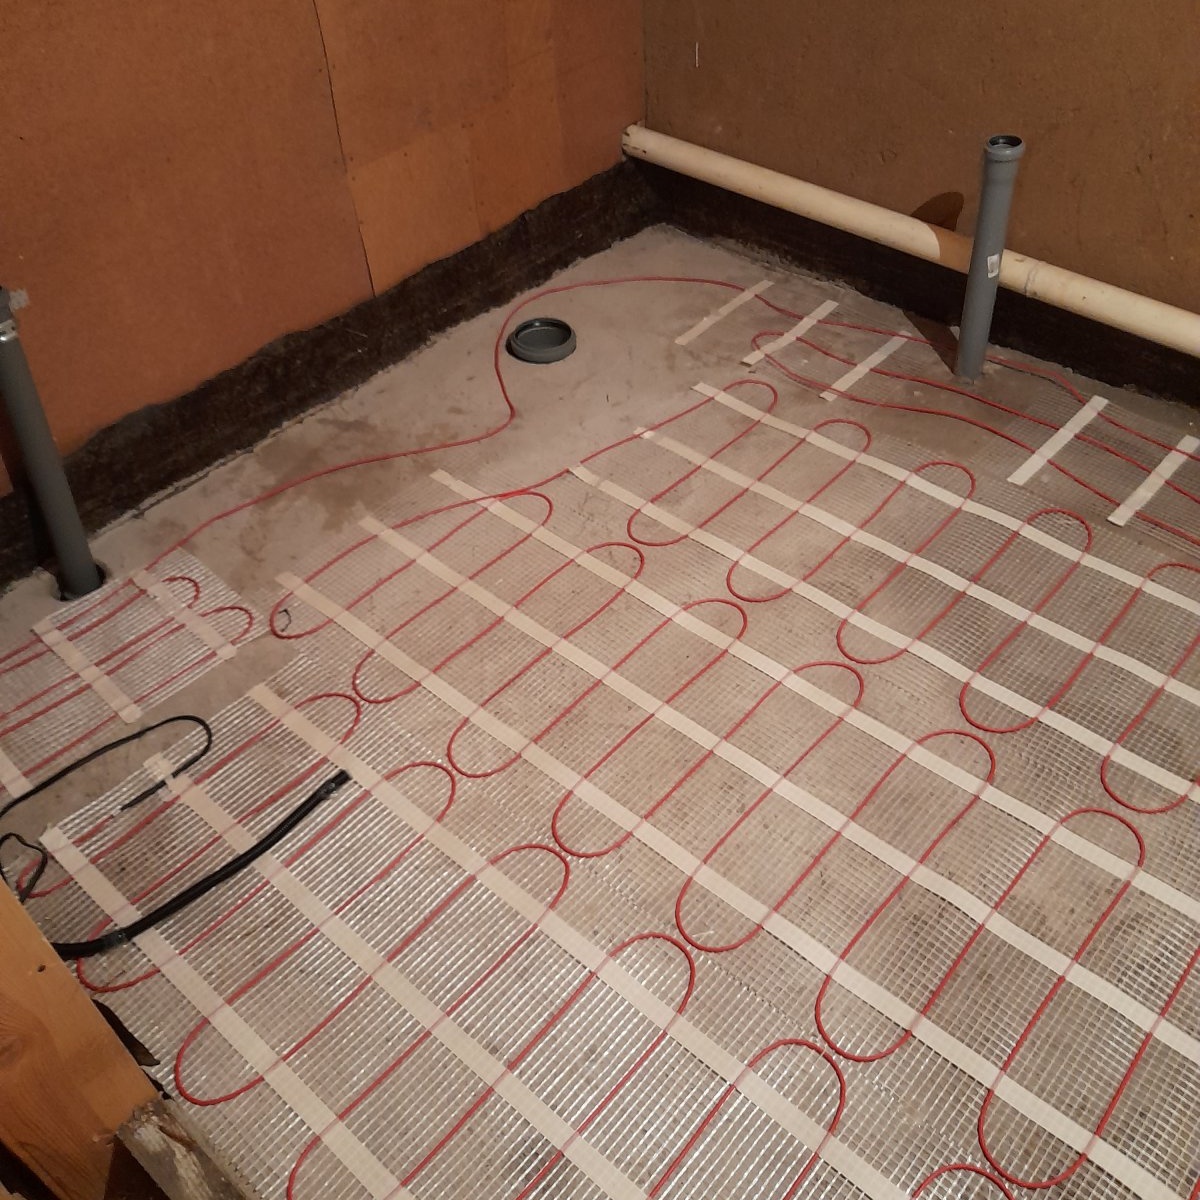
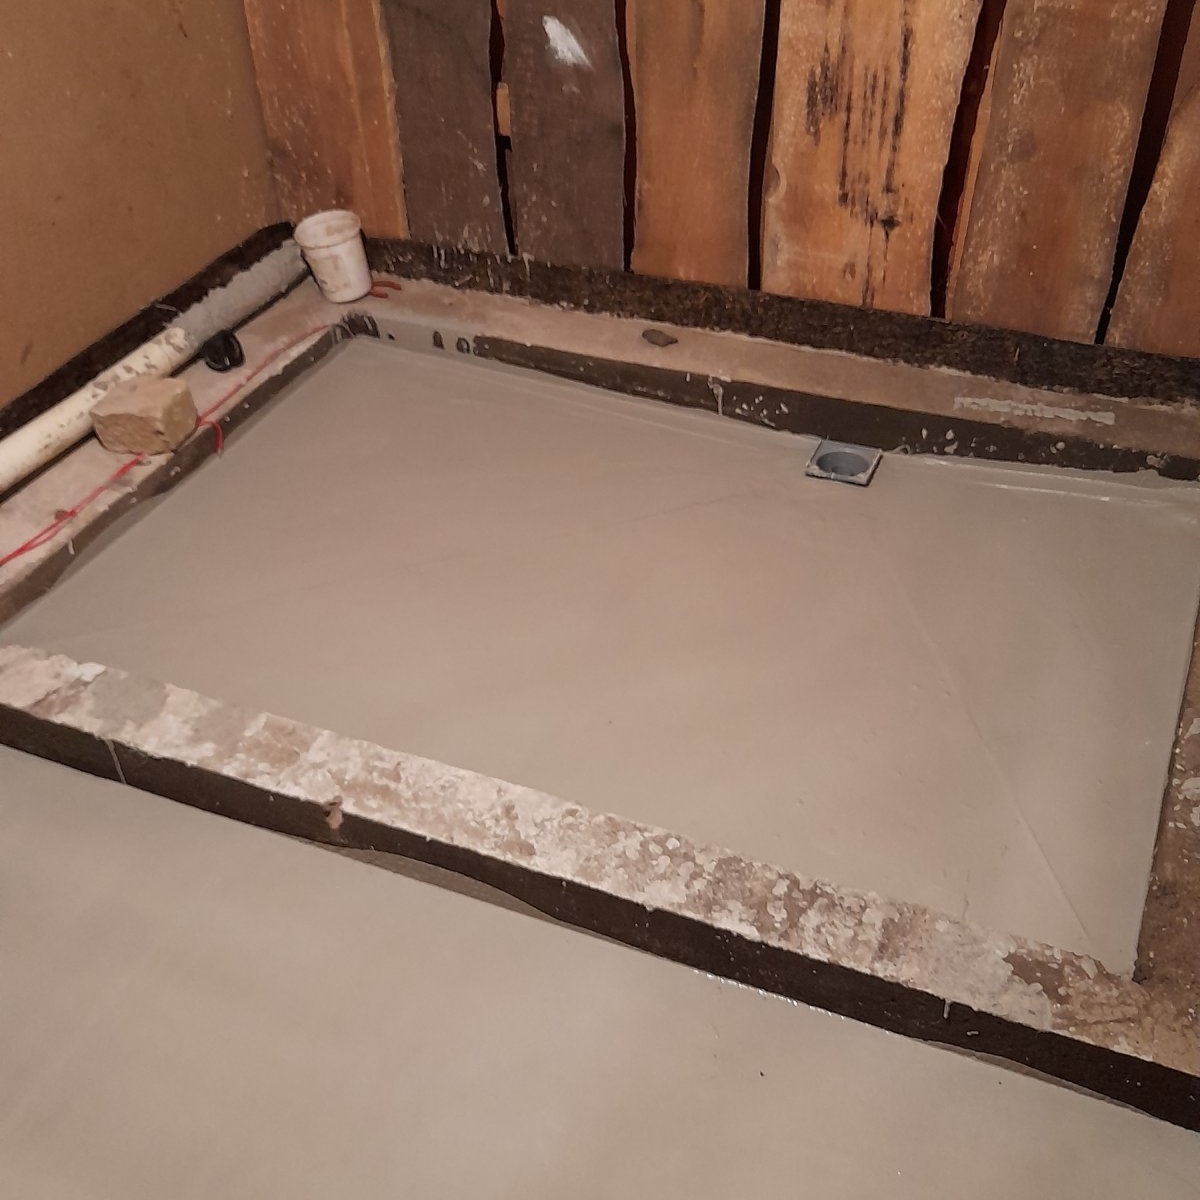
The sprinkled ASG must also be compacted. Just be careful, because under the pillow (PGS) there are sewer pipes. They are easy to break. Before pouring the screed, you need to make sure that the concrete (screed) will not come into contact with the wood. If concrete comes into contact with wood, then the wood quickly becomes unusable, that is, it rots, which causes an unpleasant odor and parasites. Therefore, I covered the entire edge of the wall with a narrow strip of felt. Now you can safely pour our screed. To prepare the concrete solution, I used M500 cement, PGS, and water. The solution was prepared in a 1k4 concrete mixer (one shovel of cement, four shovels of PGS); water was added by eye.


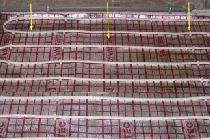
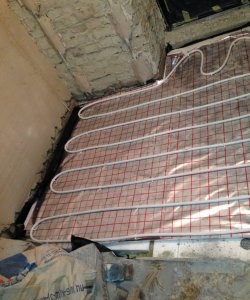
On average, one full batch of 30 shovels requires 20 liters of water. I prepared the solution on the street and took it home in a wheelbarrow. A wheelbarrow on one wheel. If the wheelbarrow has two wheels, then the solution pours out of the wheelbarrow from the right and left edges. If you have a wheelbarrow on one wheel, maintaining balance, you will not spill a single gram of solution. It took me 250 kg of cement (5 bags of 50 kg each) to cover the entire area of the room.I made the screed 15 cm thick. This is enough for a shower room. After the screed had hardened (24 hours), I began laying the heating mat (220V heating cable). The heating mat is very easy to install. It is sold in rolls. Just roll out the roll on the floor and you're done. After laying the heating mat, be sure to connect it to the network via a thermostat and check whether it works. Which is what I did.
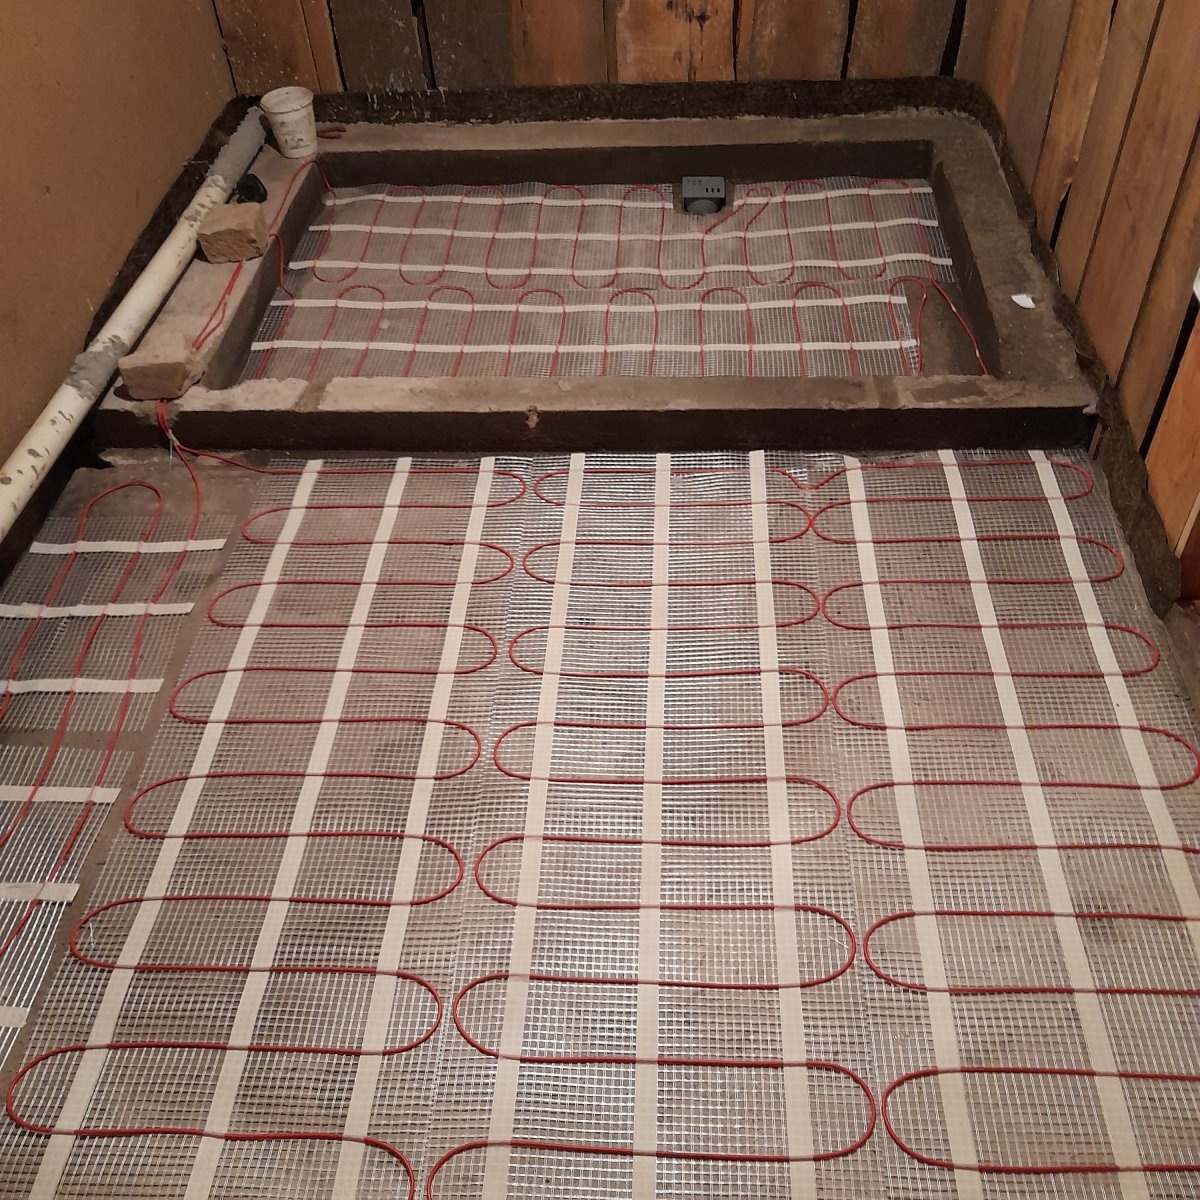
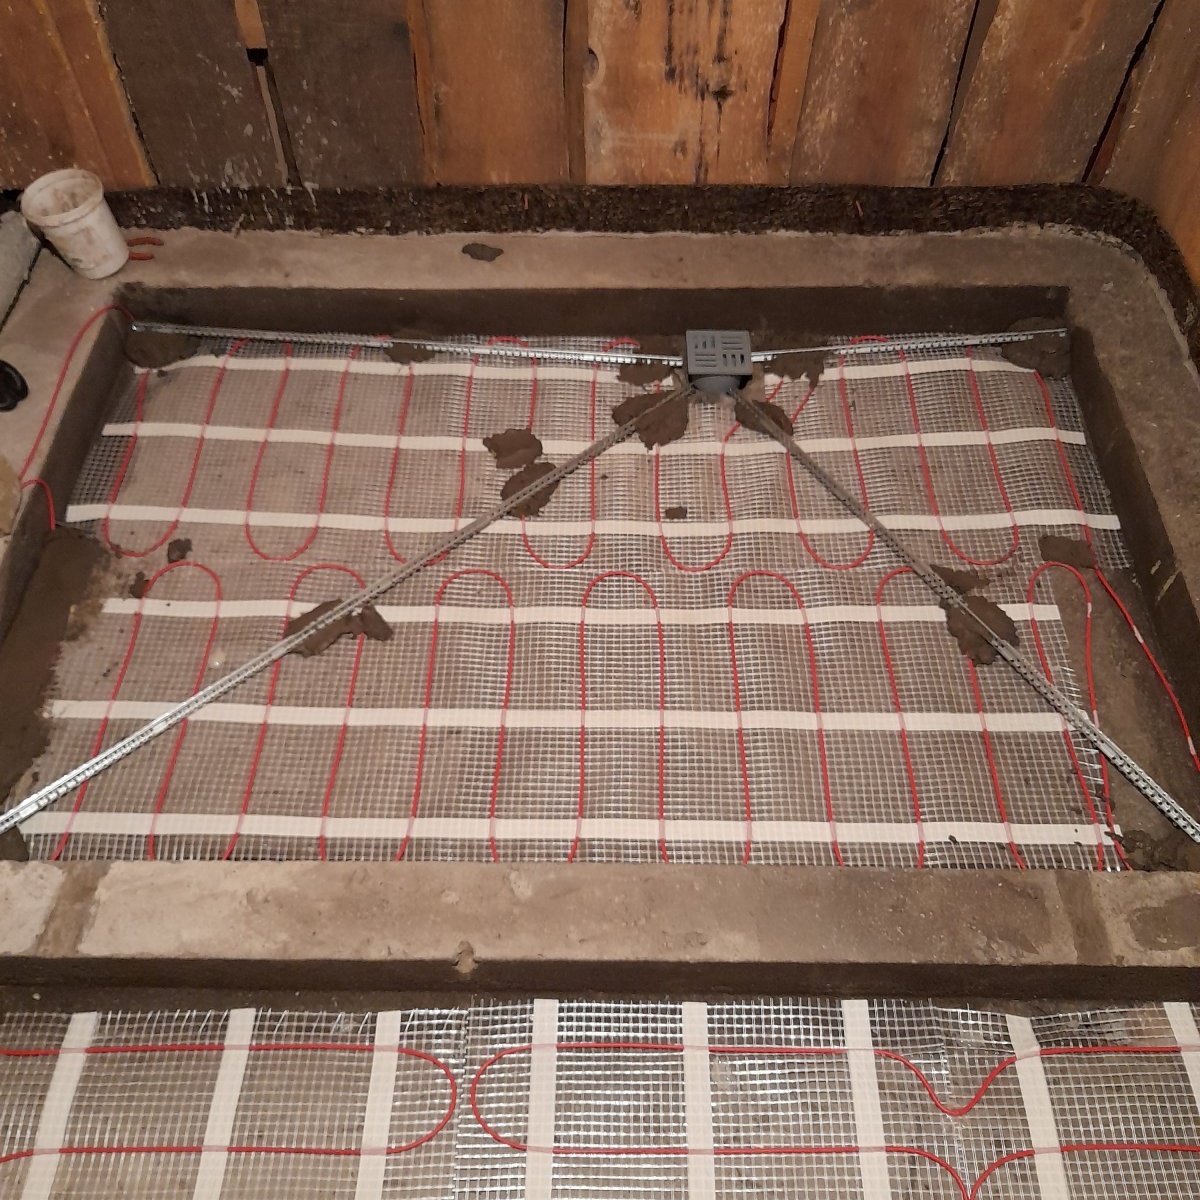
The heating mat is working, now you can begin installing the self-leveling floor. Self-leveling floors are sold in construction stores in 25 kg bags. It took me 5 bags for the entire area. It is very simple to prepare a self-leveling floor solution. You will need a construction mixer (drill, hammer drill), mixer attachment, water, bucket. To level the self-leveling floor, you need a special needle roller. Method for preparing the solution: open the bag with the mixture, pour the contents into a 30-liter bucket, add water, mix with a mixer until a homogeneous substance is obtained. Then pour the contents onto the screed and roll it out with a needle roller.

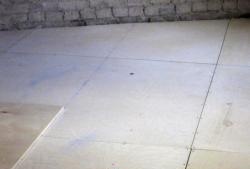
The self-leveling self-leveling floor just needs to be rolled out with a needle roller. The self-leveling floor is ready. After the self-leveling floor had dried, I turned on the heating cable. Everything works perfectly. Heats up well and evenly. Warm floors are ready. Thank you for your attention.