Do it yourself
Life hacks, master classes, useful tips, recipes.
home » Useful and interesting » How to make a convenient and simple organizer for drills
How to make a convenient and simple organizer for drills

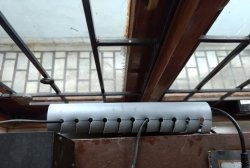
Almost everyone keeps their drill bits in a drawer. As a result, to find one thing you need, you have to sort through the whole heap. By making this organizer, you can store drill bits in a visible place.

Materials:


  • plywood 6 mm;
  • M6 studs 41 mm and 66 mm – all 4 pcs.;
  • M6 nuts – 28 pcs.;
  • M6 cap nuts – 8 pcs.

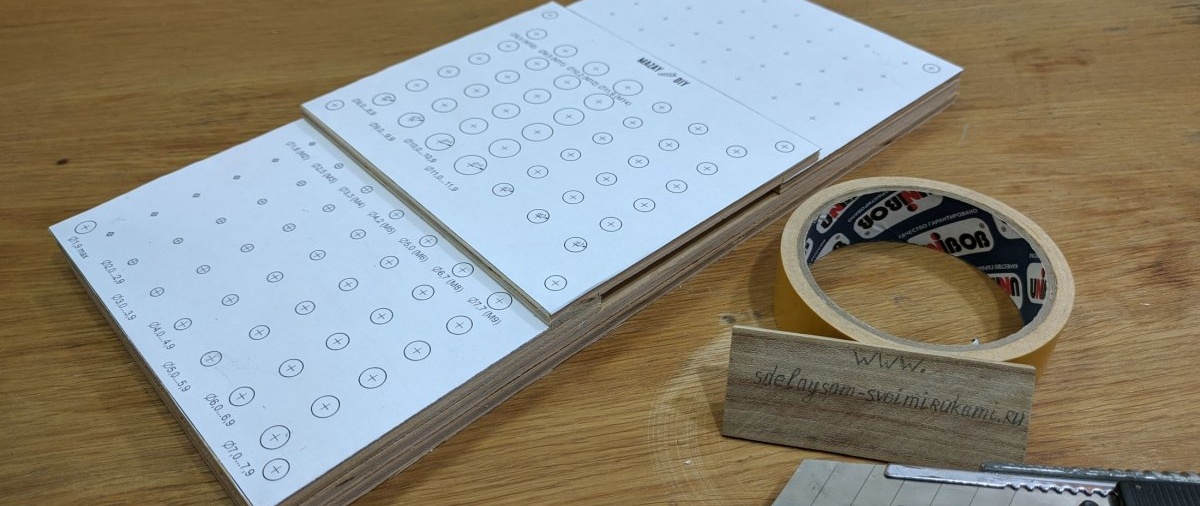
Printing templates with hole markings - https://mazaydiy.com/plans/drill-bit-organizer.pdf

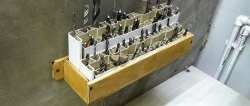
Organizer manufacturing process


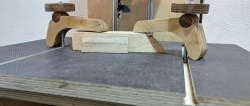
4 rectangular parts are cut out of plywood. The size of two is 160x335 mm, two are 121x160 mm and one is 133x160 mm.
How to make a convenient and simple organizer for drills

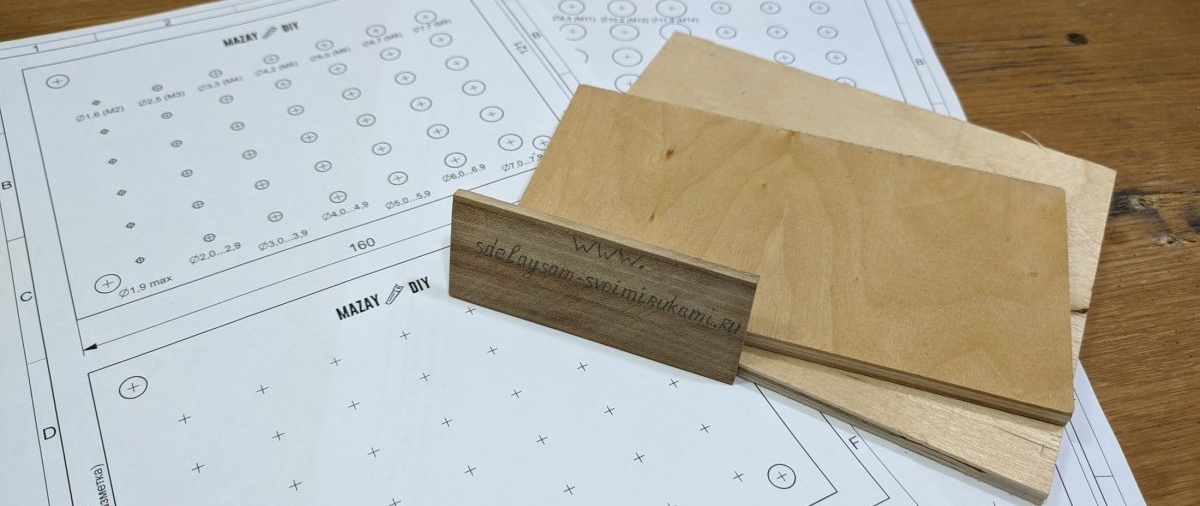
Based on the size of the three smaller blanks, it is necessary to print a paper template with marks for drilling mounting holes for drills of different diameters. Their sizes must be signed. After this, the templates are glued to the plywood.
How to make a convenient and simple organizer for drills

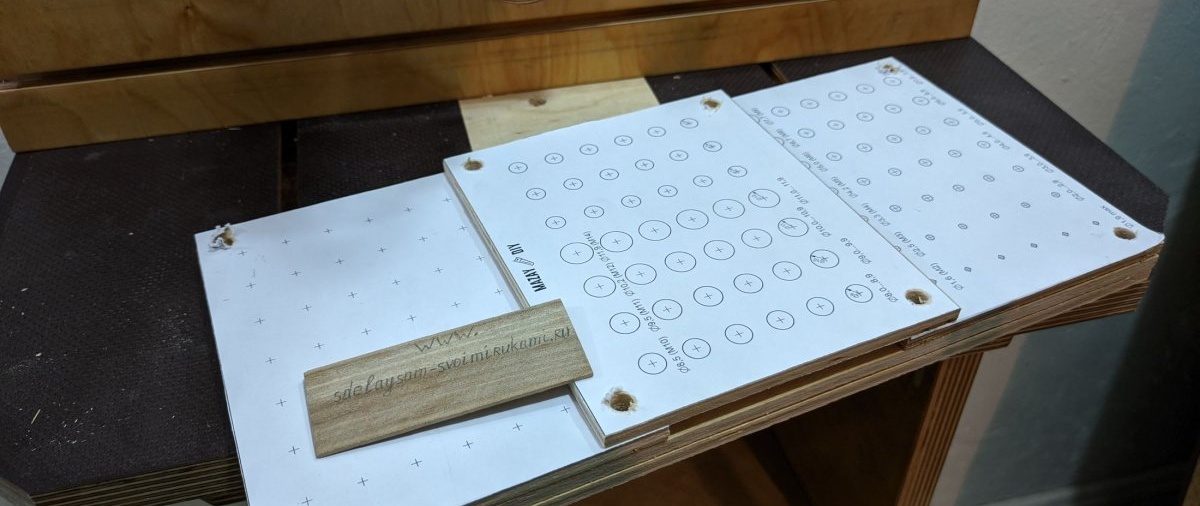
Using double-sided tape, you need to connect large pieces at the corners. A pair of smaller ones are glued to them on the sides. The middle part 133x160 mm is glued onto the latter in the center.
How to make a convenient and simple organizer for drills

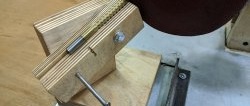
At the next stage, through holes are made in the corners of the workpieces in order to fasten them together.There will be a total of 8 holes.
How to make a convenient and simple organizer for drills

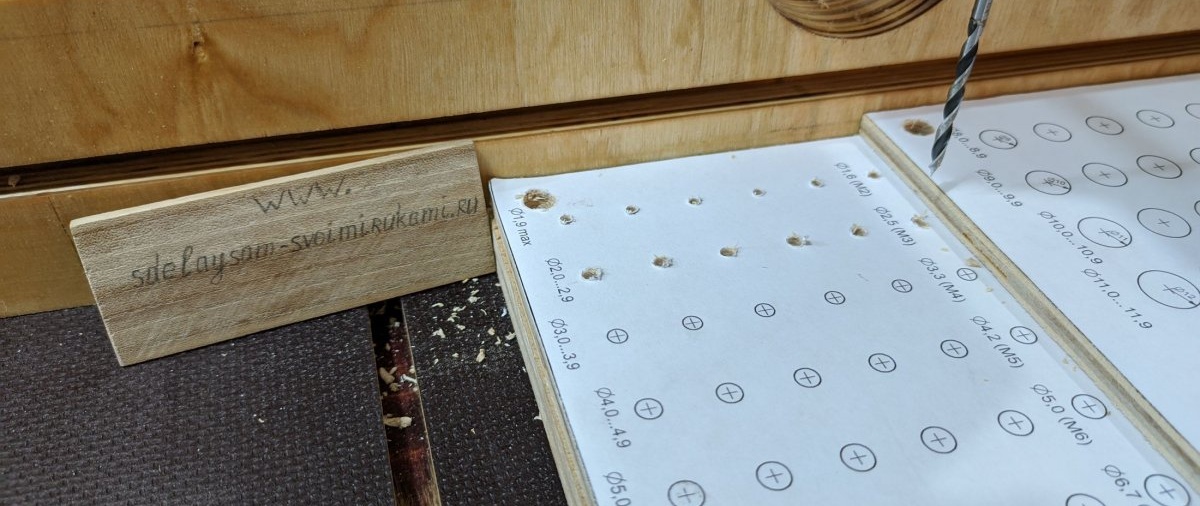
Next, the large lower workpiece is detached. After this, the mounting holes for the drills are drilled according to the glued templates. For each of them, a drill of the appropriate diameter is used.
How to make a convenient and simple organizer for drills

How to make a convenient and simple organizer for drills

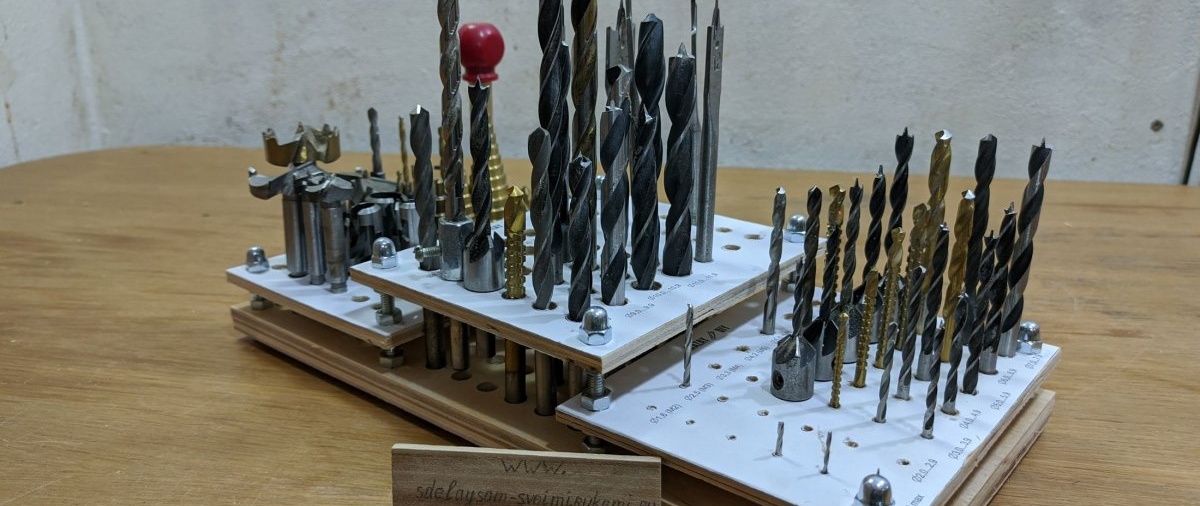
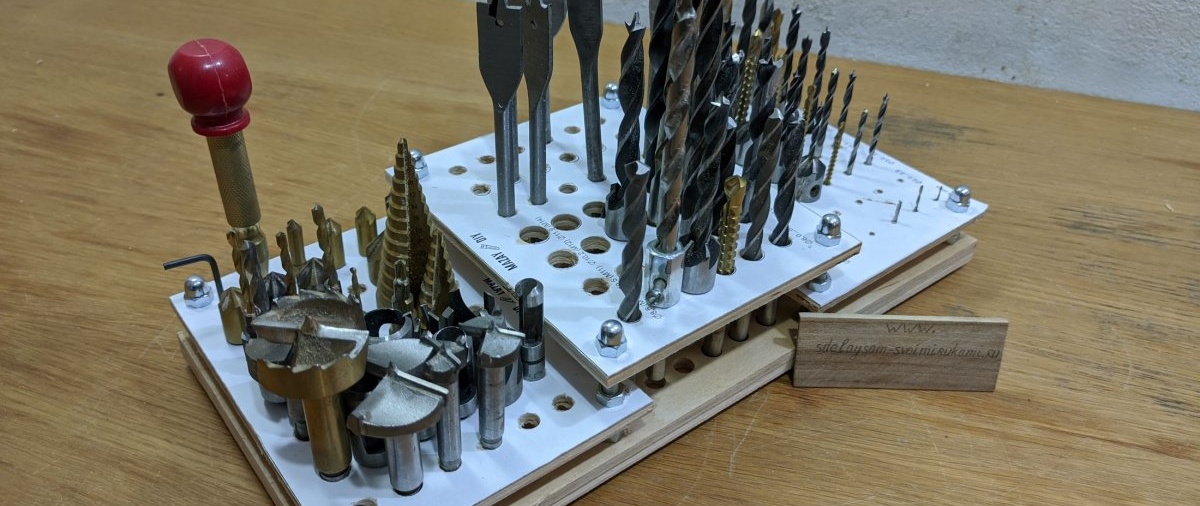
To assemble the parts, 8 M6 studs are prepared. You need to put a nut on them. Then the pins are inserted into a large blank, in which 8 holes are made. Short ones are placed in the corners, long ones in the center.
How to make a convenient and simple organizer for drills

How to make a convenient and simple organizer for drills

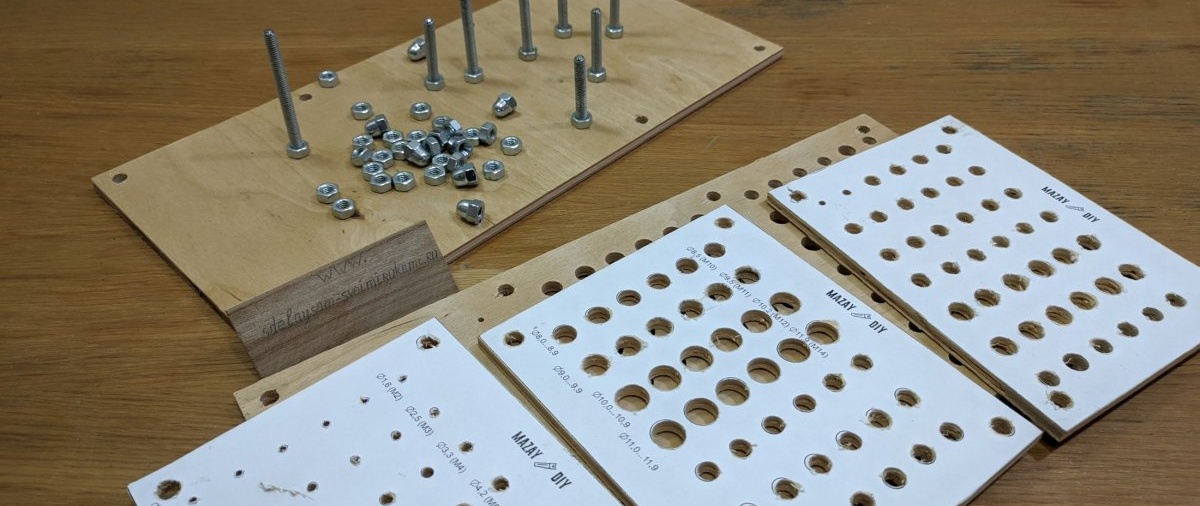
A second large part with perforations for drills is installed on top and tightened with nuts. Next, another nut is screwed on, and identical perforated parts are placed on them. On short studs, they need to be tightened with cap nuts.
How to make a convenient and simple organizer for drills

How to make a convenient and simple organizer for drills

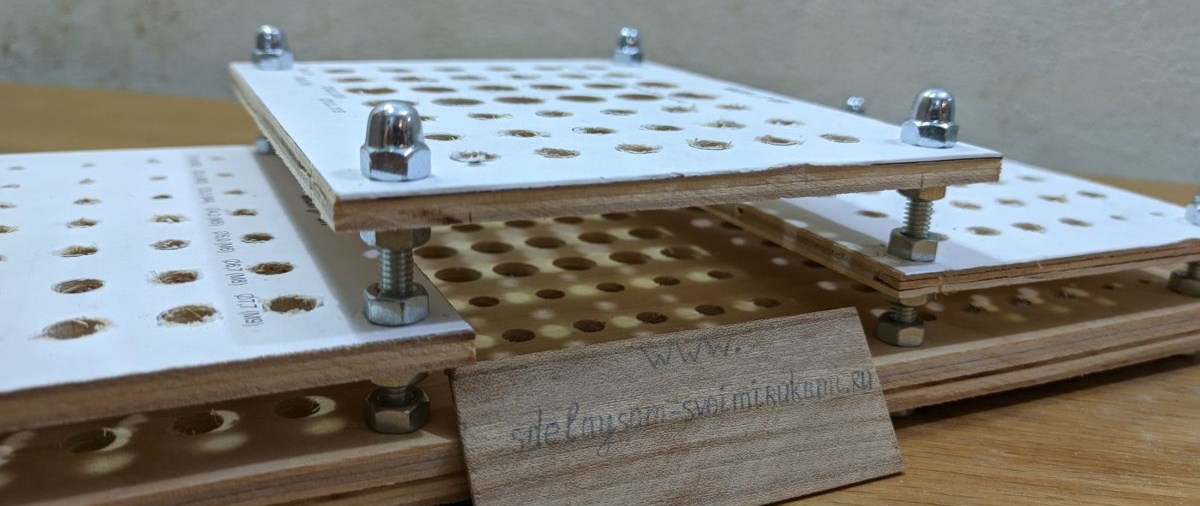
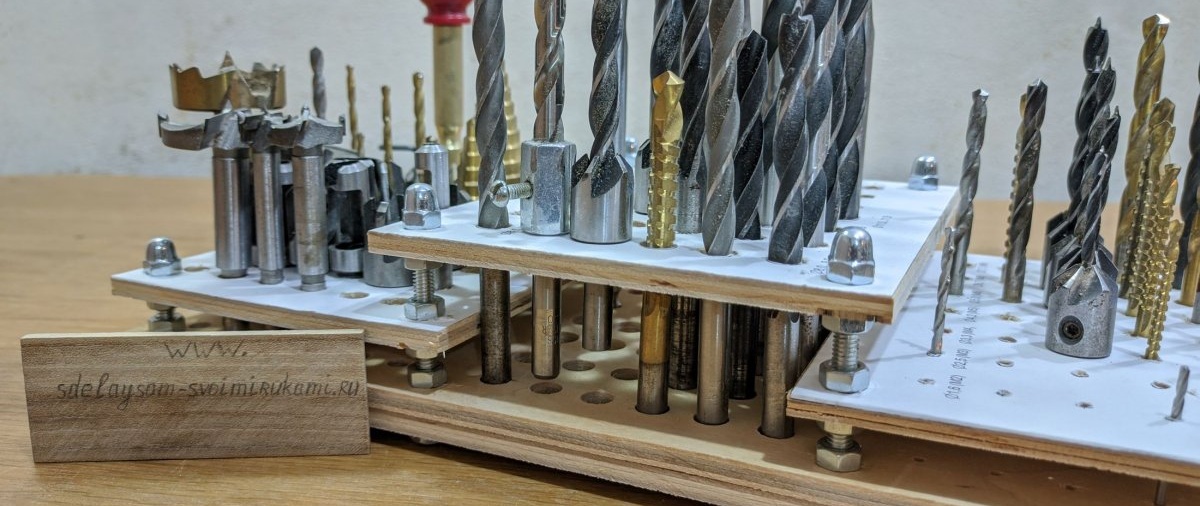
Short nuts are screwed onto the long studs and the remaining part is installed. It is clamped with cap nuts. Now all that remains is to arrange the drills according to size.
How to make a convenient and simple organizer for drills

How to make a convenient and simple organizer for drills

Watch the video


come back
Comment
  • bowtiesmilelaughingblushsmileyrelaxed relaxedsmirk
    heart_eyeskissing_heartkissing_closed_eyesflushedrelievedsatisfiedgrin
    winkstuck_out_tongue_winking_eyestuck_out_tongue_closed_eyesgrinningkissingstuck_out_tonguesleeping
    worriedfrowninganguishedopen_mouthgrimacingconfusedhushed
    expressionlessunamusedsweat_smilesweatdisappointed_relievedwearypassive
    disappointedconfoundedfearfulcold_sweatperseverecrysob
    joyastonishedscreamtired_faceangryragetriumph
    sleepyyummasksunglassesdizzy_faceimpsmiling_imp
    neutral_faceno_mouthinnocent
3+three=
Comments (0)

Gold-plated leather flower | Do it yourself

Antenna - Bi-Quad W-LAN Wi-Fi 2.4 GHz | Do it yourself

Do it yourself - crafts and master classes | Page 298

An ancient way to remove any stains from white linen

«Do it yourself - with your own hands» - a site of interesting homemade products made from scrap materials and items at home. Step-by-step master classes with photos and descriptions, technologies, life hacks - everything a real master or just a craftsman needs for needlework. Crafts of any complexity, a large selection of directions and ideas for creativity.

We recommend reading

Washing machine error codes