Many old laptops with very good hardware have problems with insufficient memory. If they have a disk drive (divider) that you no longer use, then you can install an SSD solid-state drive in its place. As a result, the laptop's memory will increase, but it will no longer be able to read disks, however, like many modern devices.
What you will need:
- Solid State Drive SSD - http://alii.pub/5rnep5
- SATA power cable - http://alii.pub/5rneqi
- eSATA to SATA interface cable - http://alii.pub/5rneqi

Laptop upgrade process
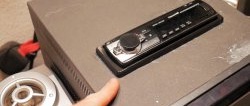
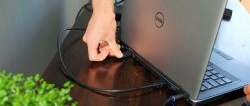
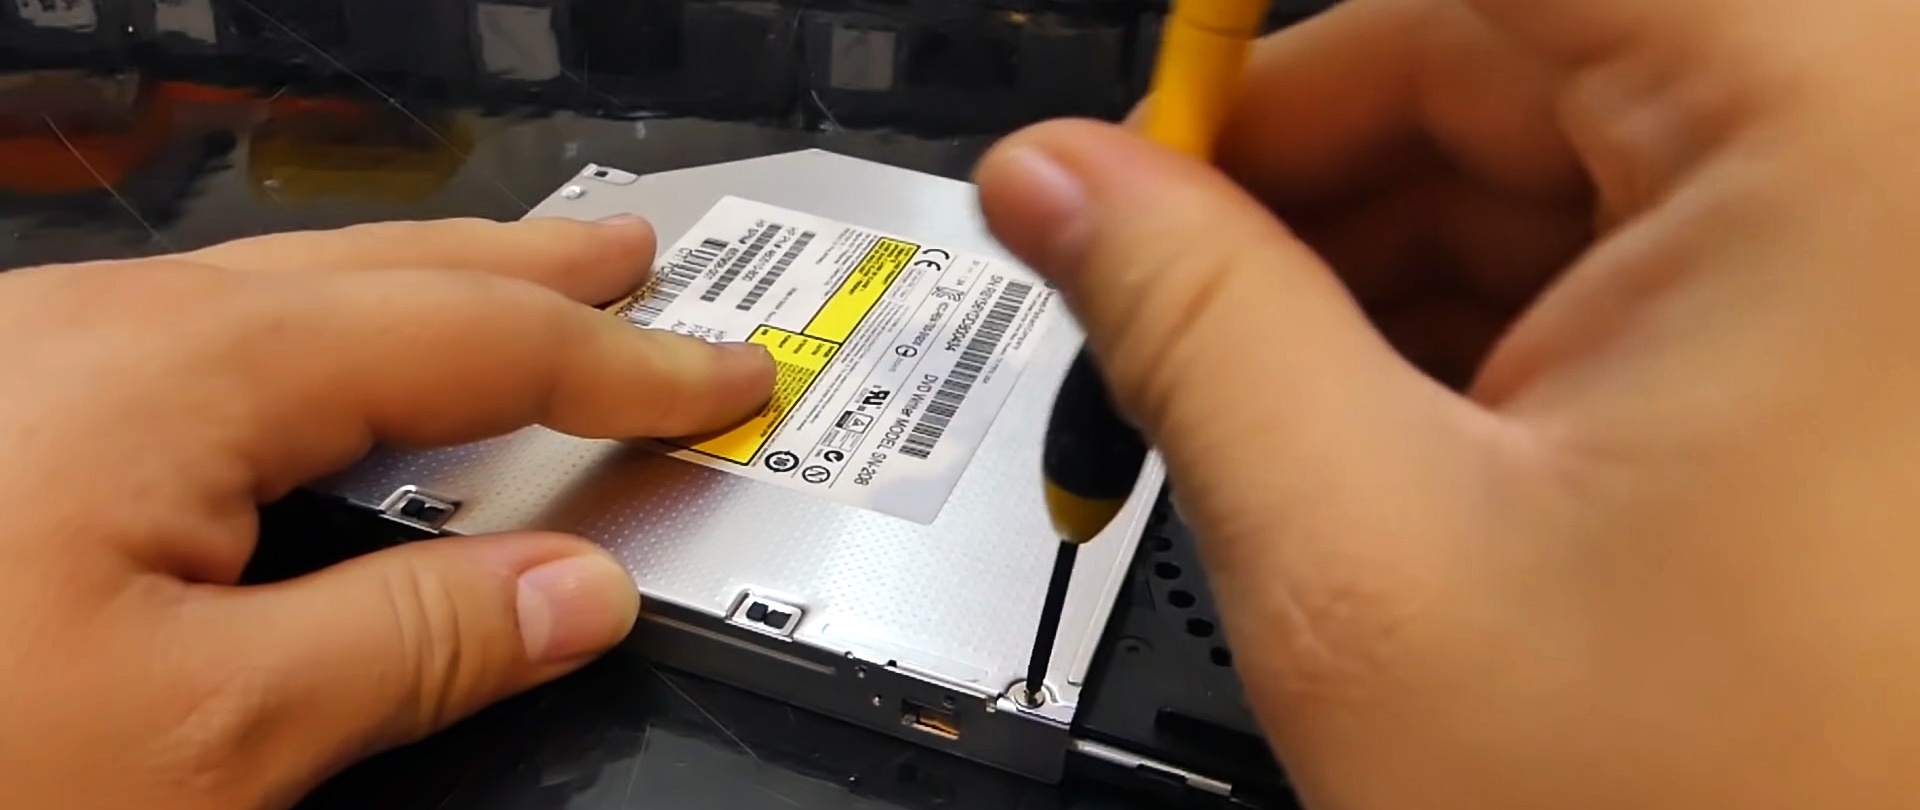
You need to disassemble the laptop to get to the motherboard. Next, the DVD drive is removed. All you need from the latter is its case and a board with connectors. You can open the removed drive by inserting a needle or awl into the hole near the button.


The body consists of two parts connected by screws. They need to be untwisted.

Next, you need to tear off the cable of the retractable part of the drive and remove it from the slide, bending the stoppers.

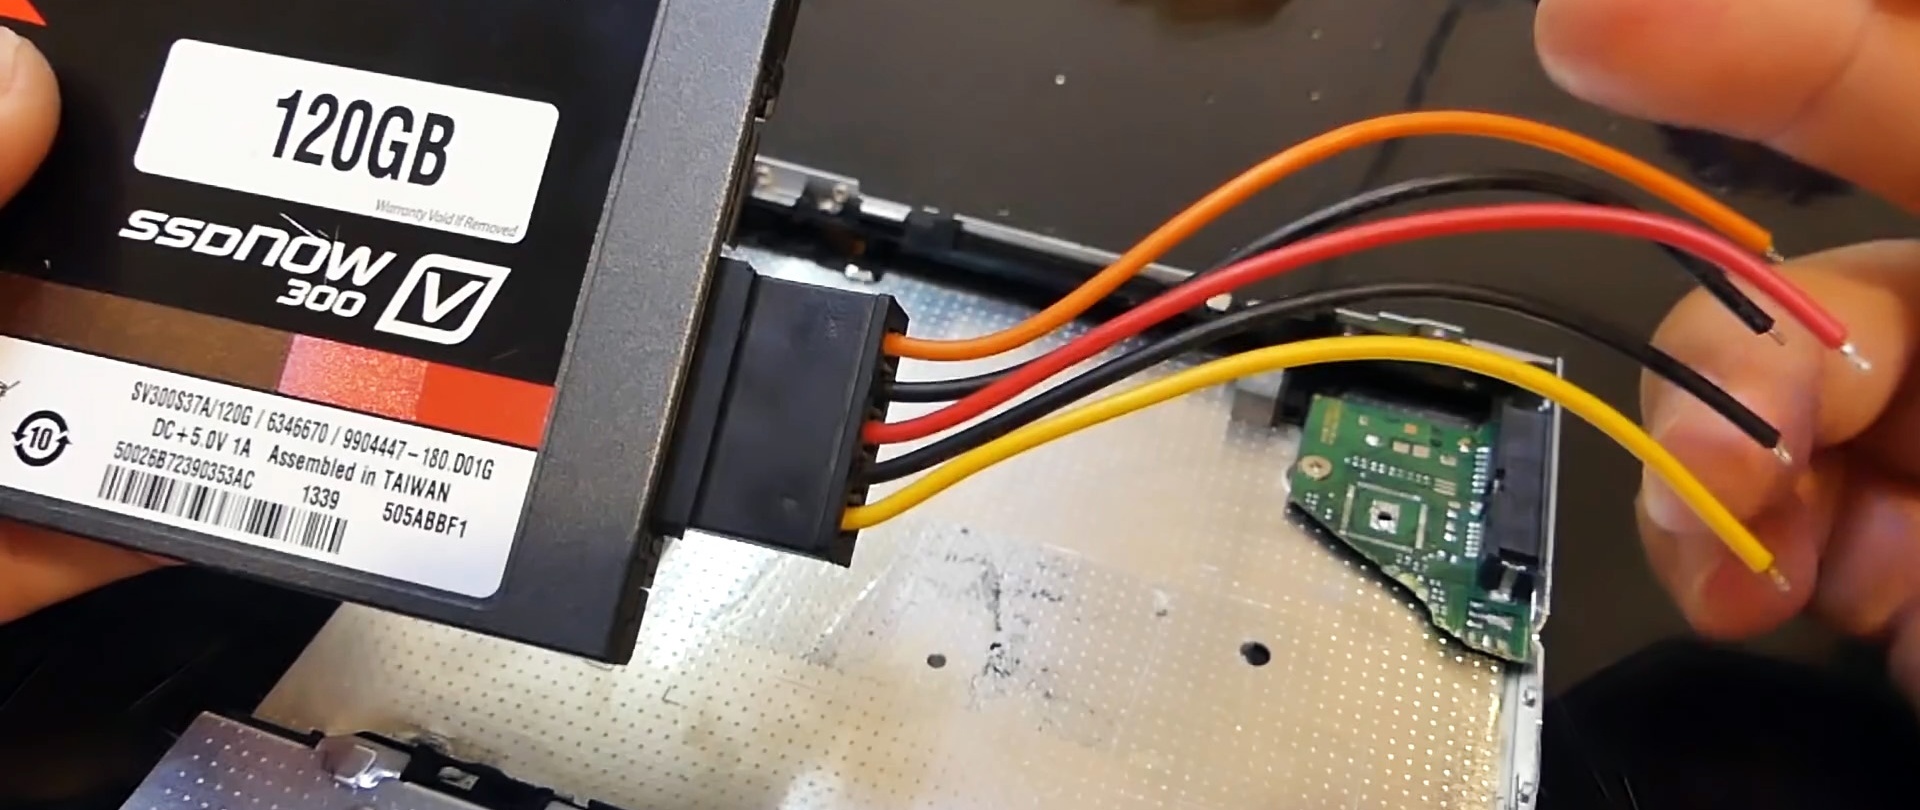
In the resulting cavity you need to place an SSD solid-state drive with a SATA power cable installed.

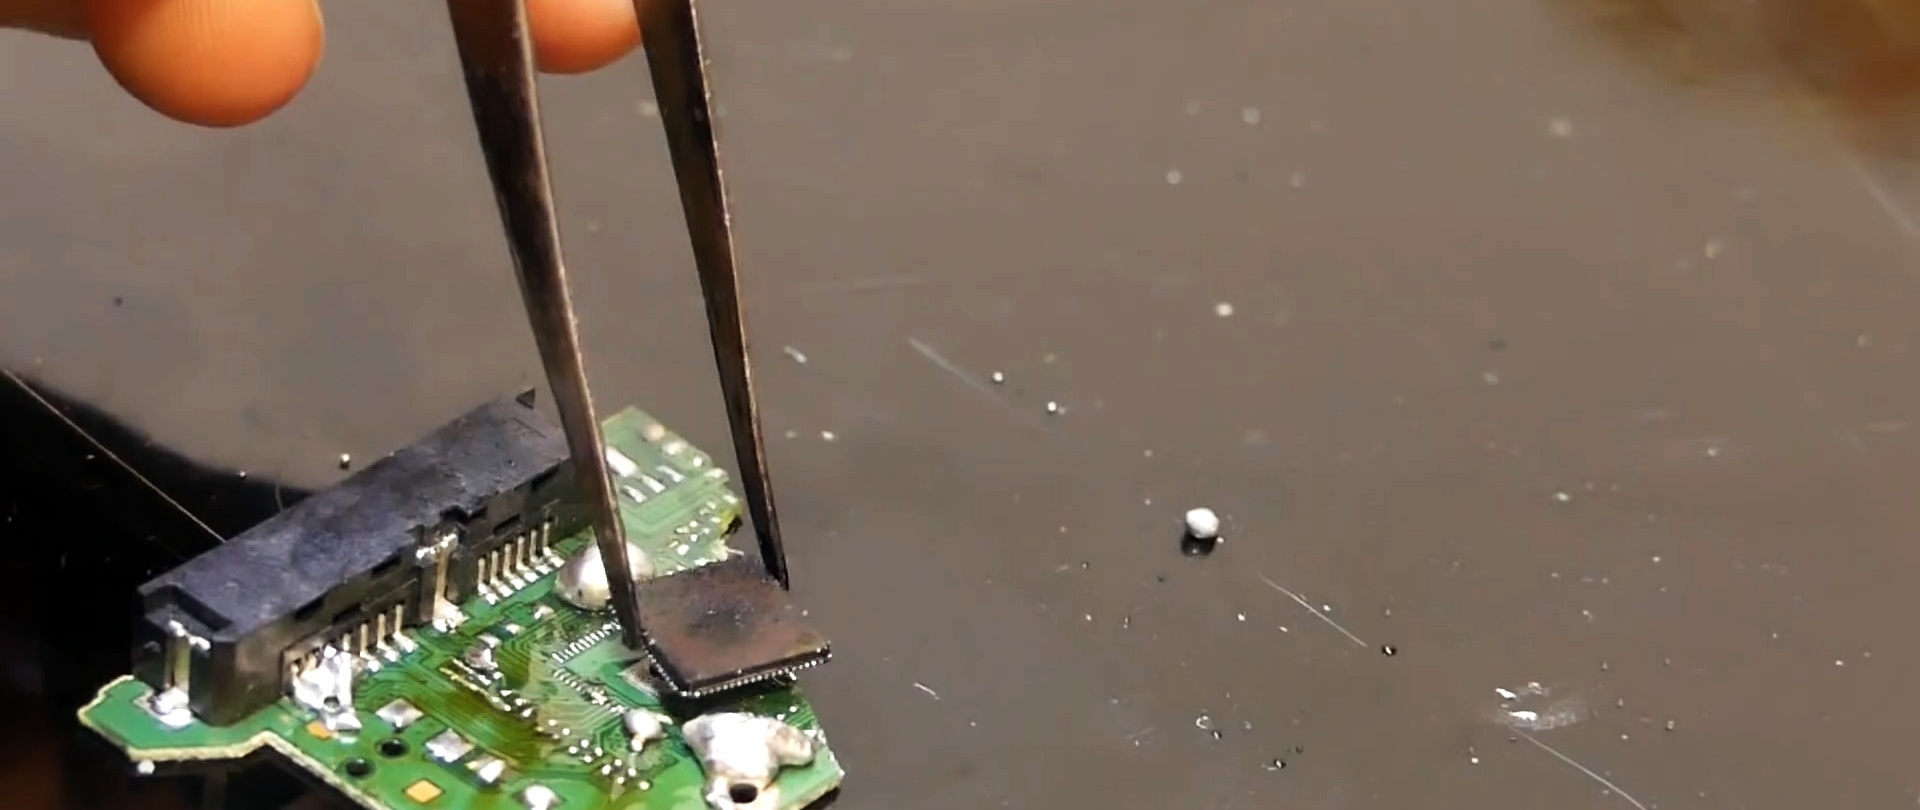
To make it fit, you will need to break off part of the circuit board.

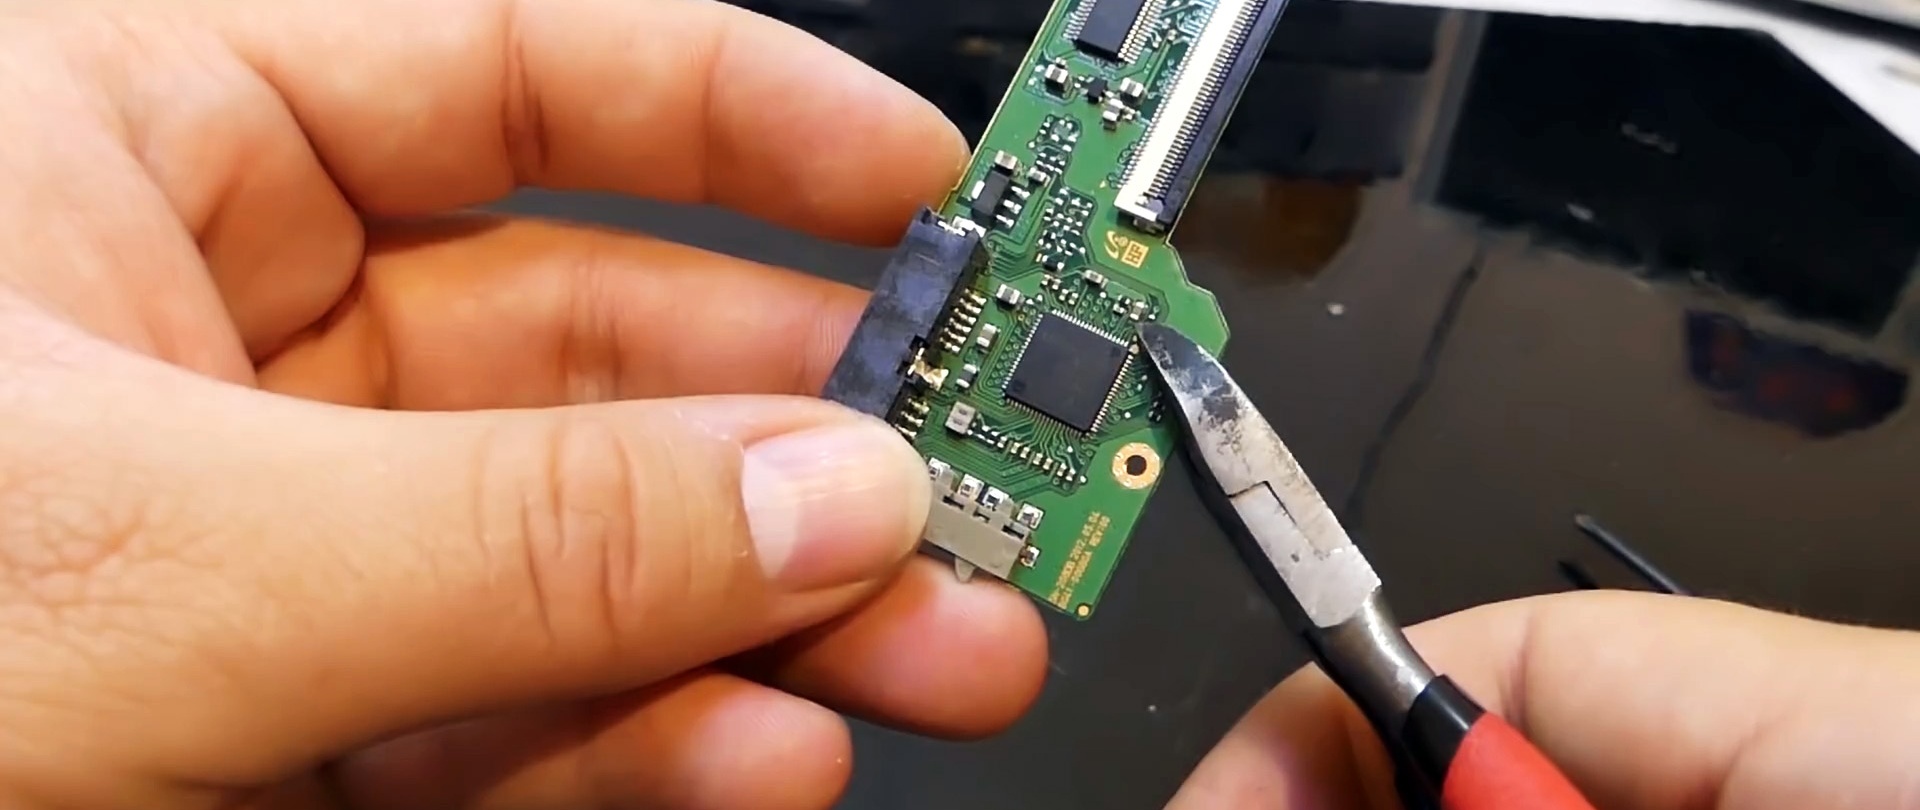
All that needs to be left is the connectors. All SMD components are desoldered.

Next you need to deal with powering the drive. To do this, remove all wires from the connector except red and black. Their ends are cleaned and tinned. Black, requires soldering to the first or second pin of the power connector on the left. The red wire is responsible for supplying 5V voltage, so it needs to be soldered to the fourth or fifth pin.

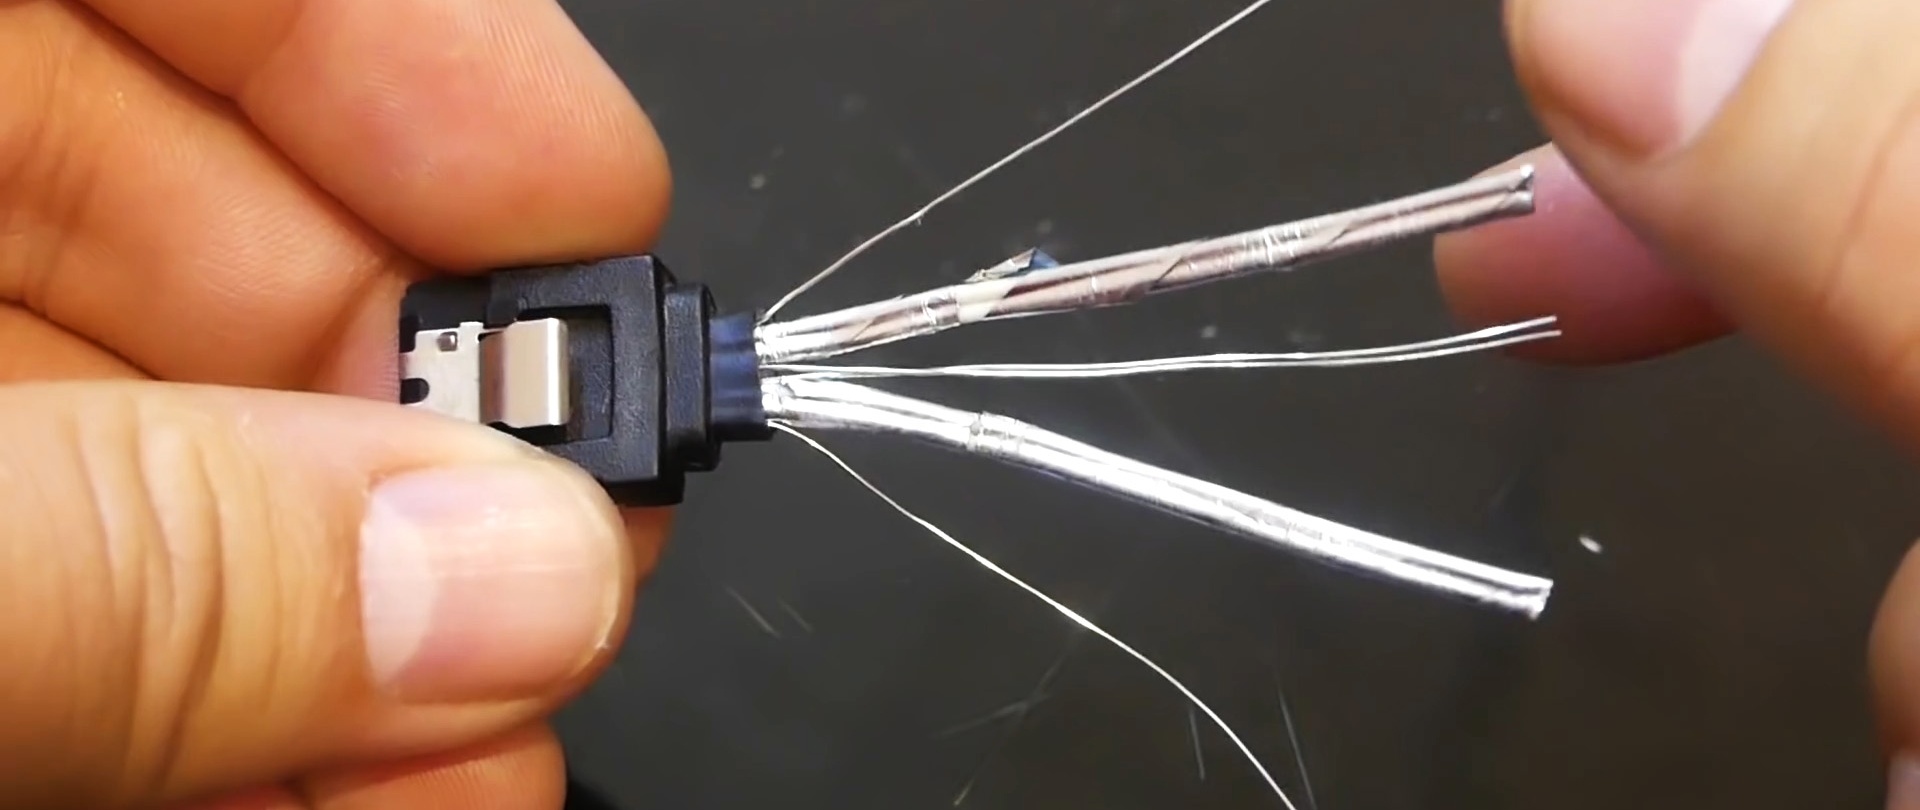
Now you need to solder the eSATA connector to the second connector. It needs to be cut off, leaving 5 cm from the cable, and stripped of its outer insulation. As a result, 4 single and 2 double wires will open. You can insert the connector into the connector and see how the wires are arranged. As a result, the first double needs to be soldered to legs 2 and 3, and the second to 5 and 6. Single wires can be connected together and soldered on the side.

The cables are connected to the drive. Insulation is placed under the exposed wires, and the drive housing is assembled. The front panel is removed from the previously dismantled part and glued onto the box.


Next, everything is connected with the same wires as the drive. The laptop is being put back together. After turning it on, a new drive will appear that you can use.


You don't have to modify anything, just replace the drive and use it.
Watch the video
How to update an old music center by adding Bluetooth and a USB player - https://enn.washerhouse.com/7623-kak-pereoborudovat-staryj-muzykalnyj-centr.html