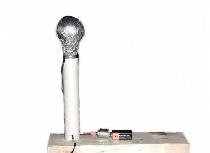
One of the interesting high-voltage devices is the Van de Graaff generator, a device that creates a high potential difference due to the electrification of a dielectric tape moving along two rollers. The maximum voltage varies depending on the scale of the device, and can range from a few tens of kilovolts for small benchtop generators to millions of volts for large devices that can be used for scientific and demonstration purposes. With the help of a Van de Graaff generator, it is possible to carry out many spectacular experiments, for example, observing how small confetti flies upward from the influence of electrical forces or a person’s hair stands up “on end” if a person’s body is connected in a certain way to a spark gap. To assemble the generator you will not need any specific parts - everything can either be found at home or purchased at the nearest hardware stores. The general circuit of the generator is shown below.

Making a Van de Graaff Generator with your own hands
Structurally, the generator is a pipe with a dielectric tape rotating inside it. Two rollers, at the top and bottom of the pipe, provide the necessary tension of the tape; the bottom roller is also a drive and is connected to the motor shaft, which will spin the tape. A massive metal sphere is fixed in the upper part of the pipe, which will serve as a charge accumulator. The shape of a sphere is best suited for this purpose, because it does not have any sharp protrusions, and therefore the charge will accumulate most efficiently: sharp protrusions can lead to the occurrence of a corona discharge through which the accumulated charge flows. To make a simple home generator, you can use a large pan as a sphere, installing it upside down; a hemostatic tourniquet from a pharmacy is ideal as a tape; rollers can be cut, for example, from wood, polystyrene foam, or you can disassemble a paint roller. A sewer pipe with a diameter of 10-11 cm is perfect as a housing pipe. The belt can be driven using a screwdriver if it has high speeds, or using various fairly powerful motors from toys or radio-controlled models. Assembly begins with finding suitable components.
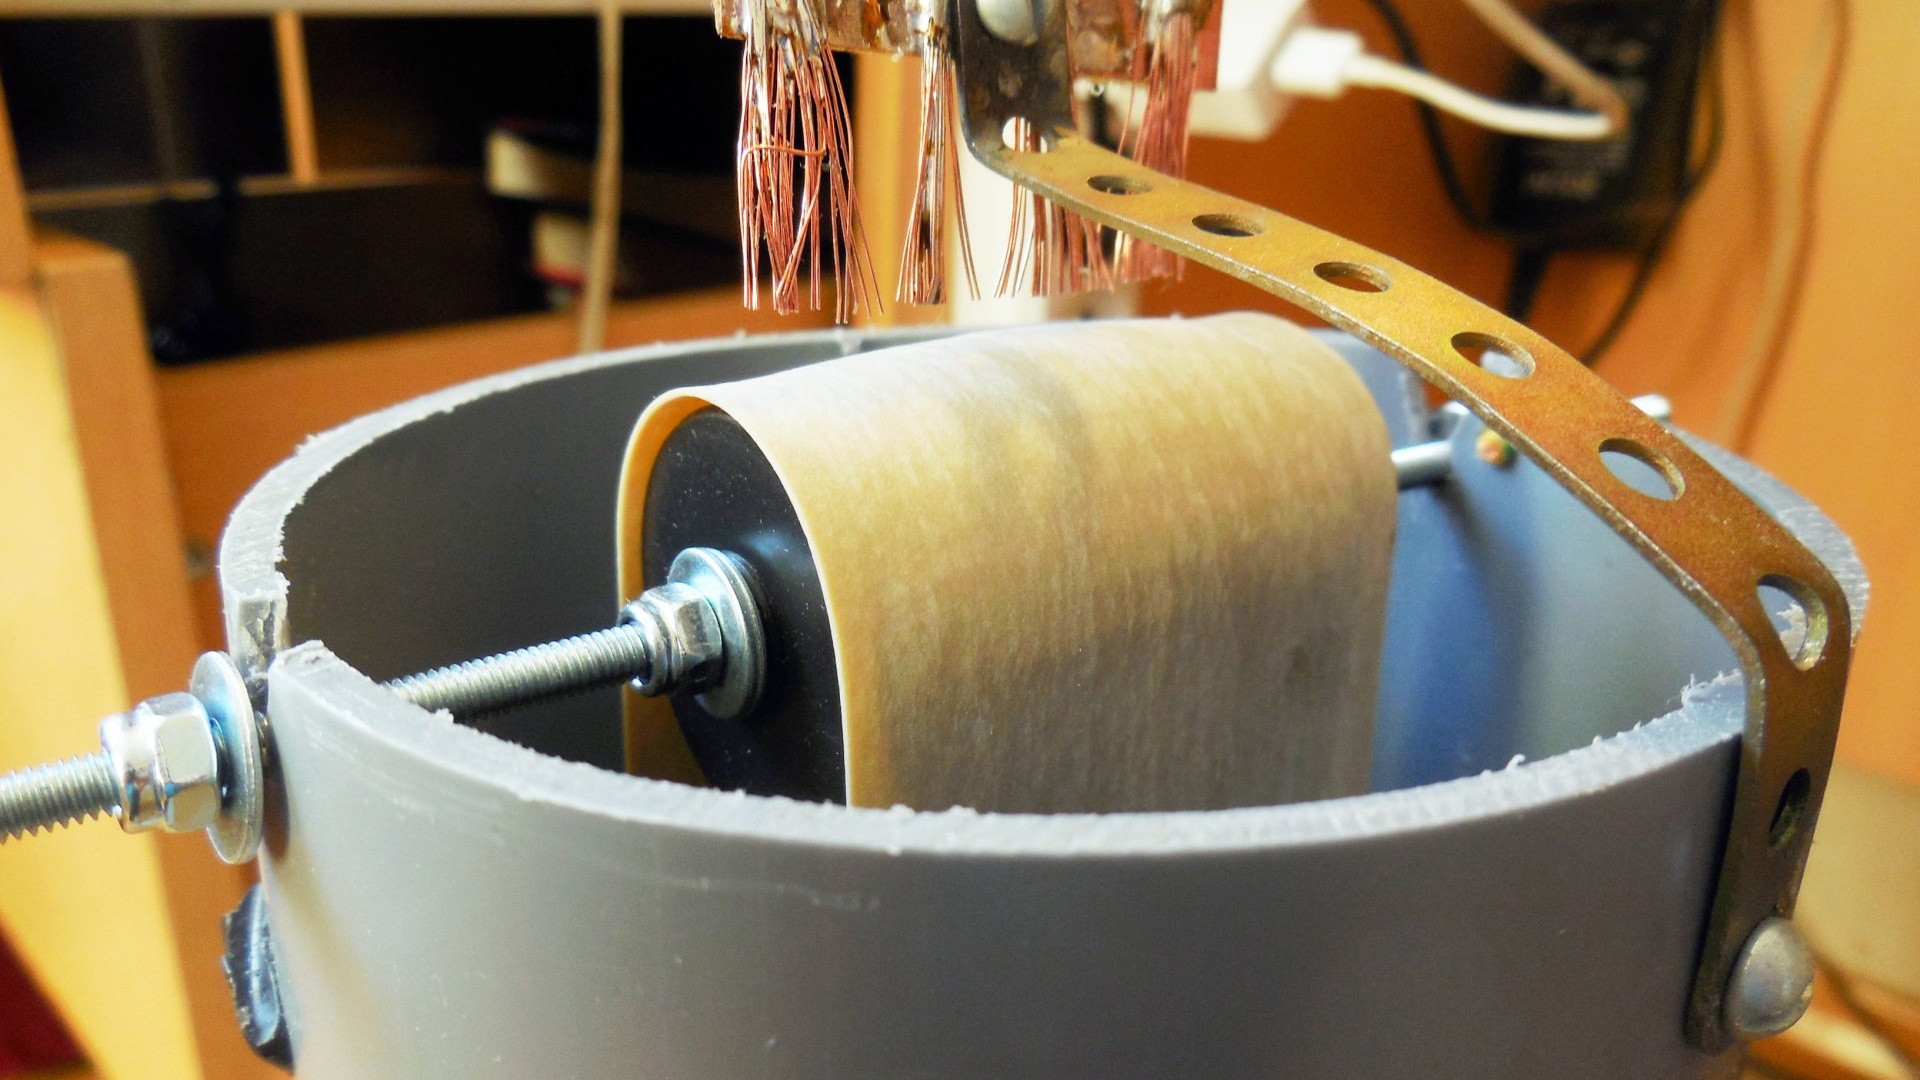
When using a sewer pipe with a diameter of 11 cm, the optimal height of the structure will be about 1 meter. The entire structure will be installed on a stand made from scrap boards.


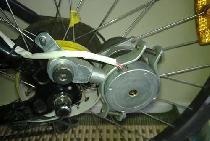
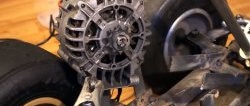
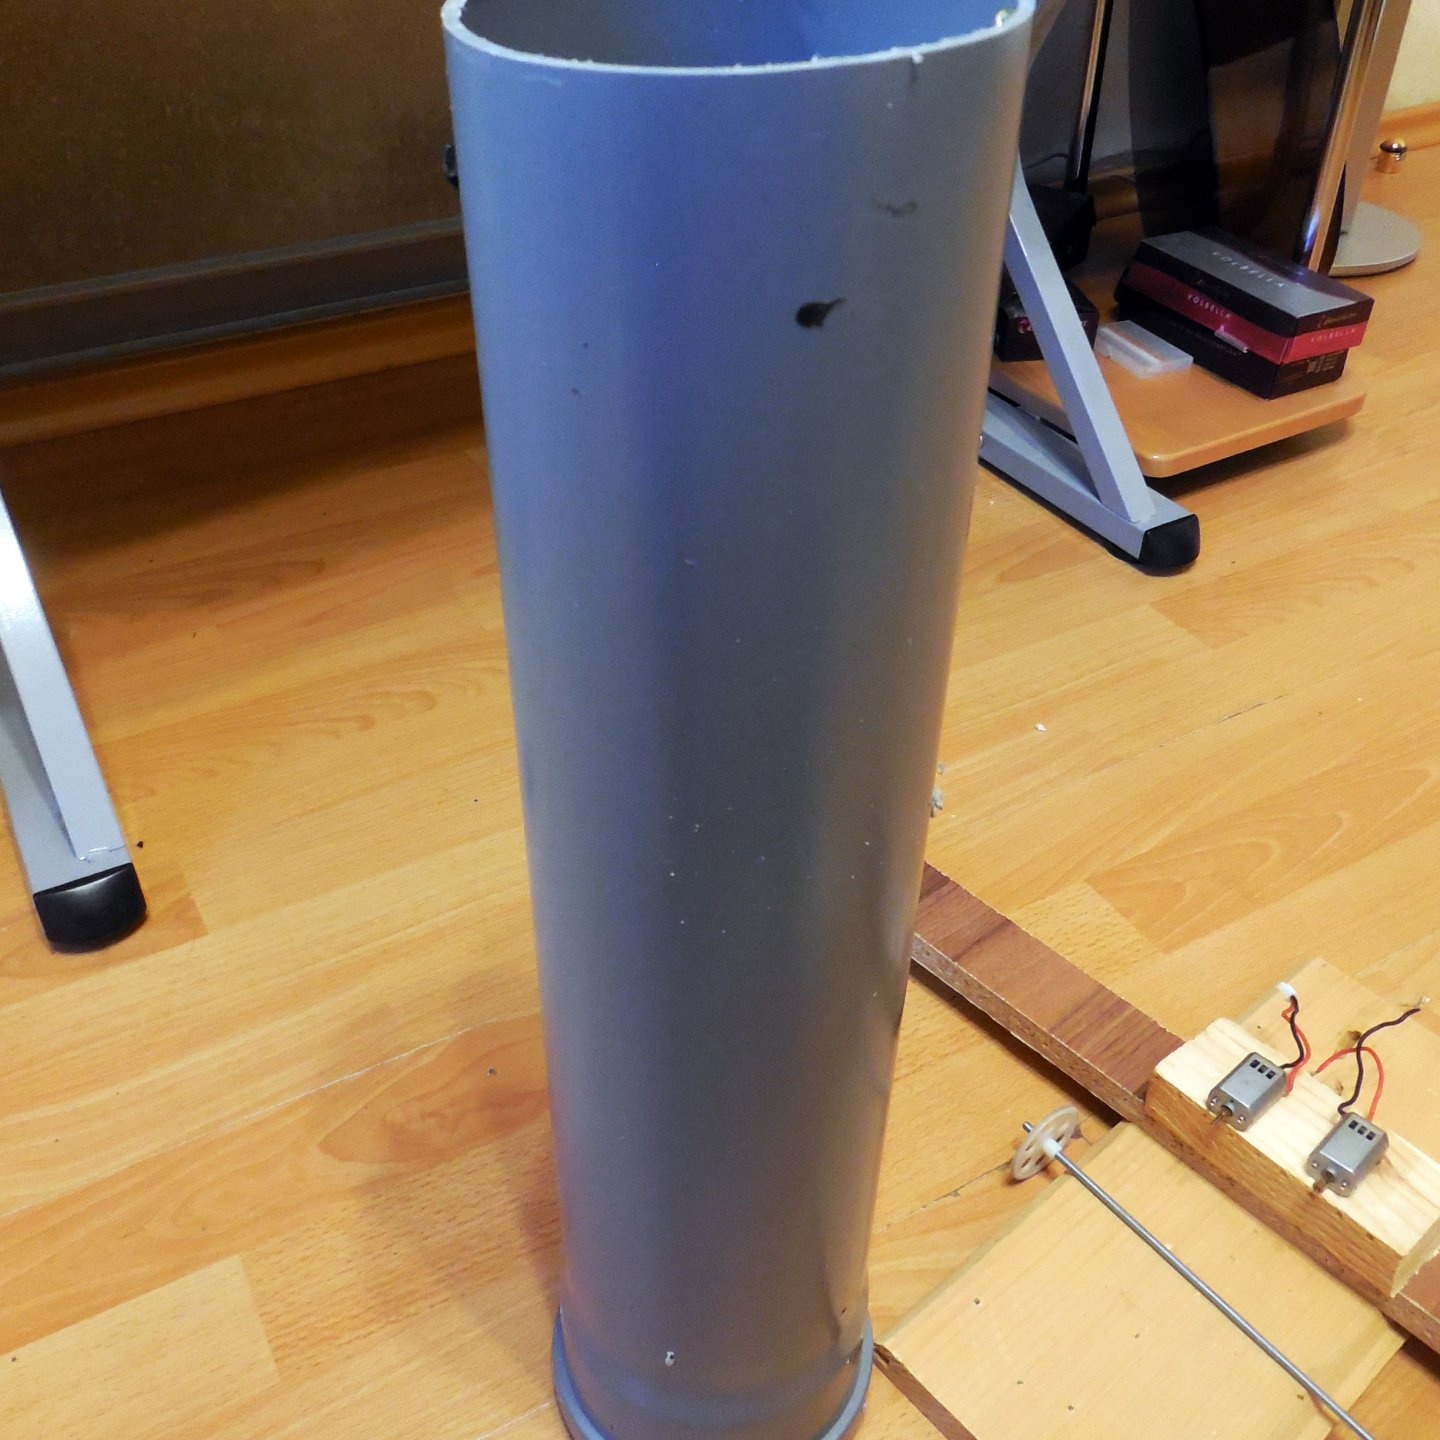
As a motor for rotating the belt, I use a drive unit from a radio-controlled helicopter, which is a pair of motors that jointly rotate a large gear, thereby forming a gearbox that lowers the speed to the desired level and increases torque. The driven gear is attached to an M4 pin, which passes through the entire pipe at the bottom; in the future, a shaft with a roller will be attached to it. As practice has shown, one helicopter motor is enough - despite their large size, such motors have decent power and easily spin the entire tape inside the housing.

The motors are pressed from above with a metal strip, and the alignment of all gears is pre-established. It is preferable to use battery power sources that are not connected to the network in any way, even through transformer galvanic isolation, to power the engine in a Van de Graaff generator.


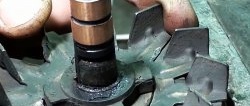
The pictures above show the bottom roller. They managed to carve it out of two pieces of penoplex insulation, giving it a barrel shape. Please note that the shape should be barrel-shaped, with a slight smooth thickening in the middle - if the shaft is completely smooth, the tape will jump off every now and then. The material of the rollers plays a significant role in the construction of the generator - the bottom should be metal, and the top should be plastic. In this case, it is not necessary to make the lower shaft all-metal; it is enough to cover it on top with conductive foil; this foil must also be electrically connected to the shaft on which the roller sits.
I took the top roller ready-made from a paint roller; it fits perfectly in shape and size.The roller, similar to the bottom one, is installed on an M4 pin, which is installed in grooves on the upper part of the pipe, which can be seen in the photo below.

A hemostatic tourniquet is sold in almost every pharmacy; it has the necessary properties for transferring a charge, and is also quite elastic. The purchased tourniquet should be washed from talc, dried, and then cut to the required length with a small margin. In order to turn the tape of the harness into a closed circle, the ends can simply be glued together with superglue with an overlap of 2-3 cm; the strength of such a connection turned out to be more than enough.


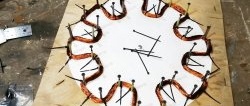
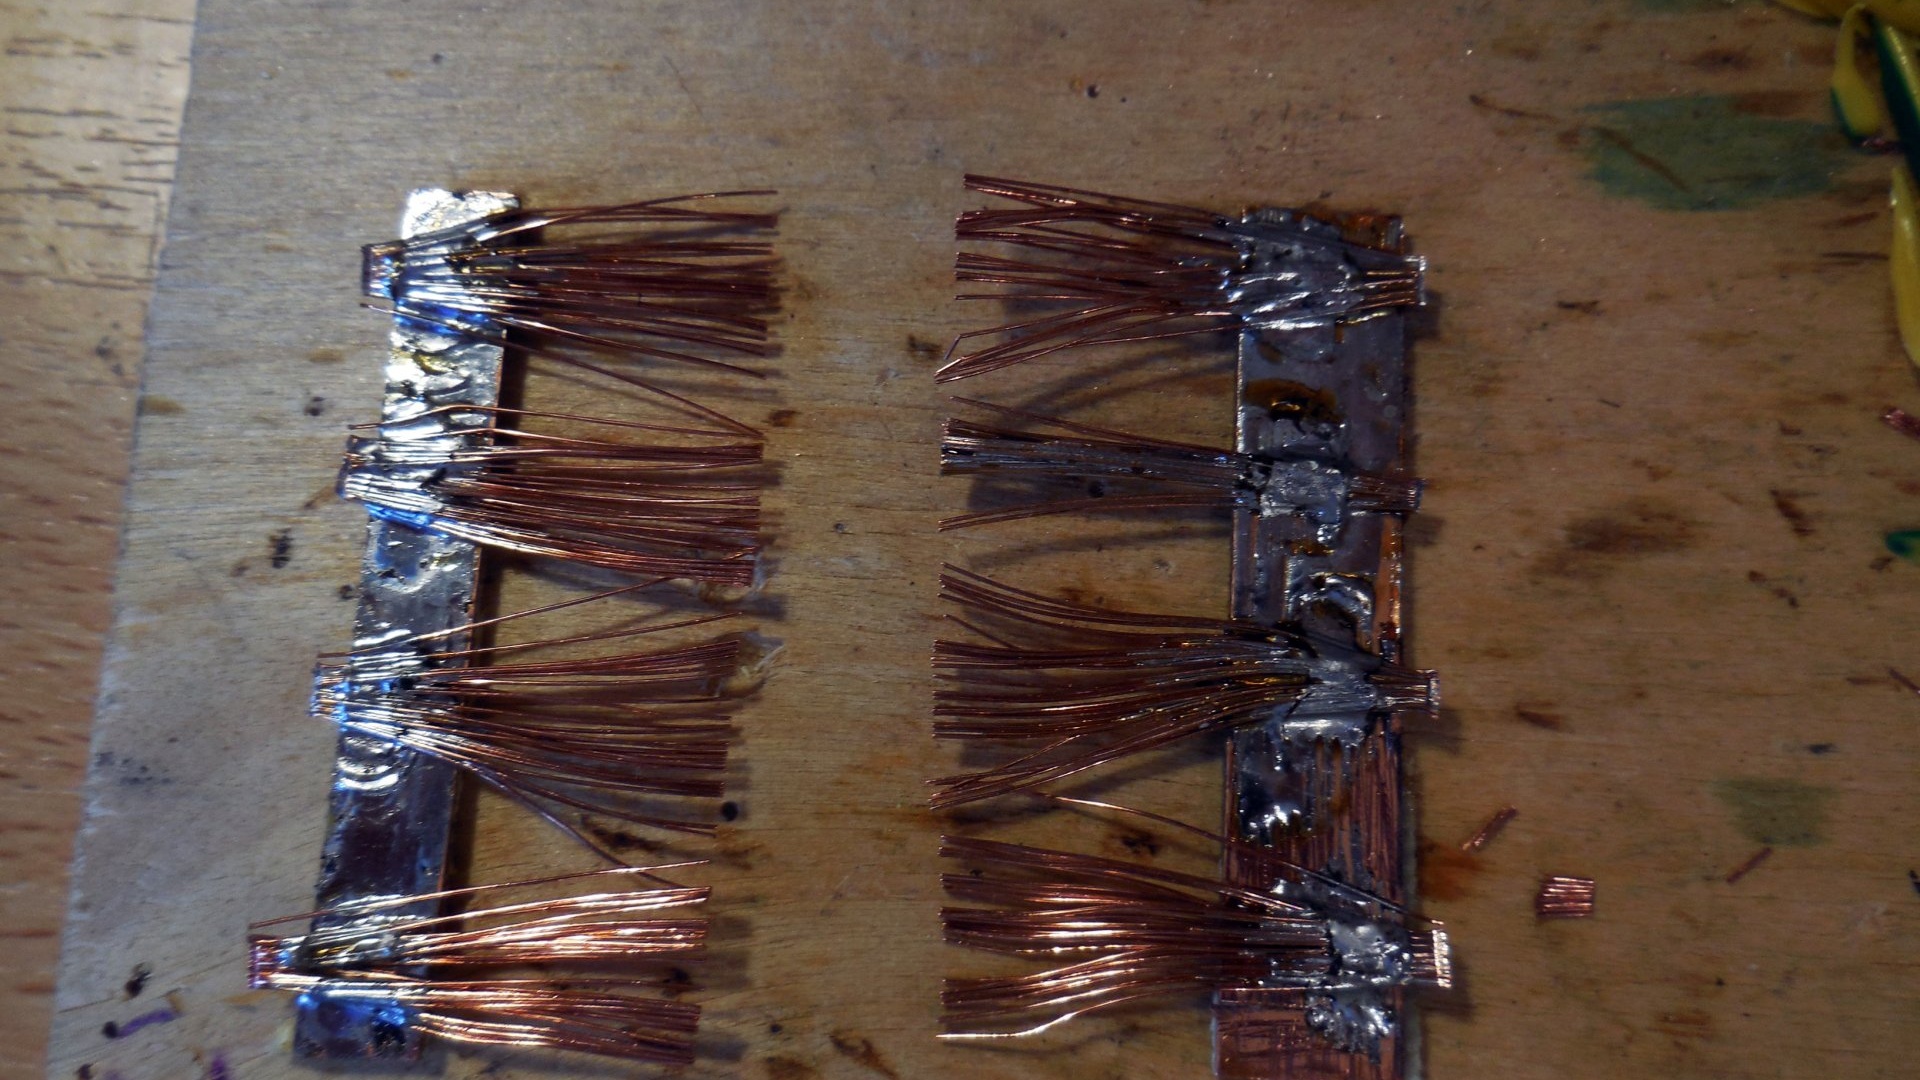
The next part of the generator is the brushes, through which the charge will be “applied” to the tape and “drain” from it into the upper metal sphere. I recommend making the brushes from a piece of multi-core cable, which is exposed from the insulation, fluffed up and soldered onto textolite plates. You should make two such brushes, one for the lower roller and one for the upper one. The bottom brush will connect to the bottom roller and be connected to ground, and the top brush will be connected to the metal sphere. The photo below shows the finished brushes.
The brushes are installed directly next to the rollers at the top and bottom; the distance from the tape to the ends of the brushes should be as small as possible, but the tape should not touch them. Below you can see the installed brushes at the top and bottom, respectively.


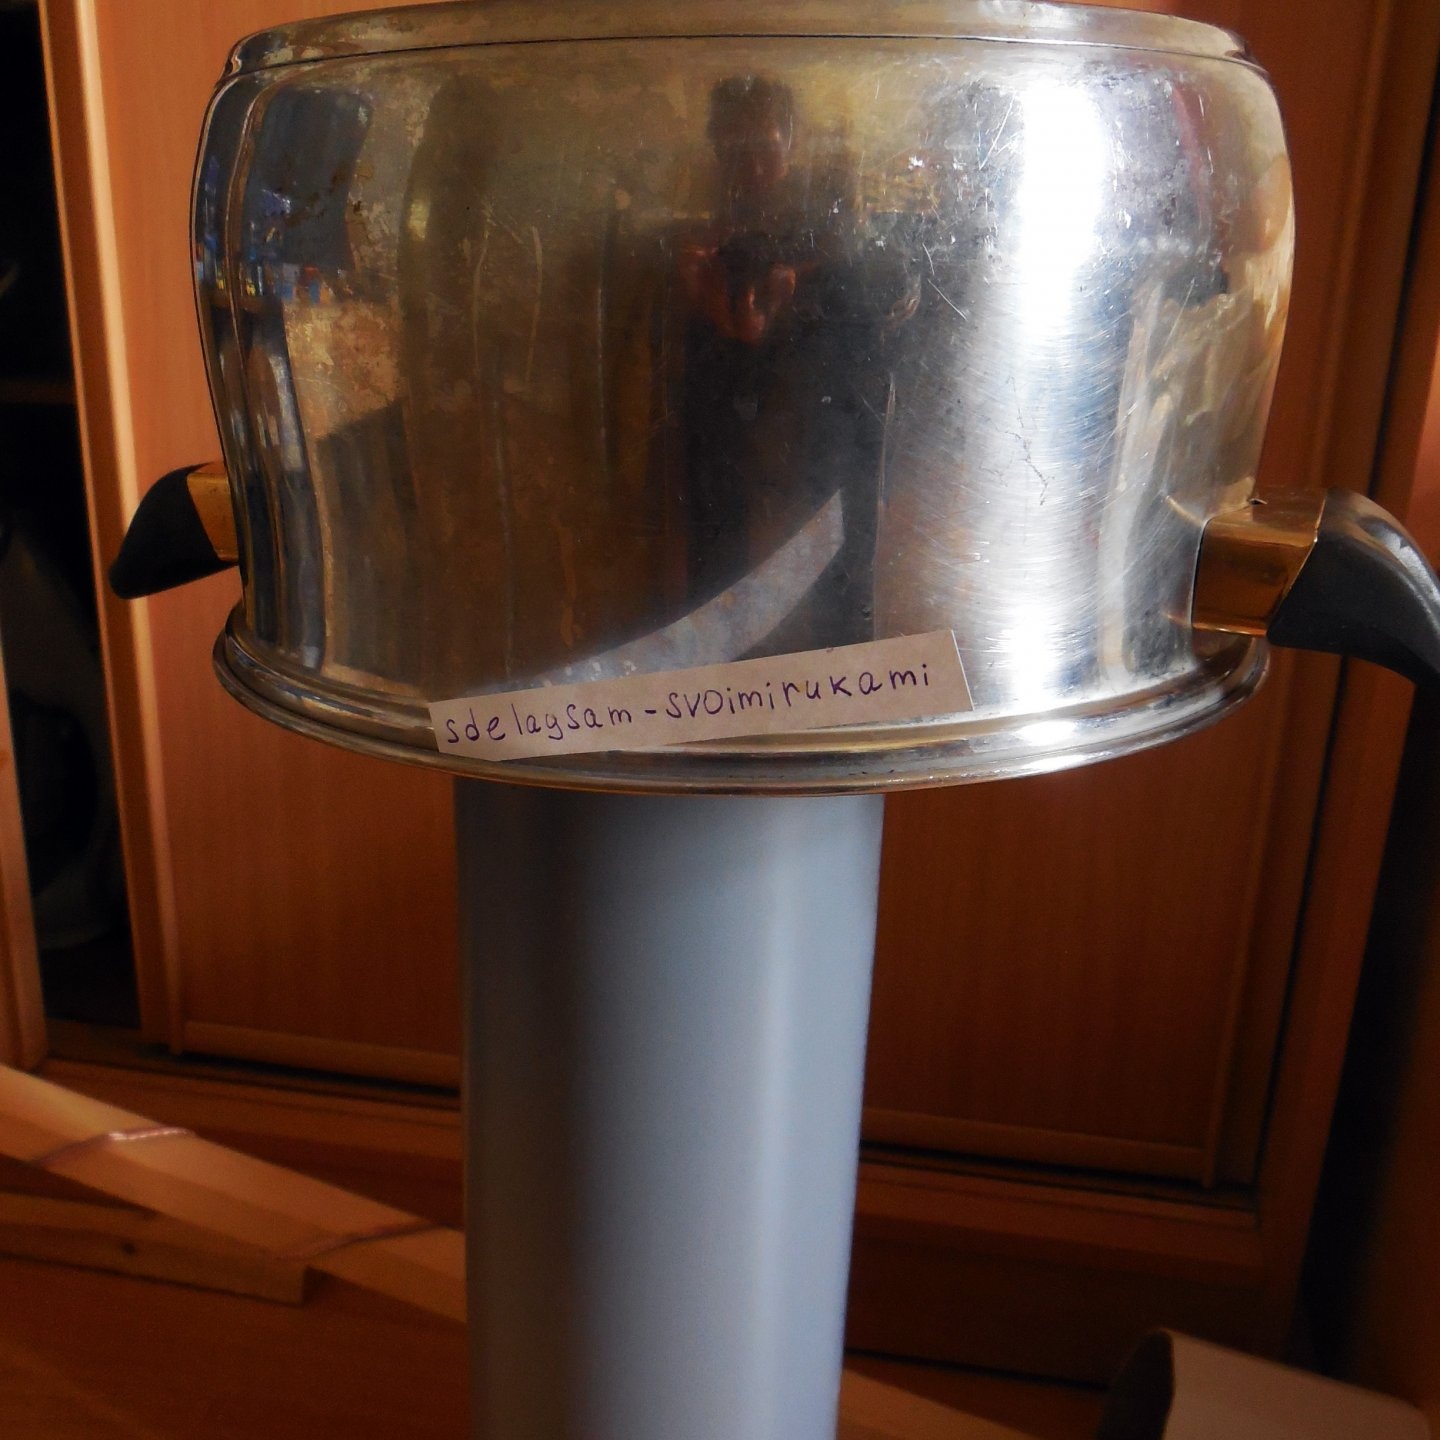
Now all that remains is to make the supports on which the upper sphere will stand - in my case, a more accessible analogue was found for it in the form of an inverted pan. A piece of wire protruding above the level of the supports is connected to the brush; it will ensure its contact with the sphere.

In the lower part of the structure, using the same piece of wire, contact between the shaft, roller and slot is ensured with grounding.Please note that a good grounding is required for the generator to operate.

The sphere is installed last, and the generator is now ready to start. When turned on, a potential difference will occur between the ground (lower roller) and the upper sphere. It will increase until an electrical breakdown occurs in the air or pipe, or until the rate of charge growth exceeds the rate of its “draining” from the sphere due to corona discharges. The efficiency of the generator strongly depends on air humidity - the more humid the air, the more losses due to corona discharge, and accordingly, the lower voltage can be achieved. You can increase the rate of charge build-up by increasing the speed of rotation of the belt, while the maximum voltage of the generator will also increase. In order to discharge the sphere, you should bring a grounded metal object closer to it. If this object has sharp edges, the charge will flow smoothly in the form of a corona discharge, which can only be seen in complete darkness. If the object has smooth lines, then when it approaches a certain distance to the sphere, an electrical breakdown of the air will occur with a rather loud sound and flash. When experimenting with the generator, you should be careful, despite the fact that it has extremely low power, voltage pulses of hundreds of kilovolts can cause harm to health.