When carrying out various plumbing, repair and other work, it is often necessary to bend strips of metal into the shape of an arc or circle. This is quite difficult to do without the use of special machines. This article describes how at home you can create a simple but very effective manually operated mechanism for such purposes.

Tools and materials used:
- - steel rod with a diameter of 12 mm;
- - a set of knobs (holders) for dies or a die holder;
- - standard M12 nuts and washers;
- - self-clamping nuts M12;
- - washers with a large M12 internal hole;
- - vice;
- - 2 pieces of square profile pipe (30*30mm) about 15-20 cm long;
- - 6 bearings with an inner ring diameter of M12 or M14;
- - welding machine;
- - file;
- - set of wrenches;
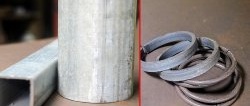
- - steel circle (rod) with a diameter of 12 mm - 2 pieces of 20 cm each; 12 mm – 5 pieces of 10 cm; 50 mm -1 piece about 40 mm long (it should have the same length as 3 bearings folded together);
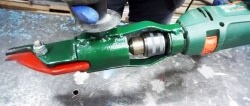
- - Bulgarian;
- - a pin or long bolt (M12) with a thread of at least 20 cm in length;
- - drill and set of drills (drilling machine);
- - square metal blank with a thickness of 10 mm and dimensions of 30 by 25 mm (plate), etc.
Making a homemade machine

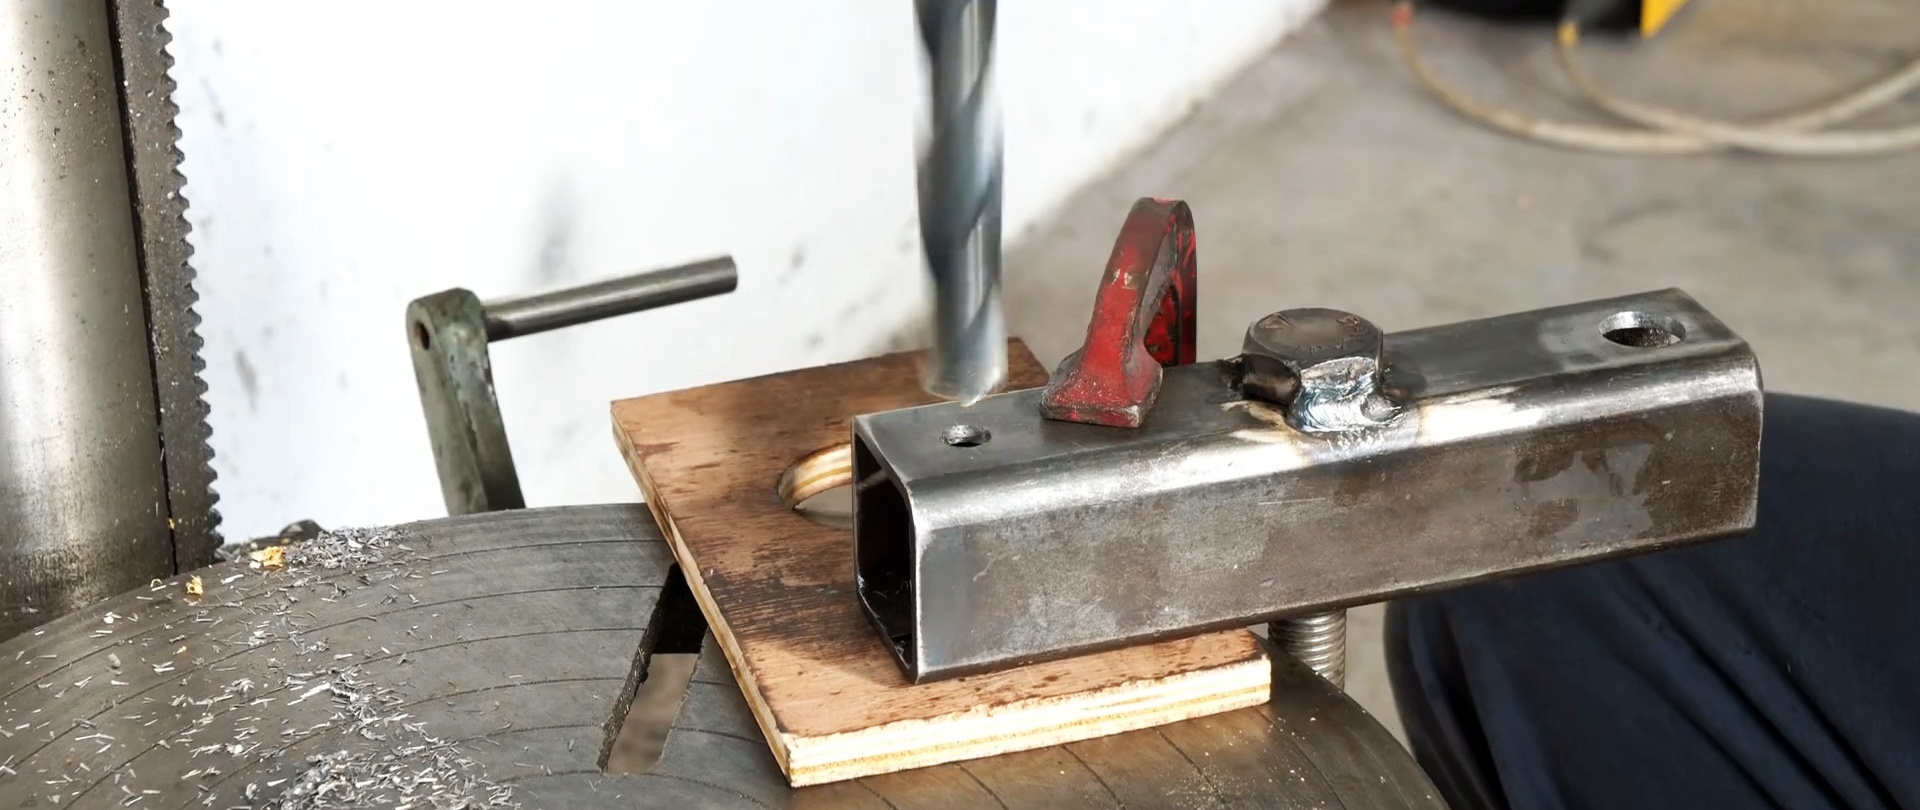
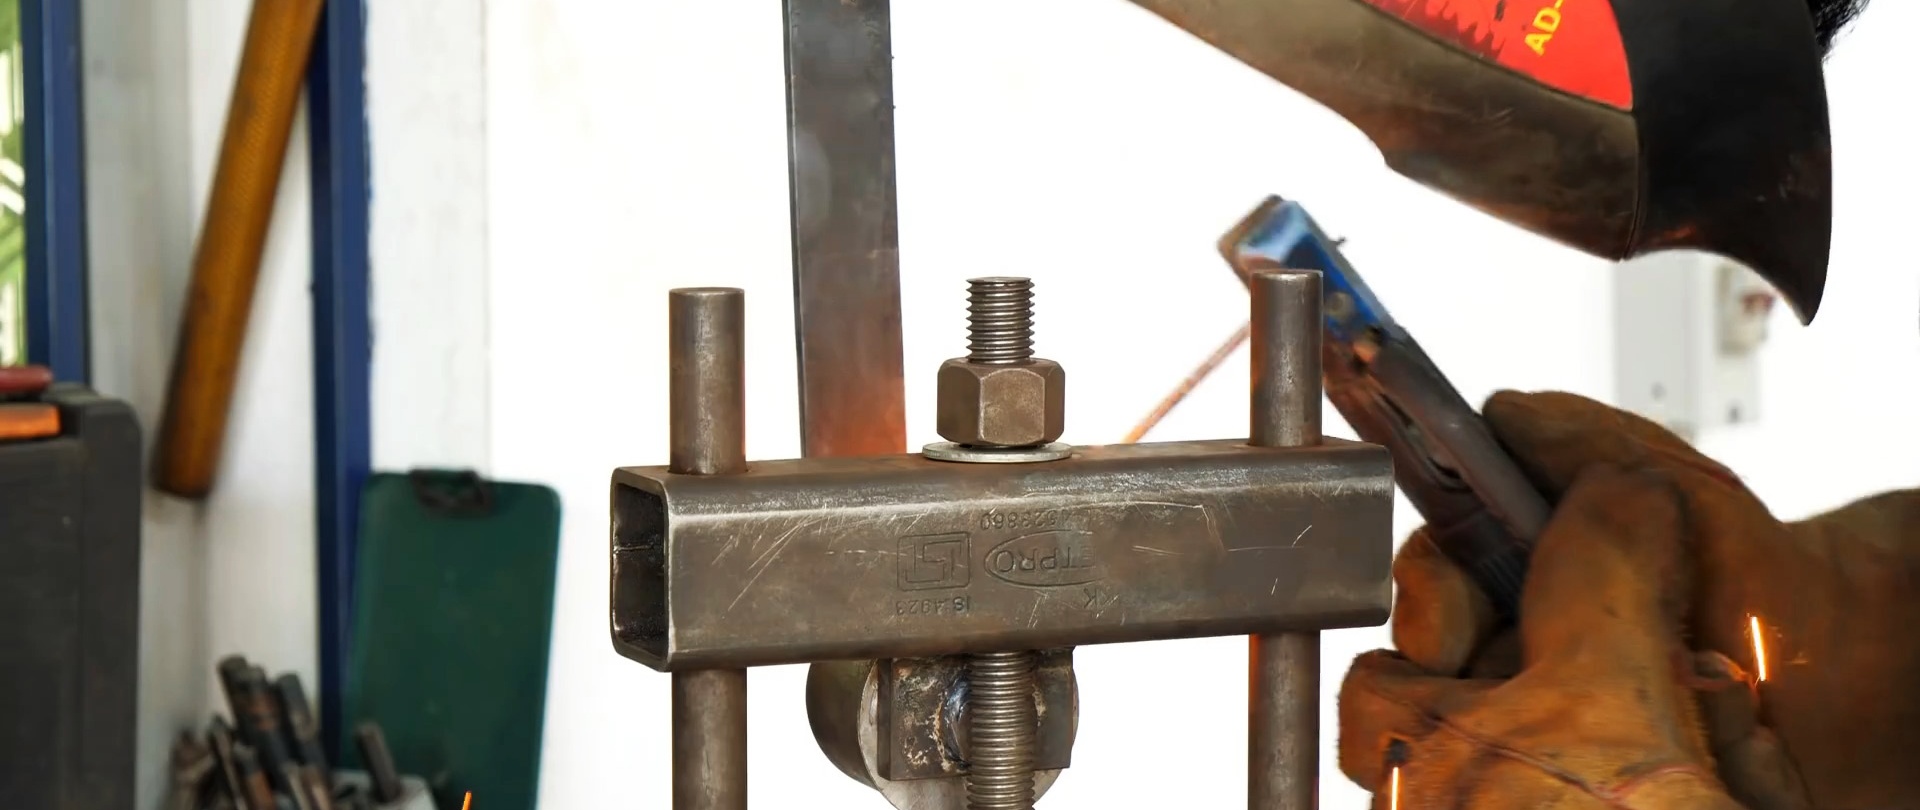
First, you will need to drill a hole with a diameter of 12 mm in the first piece of profile square pipe and insert into it a pin or a long bolt (M12) with a thread 20 cm long, on which you will need to weld the bolt head.

After this, you need to make symmetrical 2 holes similar to the central one (in the same plane) in the profile pipe at the edges with an indentation of 1 cm from the edge of the workpiece.
Next, 2 pieces of a steel circle (rod) with a length of 20 cm are welded in a similar way along the edges of the workpiece.

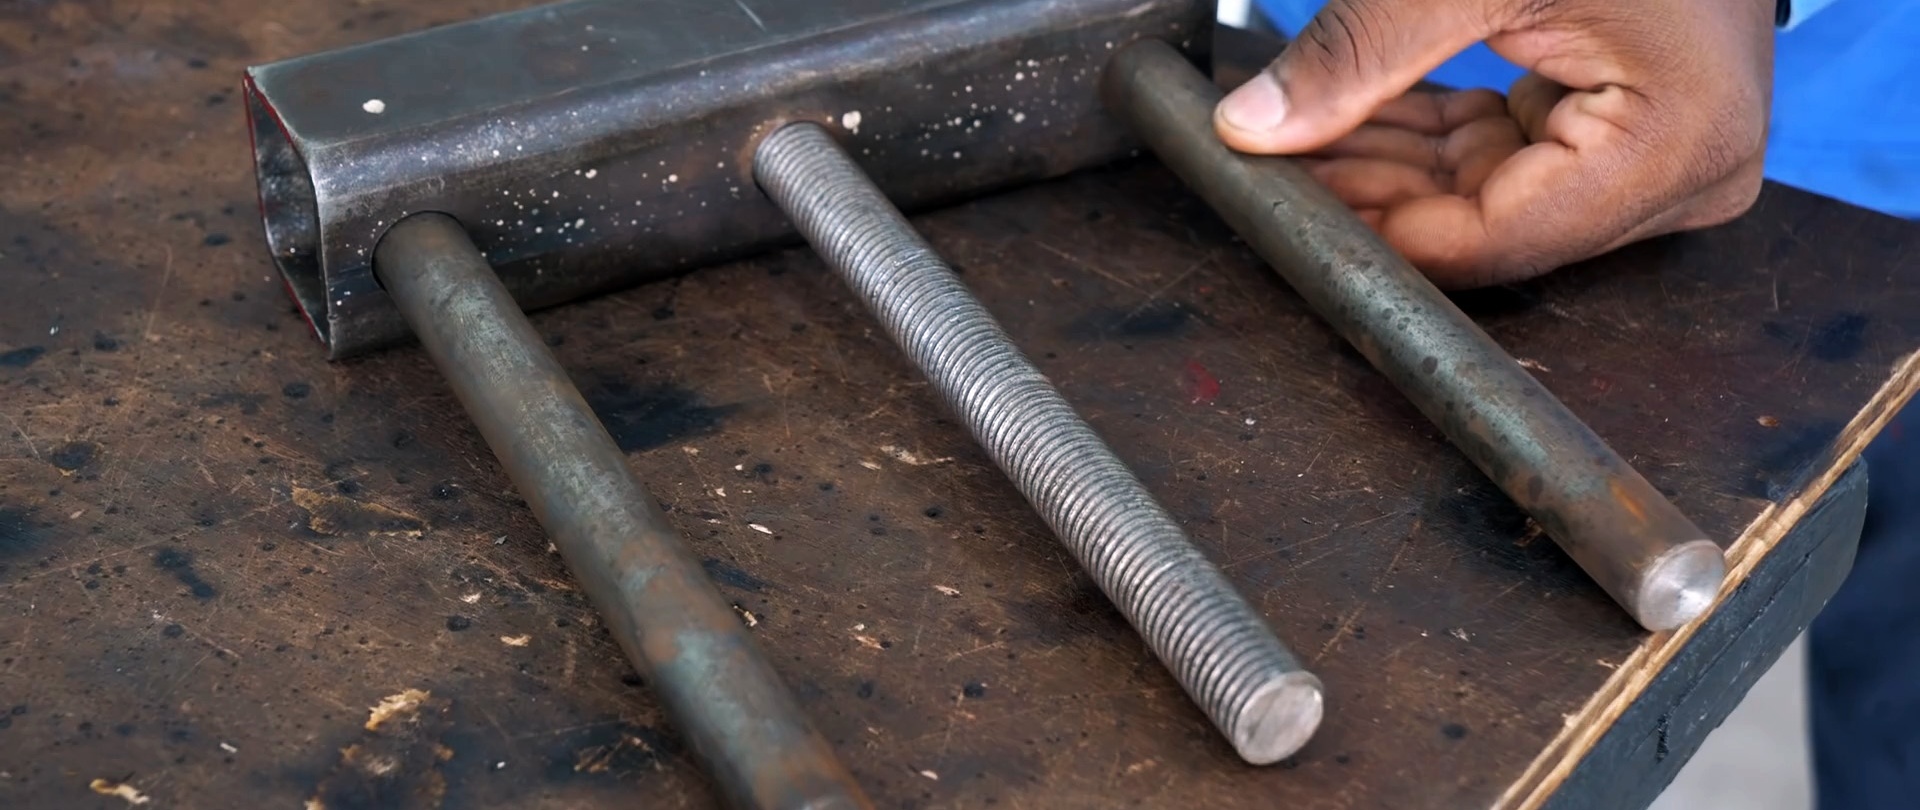
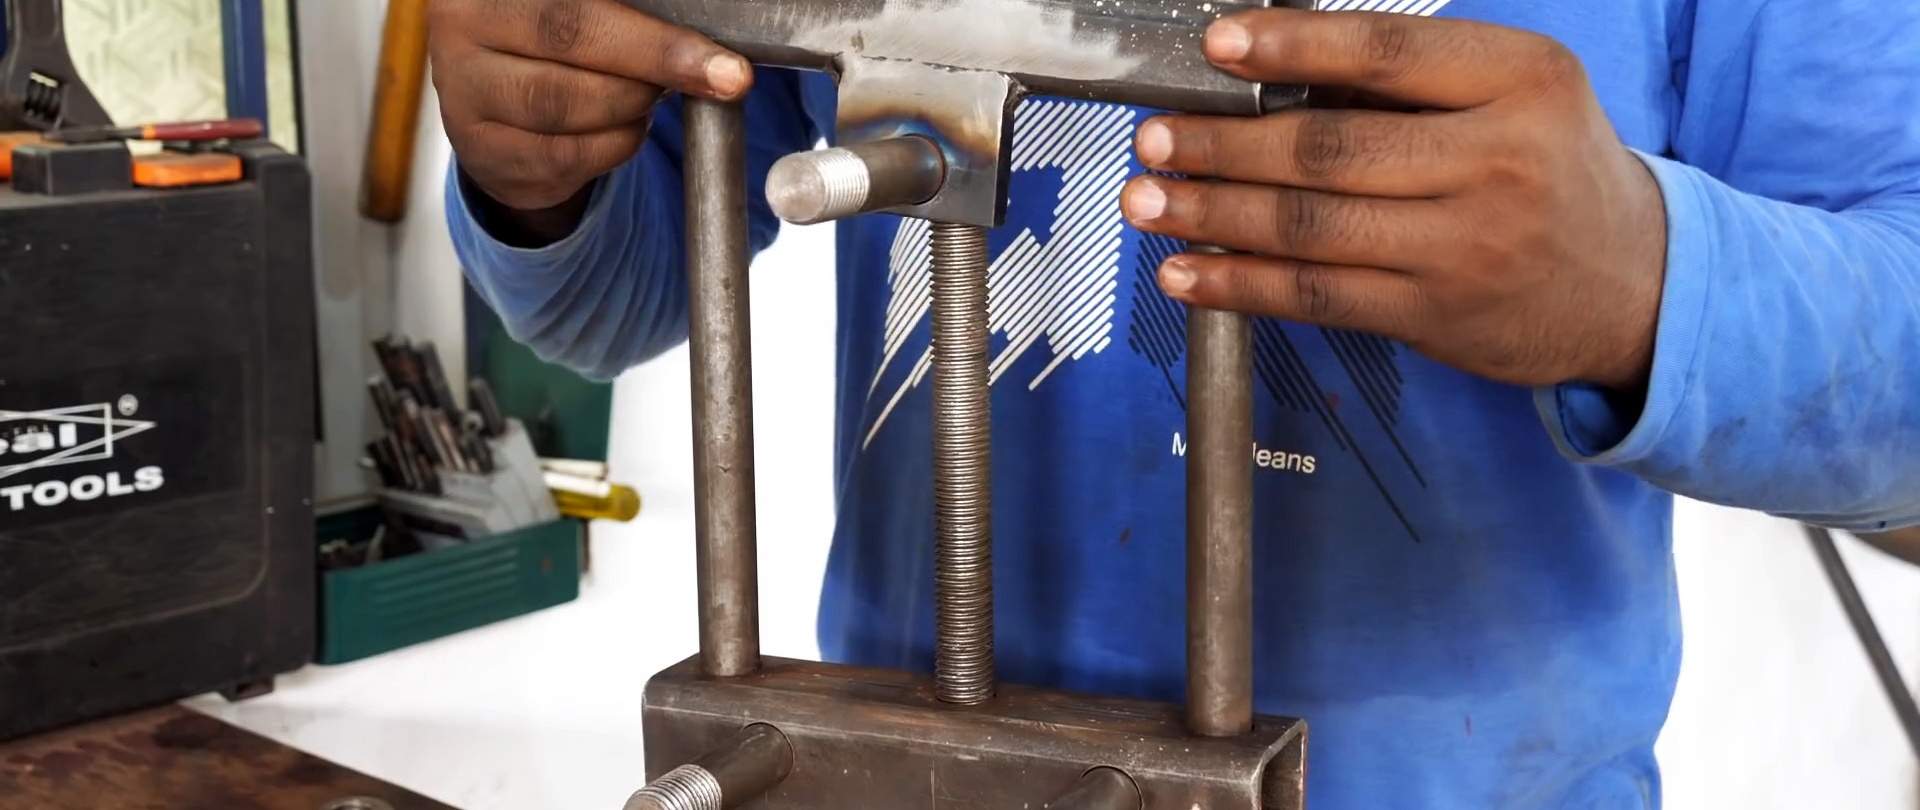
The result is a part consisting of: a profile pipe and 3 long “pins” of the same length, located in the same plane. Then you will need to drill 2 holes (in a different plane!) in the profile pipe, stepping back 1 cm from the edge of the previously made holes.
On 2 pieces of a steel circle (rod) with a diameter of M12, using a die holder, an M12 thread about 2 cm long is cut. Next, 2 of these rods are inserted into the previously made holes on the workpiece and welded. The result is a solid welded part in the shape of the letter “L” (3 pins “stick out” on one side, and 2 on the other).


At the second stage, similar 3 through holes with a diameter of 12 cm are made in the second piece of square profile pipe.

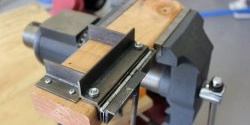
Next is a square metal blank (plate), in which a hole with a diameter of 12 mm is drilled in the center.

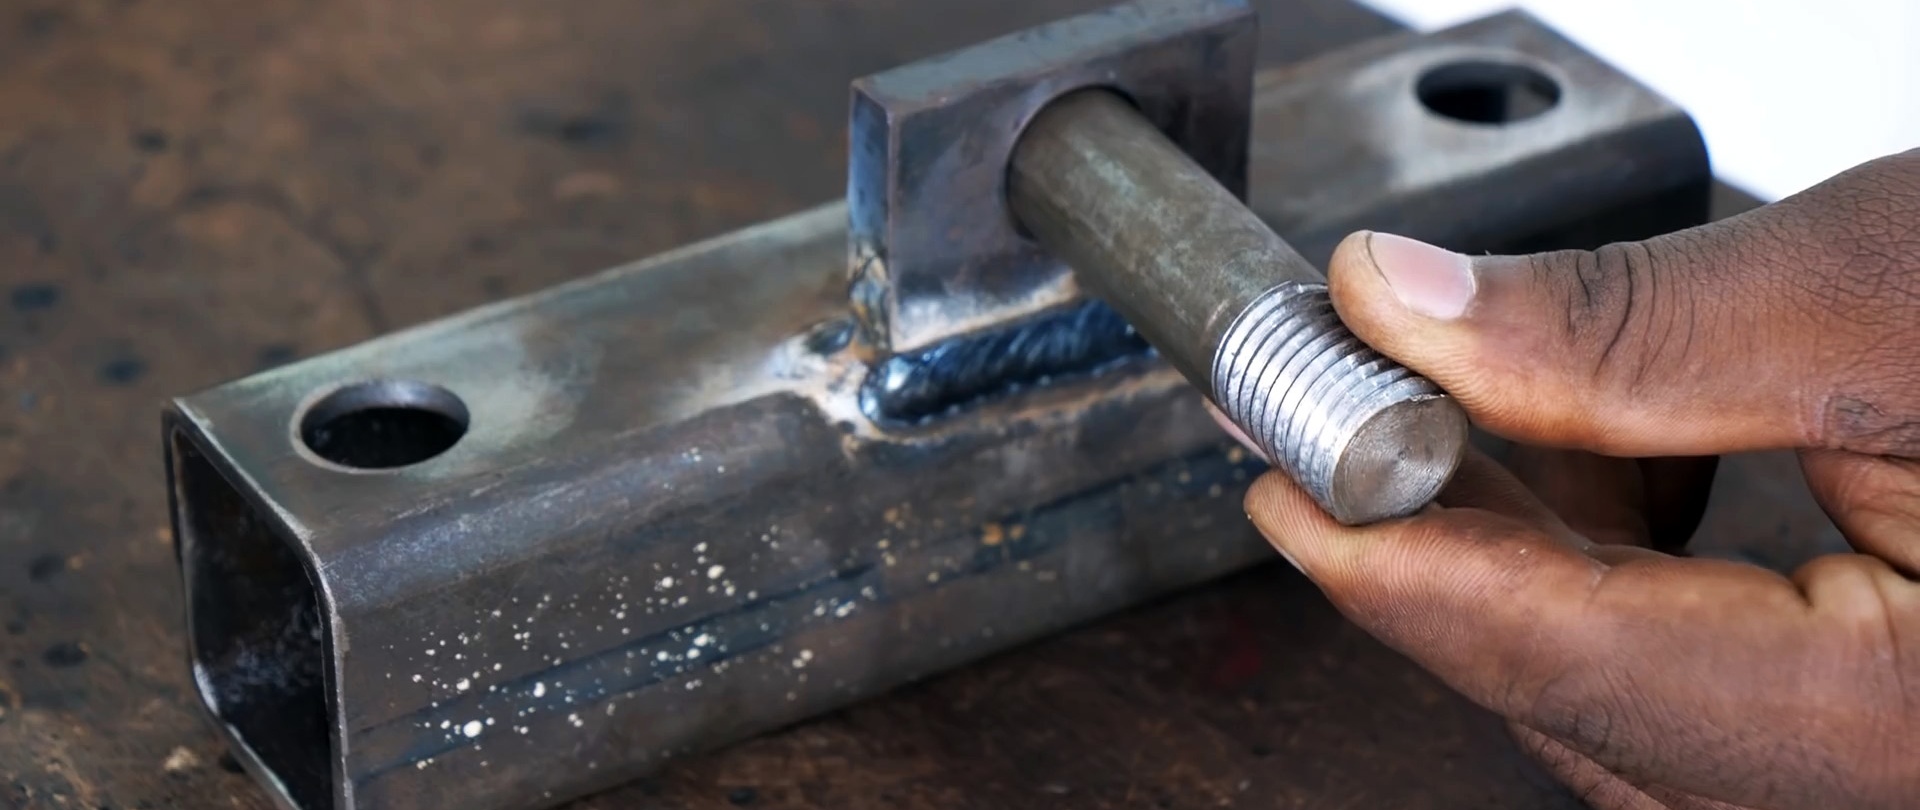
It is welded onto the edge of the profile near the central hole (perpendicular). In this case, the weld marks are “sanded” using a file or grinder.

On one piece of rod (with a length of 10 cm) and a diameter of M12, an M12 thread about 2 cm long is cut using a die holder. This threaded rod is welded to a metal square plate (welded to a square pipe) so that it is at an angle of 90 degrees to the plane of the square (outside).
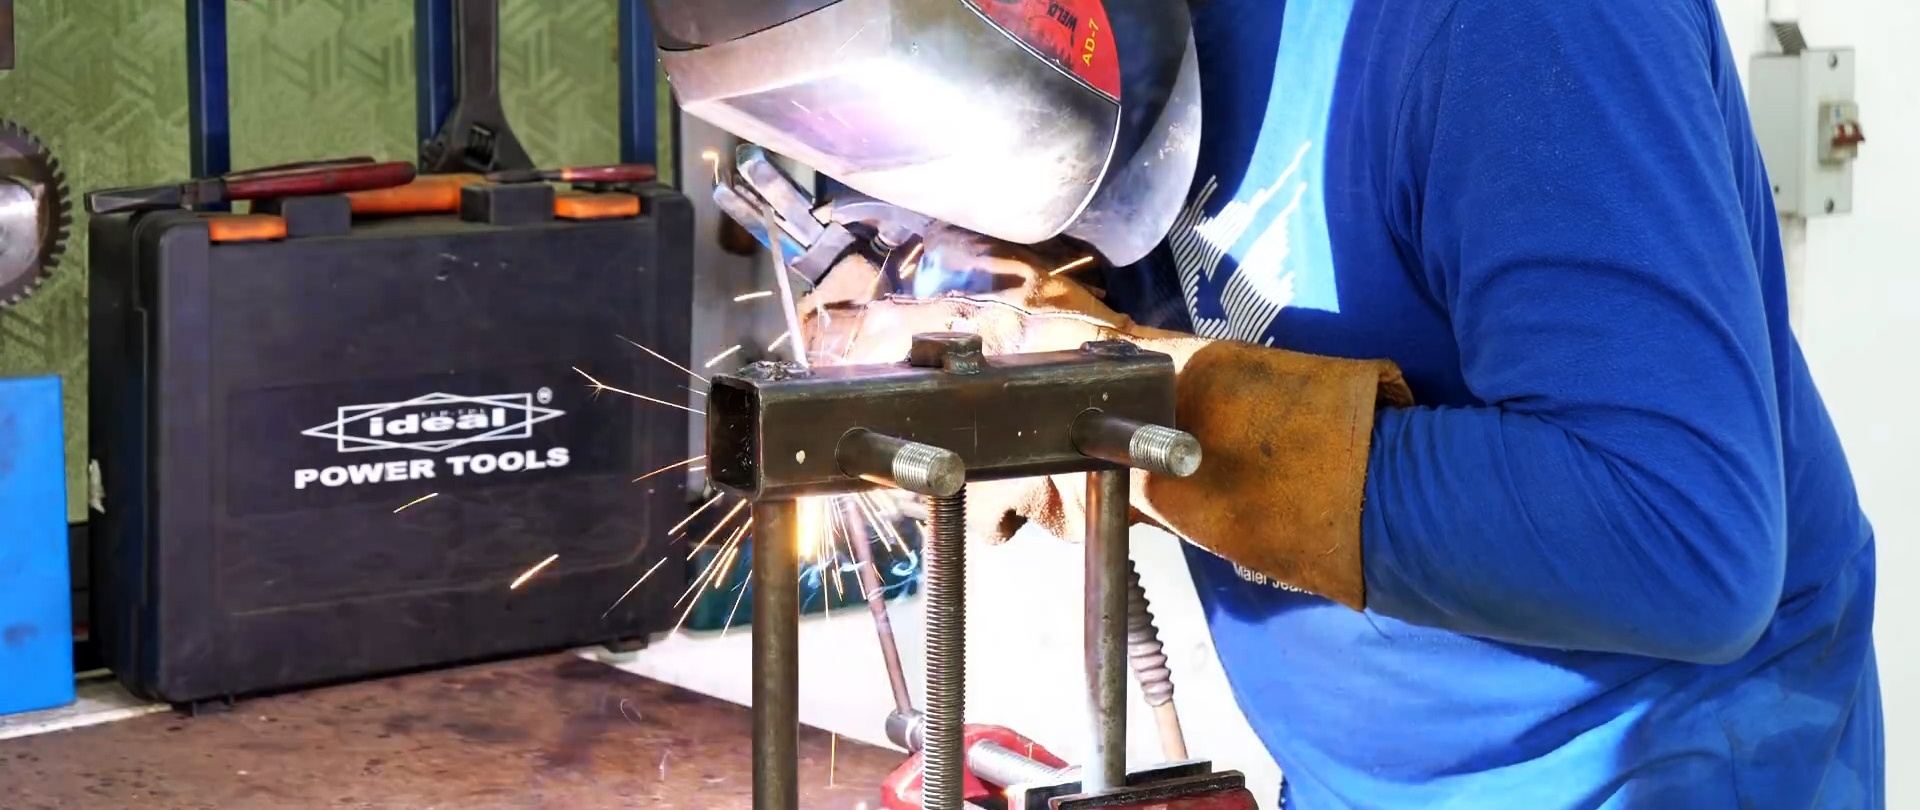
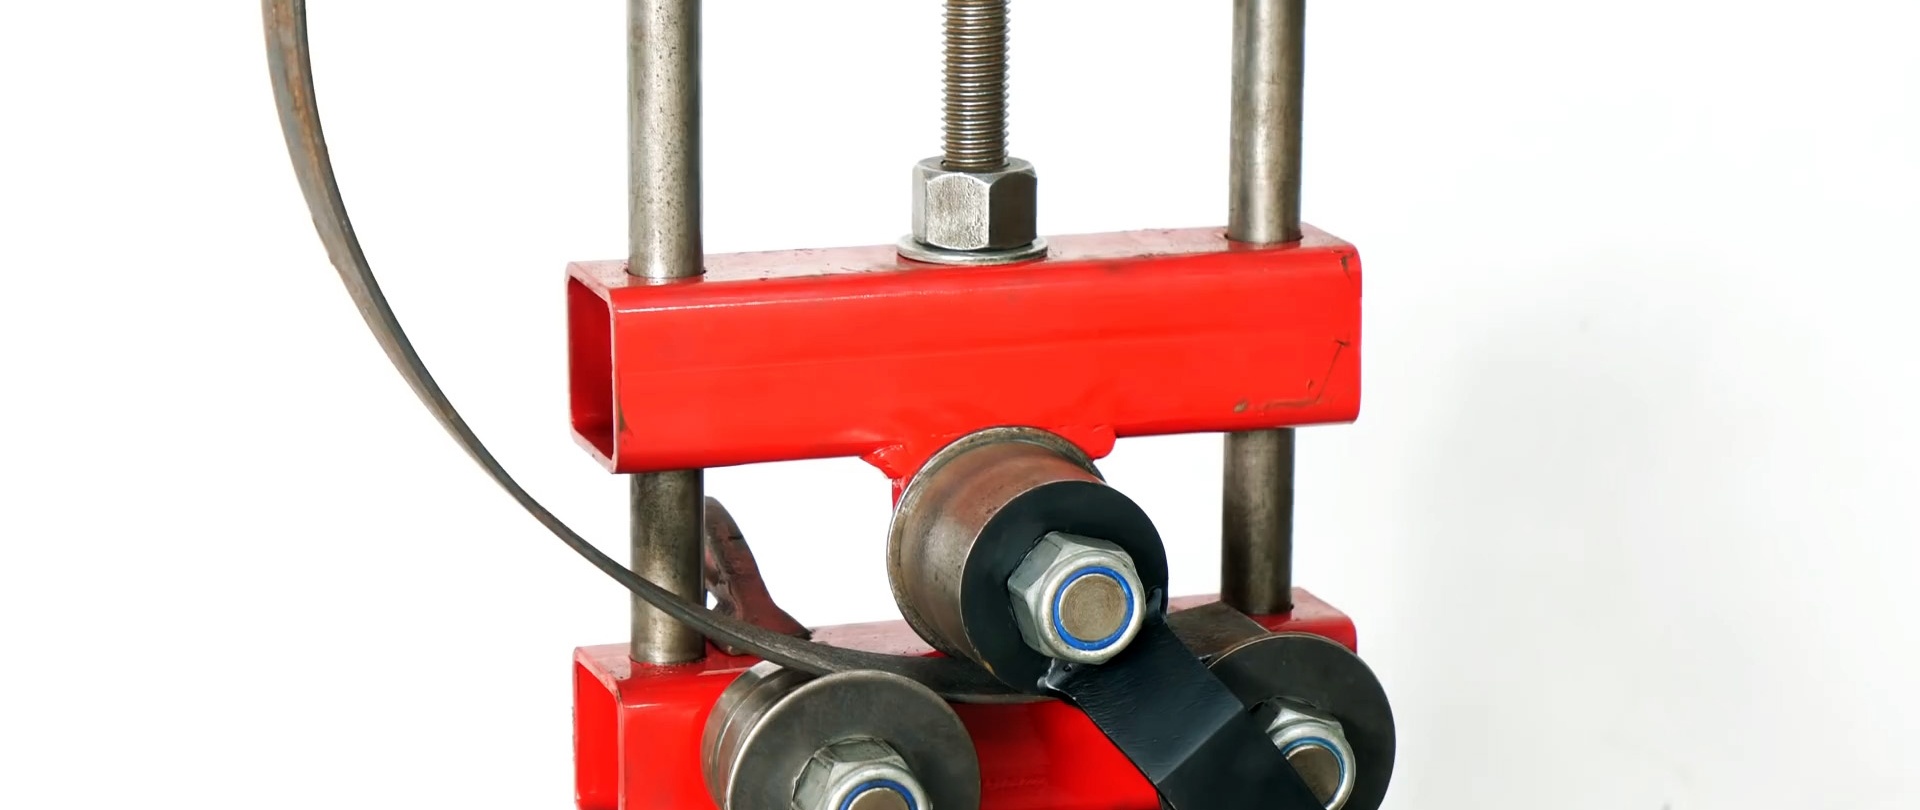
The resulting 2 pieces of square pipe with welded “pins” are combined with each other, so that the smaller part (with the 1st pin) is threaded through the corresponding holes of the 2nd part. The part is strung on another with a welded “heel” (plate) inside. In this case, 2 side pins should “look” in the same direction as one similar one on the other part.
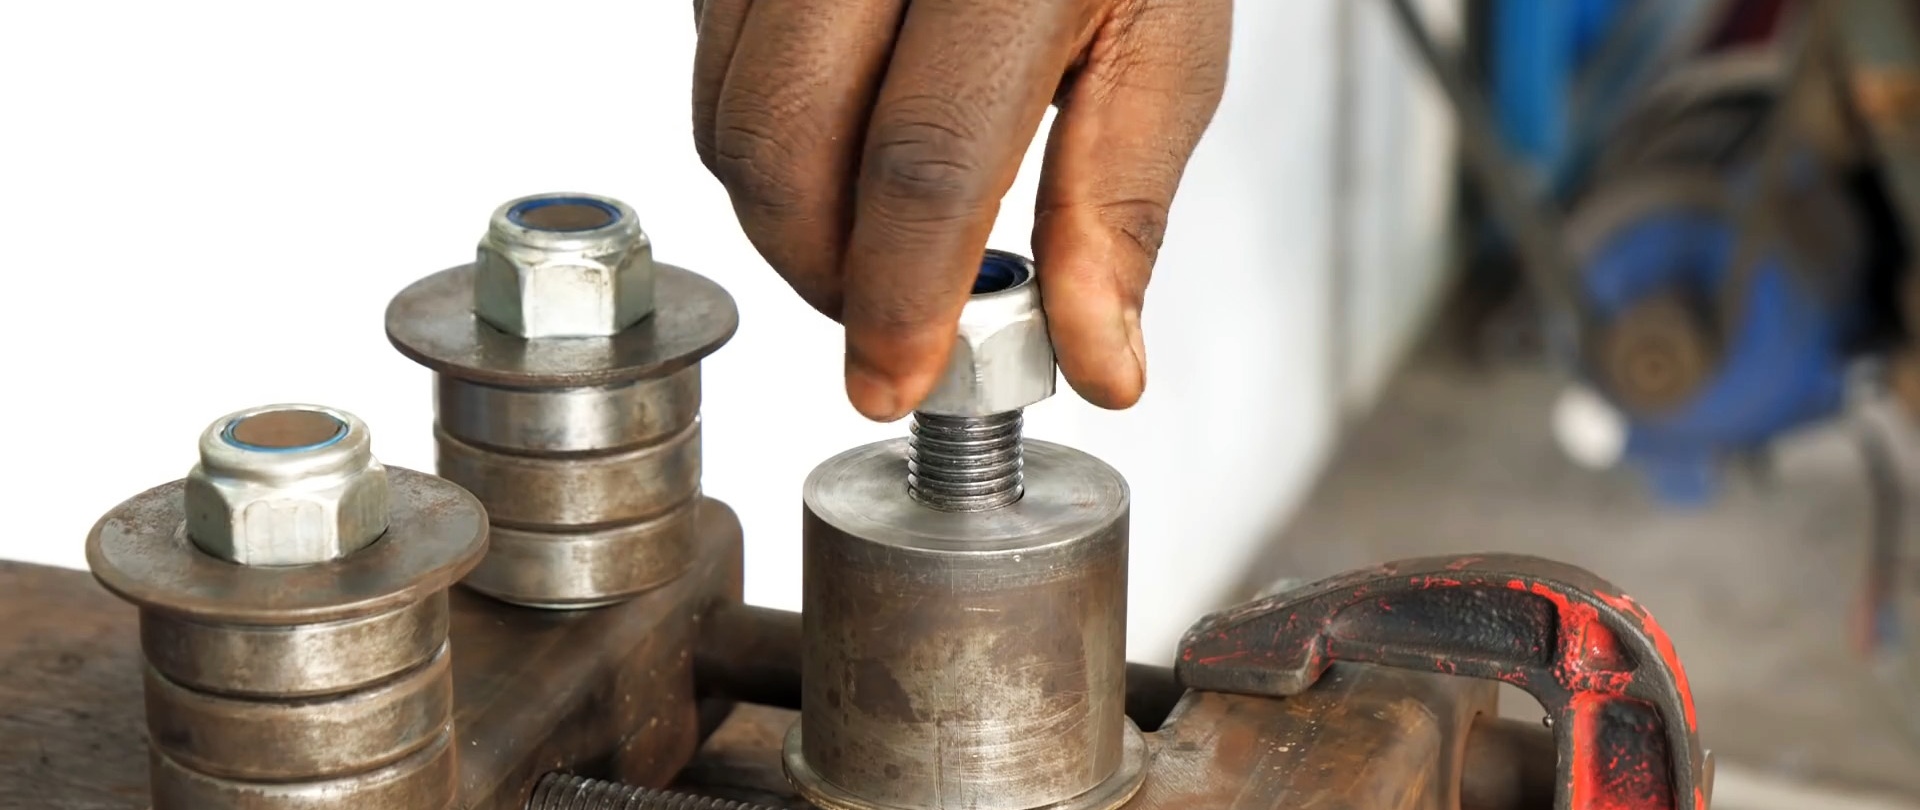
Having combined the 2 parts, you will need to fasten them together. To do this, place an M12 nut in the central pin (of 3 pins arranged in parallel) - place a washer. Next, 3 bearings are placed on two (those that are on the same square pipe) of the three side pins arranged in the form of a “triangle”. In this case, you will need to place a washer on top and bottom (4 pieces in total) to ensure reliable fixation of the bearings. After this, the first large washer is placed on top of the resulting structure and the M12 self-clamping nut is screwed on using a wrench (you can use a “socket wrench”). In this case, you need to tighten the nut so that the bearings are able to rotate.

Then, in a steel circle (rod) with a diameter of 50 mm, a through hole is made in the center to create a large workpiece in the form of a cylinder. This part is placed in place of the 3rd pin (near the bearings), and a washer larger than the size of the cylinder is placed at the bottom. After this, a self-clamping nut is installed and tightened so that the cylinder can rotate.

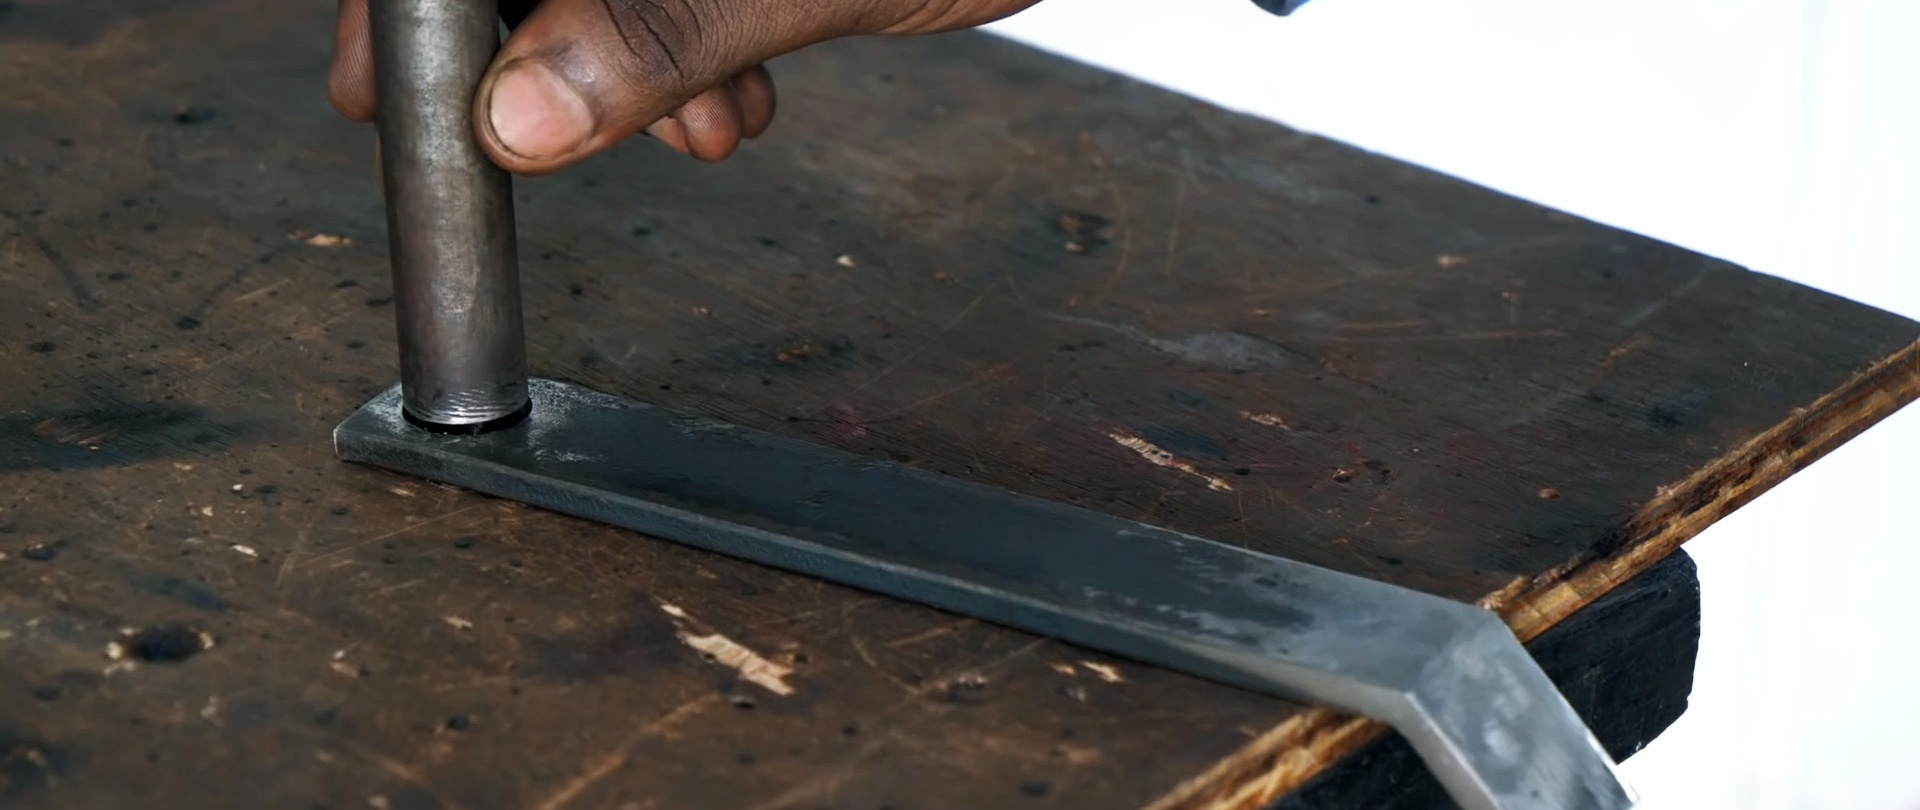
A special handle will need to be attached to the resulting product (you can use a suitable one). If necessary, it can be made from a steel plate 20 cm long, cutting the edge by 2 cm using a grinder, which is then bent at an angle of approximately 135 degrees. Next, the bend on the notch side is welded and polished. Then, at the other end of this part, a hole is made in the center of M12 with a distance of approximately 1 cm from the edge, and a rod (with a diameter of 12 mm) 10 cm long is welded to it.
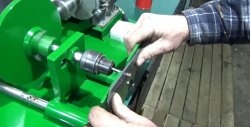
The resulting handle is carefully welded to the cylinder so that it can freely scroll in a circle without touching the other two pins with bearings. If desired, individual parts of the resulting mechanism can be painted or sanded. After this, the mechanism can already be used to bend steel strips of different sections.
It is important to know: In order to avoid blunting the M12 drill, it is necessary to first make holes with drills of a smaller diameter, wetting the drilling site with oil.
Conclusions: The presented homemade machine can be made relatively quickly in normal home conditions. It copes with its tasks perfectly and makes it possible to quickly make various parts from strips of metal, such as circles for wooden barrels, hoops for load-bearing structures and much more. Thanks to its convenient shape and simple design, it is not subject to excessive wear and will serve for a long time, performing its functions perfectly.