For the average summer resident or self-builder, laying paving slabs on his own property is expensive, difficult and time consuming. You need to prepare the site, walk over it with a vibrating rammer, and then lay out the tiles, leveling them. If this is done for the first time, the result may be worse than expected. On your own site it is much easier, and cheaper, to make an imitation of paving stones. Let's look at the technology on how to do this very realistically and quickly.
Materials:
- Cement;
- sand;
- crushed stone;
- black powder dye for concrete;
- reinforcing mesh;
- polyethylene film;
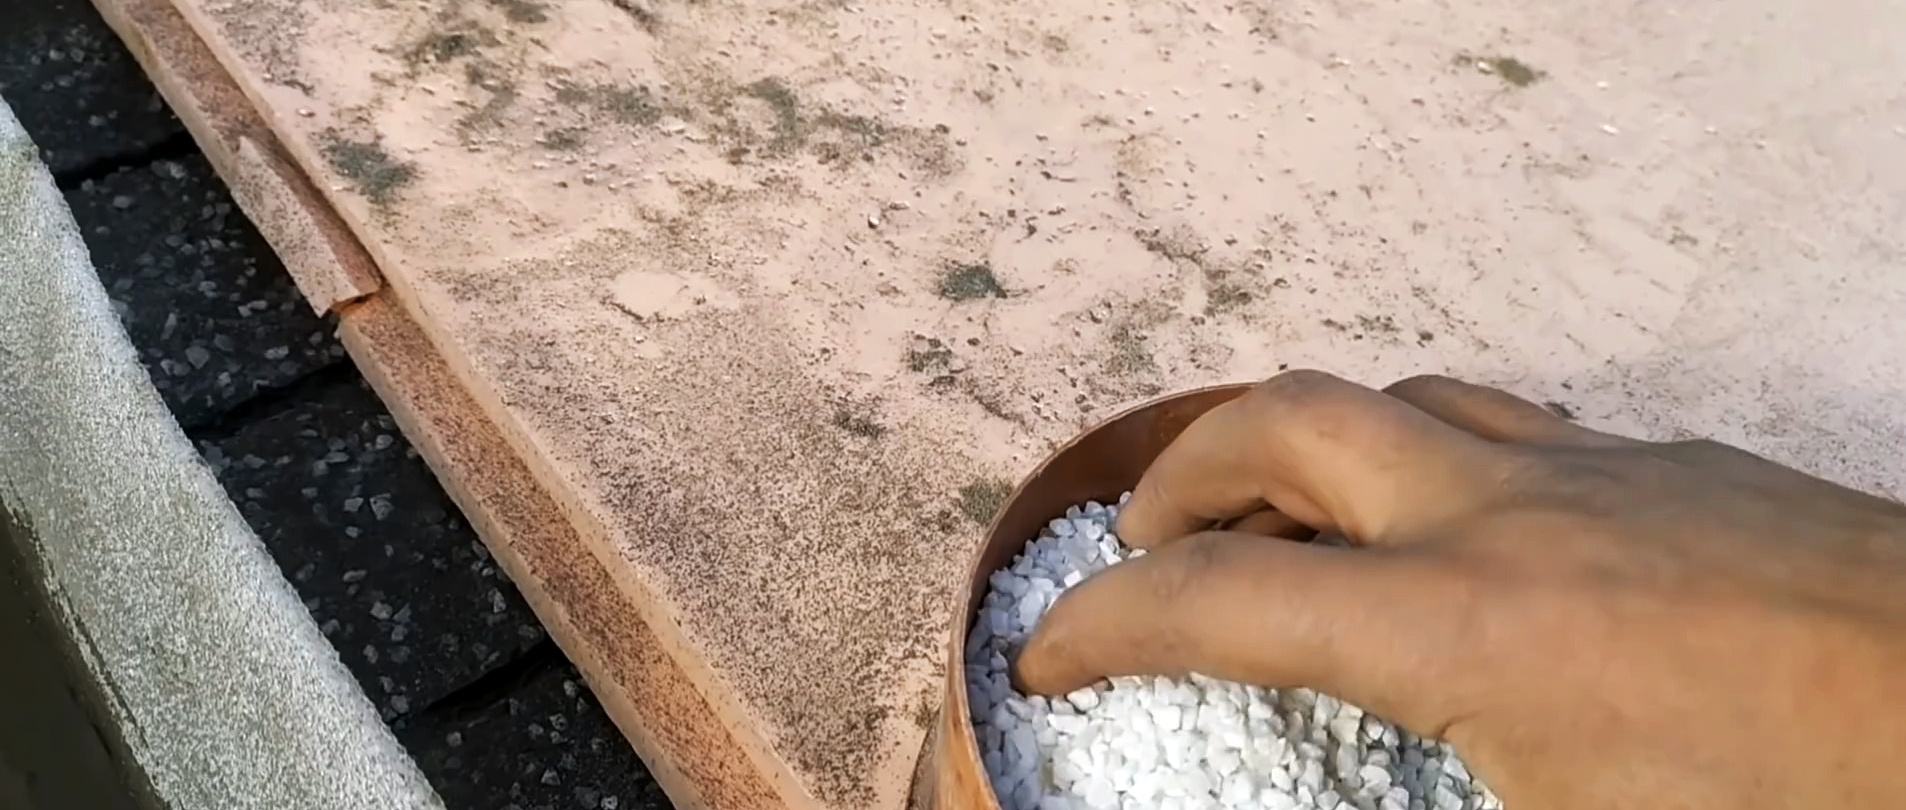
- marble chips fraction 3-5 mm.
The process of pouring imitation tiles
The beginning of work is completely the same as when simply pouring concrete paths. You need to select the top loose soil and place the formwork from the board. The bottom is covered with a plastic film so that the concrete does not draw moisture from the soil, which will make it last longer. When pouring a blind area under the foundation, it is better to lay foam plastic on the bottom to prevent it from freezing. A reinforcing mesh must be laid on top.

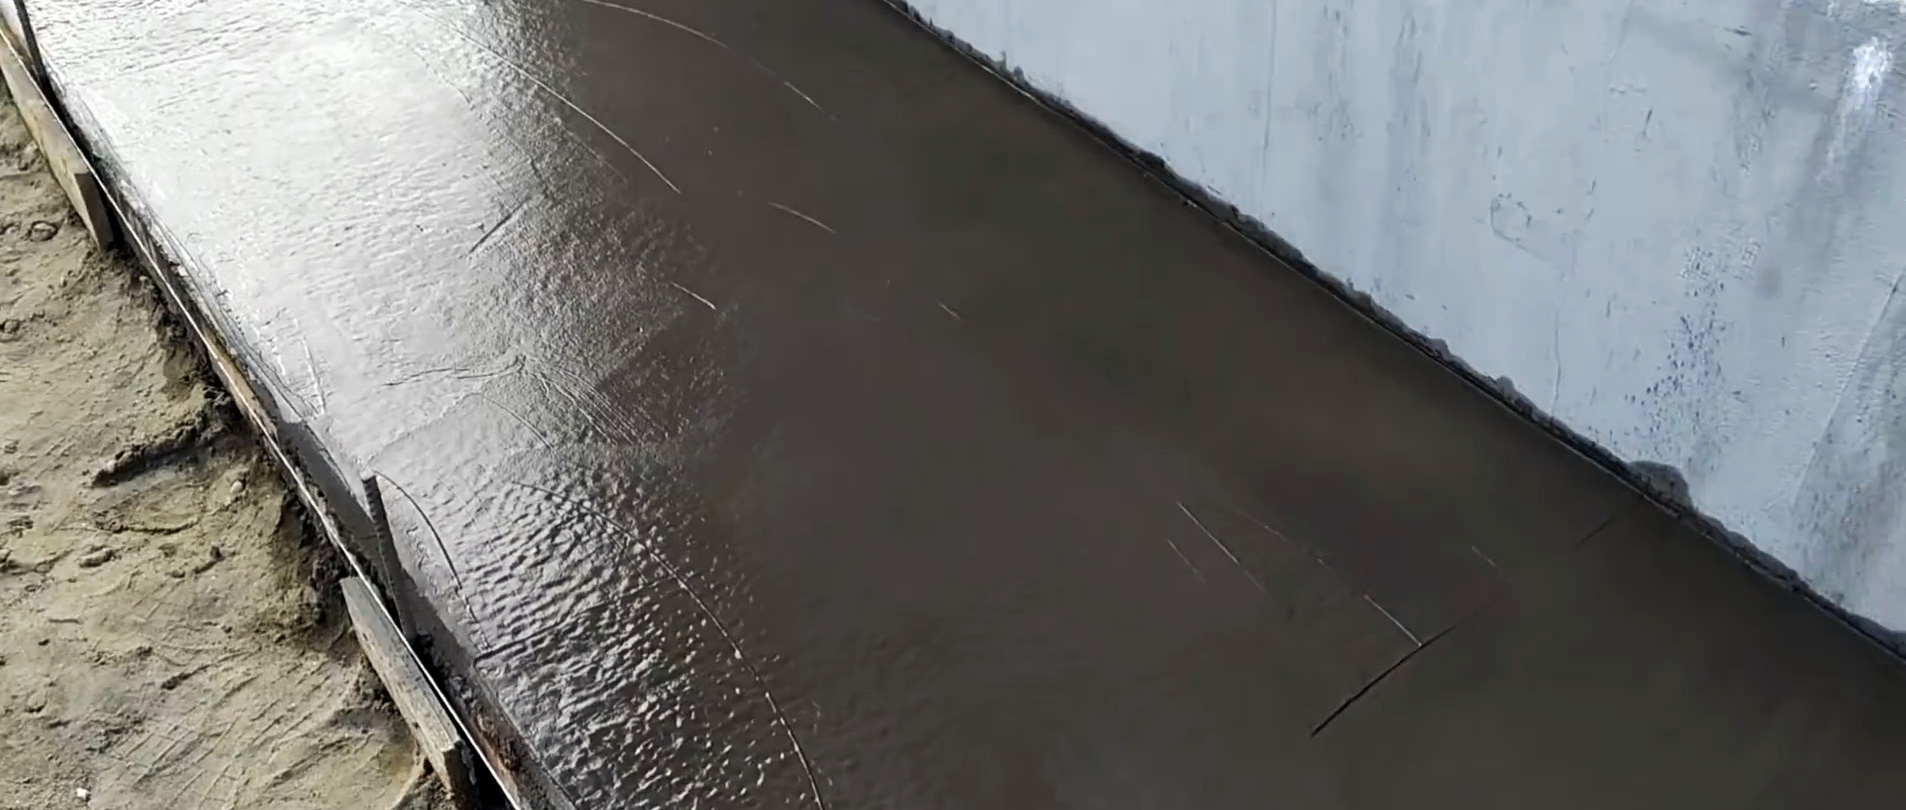
Next, the concrete is prepared.To 1 part cement add 2.5 parts sand and 4 parts crushed stone. Add a minimum amount of water to obtain a thick mixture. The concrete is poured, leveled and smoothed.
After smoothing, you need to prepare a coloring composition. To do this, add approximately 200 grams of black powder dye for concrete to a volume of 3 liters of cement.
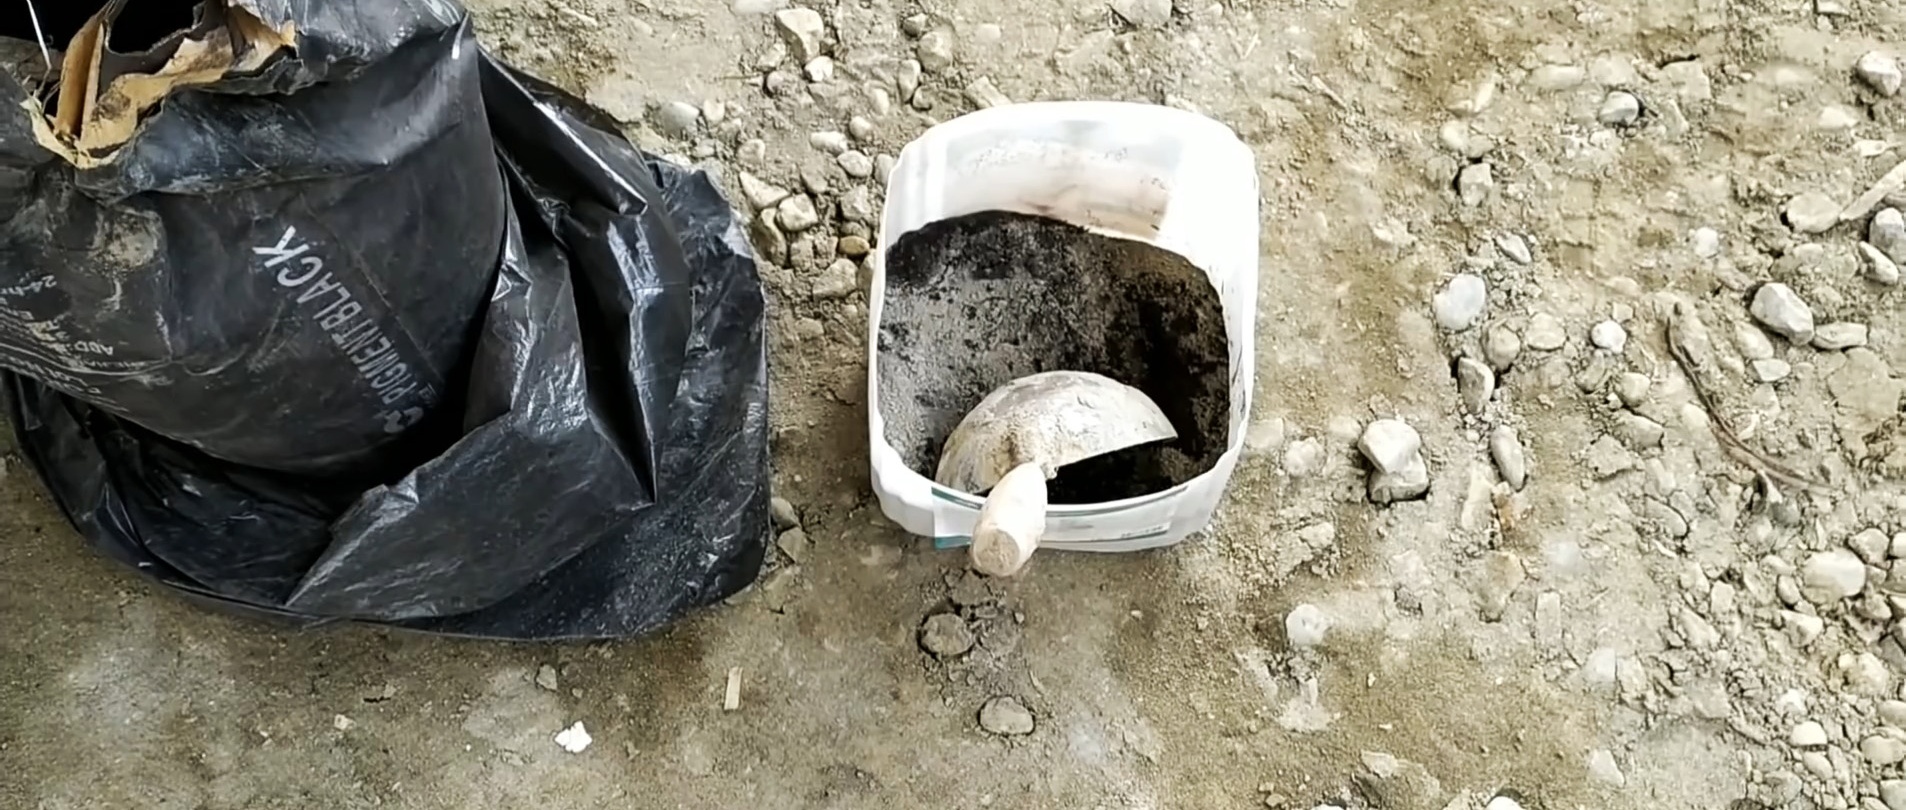
Soon moisture will appear on the surface of the concrete. At this point, you need to sprinkle it with a mixture of cement and pigment through a sieve. It spreads evenly over the entire surface. Adding cement will reduce powder consumption and also strengthen the top layer of the imitation.
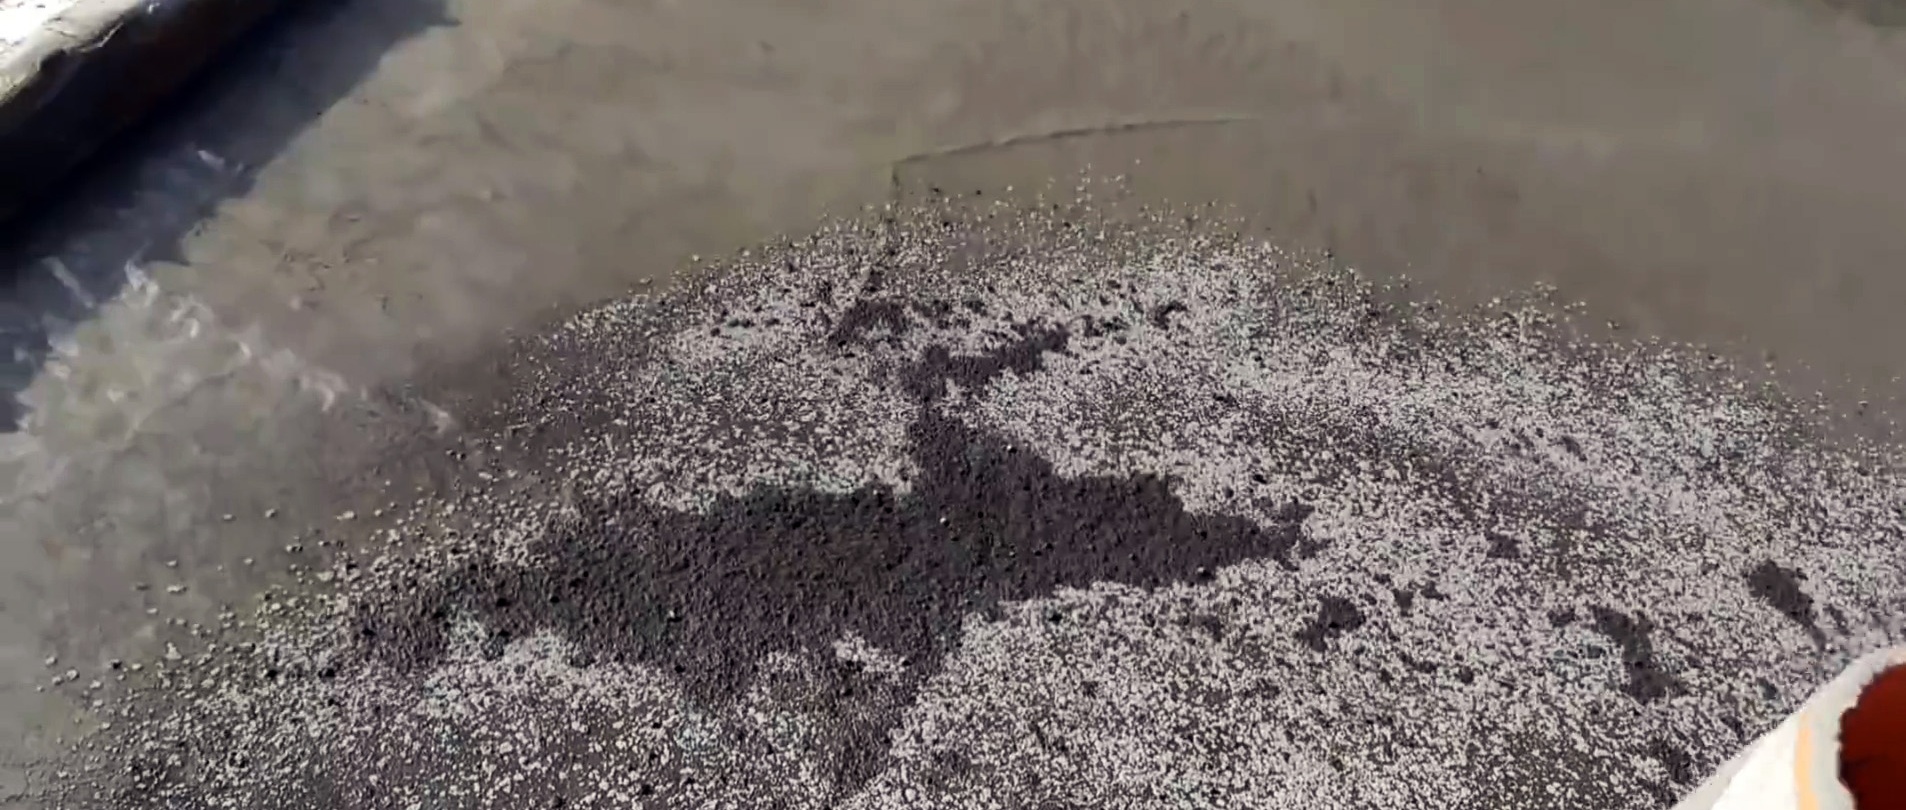
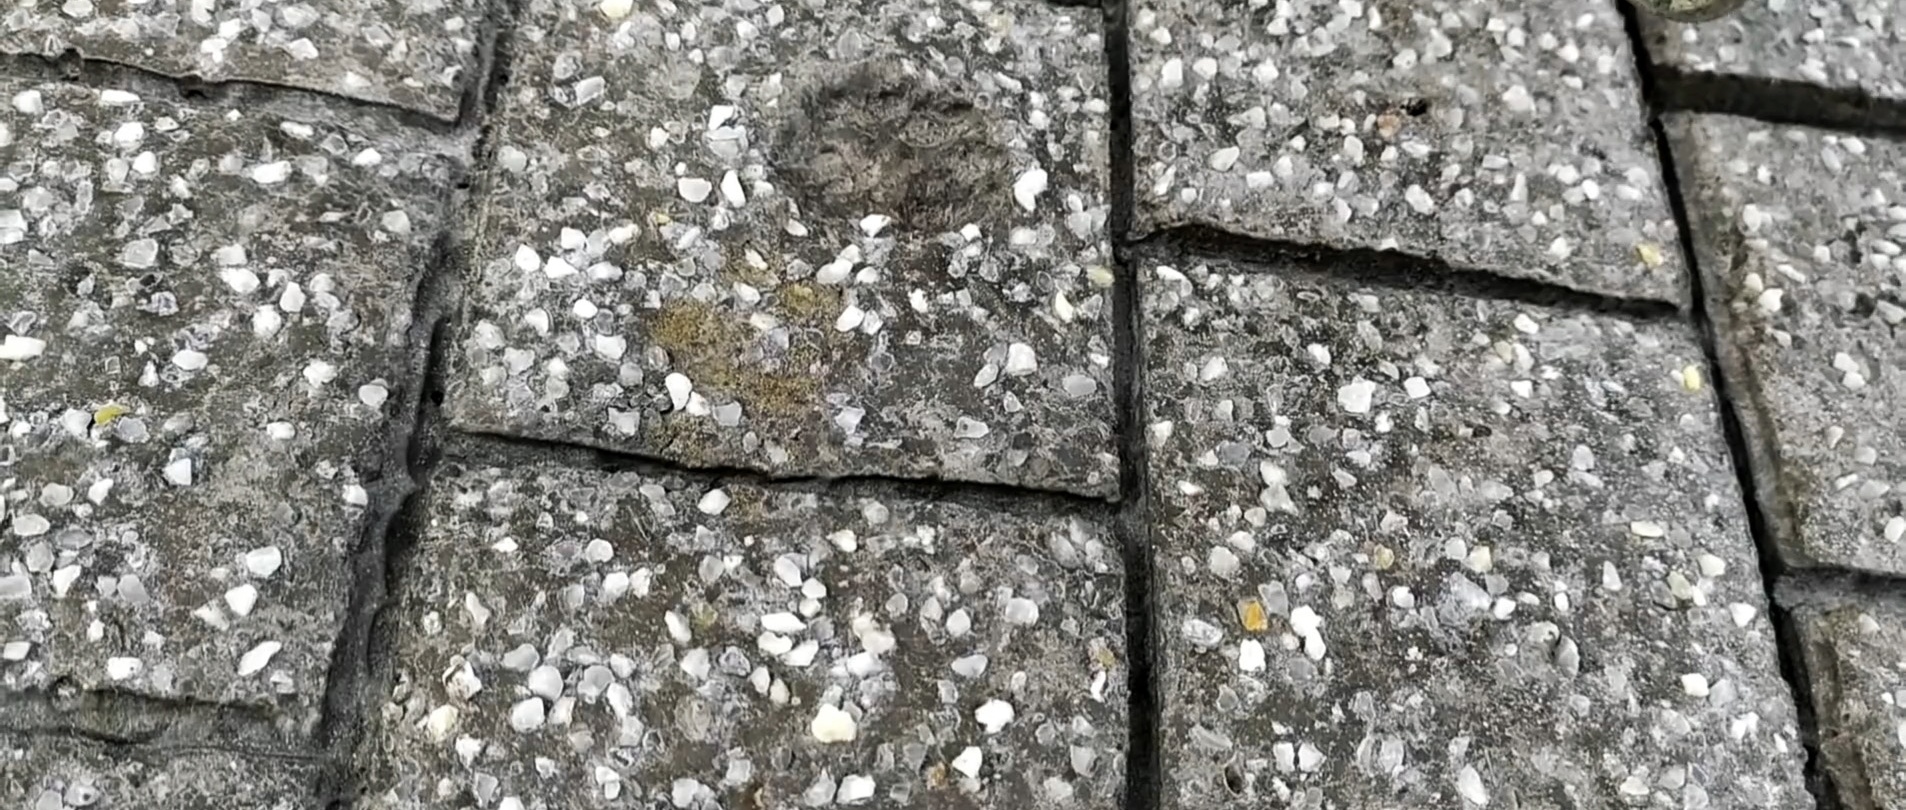
The tinting mixture will be saturated with water from the concrete, after which you need to mix it. This is done with a smoothing iron. It needs to be kept in one place. At first, the powder will leave black streaks. You need to smooth it until the surface turns black without streaks. As a result, you need to get 3 mm of tinted cement-sand composition without pebbles on top. You should try to push the latter deeper.
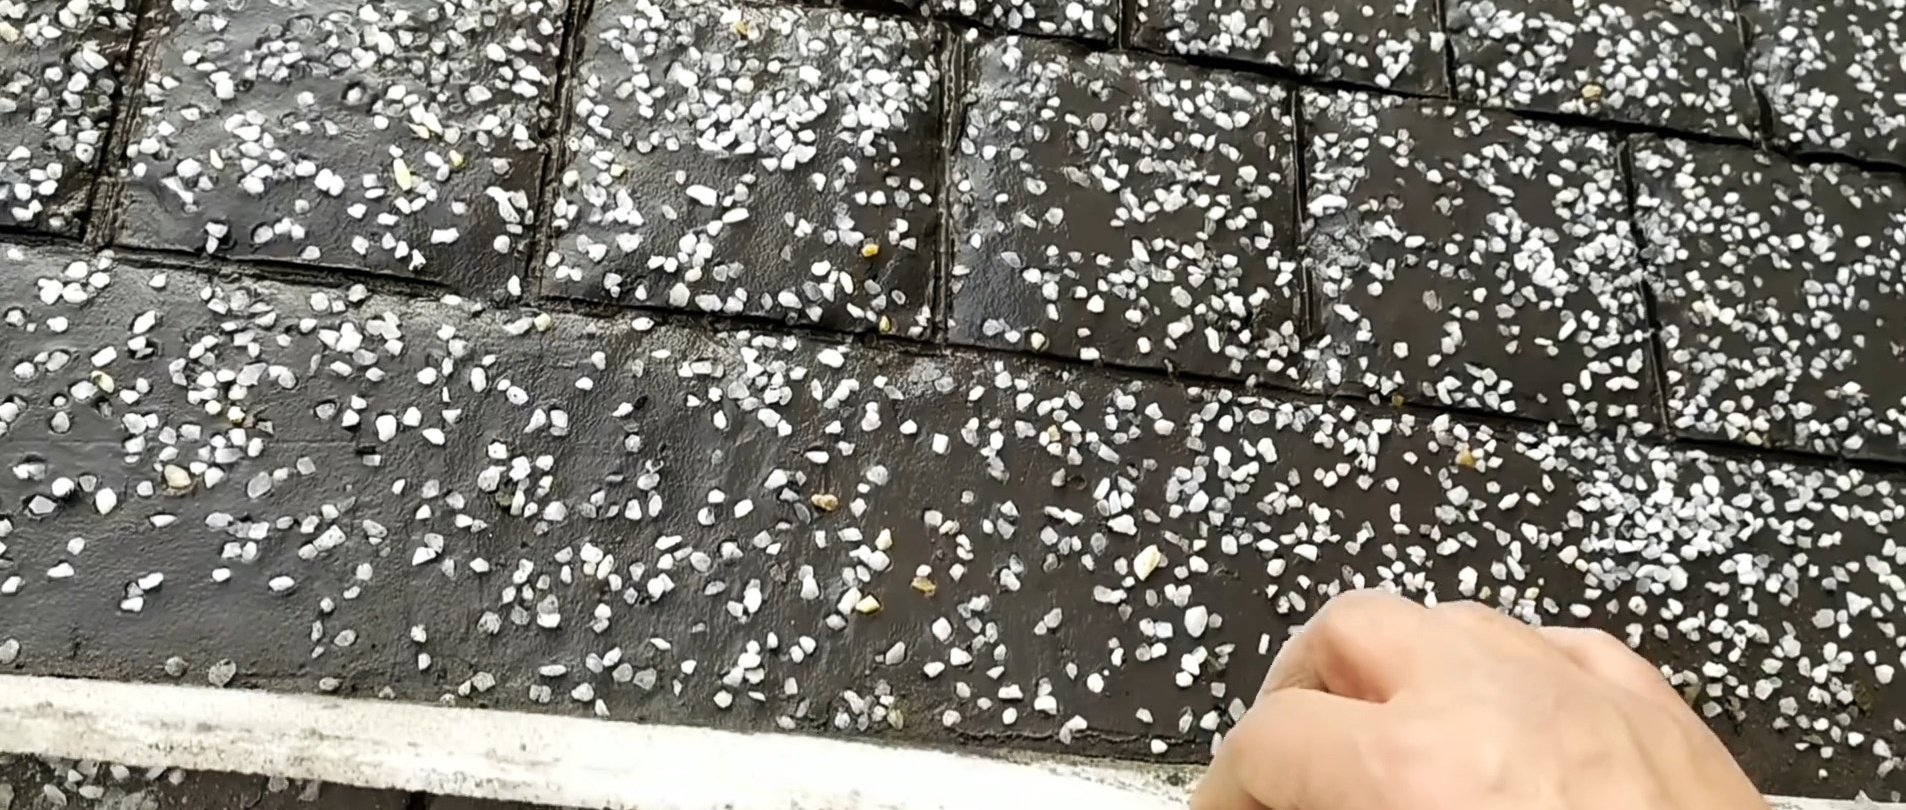
As soon as the consistency of the top layer resembles thick sour cream, you need to sprinkle it with marble chips. It is required that falling pebbles enter the solution halfway. If they sink more, then it is necessary to sprinkle from a close distance, and if they do not sink, then raise your hand higher.

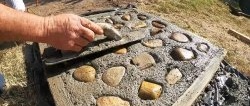
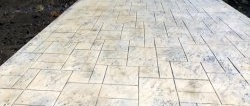
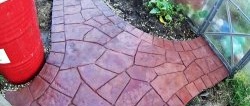
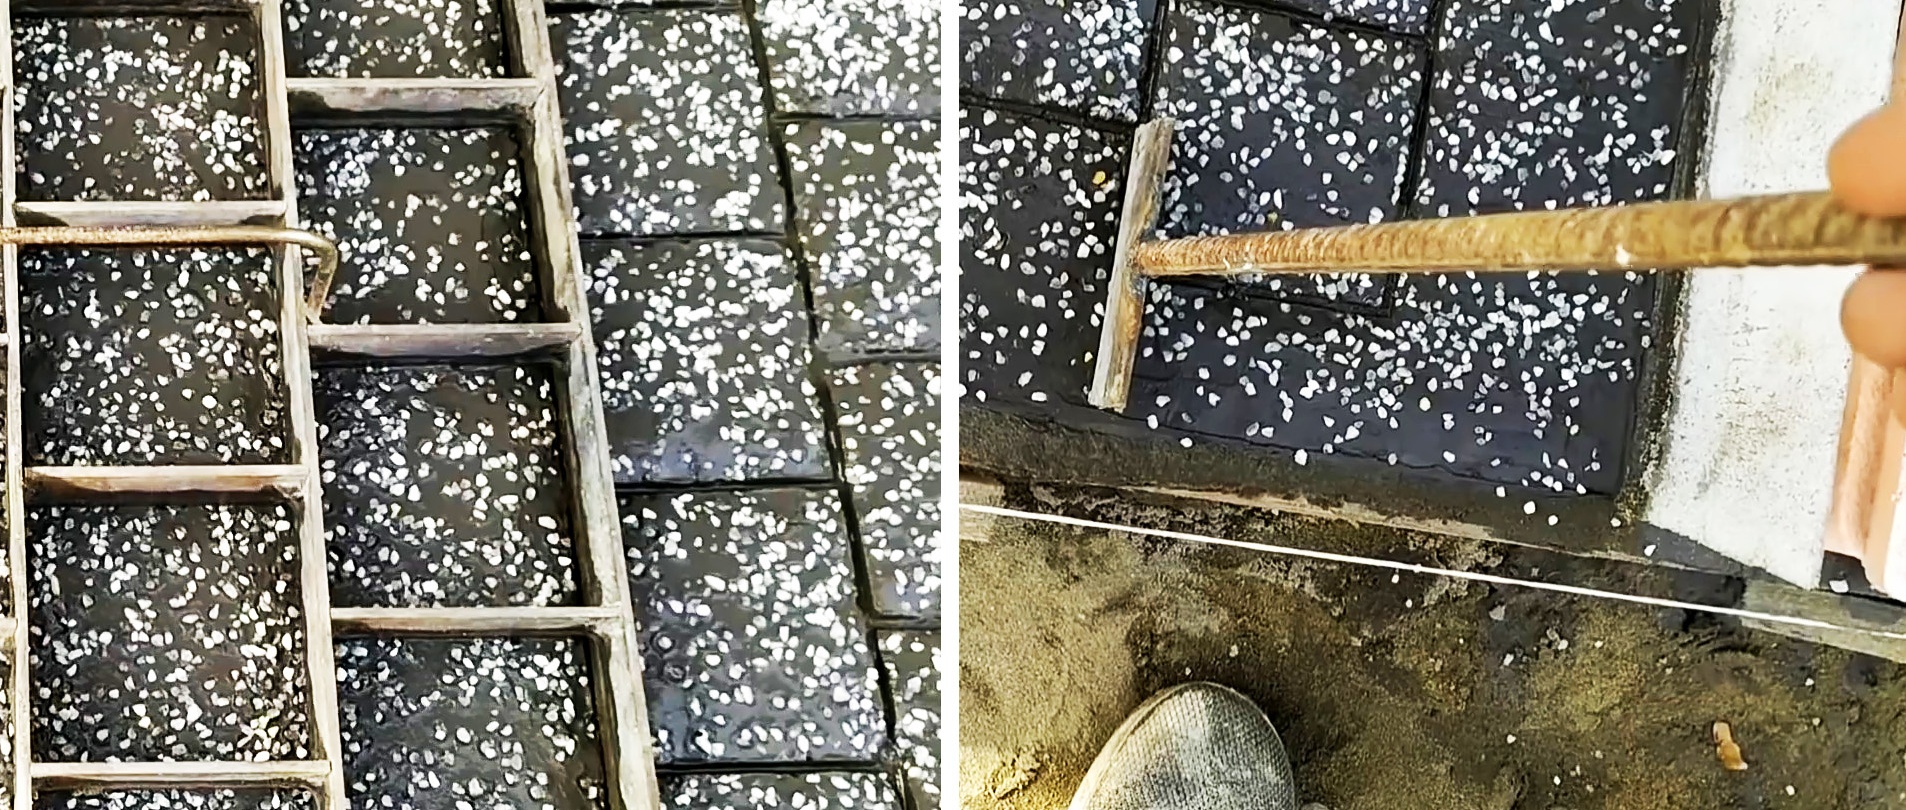
About an hour after sprinkling, the surface of the concrete will begin to resemble butter in thickness. At this point the concrete can begin to be stamped. To do this, a stencil of the desired size is welded in advance from a steel strip. In this example, a strip of 40x3 mm was used. The stamp squares have a size of 110x110 mm.
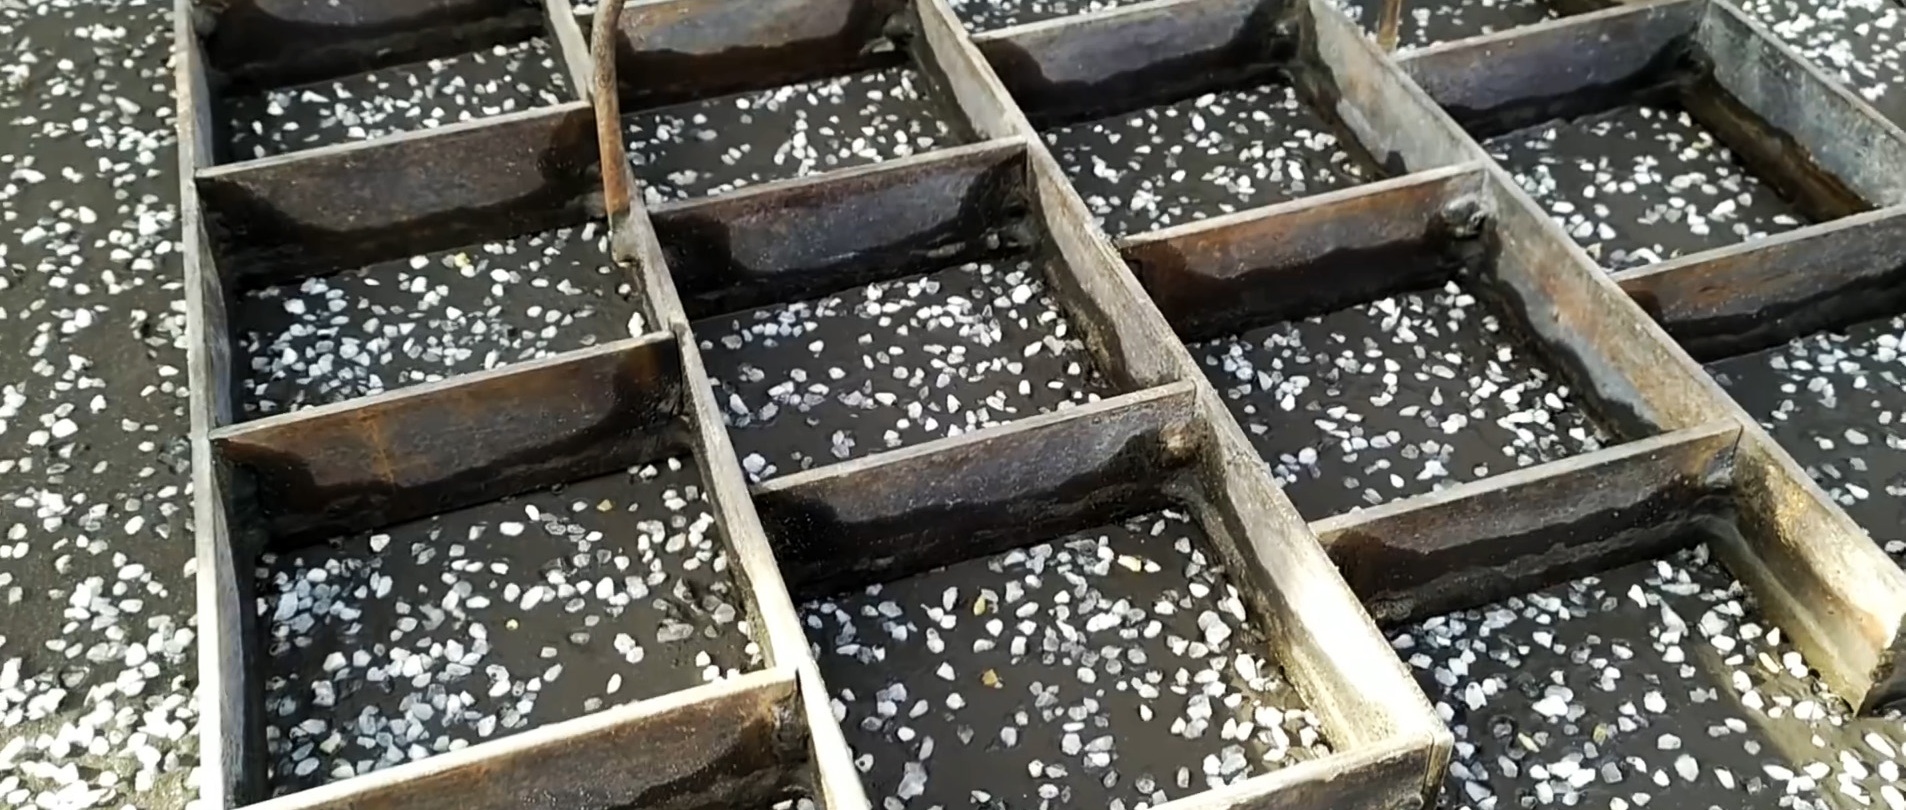
The stencil is placed on the concrete and tapped on top with a mallet to evenly recess it by 10 mm. Then it rises and is rearranged further.To prevent the concrete from sticking to the stencil, you need to shake it when blasting, creating vibration.
Those areas of concrete that are not captured by the stencil are completed with a homemade spatula welded from reinforcement and a piece of strip.
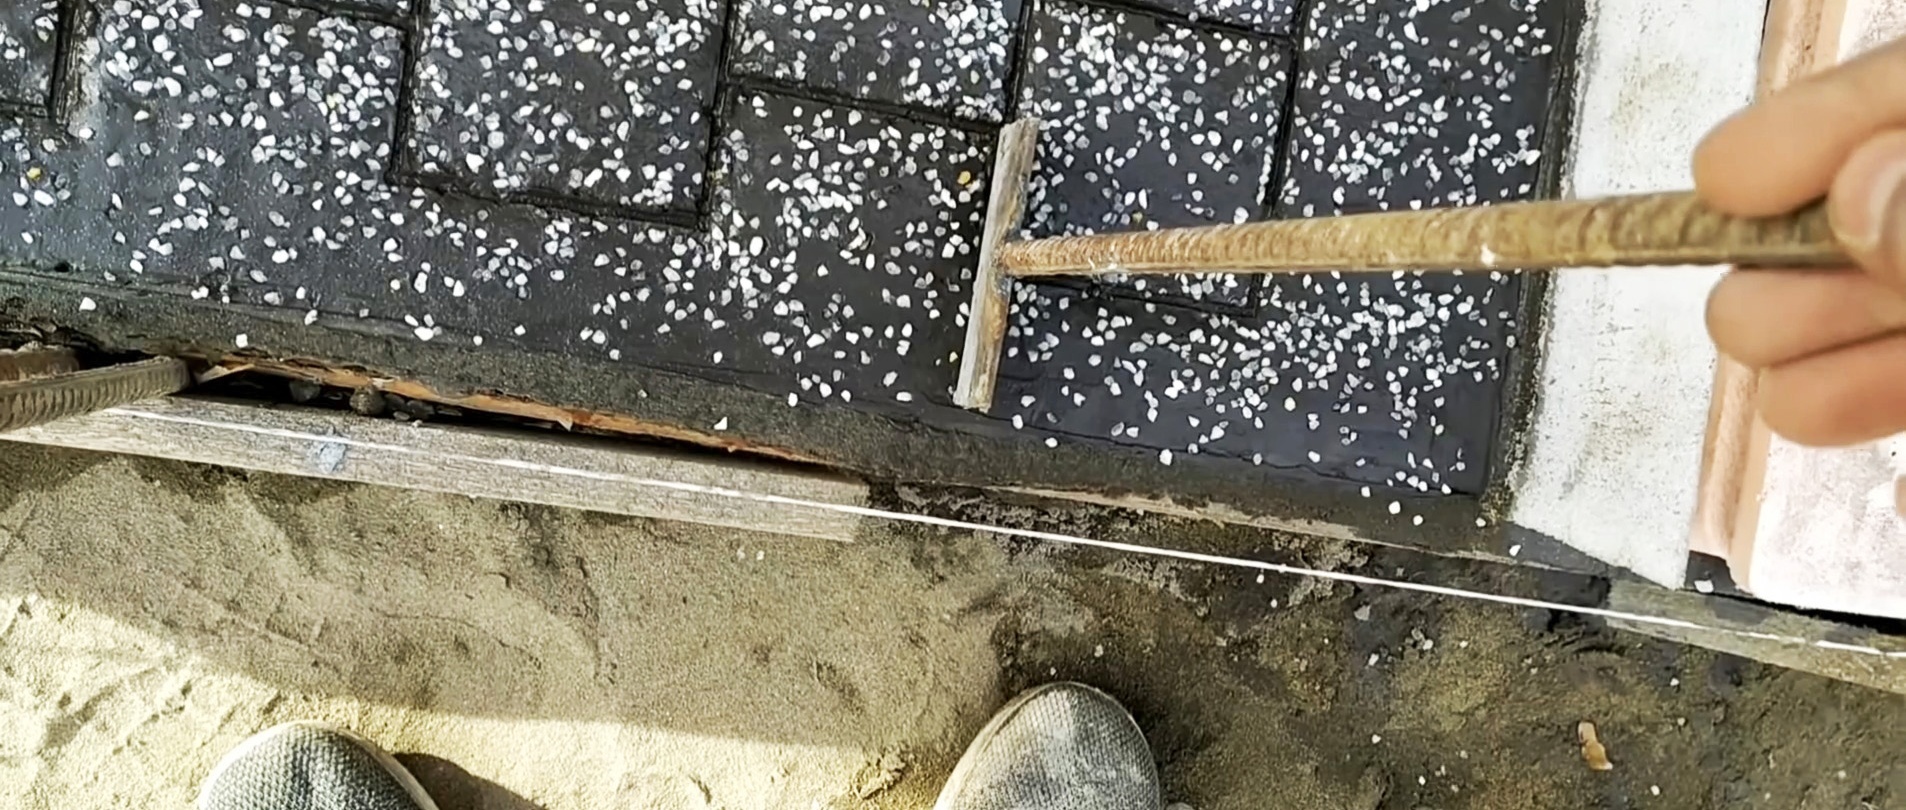
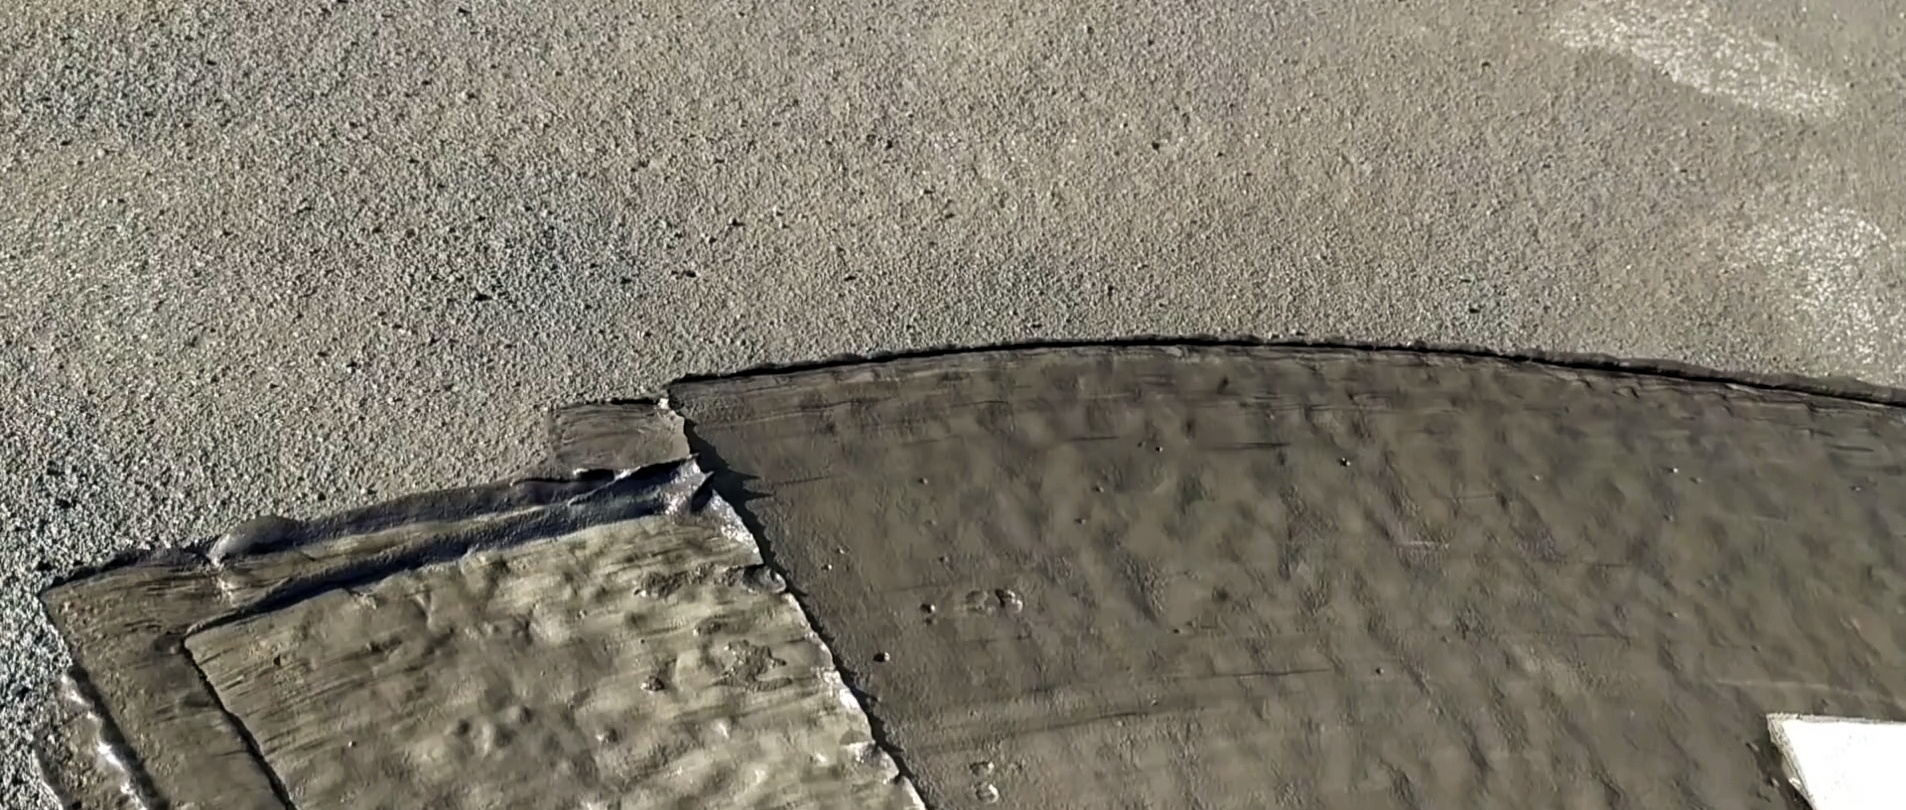
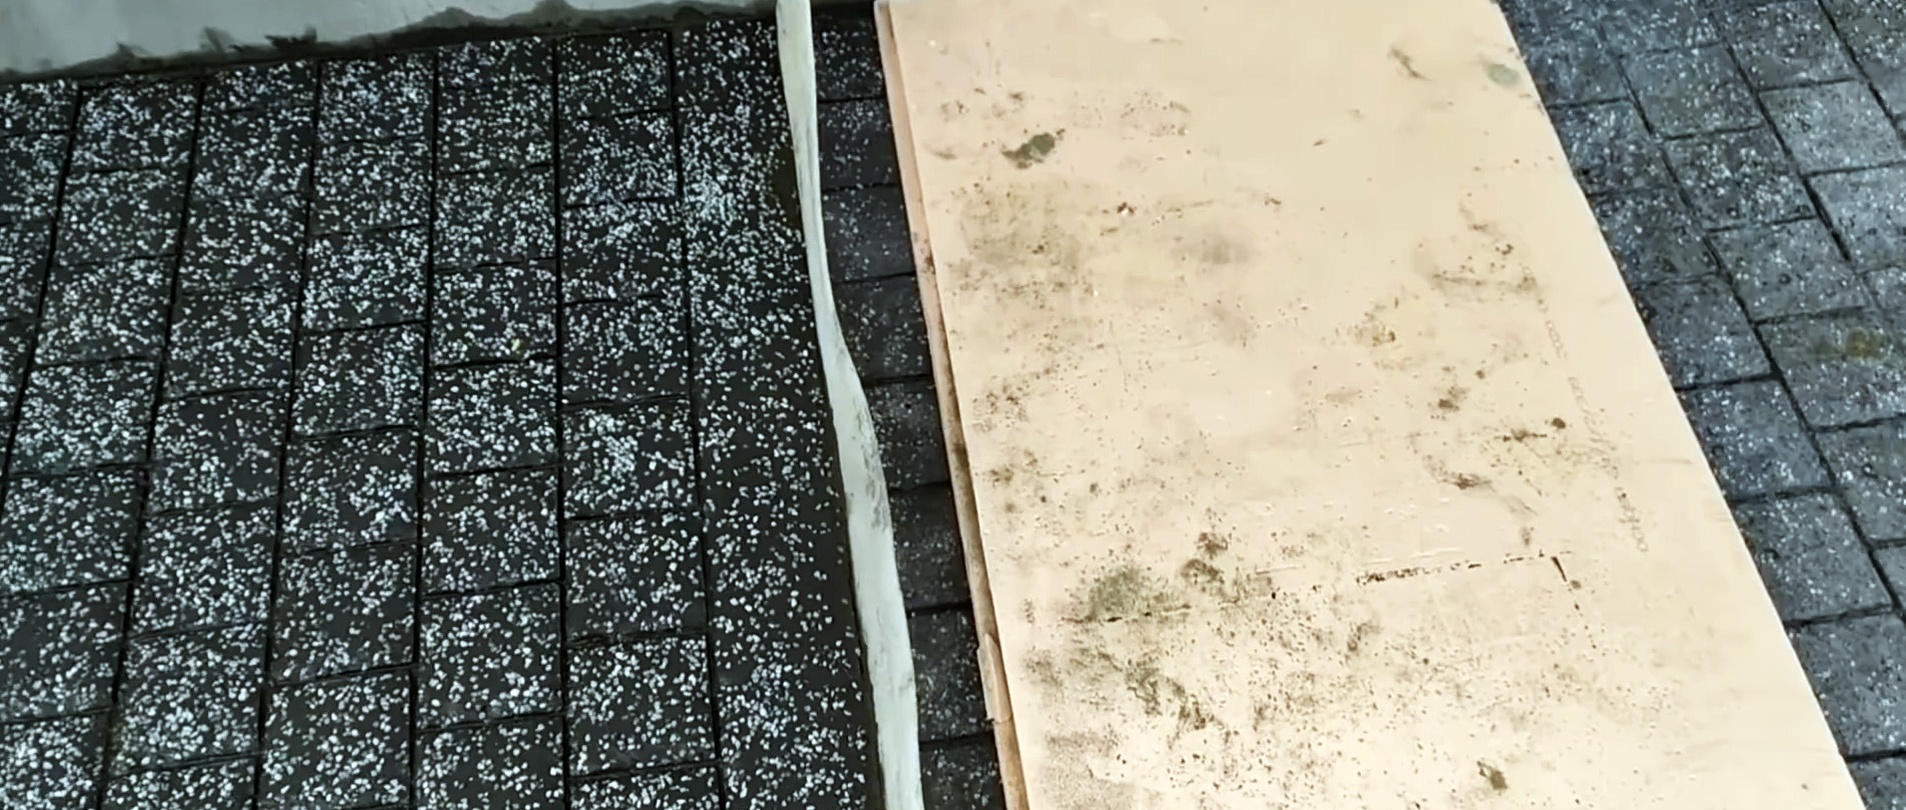
The track is poured in sections of 4-5 m. The next section must be poured through the damper layer. It is very convenient to lay a cut strip of 6 mm polyethylene foam between them. Then it is trimmed flush, and it will be invisible. When printing concrete with a stencil, it is important to ensure that the seams in the new area match the previous one.
After 2 days, you need to embroider the imitation, since the stencil leaves uneven edges. To do this, use homemade jointing from a spatula bent in half. This should not be done before, as the marble topping does not stick well.
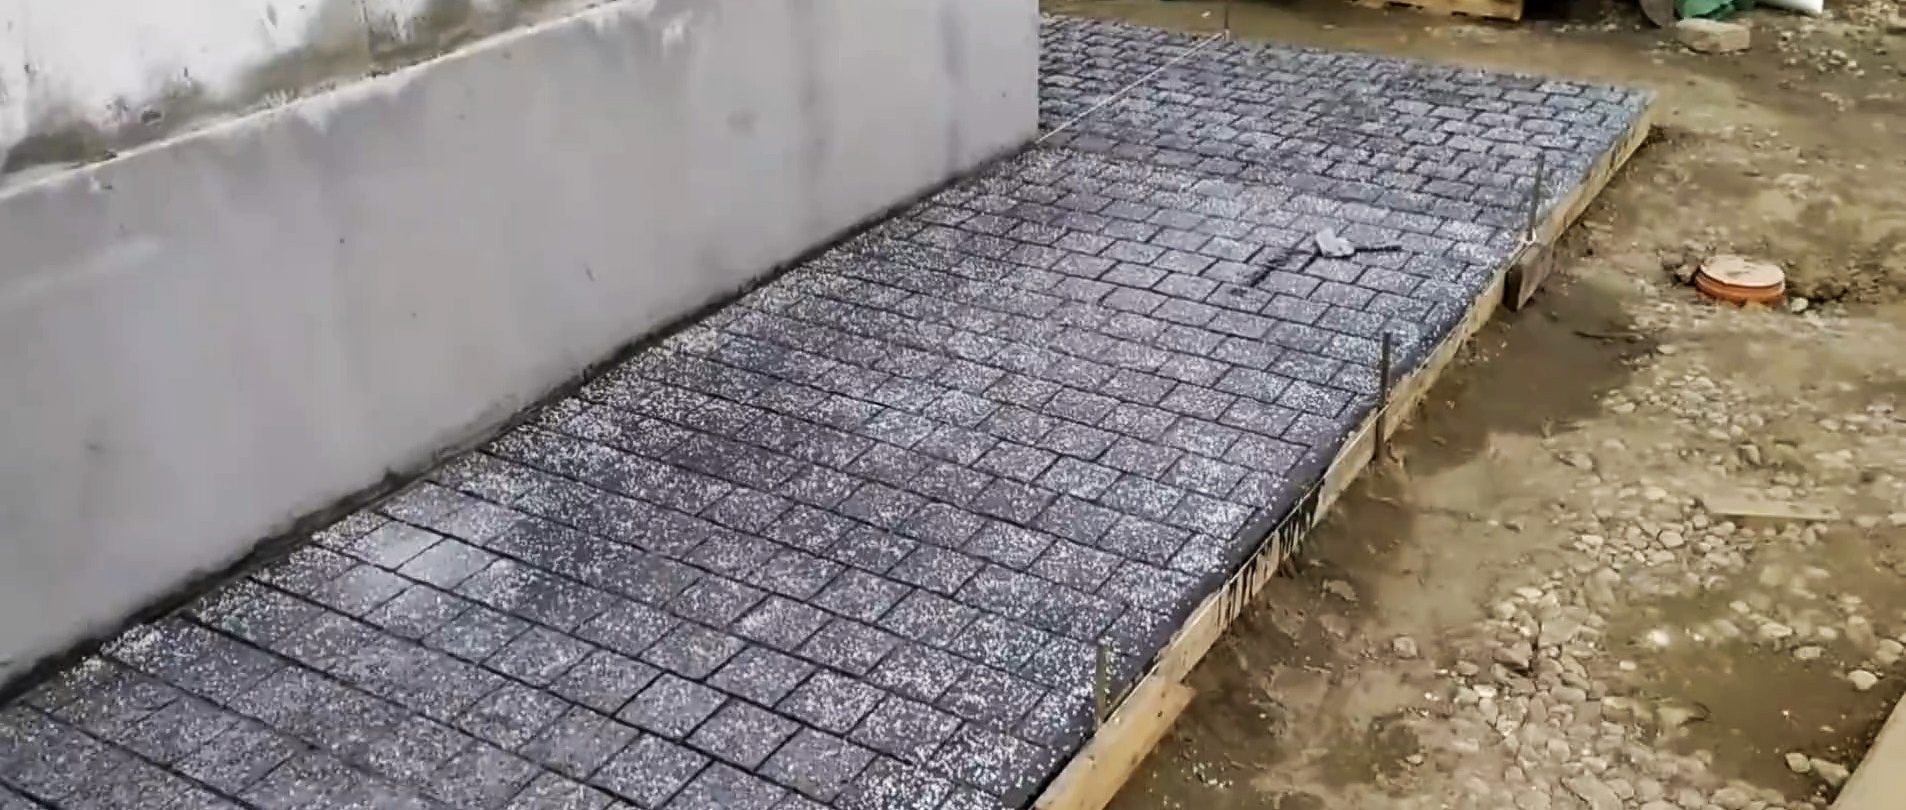

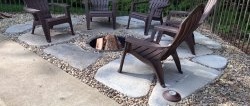
The result is an imitation that is difficult to distinguish from real paving stones. It can be made in any size and color, not necessarily black. Such a path will cost much less than paving slabs, and weeds will not grow in its seams.