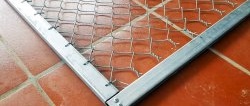
You can use a chain-link mesh to fence off an area, divide an area into zones, make enclosures for animals, etc. You can buy it in a store for a lot of money. A machine for weaving a chain-link mesh, which an adult can assemble, will help you save your family budget.
Will need
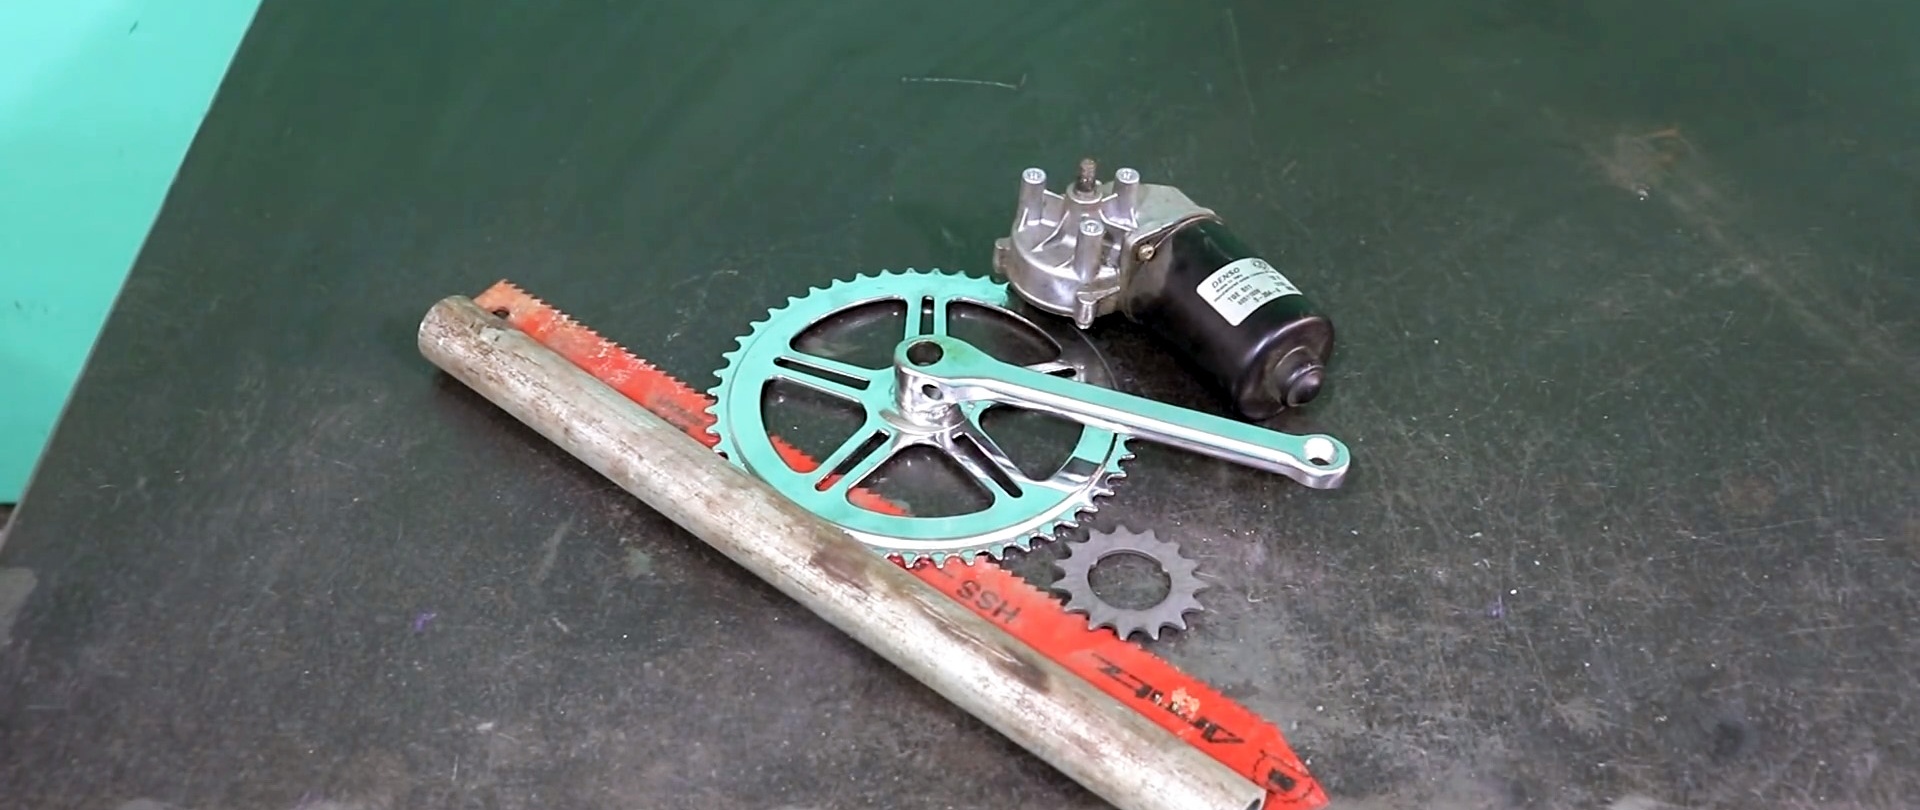
Materials:
- round pipe;
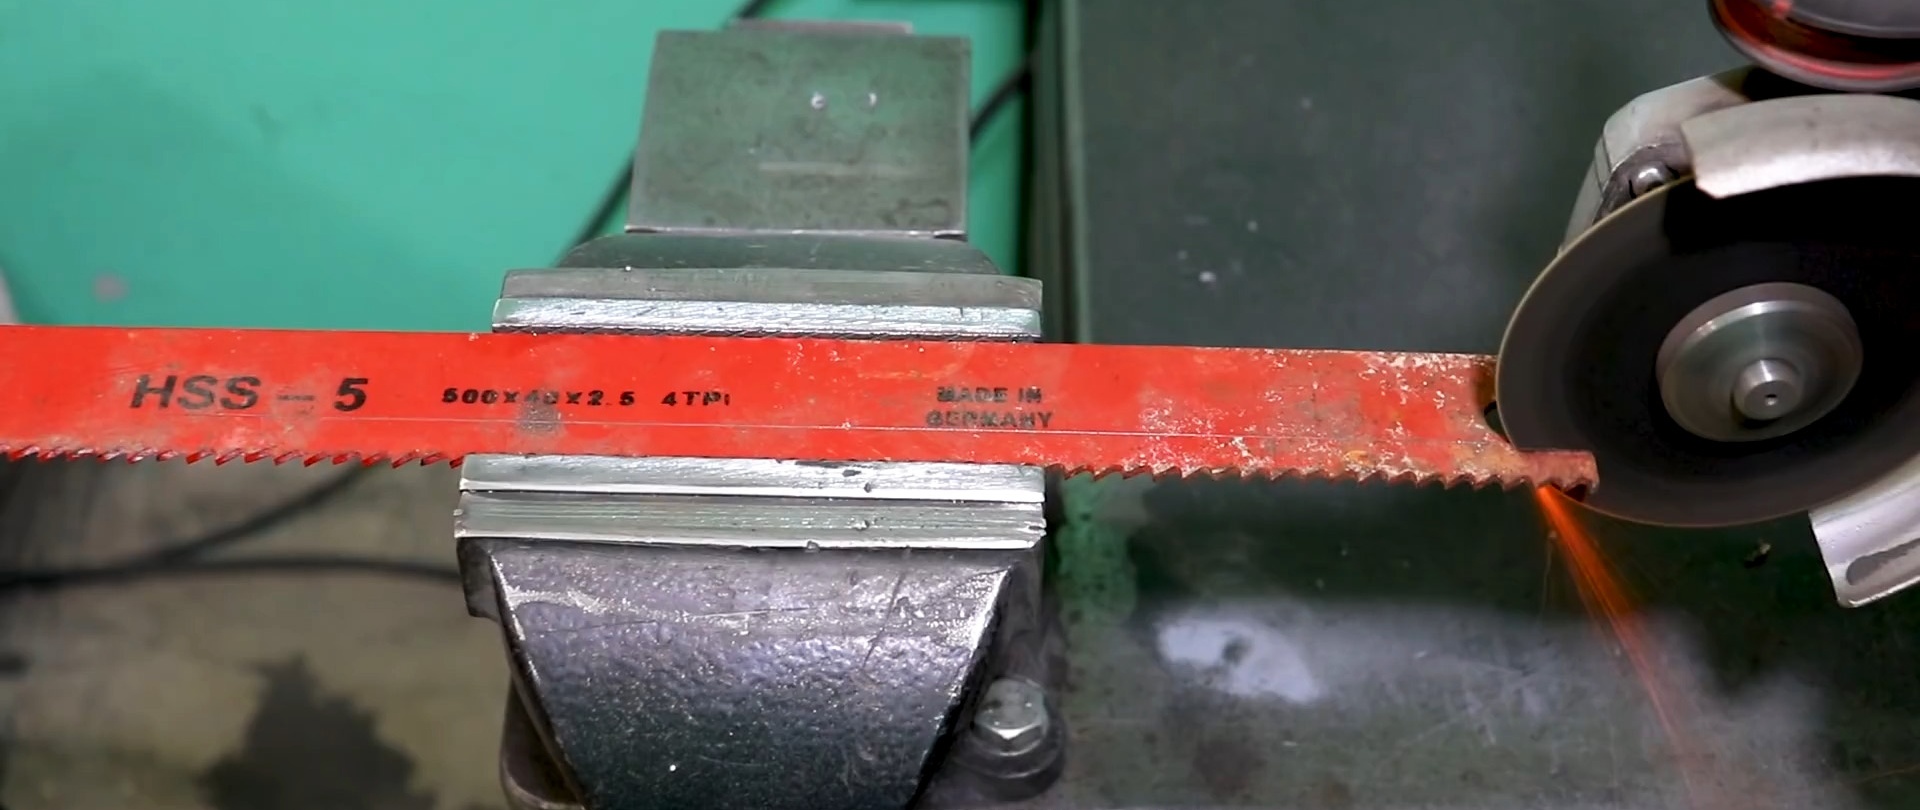
- saw blade;
- large and small bicycle sprockets;
- gear motor;
- cylinder with collar and protrusion;
- profile square pipe;
- steel strip;
- bolts and nut;
- bicycle chain, etc.
Tools: vice, drill with sandpaper holder, grinder, welding, measuring and marking tools, circular saw, drilling machine, etc.
The procedure for assembling a machine for weaving a chain-link mesh
We clean the inside of the pipe with a drill with a sandpaper holder.
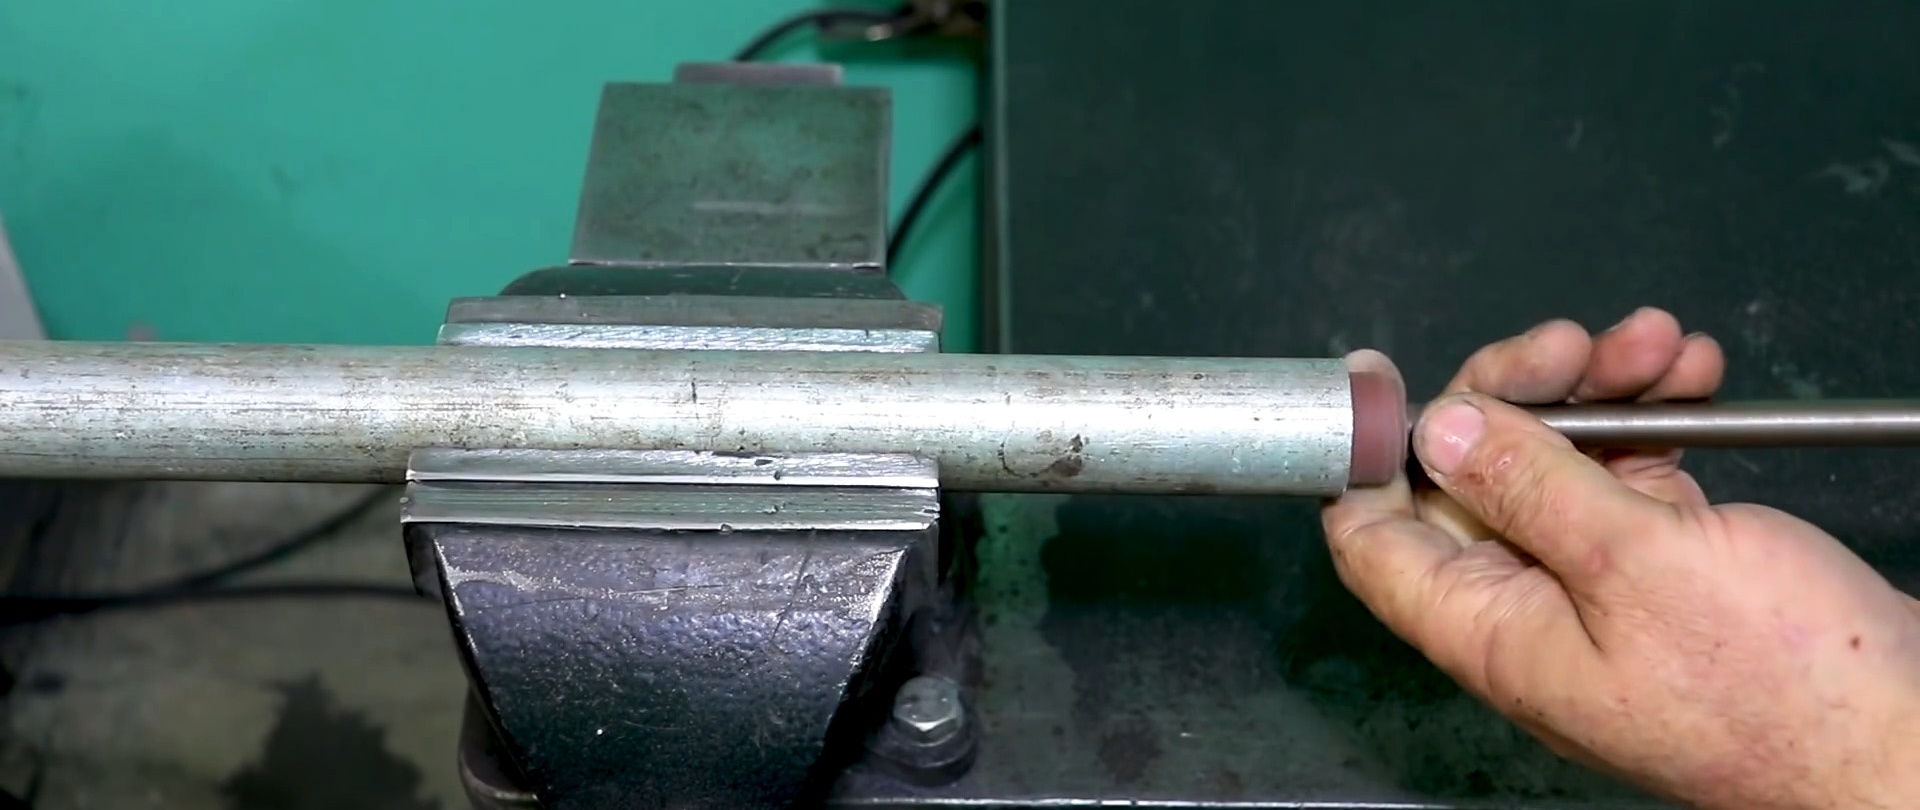
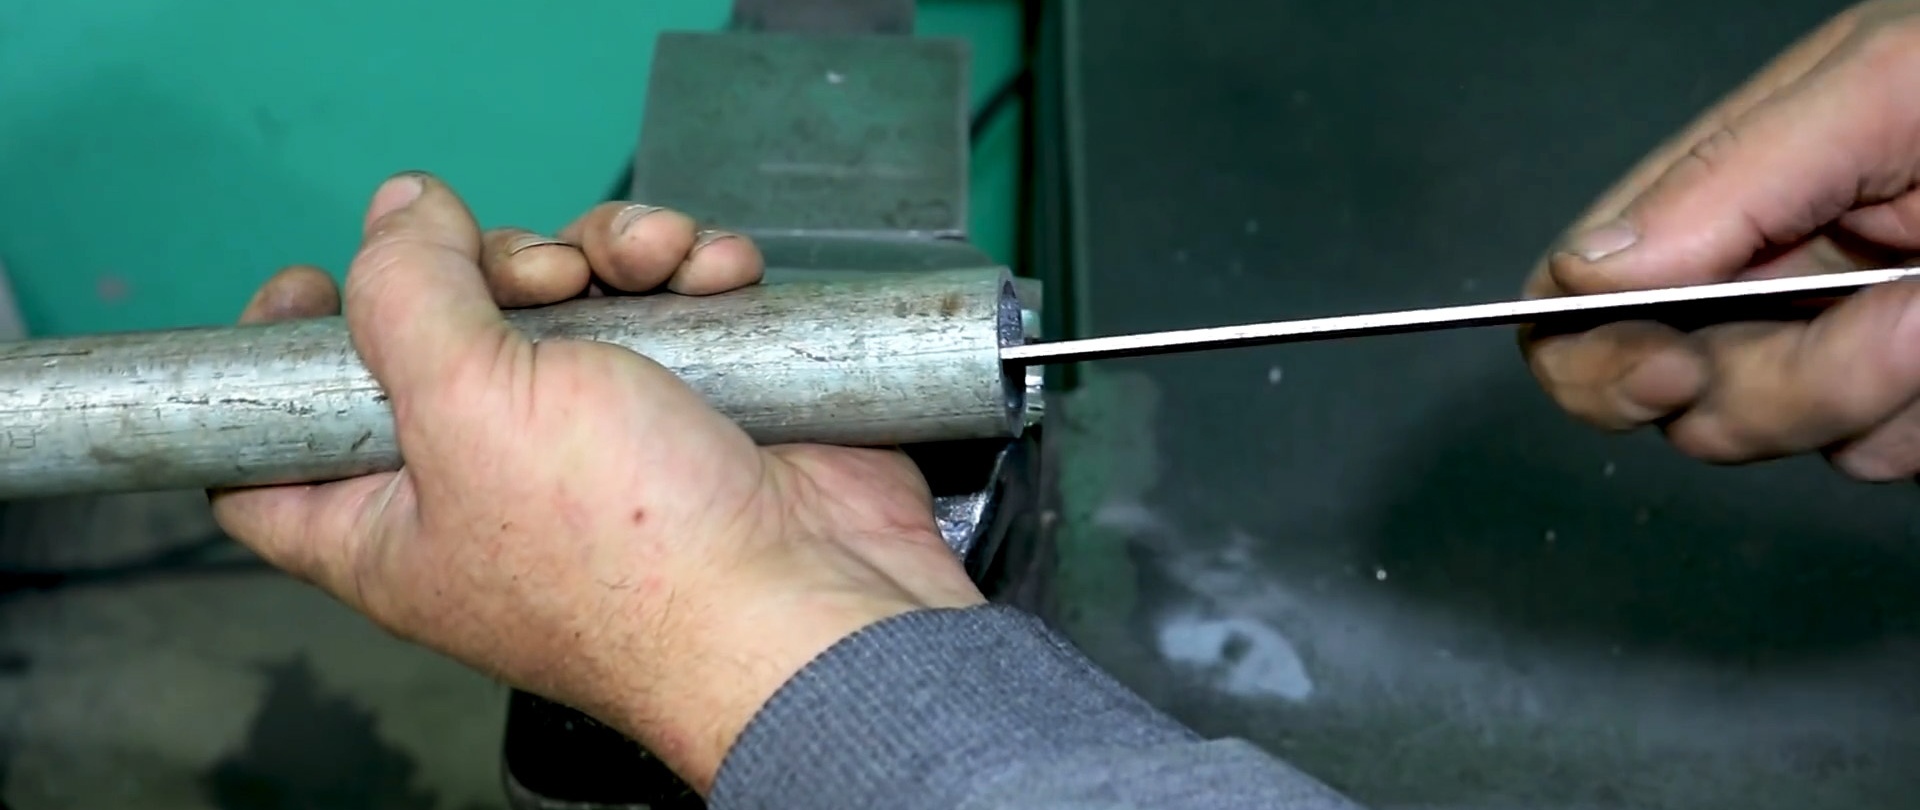
We check the entrance of the cylinder with the collar into the pipe.
We make a slot in it in the center of the smooth end to the required depth.
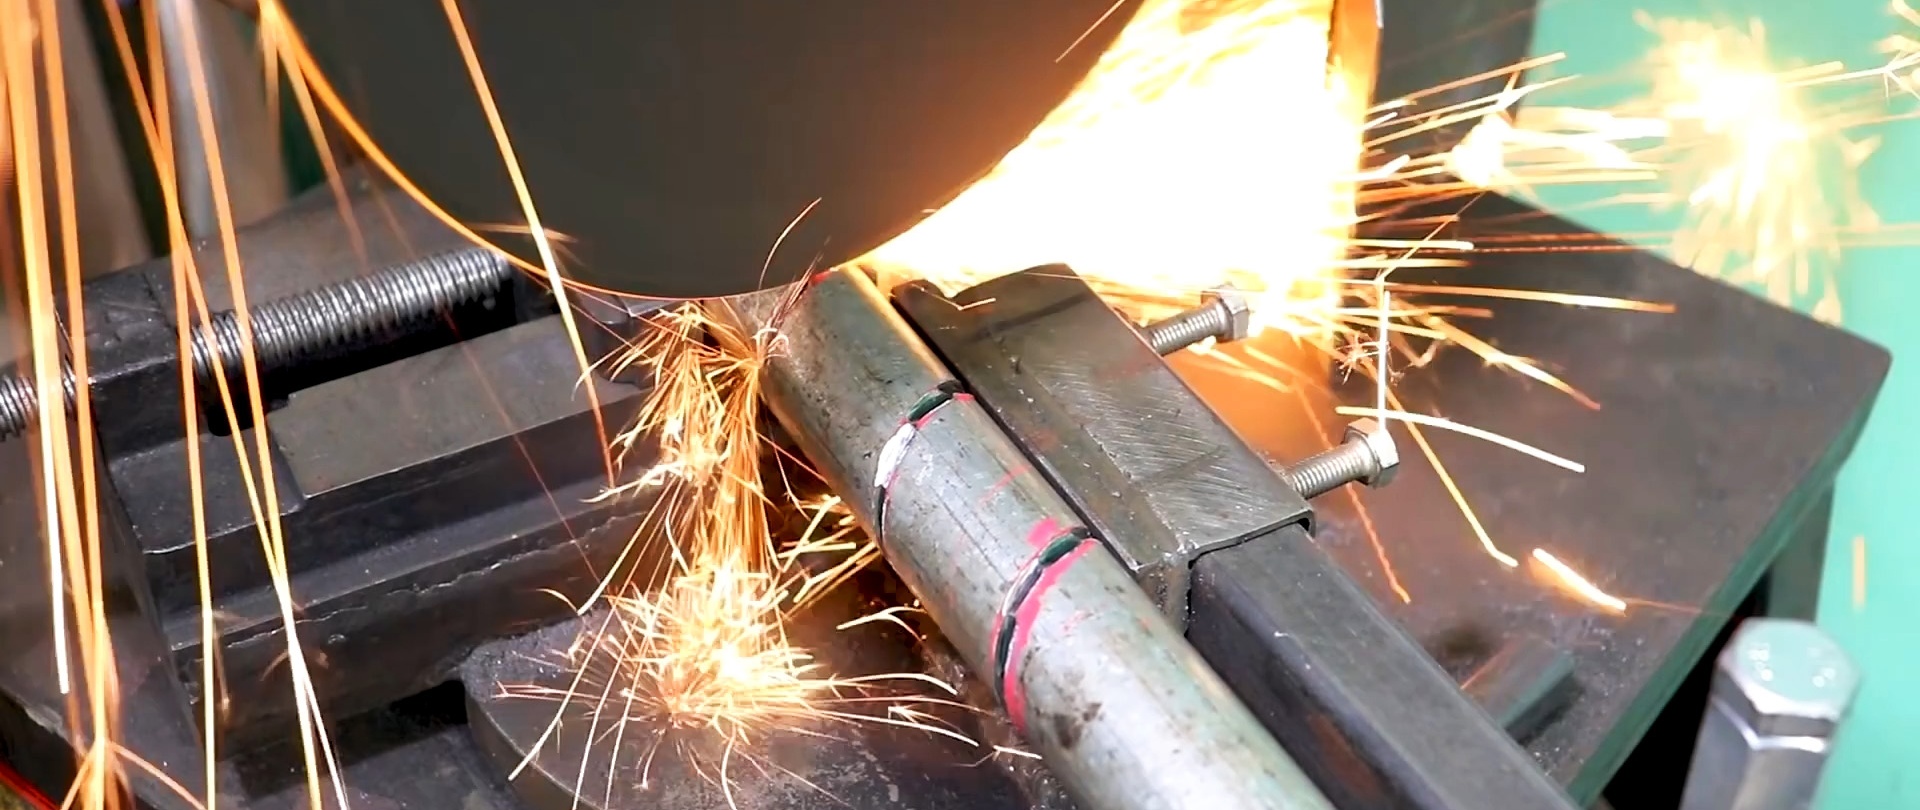
We remove the teeth from the saw blade and cut the strip to the required width and length. We clean, round the edges and check the ease of rotation in the pipe.
Long-lasting discs for angle grinders on AliExpress at a discount - http://alii.pub/61bjly
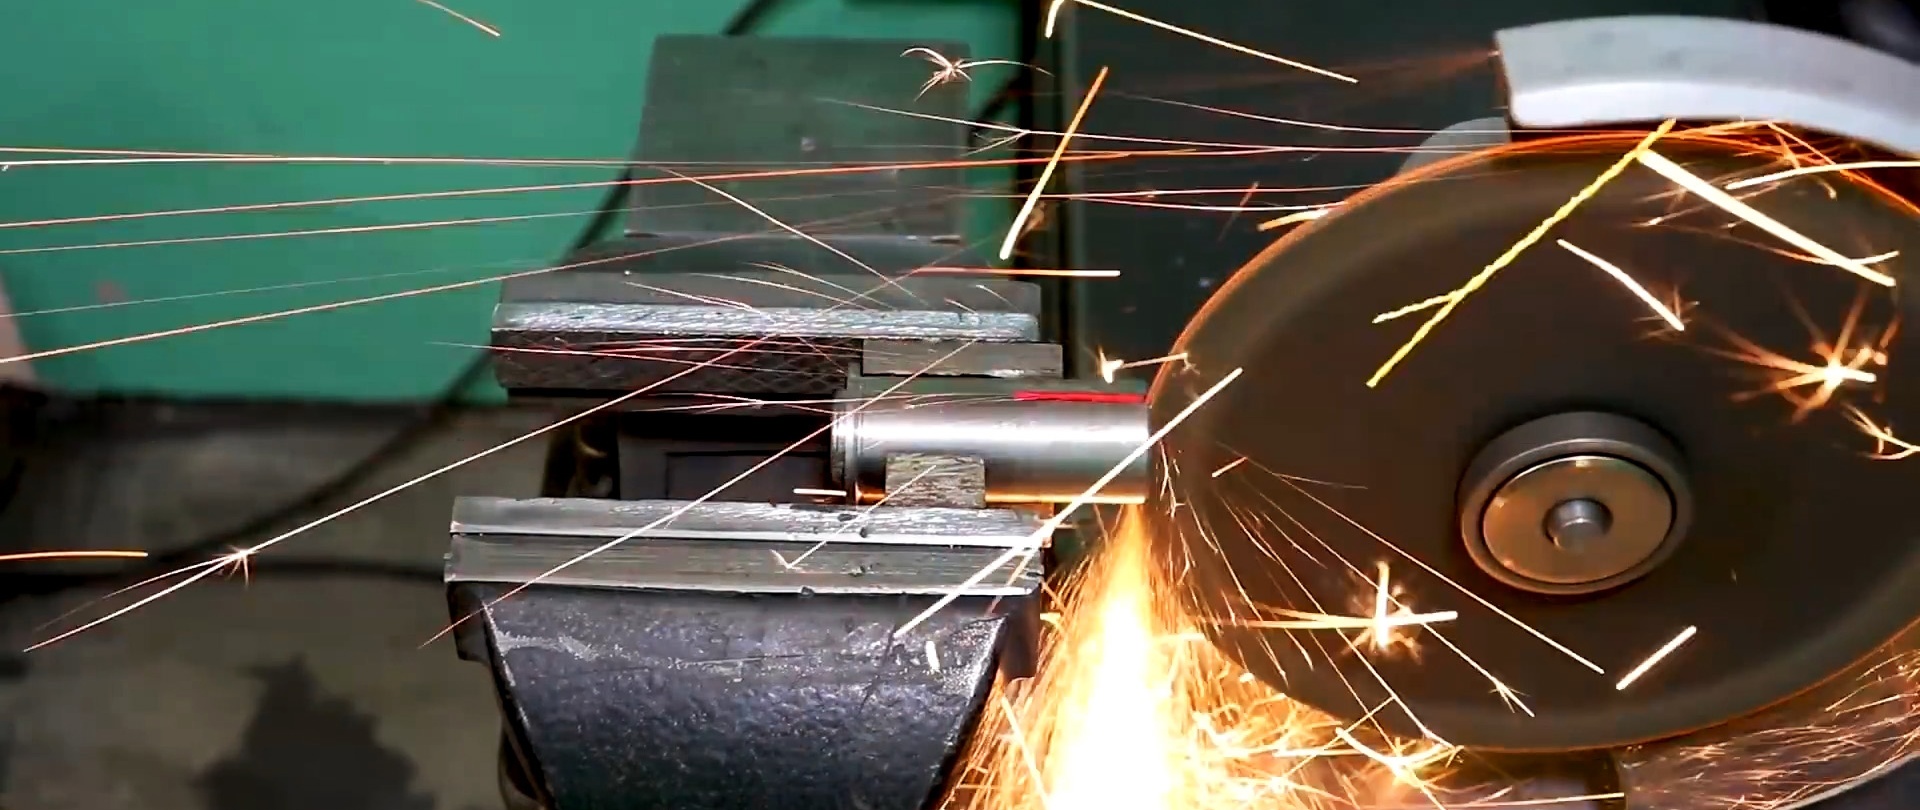
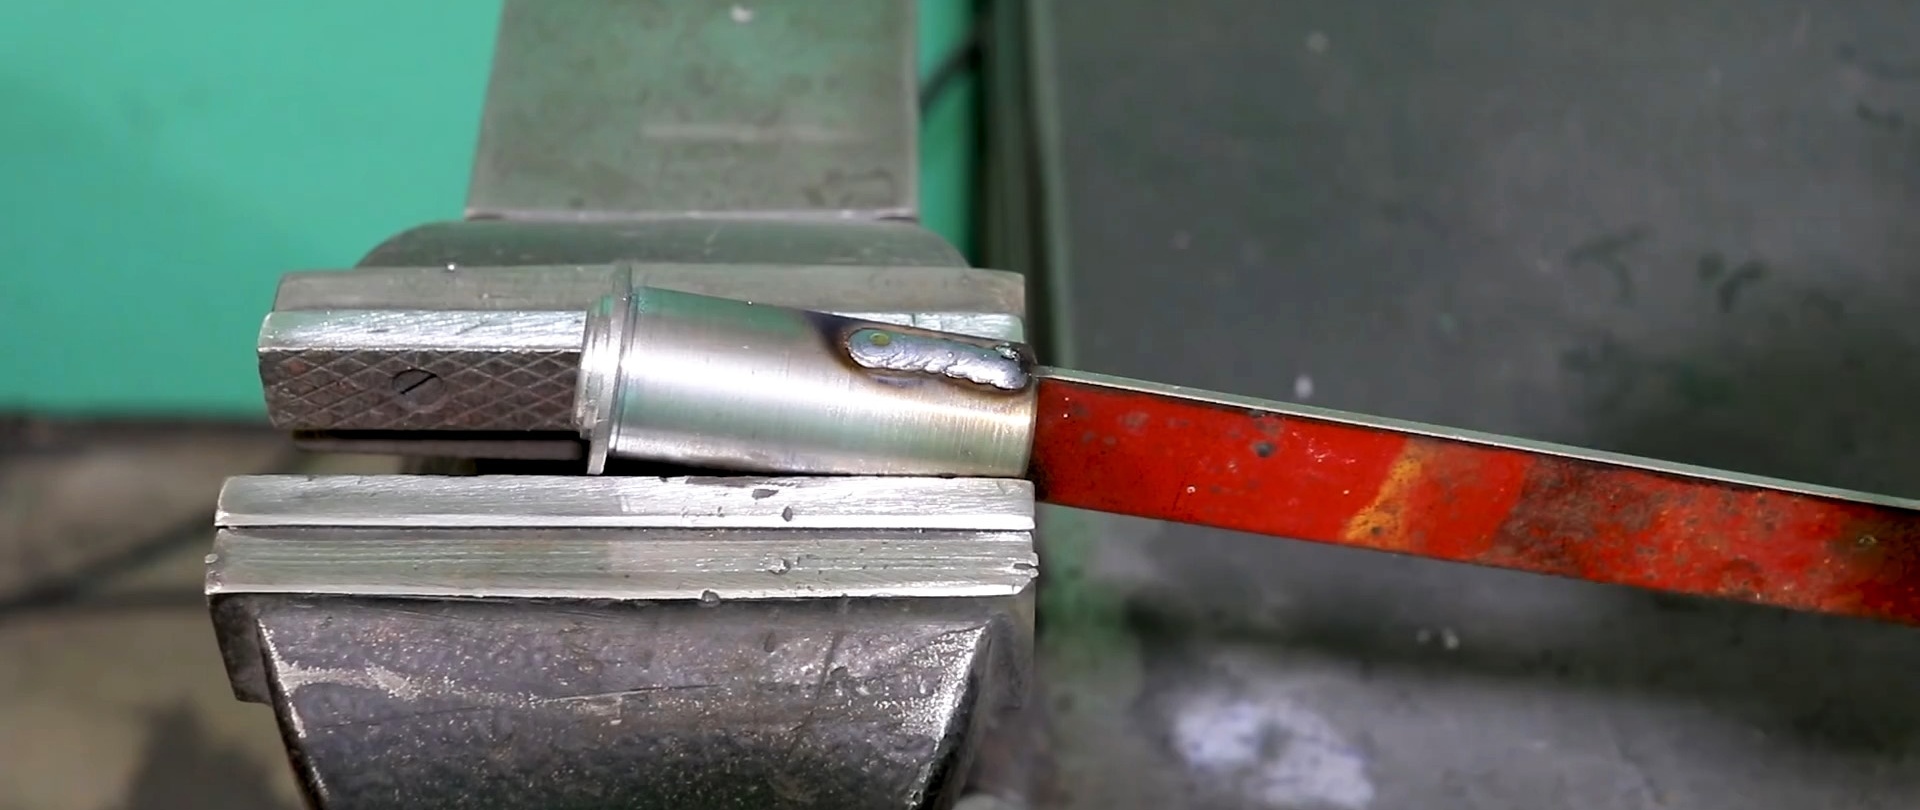
We insert the bar into the slot of the cylinder and weld it.We grind the welds, not allowing them to go beyond the dimensions of the unit.
Welding electrodes for general purposes on AliExpress at a discount - http://alii.pub/606j2h
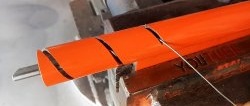
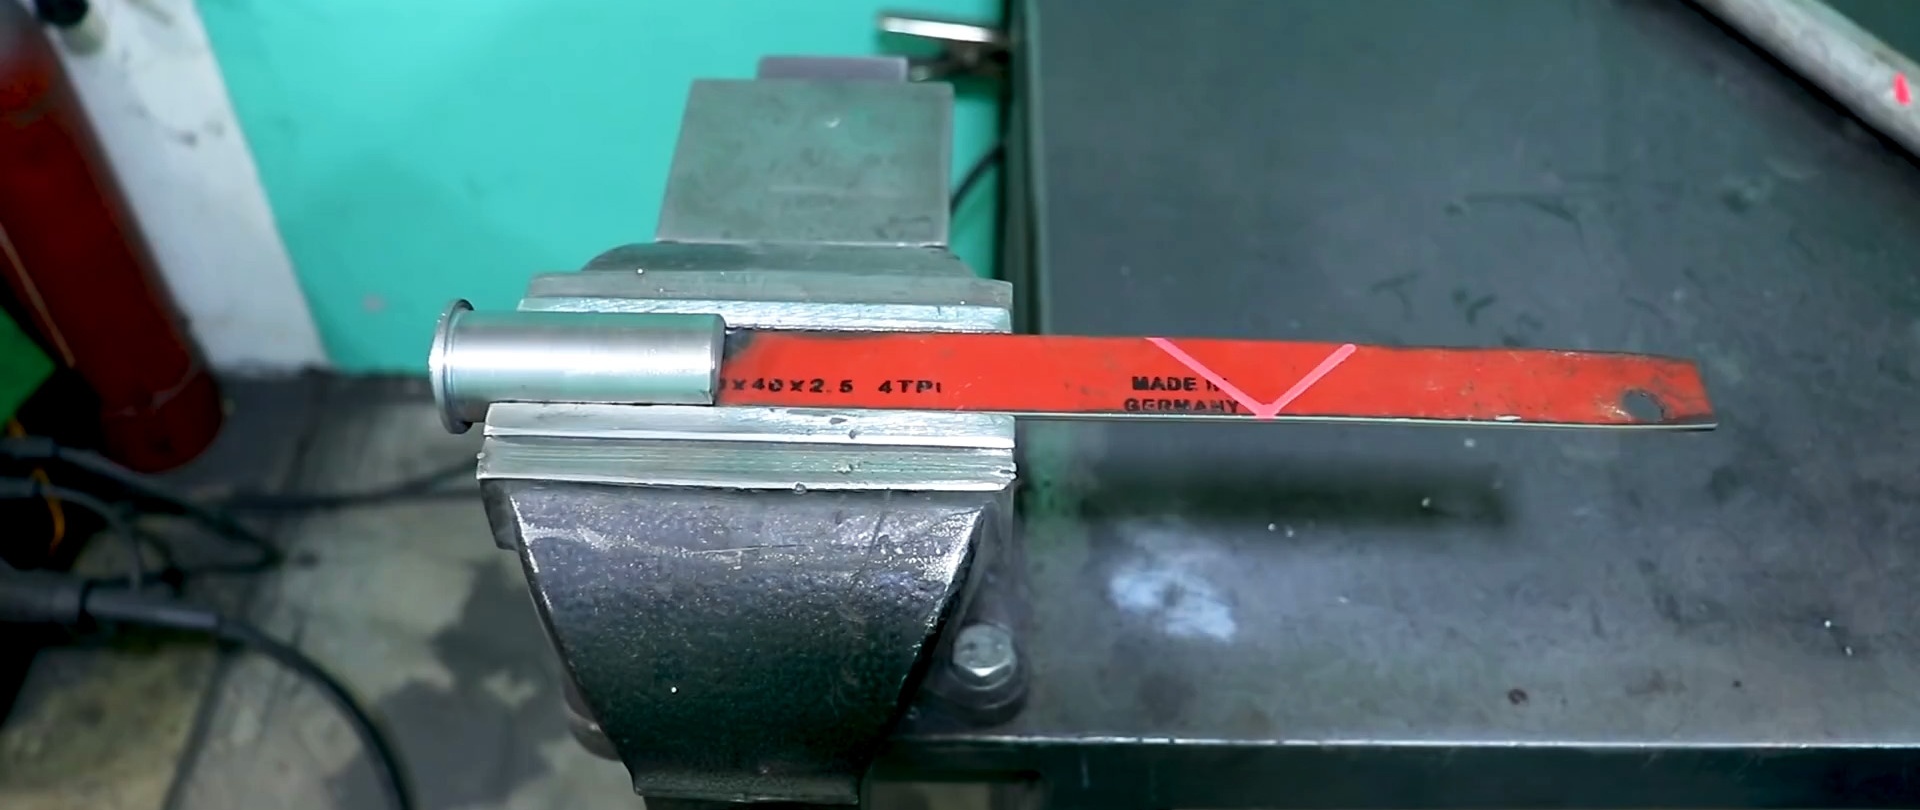
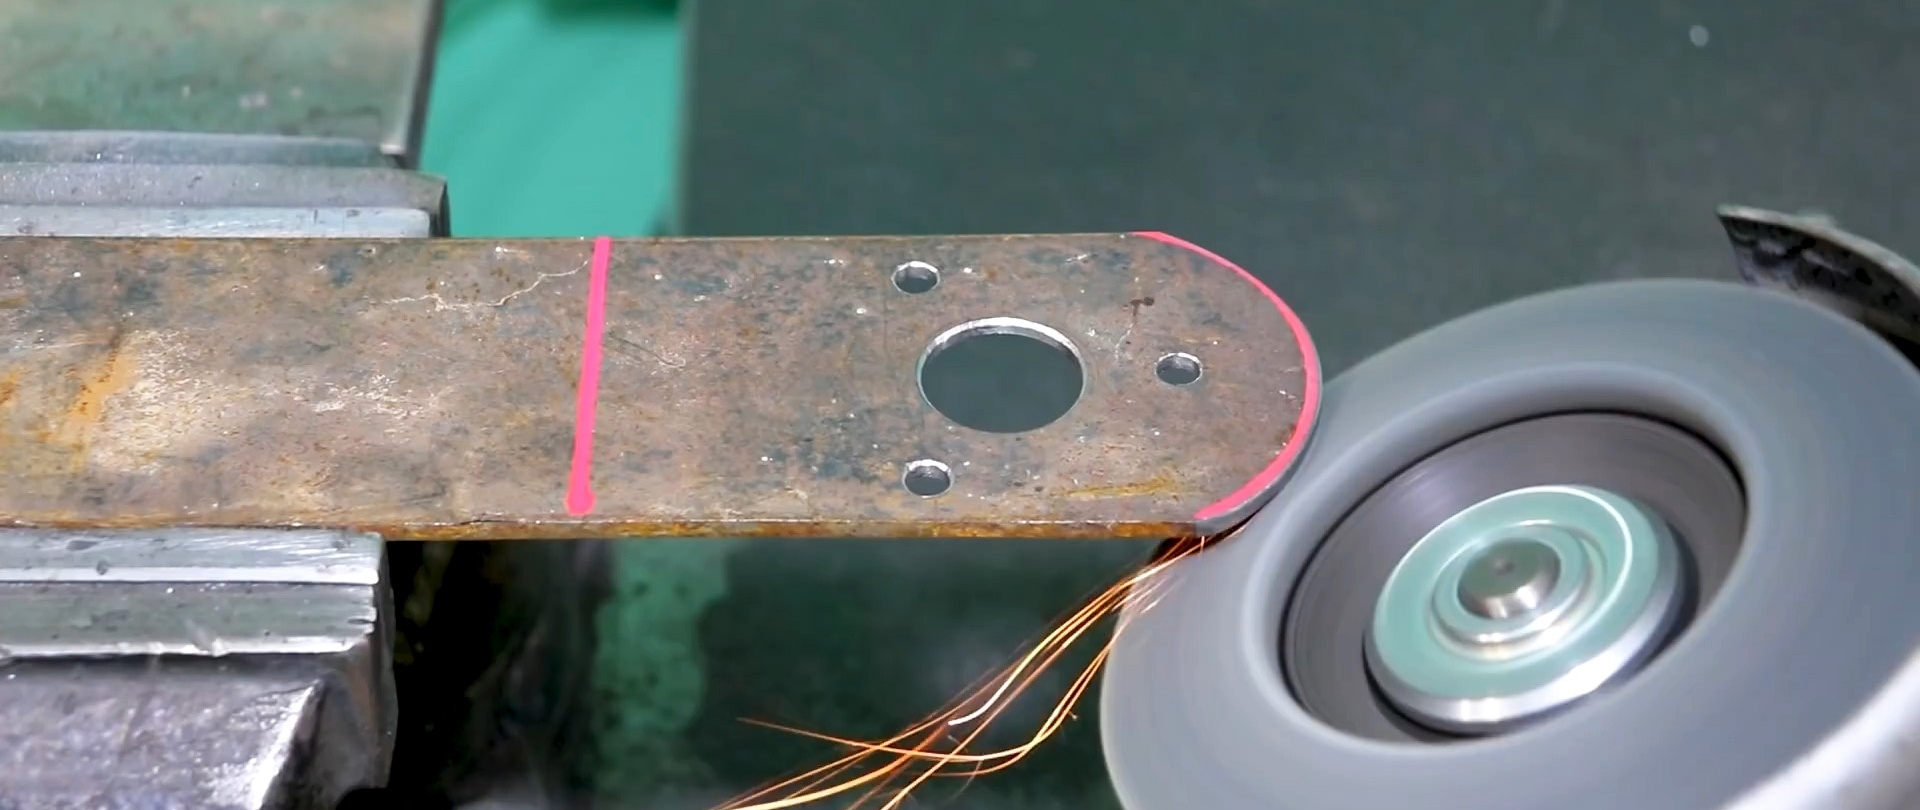
On the bar we draw two straight lines at 45 degrees, the ends of which on the other edge are 48 mm apart.
We apply a tape measure to the pipe so that the end of the pipe is at the 22 cm mark. We mark the marks 15, 10, 5 and 0 cm on the pipe.
We fasten the end of a thin wire with tape at the 0 cm mark and wind it in a spiral onto the pipe at the 5, 10 and 15 cm marks. We also secure the second end with tape. We draw a spiral line along the pipe along the trajectory of the wire.
We make a slot along a spiral line on the pipe, which we clean. We remove burrs inside the pipe using sandpaper on a drill holder.
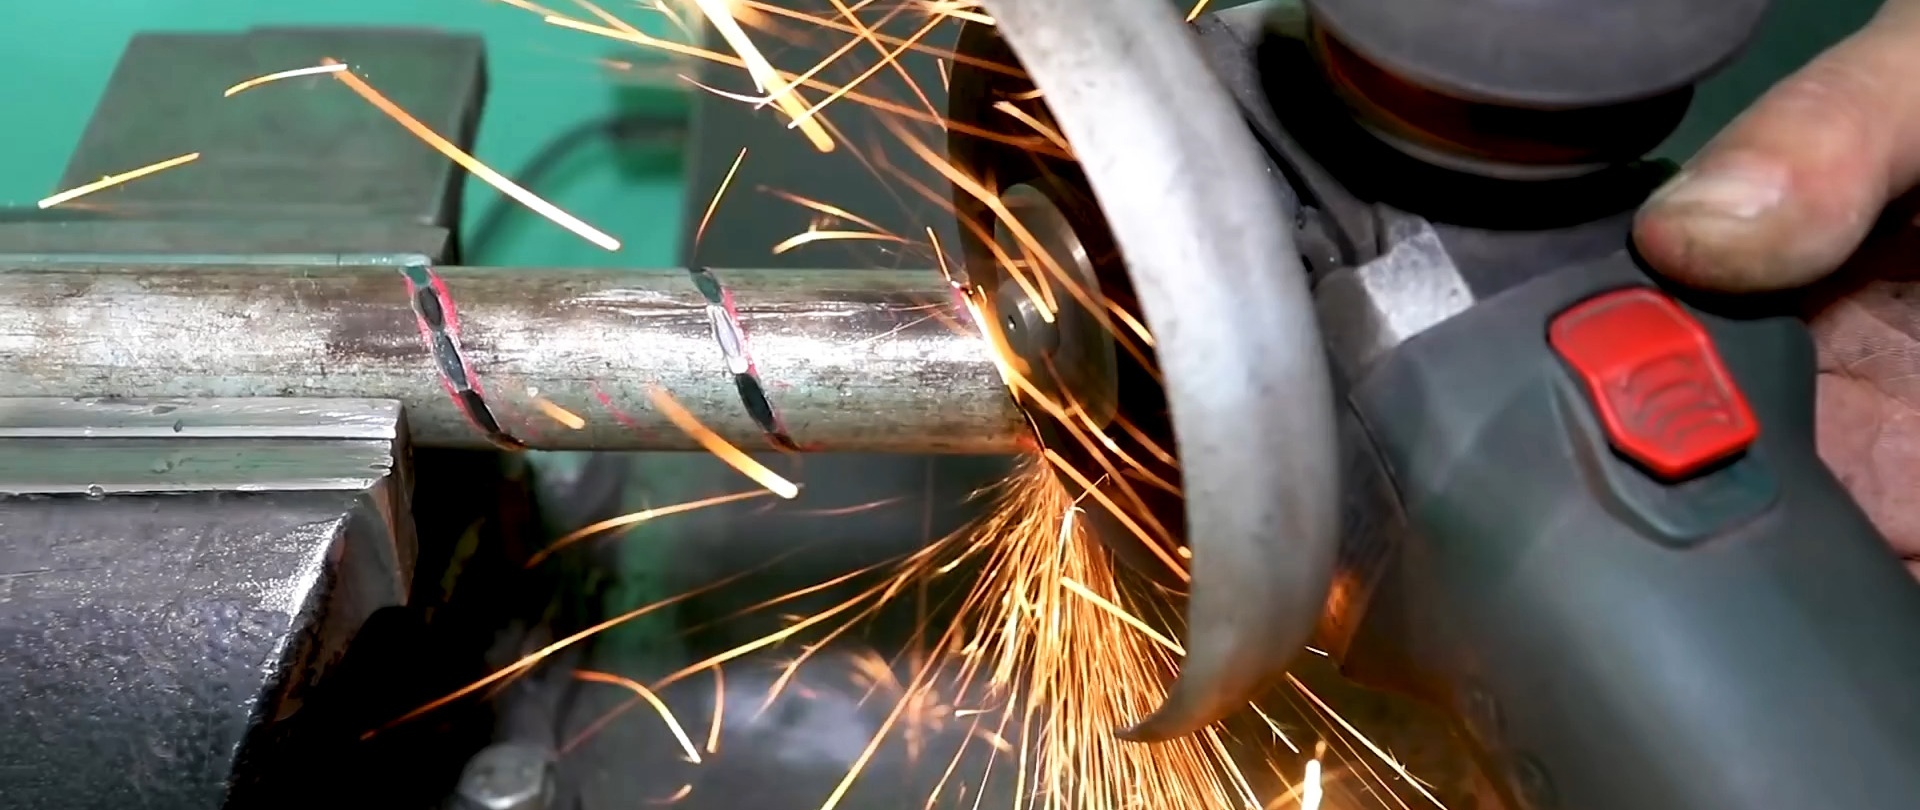
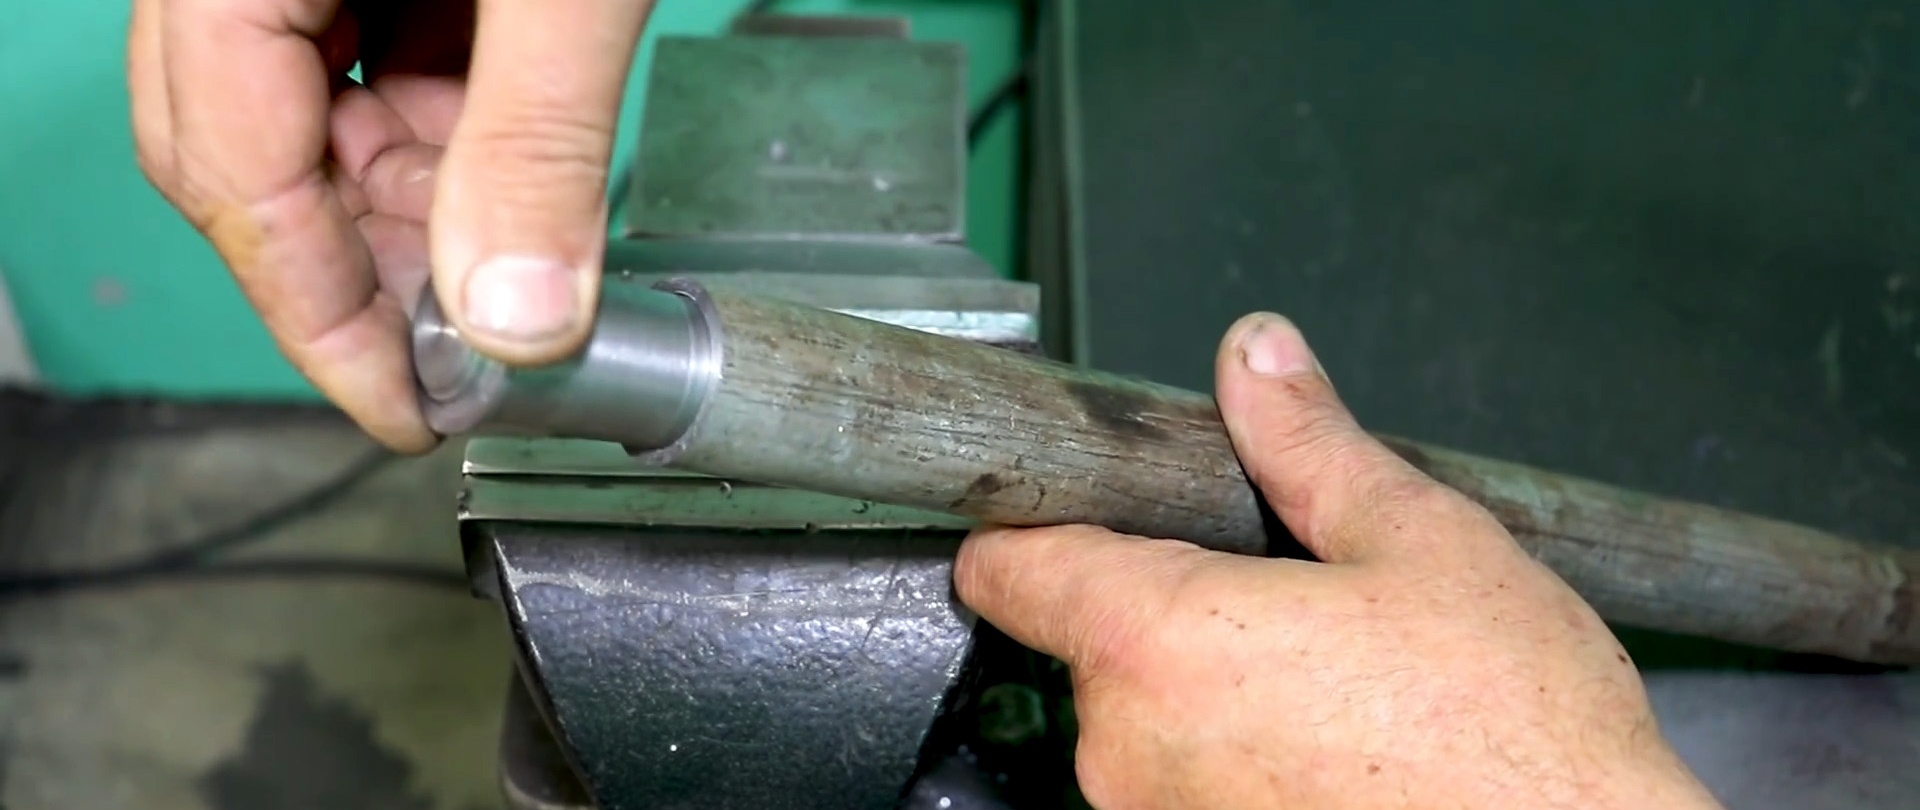
We insert the bar with the cylinder into the pipe until it stops against the collar. Cut off the end protruding from the pipe and round the corners.
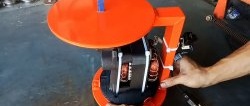
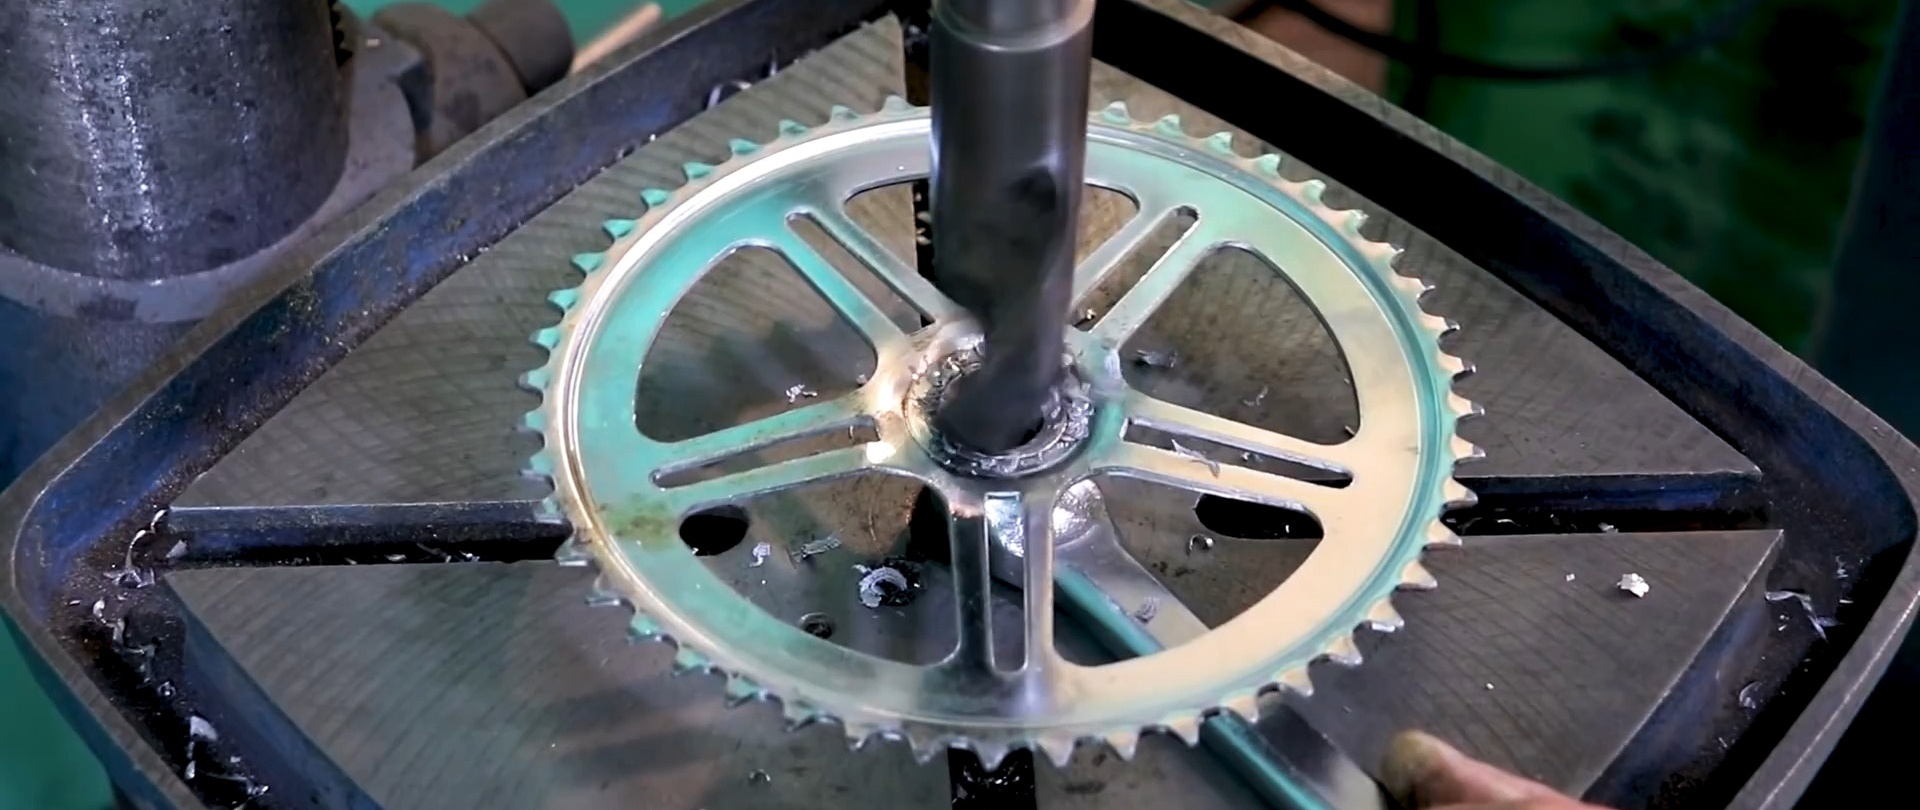
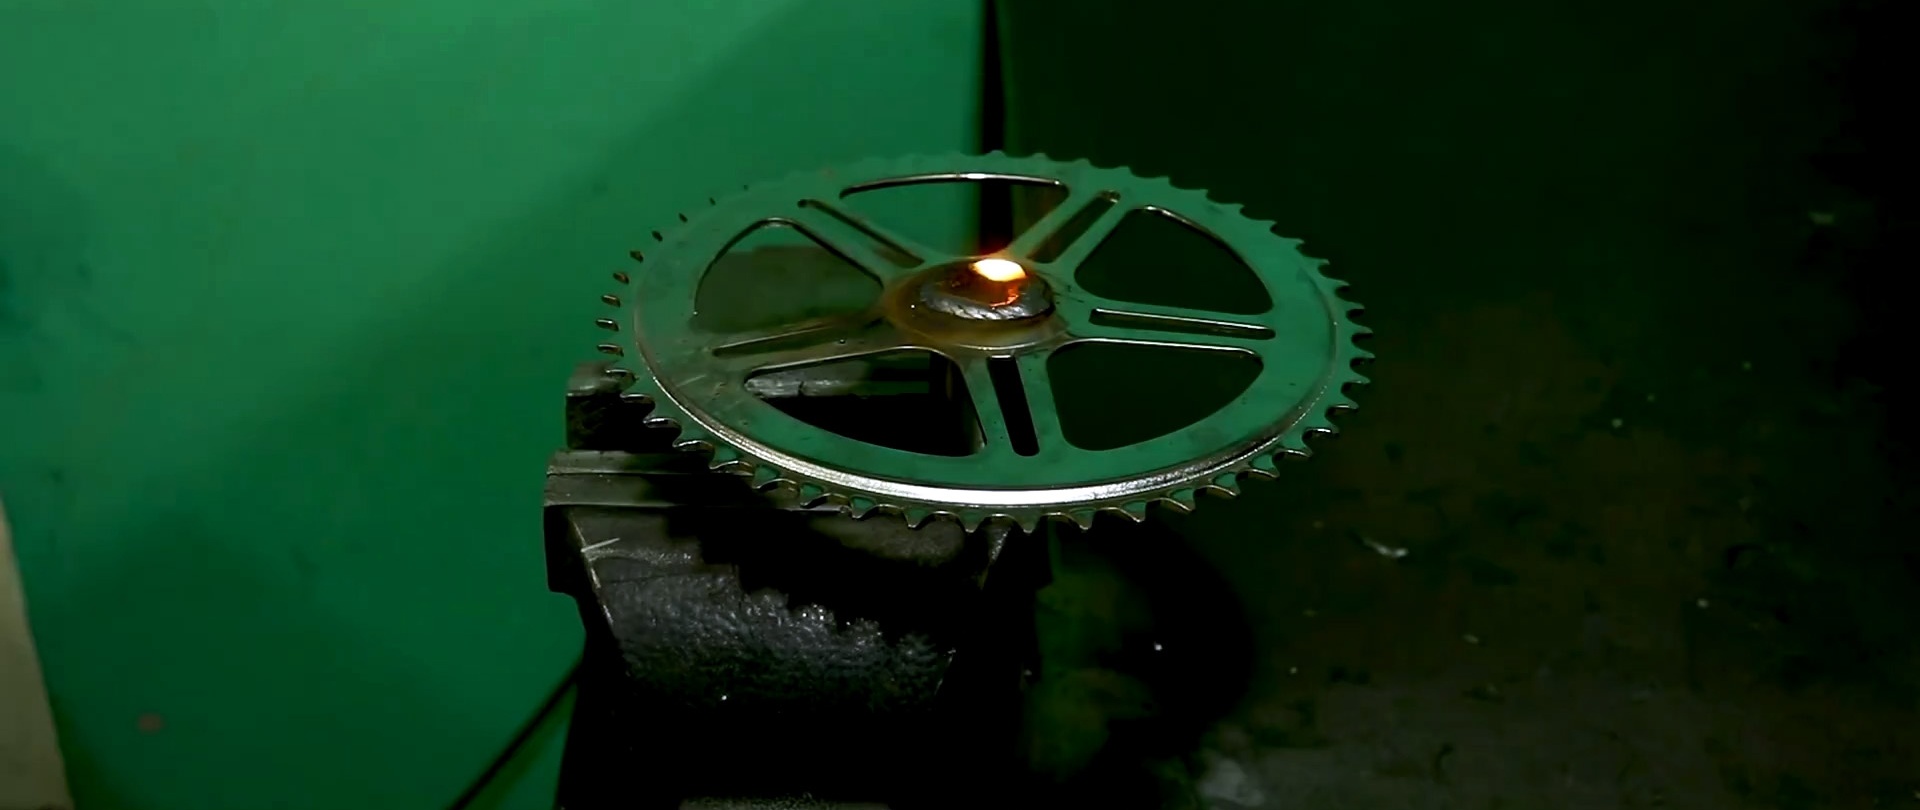
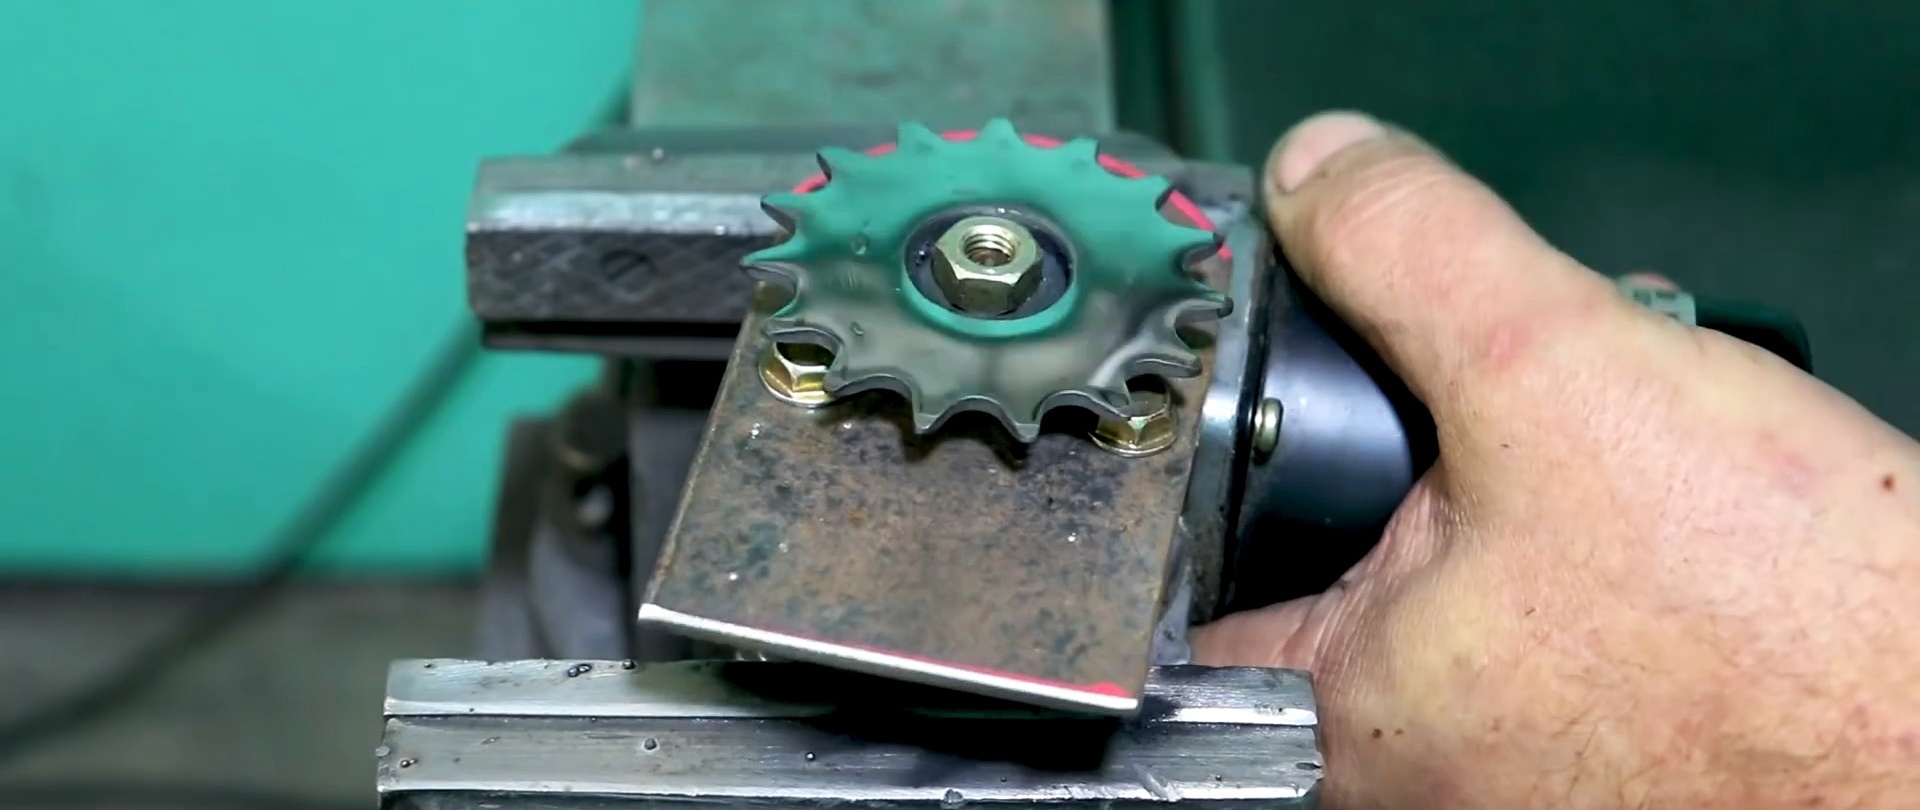
We countersink the hole in the center of the large sprocket, knock out notches, place it on the cylinder protrusion until it touches the shoulder, weld and grind the weld seam.
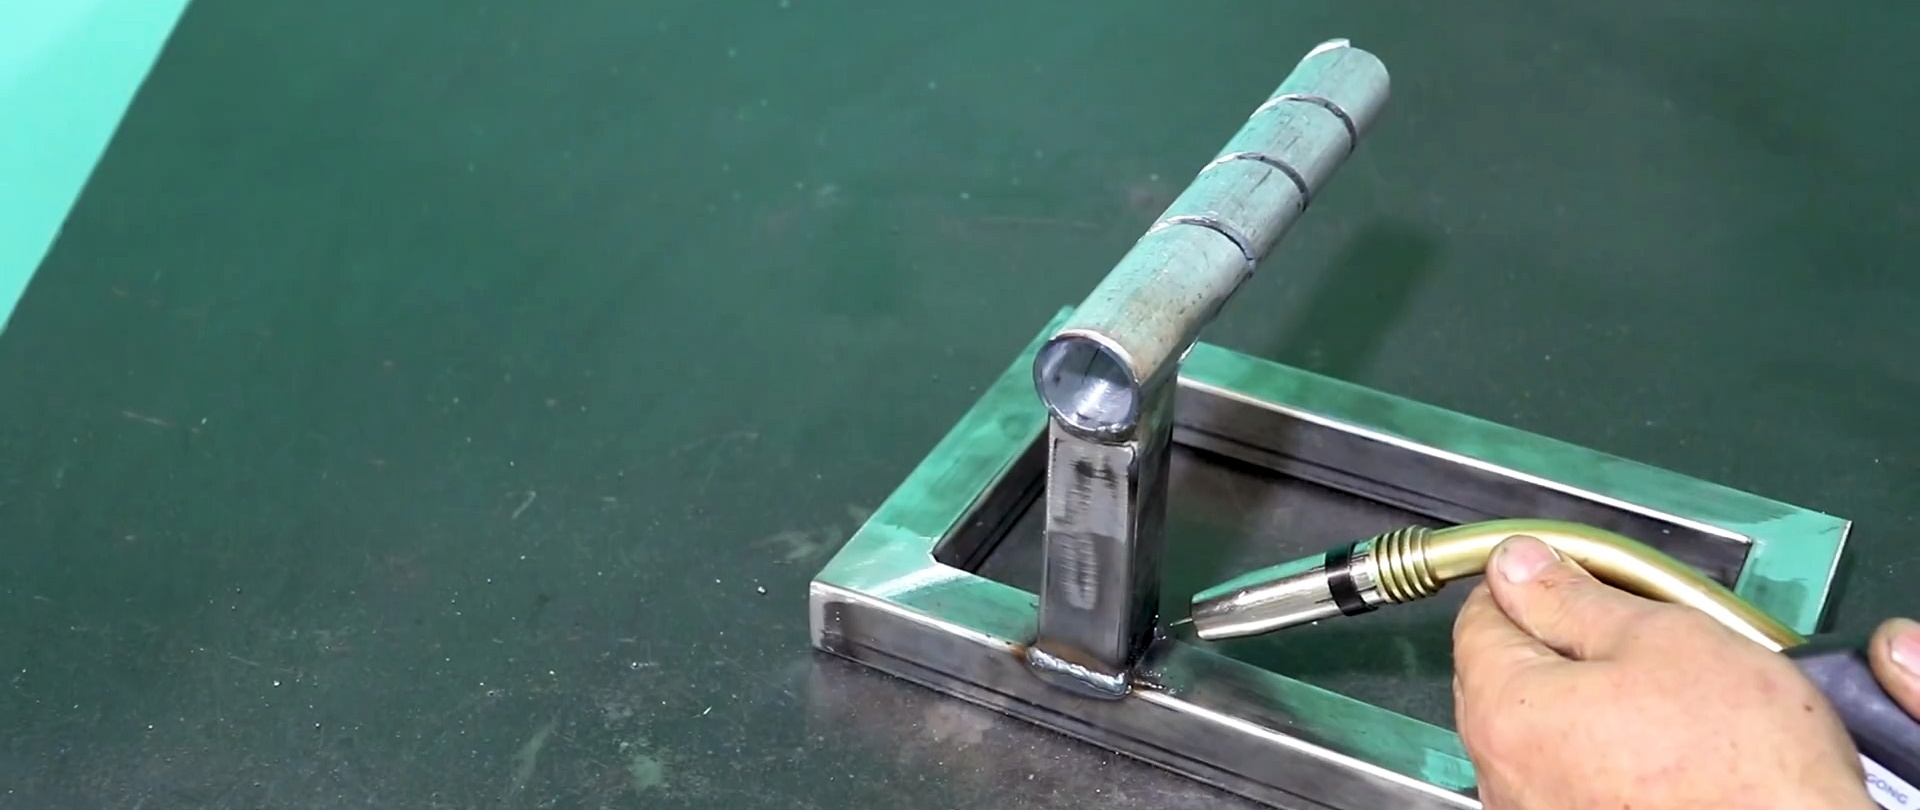
We weld a vertical section of square pipe to the end of the pipe without a slot. We weld a rectangular frame from it and weld the free end of the pipe stand to the long side of the frame, offset from the center so that the pipe is located above the frame.

We transfer the elements of the gear motor bracket to a steel strip and perform them on a drilling machine. We form the outer contour and cut off a fragment of the required length from the strip.
High-quality and durable drills on AliExpress at a discount - http://alii.pub/5zwmxz
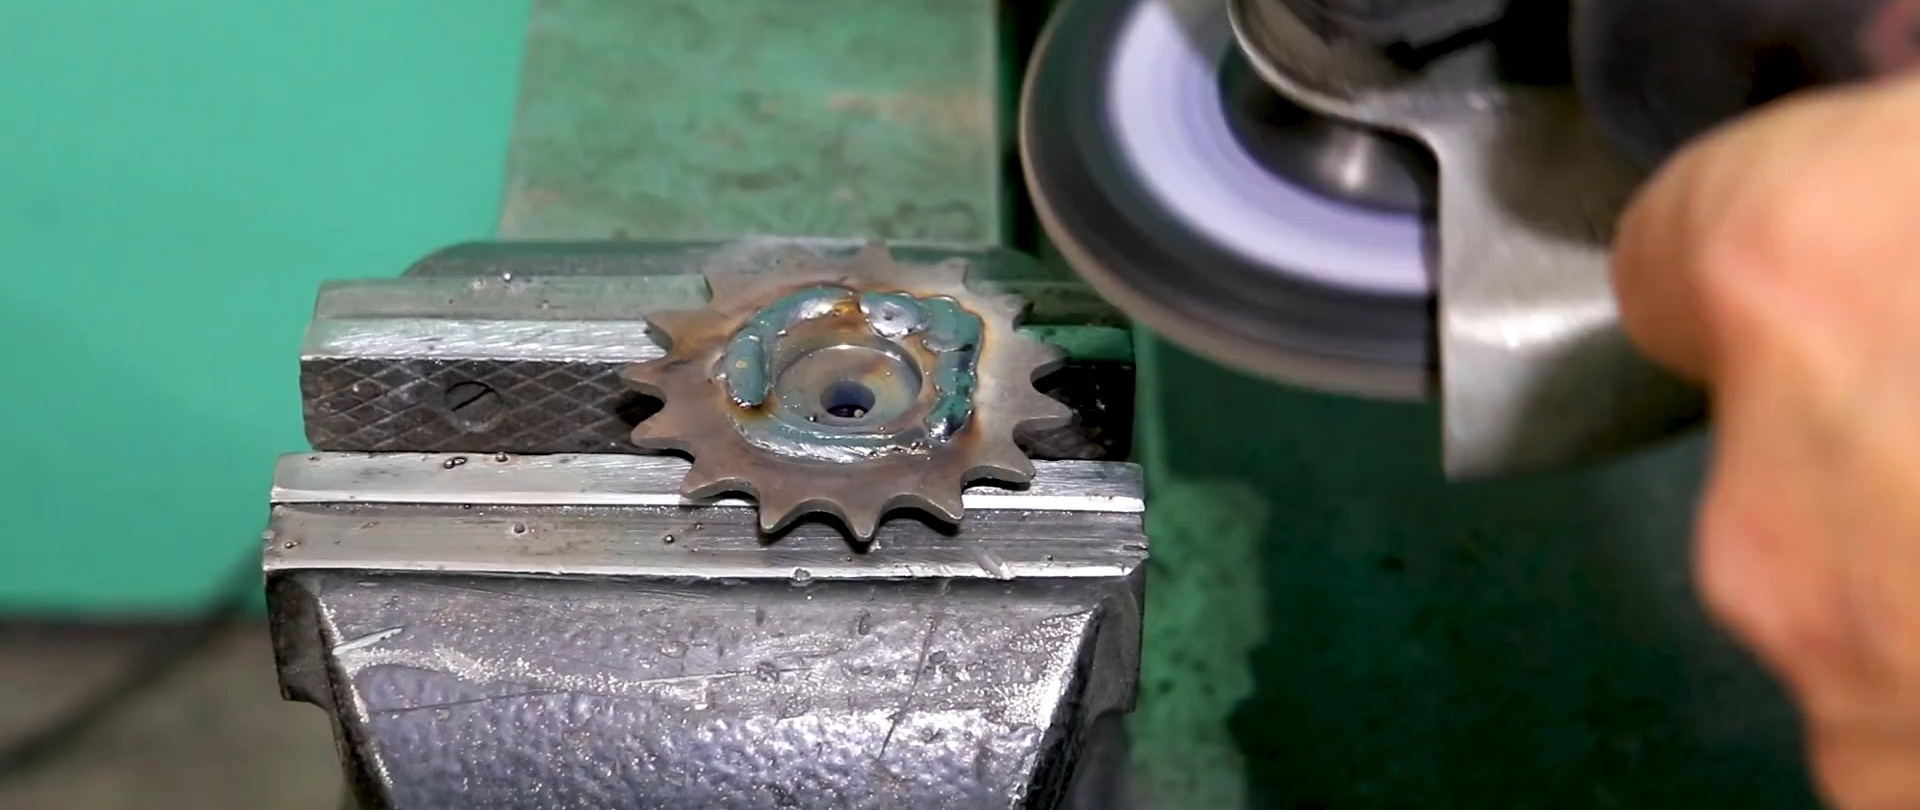
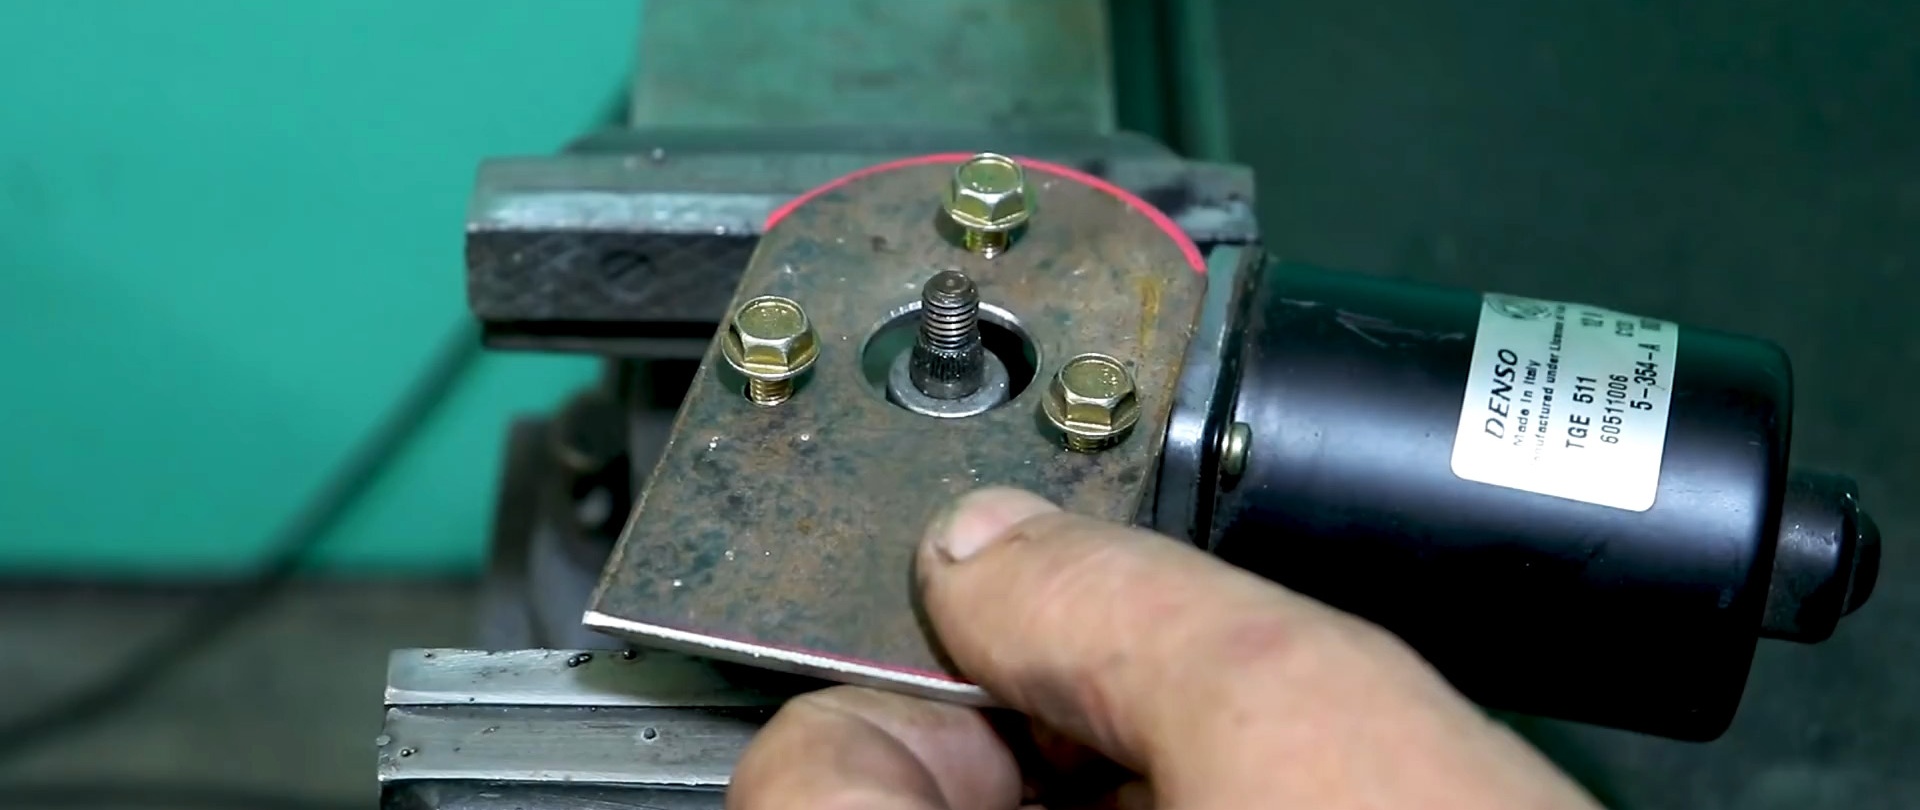
We place a bushing insert into the hole of the small sprocket, weld and grind the weld. We fix the fragment from the strip with bolts to the gear motor. We put a small sprocket on the gearbox axle and tighten the nut.
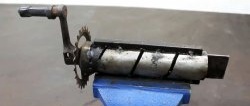
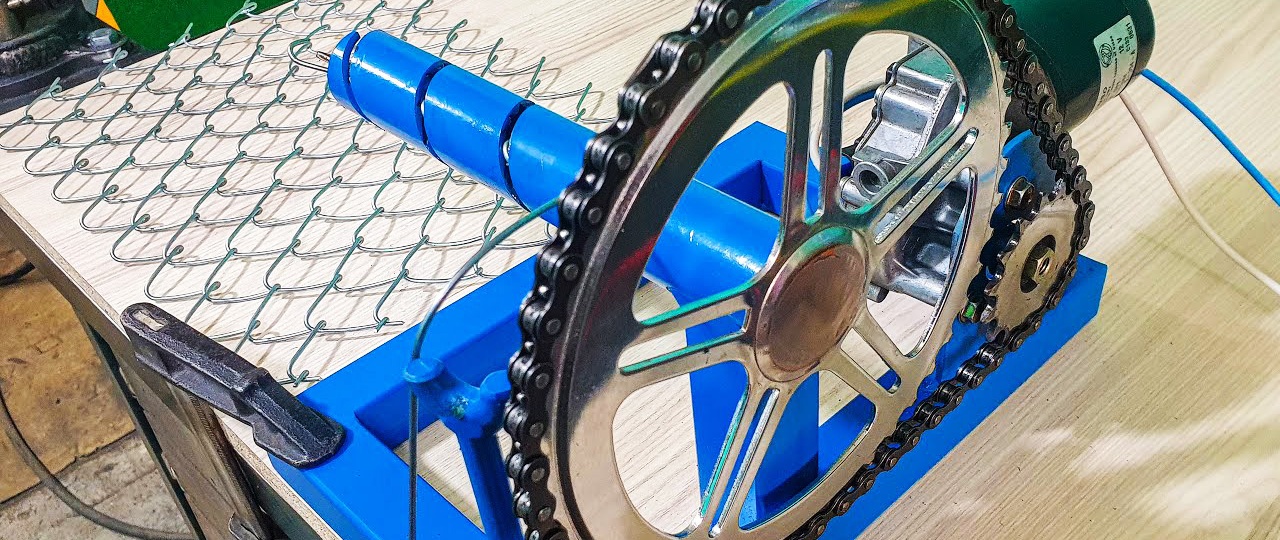
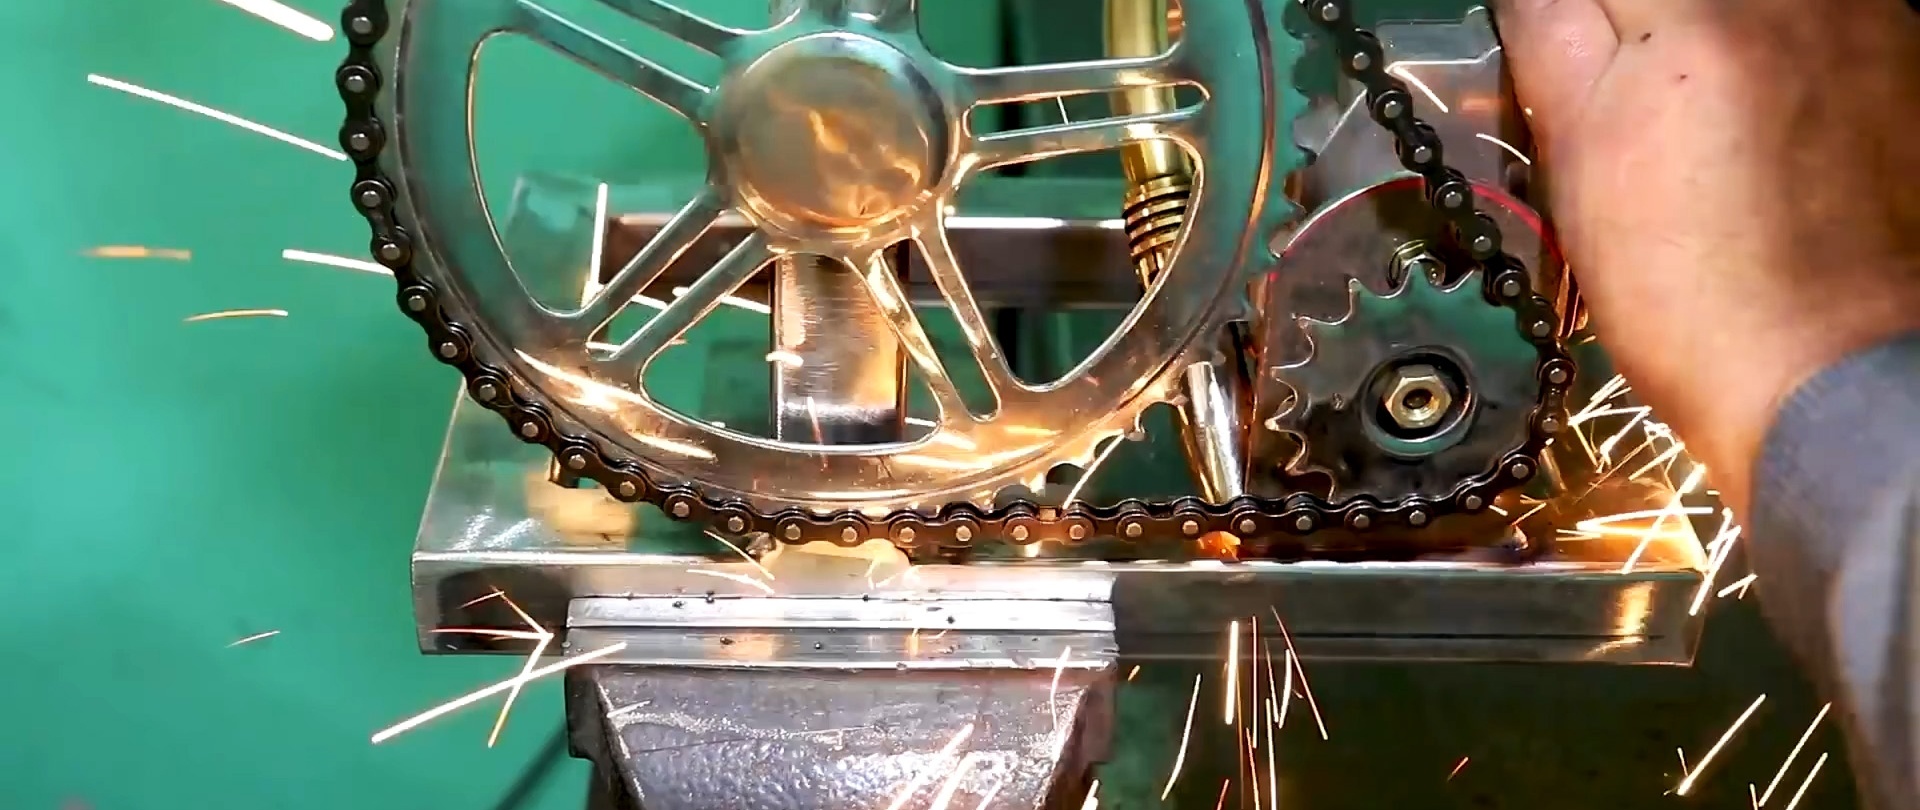
We insert the bar with the cylinder into the pipe with a spiral slot, and put a bicycle chain on the large sprocket. We tighten the chain with a small sprocket and fix the bracket on the frame by welding, which we securely weld.
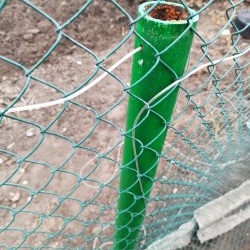
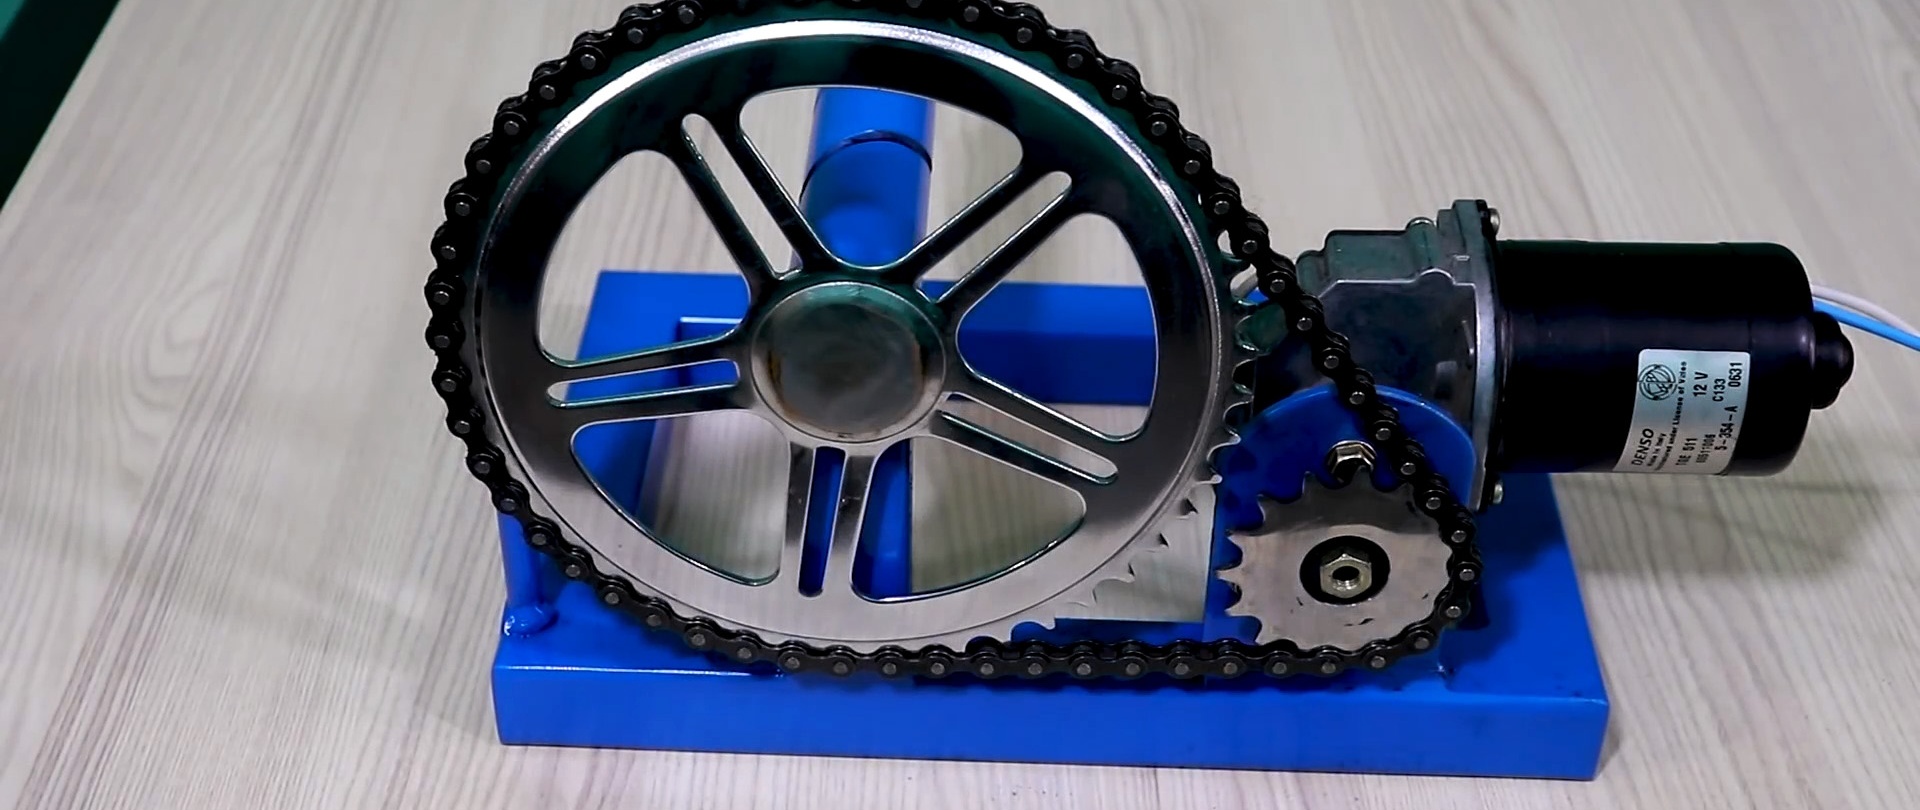
On the other side of the pipe stand, we weld a vertical rod with a half ring closer to the end and paint the structure.
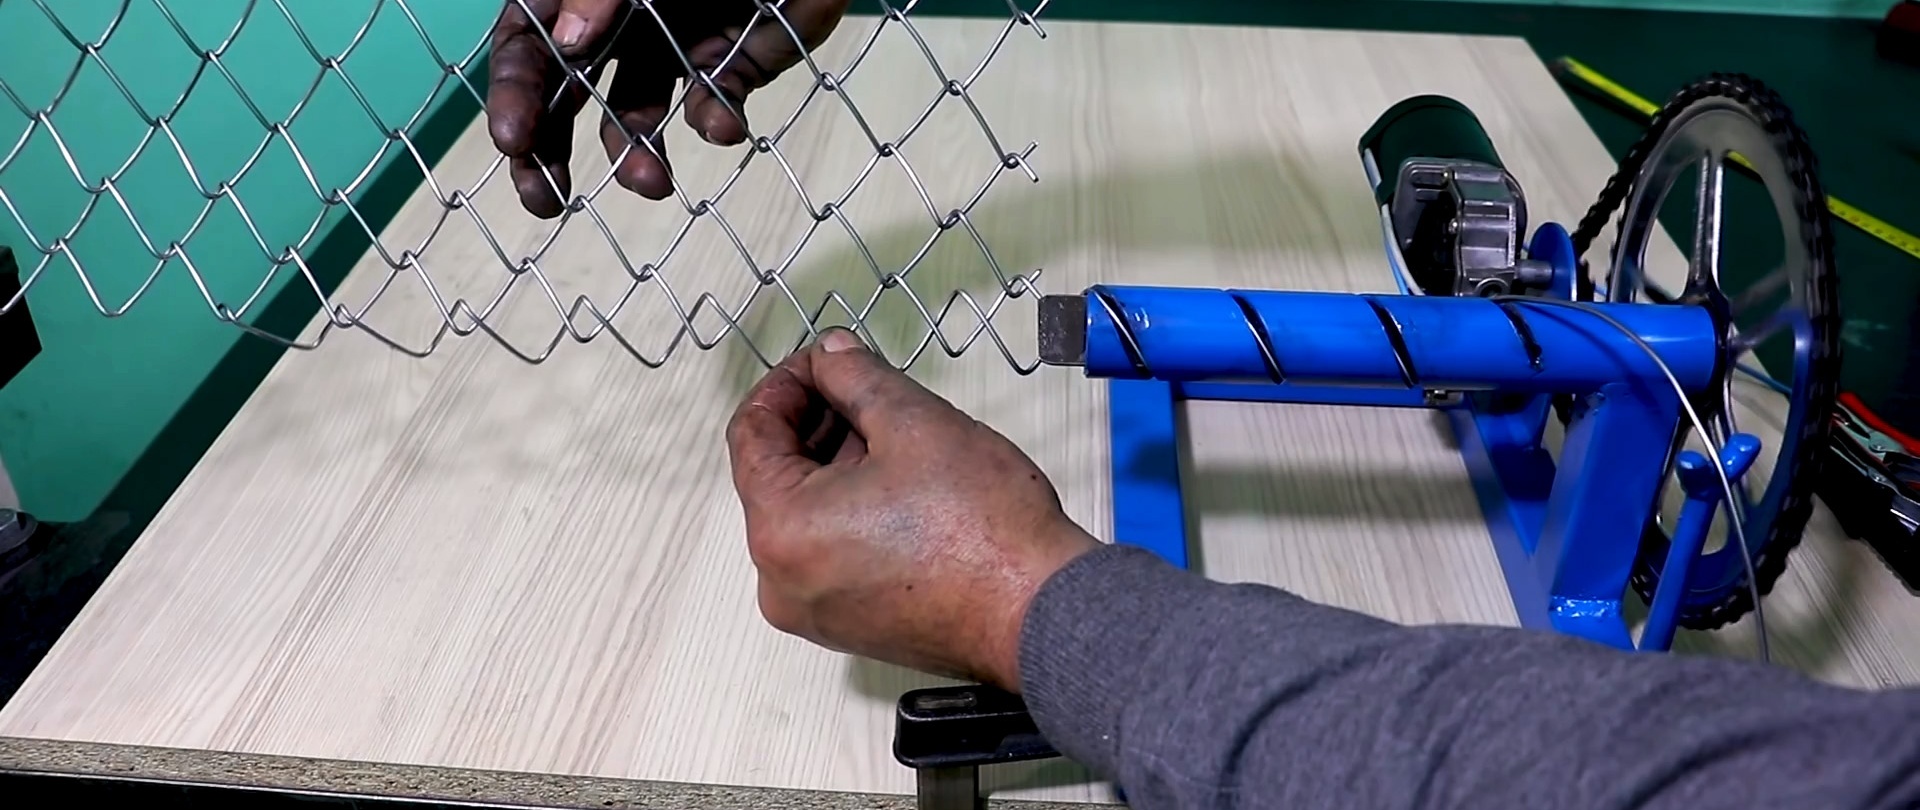
Lubricate the cylinder and sprocket teeth. We securely fasten everything and connect the sprockets with a chain. We connect the wires to the motor and the machine is ready to work.
To do this, we attach a wire to the bar at the beginning of the spiral slot, apply voltage and it, carried away by the rotating bar, and sliding along the spiral slot in the pipe, periodically bends 90 degrees.
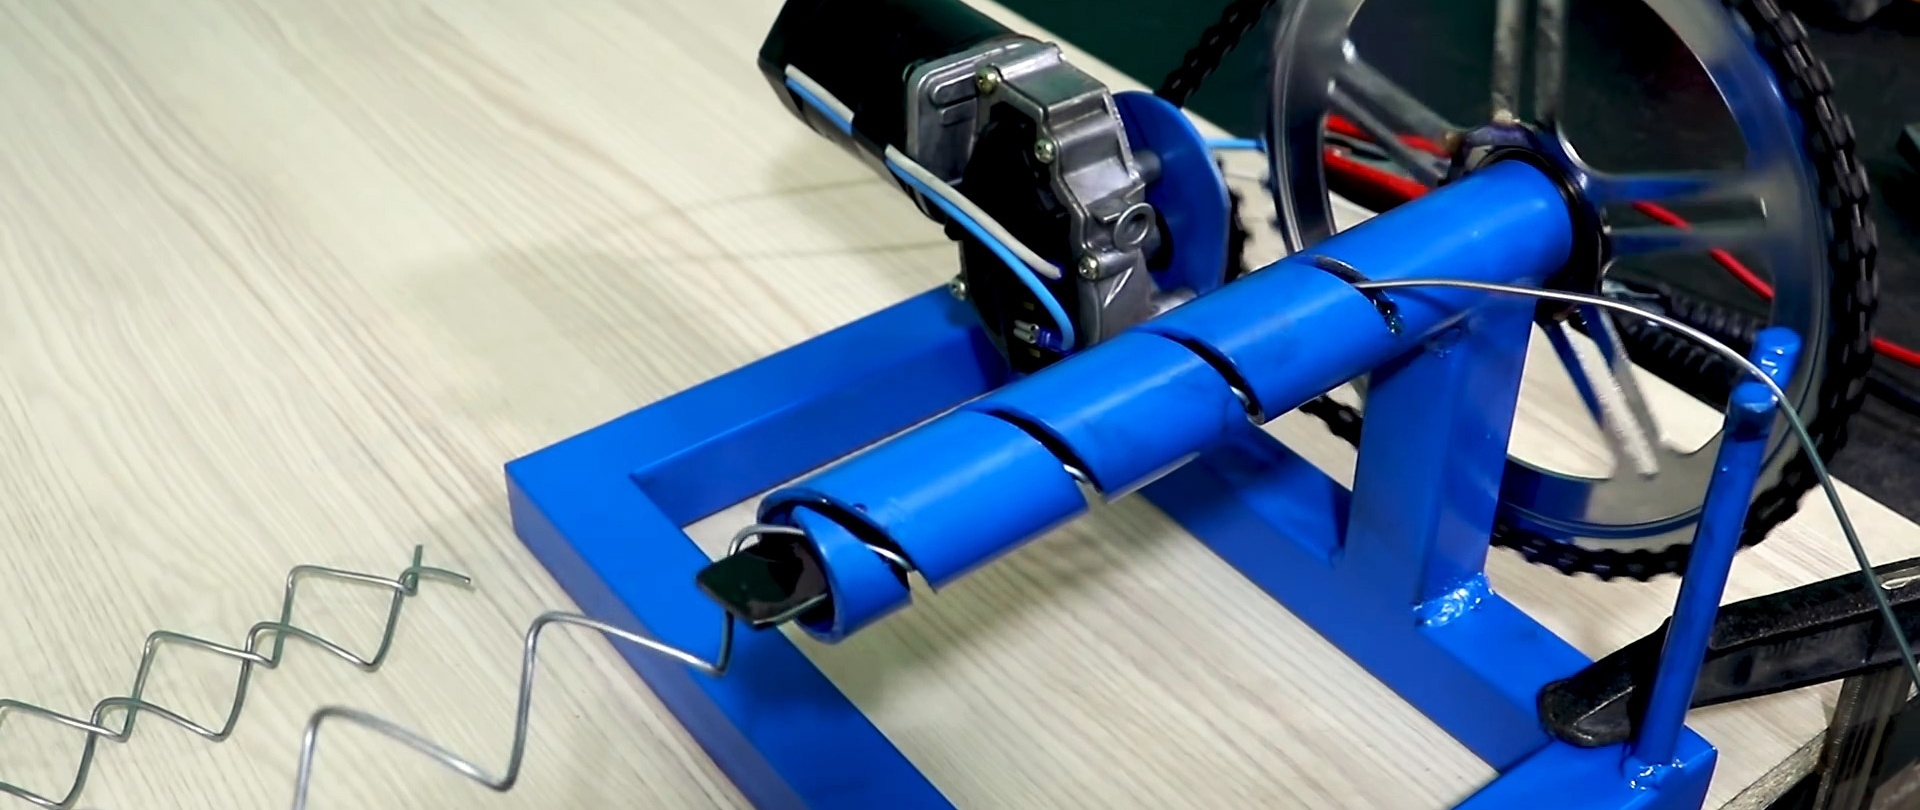
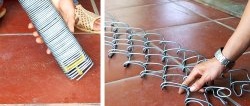
We cut off the bent wire with pliers and repeat the process. Moreover, each subsequent curved wire can be immediately woven into the previous one until the desired height is reached.