At first glance, it seems that only at least two experienced carpenters can handle such labor-intensive and complex work as the construction of elements of a wooden gazebo or house. But having the necessary materials and tools at hand, and showing some patience, perseverance and attention, almost any adult can master it, even without assistants.
Will need
Materials:
- timber for flooring;
- edged board or timber for logs;
- protective wood preservative;
- screws or self-tapping screws;
- tongue and groove floorboard;
- timber for wall frame;
- tongue and groove boards for wall cladding, etc.
Tools: portable circular saw, carpenter's adze, hammer, chisel, paint brush, measuring square, measuring tape, drill, etc.
The process of making floors and walls for a wooden house with your own hands
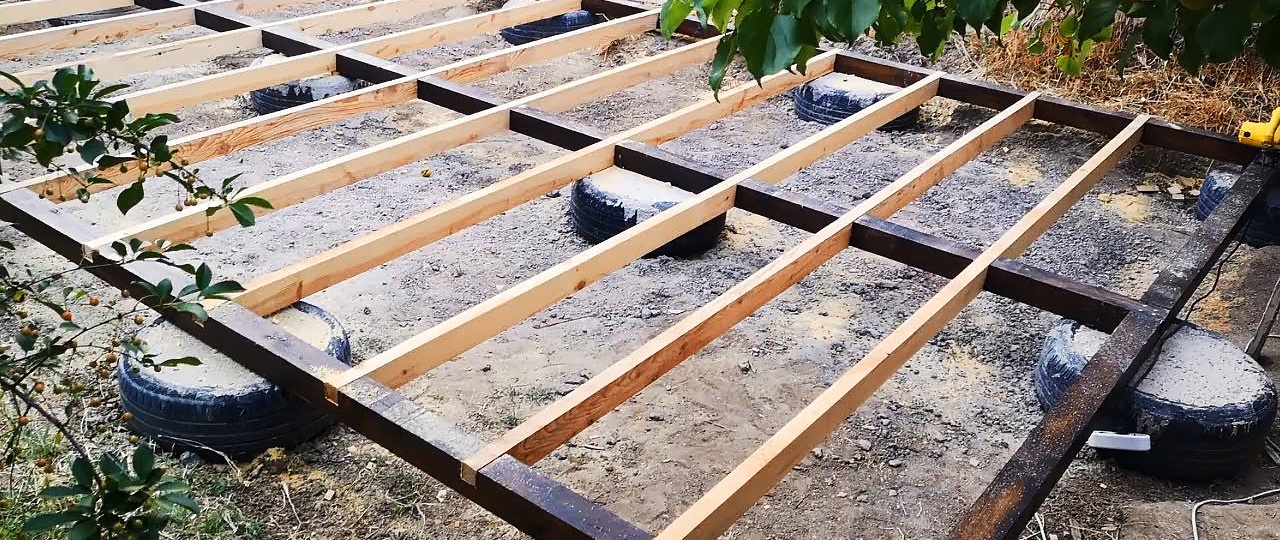
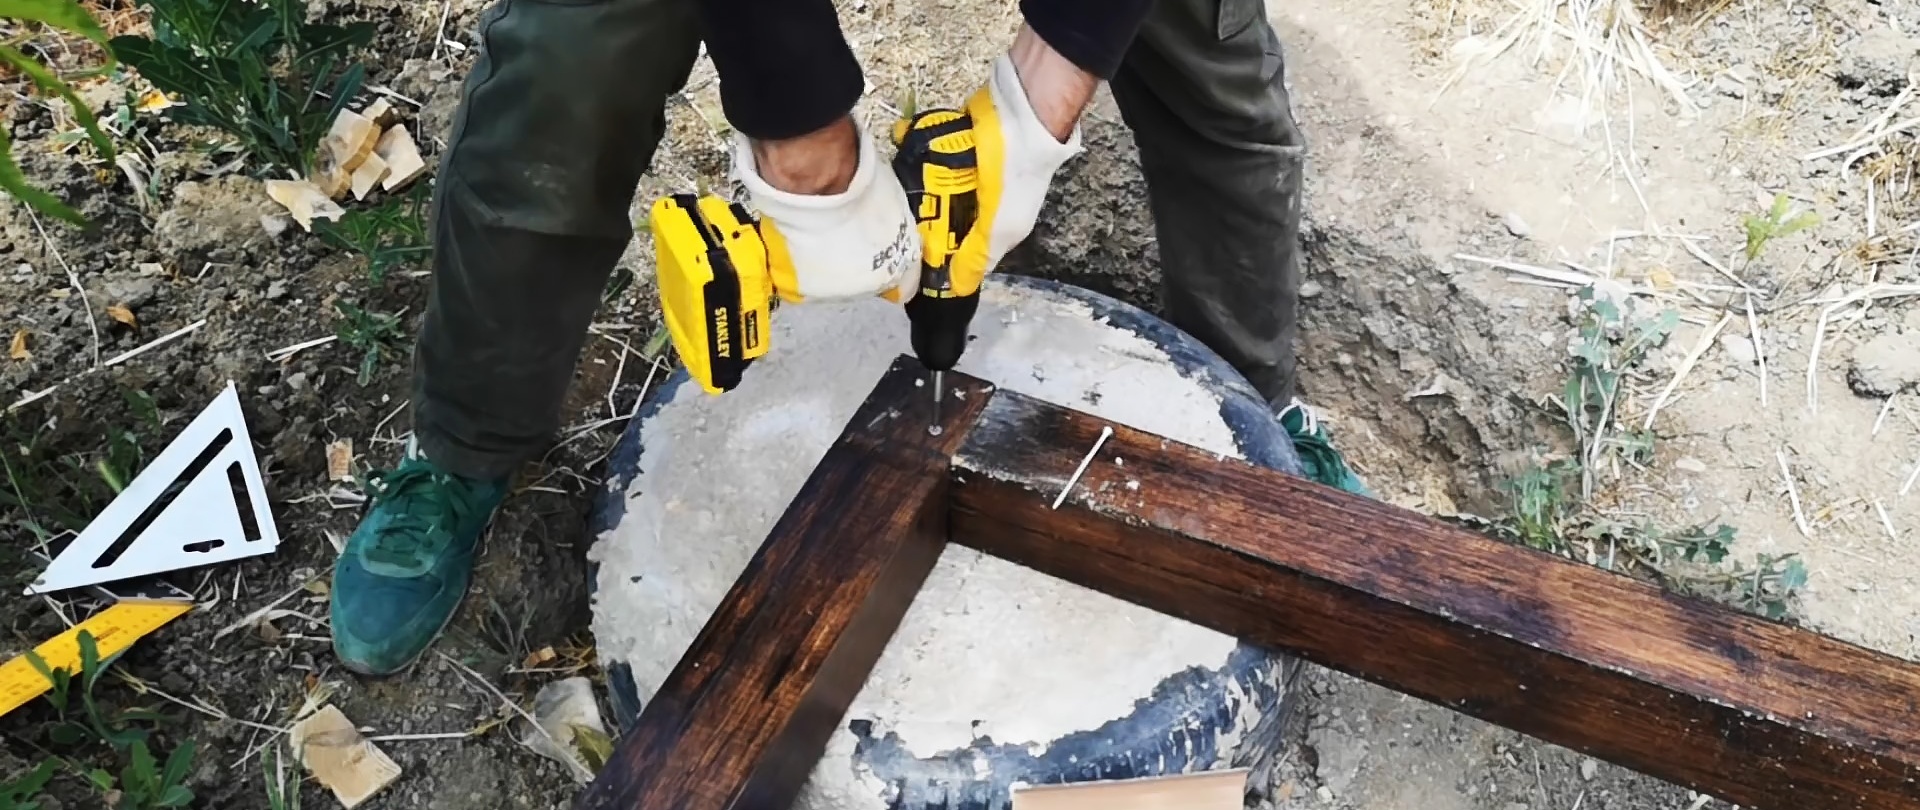
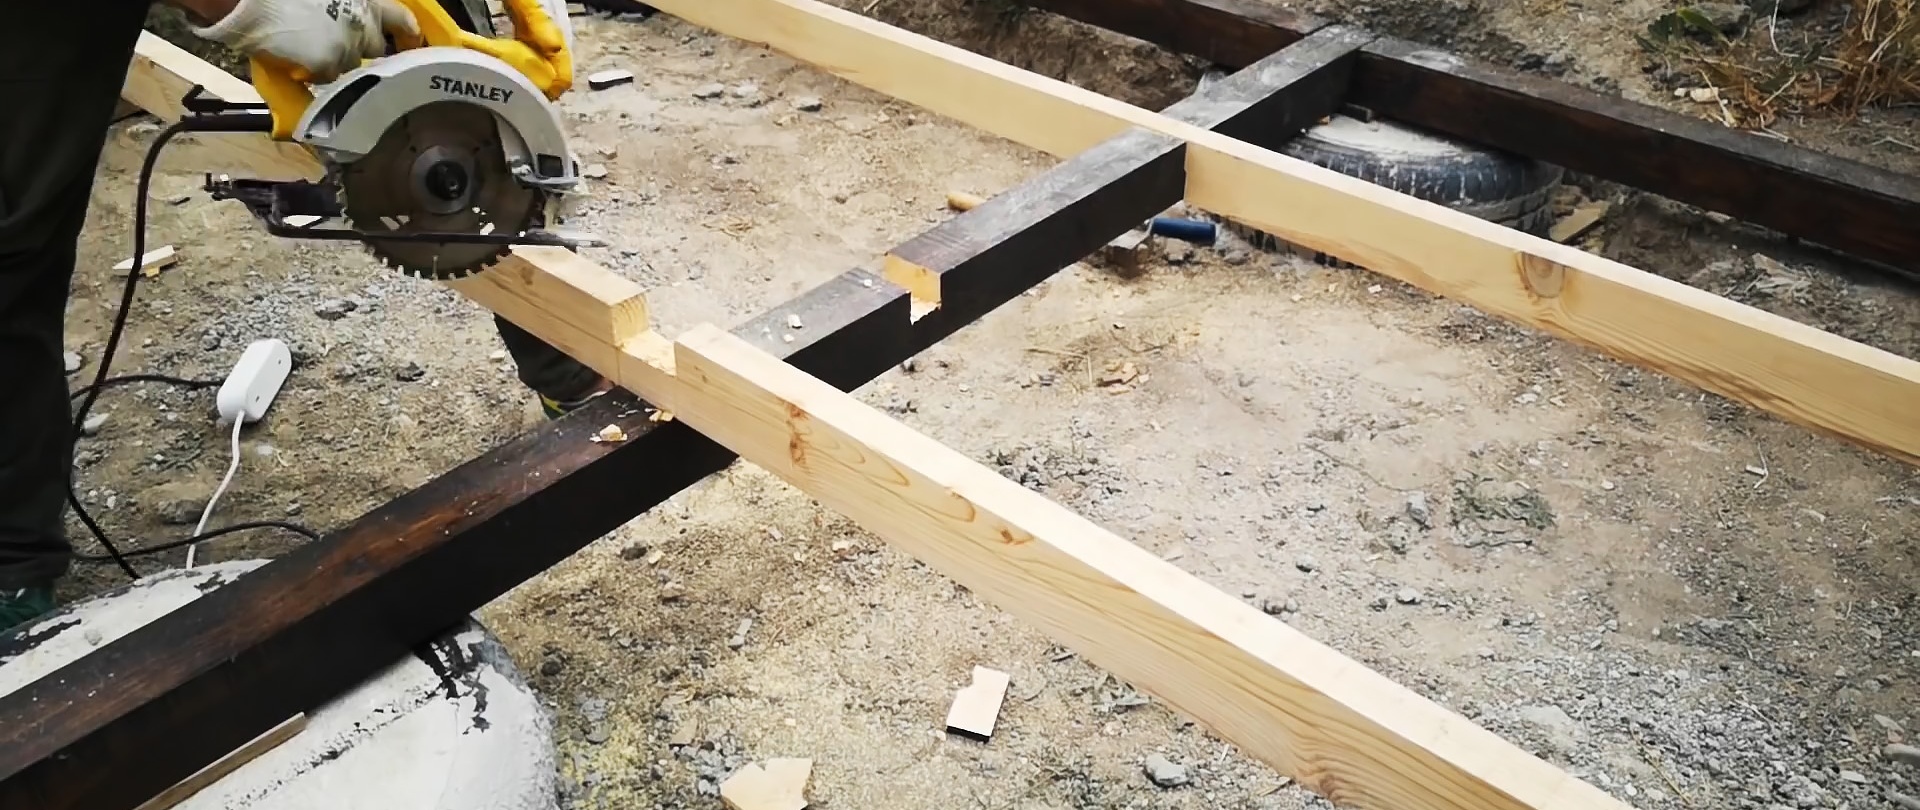
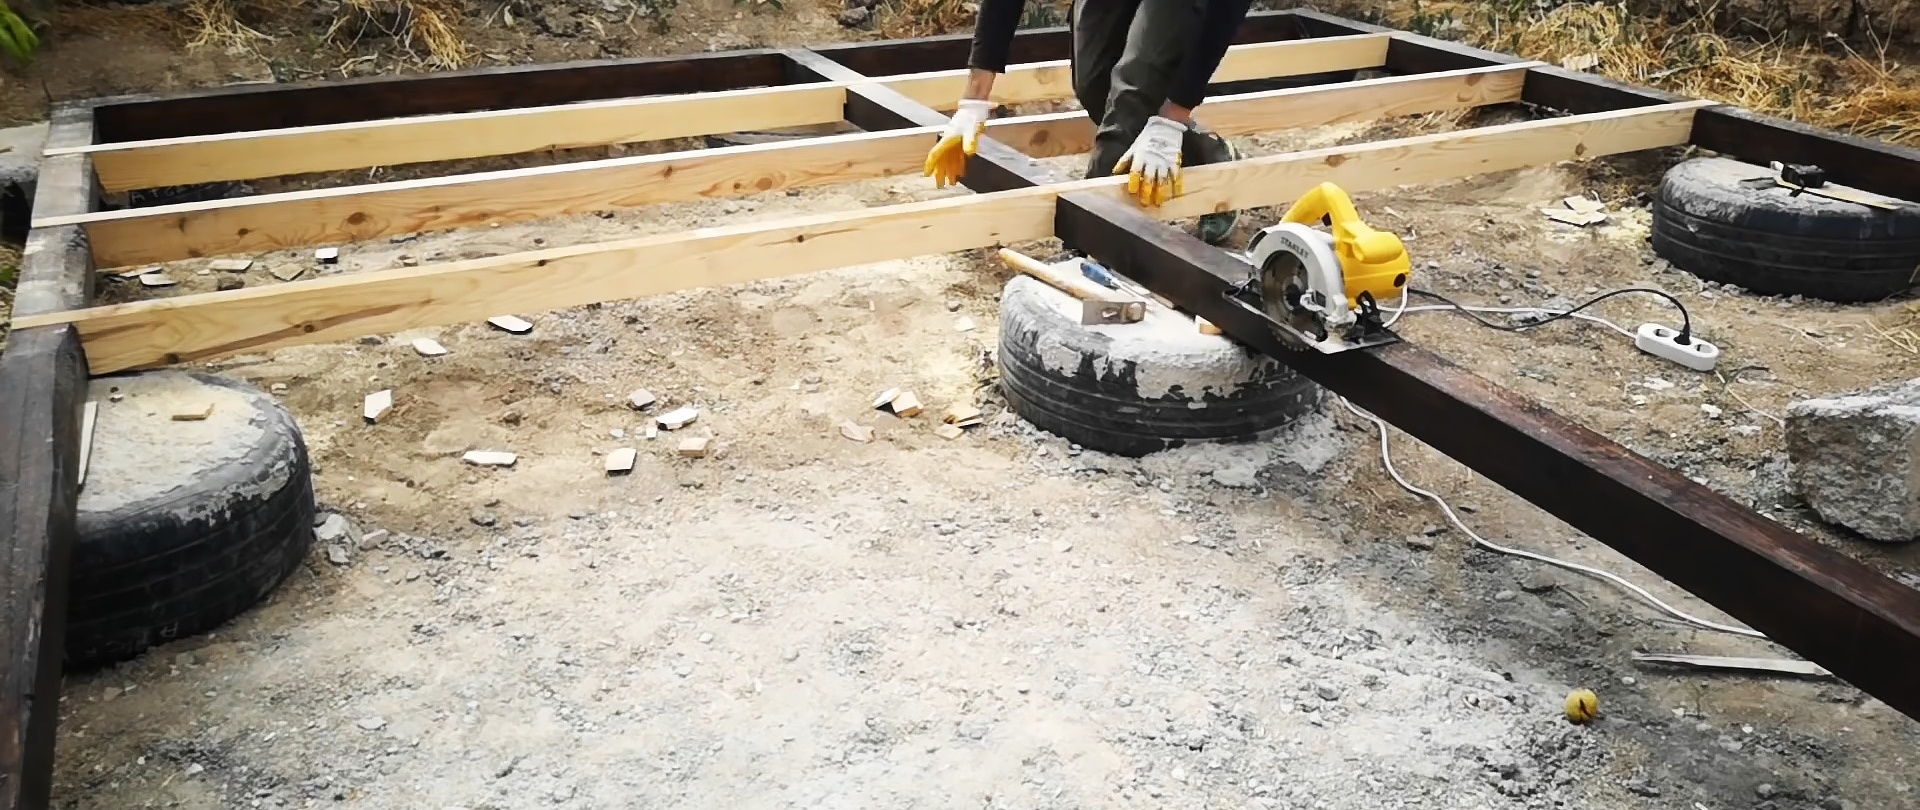
On foundation supports made of car tires, pre-filled with concrete mortar, we assemble a floor frame from a wooden beam of the design cross-section with one cross member in the wood floor.For this we need a circular saw, a carpenter's adze and a chisel.
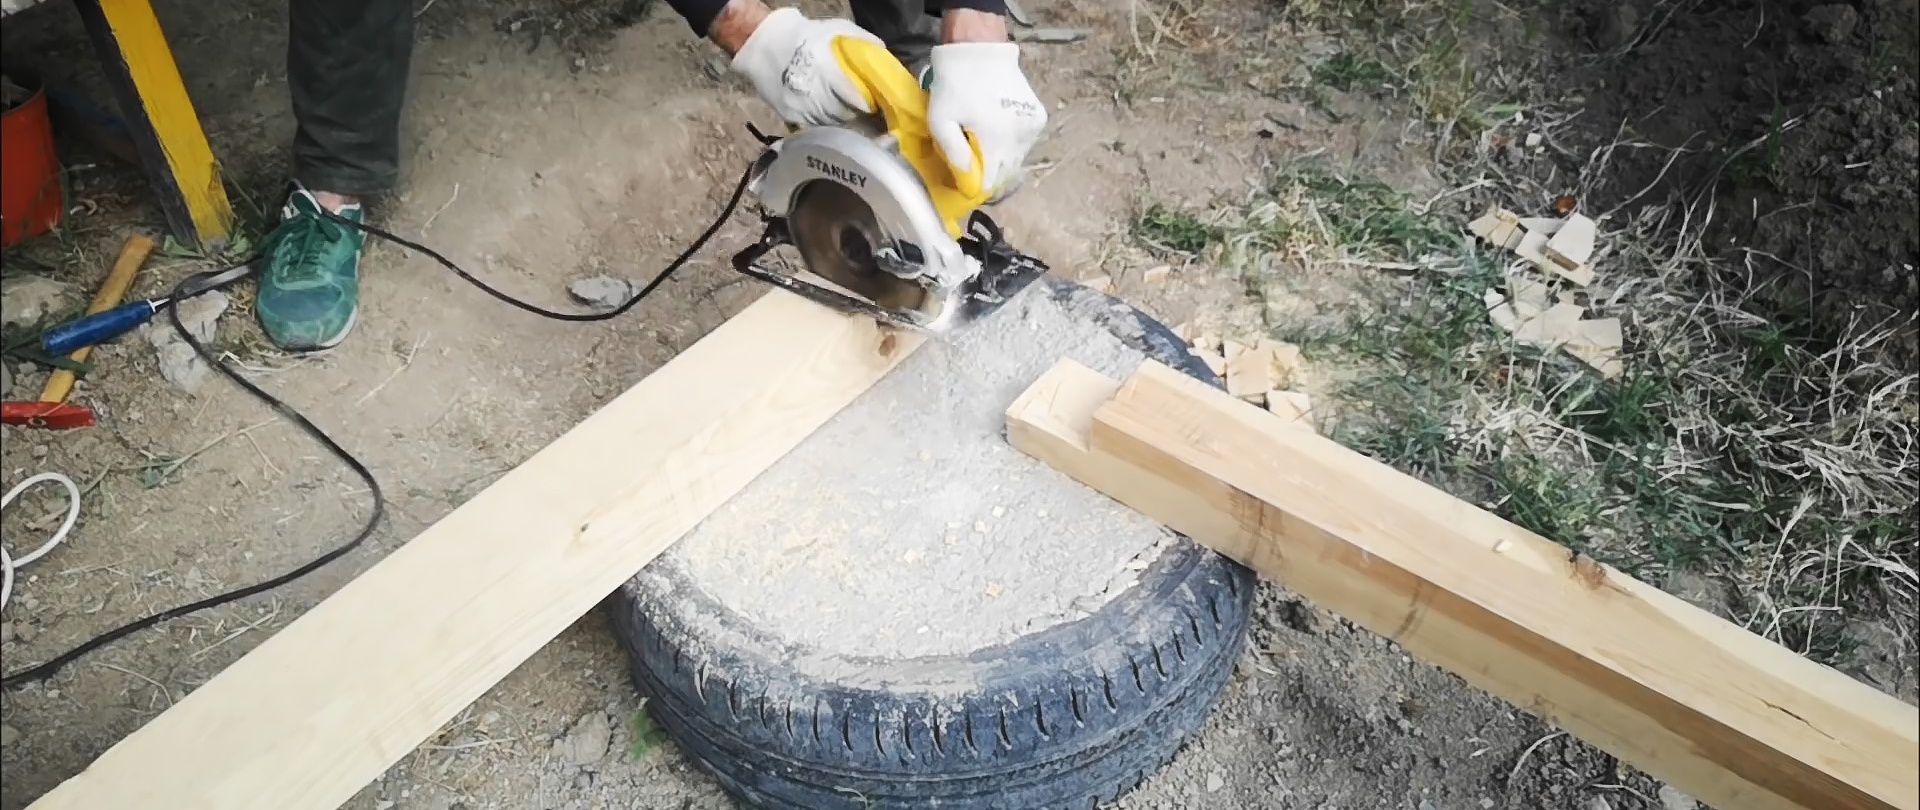

Before final assembly, all floor trim elements are carefully treated with a protective wood preservative, which is applied liberally with a paint brush. If a gap forms between the foundation support and the floor frame, then place a board of the required thickness.

Having measured the diagonals and checked all the angles, after the necessary adjustments, we connect the floor trim elements using screws or self-tapping screws. We attach the logs, pre-prepared in length from boards or timber, to the floor trim, also in the wood floor, and fix them with screws or self-tapping screws.

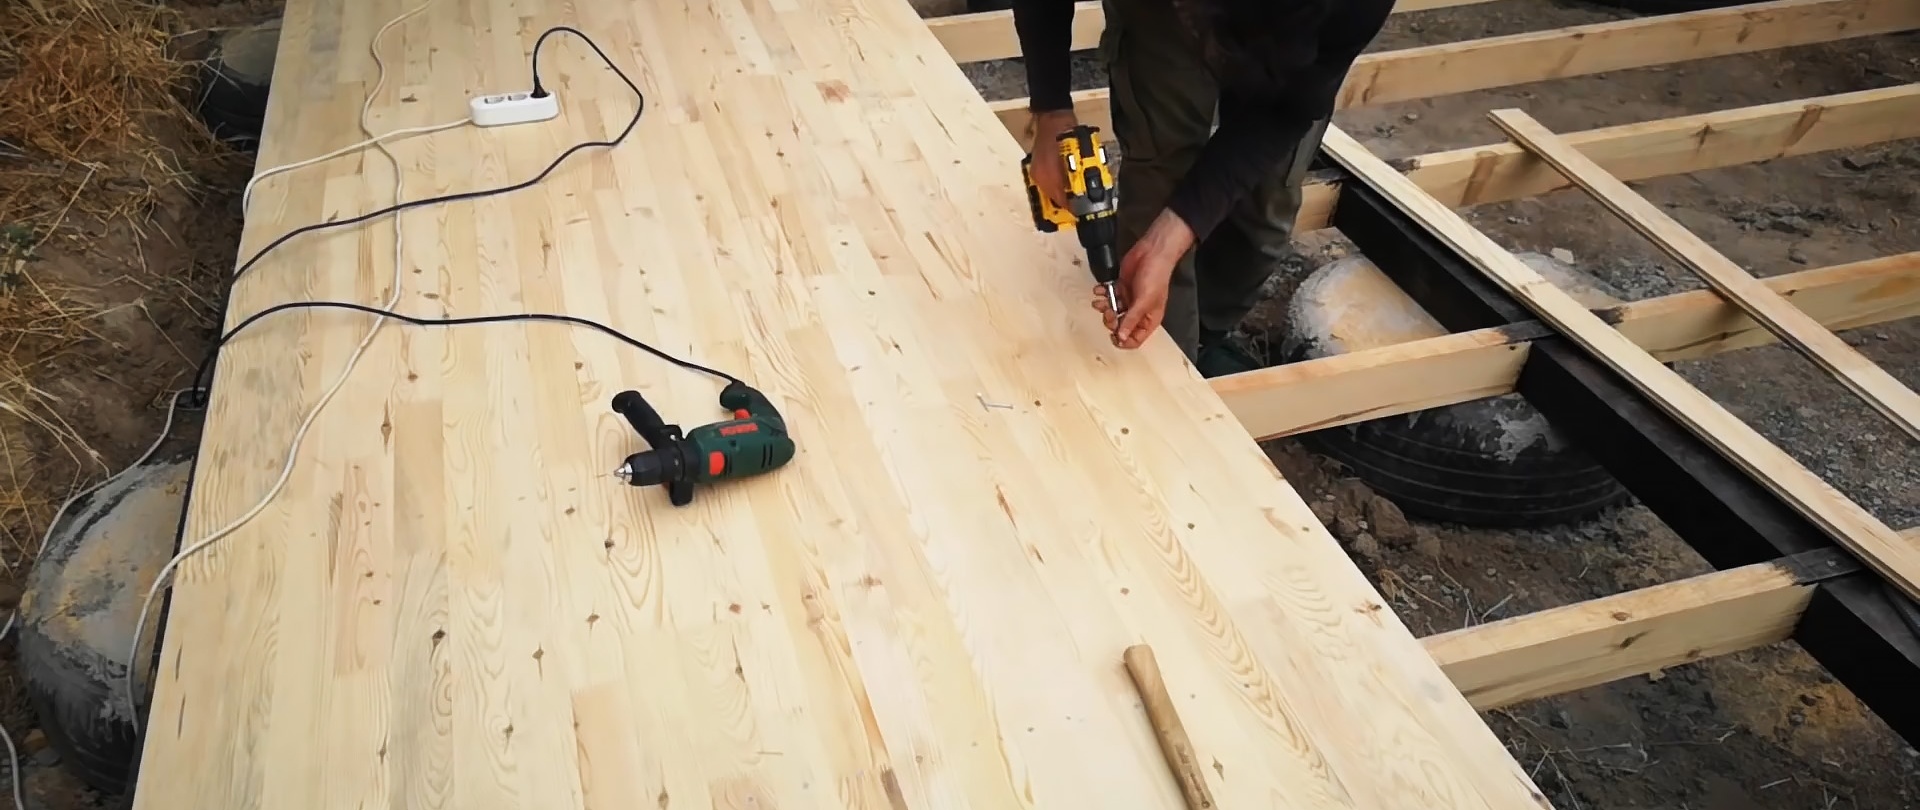
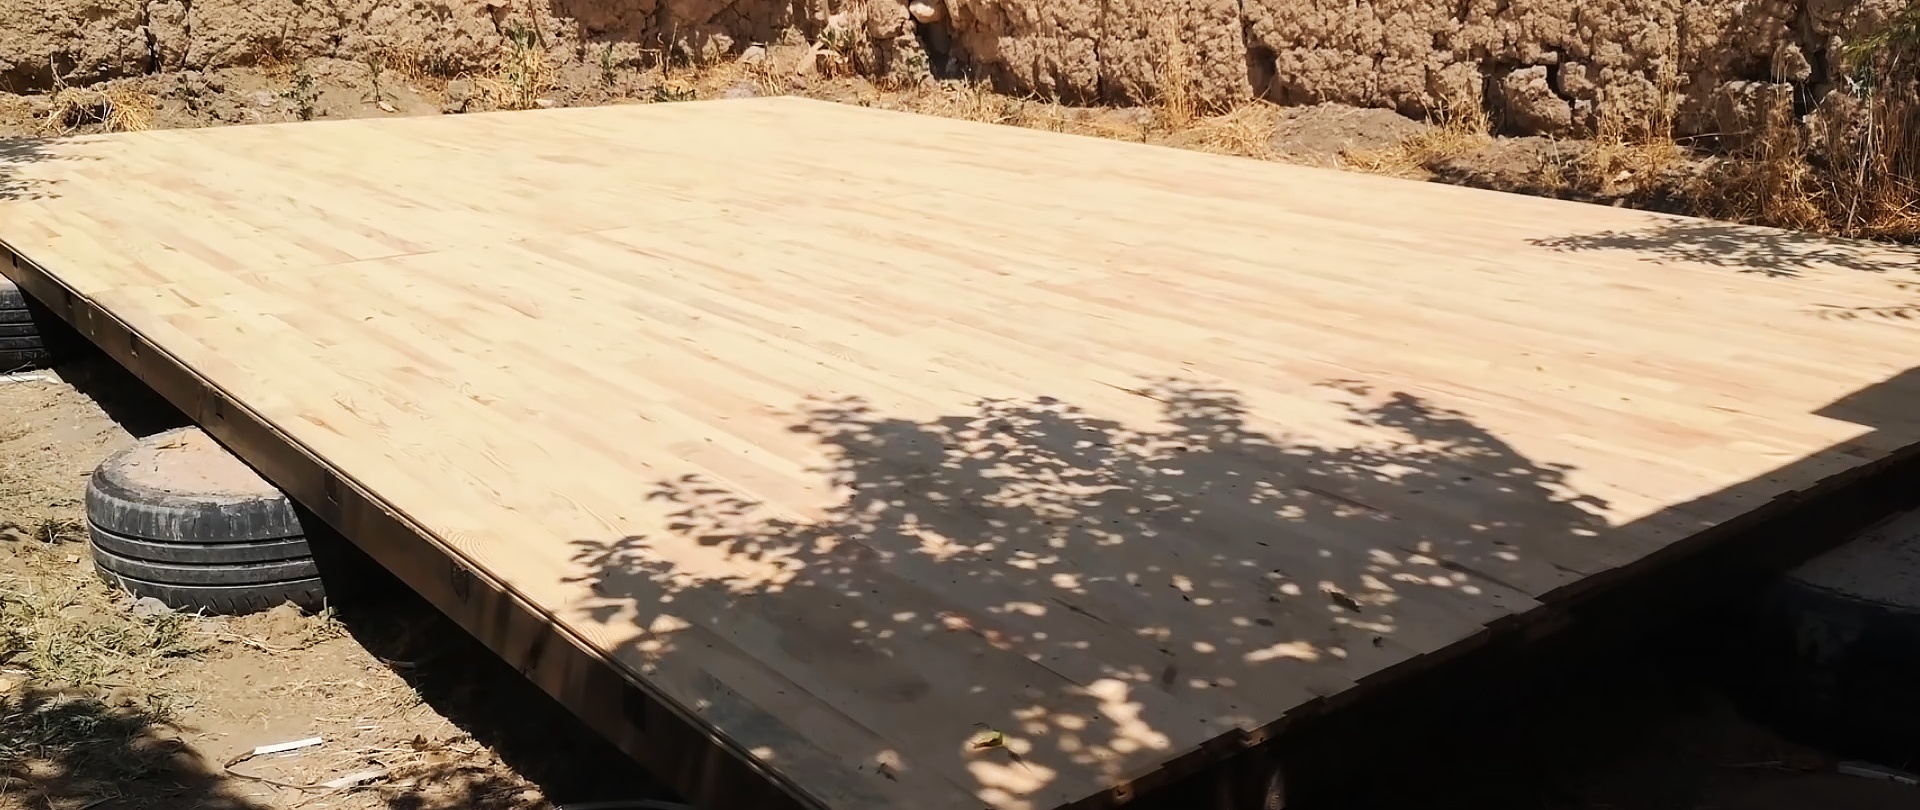
On top of the joists in the transverse direction we tightly lay a tongue and groove floorboard, pre-cut to length, and fasten it to the joists also using screws or self-tapping screws.


We cut the boards or beams for the wall frame and assemble them on the floor. As a result, we get a frame structure consisting of longitudinal and transverse elements securely fastened together with screws or self-tapping screws. We lift it vertically along the edge of the floor and make sure that the sizes match.
Then we lay the wall frame back on the floor and fasten tongue-and-groove wall boards to it from the outside with screws. We lift the wall panel vertically again and fix it to the floor frame, first temporarily, and then, after checking the verticality and accuracy of installation, we make the final fixation.