To heat the garage, you can use a stove made from a 200-liter iron barrel, which will be both efficient and economical. To make it you need some skills in working with metal.
Will need
Materials:
- two 200-liter steel barrels;
- fittings;
- corners 45×45 mm and 30×30 mm;
- 3 extended nuts M10;
- 3 M10 bolts with nuts;
- iron sheet;
- steel strip 20 mm wide;
- pipes with a diameter of 60 and 115 mm;
- part from a propane tank;
- 2 hinges and 2 metal brackets;
- set of nuts, bolts, etc.
Tools: marking and measuring accessories, grinder, welding, pendulum saw, drill, die, etc.
The process of manufacturing a long-burning solid fuel furnace from scrap metal
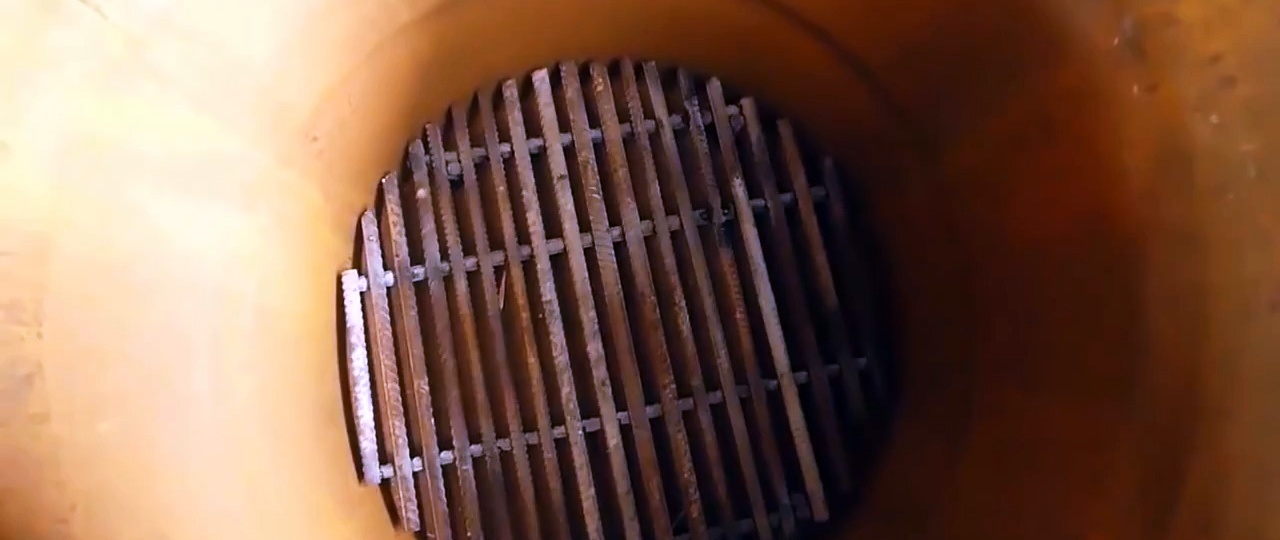
We cut off the lid from the barrel and use it to make a grate from reinforcement, cut to the size of the lid, and laid 10 mm apart. We weld the crossbars on top to each rod at the intersection points. The legs for the 100 mm high grate are also made from reinforcement.
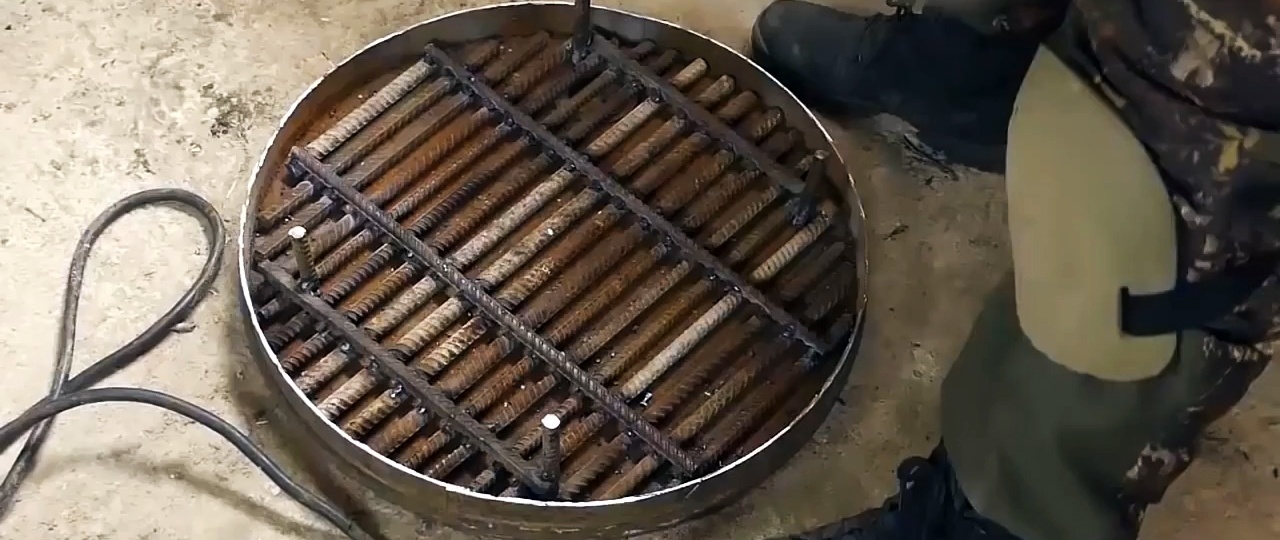
Place the grate on the bottom of the barrel.
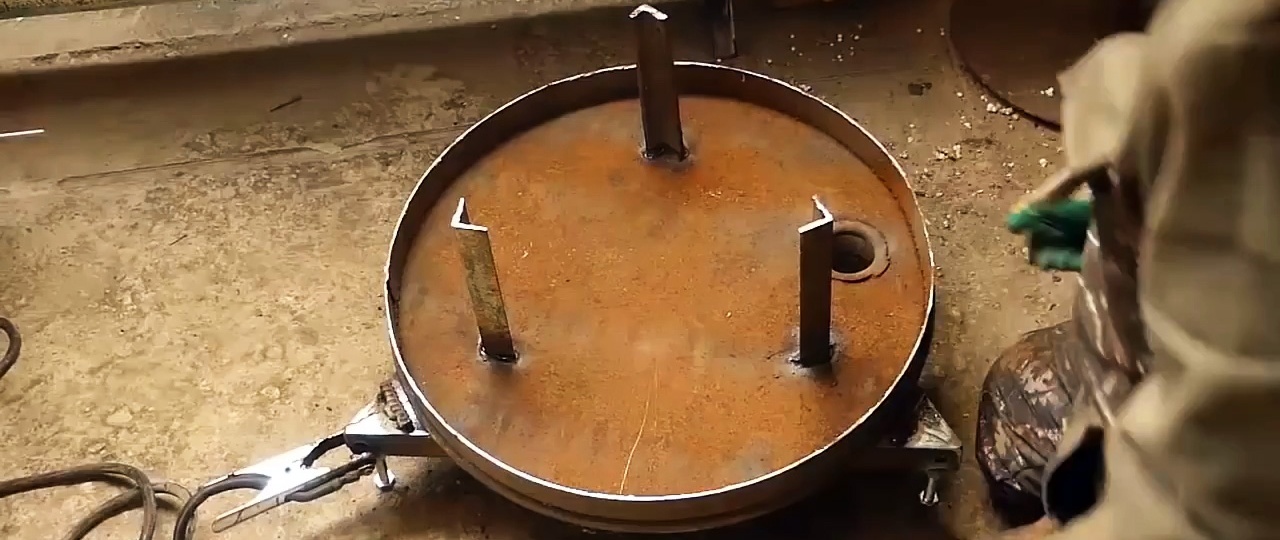
On three corners 45x45 mm with a length of 620 mm, measure 30 degrees on one side of each end and cut with a grinder. By folding the corners along the cutting lines, we get an equilateral triangle. After adjustment, we scald all joints.

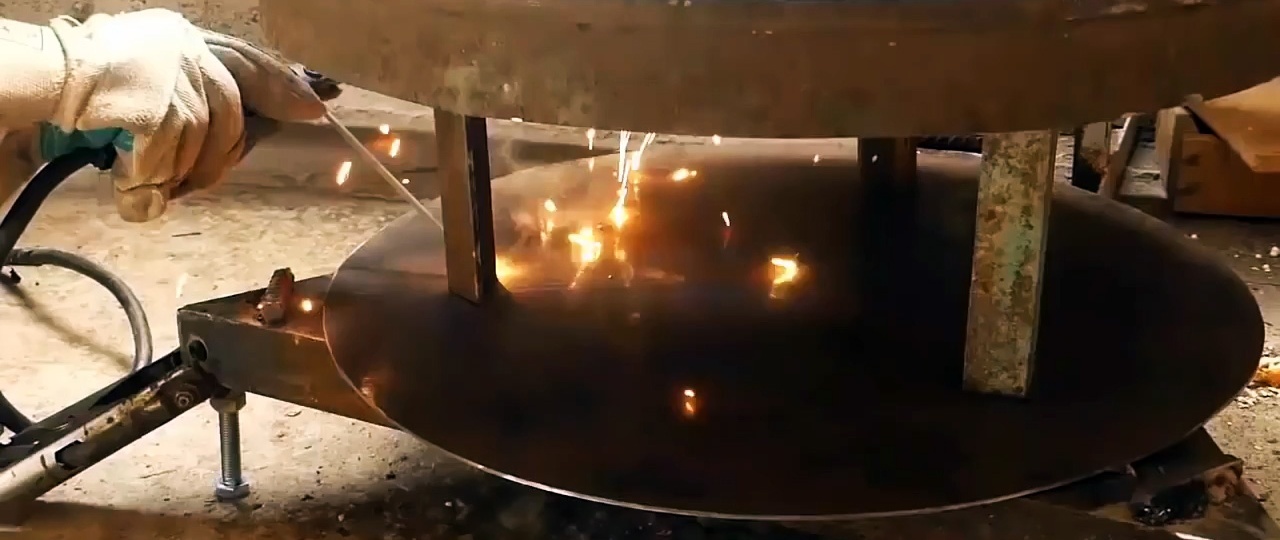
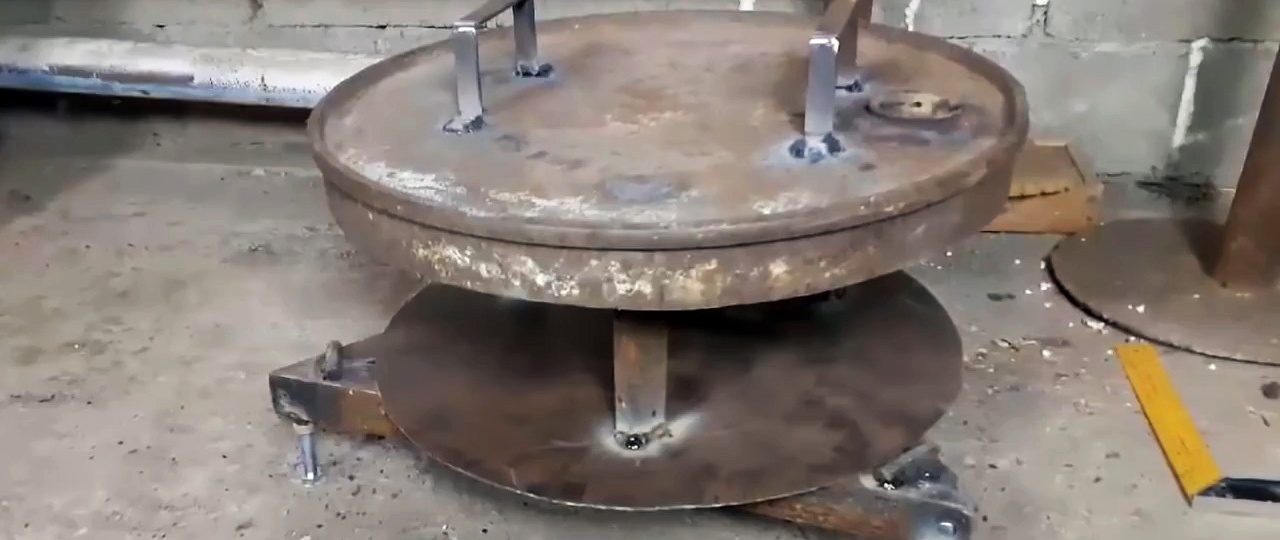
We place extended M10 nuts in the corners of the triangle and weld them. We screw bolts and nuts into them. We place the tripod with bolts on the floor, place the lid on it and weld 3 stops made of reinforcement to the tripod to stabilize the barrel.
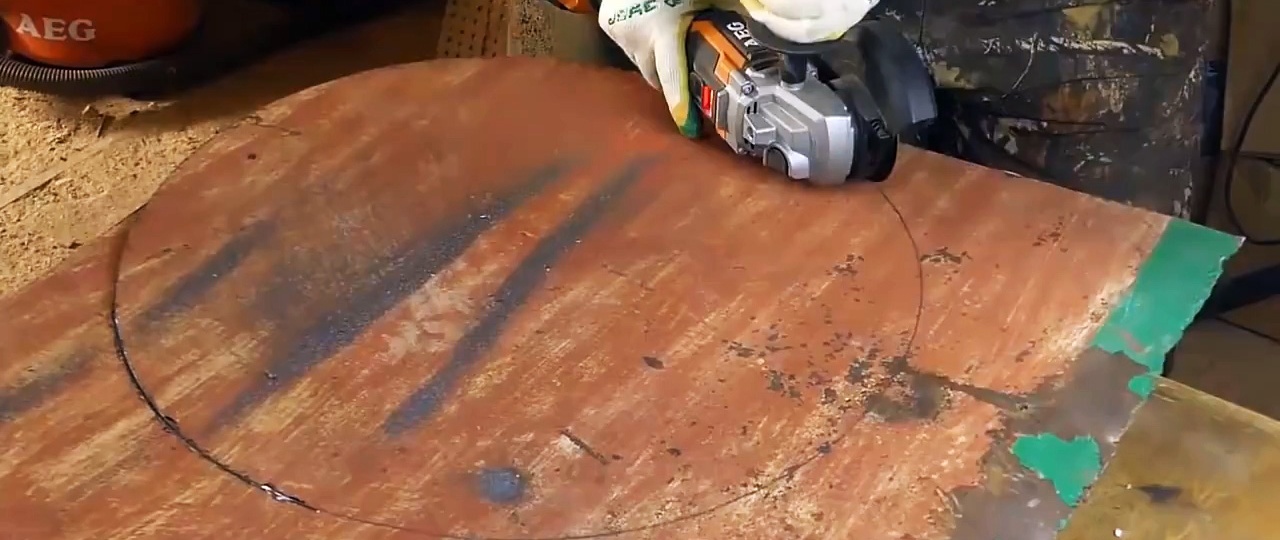
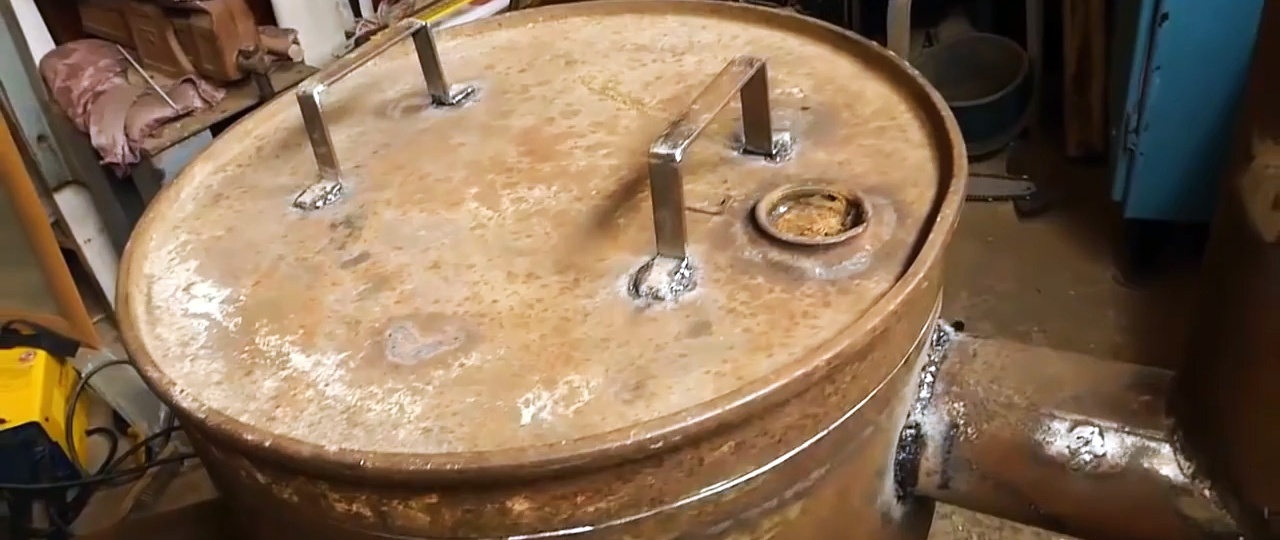
We cut a circle with a diameter of 530 mm from a sheet of metal. We make 3 pieces of 210 mm length from a 30x30 mm corner. We weld them to the bottom of the lid, on which we place a circle and also weld it. We also weld the hole from the cork.
We make the lid handles from two strips of metal, cutting the marks to half the thickness and bending them 90 degrees. To strengthen, we boil and clean the bends. We place them on top of the lid and weld them.
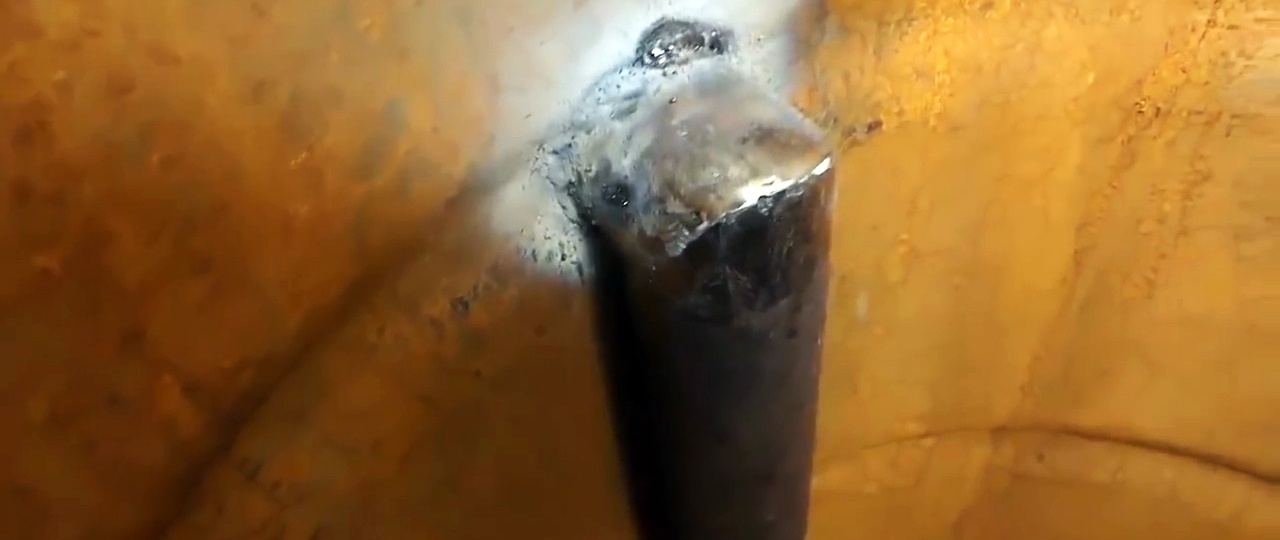
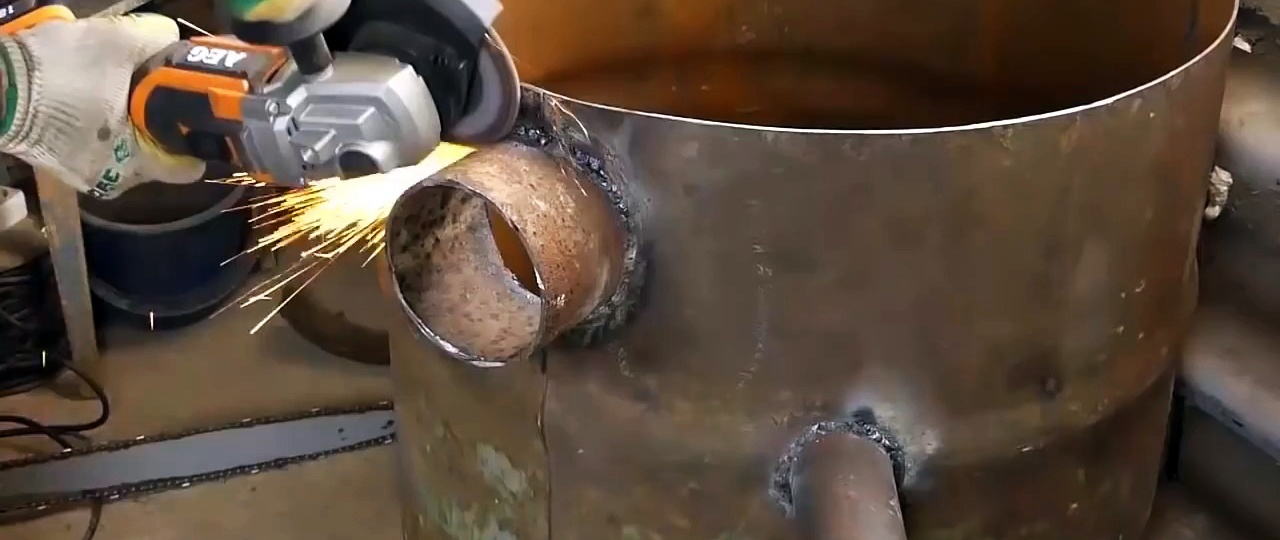
To supply air to the combustion zone, take a 60 mm pipe. We make 2 sections with a length of 230 mm and a trim at 45 degrees, and 500 mm with a ready-made trim. We remove the chamfers from the ends, clearly fix everything and weld it.
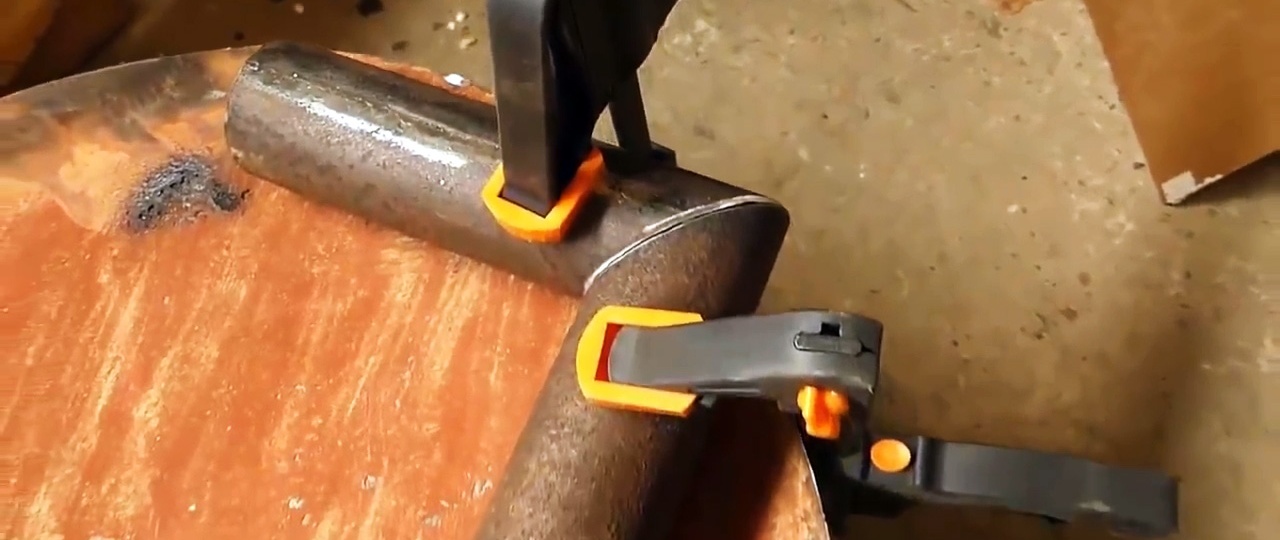
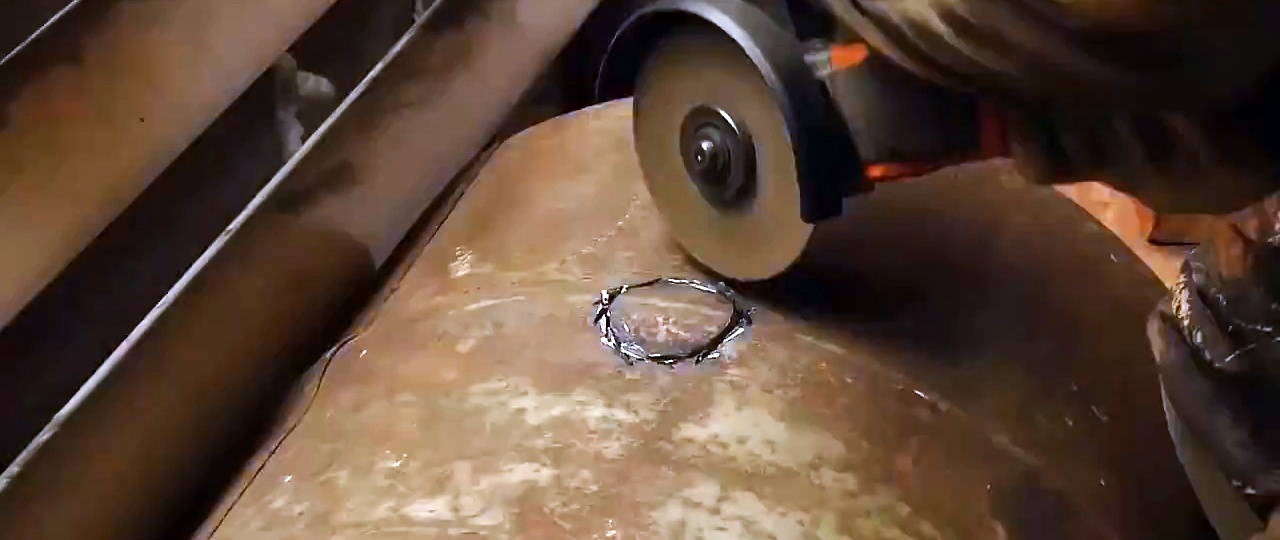
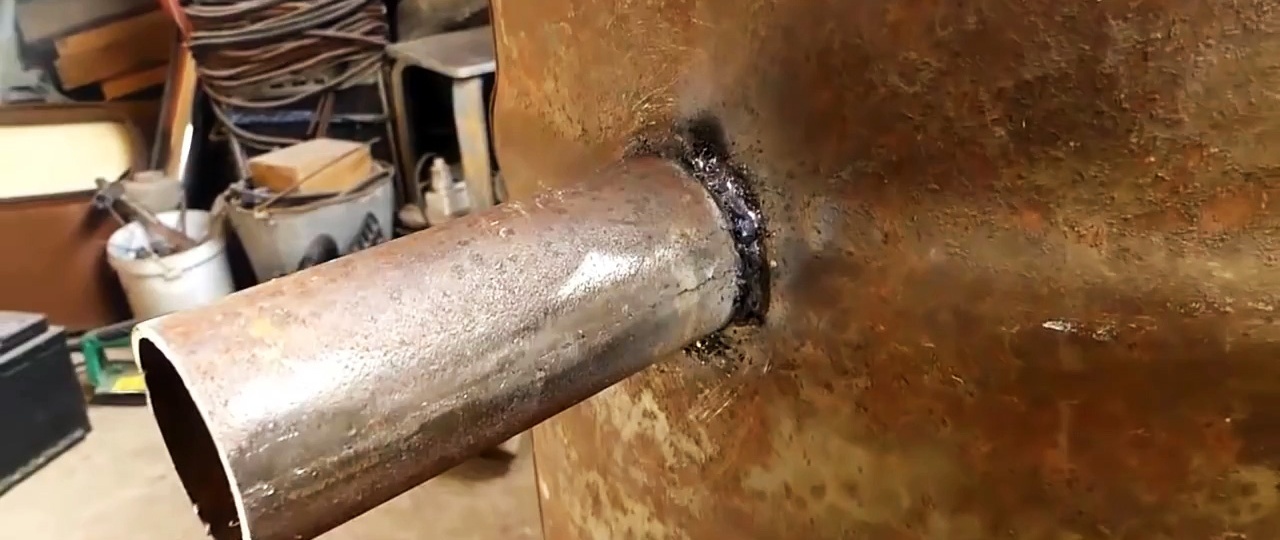
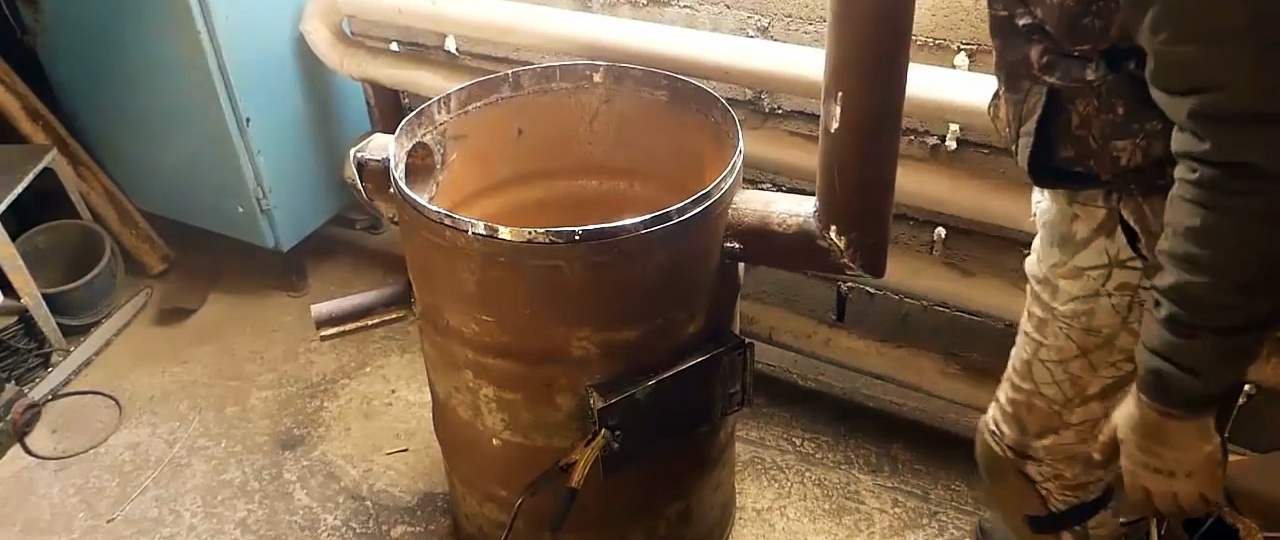
To install the pipe in the barrel, cut a hole at 190 mm from the top. From inside the barrel, insert a short piece of pipe into the hole until it stops and weld it in a circle.
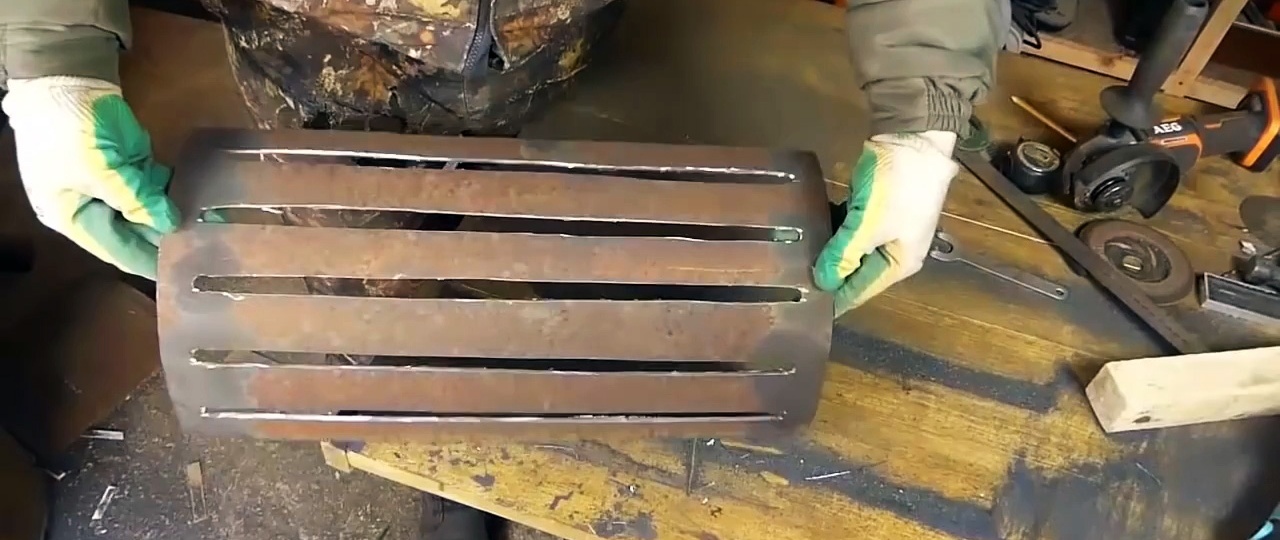
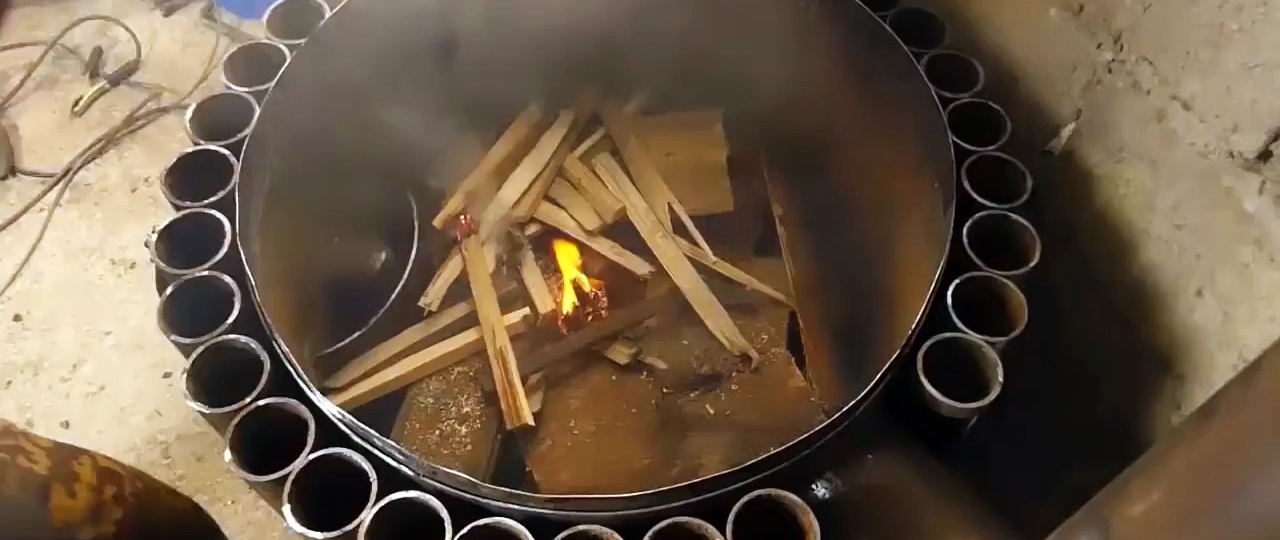
From the cylindrical part of the propane cylinder we cut a fragment 500 mm long. We draw 5 lines on it, equidistant from each other. We drill 10 mm holes on them 30 mm from the ends. Connect the edges of the holes and cut out 5 strips. We place this grate vertically along the pipe, resting on the bottom one, and weld it to the barrel. This side grate is a protection for air supply when filling the firebox with wood.

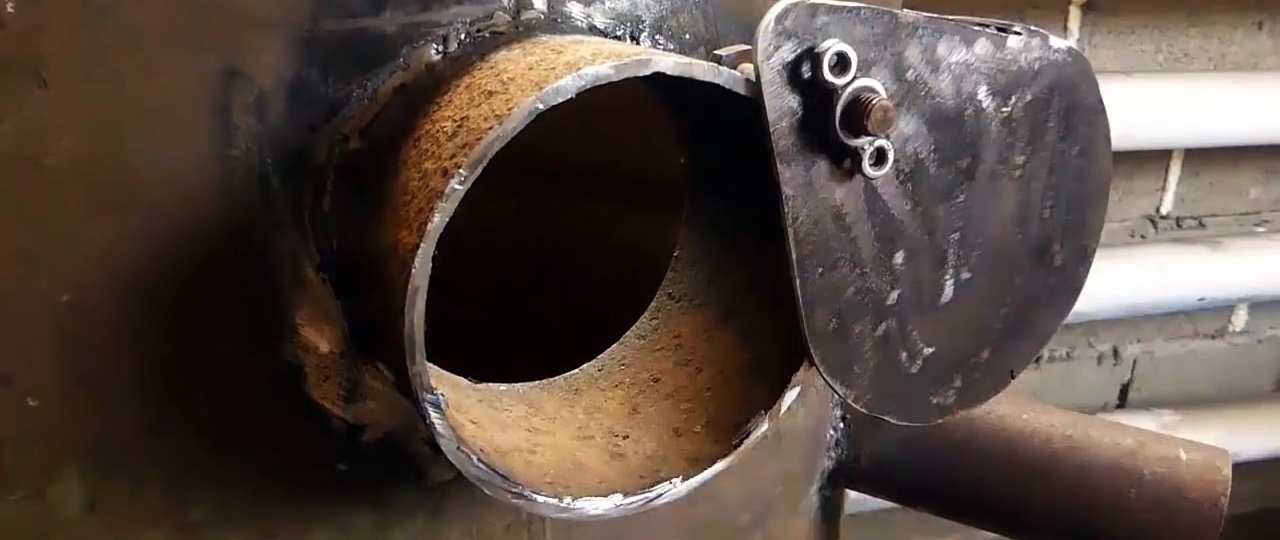
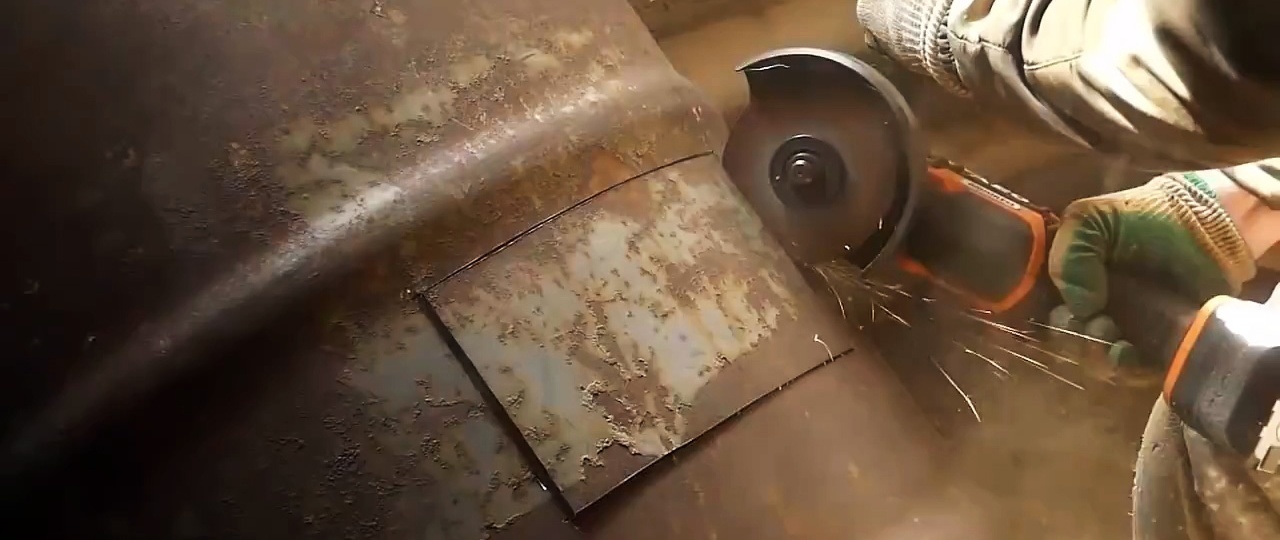
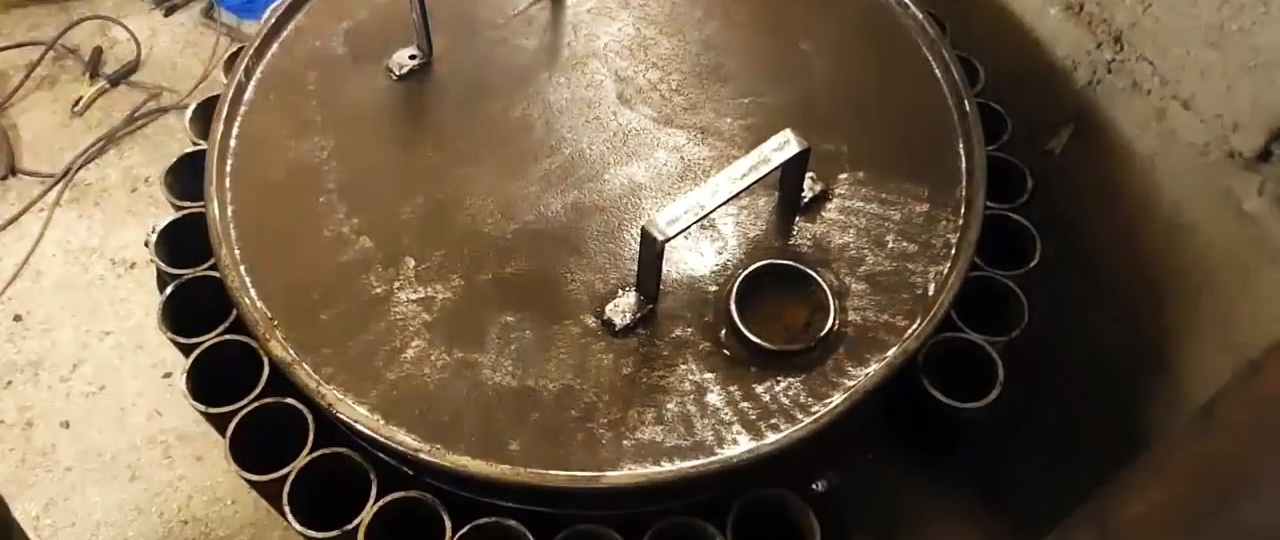
We make the next part from a 115 mm pipe with a length of 90 mm.We place it against the barrel and make marks on it to cut off excess metal. We press the part to the barrel, cut a hole in diameter and scald it in a circle. It is needed for secondary air supply to burn pyrolysis gases.
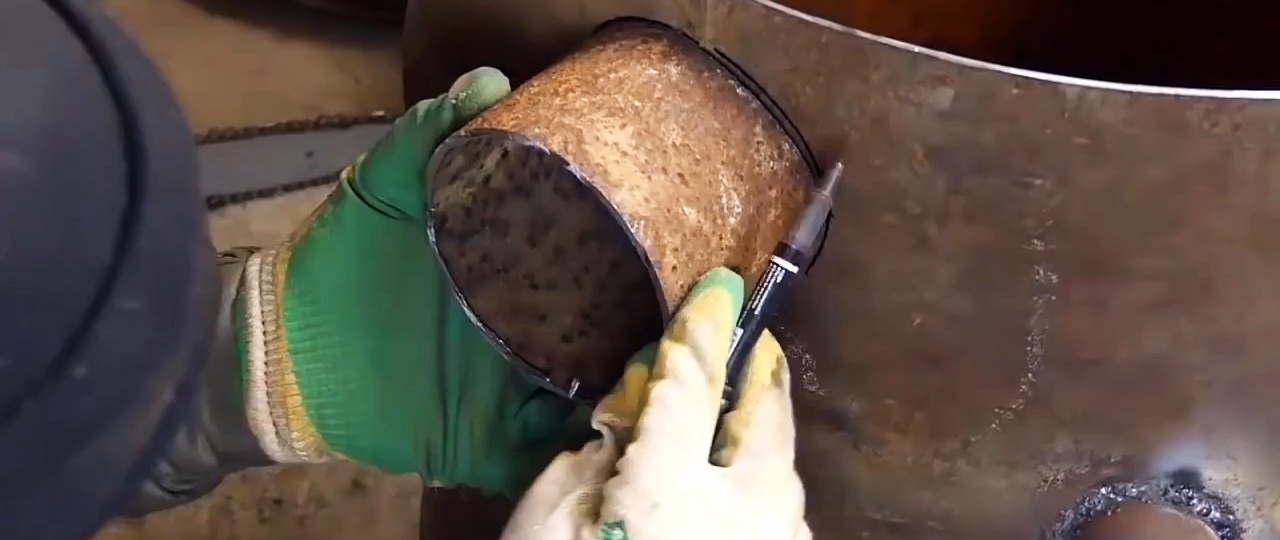
From a sheet of metal we cut out a drop shape with a round part diameter of 115 mm. Using a bolt and nut welded to the secondary, we attach a “drop” to regulate the air supply. We make exactly the same air supply adjustments on the main firebox.
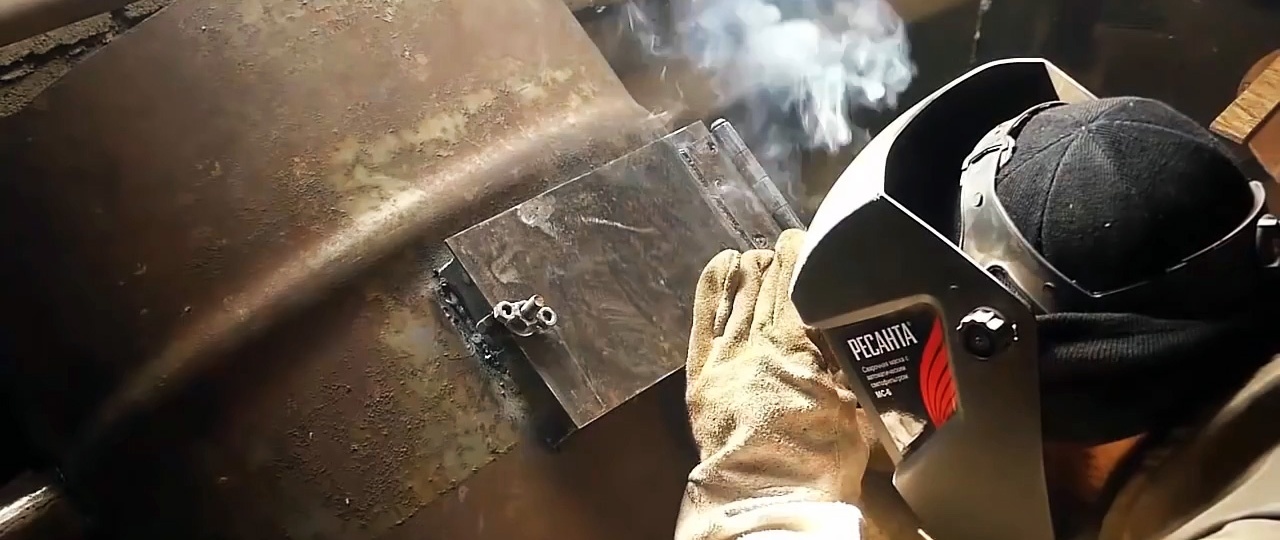
We make a hatch for the ash pan by first making a pattern that follows the bend of the barrel. With its help, we cut out all the parts of the hatch from a sheet of metal. We weld them together and fasten the door on the hinge. We attach the T-shaped door latch to the hatch with two brackets. We cut a hole in the barrel for the hatch, try it on and weld it.
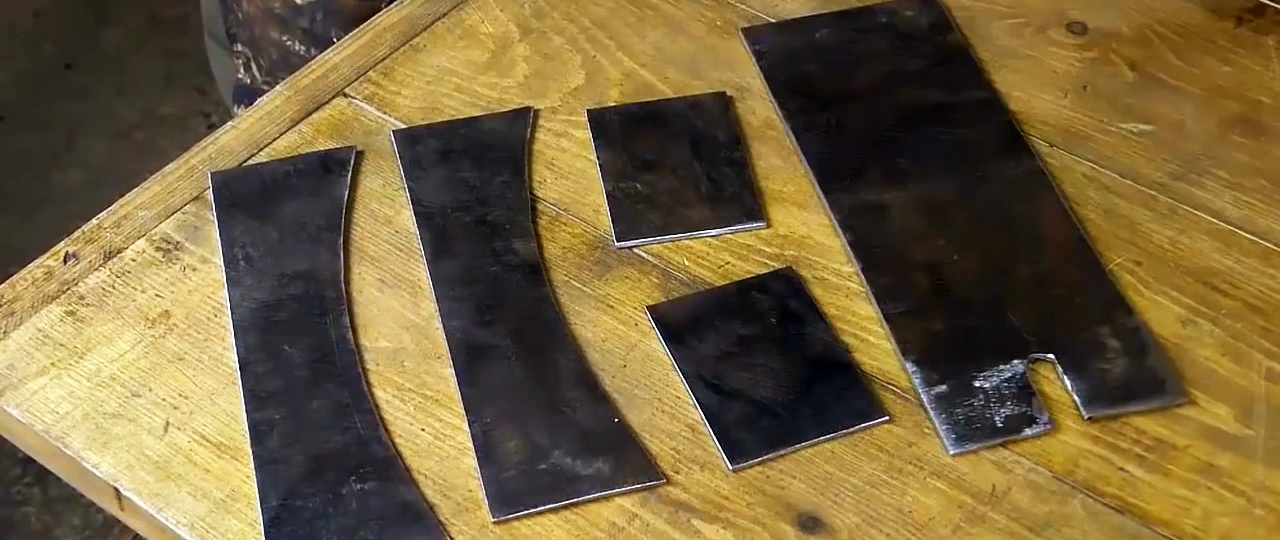
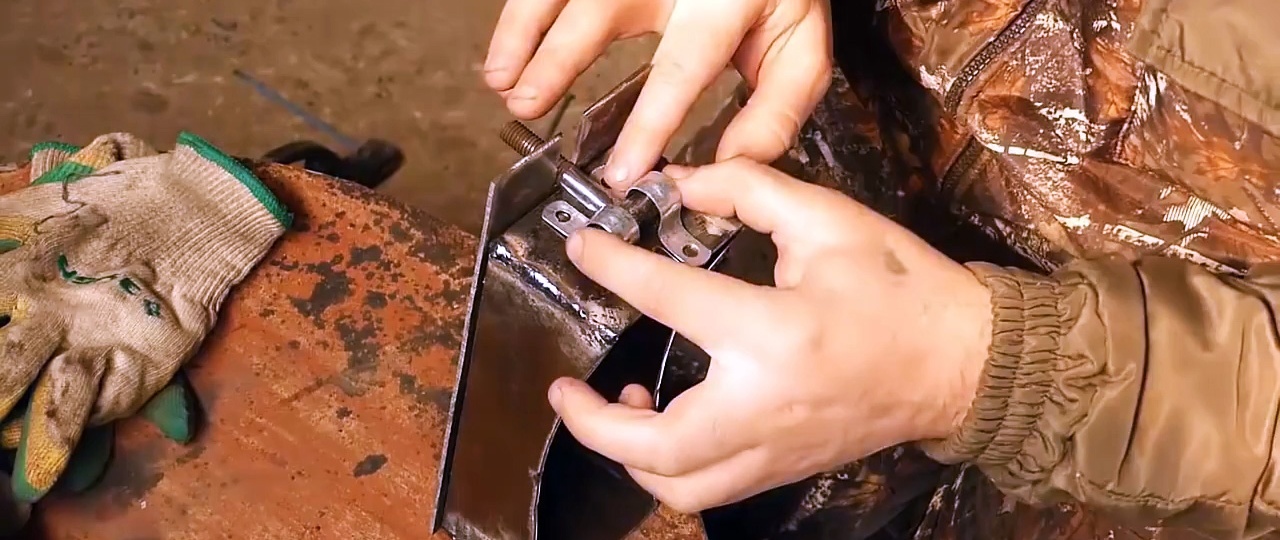
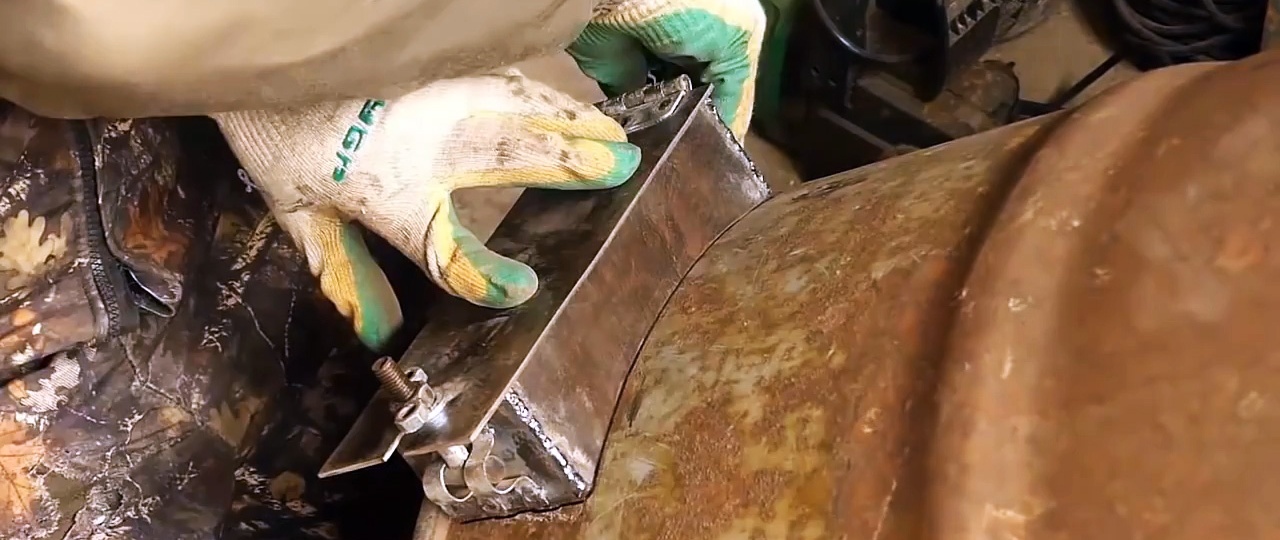
We make the firebox hatch according to the same principle as the ash pan hatch. Only to secure the bracket retainer, we replace it with 2 nuts and take a larger loop. We weld the hatch under the stiffening rib.
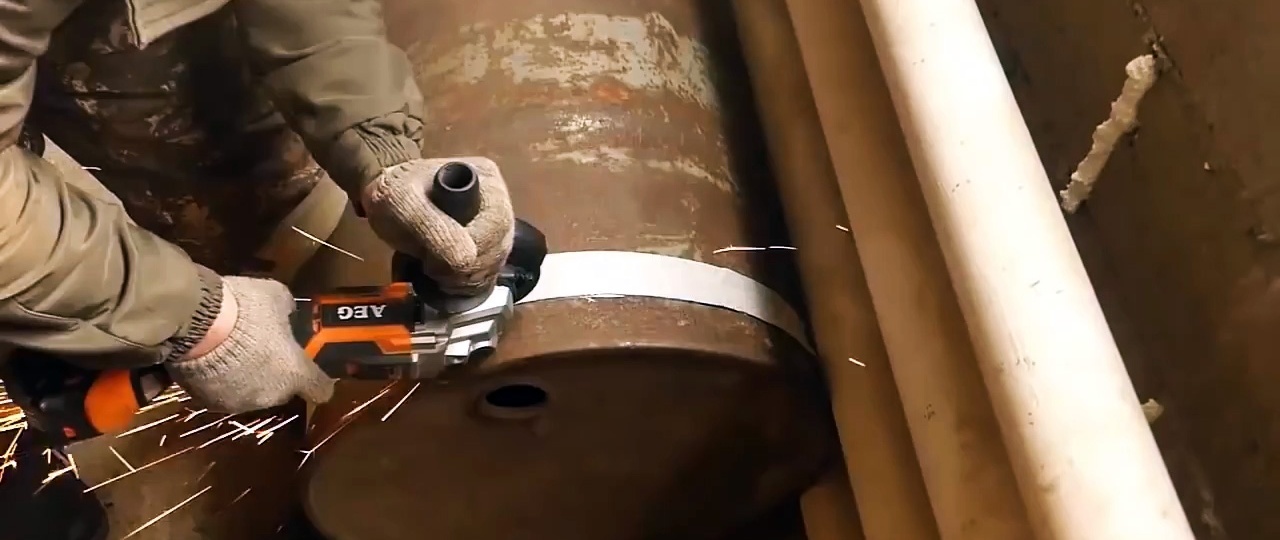
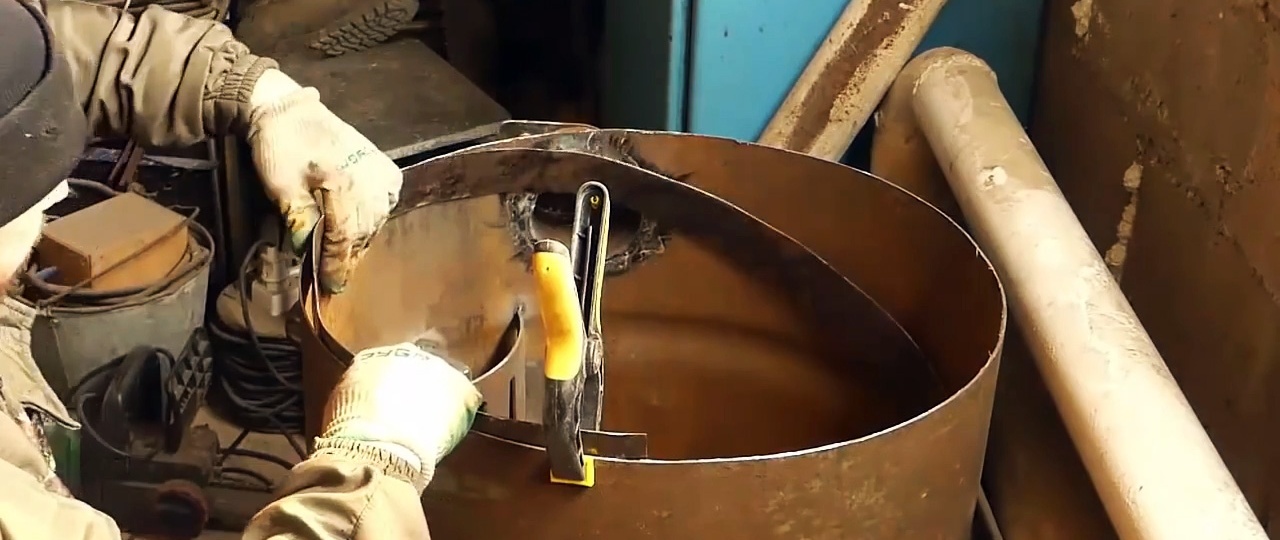
We make the next part from the second barrel, cutting off the part with a turn, because it is heavily dented. Then we cut a ring 50 mm wide and cut it. This will serve as a rim on the first barrel so that the lid can take its place. To do this, extend the ring upward by 20 mm and weld it. We cut off the excess strip and also weld the joint.
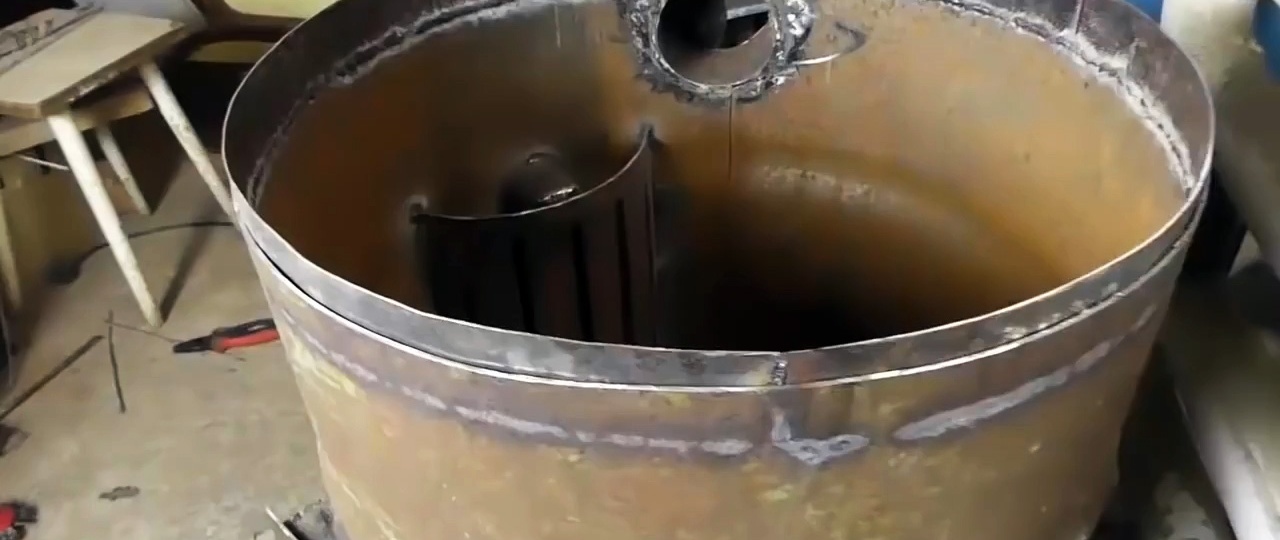
We make a chimney from a 115 mm pipe. First, cut a piece of 260 mm at 45 degrees. From the remaining pipe with a ready-made 45-degree angle, we cut a length of 1430 mm and weld it to each other.
On the contrary, at the level of the hole for the secondary air supply, mark the landing site 50 mm from the top and cut a hole of 115 mm. After fitting, we install and weld the chimney.
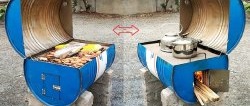
We put on the lid with the bumper and the stove is almost ready for use.But for greater heat removal from the surface, we make a convection jacket from 60 mm pipes, having previously cleaned the barrel and chimney.

We weld the first beacon pipe, 790 mm long, focusing on the seam of the barrel. The welding points are the stiffeners and the lower rim. In addition to the potholders for the firebox, we also fasten the following tubes together.
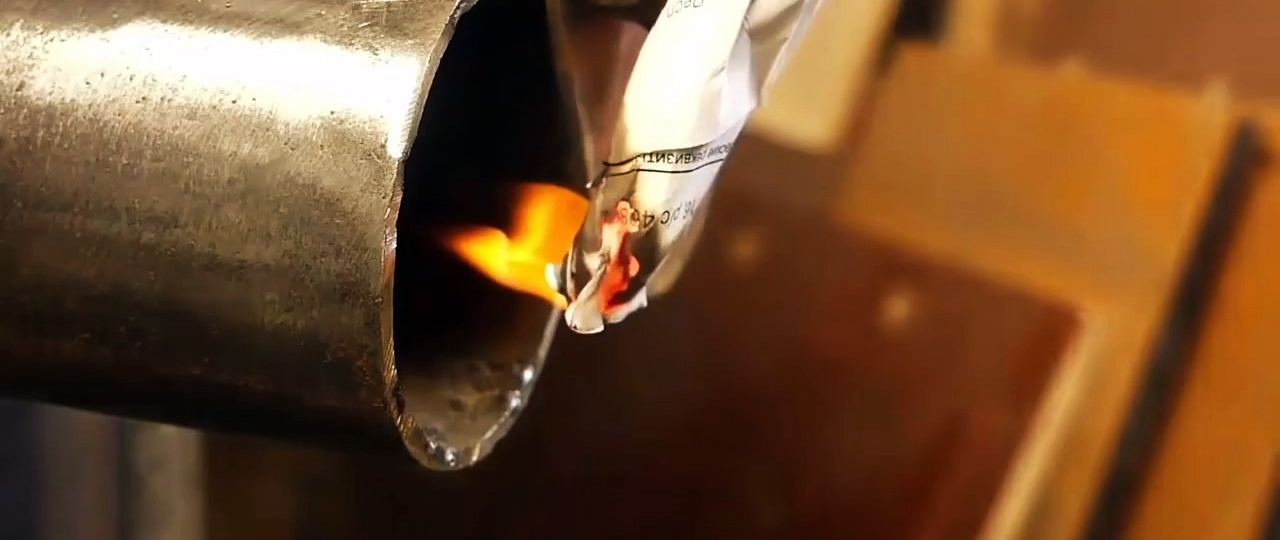
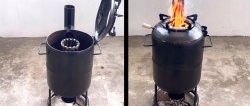
First, level the three-legged stand, adjusting the length of the bolts and tightening the locknuts. We put the stove in its place on the stand. We place a valve on the chimney. We load firewood vertically along the upper edge of the side grate, but below the bumper.

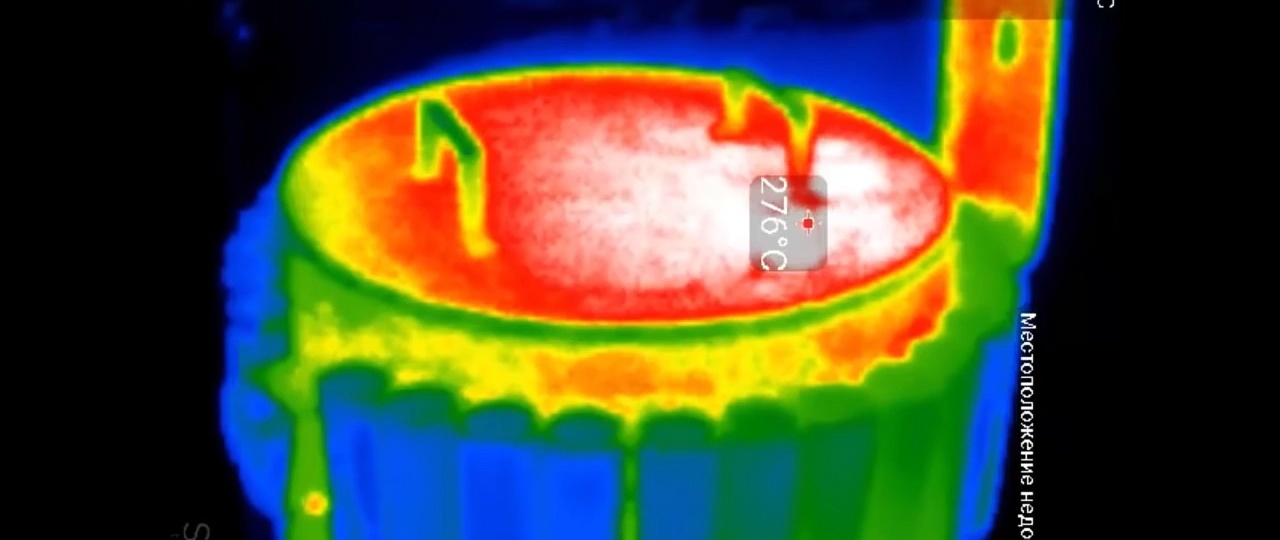
We test the stove at a temperature outside and in the garage of 7 degrees Celsius, which is partially insulated. Fuel is not completely dried maple firewood and pine croaker. After kindling, the temperature in the garage rose to 27 degrees, although the stove continued to heat up at a rate of 1 degree per 5 seconds. A day later the temperature in the garage was 17 degrees Celsius.