New Year's holidays are over, present presented and received, and everyone happily stepped into the next year. But there are still many other holidays ahead on which gifts can and should be given. And no one canceled birthdays. And it will be doubly pleasant for a loved one, or even just a good friend, if the gift is made with your own hands, and not blindly bought in the first store you come across with cheap junk, just to get away with it. And for yourself, your loved one, such a thing in the interior of the room will not be superfluous. Today we will talk about a table lamp.

This lamp is intended only for interior decoration, for light illumination. Not for reading or doing any menial work. You can also press the remote control button at night and see the time on the wall clock in the dark, so as not to squint at the bright smartphone screen.
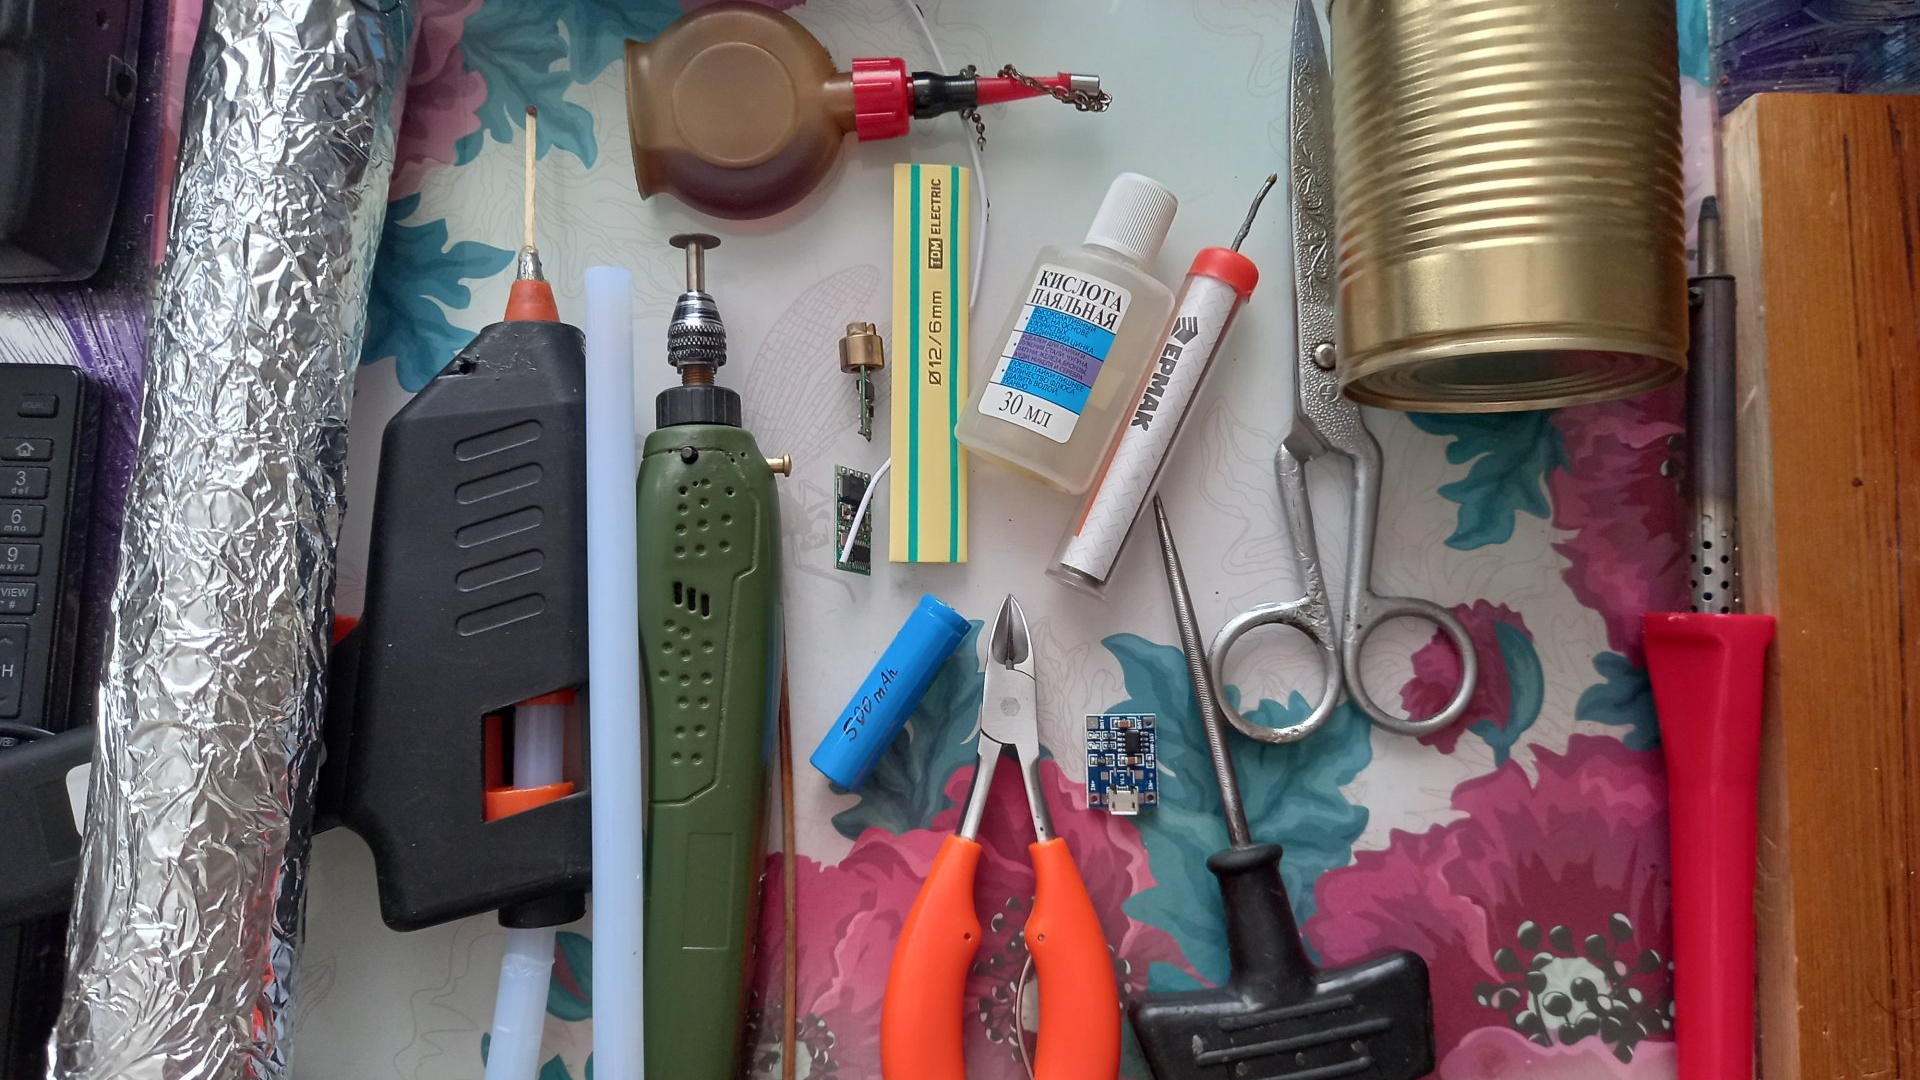
You will need:
- Tin.
- Foil.
- Hot glue, with a glue gun.
- Secondary glue.
- Engraver with cutting disc, or a sharp knife (for making cuts on tin).
- Scissors.
- Soldering iron with solder.
- Yellow self-adhesive film.
- Round base for a glass, cork or wood.
- Radiation hazard sticker.
- Machine oil (any kind is possible).
- Wire cutters.
- Awl.
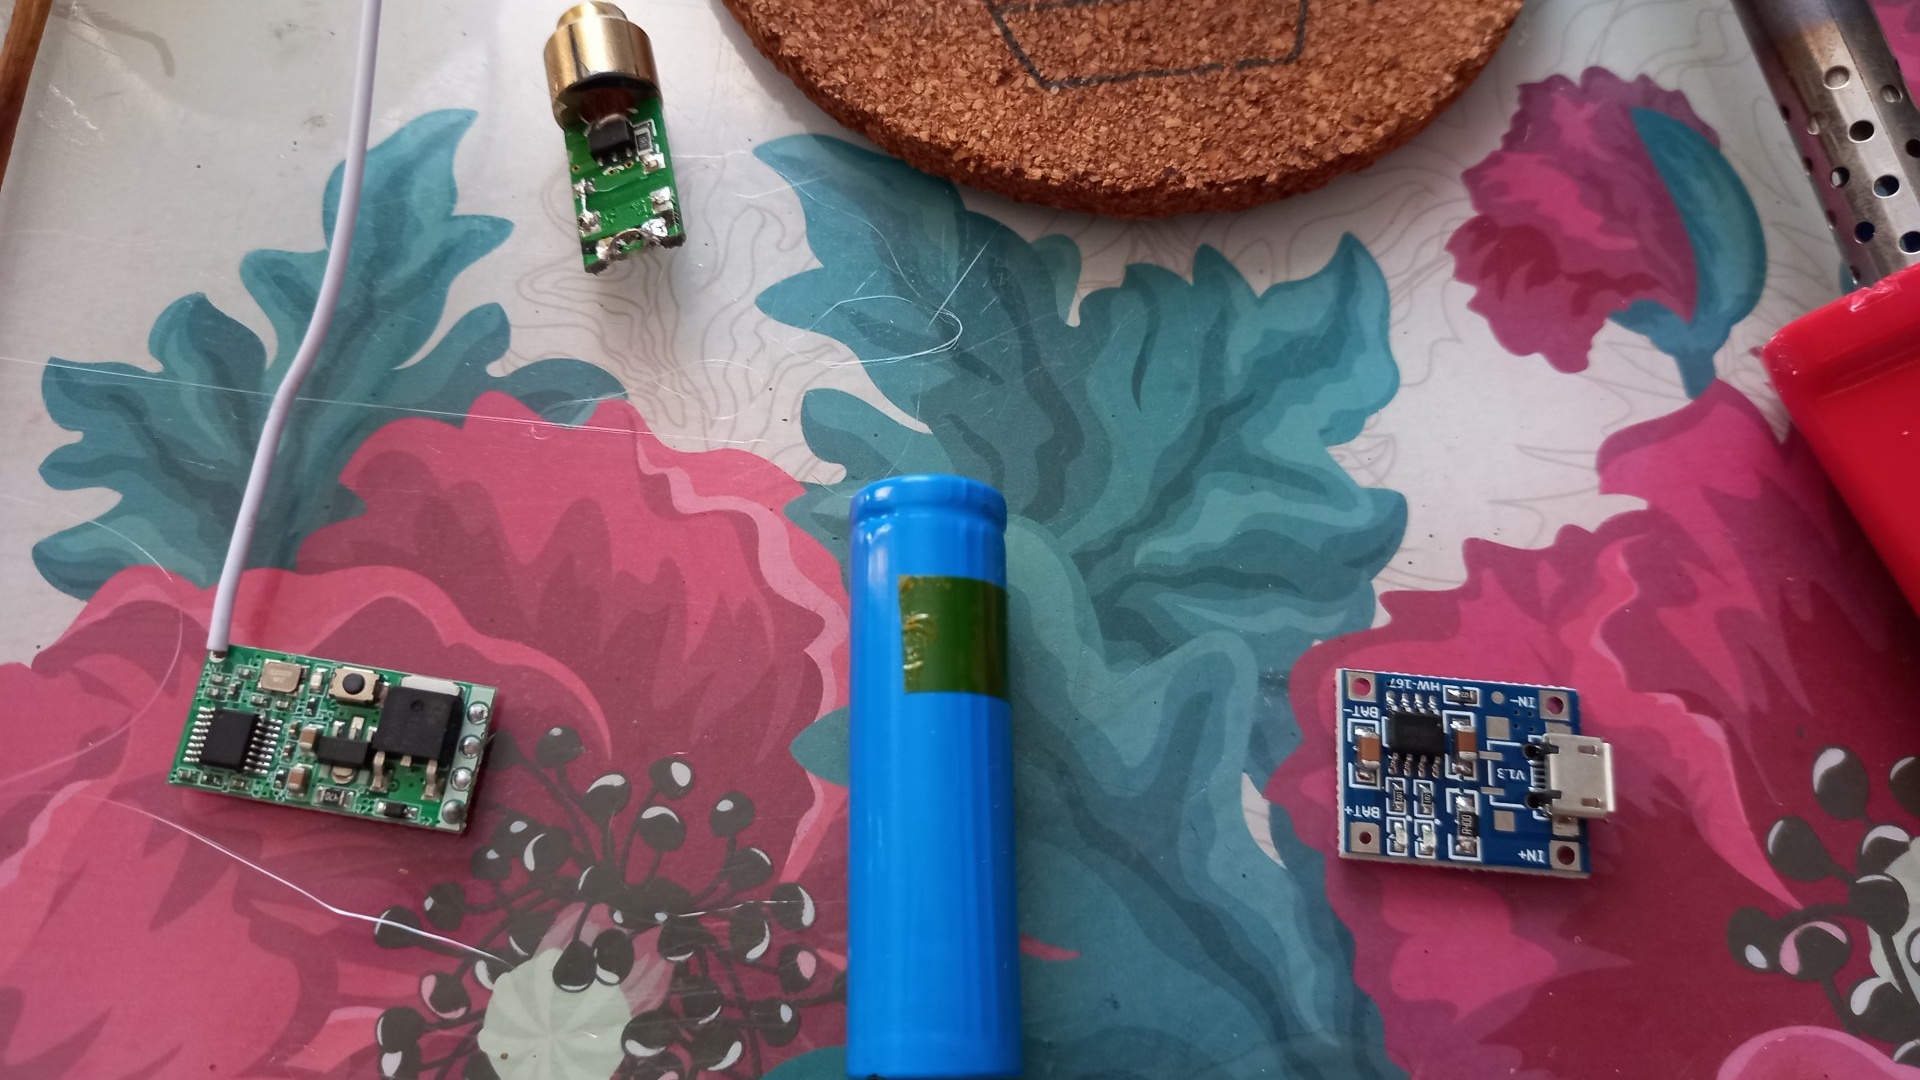
- Battery 14500, 3.7-4.2 volts.
- Green LED, good luminous efficiency, bright.
- Charging module for Li-Ion battery 3.7-4.2 volts.
- Remote switch 433 MHz.
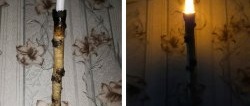
Making the “Radioactive Barrel” lamp
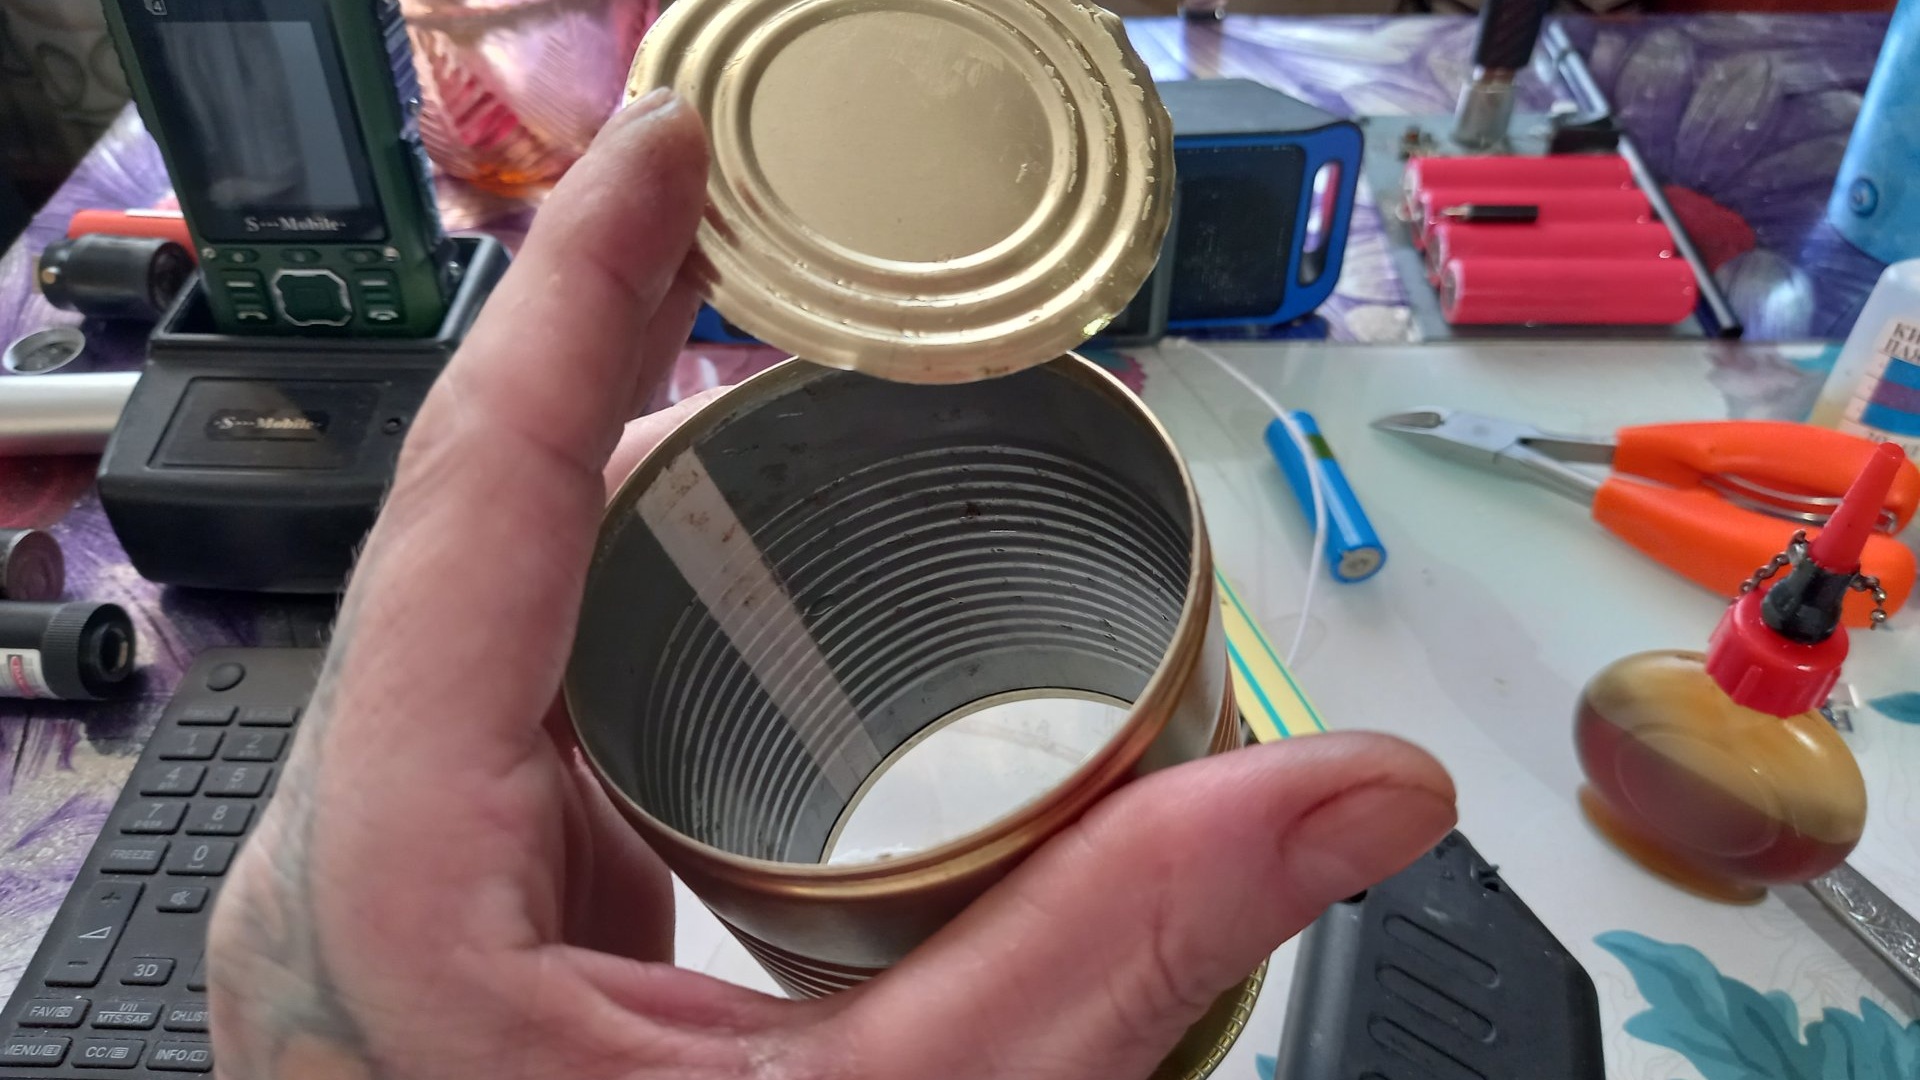
Let's take a tall tin can as a basis. I took it from the beef stew. So, we empty the jar of its contents, rinse it, dry it, and get to work. The bottom of the jar, from the outside, must be wiped and a little machine oil applied to it. Possibly vegetable.

This is necessary in order to easily tear off the frozen hot glue from it in the future, from which we will make the “radioactive chemical” flowing out of the barrel. Using a glue gun, apply a thick layer of hot glue to the oiled bottom of the jar.
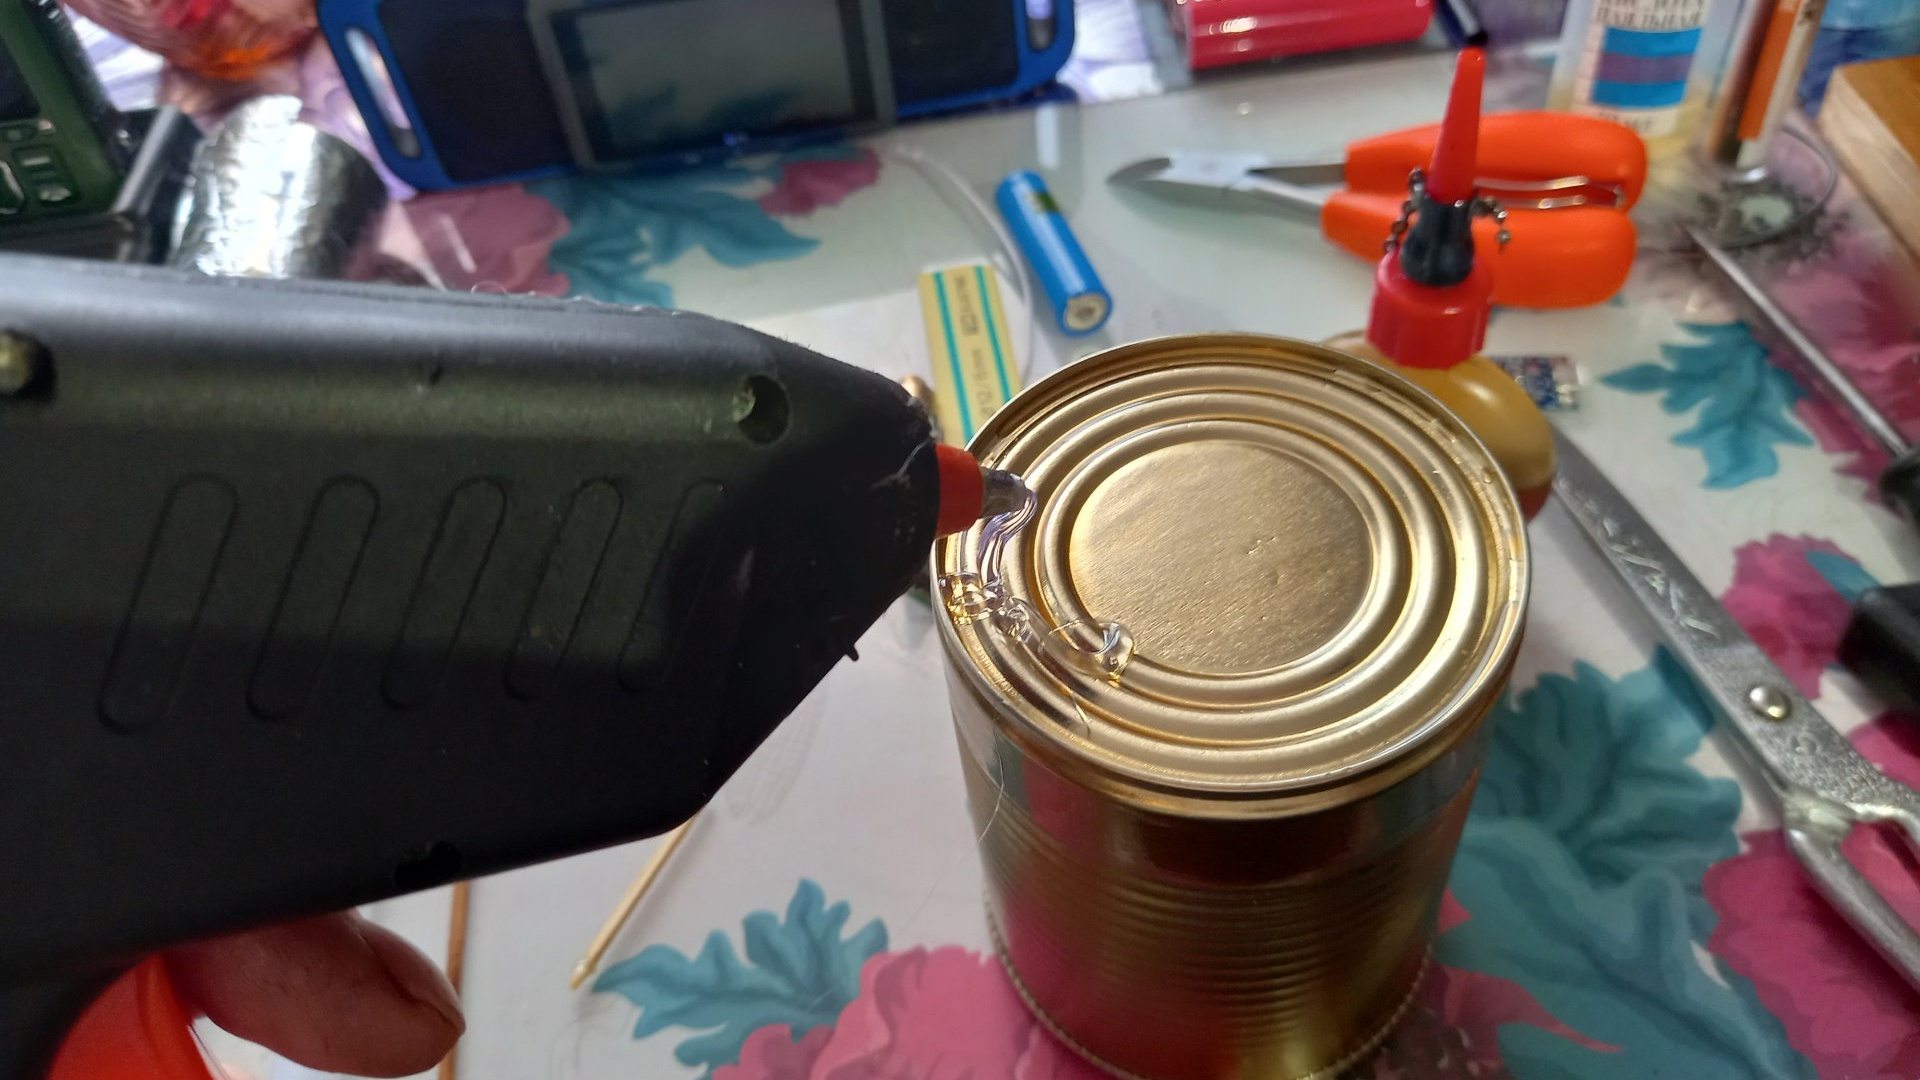
3-4 millimeters thick. While the glue has not cooled, we make small smudges along the edges.
We tear off the frozen glue from the bottom and put it aside so that it does not interfere.

Next, use a bottle opener to cut out the bottom of the jar; we won’t need it anymore.
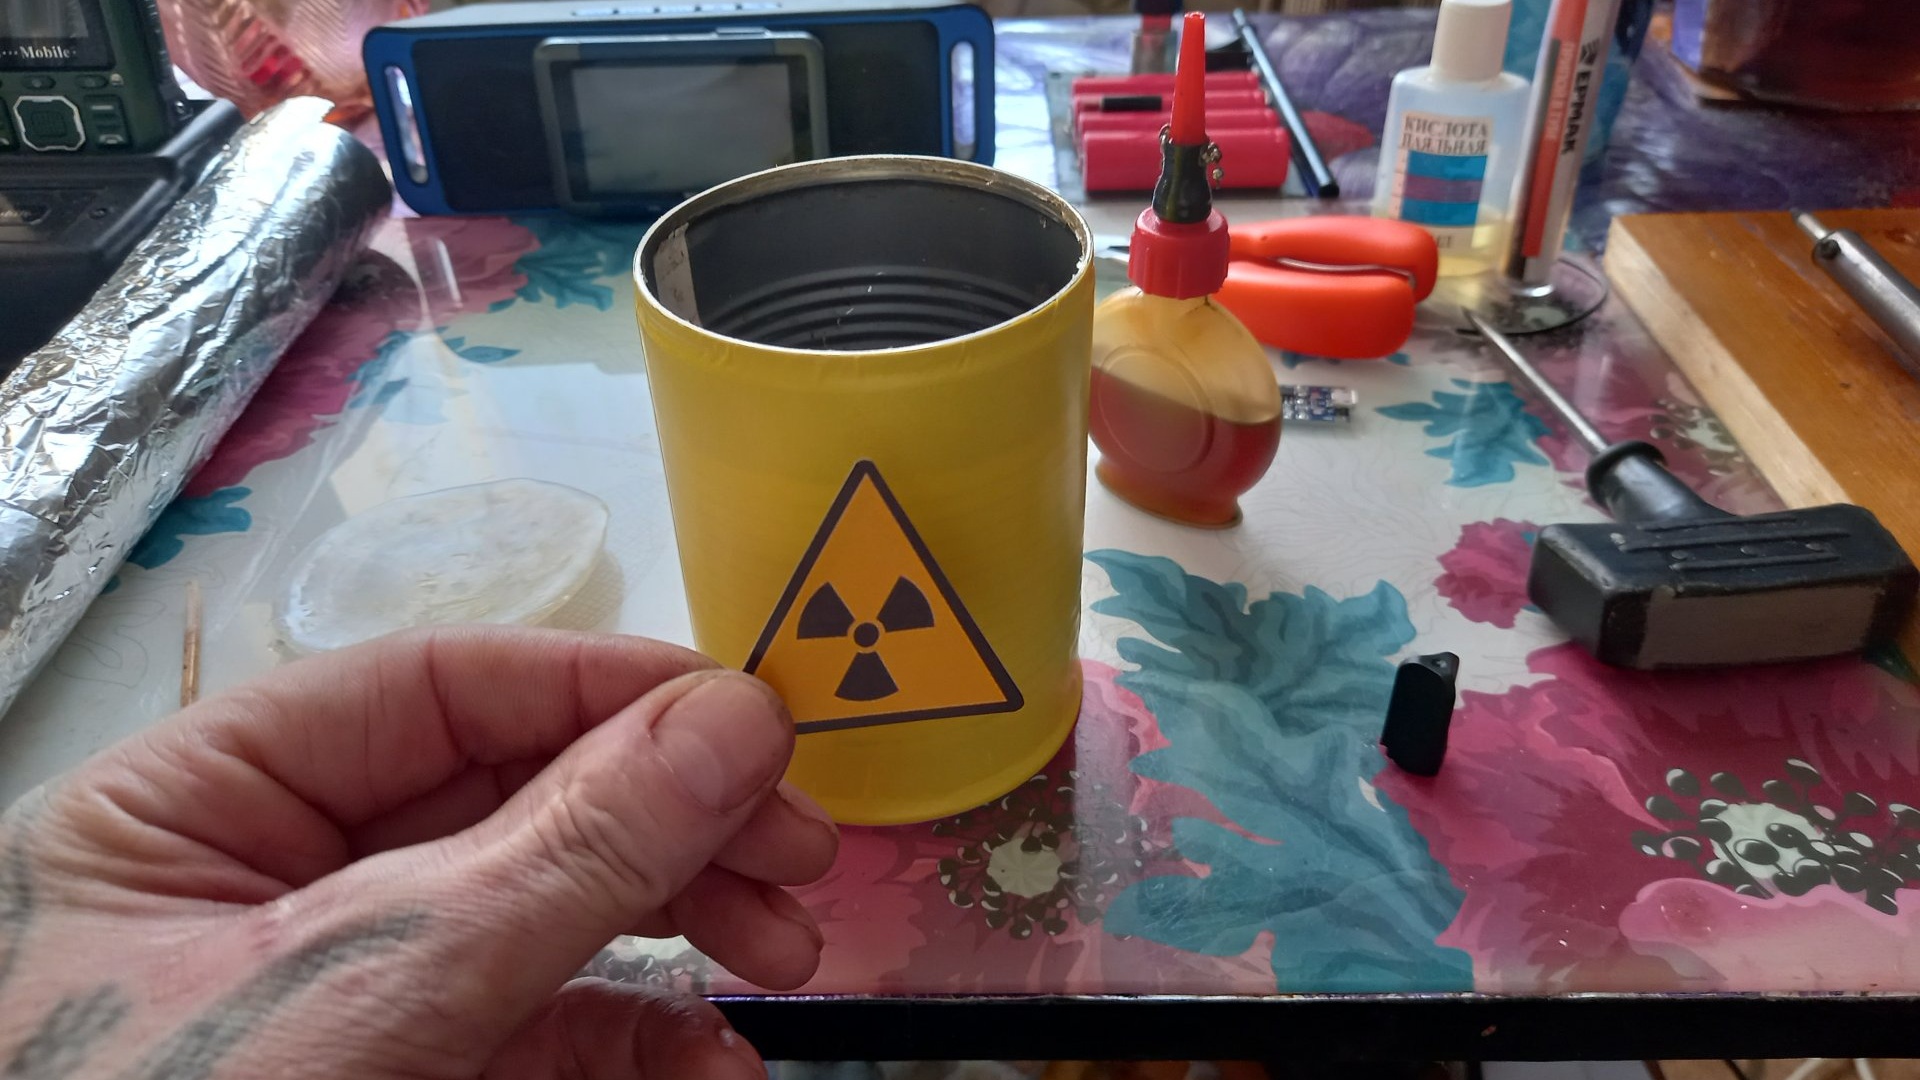
Using a cotton pad and solvent or alcohol, clean the jar from any remaining fat and oil, and cover it with yellow self-adhesive film.

This film of different colors is sold in any store that sells wallpaper. Print on a self-adhesive A4 sheet radiation hazard sticker, about half the height of the can, cut it out of the sheet and glue it onto the can.
You can also buy such a sticker in a store that sells magazines, calendars, translations and other color printing products. Now you need to cover the inside of the jar with aluminum food foil. Like this:

This is necessary for better reflection of light onto the top of the can. Next, using a knife or an engraver with a cutting disc, we make longitudinal through cuts on the can, no more than one centimeter long, in any order. Using an awl, we widen the cuts downwards so that the cuts take on a teardrop shape.
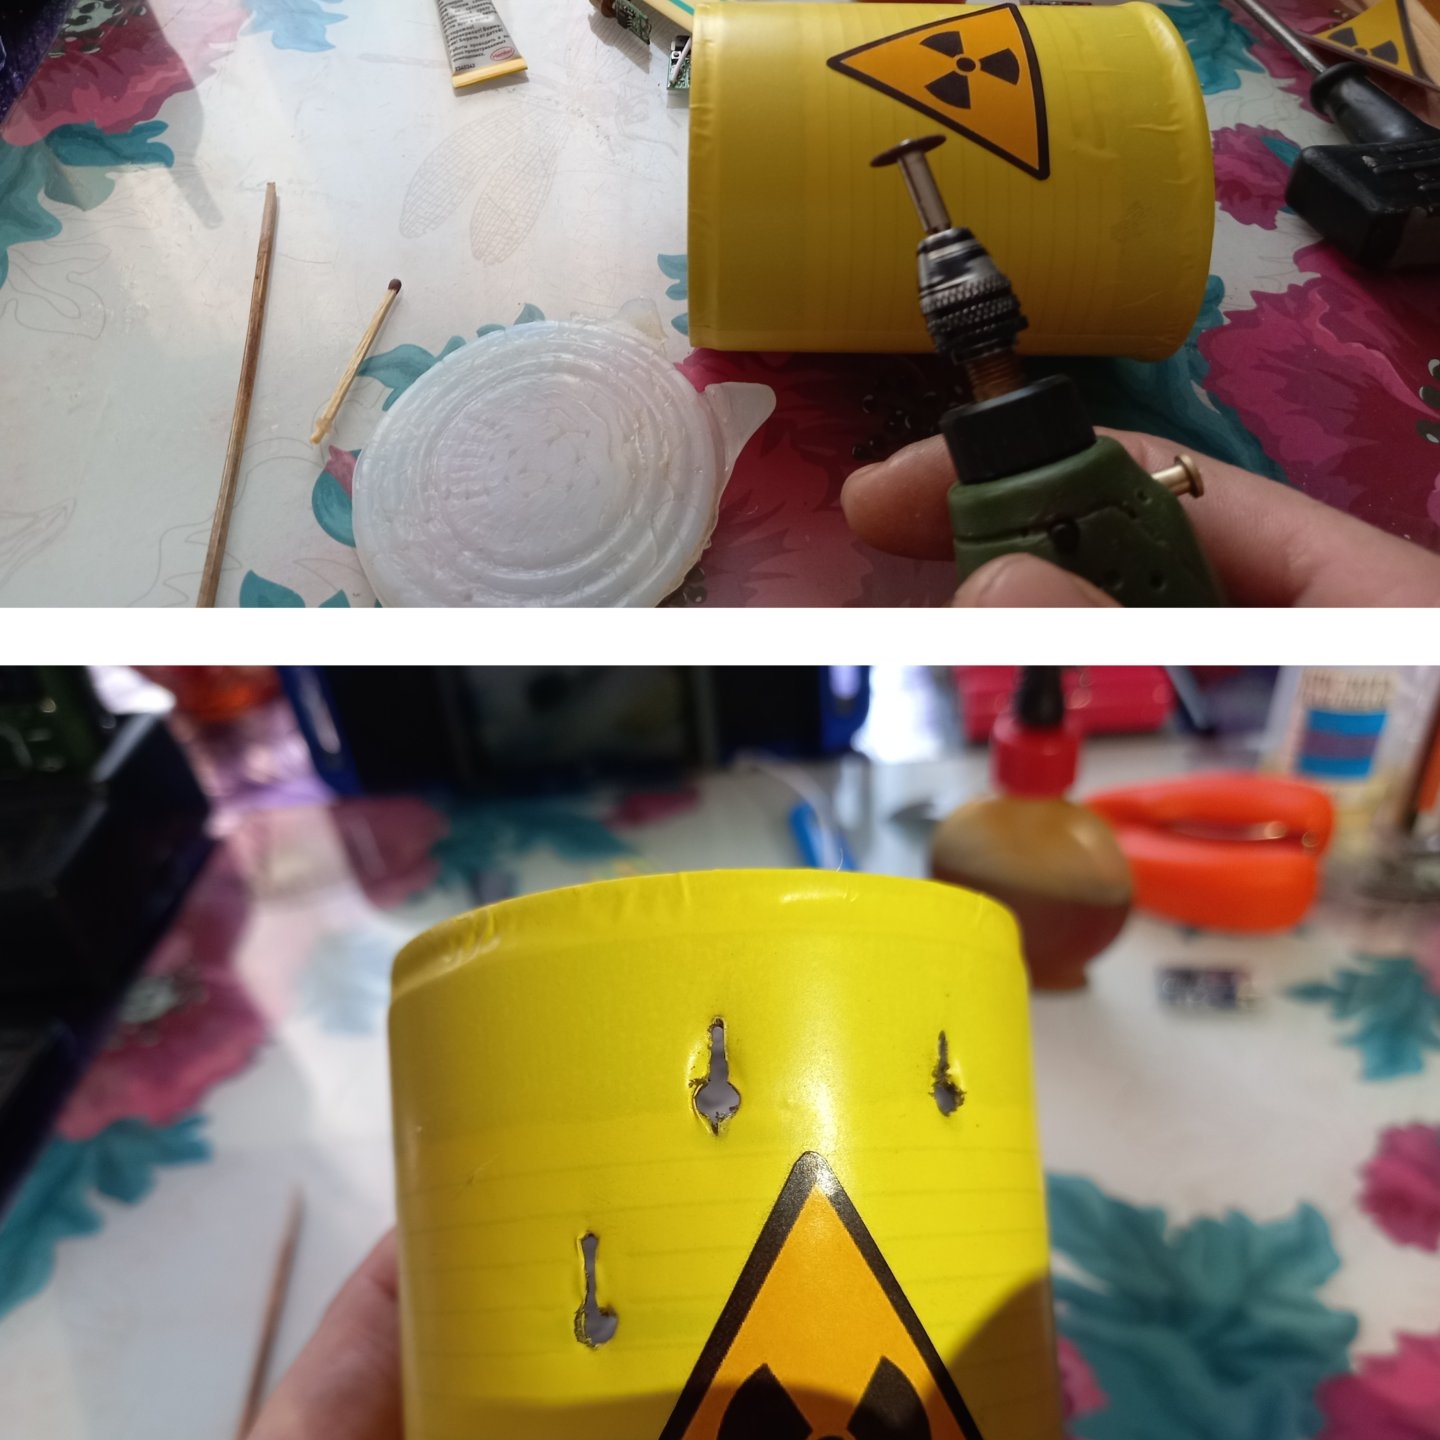
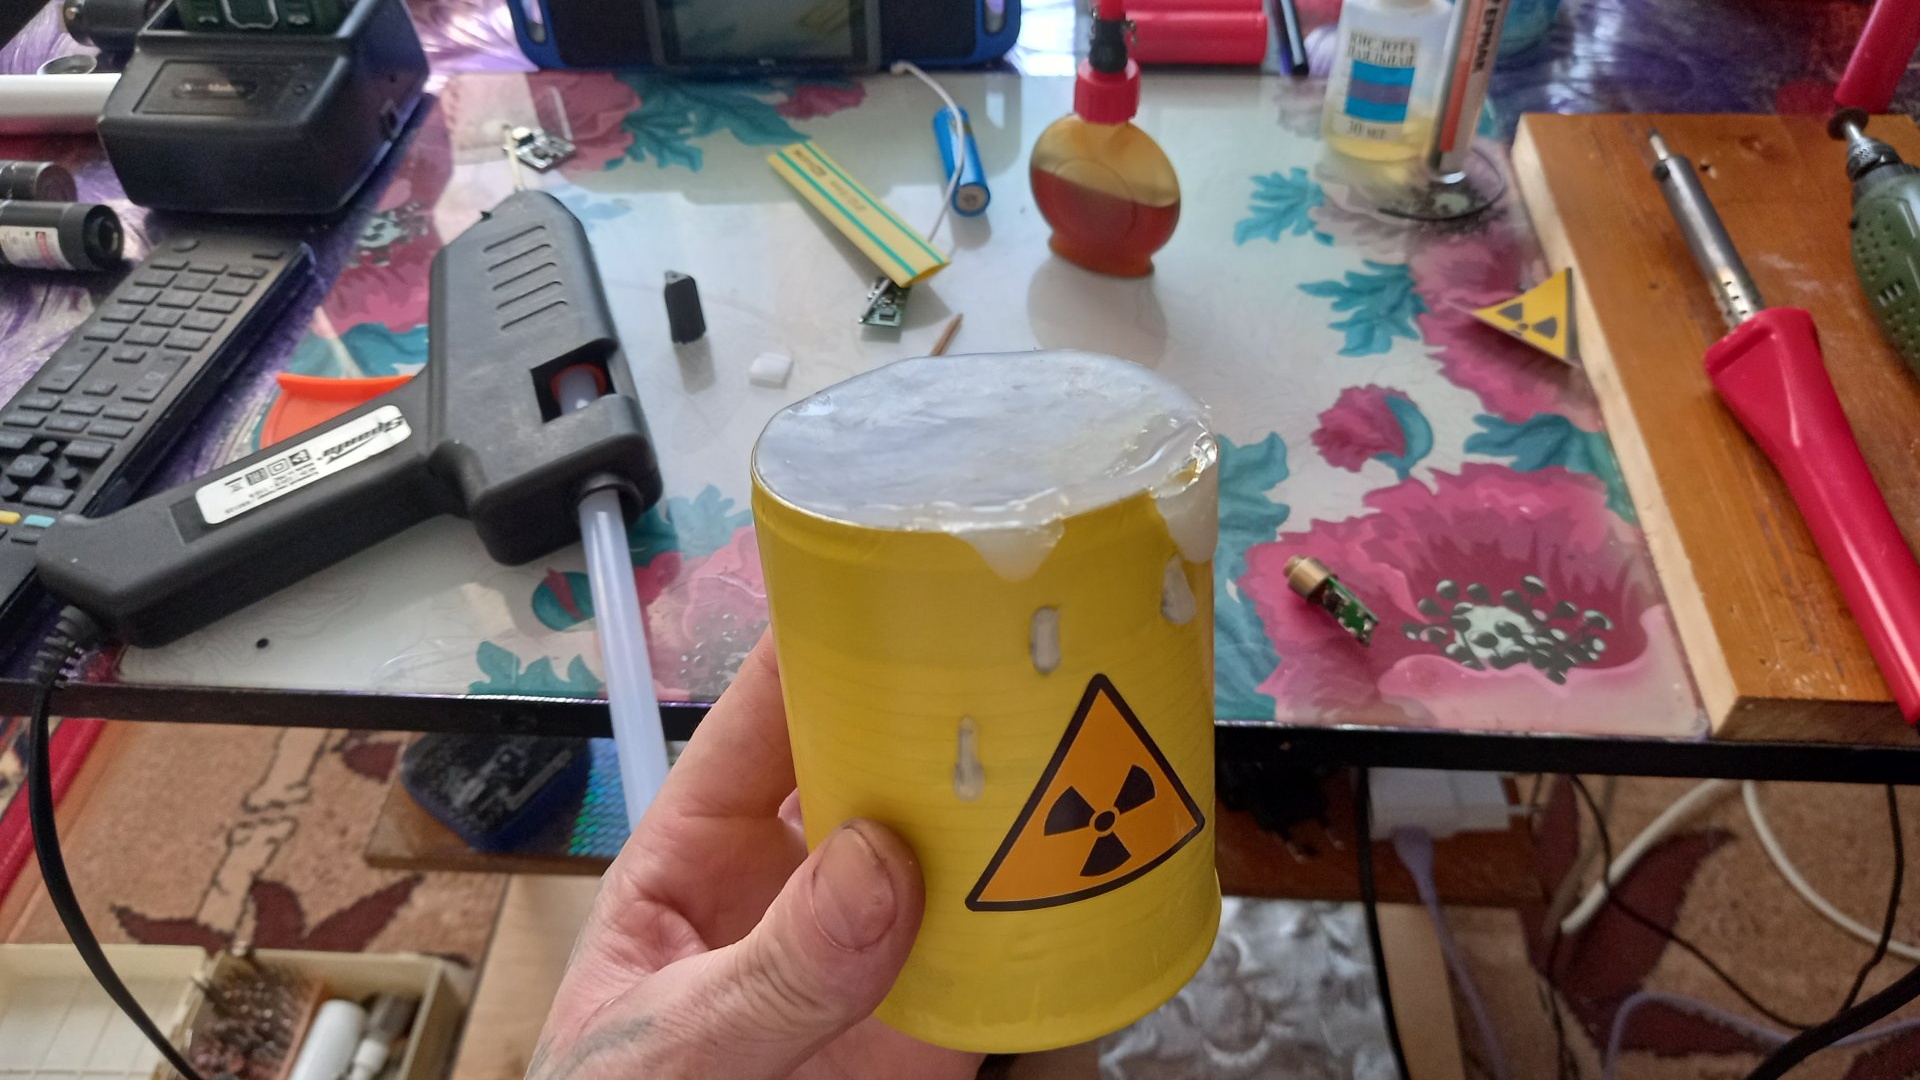
Using a glue gun, apply glue to the cuts. These will be drops of “radioactive chemical” leaking from a leaky barrel.

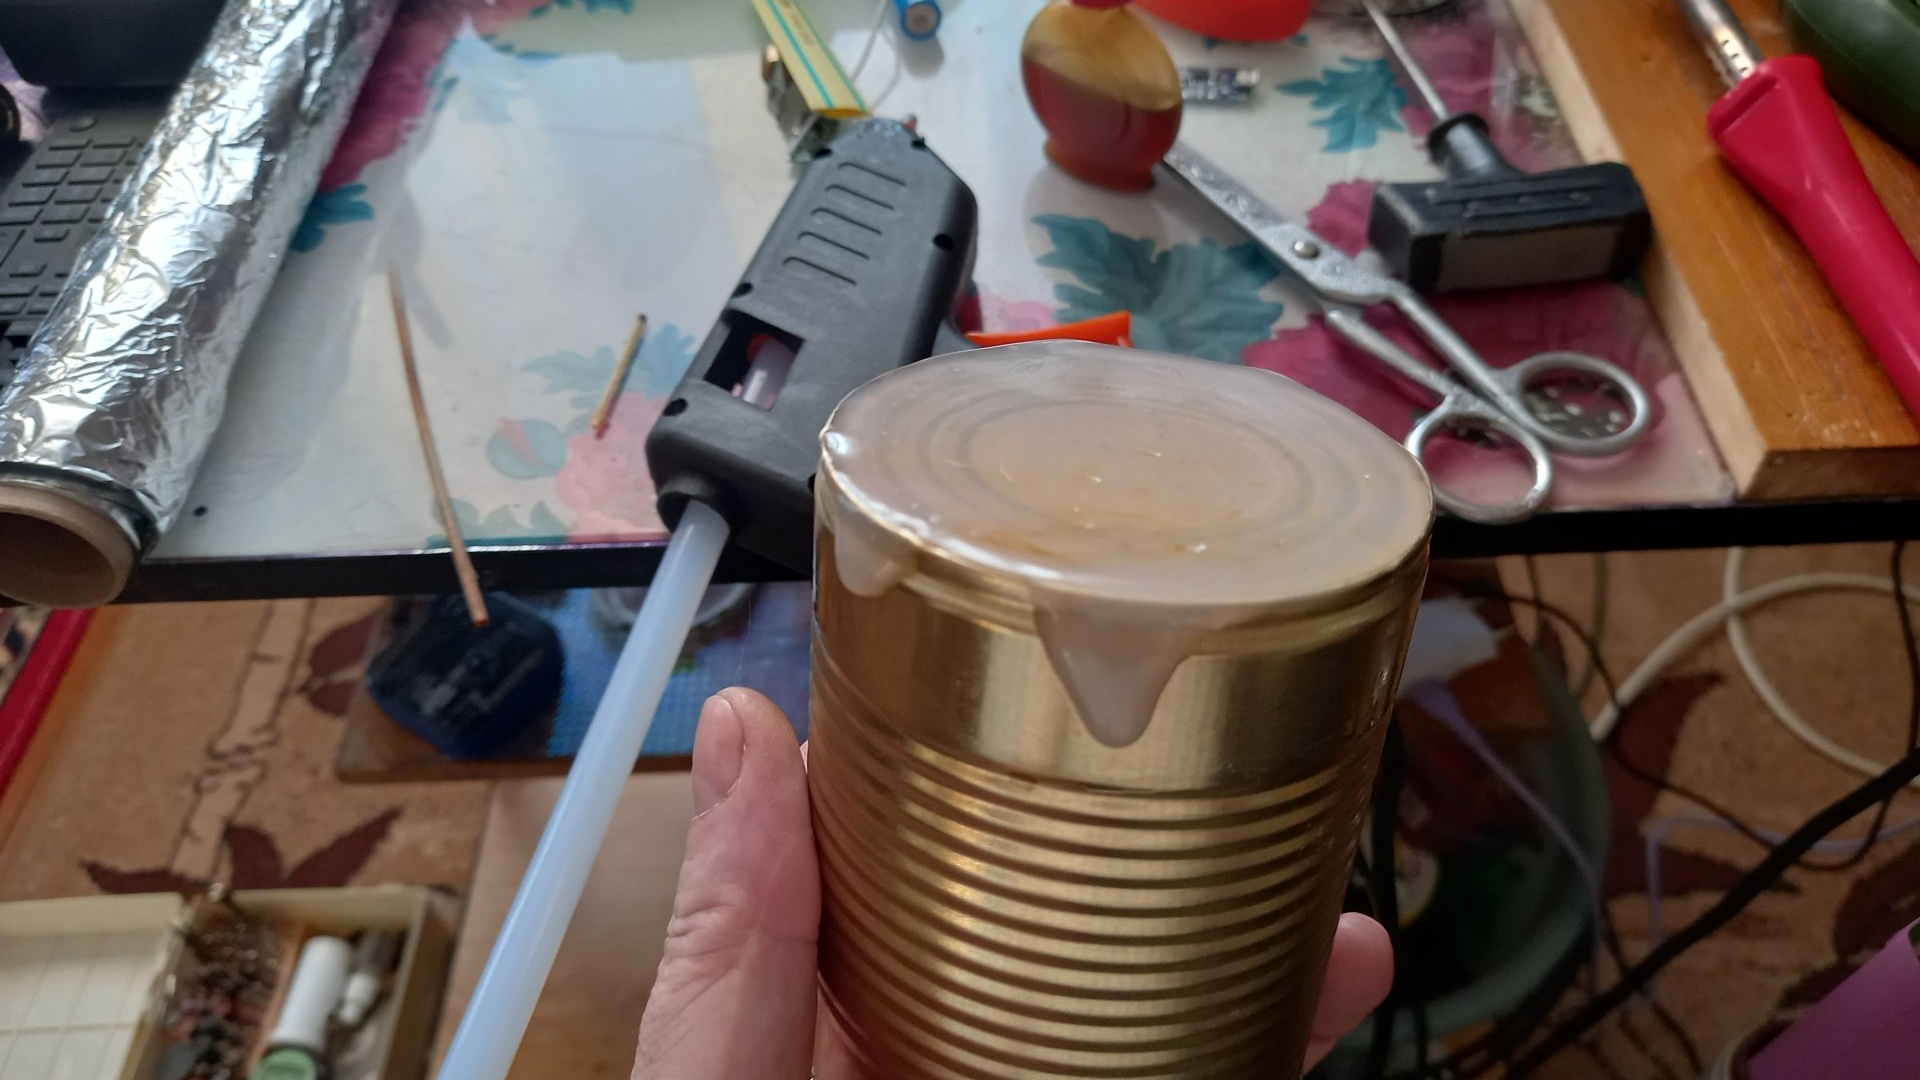
Using instant glue, we glue on top the adhesive lid with smudges that we made from the very beginning. This is what you should get:
Now we will solder the electronic filling.
Your only green one Light-emitting diode I had the temerity to burn it during a test connection, gave the wrong voltage, so I replaced it with a disassembled one laser module from broken laser pointer. This, in fact, does not play a big role - Light-emitting diode will shine in the jar, or laser module. Both of them shine quite brightly. So, we solder all the parts as follows:
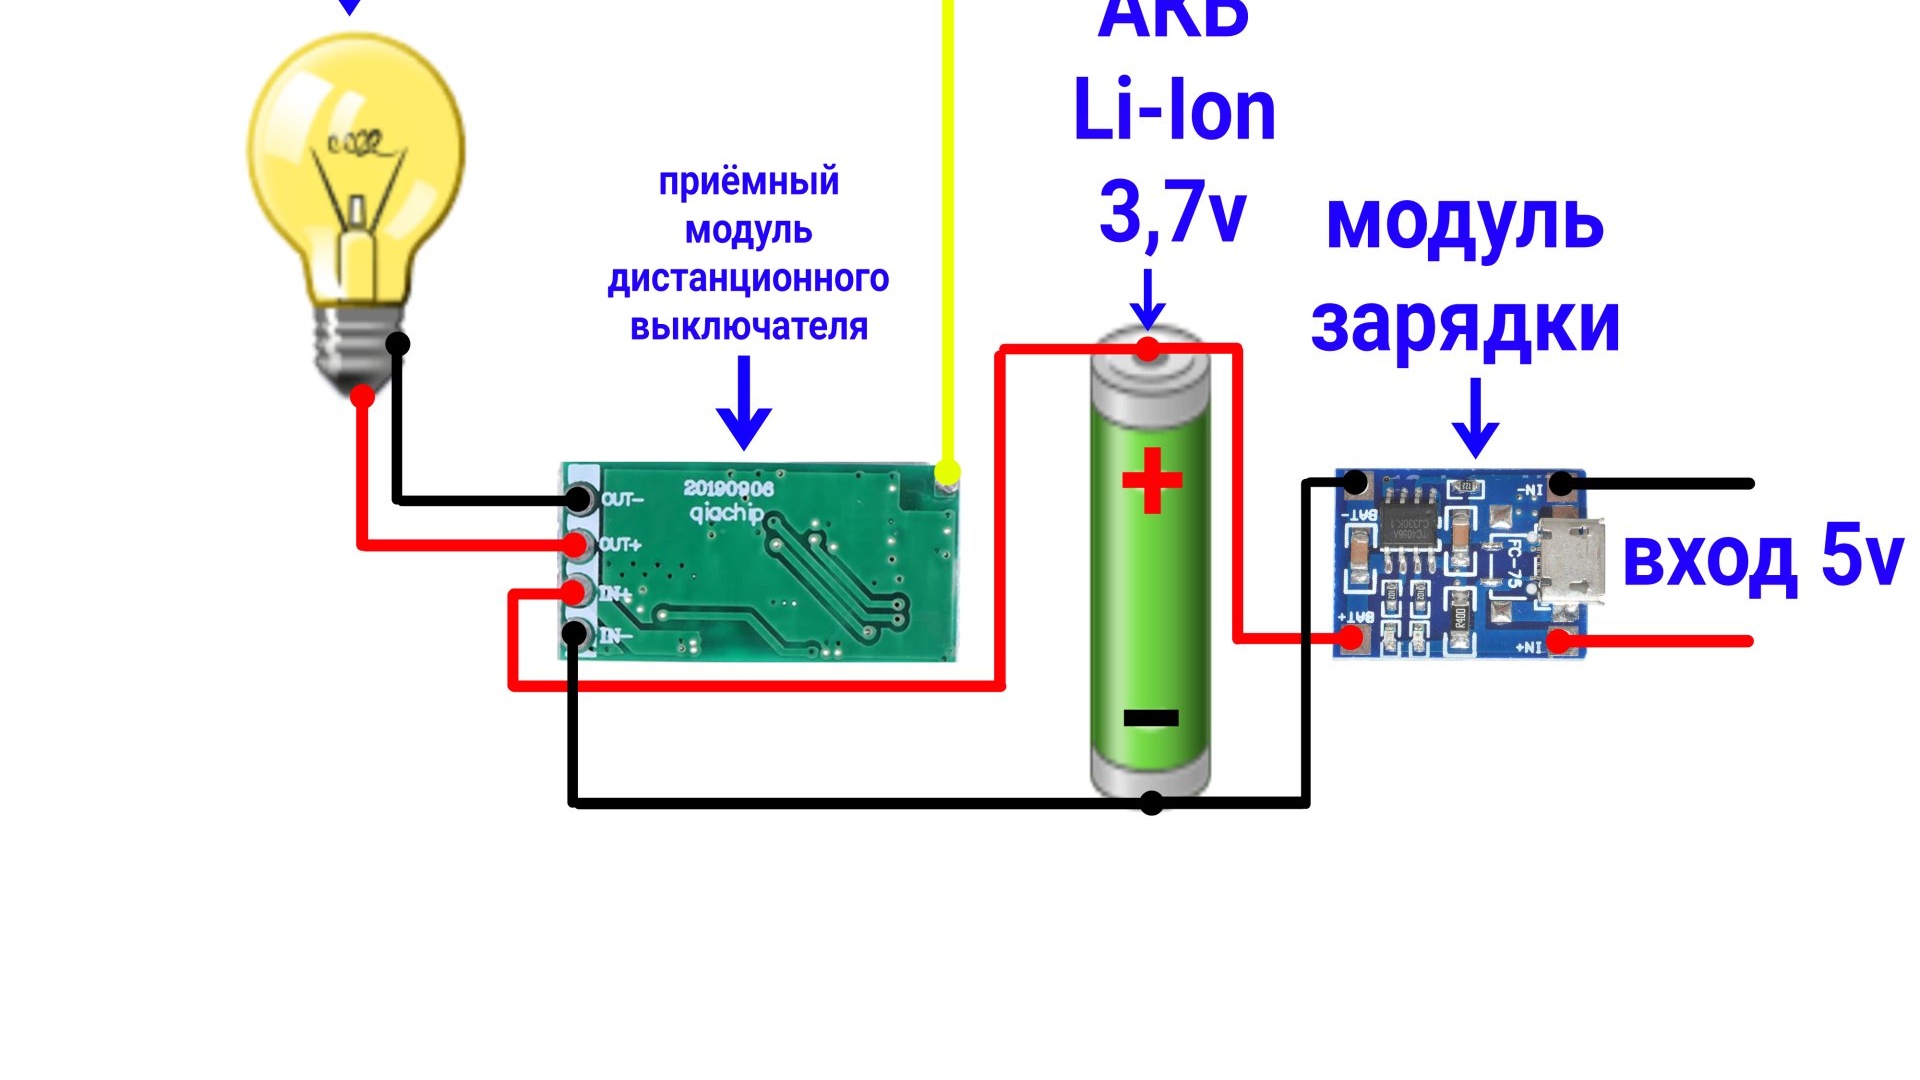

Glue the soldered parts to the glass base. Glue it in the center as closely as possible. With hot glue. We insulate the contacts with the same glue so that they do not short-circuit to the body.
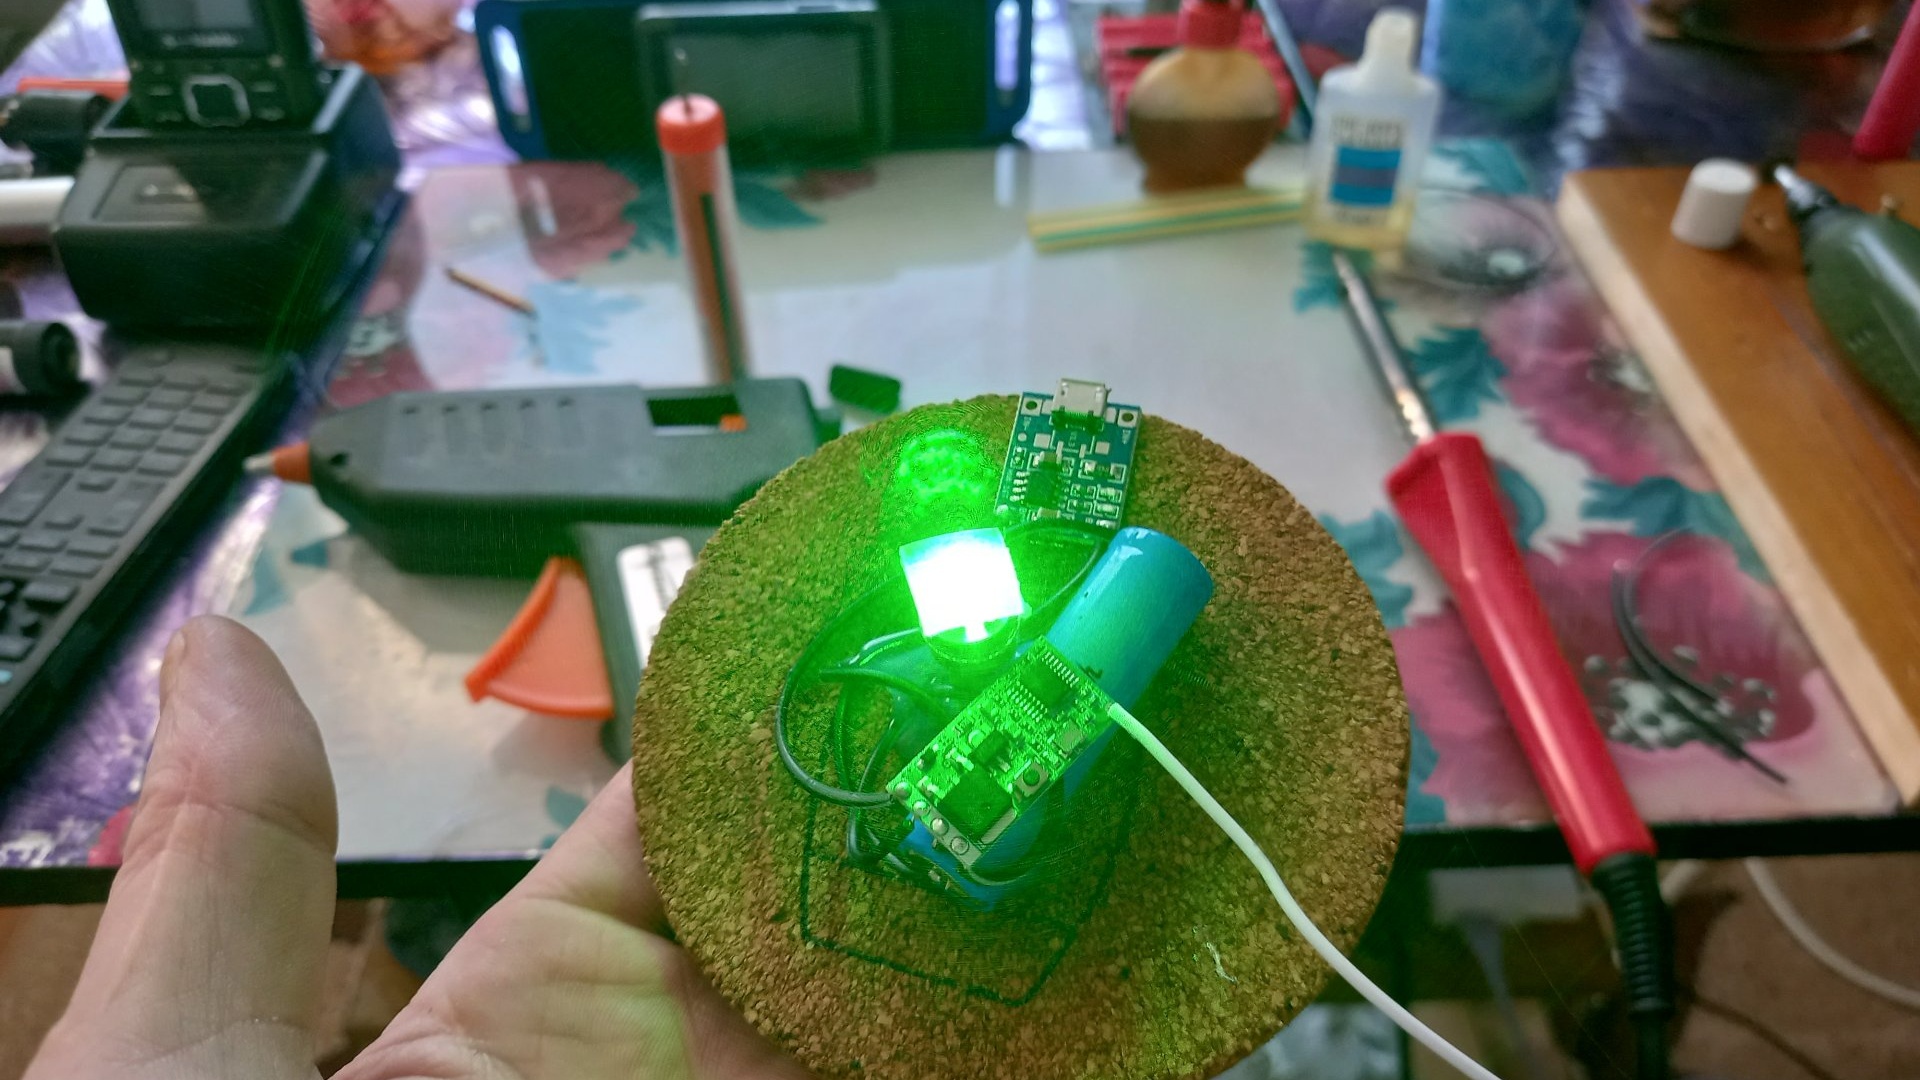
Let's check how it works. I took the switch remote because I was too lazy to cut a hole in the housing for a regular switch. But it’s for the better – the look is more aesthetic than with a protruding key. Now you need to solder the antenna from the receiving remote switch module to the tin body of the can from the inside.

This is necessary because the inside of the bank covered with aluminum foil will be great at blocking the radio signal from the switch remote control. And so, the body itself will be an excellent antenna.At 25-30 meters the signal reaches the receiver, even through walls (depending on the freshness of the batteries in the remote control). It is also necessary to make, on the edge of the can opposite from the sticker, a cutout for the outlet of the charging module connector. Now you need to check if it works properly battery charging module. To do this, just connect any charger suitable for the connector and voltage (5 volts), and wait: a stable red light - charging is in progress, a stable blue light - charged.

And this is what we get in the end.
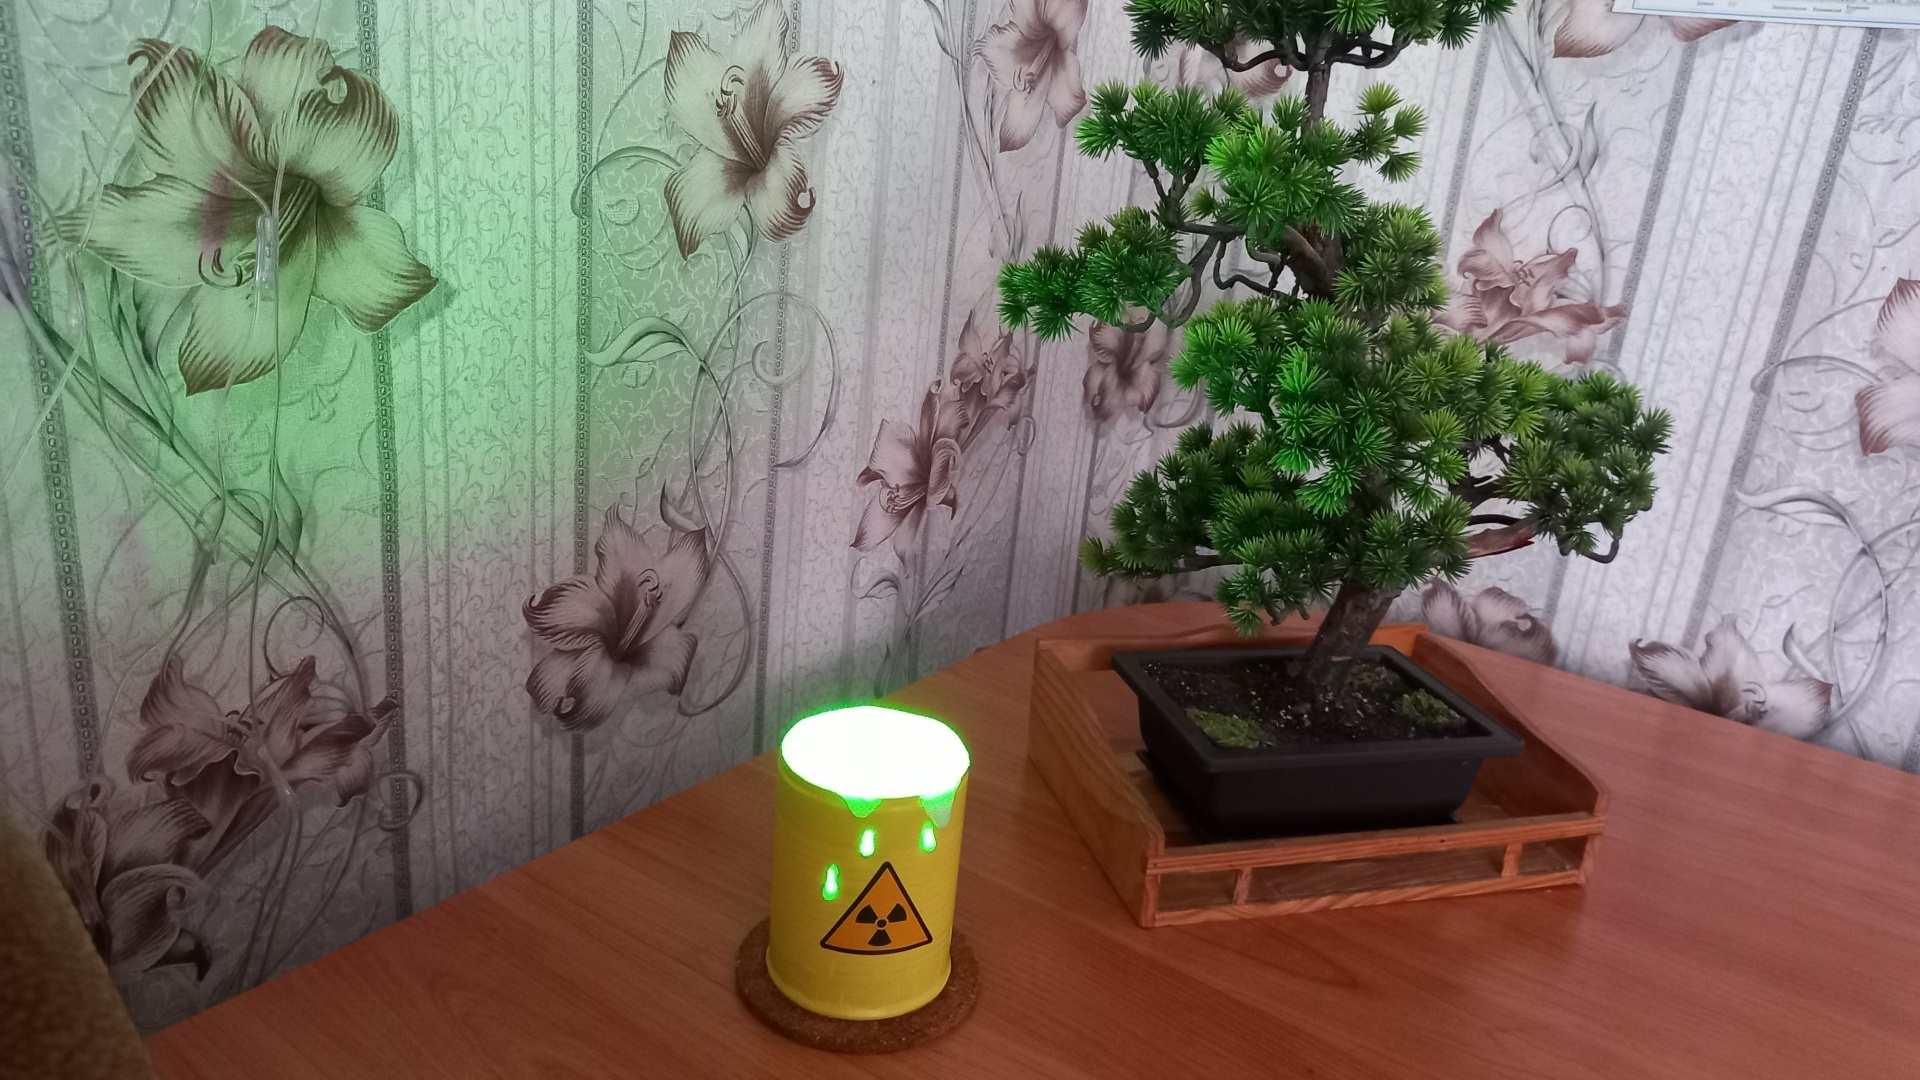
Even in daylight, natural light, you can clearly see how the charging indicators work, but there’s nothing to say about the main green color. Especially in the dark!