Water leaking from the toilet tank can occur for three reasons:
- when the filling mechanism does not completely block the flow of water into the tank, which causes its level to increase compared to the norm, and water flows through the drain tube into the toilet;
- when the membrane (gasket) of the drain mechanism is damaged or worn;
- when both the filling and draining mechanisms are faulty at the same time.

Step-by-step search for the cause of the leak and methods for eliminating it
You can determine the cause of water leakage from the toilet tank without removing the lid. To do this, we empty it and wait for the next filling to begin. If it is accompanied by a water leak from the very beginning, then the membrane of the drain mechanism is not in order.
But the process of collecting water into the tank and for some time after it can occur without leakage. However, after some time the leak resumes. This means that the reason is related to the filling mechanism. Also, a leak can be caused by a simultaneous malfunction of both the filler and drainage mechanisms.
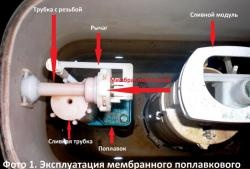
Let's start inspecting the filling mechanism. To do this, drain the water from the drain tank.We make sure that water does not drain into the toilet both when filling and after closing the inlet valve. Moreover, there may not be a leak for another 15 to 30 minutes or more. But it will start sooner or later depending on the degree of leakage of the intake valve.
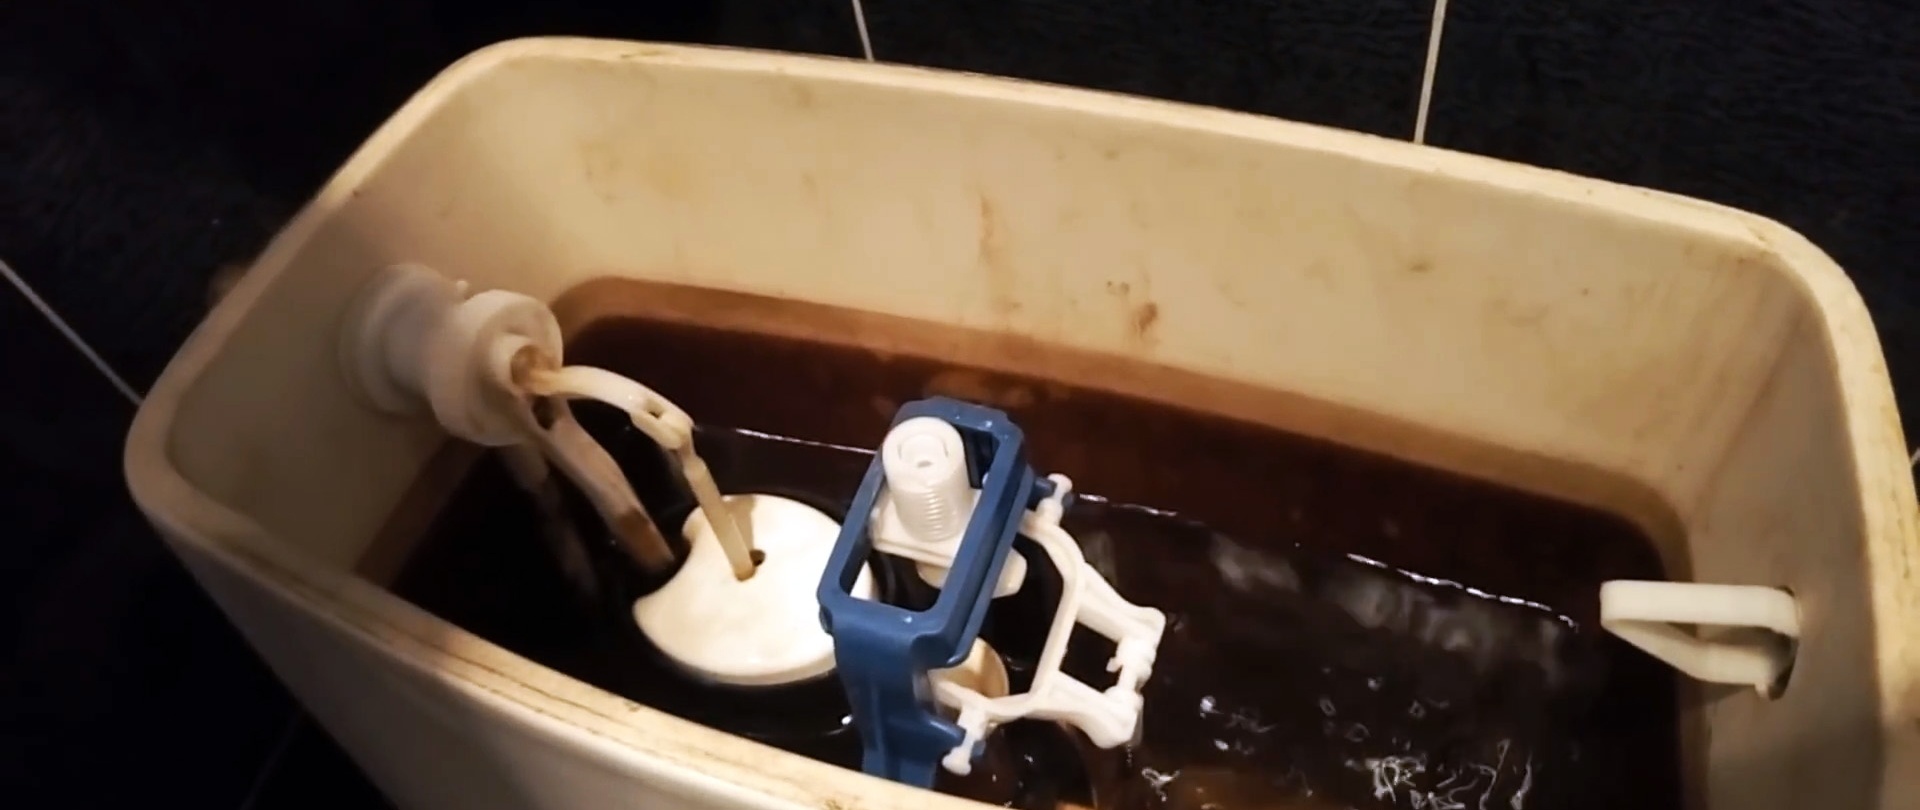
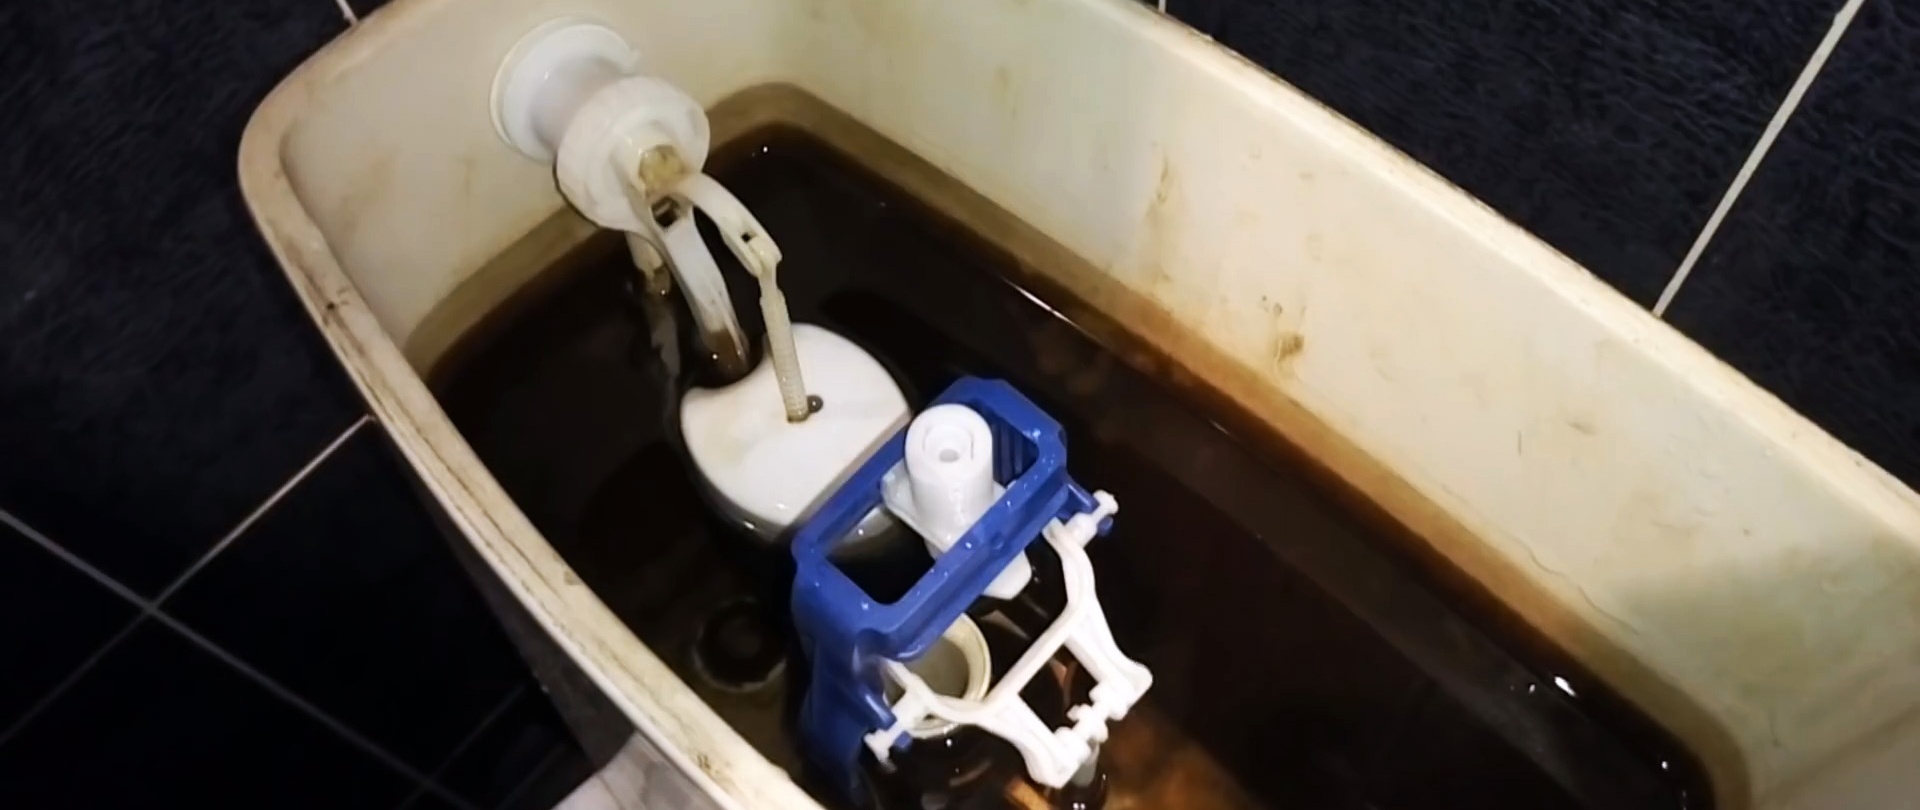
After removing the lid, we clearly see 2 water levels on the inner wall of the tank: the lower one is dark, the upper one (at the level of the overflow tube) is lighter, indicating that the leak did not start immediately after installing the toilet, but later. According to the norm, the water level in the tank should be 1.5-2.0 cm below the top of the overflow tube.
We found every indication that the fill valve was not completely shutting off the water and was causing the toilet to leak. This is usually due to a faulty filler membrane.
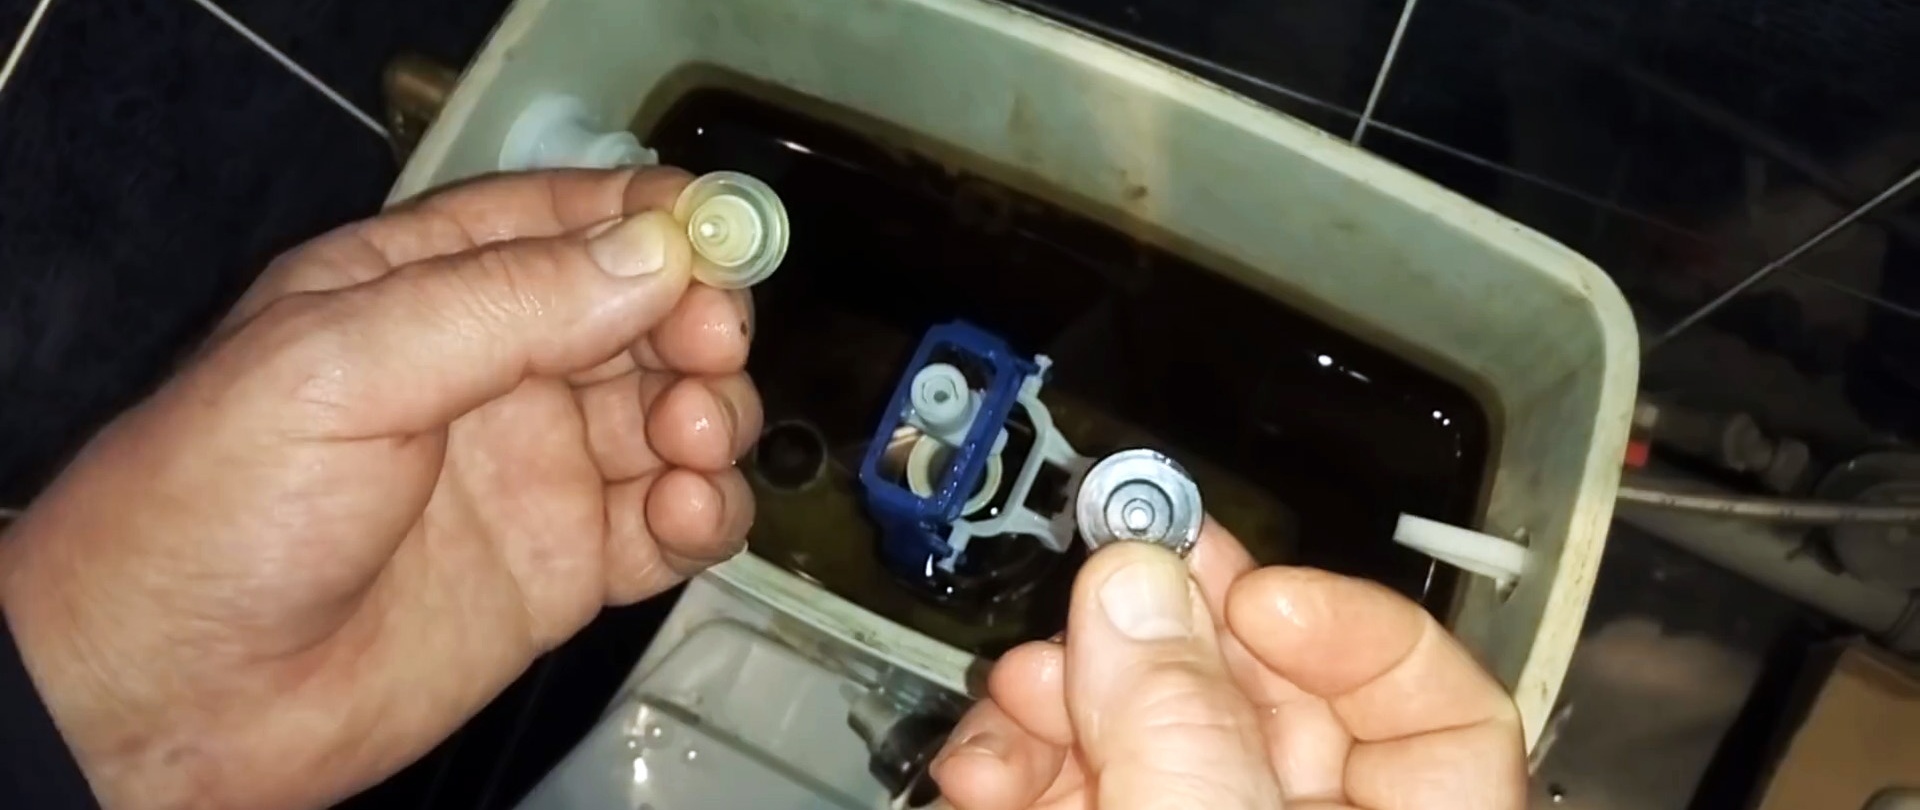
To make sure of this, turn off the water and slightly loosen the outer nut that secures the filling mechanism to the tank body. Then, holding the body of the filling mechanism, we turn the guide cover to the left until it clicks, signaling its release from the engagement with the body.

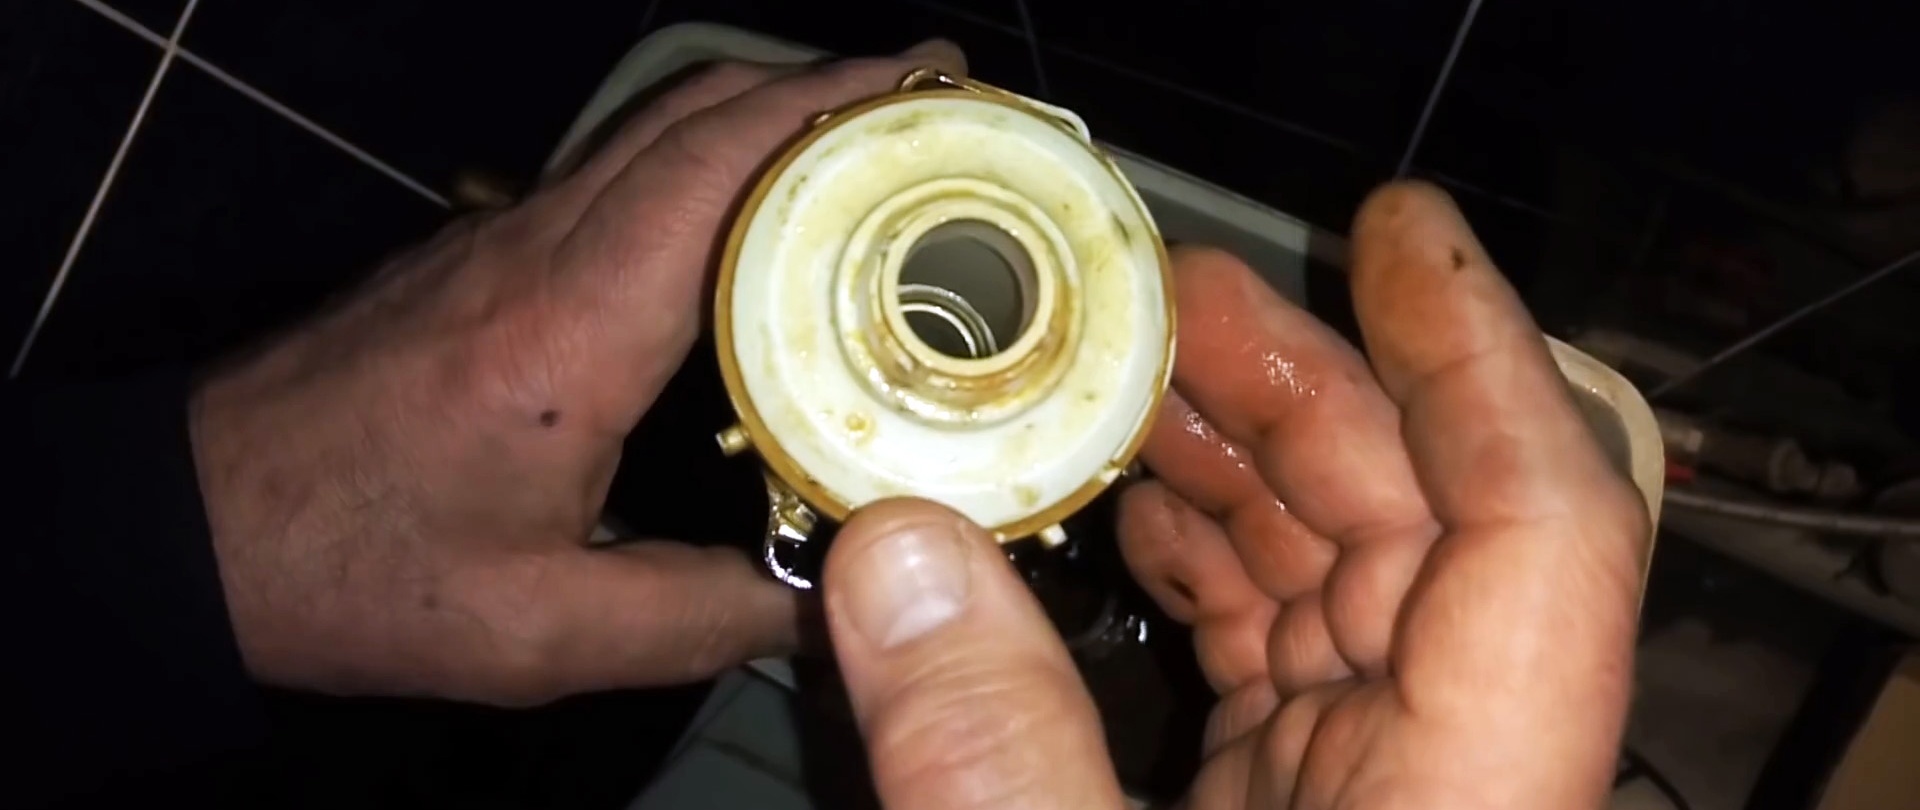
We remove the membrane, make sure of its mechanical integrity and clean the rust deposits from the working surface with a toothbrush. Using a rubber hose, we blow out the channel in the guide cover. We clean the body of the filling mechanism and the washer in it.

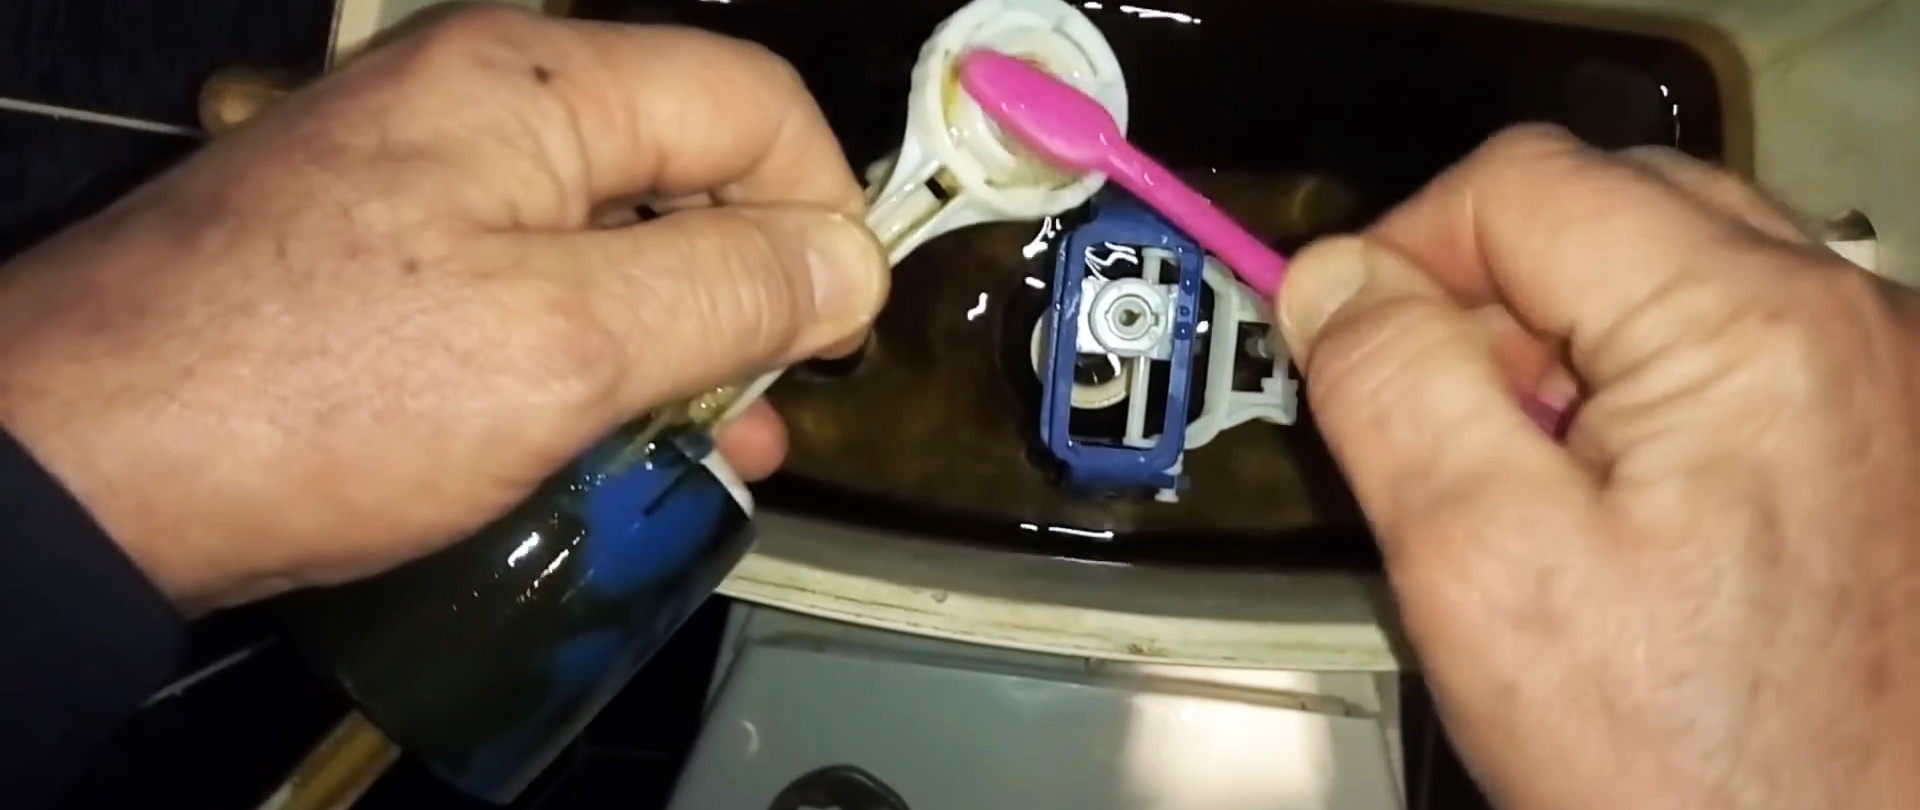
Now we begin to examine and restore the membrane. It can be seen that rust has accumulated inside it. We first clean the guide sleeve, and then the membrane itself. After which we return the membrane with the guide bushing to its place. It is clear that in case of mechanical damage to the gasket, we replace it with a new one.

Let's check the operation of the filling mechanism after cleaning.

We open the water and drain it from the tank.After the mechanism works, we see that there is no leak, and the water level in the tank is within normal limits. Just in case, wait 30 minutes and make sure that the water level remains the same and there are no leaks.
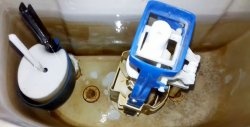
When the leak is related to the drainage mechanism gasket, we shut off the water again and drain it. We remove the drain mechanism from the hook with the tank body, turning it to the left, and remove it.

We check the condition of the drain funnel and its integrity.
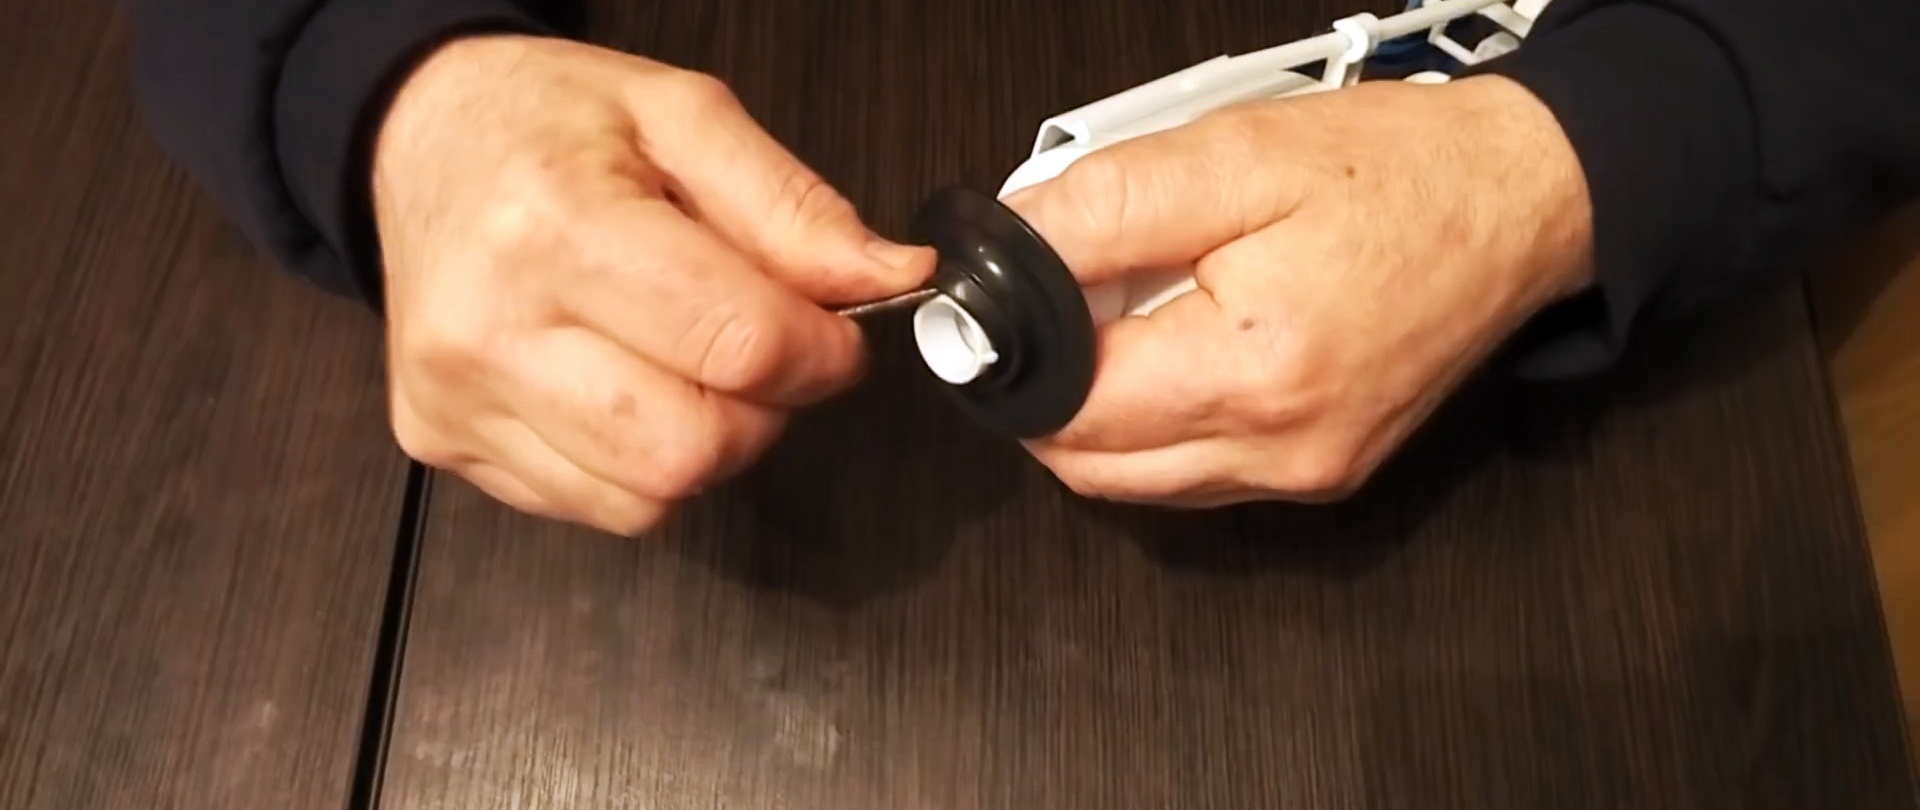
If the funnel is in order, then simply remove the old gasket and replace it with a new one. To do this, dismantle the seat and remove the old gasket, lifting it one by one above the four fixing protrusions. Install the new gasket in the reverse order.
We install the assembled drain mechanism with a new gasket by turning it to the right to ensure a hook. We return the lid and screw in the water release button without too much tightening, so that there is no sticking and failure of the button settings.