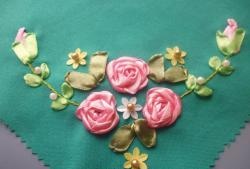
Materials that will be needed for work:
1. A piece of sea green gabardine measuring 20 cm by 20 cm.
2. Green embroidery floss (the same as thin ribbon).
3. Pink and white polyester sewing threads.
4. Satin or silk ribbons: pink and green 6 mm wide, green of a different shade - 10 mm.
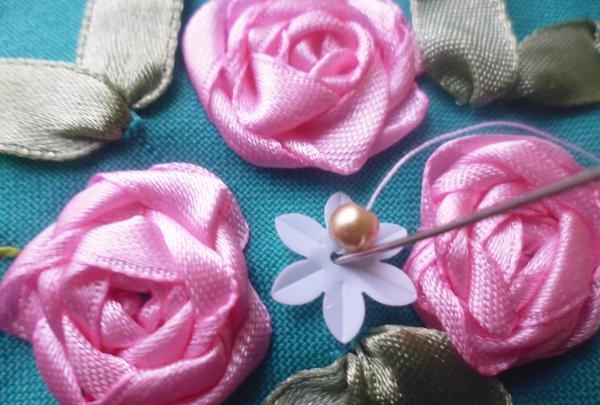
5. Small beads of white and golden color.
6. Sequin flowers are light yellow and white.
7. Scissors, hoops and needles: 1 for sewing with a small eye, 2 for ribbons with a blunt end and large eyes (the length of the eye should correspond to the width of the ribbons).

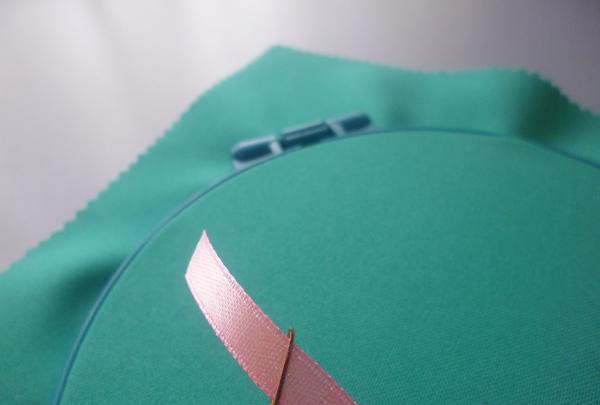
We start by creating a sketch of the drawing. Next, we transfer it onto the fabric with a simple pencil, schematically using lines and dots. We trim the edges of the napkin with curly scissors - this will protect the fabric from fraying.
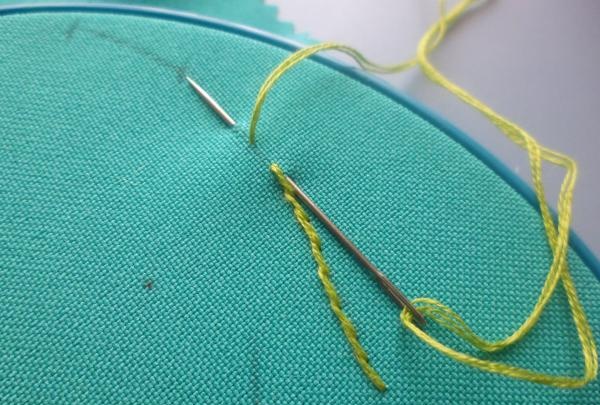
In order for the work to be neat, we stretch the fabric onto the hoop.We embroider the twigs with floss threads using a stitch behind the needle.
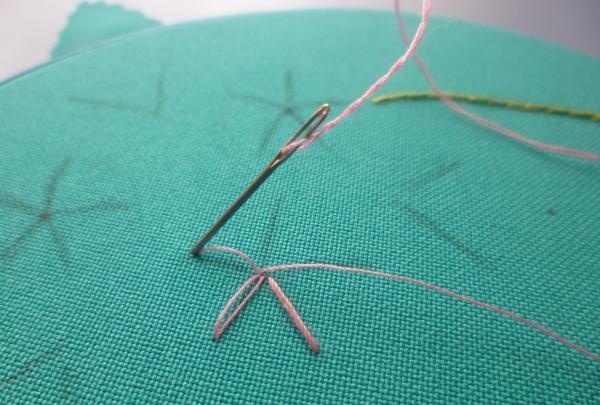
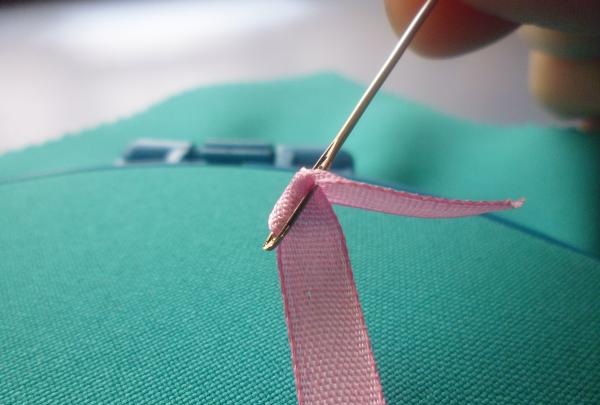
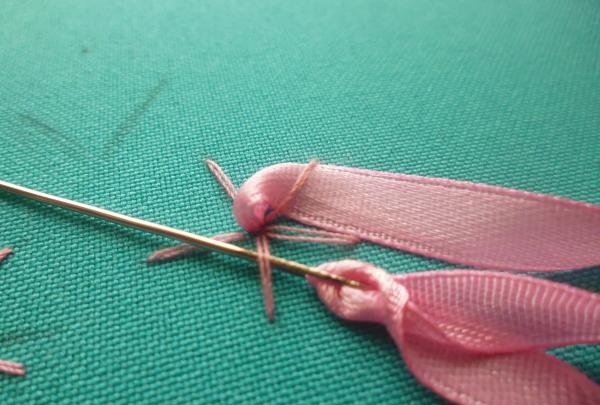
To create roses you need to sew a base. To do this, take sewing threads of the same color as the ribbon for the roses and begin to embroider the rays. We do not sew tightly with one thread. We stitch each ray twice. For one rose, 5 rays are sewn on. We embroider the base for three roses.

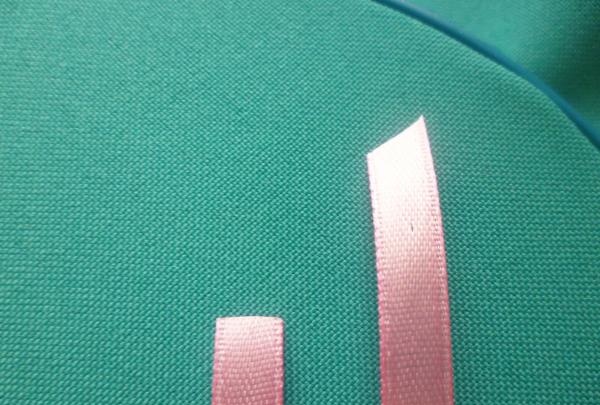
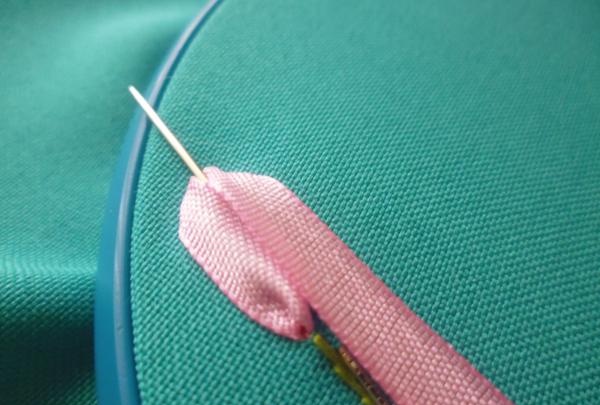
We prepare a pink ribbon about 40 cm long (for each rose), cut one end straight and the other at an angle of 45°, so that it is convenient to thread the needles into the eye.
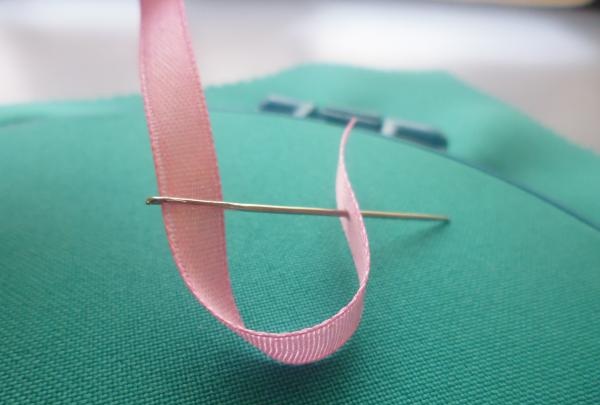
Attach the ribbon to the needle.

We make a flat knot. To do this, bend the straight end of the tape twice and pierce it in the center with a needle. We pull the ribbon through the knot.
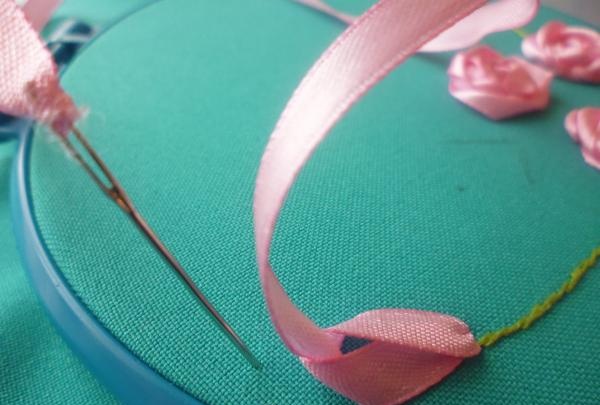
We begin to embroider a rose - a web. We bring the tape to the front side and wind it onto the base through one ray.
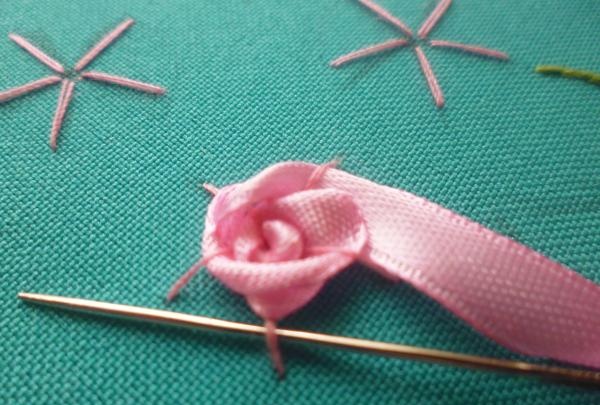
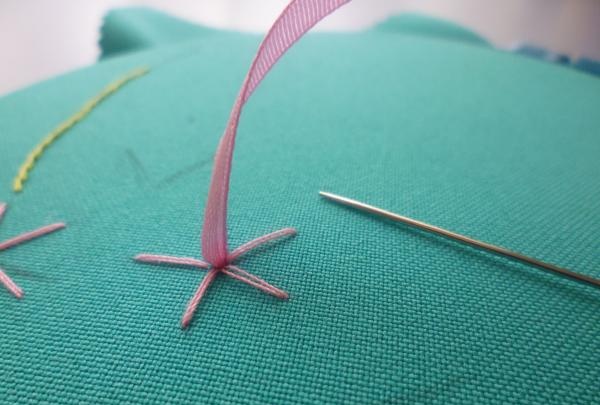
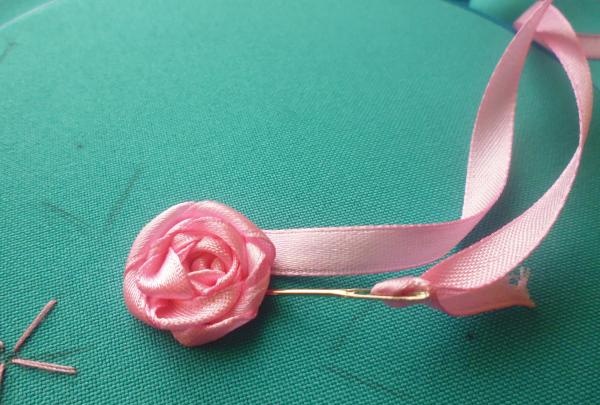
First, we tighten the tape more, forming the middle, then looser. Passing the ribbon under the rays, twist it slightly to achieve a resemblance to a living flower. When the rays are completely filled, we take the tape inside out. We embroider other roses in the same way.
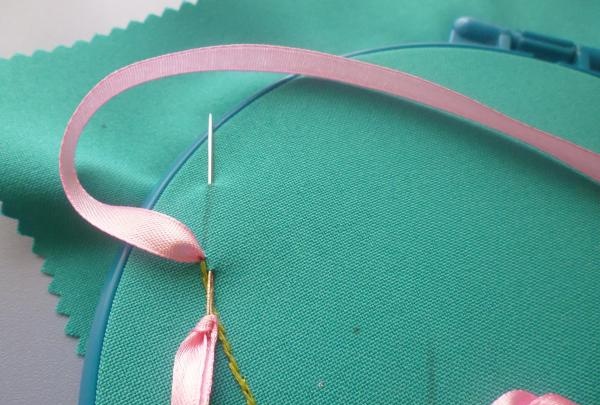
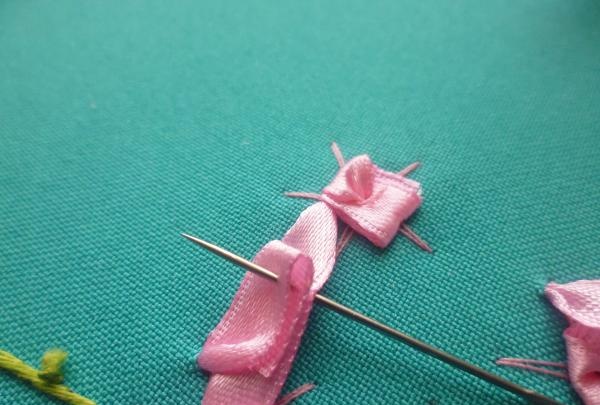
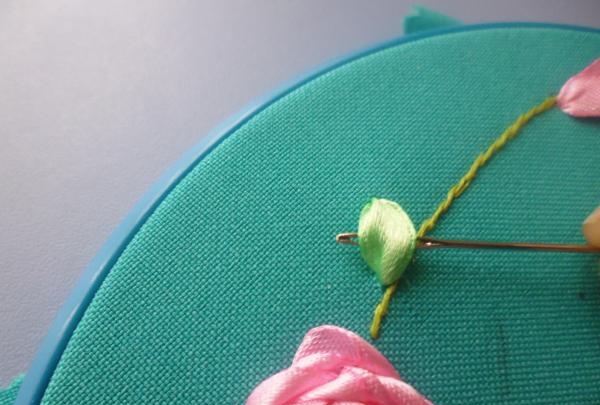
At the ends of the branches, we embroider the buds with a pink ribbon using a “loop-to-attach” stitch. To do this, place the ribbon on the front side at the base of the branch. Using a needle, grab the fabric to the length of the bud, wrap the ribbon behind the needle and lower it down, carefully straightening it. Hold the loop formed from the ribbon with your finger and pull the needle out of the fabric, twisting it slightly (this will help the thickening near the needle pass through the fabric more easily).
Using a small straight stitch, we bring the tape inside out and cut it, leaving 1.5 - 2 cm. All the “tails” from the inside must be hemmed, after tucking in the cut edge.
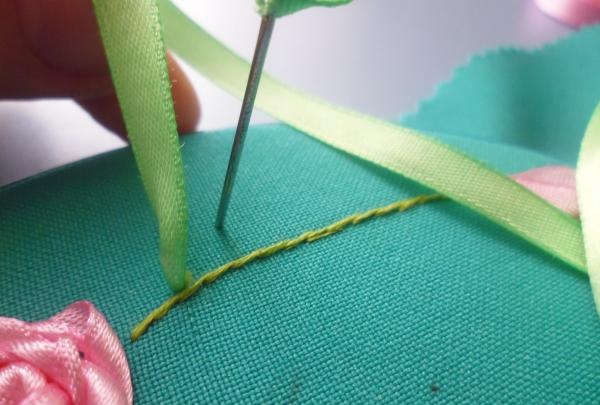
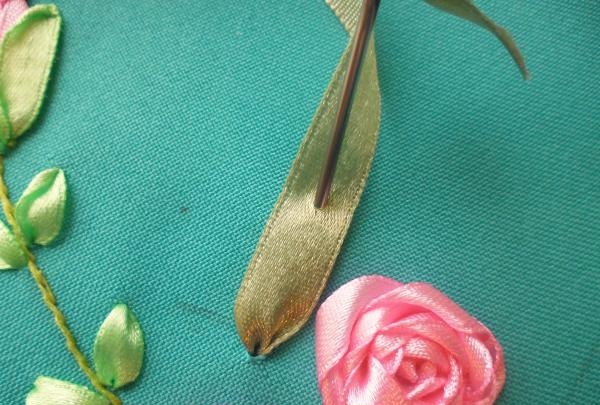
When the flowers are ready, we embroider the leaves on the branch with 6 mm ribbon using a straight stitch.Using the eye of a large needle, we straighten the ribbon, forming a leaf, and make sure that the ribbon does not twist on the inside. We embroider the leaves from bottom to top, moving towards the bud.
Using a ribbon stitch we embroider the sepals of the buds.
From a green ribbon of a different shade, 10 mm wide, using a larger needle, we embroider leaves near the roses in pairs using a “ribbon stitch” seam.
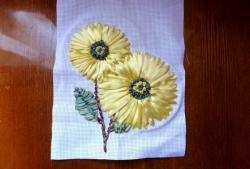
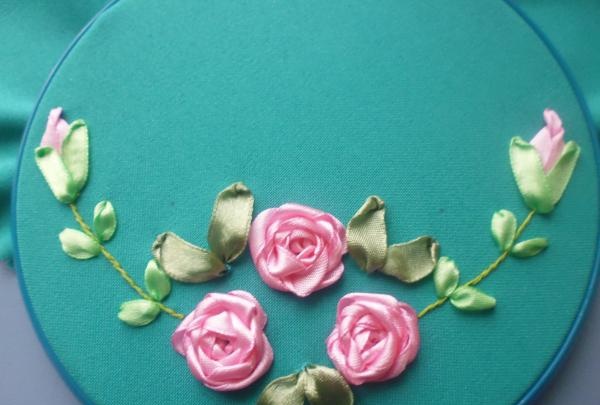
Remove the napkin from the hoop. We lay out the sequin flowers and secure them to the fabric with golden beads. And the final touch - we sew white beads in the axils of the leaves on the branches in a checkerboard pattern.