Do it yourself
Life hacks, master classes, useful tips, recipes.
home » Different » Crafts » Origami » Envelope stroller
It’s true what they say: everything ingenious is simple. So it is with this master class. As a result, you will get a small masterpiece - a postcard stroller. Which in itself is already present, in addition to toys, booties, vests. Since the stroller will remain as a long-lasting memory, and the postcard-envelope with a certain amount of money will provide financial assistance to young parents. And besides, the birth of children is a miracle and a holiday. It is the birthday that is the most special and significant, so why not add even more warmth and love to this wonderful day. After all, gifts made with your own hands bring great love and tenderness, and sometimes even serve as a talisman.

So let's get started.
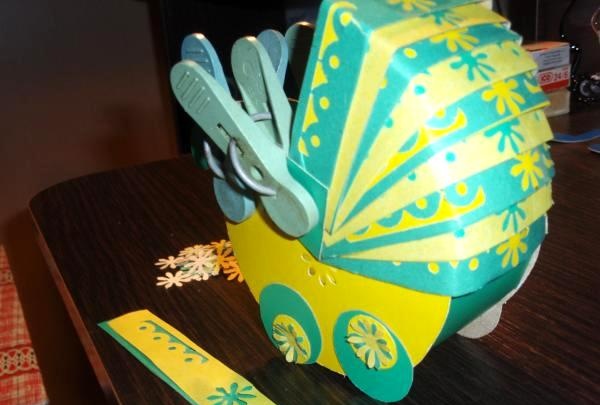
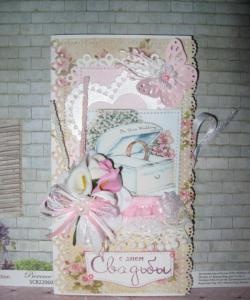
We arm ourselves with cardboard (paper for scrapbooking), glue, hole punchers and borders, and a compass. It’s impossible without clothespins, imagination, free time and a good mood. as you can see the set is minimal. If you don’t have hole punchers and other special attributes, then you have two options: 1. turn to a friend, which is what I did; 2. do without them; it is not necessary to repeat this model exactly. cardboard in combination with fabric, beads, threads and other things also looks very presentable.The main thing is a creative approach.
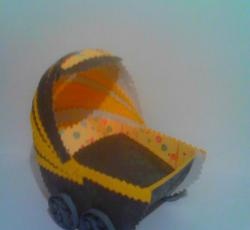
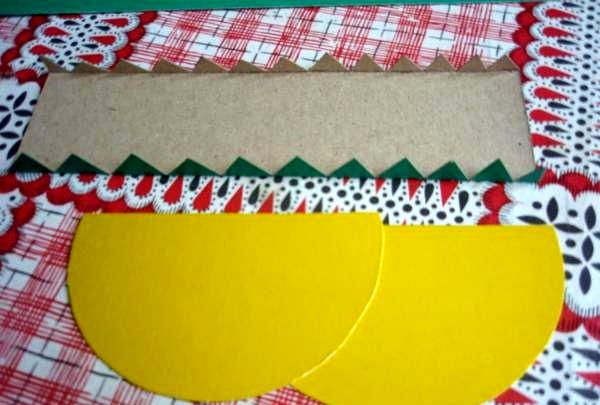
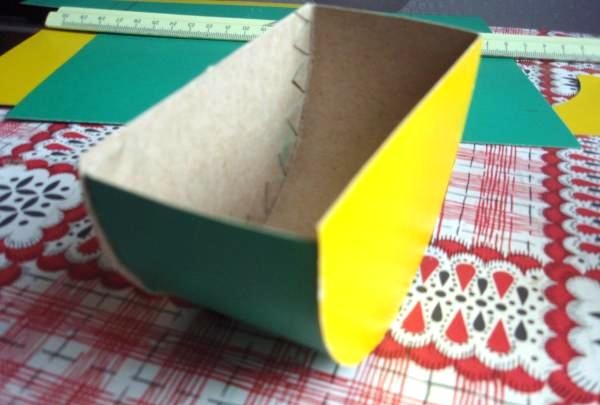
I have two colors as a base - yellow and green. As a stroller for a long-awaited child. That's why everything is bright and cheerful. Cut out the base of the stroller. These are two semicircles and a connecting strip. The size is at your discretion (I set the compass at 4.5 cm.) Glue everything together.

blanks


Making a roof. We cut strips 1.5 cm * 14 cm, make the outer strip longer, about 16-17 cm, depending on what kind of paper is used. It's better to try everything on in advance. Our dome can be made square, like mine, or oval, at your discretion. As you can see in the photo, I combined the colors - I glued green stripes with decor onto the yellow stripes, and green and yellow ones. Again, there are many options here. The main thing is my favorite clothespins.

stroller base


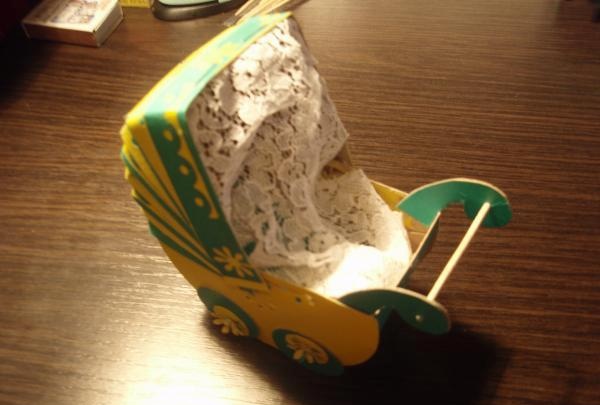
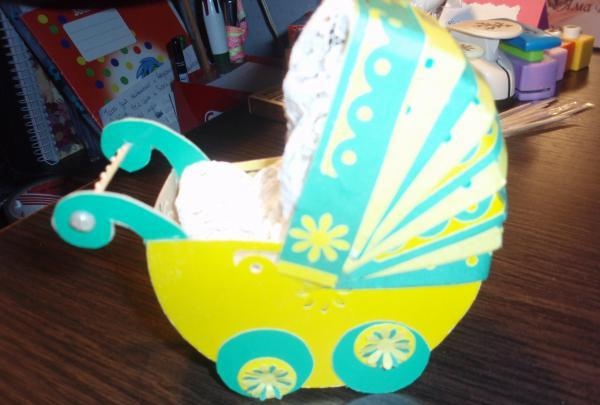
I made simple handles, and with the help of an ordinary toothpick (nippers came to the rescue, I easily made a toothpick of the required size) I connected them by making punctures in the middle of the handles. I decorated it and glued it with lace. Voila, you're done. Happy experimenting.

Stroller envelope

Stroller envelope

Stroller envelope
come back
Comment
  • bowtiesmilelaughingblushsmileyrelaxed relaxedsmirk
    heart_eyeskissing_heartkissing_closed_eyesflushedrelievedsatisfiedgrin
    winkstuck_out_tongue_winking_eyestuck_out_tongue_closed_eyesgrinningkissingstuck_out_tonguesleeping
    worriedfrowninganguishedopen_mouthgrimacingconfusedhushed
    expressionlessunamusedsweat_smilesweatdisappointed_relievedwearypassive
    disappointedconfoundedfearfulcold_sweatperseverecrysob
    joyastonishedscreamtired_faceangryragetriumph
    sleepyyummasksunglassesdizzy_faceimpsmiling_imp
    neutral_faceno_mouthinnocent
4 minus one =
Comments (1)
  1. Iogo
    #1 Iogo Guests 10 August 2017 19:01
    0
    An envelope in the shape of a stroller - what could be the best gift for parents of a newborn baby? Such a gift will become a child’s talisman, which will be admired for many years.

Homemade multimeter probes

How to cut a circle out of glass

Beading master classes for beginners

Topiary | Page 2 | Do it yourself

«Do it yourself - with your own hands» - a site of interesting homemade products made from scrap materials and items at home. Step-by-step master classes with photos and descriptions, technologies, life hacks - everything a real master or just a craftsman needs for needlework. Crafts of any complexity, a large selection of directions and ideas for creativity.

We recommend reading

Washing machine error codes