Do it yourself
Life hacks, master classes, useful tips, recipes.
home » Handicraft techniques » Beading » Beaded flowers » Beaded crocodile
The variety of bead products is simply amazing. Beads can be used to weave not only flowers, but also animals. With this master class you can weave a crocodile very simply. To create it we will need ordinary beads. Take some flowers. For example, for the back of a crocodile, prepare dark green beads, and for the tummy, prepare light green or yellow beads. Also, you will need 2 white beads and 2 black beads for the crocodile's eyes. Prepare a copper wire 180 cm long for the entire body of the crocodile and 30 cm of wire for the lower jaw.

beads


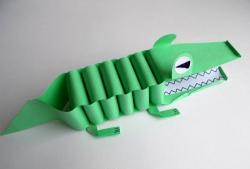
The general pattern of weaving a crocodile looks like this:

crocodile bead weaving pattern


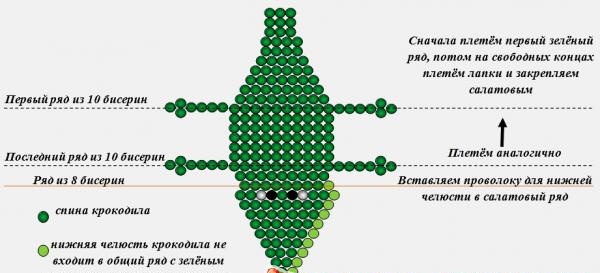
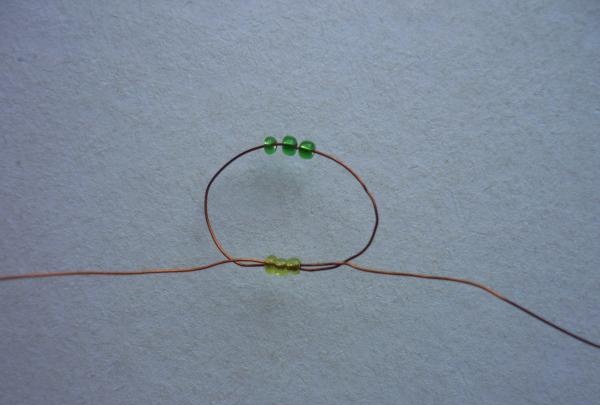
Let's put the wire for the lower jaw aside for now, take a long wire and start weaving the crocodile's body from the tail. Please note that the scheme is general: as many green rows as there are light green ones. In the diagram, the lower jaw is shown schematically in light green - it is not included in the weave of green rows. First, collect 3 green beads, and then 3 light green beads and thread the ends of the wire through them. Pull tightly so that the free ends of the wire are even.

string beads


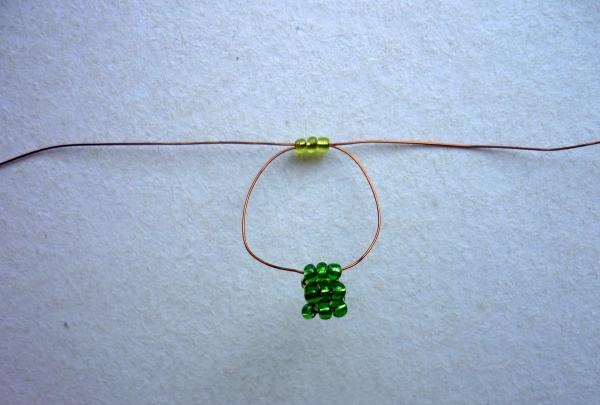
It is necessary that the body be voluminous, so it is necessary to weave so that the green row is above the light green one. Next, first we string the green row and thread the free end, and then the light green one. By maintaining symmetry, we get simple movements for weaving a crocodile, which you need to follow further. We weave 3 rows of 3 beads each.

string beads


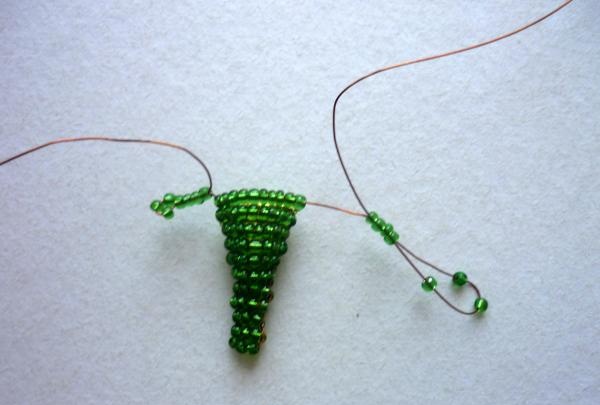
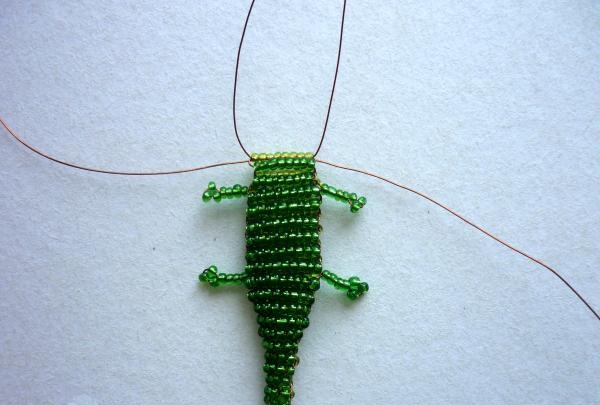
According to the diagram, we weave to a row of 9 beads. Next we string 10 green ones and thread the free end through. While we are not weaving the bottom light green row of 10 beads, we are weaving the legs! We string 7 beads onto the free ends, skip the 3 outer ones and thread the wire through the other 4 (at both ends = two legs). Before tightening, it is necessary to lower all the beads towards the body so that there is no free wire left between the foot and the body. After weaving the legs, we complete the bottom light green row of ten beads.

weave with tails


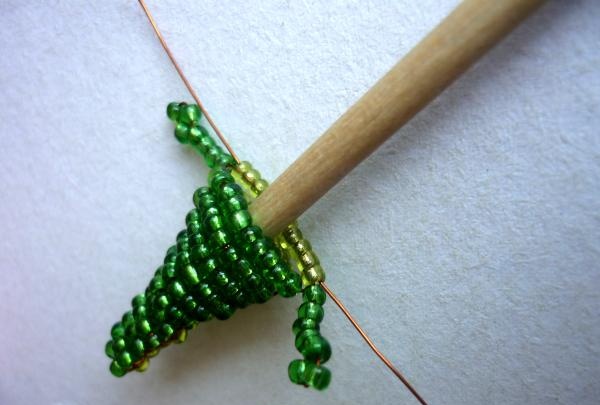
Using a thin pencil or a brush pen, you need to add volume to the body by pushing it inside up to the 4th row. Repeat this as you weave.

weave crocodile beads


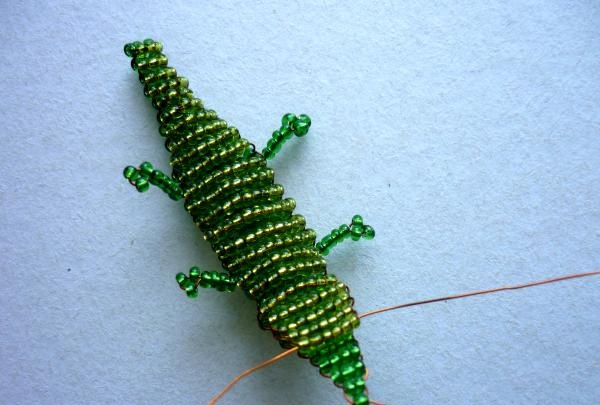
We add another 5 rows of 10 beads each. On the last 7th row we repeat the same thing as on the first row, when we wove the paws (we follow the sequence “10 green paws-10 light green”). Having weaved a row of eight beads, we insert the prepared wire for the lower jaw of the crocodile into the lower light green one.

weave crocodile beads


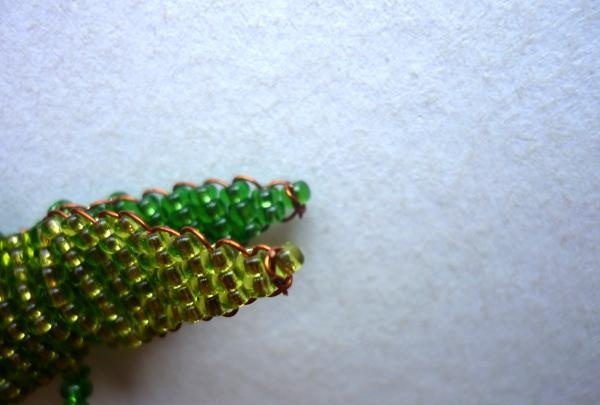
We first weave the upper part of the jaw according to the pattern and similarly weave the lower part.

weave crocodile beads


We tie the wire, pointing it down on both parts.

weave crocodile beads


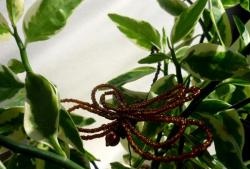
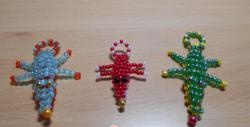
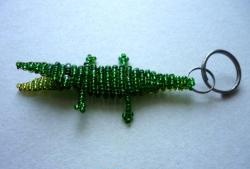
The crocodile is ready. It can be placed on its paws.

Beaded crocodile


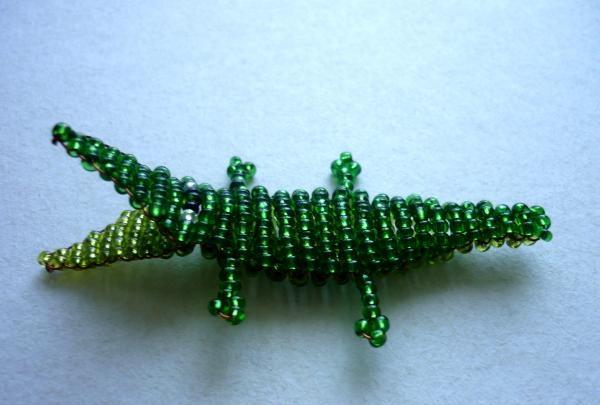
It can also be placed on the stomach as a decoration. You can make a keychain out of a crocodile.

Beaded crocodile


Creative inspiration!
come back
Comment
  • bowtiesmilelaughingblushsmileyrelaxed relaxedsmirk
    heart_eyeskissing_heartkissing_closed_eyesflushedrelievedsatisfiedgrin
    winkstuck_out_tongue_winking_eyestuck_out_tongue_closed_eyesgrinningkissingstuck_out_tonguesleeping
    worriedfrowninganguishedopen_mouthgrimacingconfusedhushed
    expressionlessunamusedsweat_smilesweatdisappointed_relievedwearypassive
    disappointedconfoundedfearfulcold_sweatperseverecrysob
    joyastonishedscreamtired_faceangryragetriumph
    sleepyyummasksunglassesdizzy_faceimpsmiling_imp
    neutral_faceno_mouthinnocent
3+three=
Comments (1)
  1. lenavt
    #1 lenavt Guests 28 August 2017 19:07
    0
    It immediately reminded me of my childhood! When I was of school age I weaved non-stop. There were a whole bunch of lizards at home. I came across a crocodile and wanted to do it again)

Do it yourself - crafts and master classes | Page 289

An original gift for the Eighth of March | Do it yourself

How to burn a hole in hardened steel

Do-it-yourself universal nozzle for renovator (MFI)

«Do it yourself - with your own hands» - a site of interesting homemade products made from scrap materials and items at home. Step-by-step master classes with photos and descriptions, technologies, life hacks - everything a real master or just a craftsman needs for needlework. Crafts of any complexity, a large selection of directions and ideas for creativity.

We recommend reading

Washing machine error codes