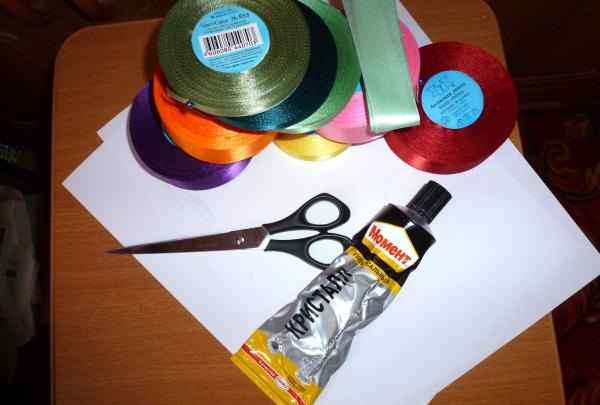
- Satin ribbons of various colors;
- sheets of paper (you can use absolutely any waste paper);
- scissors;
- glue (I chose crystal moment);
- any thread with a needle;
- beads;
- a little tinsel.
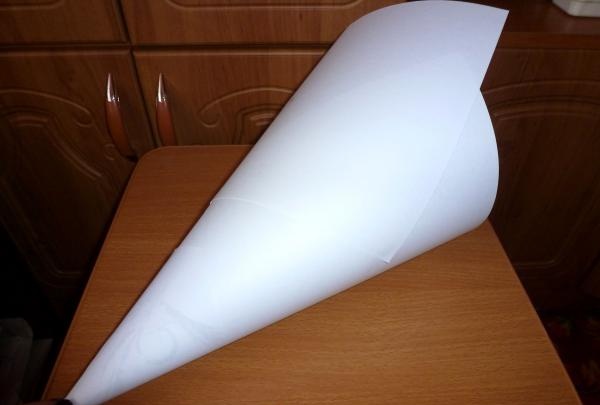
First of all, we need to build the base of the Christmas tree, the material for which will be paper. For clarity, I took regular sheets of A4 printer paper, but you can use any other paper. The sheet must be folded to form a cone. We coat the edges with glue. In order to get the desired length (in my case 30 centimeters), we simply glue additional sheets to the bottom of the cone and increase it to the required parameters.
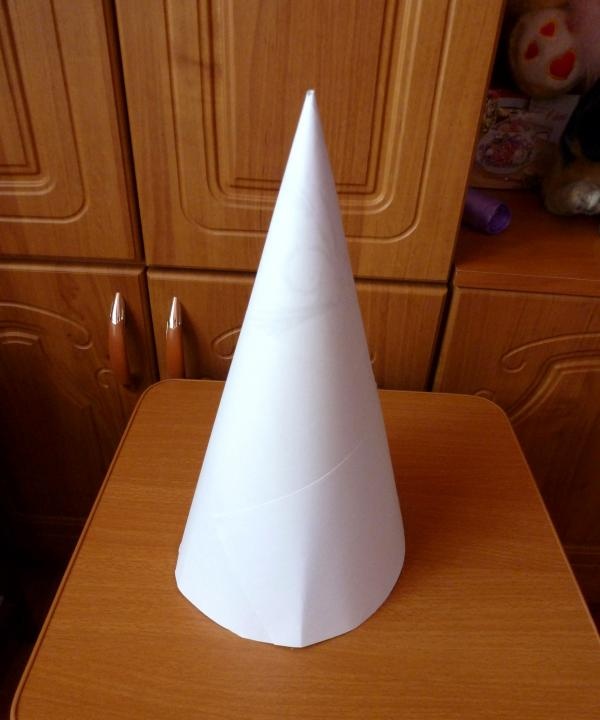
To ensure that the base of the tree is even, after growing, we set aside the required length from top to bottom in several places, and carefully cut along the marks.
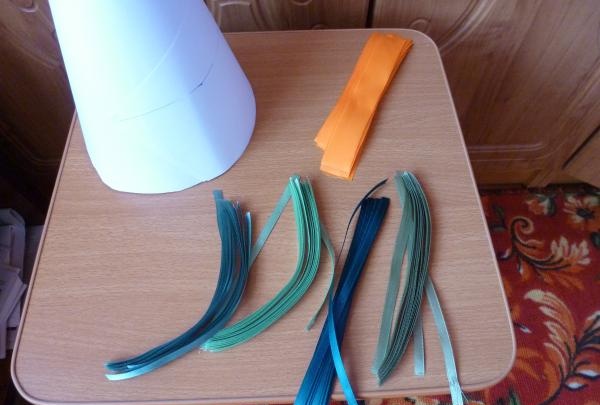
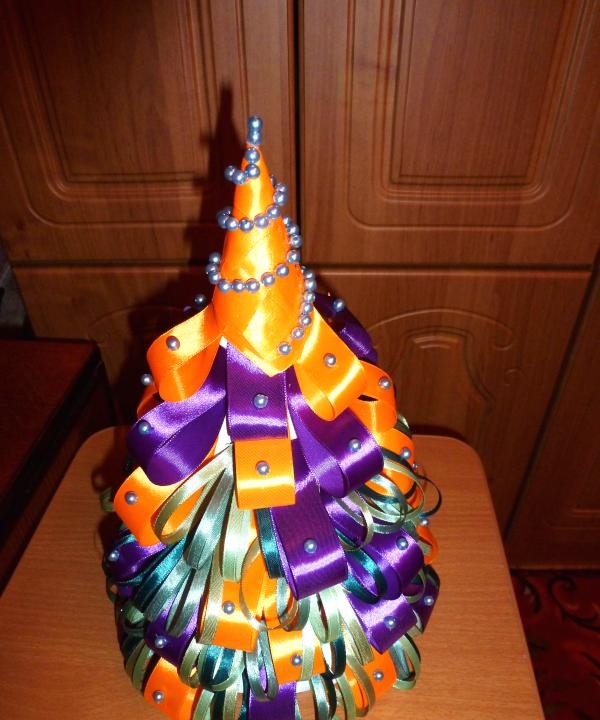
Second phase. For fir branches, I decided to choose satin ribbons of various colors and sizes. For needles I took thin ribbons of different shades of green (0.6 mm wide), and for toys orange and purple (25 mm wide). We cut them into pieces of the required length, I took 16-17 cm.
Now we begin to fasten. For splendor, it was decided to mix all the thin ribbons into packs. We bend the pieces in half, right side out, and fasten their ends.
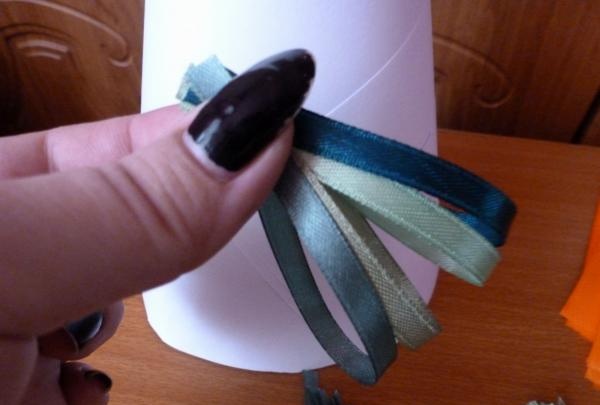
In the photo, I simply glued them together, but then I came to the conclusion that it is better to do this using regular thread and a needle, securing them with a couple of stitches. We do the same procedure with wide pieces of tape. Now, in order of priority, we glue the blanks onto our cone.
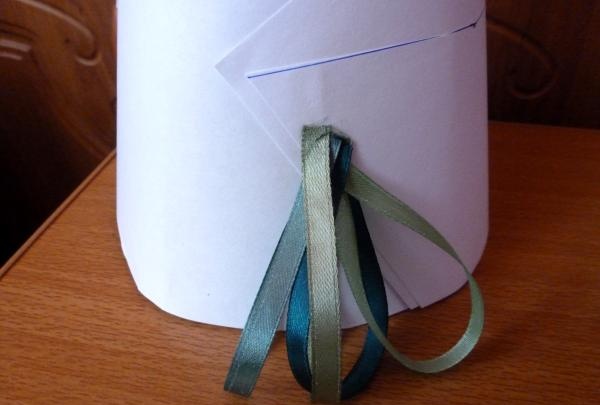
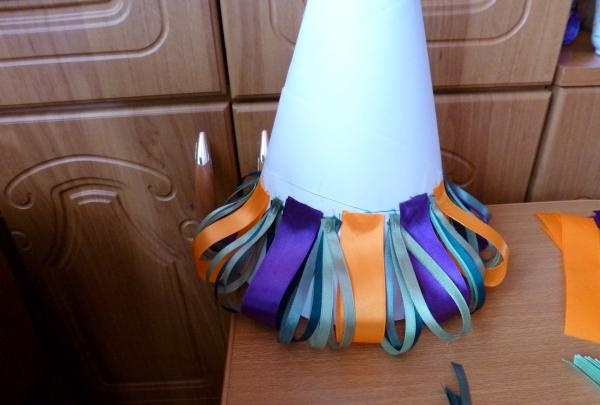
Do not be afraid of protruding threads; they will be covered with the next layer of tapes, so they will not be noticeable. So, by alternating, we glue the entire base of our future Christmas tree.
Thus, having retreated a little space upward, we seal up most of the tree.
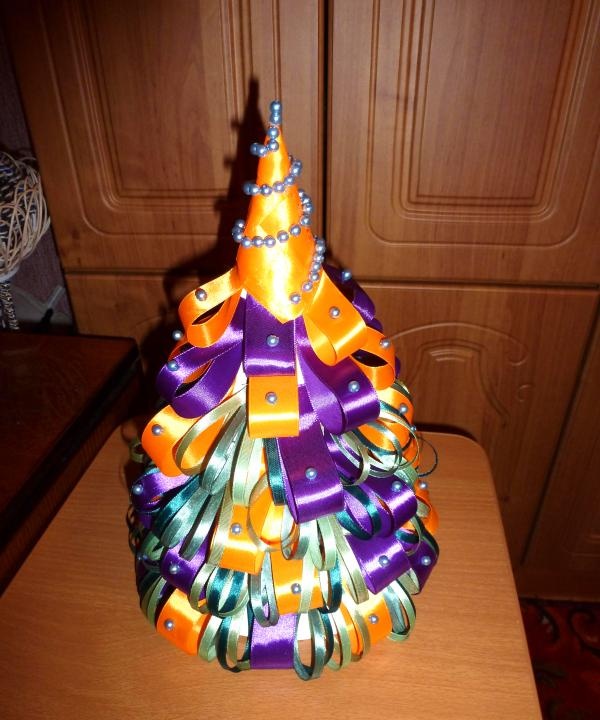
I simply covered the very top of the Christmas tree with orange tape. So our forest beauty began to seem even fluffier.
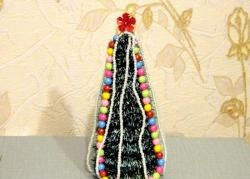
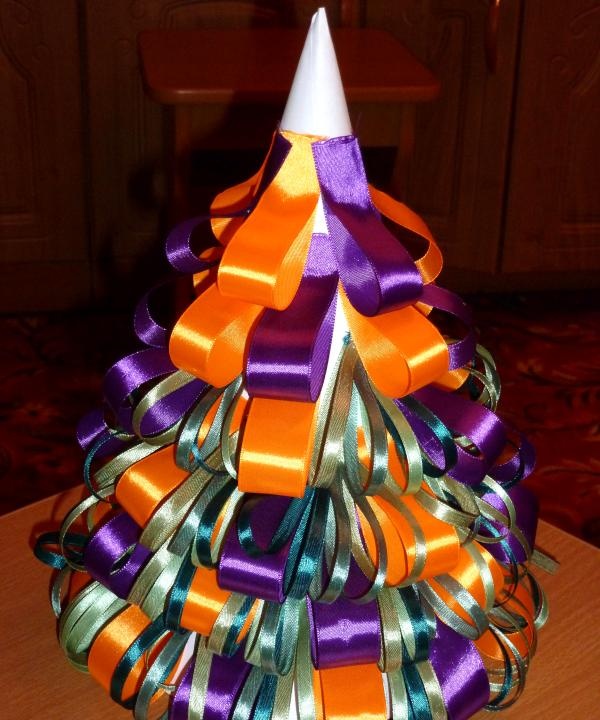
Stage three. In order to decorate the Christmas tree, I glued beads onto wide pieces of ribbon that imitated toys.
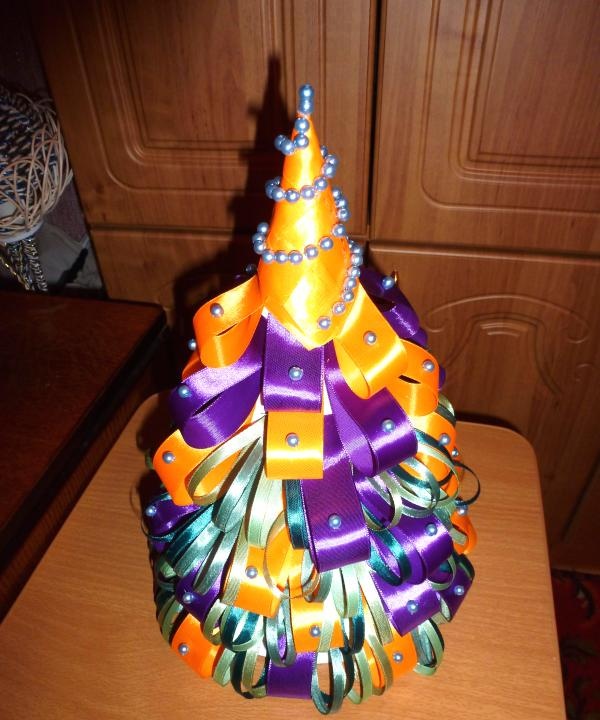
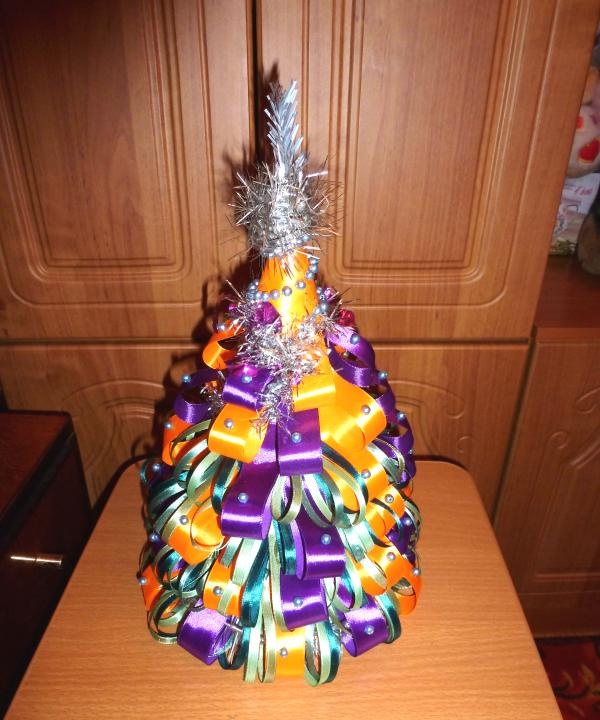
Also, it was decided to stick a certain design made of beads on the upper part. crafts, it turned out something like a garland. Well, at the end of the work, I gave the craft to the child to be torn to pieces. He couldn't wait to add some tinsel. After briefly twirling it in my hands, I got an interesting tip, which became a decoration instead of a star.
By adding a couple of pieces of “rain” to the cones that were not filled with ribbons, we got our beauty.
P.S. The next day, the child came from kindergarten in a great mood and said that our craft had been sent to a city exhibition by the kindergarten. Well, it’s a small thing, but it’s nice...