So, you will need the following materials:
- Styrofoam.
- Lilac crepe paper.
- Beige crepe paper.
- Pink crepe paper.
- Green corrugated paper.
- Corrugated paper is white.
- Black corrugated paper.
- Green film.
- White paper.
- Cardboard.
- Gold colored ribbon.
- Glue gun.
- Scotch.
- Ruler.
- Red glossy paper.
- Wooden skewer.
- Pen of any color.
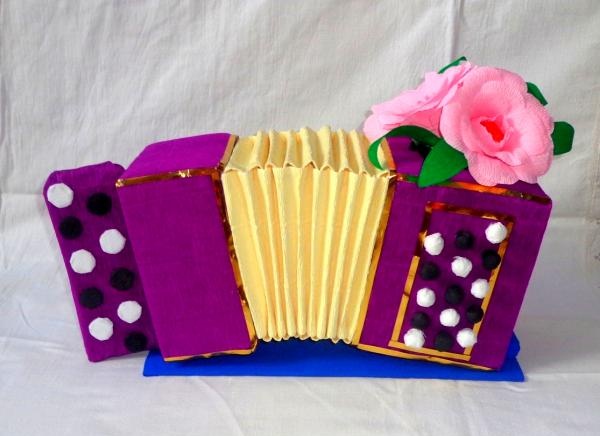
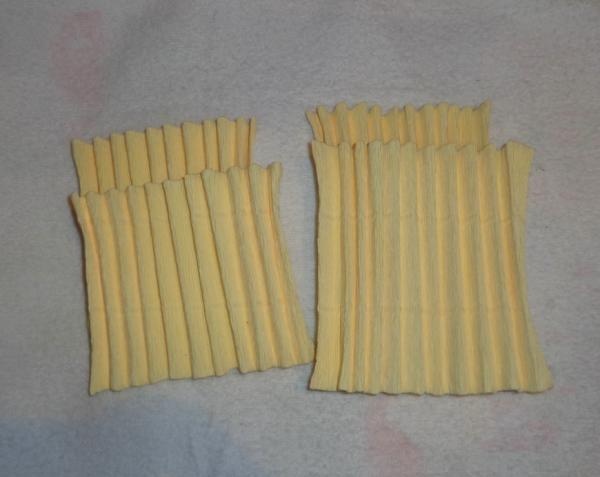
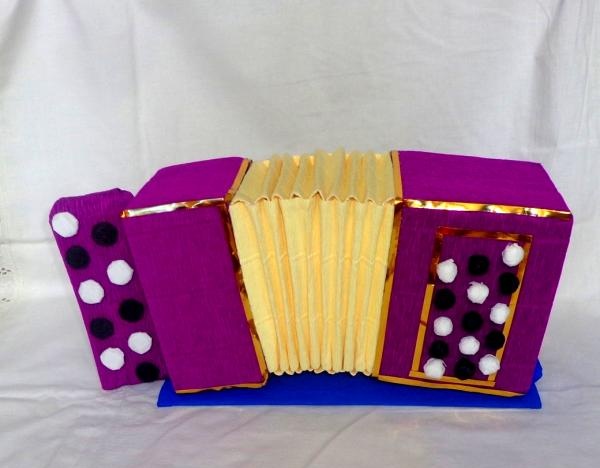
From foam plastic we cut out the side parts for the button accordion, 15 cm high and 11 cm wide. One part has a front side width of 7.5 cm, and the other 12 cm. We cut out the part from the cardboard on which the round flat buttons will be located.We wrap the foam well with ordinary tape so that paper can be glued to it. We cover all three resulting parts with lilac crepe paper. Now you need to make bellows for the button accordion. Take clean white paper and beige crepe paper. We cut out 2 strips of them, 11 cm wide and 20 cm long. Then we cut out 2 more strips, 19 cm wide and 24 cm long. We fold the strips of white paper like an accordion. Then, using a glue gun, glue the beige paper to the white stripes.
We glue the resulting furs to the two parts made earlier.
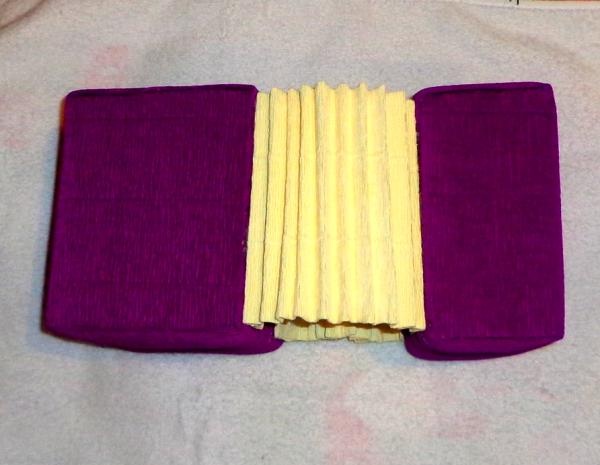
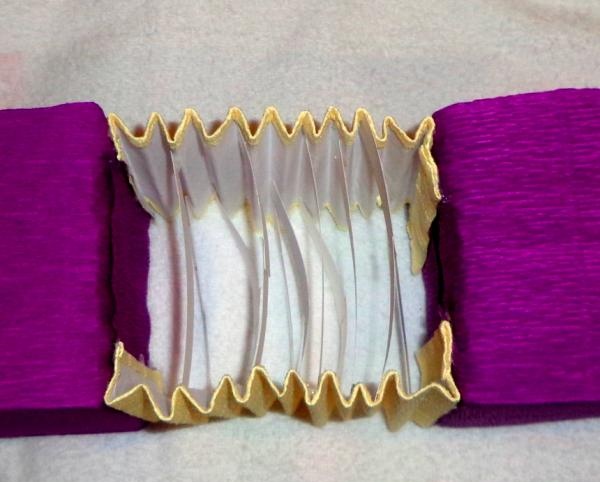
In order to make the accordion look more natural and you can play with it a little, we glue the opposite sides of the fur and secure it with cardboard strips. We glue gold tape to the places where the paper was glued together.
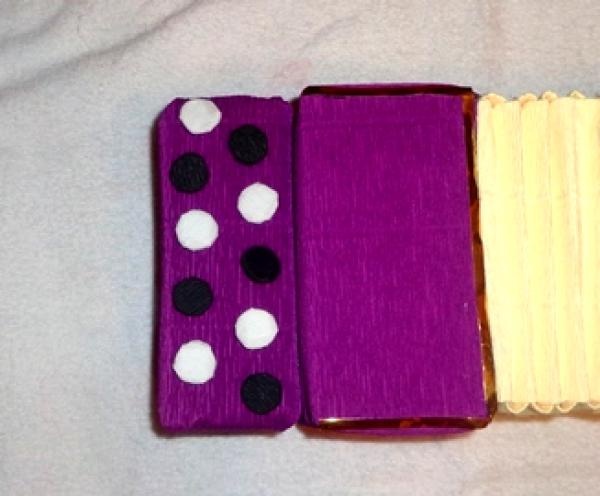
We cut out 10 circles with a diameter of about 2 cm from cardboard. We cover 5 circles with white corrugated paper, and the remaining 5 with black corrugated paper. We attach to the button accordion the part on which these buttons will be located. Using glue, glue the buttons in the order as shown in the photo.
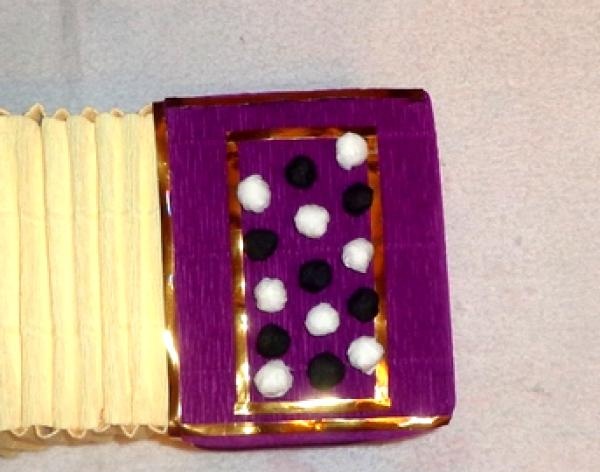
Roll up plain paper into balls and cover them with white and black corrugated paper; these will be buttons on the other side of the button accordion. We also glue them in the same order as in the photo. We glue gold tape around them for beauty.
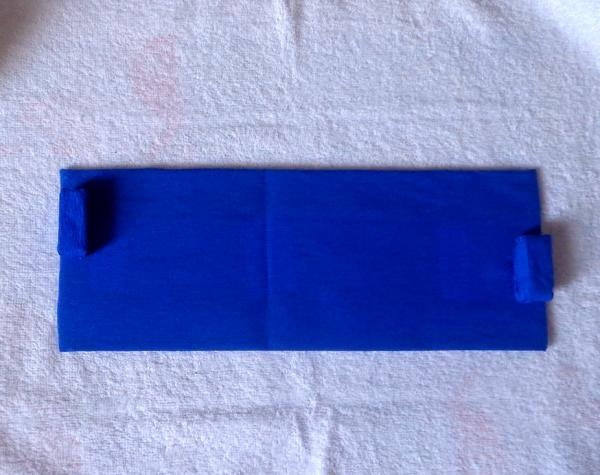
Let's make a small stand for the button accordion. We cut out a rectangle from thick cardboard along the length of the button accordion and cover it with blue corrugated paper. We glue small pieces of foam and blue paper to the edge of this part.
Let the glue dry and place the button accordion in the stand.
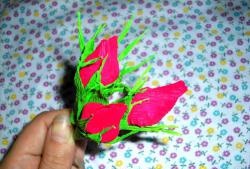
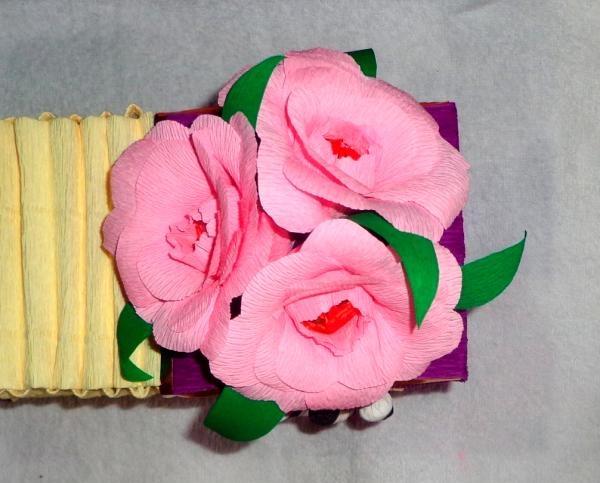
The Russian folk button accordion is always associated with flowers.Cut out 24 pieces of pink crepe paper, 2.5 cm wide and 5.5 cm long. Stretch each piece. Fold in half and cut into half a heart shape. We open it and use a wooden skewer to curl the edges, giving the petals the desired shape.
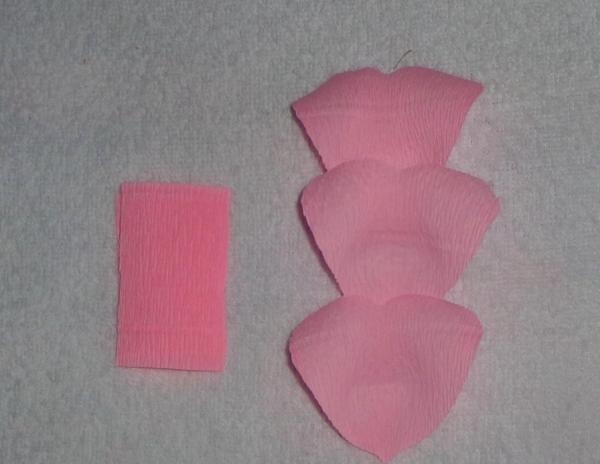
From polystyrene foam and red glossy paper we make a small ball for the center of the flower. We glue this ball with the resulting petals, that is, you will need 8 petals for each flower. From green corrugated paper, cut out 2 leaves for each flower.
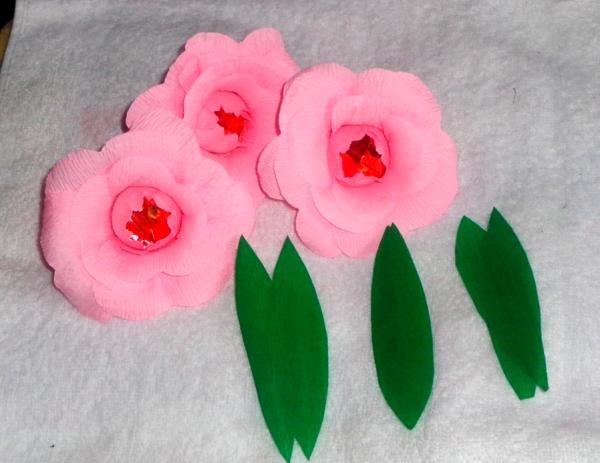
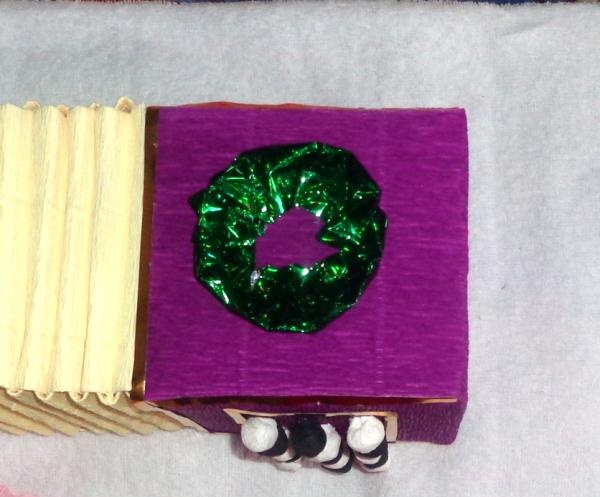
We glue green film onto the wide part of the button accordion as in the photo.
Glue the flowers into the middle of the green base.
Bayan is ready! They can safely please someone who is crazy about this musical instrument.