To work on the painting you will need:
- PVA glue and “Moment”.
- artificial leather in black, pearl, red, green and cream colors.
- fiberboard sheet measuring 55x40 cm.
- a small piece of suede-like fabric.
- blue paint, for coloring the background.
- scissors.
- one tablespoon of dry semolina.
- a small sheet of thick cardboard.
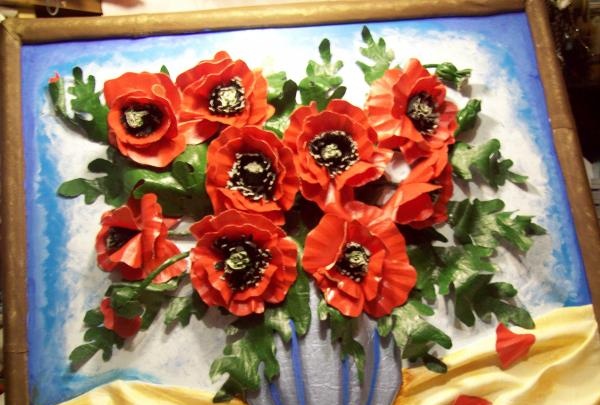
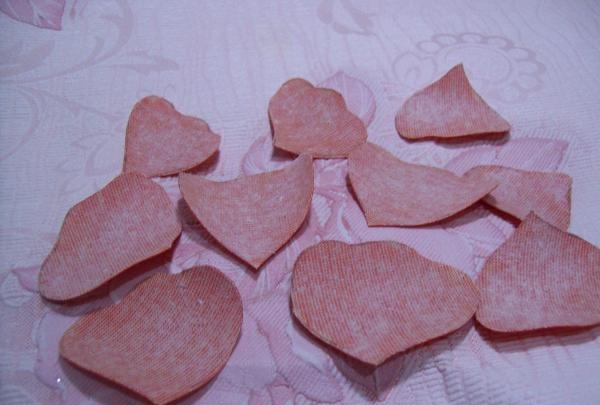
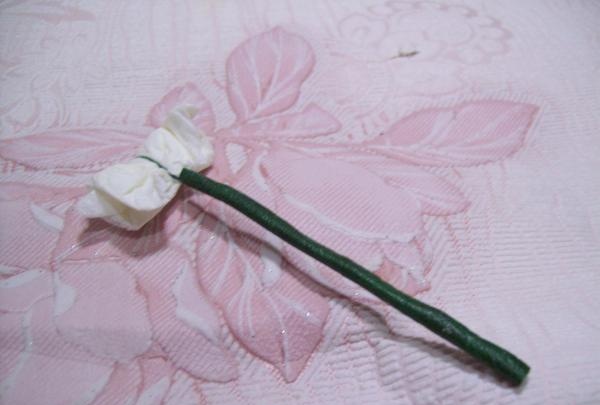
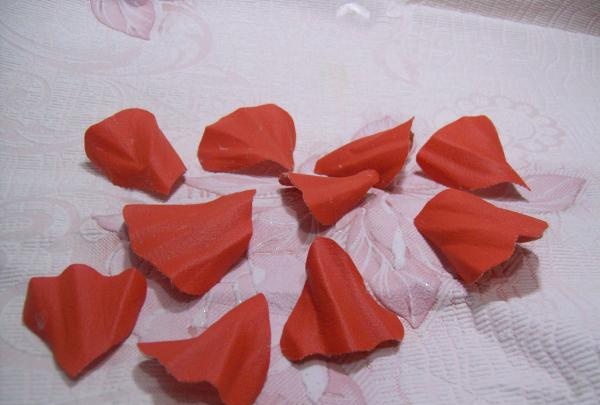
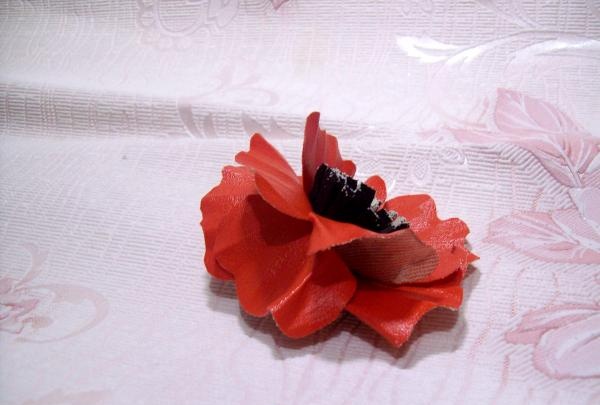
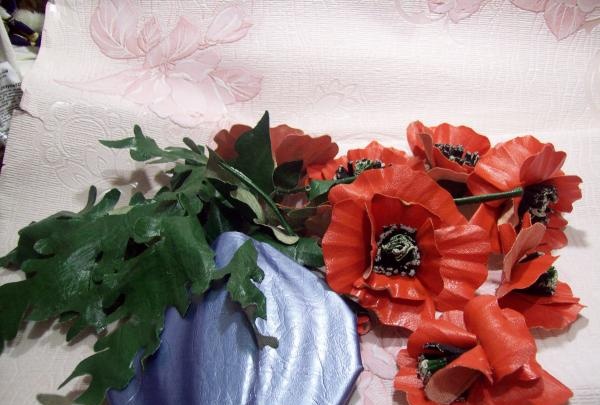
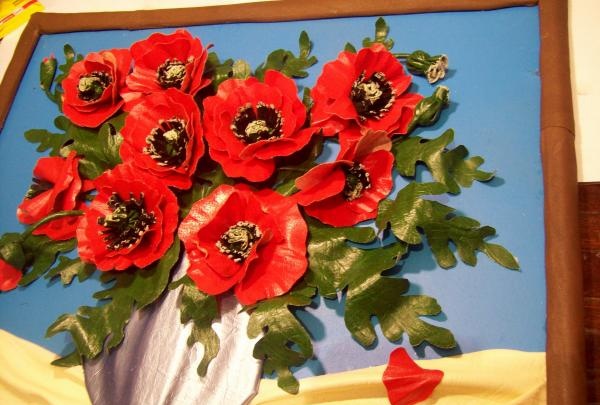
We start by coloring the background. We take a sheet of fiberboard and paint the front side blue. And while the painting is drying, we begin to make flowers, and ours are red poppies. We cut out the flower petals according to the templates. For one flower you will need 4 small petals measuring 3x3 cm in the shape of an irregular droplet. Four medium petals measuring 4x4 cm, and 4 more large petals 6x5 cm. It turns out that one flower needs 12 petals. We cut them out of red leather and brush them on the reverse side with PVA glue.
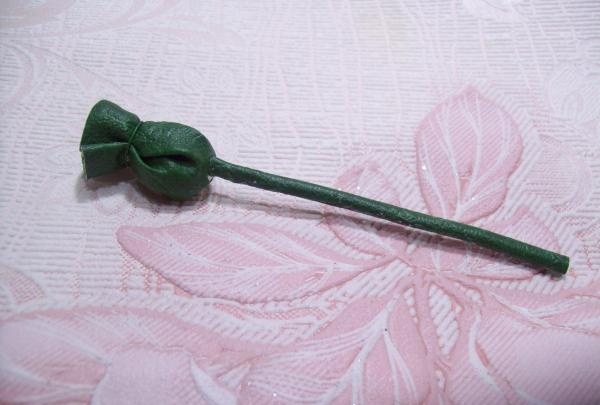
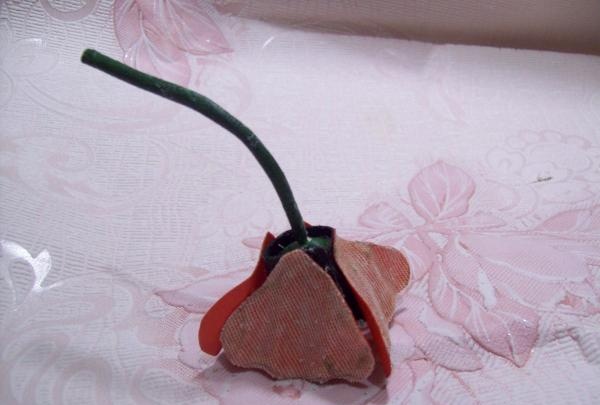
While the petals are drying, we begin making a stem for the flower. We take a wire from 10 to 15 cm long. We cut out a strip of 1 cm wide and as long as the selected wire from artificial leather of green flowers.We lubricate this strip with “Moment” glue and give it time to set, and then glue it onto the wire, leaving 1.5 cm at the top of the wire unglued. This will serve as a stem for further work. Now take one fourth of the napkin and fold it into several layers. Then we take the stem and clamp this napkin with the upper part of the wire.
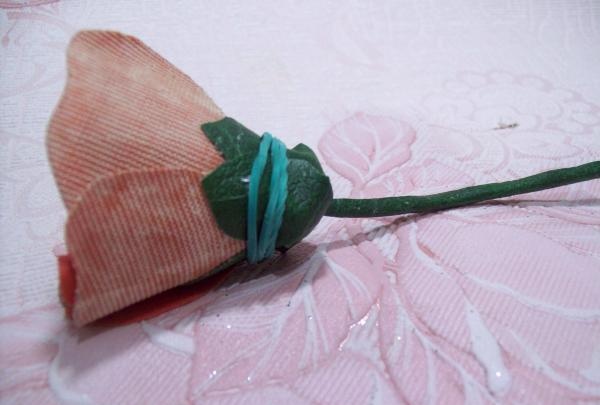
Take green leather and cut out a circle with a diameter of 6 cm. Make a small hole in the center of the circle. We pass the stem with a napkin through it. We wrap this circle around the napkin and secure it with wire at the top, leaving about one cm of free edge. It turns out a box of poppy seeds.
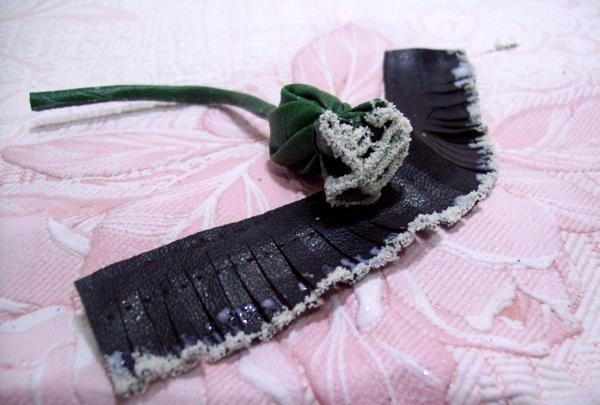
But to complete this box you will need to take PVA glue, coat the edges of the box with it and dip it in dry semolina. In this form, we will use two of these boxes in the picture.

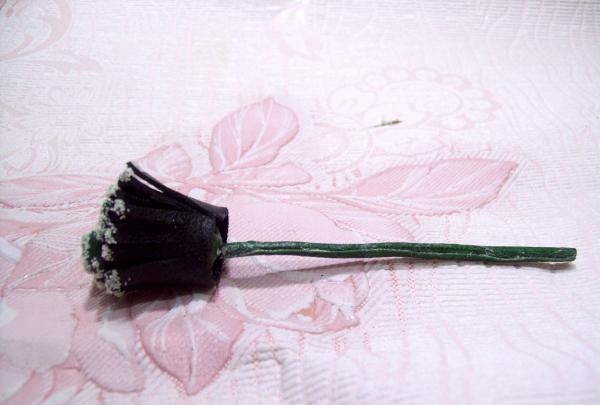
But for poppies, you will need to add a few stamens to this box. We will make them into strips of black color measuring 10x2 cm. From such a rectangle we cut the fringe - we make cuts, not reaching a little to the edge, and the height of the stamens will be about 1.5 cm. When the fringe is ready, we also grease its cut edge with PVA glue and dip it in semolina. And when everything is dry, glue this strip with Moment glue to the finished box, stamens facing up. The center of the color is ready.
Now we return to the red petals. They are not completely dry yet and we fold each petal like an accordion along its length, press it a little and hold it in our hands. And then we leave them until completely dry.
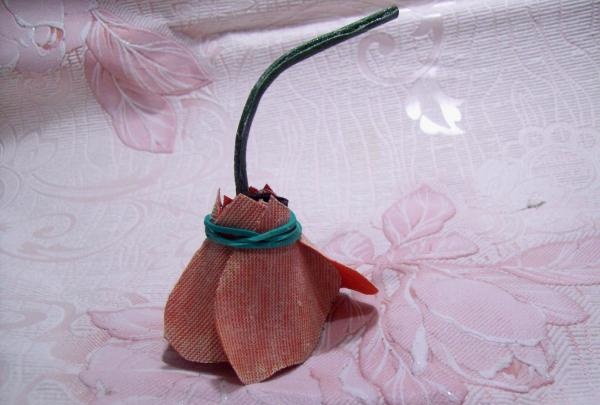
When all the petals have dried, we begin to form the poppy. We take the finished green center with black stamens, turn the stem up and begin to secure the small petals. We glue them with Moment glue with the corners to the base of the stem.
Now we fix the middle petals in a checkerboard pattern relative to the first. You can press it with a rubber band until it dries completely.
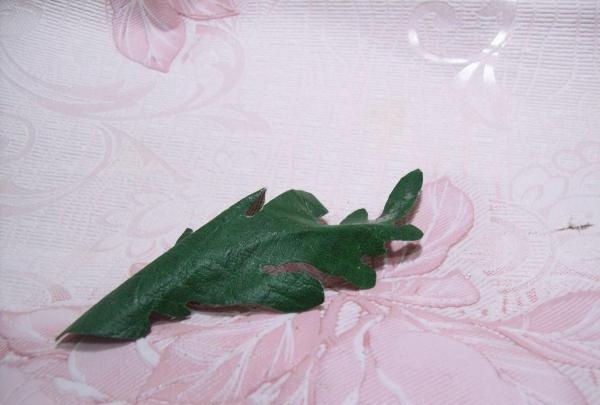
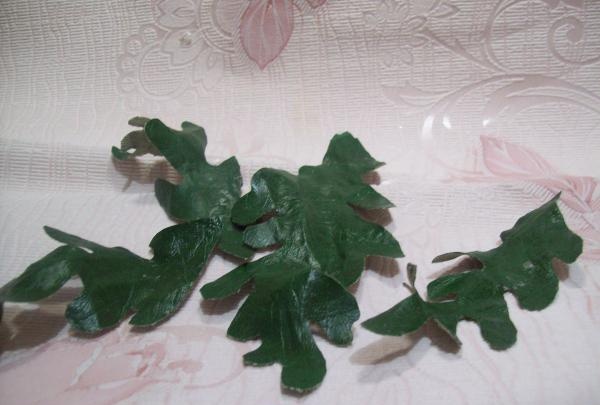
While part of the flower dries, we cut out the green leaves. Their height will be from 13 to 15 cm, and their width will be from 5 to 8 cm. We cut out zigzags and waves on the leaves at random. You need about 15 leaf blanks of different sizes.
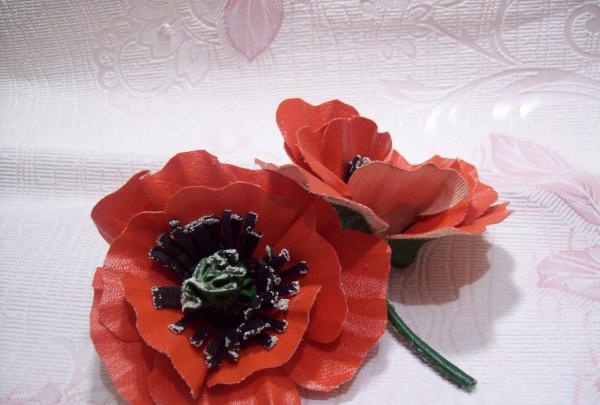
We continue to work on the poppy. We glue the third row to the dried petals, and glue a backing made of green artificial leather to all the leaves. The backing is cut out in the shape of a star with a diameter of 7 cm. And again we heal it with a rubber band until it dries completely.
And we ourselves continue to work on the leaves. You just need to coat them with PVA glue on the wrong side. And when the leaves have dried, you need to crush them a little in your hands, you get a new leaf shape.
And during this time our poppy dried up. Remove the elastic band and straighten the petals. The flower is ready. You will need nine of these flowers.
Our poppies in the picture will be in a vase. So we make a vase. We take cardboard, cut out the shape you like, you need 4 blanks, but each subsequent one will be 1.5 cm smaller in volume. And glue it together like a pyramid. Starting from the large one and ending with the small one, we place them on top of each other. Then we take pearl-colored skin and glue it on top. The vase is ready. Now we have leaves, flowers and a vase ready.
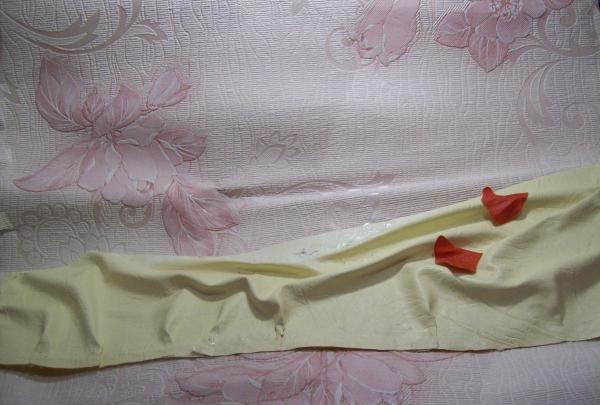
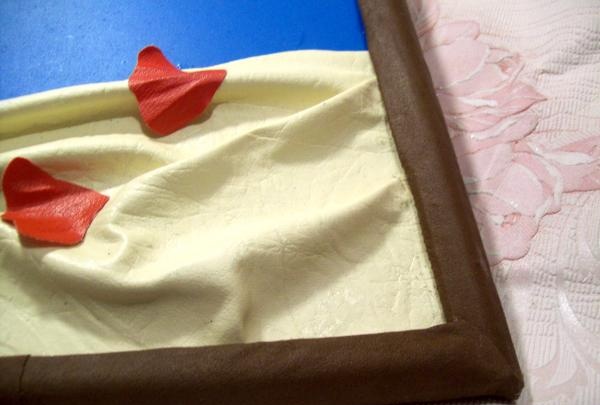
It's time for a creamy piece of leather. We cut it out as long as the base of the picture, and 10 cm wide on one side, and 15 cm on the other. Take Moment glue and smear several random strips on the reverse side, placing them horizontally. We give time for the glue to set and make clamps on the front side, pressing the folds with glue inside. You can glue 2-3 petals to the side.
When the folds have dried, we glue this canvas to the blue base at the bottom of the future composition, this will be the fabric on which the vase with poppies will stand. Making a picture frame. We cover the frame with suede-like fabric, it is brown. We glue it carefully.
Now we glue the vase to the base, and green leaves around it. We place the beads in the places of future flowers.
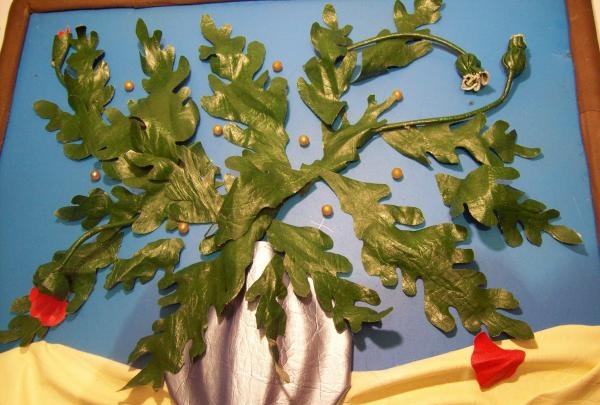
Then we arrange the flowers to make it beautiful. And secure it well with Moment glue. At this point, the “Miki” composition is ready, and for shine you can spray the flowers with hairspray. All is ready.

Good luck to all.