It's been seven years since Jani Ponkko, nicknamed Japala, made his first work with engraved and illuminated acrylic. Back then it was just a simple mouse pad. A lot of new things have been discovered in modding over the years. The technology has become more advanced, and modders have gained a lot of experience. But as then, today most often a single sheet of acrylic is used for engraving. But you can work with several. This can open up new possibilities: multi-colored lighting, believable representation of 3D models, or even the creation of animation. Jani Ponkko shows what you can do with a few layers of acrylic, a Dremel and LEDs.
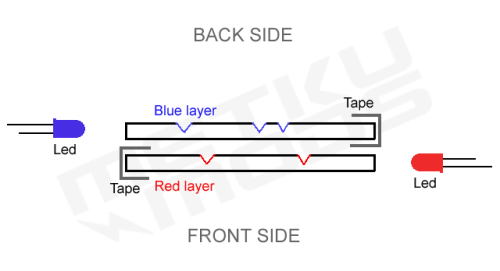
As the name suggests, layered design technology consists of two or more layers of acrylic. Each layer can have its own pattern and color. The result will be impressive.
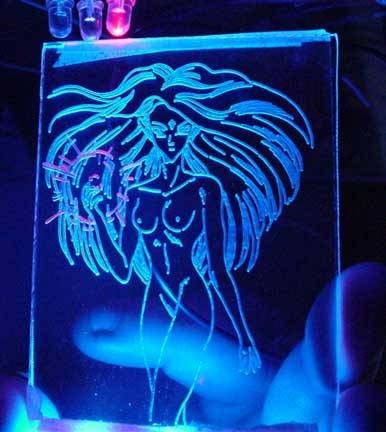
For the first time, Japala spoke about multi-layered images engraved on acrylic back in 2002. Then he made a test project - an anime-style silhouette of a girl with a flashing red ball. The girl herself was engraved on one layer, the ball on another.
First you need to understand the very principle of illumination of engraving on acrylic.Engraving is a series of fine indentations in acrylic. To make them more visible, they are highlighted. For this purpose, high-intensity LEDs. At the same time, the engraving area scatters the light, and it reaches the viewer. With multi-layer animation, first one layer is highlighted, then the second, third, and so on. The result is similar to animated neon signs.
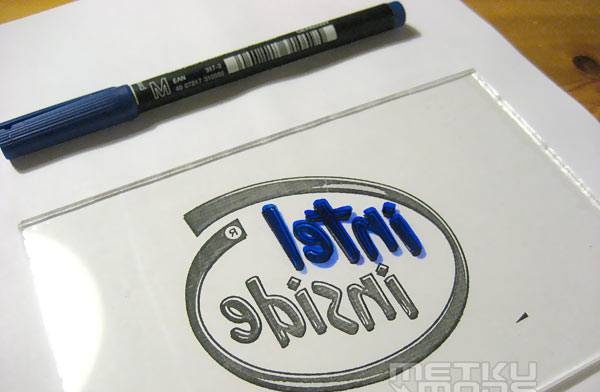
Japala engraves the back of the acrylic sheet. This improves light dispersion and makes the picture brighter. You just need to remember that the image must be made in a mirror image. The modder himself admits that he sometimes forgets this simple truth. This is not so important with an arbitrary picture, but sheets with text can be thrown away.
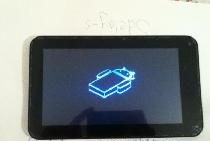
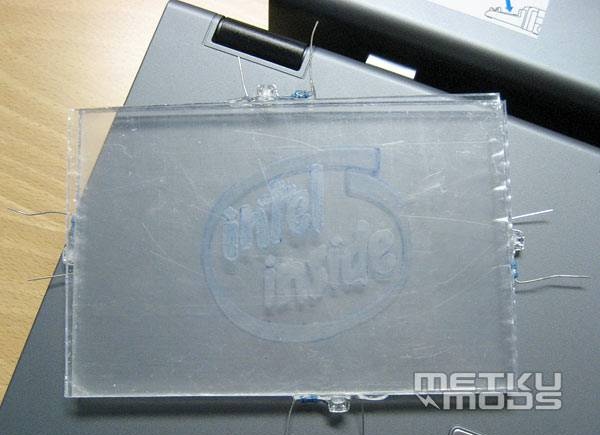
For the animated image, Jani chose the Intel logo. There are reasons for this. This is the first three-element design that came to his mind. In addition, images on different layers do not overlap each other, which makes the task easier for the first time.
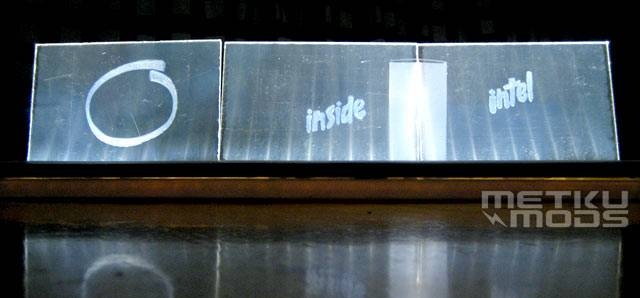
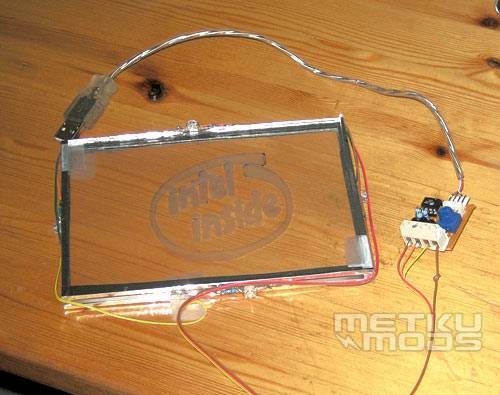
After a short session with the Dremel, all three layers were ready. The acrylic sheets appear a little cloudy in the photos. No need to worry, it's just that the protective film has not been removed yet.
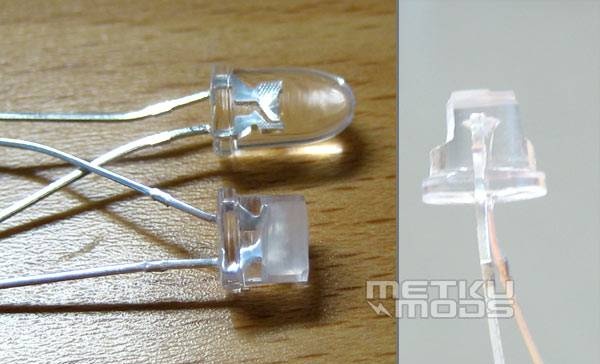
Used LEDs have a thickness of 5 mm. Moreover, the thickness of the acrylic sheets is only 3 mm. So I had to work on them a little. They are now shorter and more compact, making them a little easier to install. But if 3mm is available in the store LEDs, then it’s better to buy them right away.
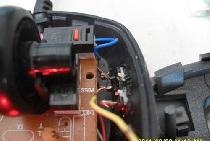
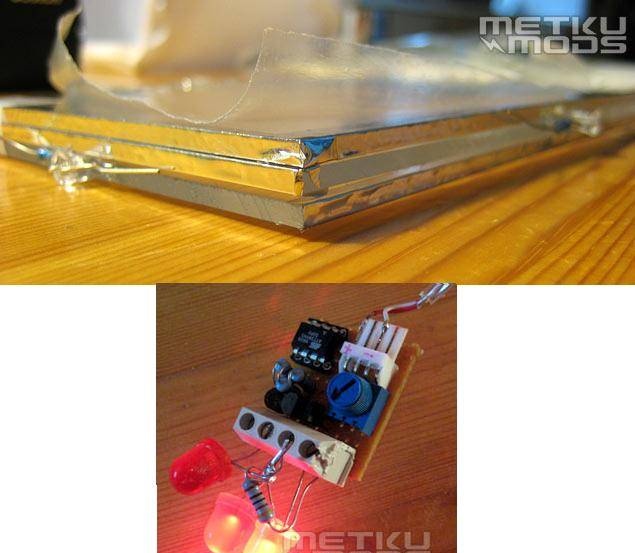
Then Japala made the pairs Light-emitting diode + resistor. Epoxy glue can damage acrylic, so regular glue was used.
For the sheet with the word "Intel" one was used Light-emitting diode, as for the “Inside” layer.But to illuminate the oval image, two LEDs are made, located on opposite sides.
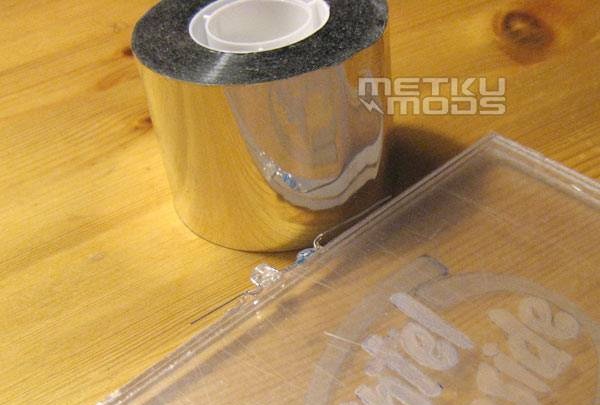
The edges of the acrylic sheets opposite the LEDs were wrapped in aluminum tape. It has a mirror effect, so the beam of light will be reflected until it exits through the engraving line. In addition, this will create light insulation between the layers.
Japala used the ATtiny4 chip from Atmel. It turns on several LEDs in turn. But the modder used this thing only for testing. It was decided to create our own scheme.
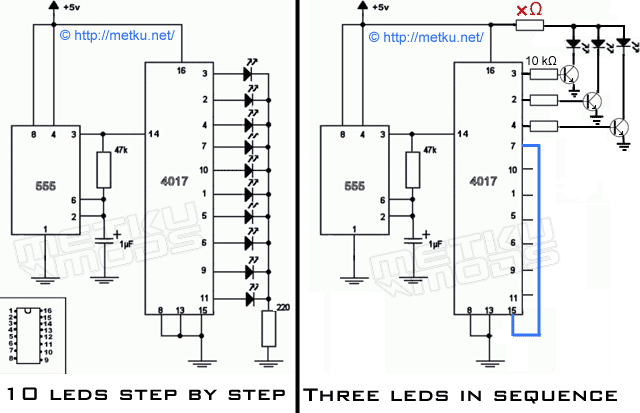
Previously, to organize the alternate switching on of LEDs, the enthusiast used the circuit shown on the left. The switching speed of the LEDs is regulated by the 555 chip. In addition, if you replace the 47 kOhm resistor with a potentiometer, you can manually change the switching frequency.
But for current needs it is more convenient to use the right scheme. Basically it is almost the same, but the outputs are additionally connected to an NPN bipolar transistor. This allows you to control a large number of LEDs. Note that the blue wire goes from output 7 to 15. Connector 15 in this circuit is a reset connector; when a signal is received, it supplies power to the first LED. In this case, you can vary the number
highlighted layers. If you move the blue wire to output number 10, and connect another LED to 7, you will get 4 layers.
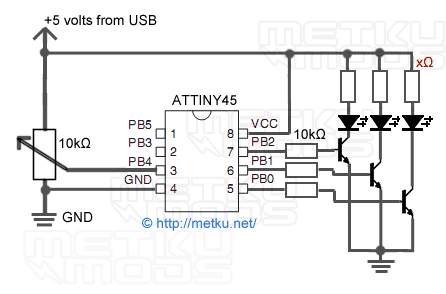
This circuit was originally developed for other purposes - regulation of three-color backlighting. But a software change in pulse width modulation made it possible to quickly prepare the device for current tasks. The chip contains an 8 MHz resonator and three separate channels. The regulator controls the switching speed.
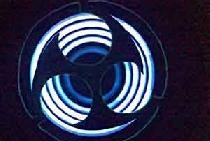
It was possible to use a scheme for turning on each layer one by one. But Jani didn't take the easy route. He made it so that at the end all three layers light up for a moment and go out at the same time.
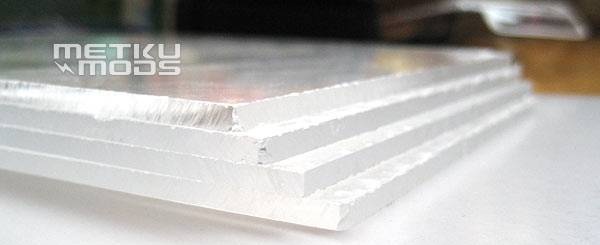
The three connected layers reached a thickness of 9 mm.

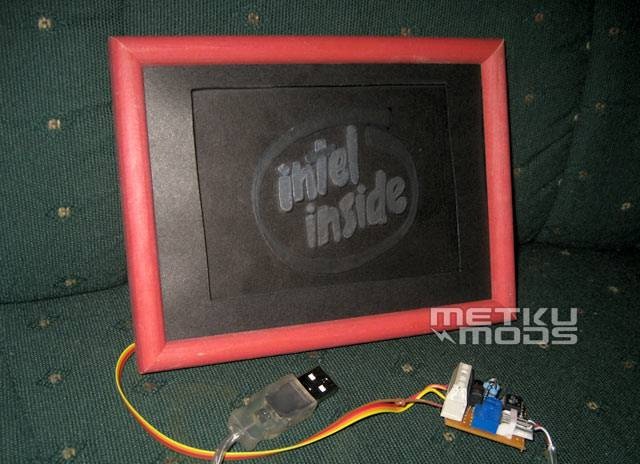
A new Dremel 400 was used to create the wooden frame. Usually the modder doesn't spend so much time on trial versions, but he decided to finish this thing to the end.
All layers are collected. "Intel" comes first, then "Inside". The sheet with the oval comes last. Turning on the backlight follows the same procedure. In the design used, consistency does not play an important role as there are no overlapping engraving lines.

To evaluate the effect of the animation, you need to watch the video, which is located at the end of the article. There is a noticeable difference between working with and without a layer of black cardboard at the back.
In this case, the author did not use devices for scattering light. You can take a piece of white paper or matte acrylic. This will allow the light to spread a little better. But if you run sandpaper over the surface of an LED and a sheet of acrylic, this method will not give results. The glue will eventually smooth out both surfaces.
It could have ended there, but Japala went even further
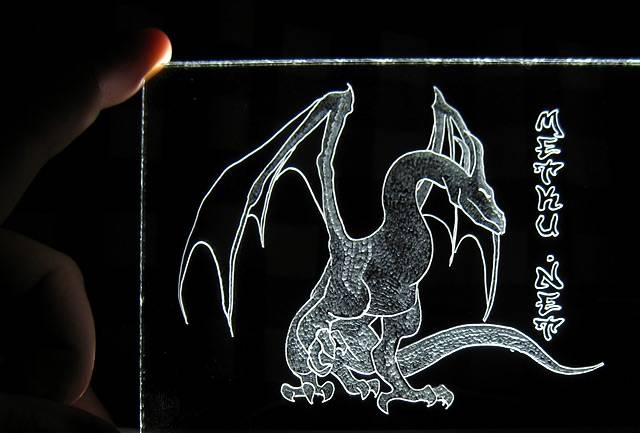
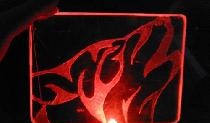
The dragon pattern was created while testing a new tool - Dremel 290-05.
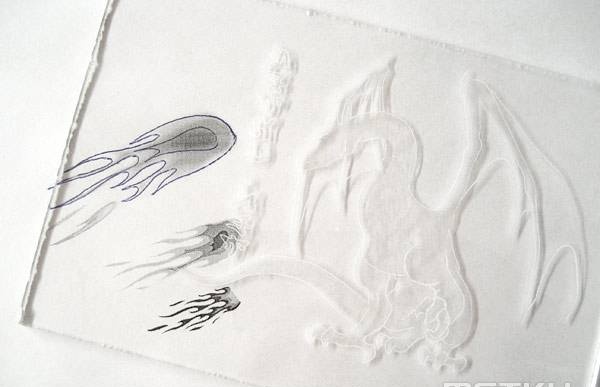
In this work, 4 layers of acrylic have already been used. The first depicts the dragon itself. It is highlighted in white. Then there are three layers of flame: from smallest to largest. All of them are red and turn on one by one.
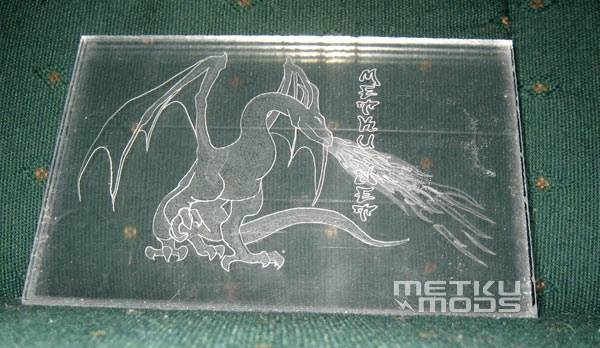
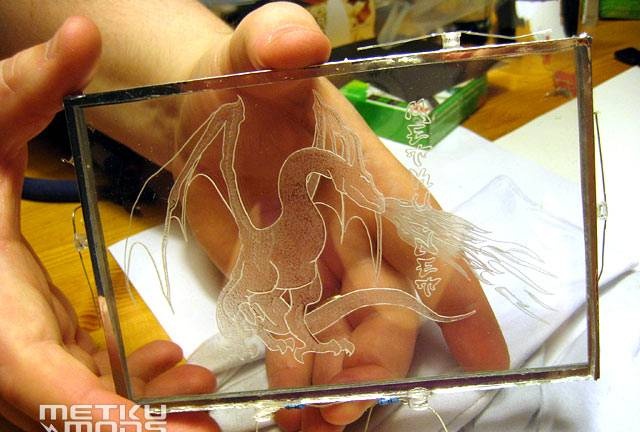
It turned out to be an excellent fire-breathing dragon. We advise you to enjoy the video demonstrating its work.

Jani Ponkko admits that he himself is surprised by the effect of the fire-breathing dragon.Just three layers of flame, animation and proper lighting can create a real miracle.
The modder did an excellent job with all stages of the production of multi-layer engraving with animated lighting. He paid special attention to cleanliness. Even the slightest speck of dust between the layers of acrylic or fingerprints can significantly spoil the overall impression of the painting. But you should not use alcohol-containing products when cleaning acrylic, they can damage it. In addition, it is necessary to preserve the protective film for as long as possible.
In the end, it is worth noting that the technology of animated multi-layer illumination turned a rather simple drawing into an impressive picture. Needless to say, there are new spaces for imagination in the field of application of this device.
Project author: Jani Ponkko