Do it yourself
Life hacks, master classes, useful tips, recipes.
home » Computer homemade products » Modding » Control Panel for PC

We will need:

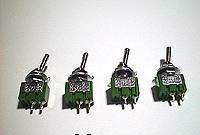
switch (they should have 3 legs, and the switch should have 3 positions).
switch (key type, optional).
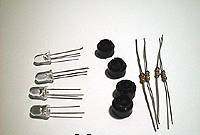
4 blue LED and 5 red ones.
4 red LED .
11 resistors 750 Ohm.
Wires.
Heat shrink tubing or super glue.
Soldering iron and accessories.
Face plug.
3 power supply splitters.
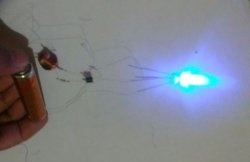
 

Characteristics LEDs
Voltage = 1.5 V, Current = 0.015 A.

From here we calculate the required resistance for incoming 12 V:

Resistance = (Main voltage - Voltage LED) / Current LED, i.e.:
R = (12 V - 1.5 V) / 0.015 A = 700 Ohm
or the closest value that can be achieved, 750 ohms

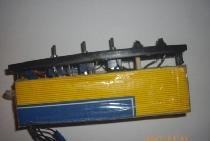
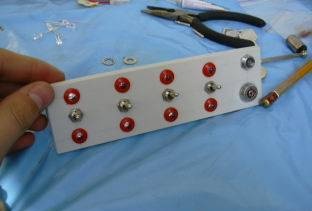
Let's start, let's take the front plug....


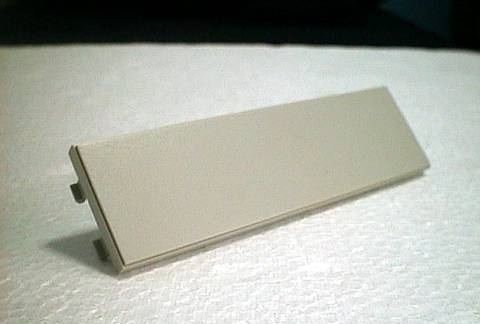
.... and drill holes in it for switches and LEDs.


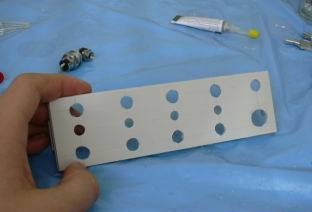
And we screw all this stuff into a plug.


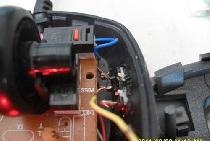
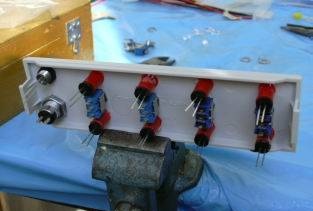
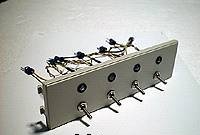
Now we turn all this stuff over to the other side, it’s better to tighten the plug in a vice, otherwise it will crawl across the table during soldering.


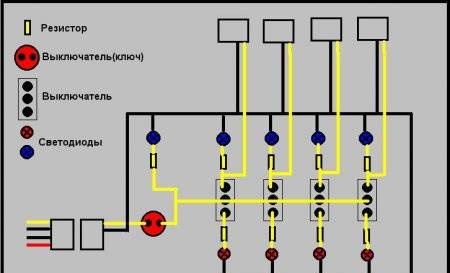
We solder everything approximately according to this scheme, or as you need.
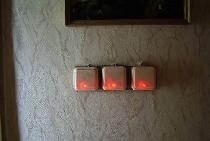
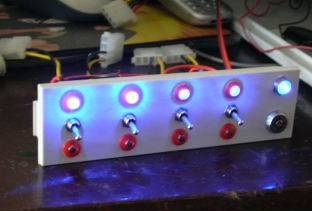
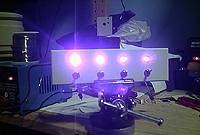

Eventually:


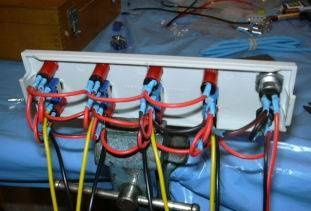
We check the operation - when the switch is removed from the neutral position, one LED should light up.


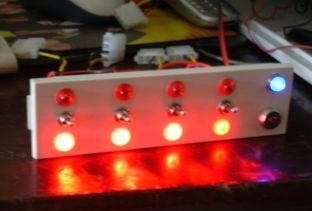
We build it into the body.And we manage what we want :-))


Second option: You can get by with one row of LEDs and switches without a neutral position:


Here's the diagram:


Job:


All !

come back
Comment
  • bowtiesmilelaughingblushsmileyrelaxed relaxedsmirk
    heart_eyeskissing_heartkissing_closed_eyesflushedrelievedsatisfiedgrin
    winkstuck_out_tongue_winking_eyestuck_out_tongue_closed_eyesgrinningkissingstuck_out_tonguesleeping
    worriedfrowninganguishedopen_mouthgrimacingconfusedhushed
    expressionlessunamusedsweat_smilesweatdisappointed_relievedwearypassive
    disappointedconfoundedfearfulcold_sweatperseverecrysob
    joyastonishedscreamtired_faceangryragetriumph
    sleepyyummasksunglassesdizzy_faceimpsmiling_imp
    neutral_faceno_mouthinnocent
4 minus one =
Comments (7)
  1. Tyger
    #1 Tyger Guests 1 June 2011 19:09
    0
    what did you control using this scheme? wink
  2. feelloff
    #2 feelloff Guests 1 June 2011 19:15
    0
    Fans.
  3. Gagafa
    #3 Gagafa Guests 26 October 2011 18:46
    0
    and where can I buy all this? in full?
  4. Veent
    #4 Veent Guests 26 October 2011 19:23
    0
    In the grocery store, where do we still sell radio electronics?
  5. a lion
    #5 a lion Guests 7 May 2014 15:15
    0
    Why do we need resistors with such high resistance? The power supply is from the molex output, and there is only 12 volts maximum...
  6. Flynn
    #6 Flynn Guests 12 December 2014 15:41
    1
    Hello. Help me please. I have this idea. I have three simple toggle switches without a neutral position (just On\OFF) 2 legs. How do I connect them? Here are the first two toggle switches for the original computer power button. And the third toggle switch is to the reset button. I'm not going to install light bulbs and additional buttons. ONLY THREE TUMBLE SWITCHES. I was told that resistors are not needed in this case. and verbally explained that the toggle switch should be connected directly to the wires of the buttons. I'm still learning, please someone explain it to me more clearly and with a diagram.Thank you all in advance.
  7. Sasha
    #7 Sasha Guests April 6, 2020 05:36
    1
    why is this needed? Doesn't it just work to turn on the computer?

Life hack: I remove tea and coffee stains in the microwave

Pictures | Do it yourself

Venom carnival mask | Do it yourself

Water, vinegar and hydrogen peroxide against rust

«Do it yourself - with your own hands» - a site of interesting homemade products made from scrap materials and items at home. Step-by-step master classes with photos and descriptions, technologies, life hacks - everything a real master or just a craftsman needs for needlework. Crafts of any complexity, a large selection of directions and ideas for creativity.

We recommend reading

Washing machine error codes