What is necessary?
Making a love tree with blooming roses is not as difficult as it seems at first glance. A minimum of skills in the art of beading and the necessary equipment are sufficient, namely:
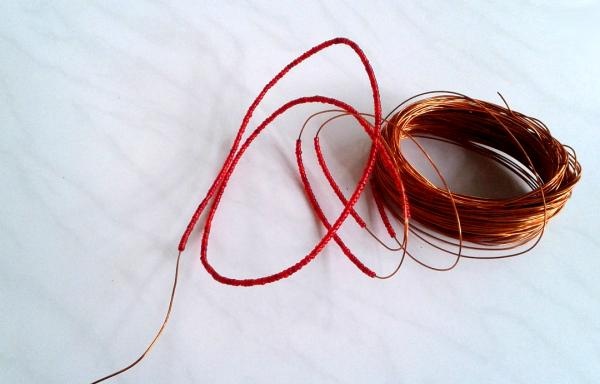
– beads (light and dark green, red);
– wire of different diameters (depending on the size of the beads and the thickness of the tree trunk);
– thin green threads;
- PVA glue;
– cotton wool;
– disk;
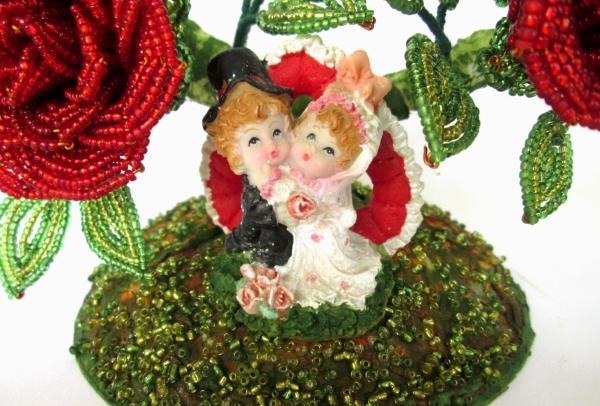
– a matching wedding figurine;
- pliers.
Weaving roses
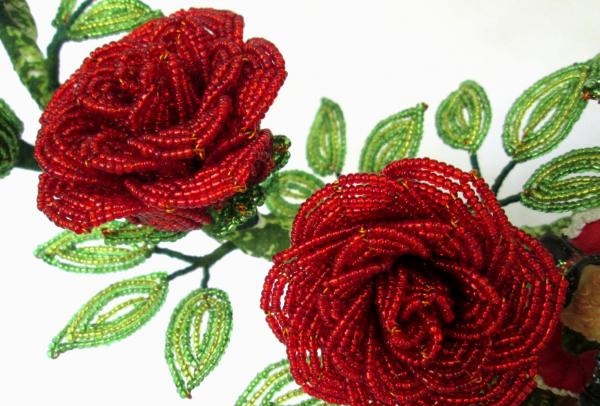
The French beading technique used to create these beautiful roses is quite simple. The central and outer petals of the flower are woven differently, but the essence of their execution is the same - circular weaving of a row of beads. Let's take a closer look at each stage.

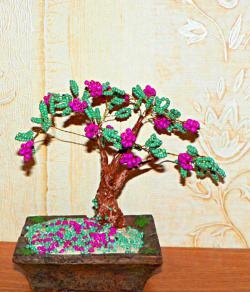
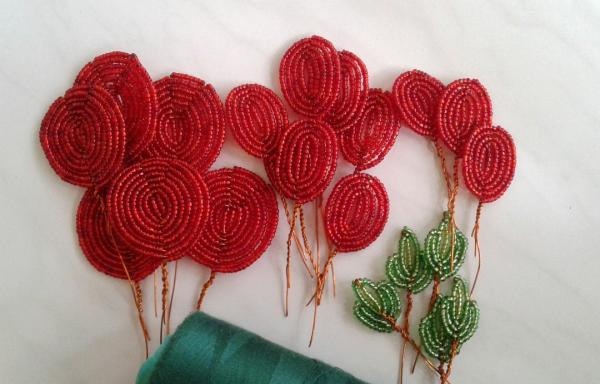
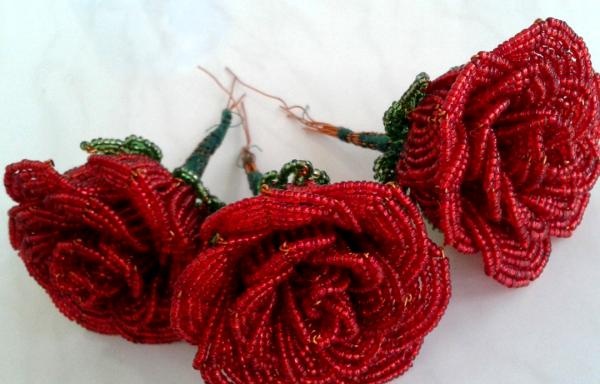
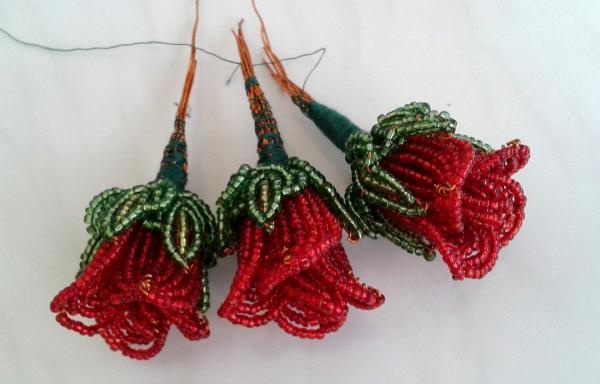
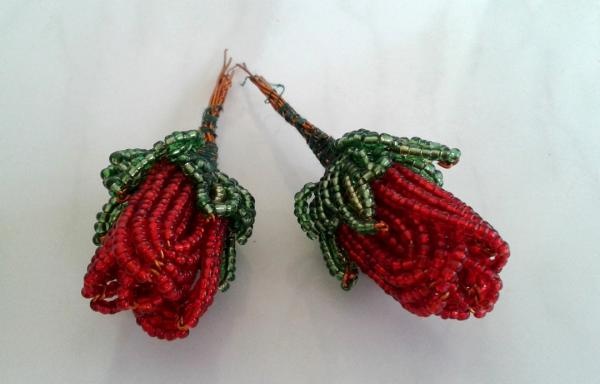
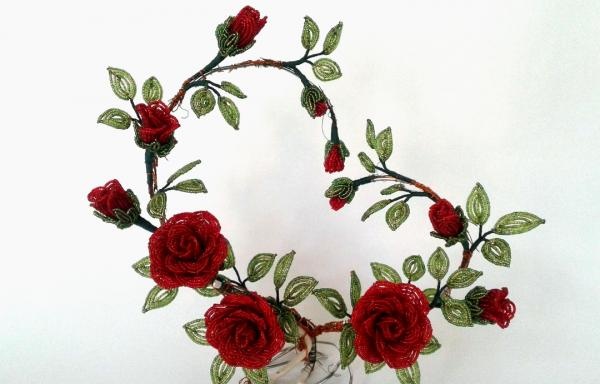
Weaving three blossoming rose flowers
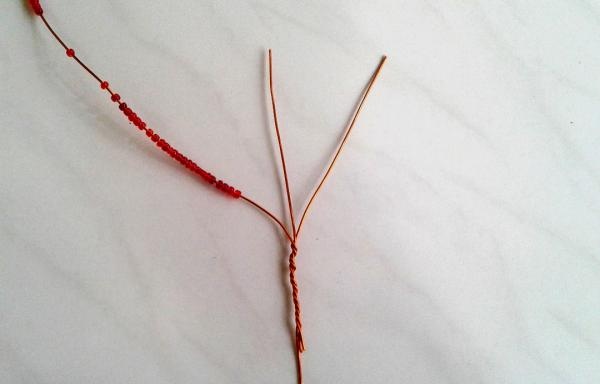
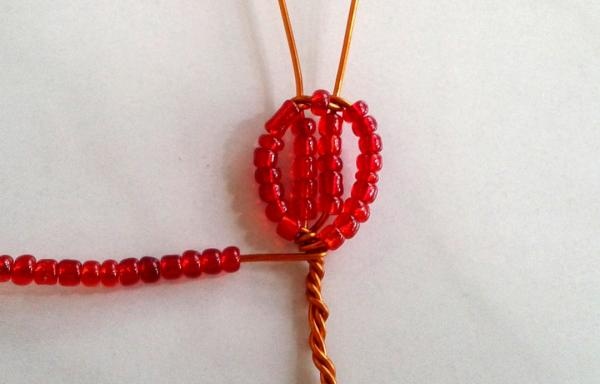
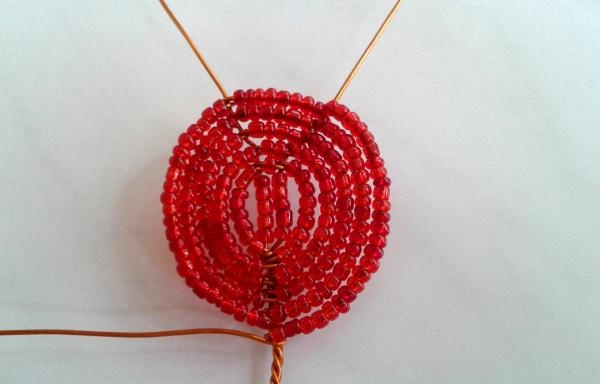
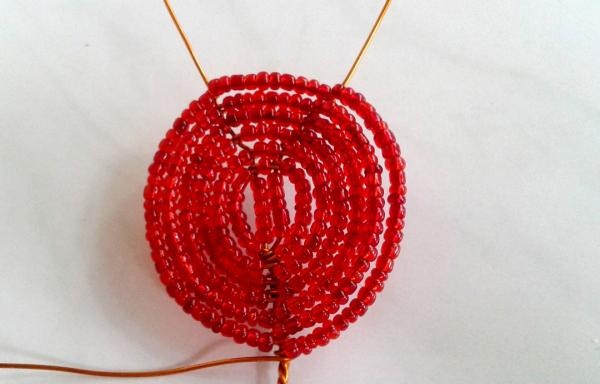
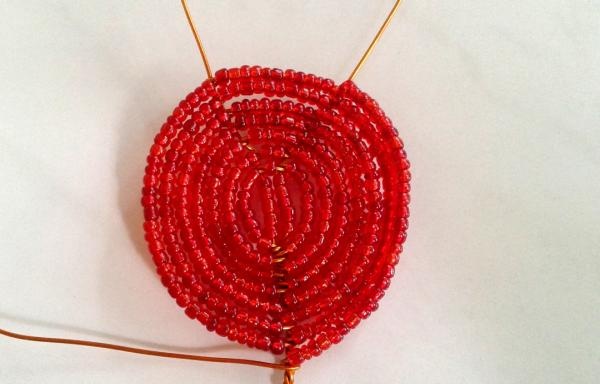
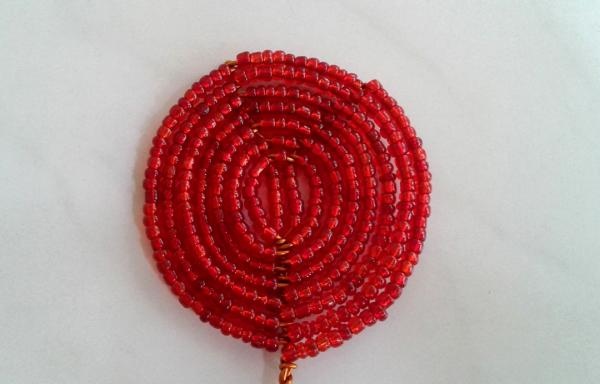
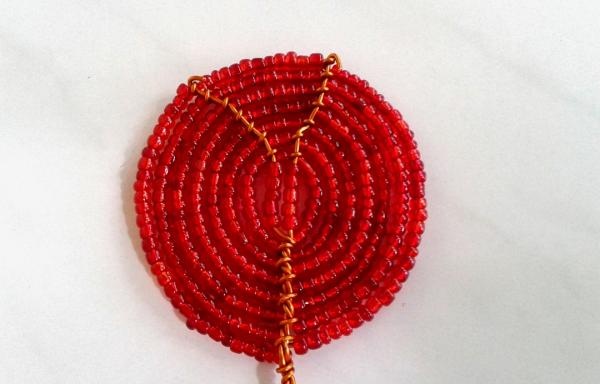
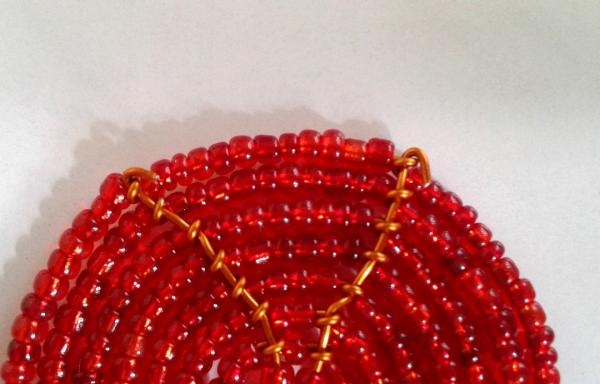
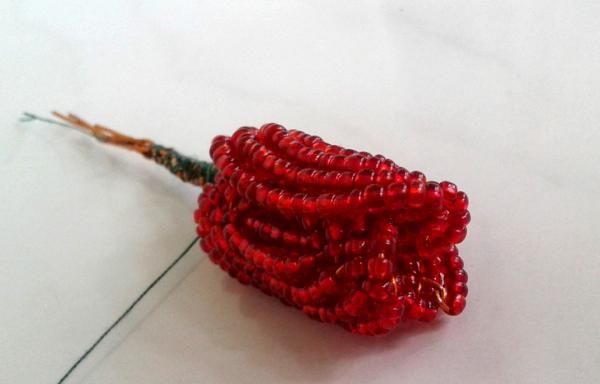
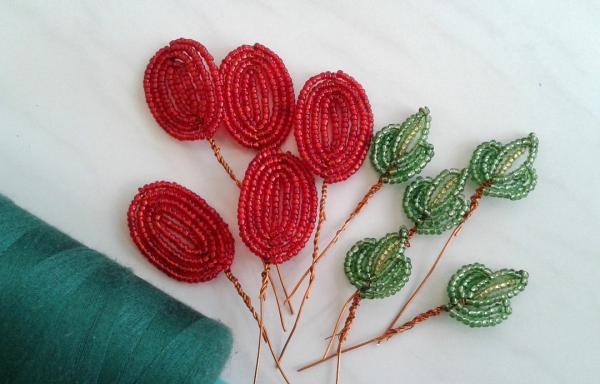
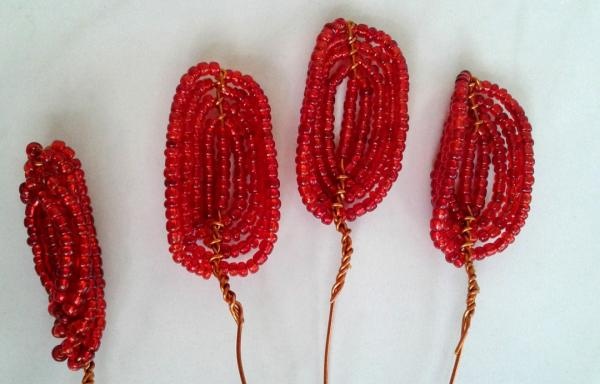
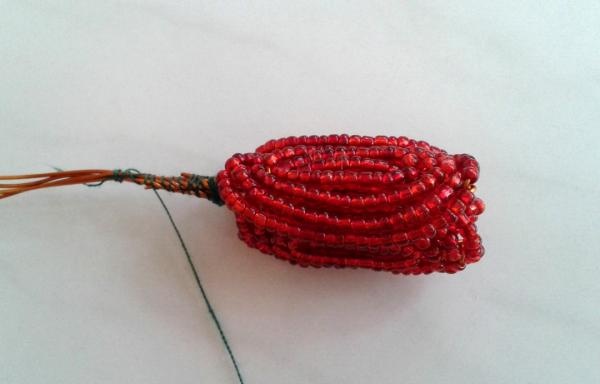
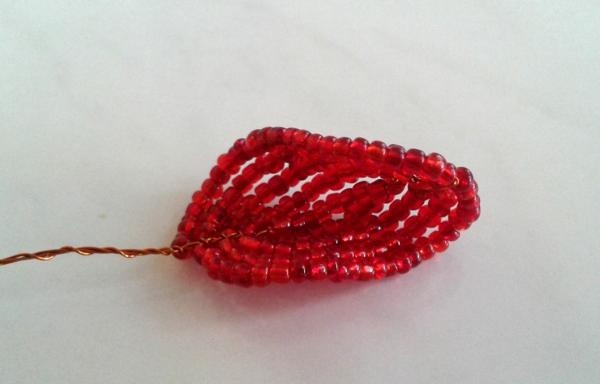
1. Weaving the central petals.
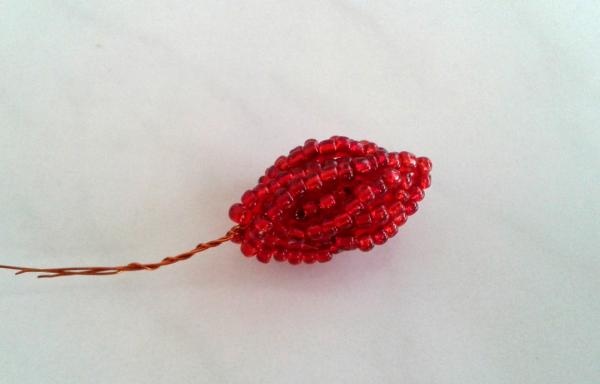
To weave the central petals of roses, you need two pieces of wire, the diameter of which should be smaller than the hole of the red beads. To save wire, a large amount of red beads is strung directly onto a skein.
A piece of wire 5-10 cm long is attached to the end of the wire with the bead row, as shown in the photo - this is the axis around which the bead row will be woven.
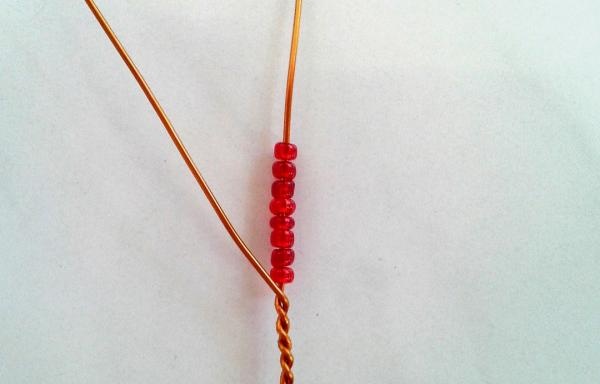
A certain number of beads are strung on the axis - the more there are, the larger the petal will be. At an angle of 90 degrees, the wire with a row of beads is secured in one turn on the opposite side of the connection with the axle. The wire must be placed above the axis - this point is important, since the wire should be less noticeable from the front side of the product.
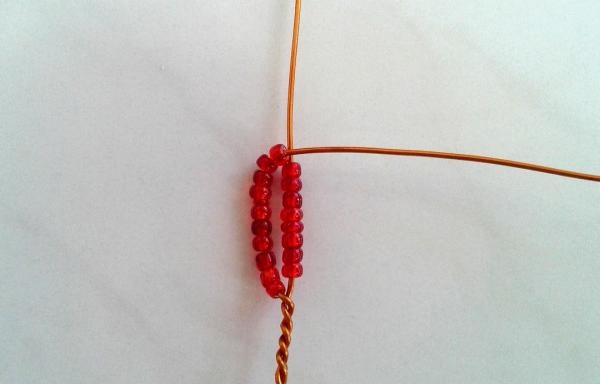
Next, the wire with the bead row is secured in one turn at the base of the connection with the axial wire. The twist angle is 90 degrees.
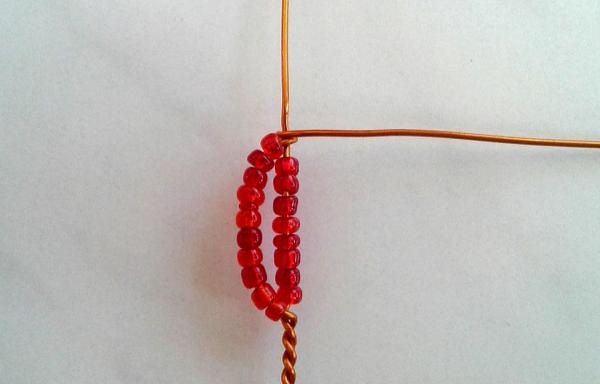
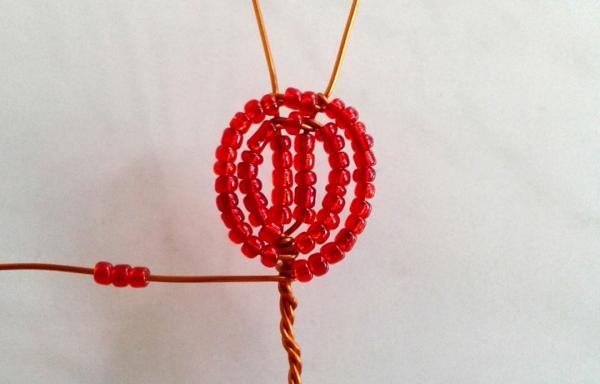
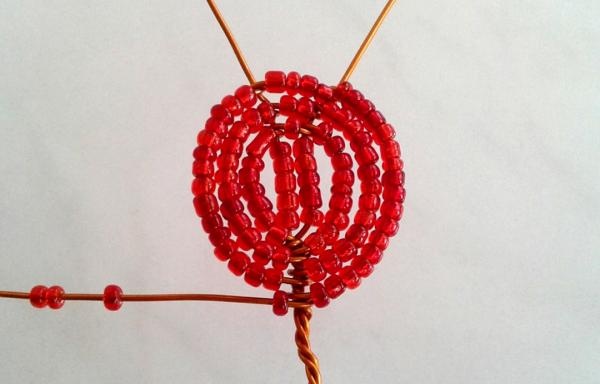
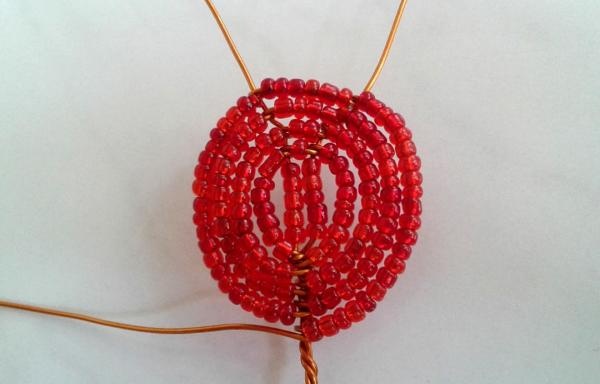
In this way, four rows of braiding of the axle are made. Due to the fact that the connection angle is 90 degrees, the shape of the petal will be round.
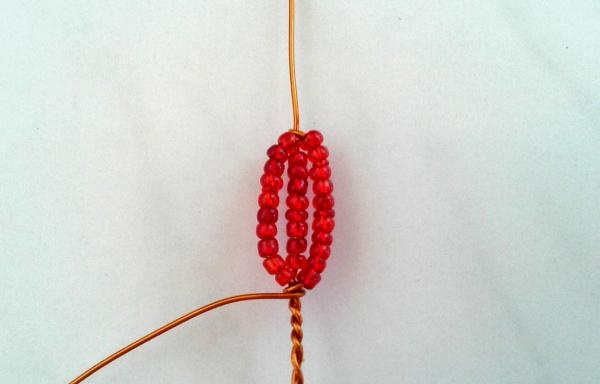
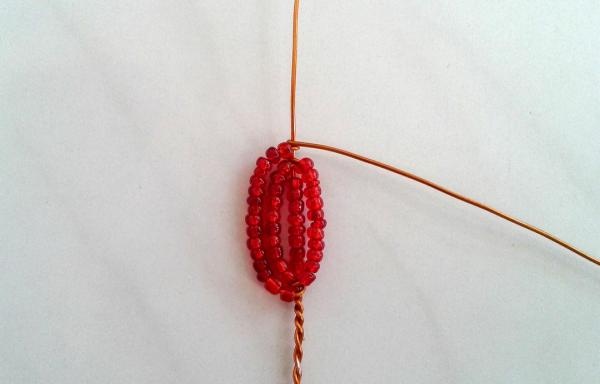
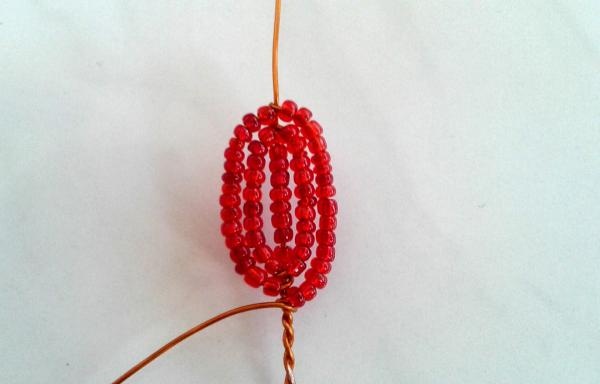
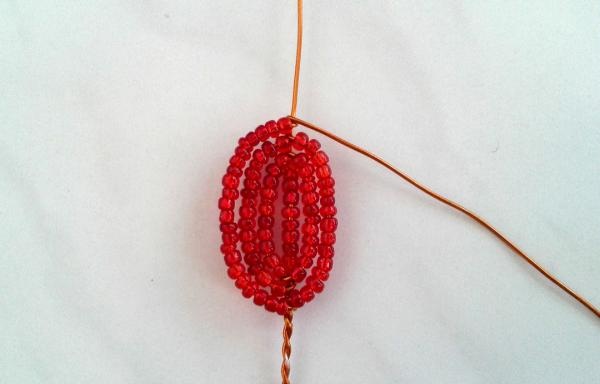
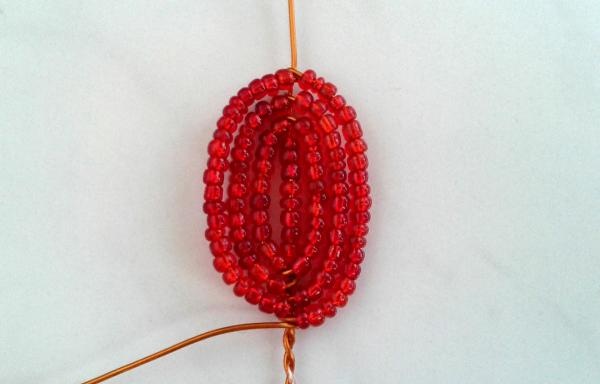
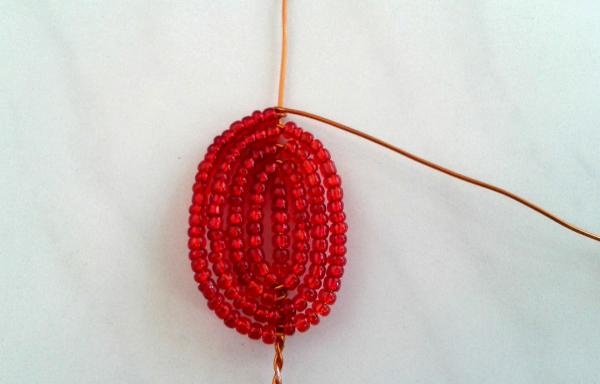
The axle wire is cut and bent to the wrong side.
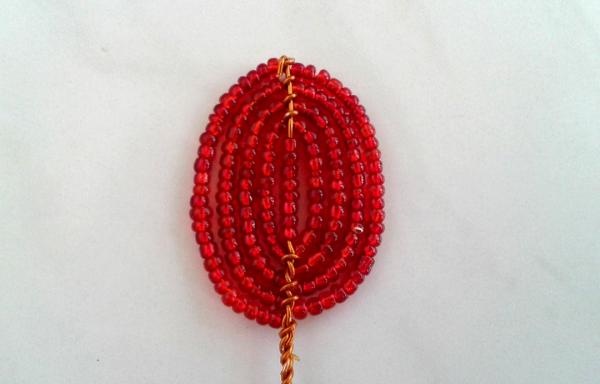
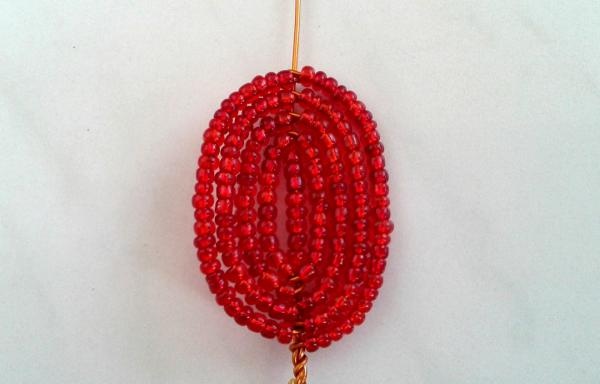
It is necessary to make nine petals with six beads on the axis, and twenty-one petals with eight beads on the axis.
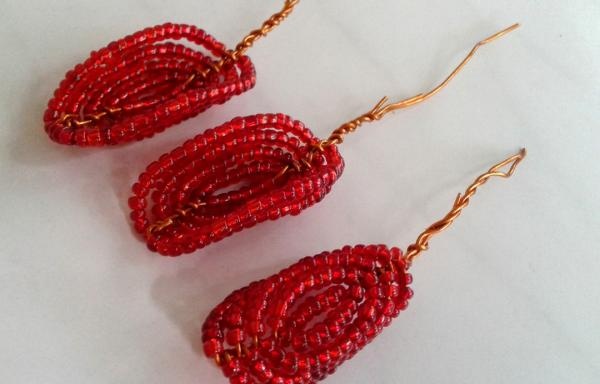
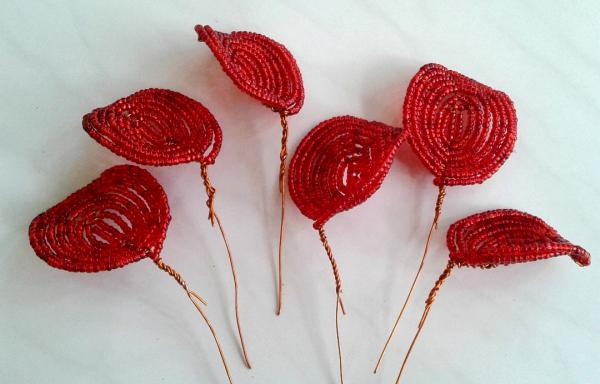
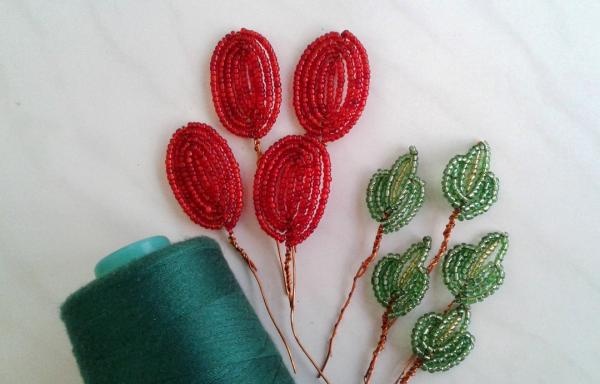
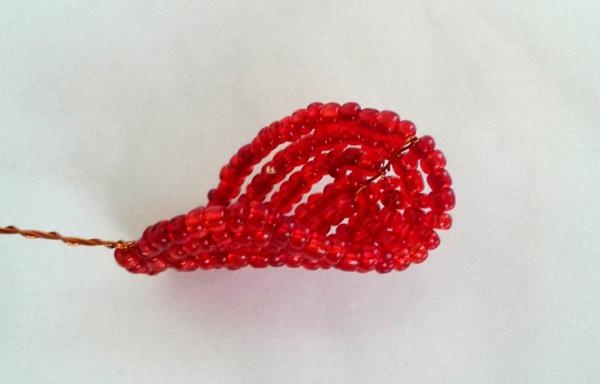
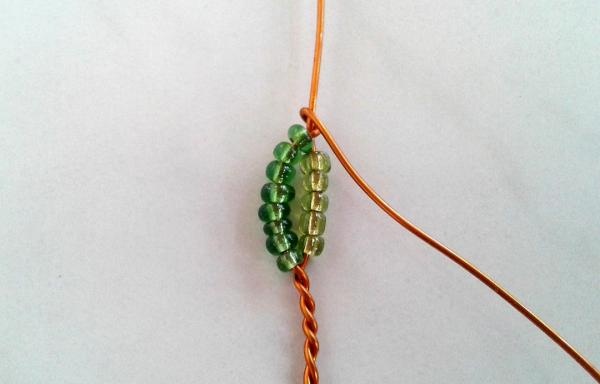
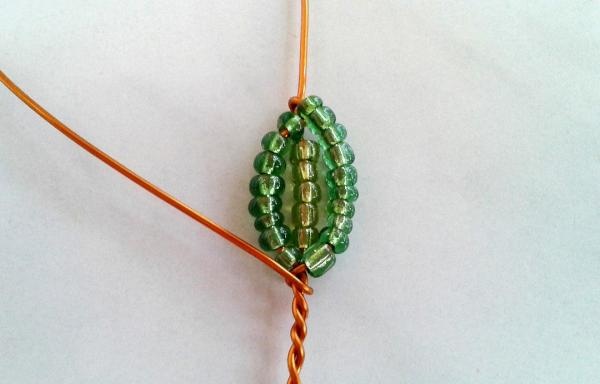
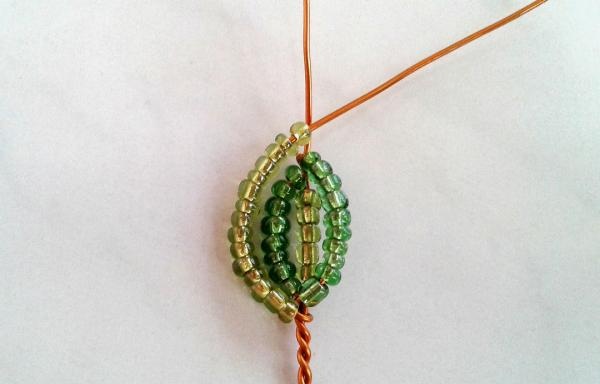
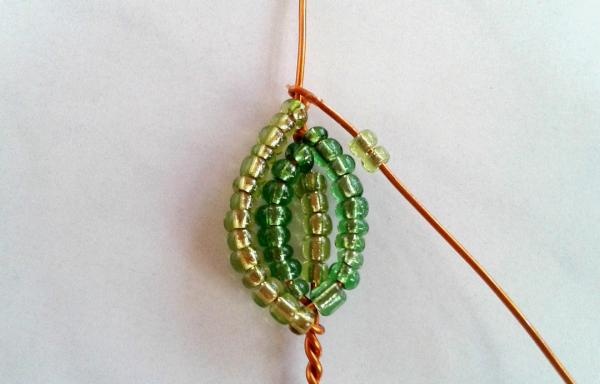
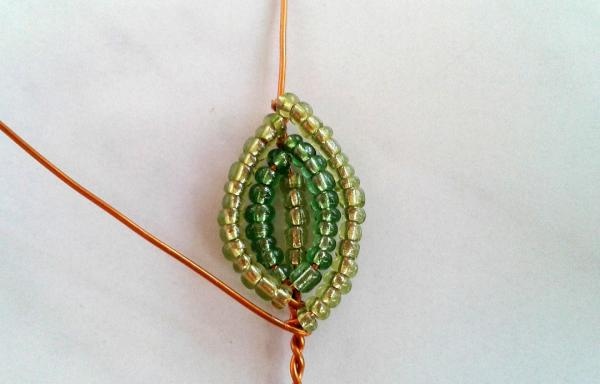
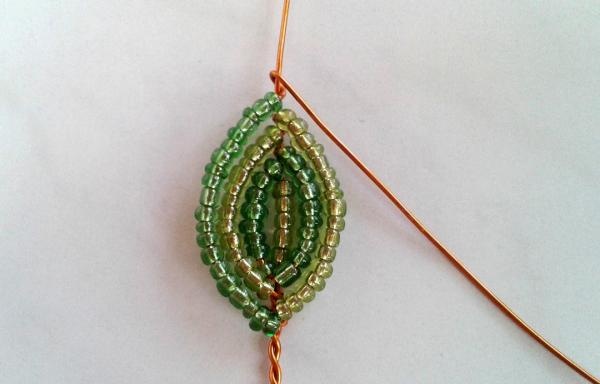
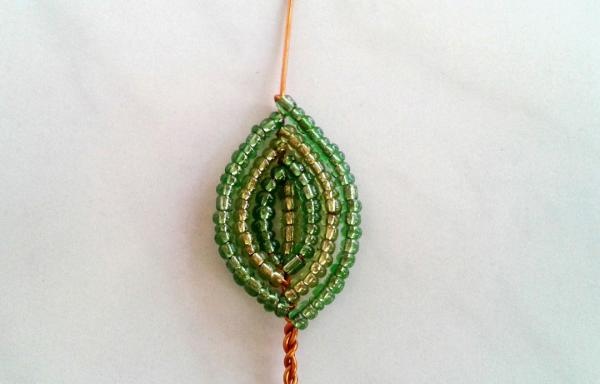
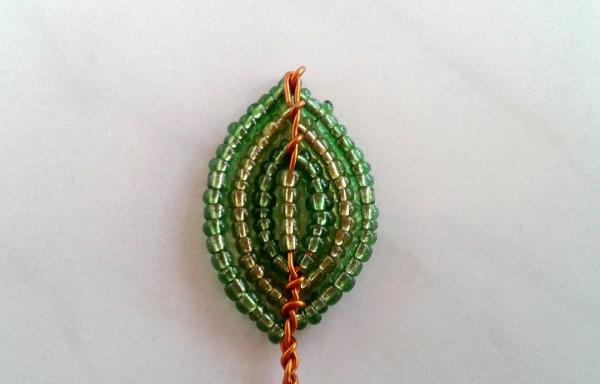
2. Weaving the outer petals
The outer petals of the rose are woven using the same technique as the central ones, with the only difference being that to obtain wider petals, two axes are used.
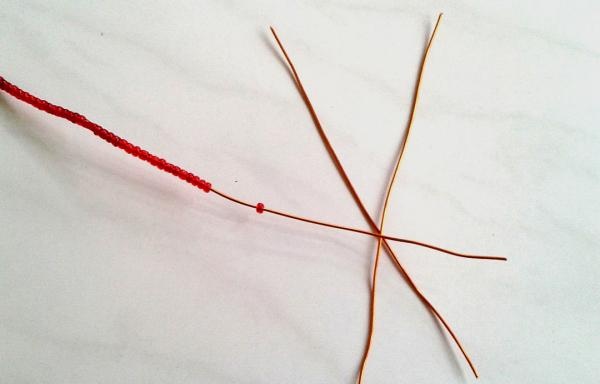
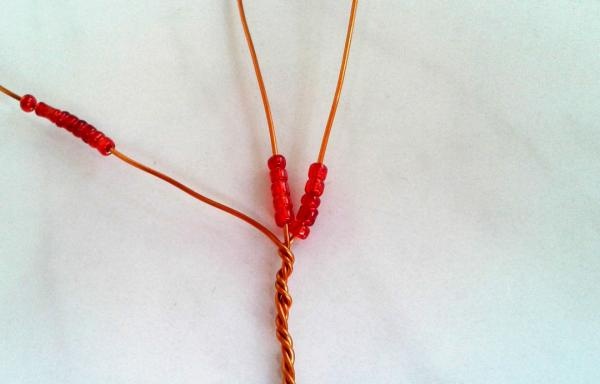
The wire is also wound over the axles when turning at an angle of 90 degrees along the edges of the axles.
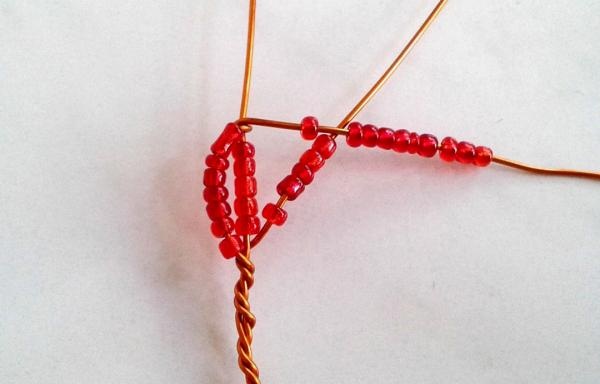
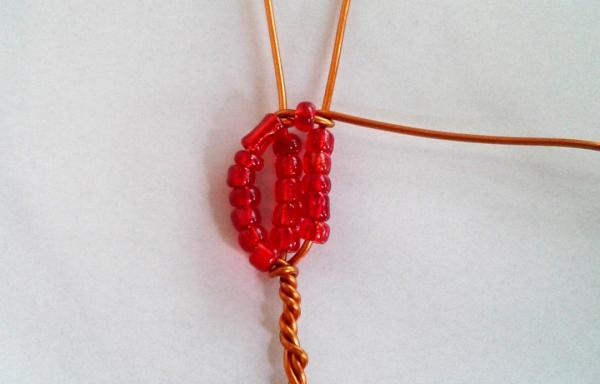
The axes are braided in seven rows. With each row between the axes, the number of beads increases in the following sequence: 1-2-4-6-8-10-12.
It is necessary to make eighteen petals with a double axis.
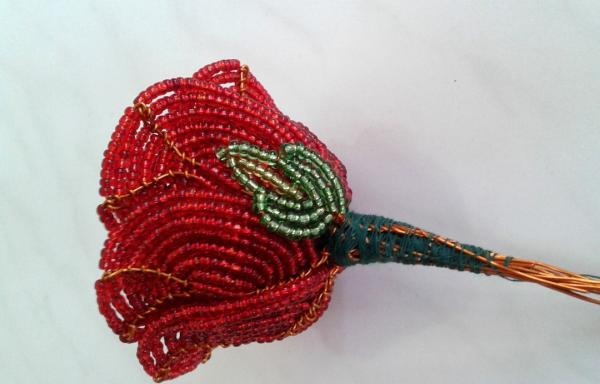
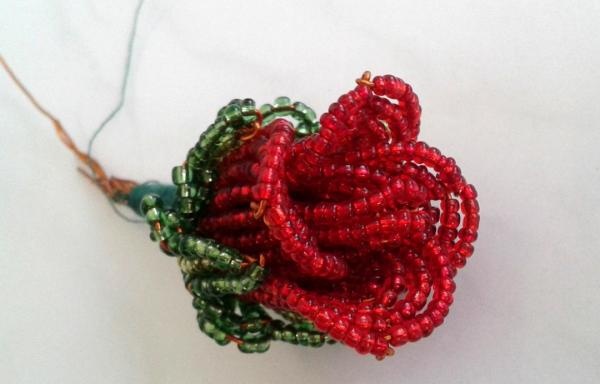
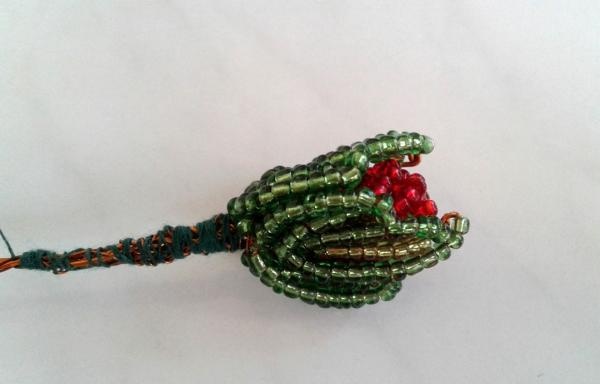
3. Weaving sepals
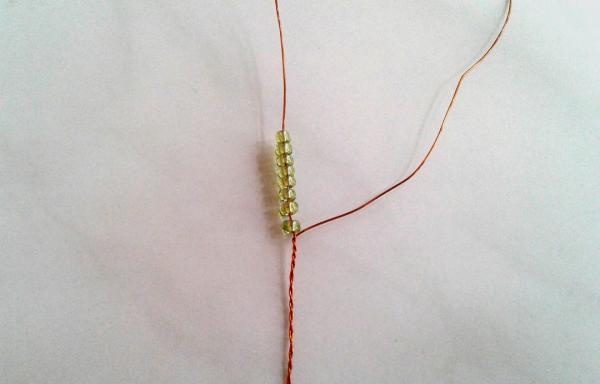
The core of the rose sepal is woven using the French technique.
It is necessary to weave a core of eight light green beads with one row of dark green beads.
When fastening, the wire is brought above the axis. The twist angle must be sharp.
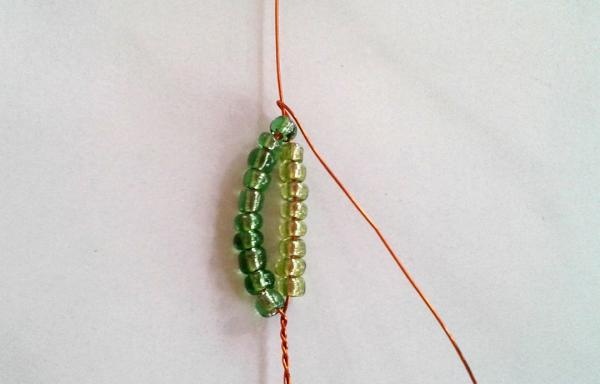
The second row consists of half the amount of the first row. The wire is placed between the beads and a double row of dark beads is woven into the middle of the outer row.
At the base of the sepal, it is necessary to bring the wire out between the outer rows and weave a similar double row on the other side.
Rose buds require five sepals per flower.
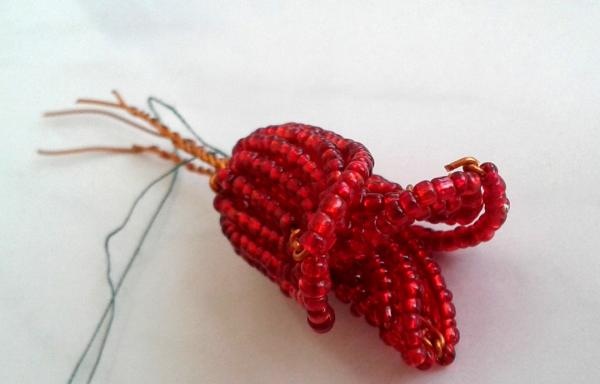
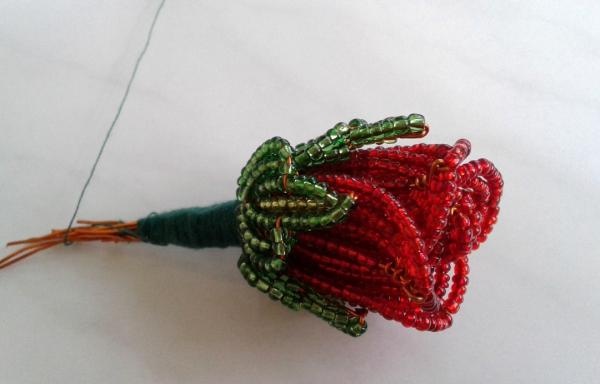
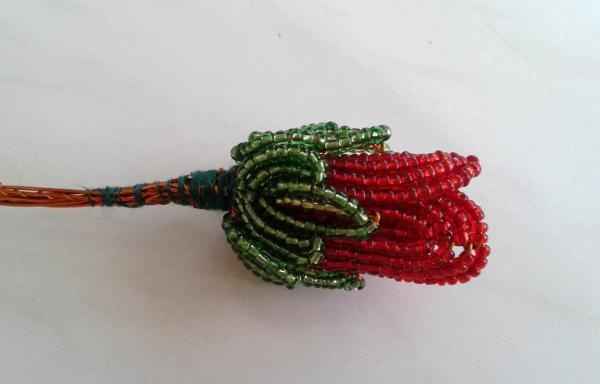
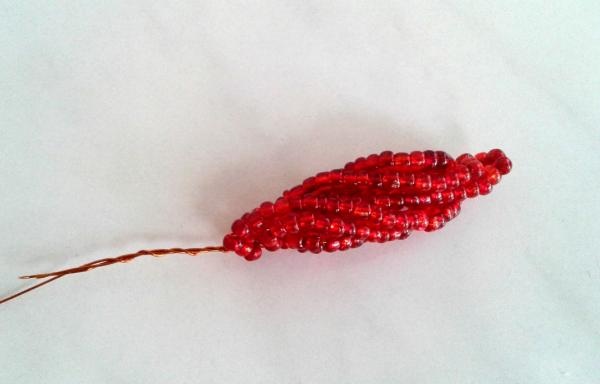
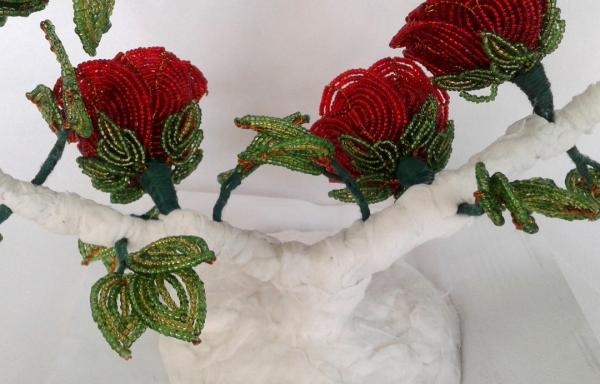
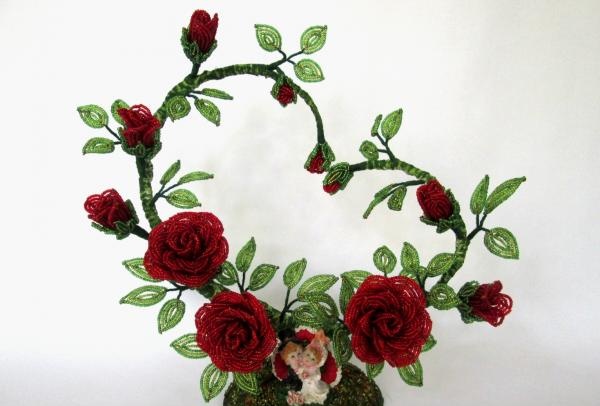
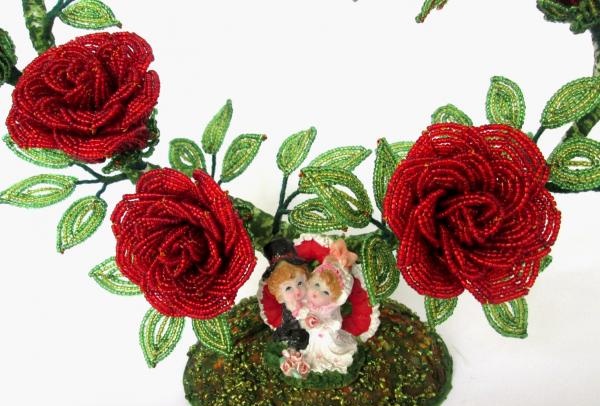
4. Assembling a rose flower
As described above, for one flower you need:
– three small petals with one axis;
– seven larger petals with one axis;
– six petals with a double axis;
- five sepals.
The petals are connected to each other by green threads. ,
First, three small petals are connected. They need to be slightly bent along the axis, then put one into the other and tightly wrap their bases with threads.
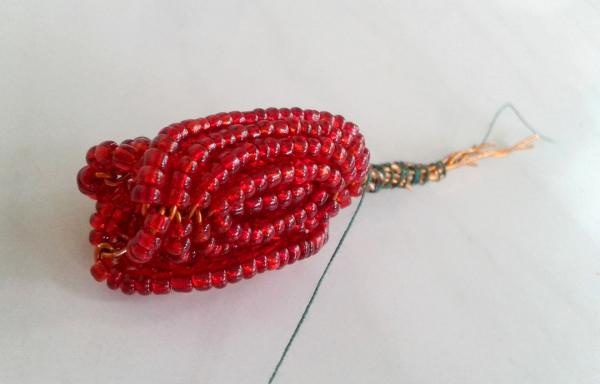
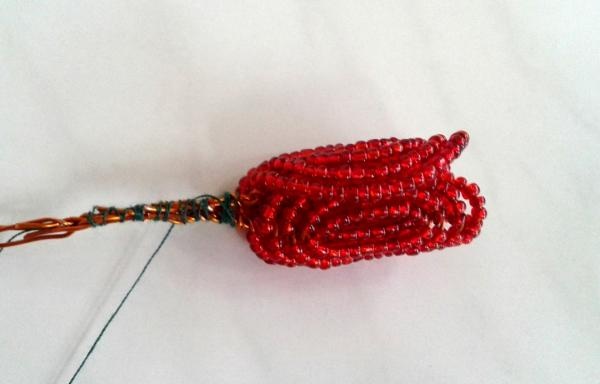
Next, the remaining petals are attached to form a bud. Each petal must be bent, giving it a natural shape. Curved petals fit onto the bud much easier and more neatly.
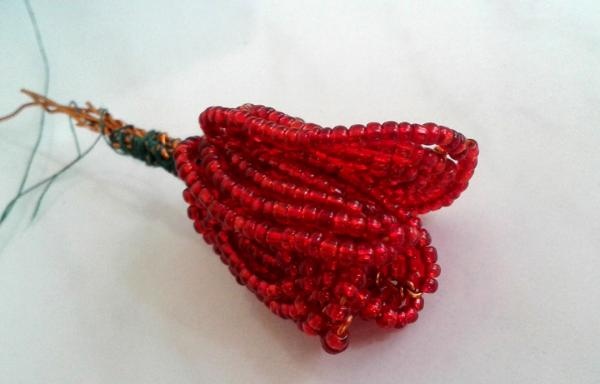
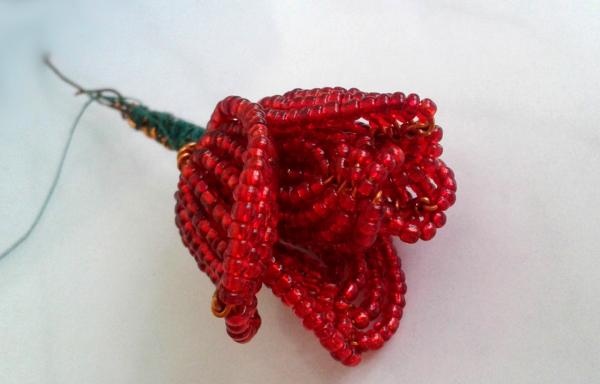
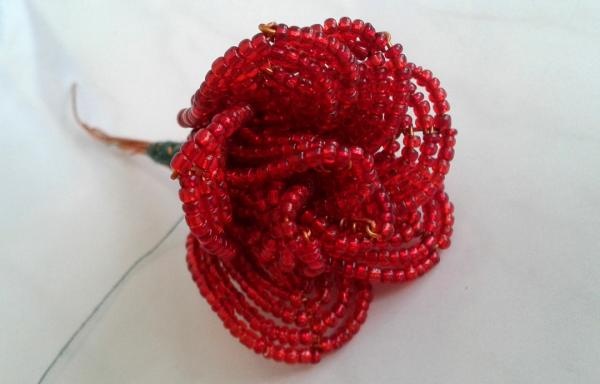

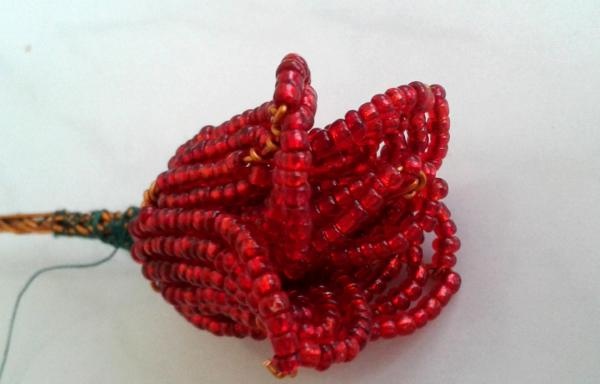
The extreme petals with two axes are attached. All rose petals are laid in a circle, overlapping.
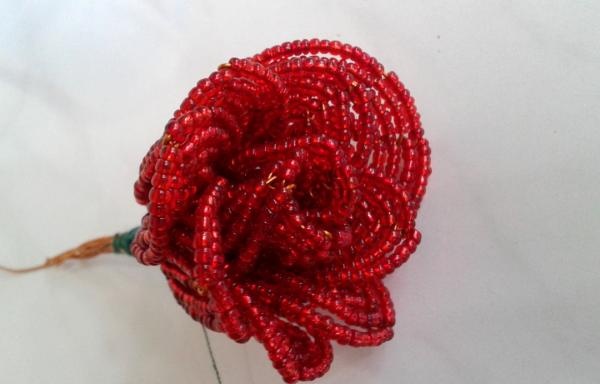
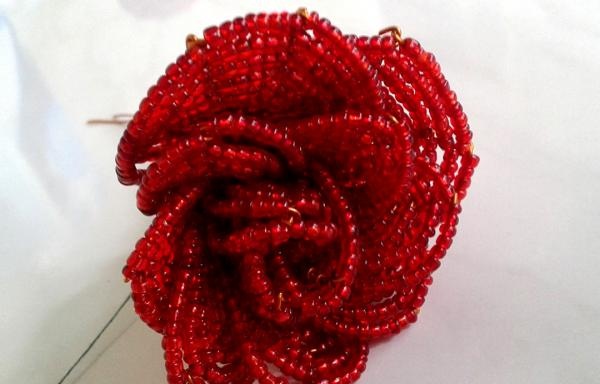
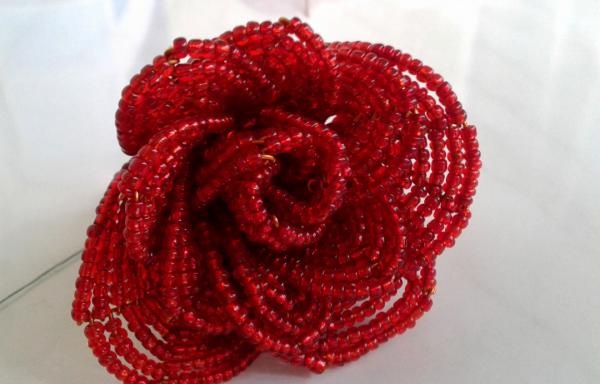
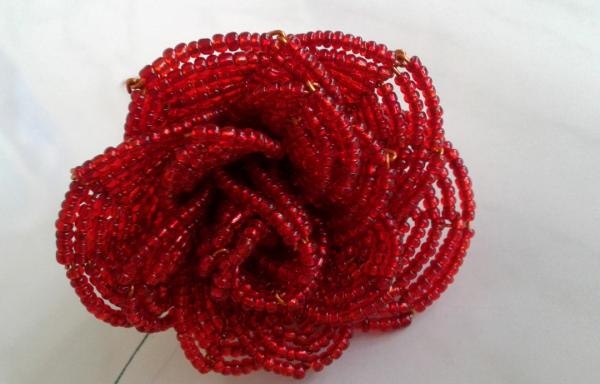
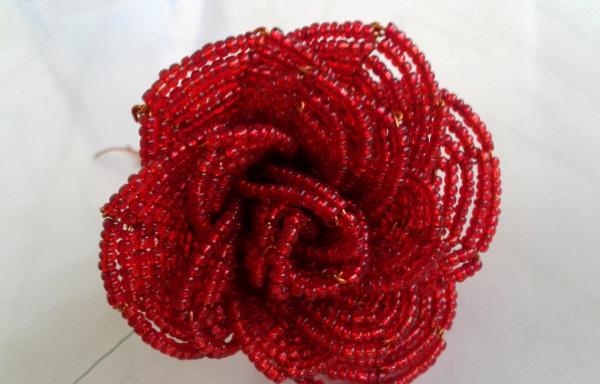
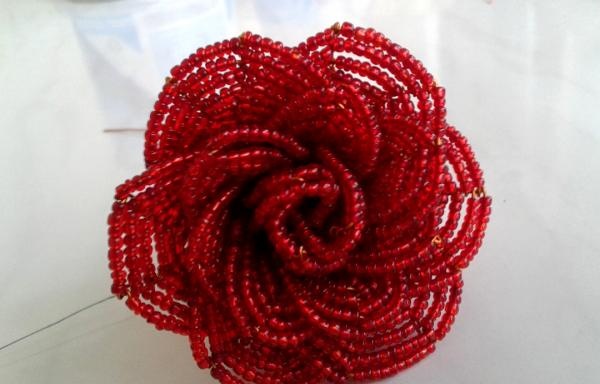
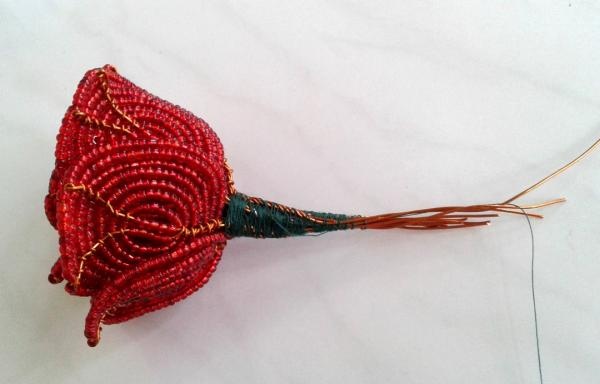
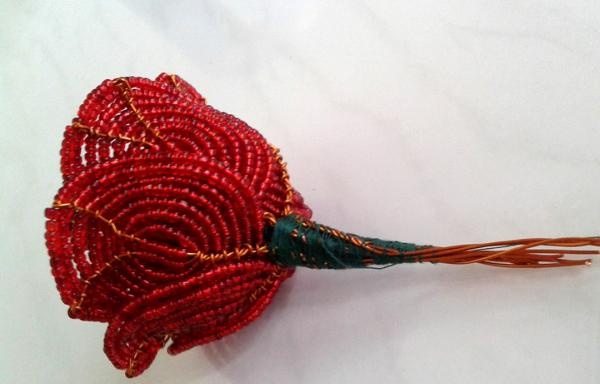
The last to be attached are the sepals, which also need to be given a curved shape relative to the bud.

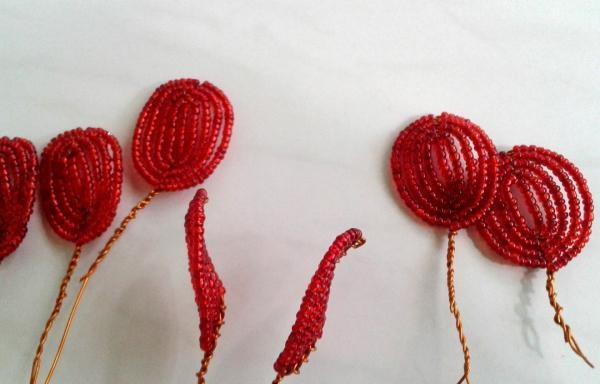
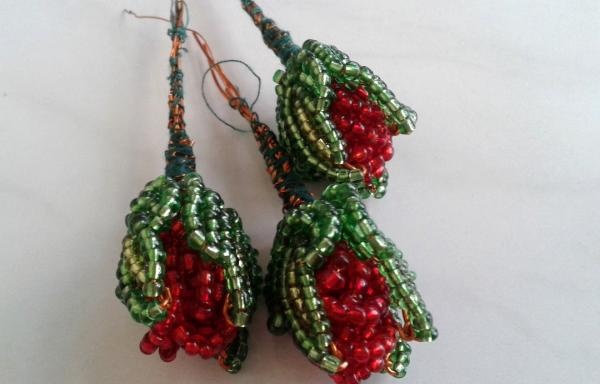
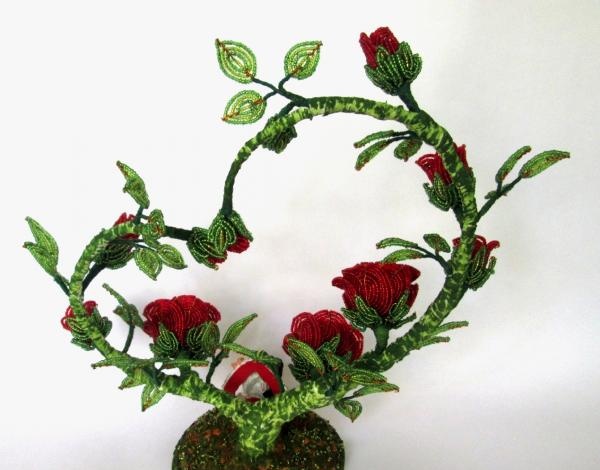
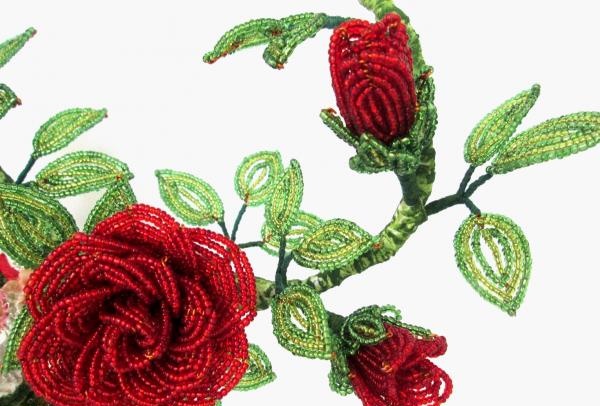
Weaving rose buds
1. Rose buds with five petals
For these buds it is necessary to weave five petals with eight leaves on the axis and five sepals.
Place one petal in the middle, folding it in half along the axis.Next, overlapping, four petals are attached with threads around the central one.

The last to attach are the sepals.
It is necessary to make three similar buds.
2. Rose buds with four petals
Rosebuds with four petals are made similarly to rosebuds with five petals, with the only difference being that the outer three are placed around the central petal.

You need to make two similar buds.
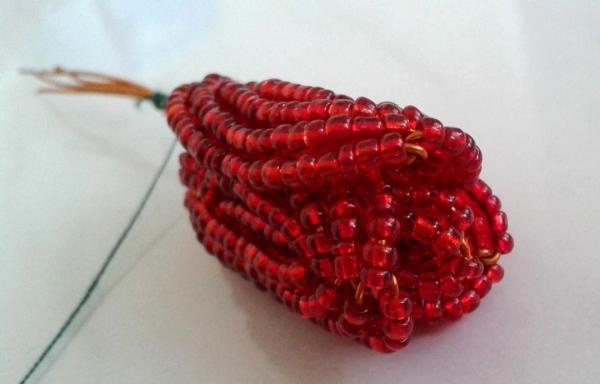
3. Closed rose buds
Closed rose buds are made from one petal with eight beads on the axis and three sepals.
The petal is twisted in a spiral and folded in half. It is advisable to use soft wire.
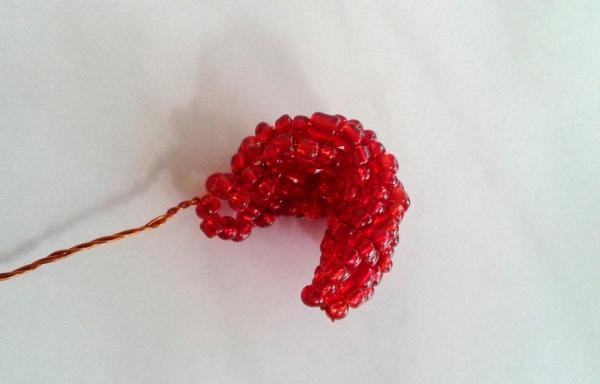
The twisted petal is surrounded by three sepals and secured with threads.
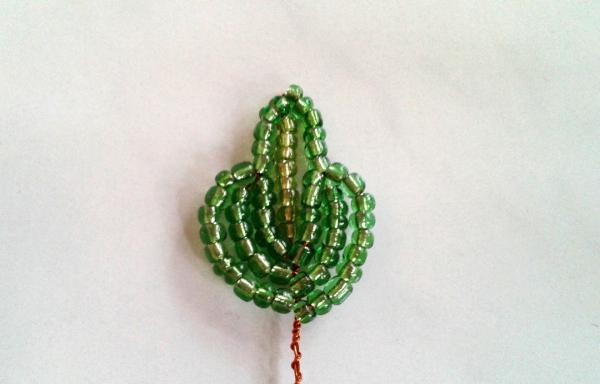
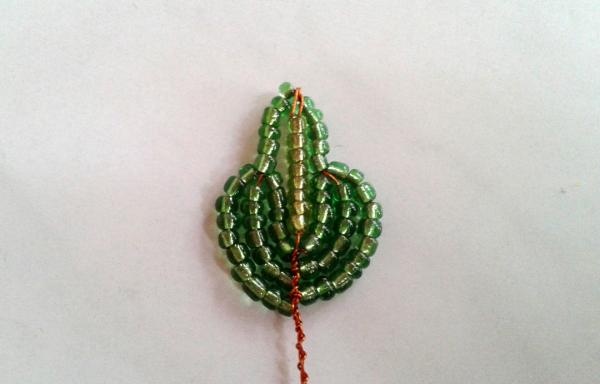
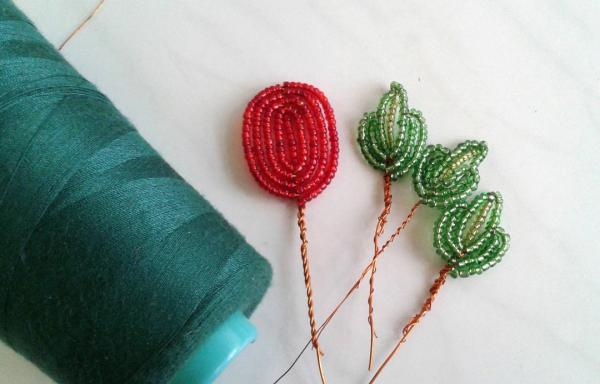
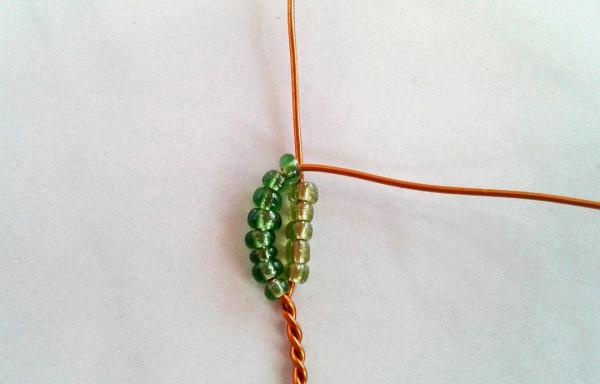
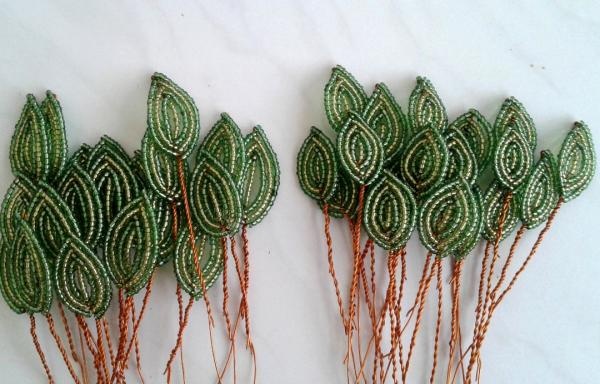
Weaving rose leaves
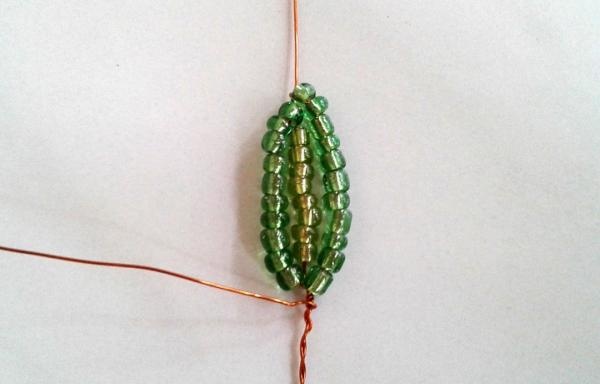
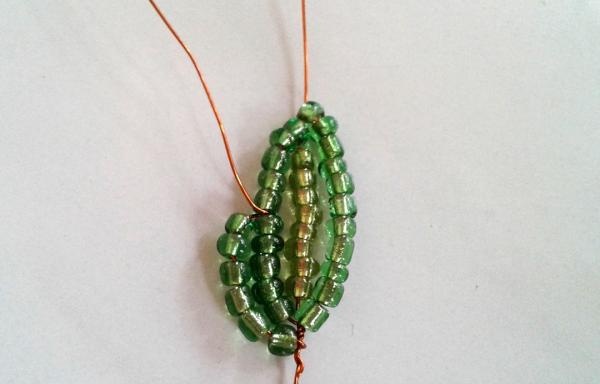
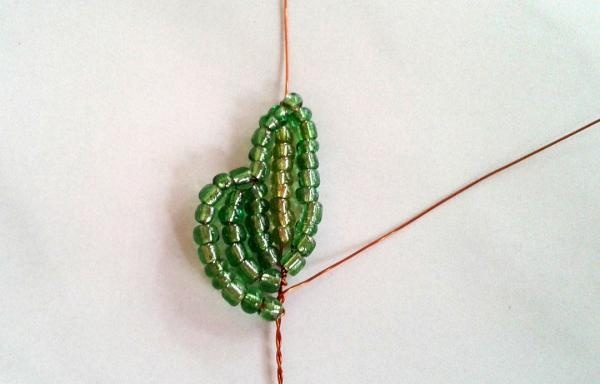
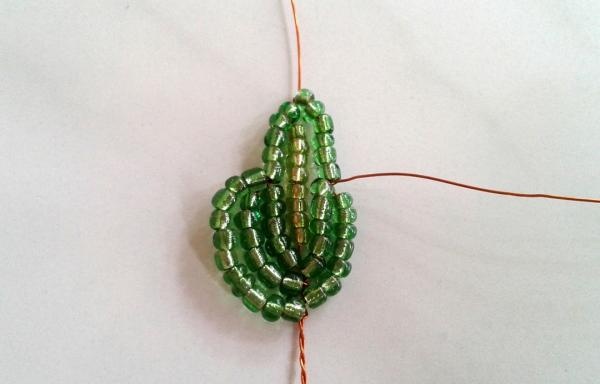
Rose leaves are also woven using the French weaving technique. A certain number of beads are collected on the axis - 5 or 8 - depending on the desired size of the leaves. The more beads on the axis of the sheet, the larger it will be.

The twist angle is acute. Alternating beads of different shades of green will make the leaves more spectacular.
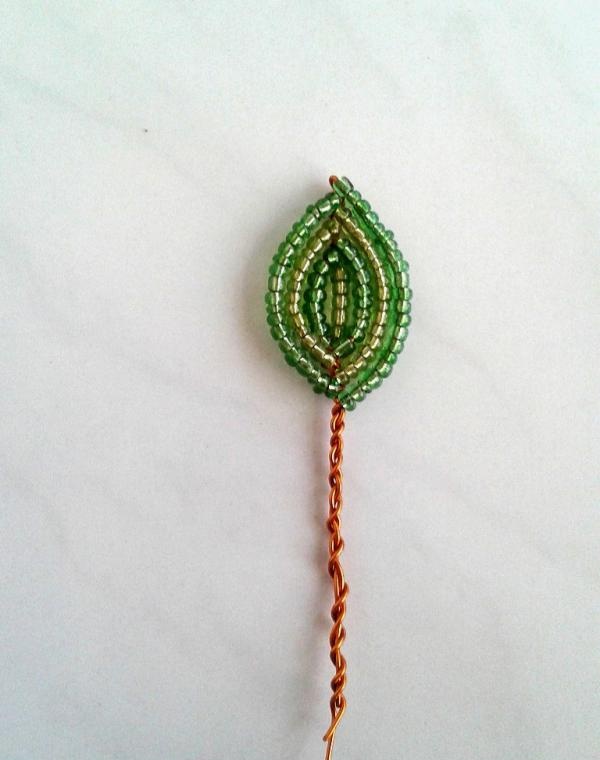
It is necessary to make such a number of leaves that it is a multiple of three. The more leaves, the more lush and green the tree will be.
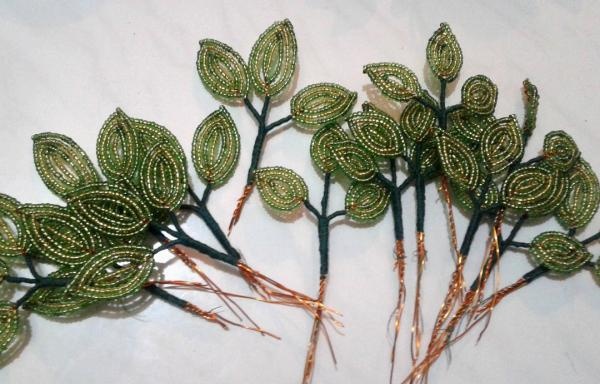
Next, the leaves are collected into branches of three leaves. This is done using green threads.
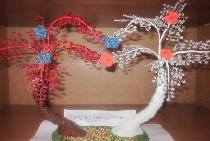
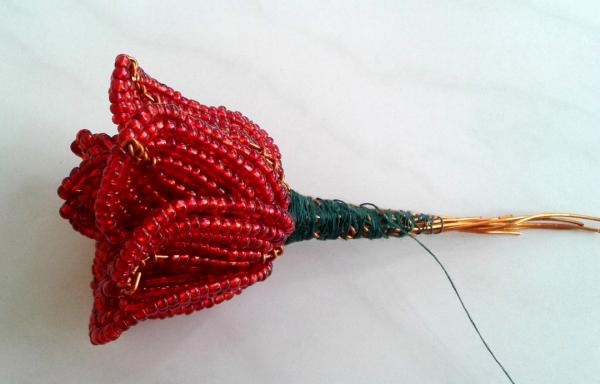
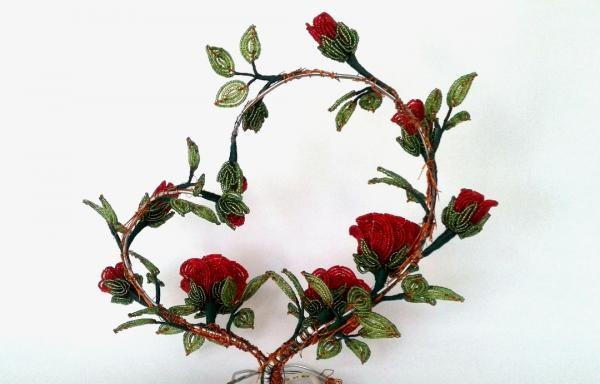
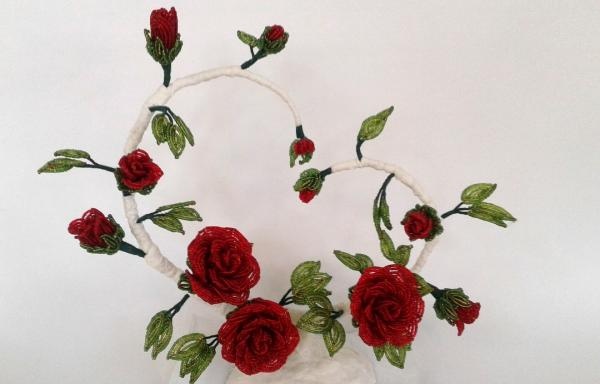
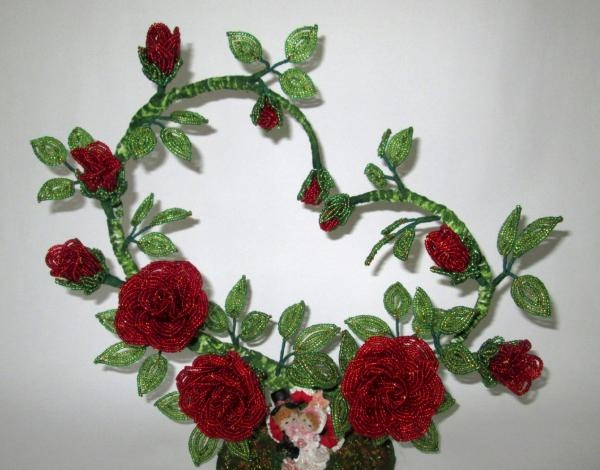
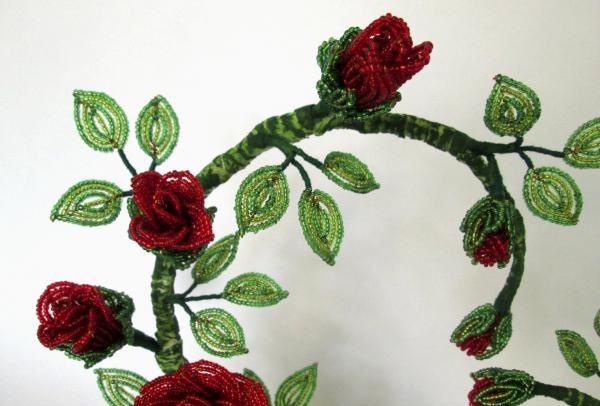
Assembling a tree of love from beads
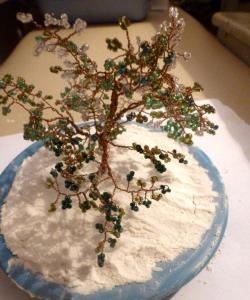
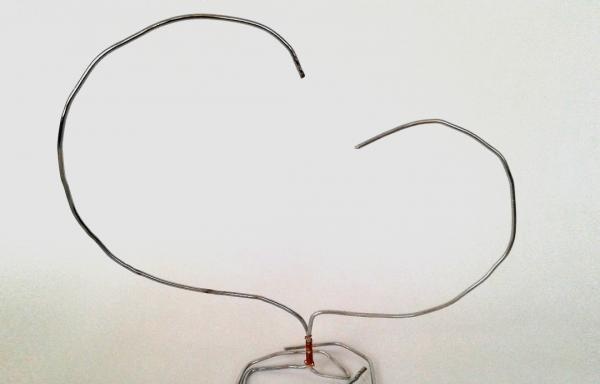
1. Making the frame
The frame for the beaded love tree is made of larger diameter wire so that it does not bend under the weight of flowers and leaves, maintaining the shape of the heart. Two pieces of wire are twisted into the required shape and connected using threads.The remaining length of the wire at the base is shaped into a ring (perpendicular to the trunk), thanks to which the tree will stand stably in an upright position. Thus, the length of the wire must exceed the length of the branches that make up the heart.
2. Design of branches
When the frame is ready, flowers and leaves are attached to it. Rose flowers turn out quite heavy. To securely fasten the flower to the base, you need to extend the stem by attaching stronger wire with threads, and then attach it to the base with thin wire. Flowers and leaves should be distributed evenly, creating a single composition.
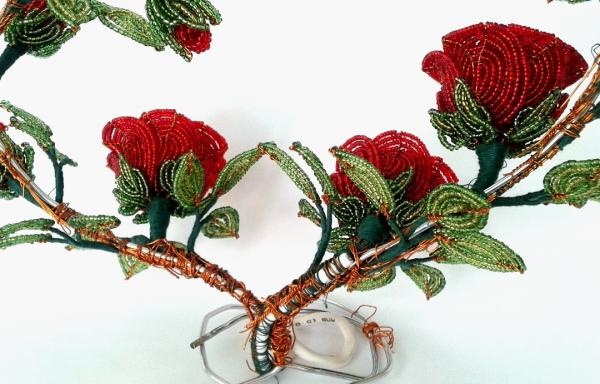
3. Decorating the tree trunk and clearing
To decorate the trunk of the tree of love and the clearing on which it stands, you will need:
– cotton wool;
- PVA glue;
– disk;
– beads;
– paints;
– brushes and water;
– clear nail polish or acrylic polish.
PVA glue is diluted with water in a 1:1 ratio.
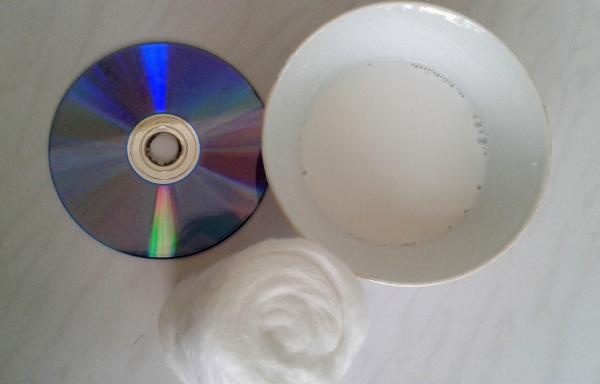
The tree is placed on a disk and covered with cotton wool soaked in a solution of PVA and water.
First, the branches of the tree are formed. The moistened cotton wool is pulled out and wrapped around the bare wire. Leaves and flowers must be bent before work.
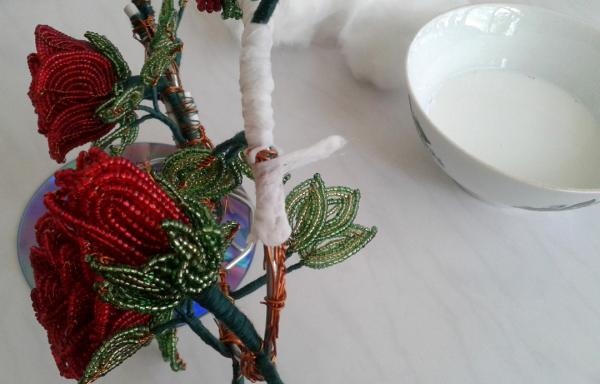
The base is also covered with moistened cotton wool, which glues the wood to the disk. It is important to fill all the voids between the wire and the disc.
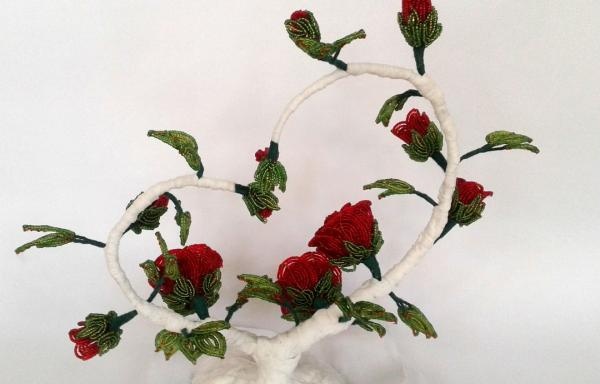
Next, the tree is removed to a ventilated room until completely dry. Dried cotton wool is painted in different shades of green and brown, applying lighter paint as the first layer.
The clearing is painted to match the wood.
After the paint has dried, a transparent varnish is applied to the trunk and clearing. Before the varnish dries, the clearing is decorated with matching beads. You can also install a figurine suitable for the occasion.
Conclusion
This kind of beaded tree does not require special care. It is enough to brush off the dust with a soft brush several times a month or blow it with a vacuum cleaner at low speed. Beadwork looks best in good lighting and in an easily accessible place.