To make it you will need:
- thin cardboard;
- pencil, ruler, compass;
- scissors;
- thick fabric of different colors;
- a needle and thread to match the color of the fabric (for those who are “friendly” with a sewing machine a little easier);
- glue, newspaper, toilet paper, brush.
First you need to assemble the paper base of the snake's head. The head consists of upper and lower elements. They are very similar, the difference is in size and slightly in shape. Therefore, we consider in detail the construction of only the top element. It consists of two parts - the oral plate and the head itself.
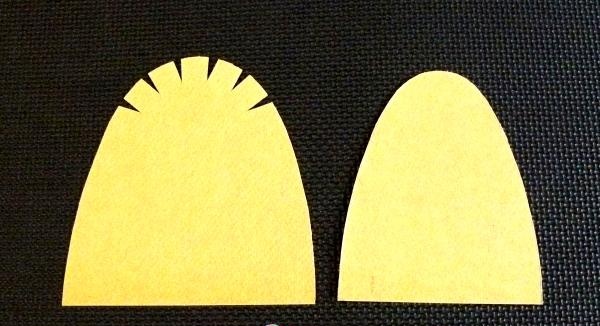
The mouth plate is cut out of cardboard and is the same for the upper and lower elements of the head. When you have cut out the two mouth plates, connect them with the straight side and trace them on paper.
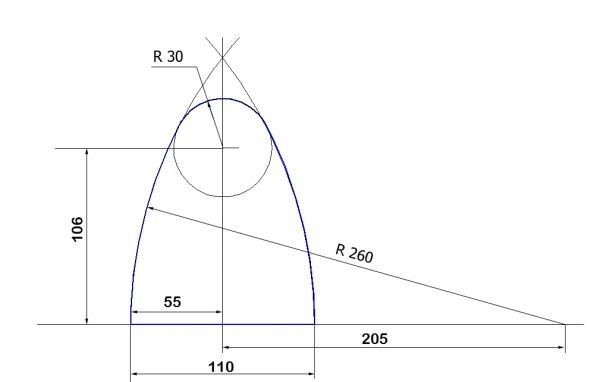
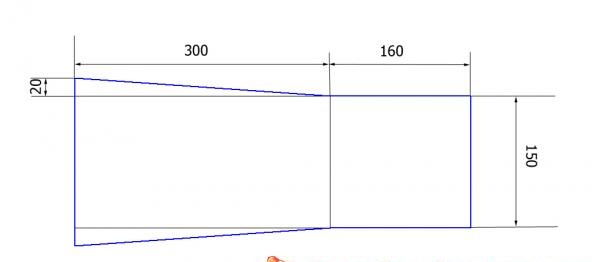
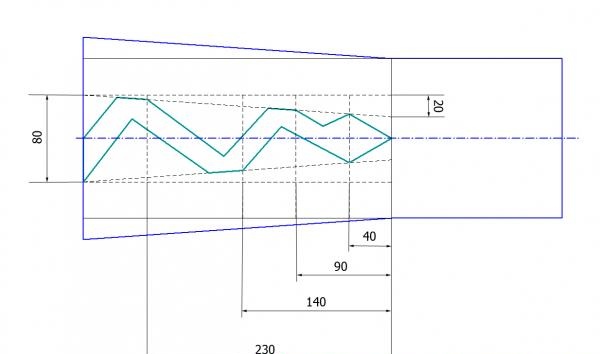
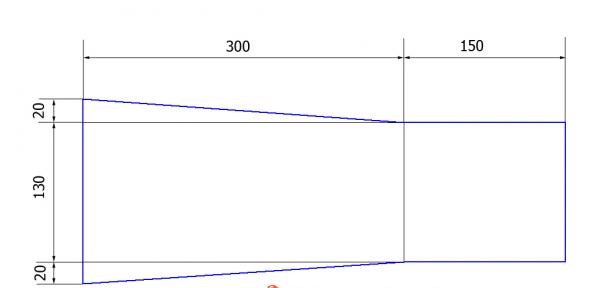
You will get a double template, which we will need later. The cardboard should not be thick - soft enough to bend and strong enough not to lose its shape when gluing. The upper part - the head itself - is cut out according to the drawing.
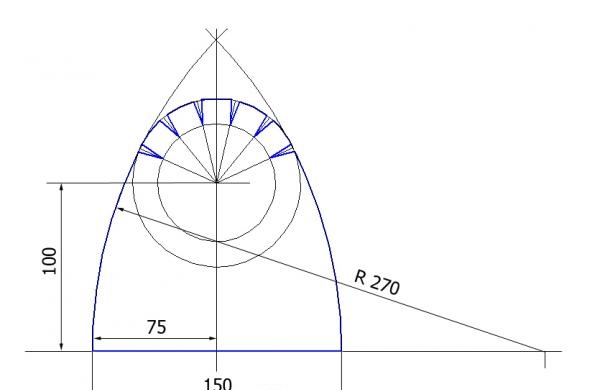
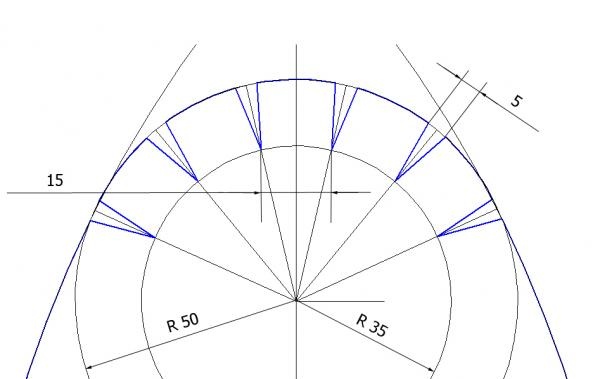
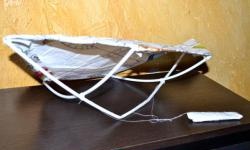
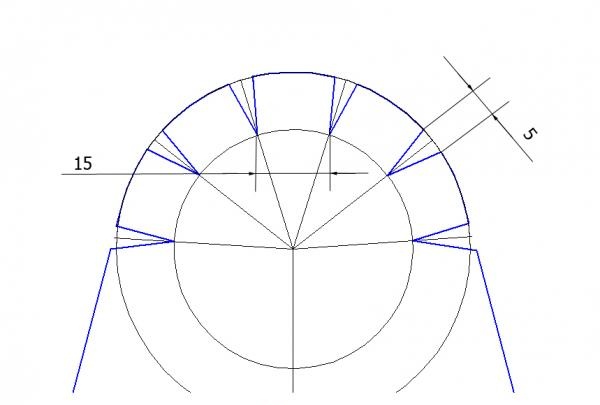
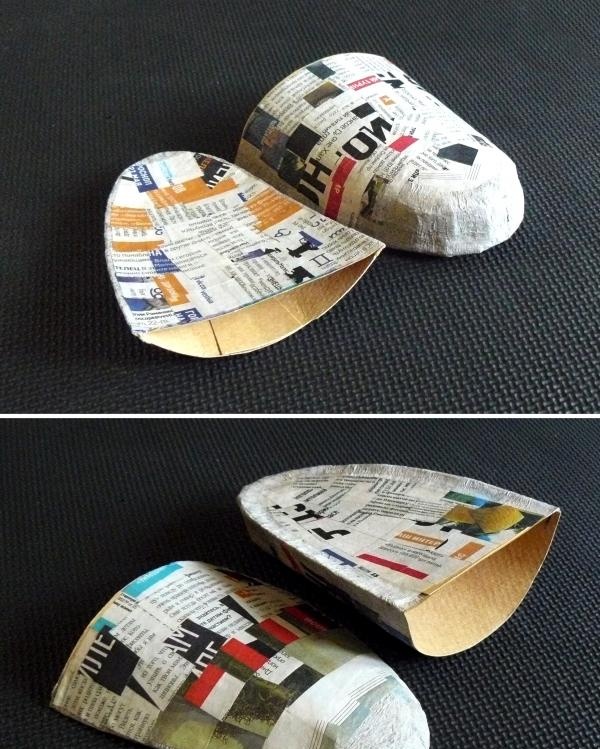
The cuts at the front are glued (or stitched) together to create a convex shape. The upper part is then folded and glued to the mouth plate. To speed up the process, you can sew with large stitches, while still maintaining the ability to correct possible errors. Now, for strength, we paste the resulting form with newspaper using the technique papier mache. In inconvenient places - on the fold, in places of cuts - it is better to use toilet paper instead of newspaper. It covers irregularities better. We cut the paper into squares of approximately 1.5 x 1.5 cm, coat the area where it is pasted with glue with a brush, touch the piece of paper with a brush with glue, transfer it to the prepared area, and smooth it with a brush. Apply 2 – 3 layers of papier-mâché. To remove the angularity in the places of the cuts, we moisten the problem areas with water on both sides with a brush, after a few minutes the form will get a little wet and use our fingers to give the desired smoothness. We glue another 4 - 5 layers. This results in a fairly strong shape for the upper part of the head. Prepare the bottom element in the same way.
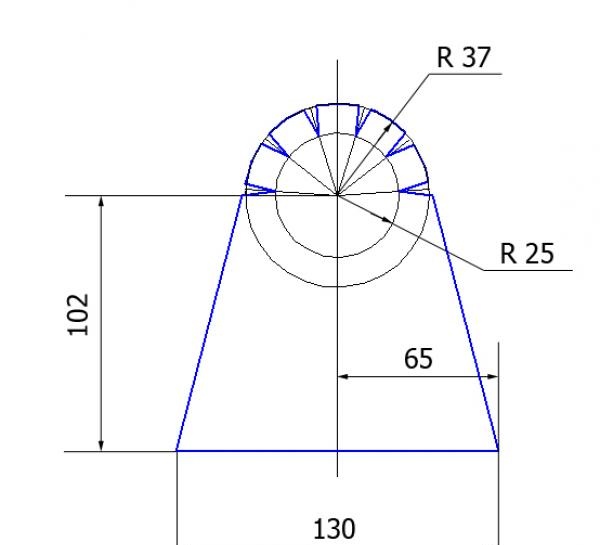
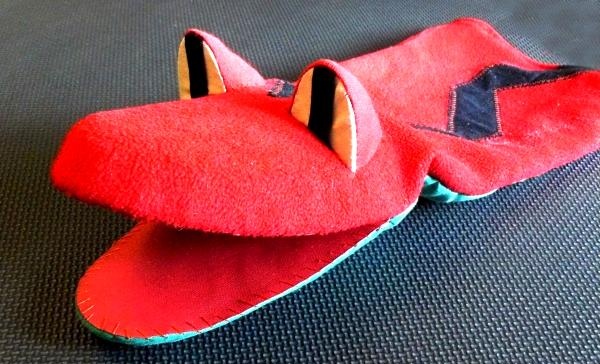
The dimensions are indicated so that four fingers of an adult's hand fit into the upper part, and a thumb into the lower part.
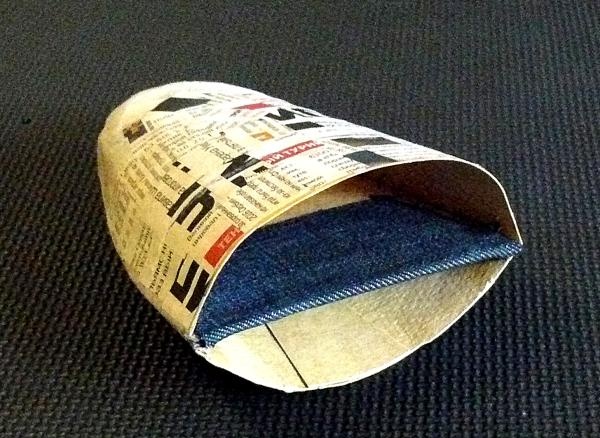
We combine the upper and lower elements, make sure that there is no distortion, and sew along the even side. Using a piece of thick fabric (for example, from jeans), we glue the parts together so that the fabric covers the entire flat area.
After the glue has dried, cut the threads on the side of the mouth.
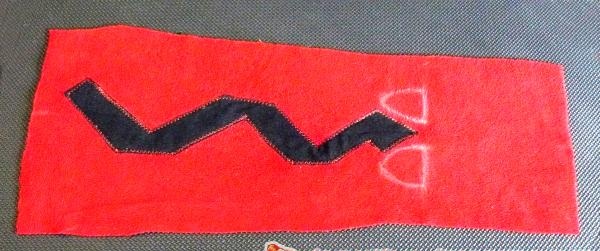
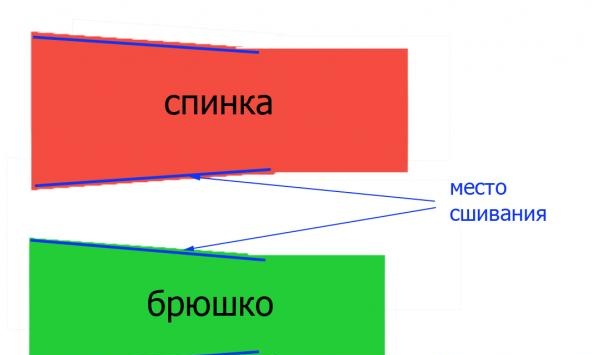
The fabric for the snake’s body should be dense, not very thick; if it stretches a little (not knitwear), this is an additional plus. The colors can be different, with or without a pattern. We select different colors for the upper (back) and lower (abdomen) parts. Plain light for the eyes, black for the pupils. Cut out the top part - the back.
We cut out a pattern from dark matter and sew it on (preferably by machine).
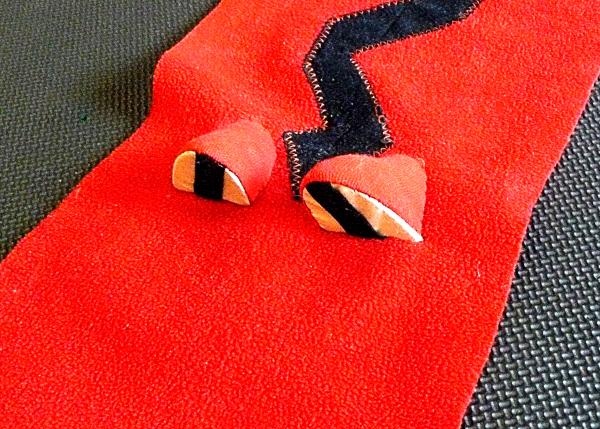
Making the eyes.
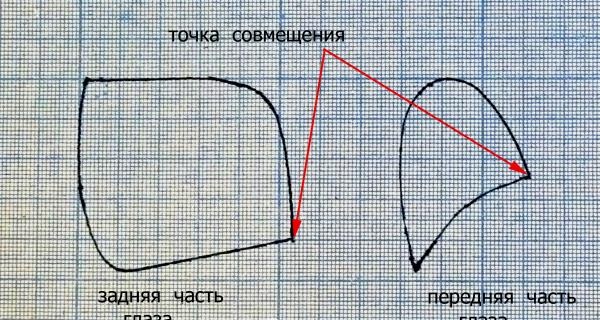
We make a strip of black fabric 1 cm wide and sew the eyes vertically in the middle. To position the eye vertically, sew on the back of the eye and insert a cardboard insert cut from the pattern.
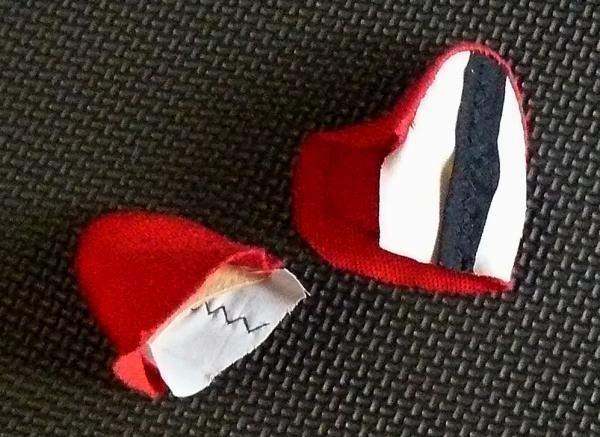
The eyes are symmetrical. Sew the eyes to the marked place on the back.
Do not sew completely, leaving a gap of several stitches. After this interval, fill the eye with cotton wool. Roll up a small piece of cotton wool and push it inside with tweezers. Repeat until completely filled. Having filled the eye with cotton, we sew up the gap.
Cut out the belly.
We sew the back and belly from the inside out, leaving free space for the head.
We insert the head into the resulting skin and attach it with a few stitches to the glued thick fabric (denim) in the corners of the mouth.
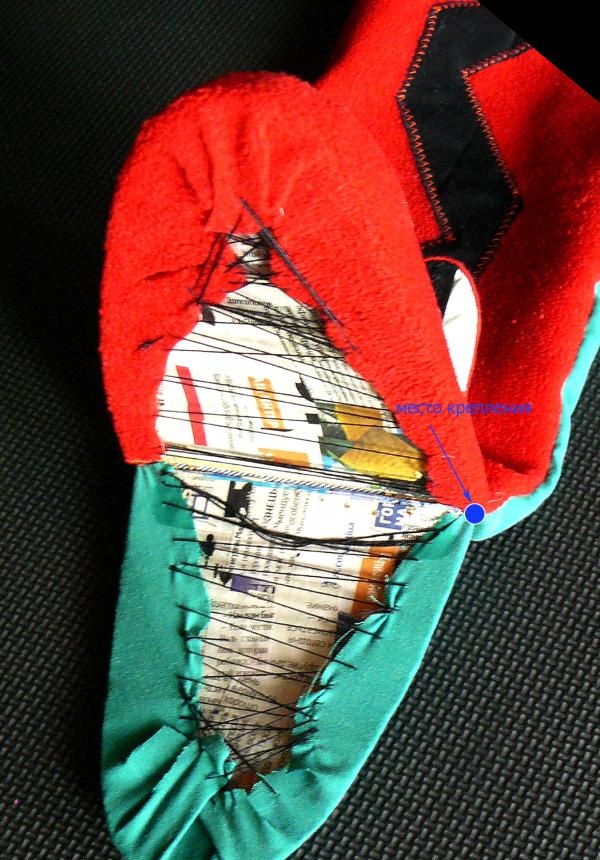
The skin should fit tightly around the head. We cover the upper jaw with fabric from the back. We tighten the fabric on both sides of the jaw with threads, and cut the resulting folds to obtain the smoothest possible surface. We also tighten the lower jaw.
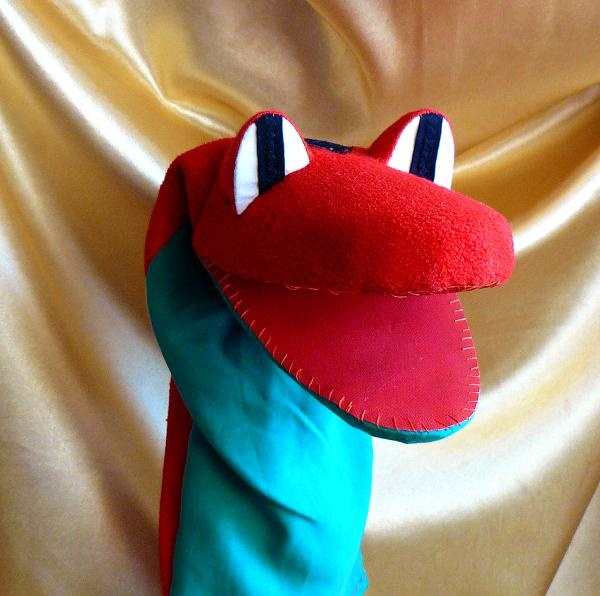
Using the double template of the mouth plate, which we made in advance, we cut out the mouth covering from thick fabric or from dermantine (it does not fray around the edges). We try it on and adjust it if necessary. Sew the mouth covering along the edge of the mouth. We sew the back of the sleeve with snake skins. We put it on our hands and “talk” to the children.