To make an elastic band “Hat” you will need:
- scissors.
- stationery knife.
- ruler.
- ball pen.
- wide ribbons of lilac and crimson colors.
- medium width white ribbon.
- narrow silver ribbon.
- glue gun.
- tweezers.
- polymer glue.
- decorative centers.
- lighter.
- thick cardboard.
- white hair elastic.
- a roll of paper napkins.
Creating decoration.
From the edge of the prepared sleeve, measure 2.5 cm with a ruler and mark a point. Gradually repeat the action around the entire circumference. Then the resulting points need to be connected into a clear, even line.
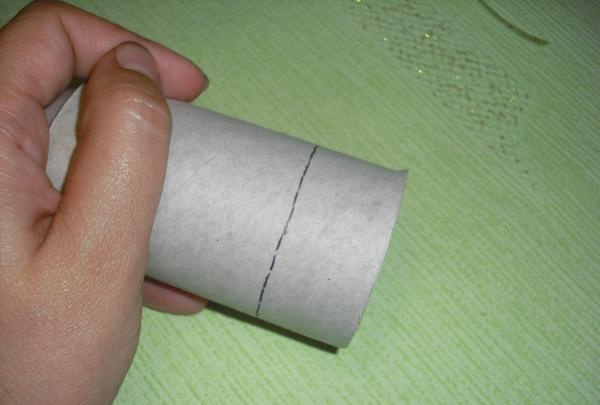
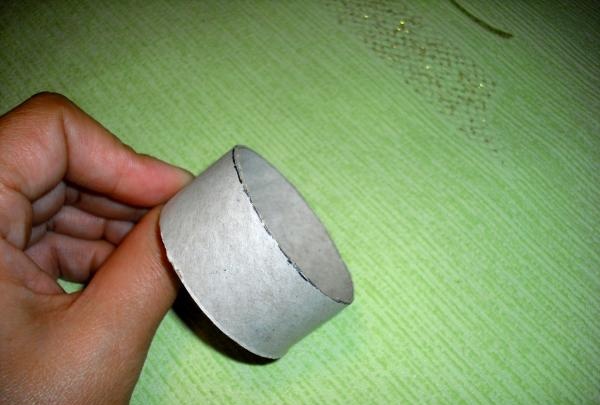
The sleeve must be cut along the resulting line, separating a small part from it.
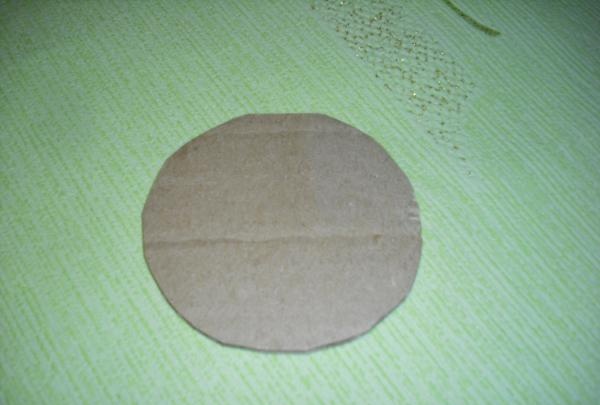
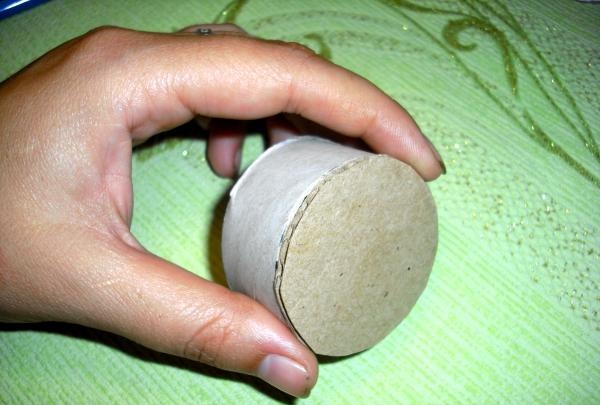
Now you should prepare a large circle with a diameter of 9 cm from thick and thick cardboard.
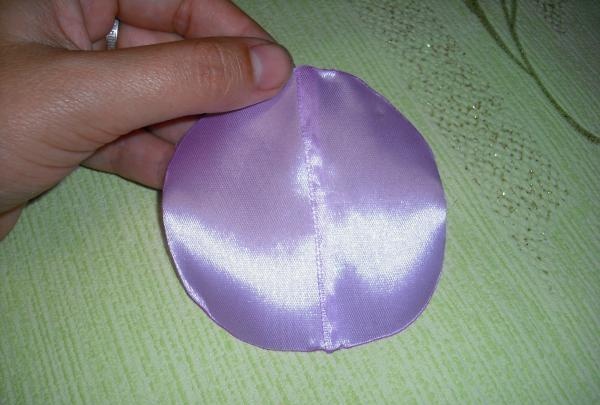
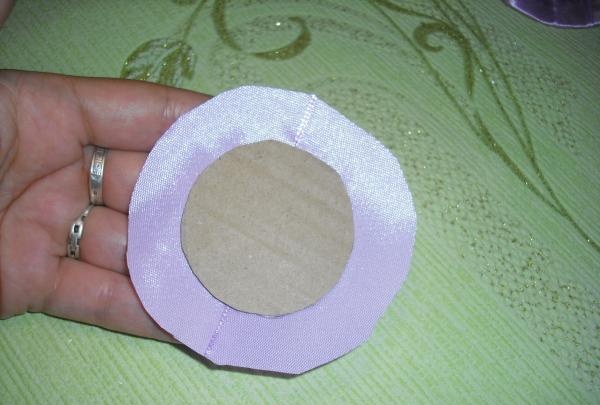
You need to make the same circle from a wide lilac ribbon, but add 2 cm for further processing. Its edges must be carefully melted.
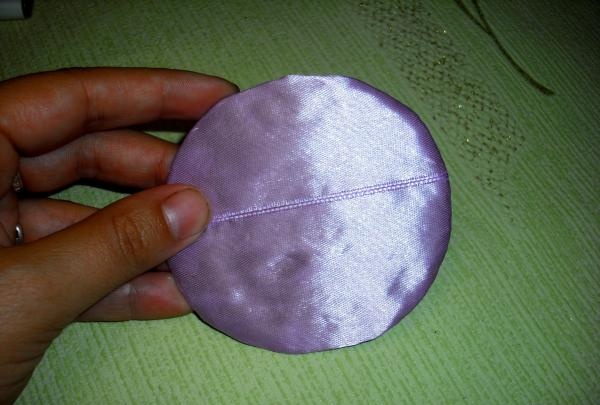
The two circles must be connected by smearing one side of the cardboard piece with polymer glue.
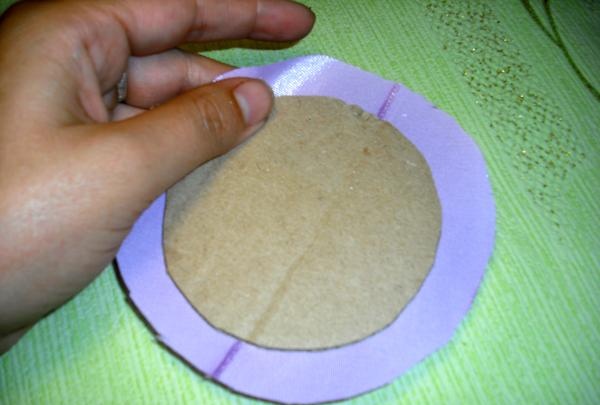
The remaining un-glued tape allowances must be slightly cut and wrapped, attached to the other side of the cardboard circle.
Now you will need a small circle made of thick cardboard, the diameter of which matches the size of the sleeve segment.
Then you need to make another circle from the lilac ribbon, with a radius of 3.5 cm. Since the width of the ribbon is not enough, you should glue the two strips together.
Now both circles made of cardboard and tapes must be connected together, pre-lubricated with glue.
A piece of sleeve should be securely glued to the center of the large circle prepared earlier. To do this, it is better to use hot silicone glue, applying it to the inside of the sleeve.

Now you need to apply a thin strip of glue along the edge of the small cardboard circle and connect it to the attached sleeve.

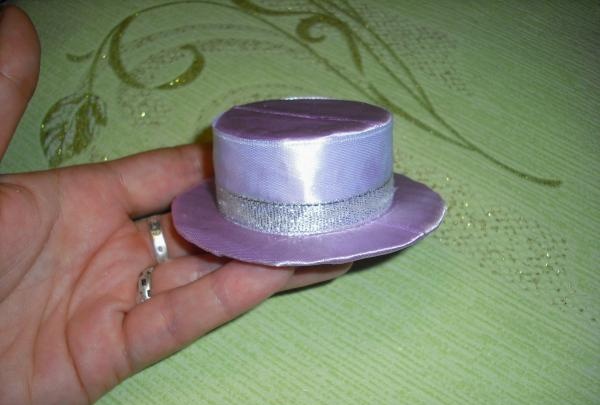
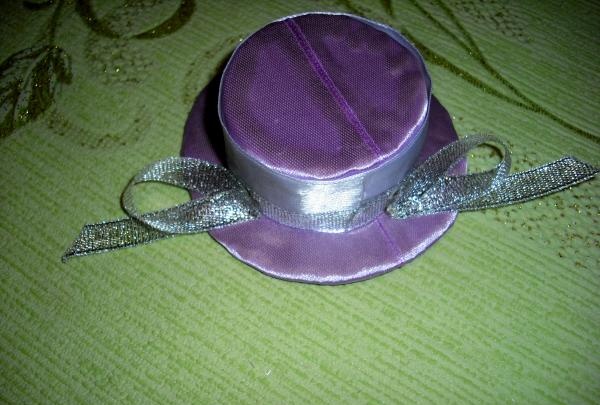
The base of the hat is almost ready, we need to continue finishing it.

The tape allowance should be slightly cut along the entire circumference.

Then the free edges of the tape need to be glued over the entire surface of the sleeve, trying to avoid large folds and creases.
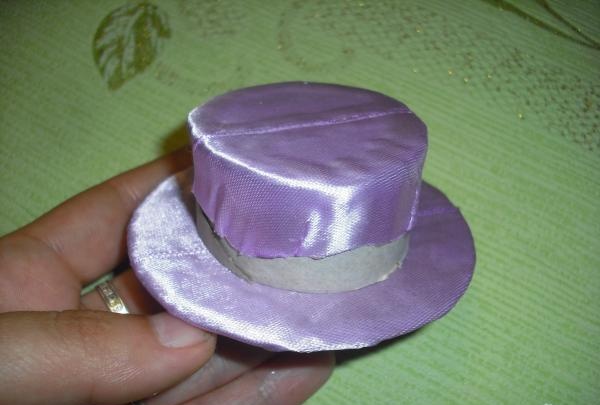
Now you need to attach a white tape to the side of the sleeve using polymer glue. This way, all cuts and edges will be neatly covered, and the hat will be more beautiful.
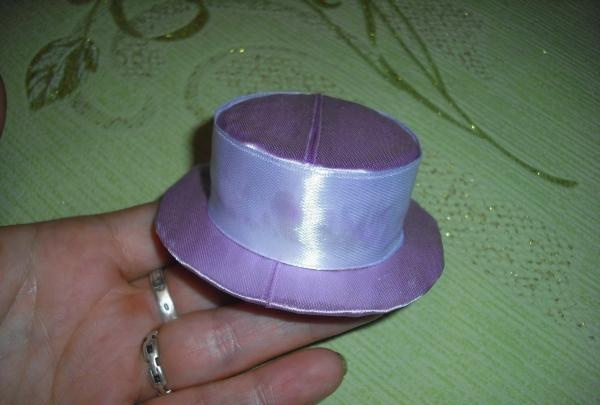
All that remains is to lay a strip of narrow silver tape along the bottom edge of the white braid.
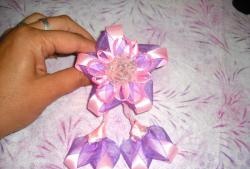
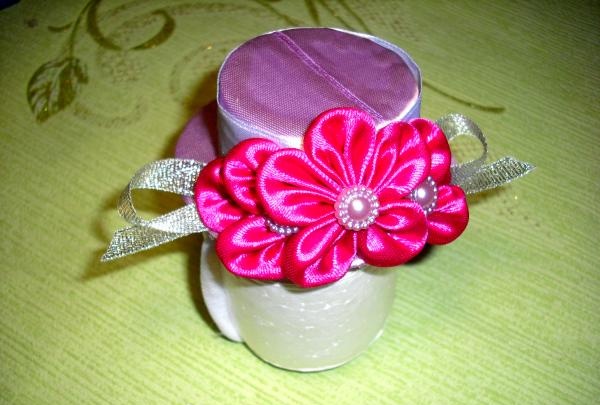
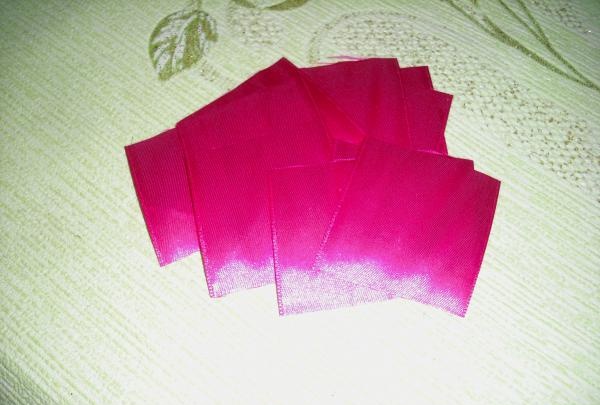
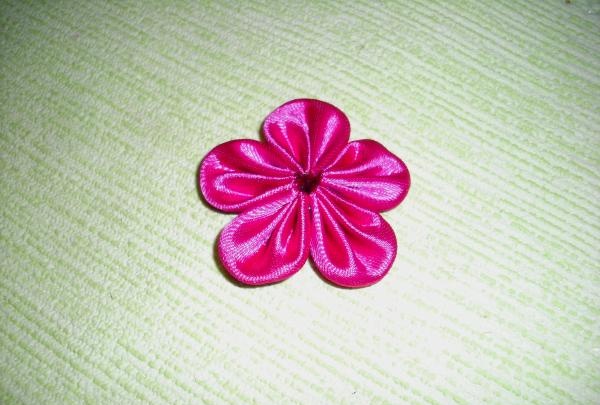
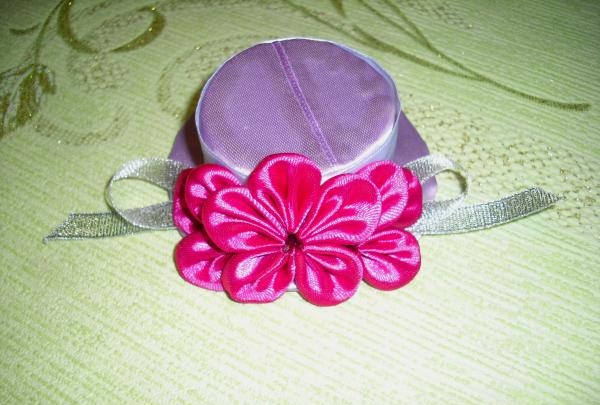
The hat is ready, all that remains is to decorate it with flowers. To do this, you will need squares of crimson ribbon, with sides of 5 cm. A total of 11 such parts will be required.
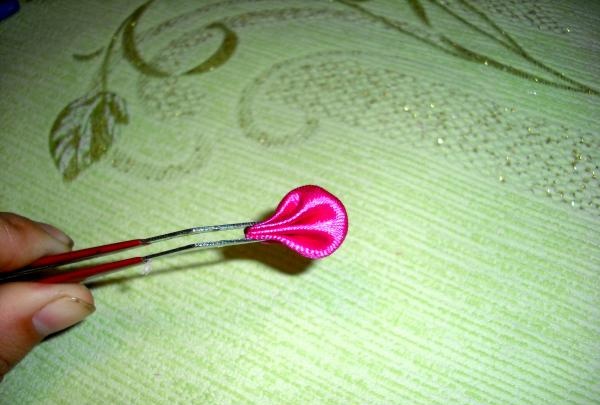
Now you need to make petals from all the created squares.Each piece must be folded diagonally from two opposite corners, giving the shape of a triangle.
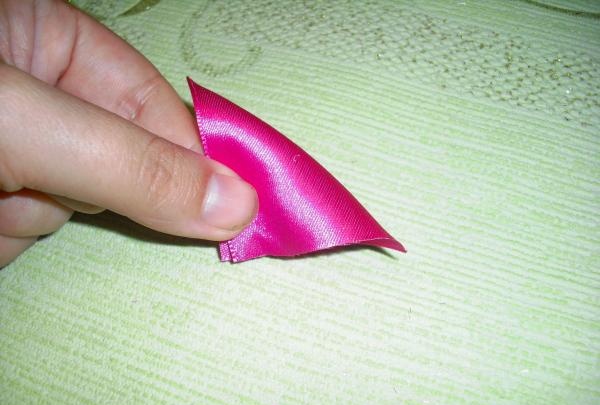
The folded sides should be left untouched, and the cut edges should be gathered into small folds.
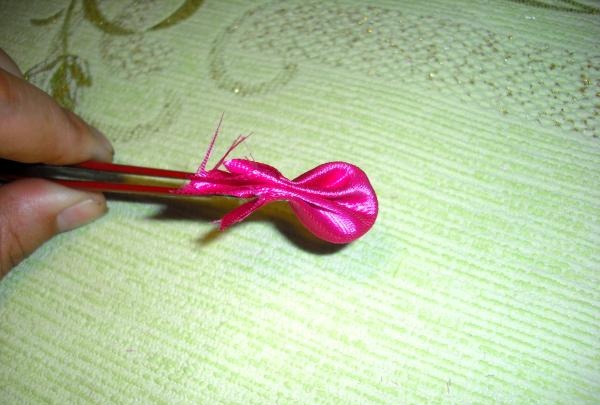
Now all the sections are connected together, they should be cut, aligned. Next, to secure the even cuts, you need to singe them, carefully processing all the folds.
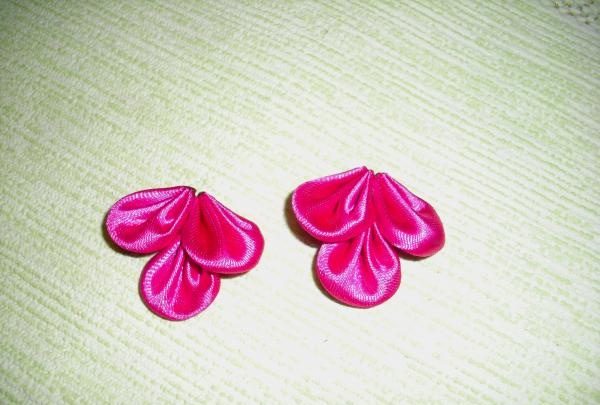
All 11 squares make beautiful rounded petals. You need to assemble a flower from them using only 5 parts.
From the remaining parts you need to glue two fans, combining three petals together.
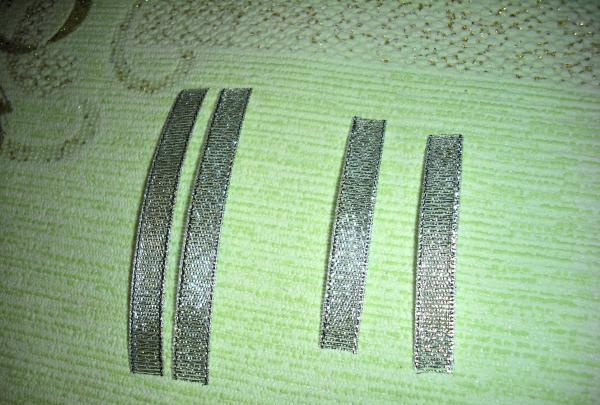
To decorate the hat you will need a bow, it needs to be made from a silver ribbon. You need to start creating a bow by preparing pieces of two different lengths.
You will need two strips of 8 cm and two of 6 cm.
Loops should be made from long pieces, aligning the cuts, and immediately singeing them to solder them together.

For short sections, you need to make oblique cuts, which also need to be treated with fire, keeping them from falling off.
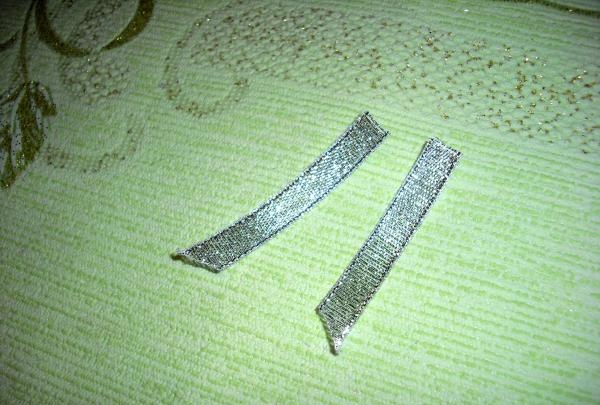
Now these parts need to be connected together, combining one loop and one strip. You get two halves of a bow.
The created parts of the bow should be glued to the hat, placing them at a distance of 4-5 cm.
In the center of the empty space you need to glue prepared small fans and a flower.
The bottom brim of the hat was left untreated, so the cardboard surface should be covered with lilac satin ribbon. Then you need to securely fasten a white hair elastic in the center of the bottom side of the hat.

All that remains is to add beautiful centers to the flower and fans and straighten their petals.
The original rubber band “Hat” is ready!