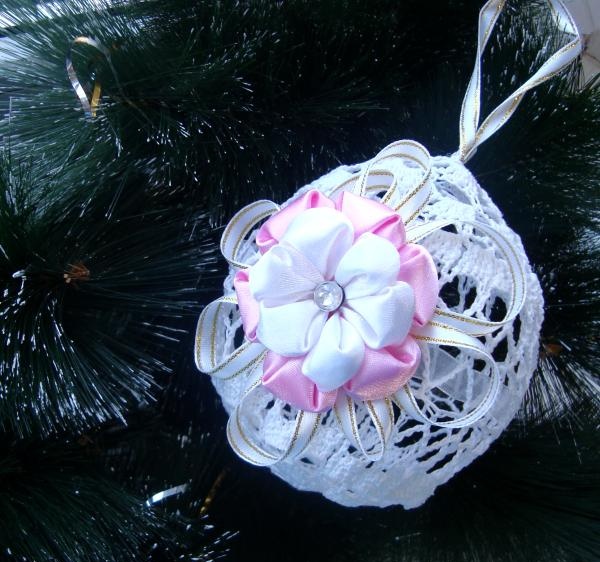
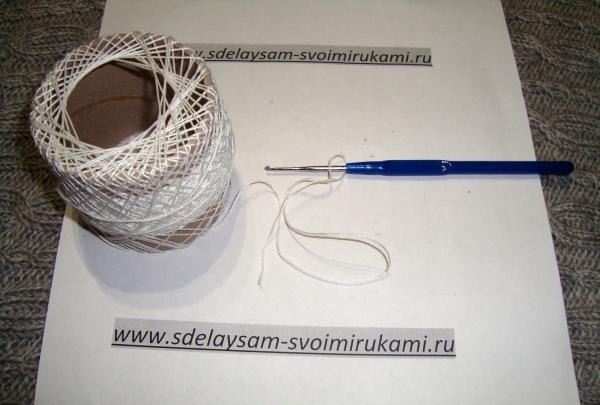
To create a ball you will need the following set of materials:
- The threads are white (100% cotton).
- Hook No. 1-2.
- PVA glue or thick sugar syrup.
- Balloon (small) and pump.
- Ribbon 1 cm wide made of white organza.
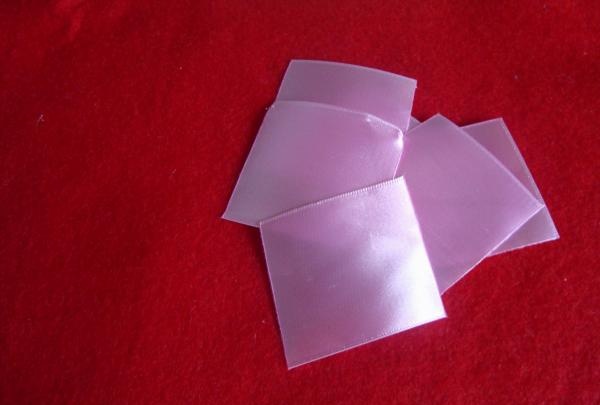
- Satin ribbons are white and pink, their width is 5 cm.
- Thin white ribbon (0.5 cm wide) with gold or silver stitching.
- Hot glue.
- Rhinestone for the center of the flower.
- Lighter.
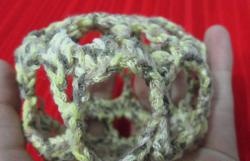
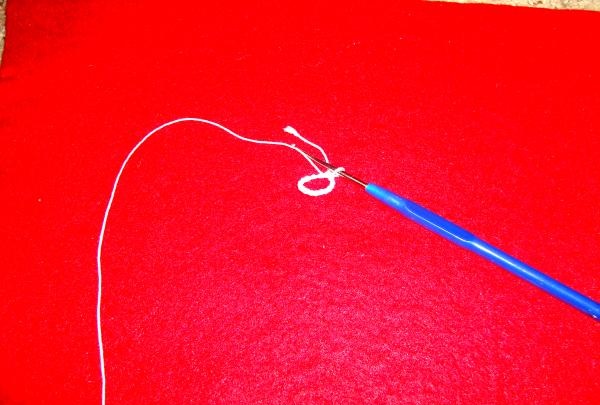
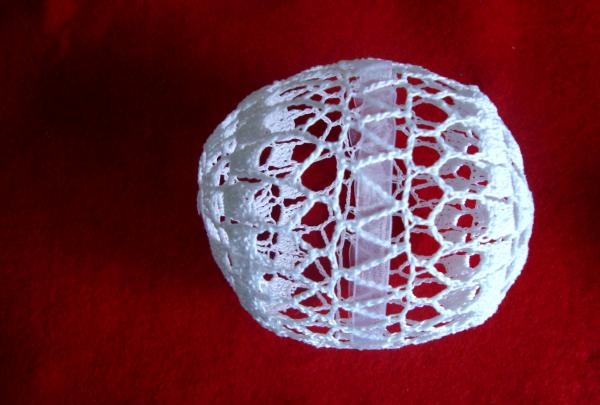
At the first stage, you need to knit a ball, which consists of two identical hemispheres, and then stitched. We knit the first half of the ball according to the following pattern:
We tie the first 9 air loops (air loops) into a ring.
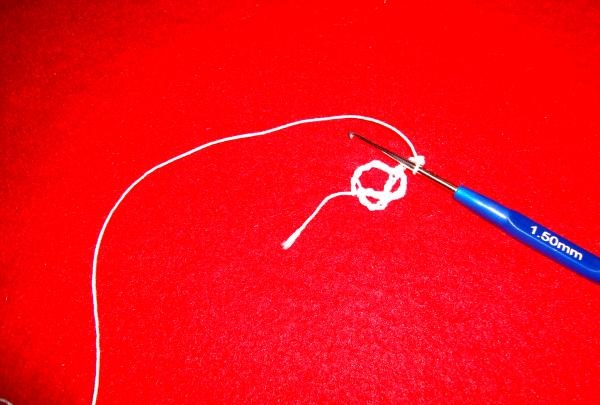
In the second row, we make arches from air loops (3-4 loops each), hook them to every second loop of the first row.
Then in the third row we knit three double crochets into each arch. The next row consists of arches of 5 air loops.
In each semicircle, knit 7 stitches with a double yarn over loop, and between the fragments, knit 3 chain loops.

The next row consists of arches that form air loops. Arches are knitted over fragments of columns from the previous row and over the gaps.
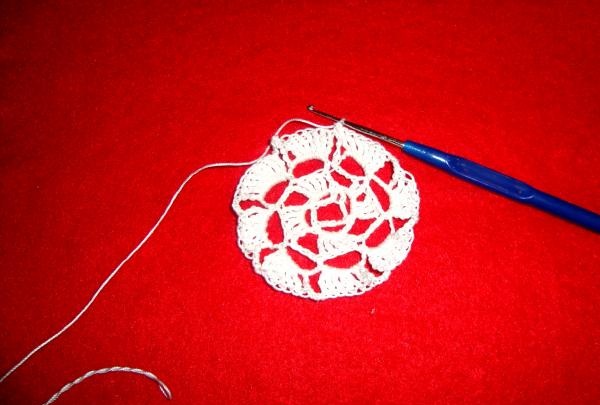
Next, again knit a row of double crochets that “grow” from the arches. Since the number of loops increases with each row, a circle is formed.
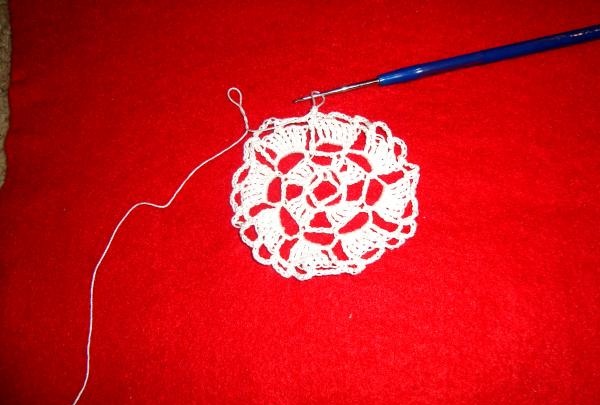
Tie the pattern again with openwork elements made from simple air loops.
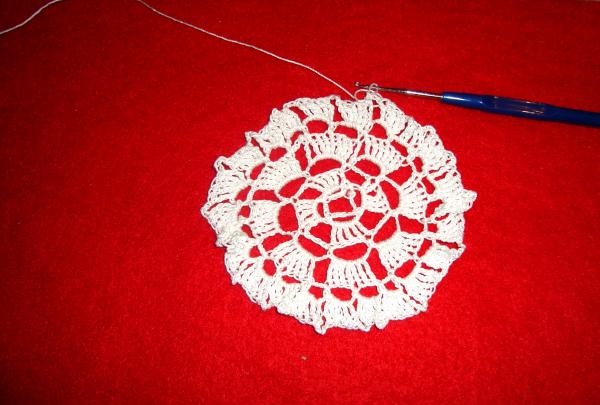
On the next row, skip a few laces when knitting arches to raise the edge of the semicircle.
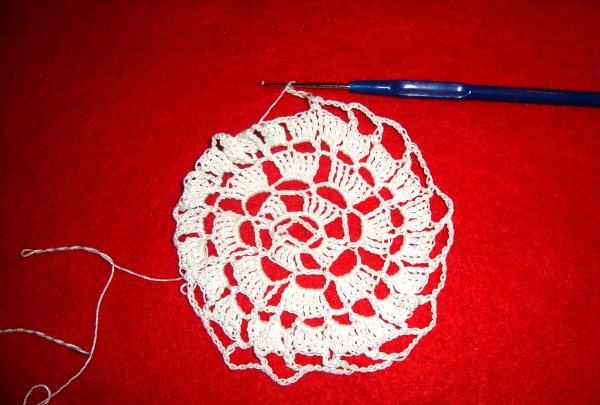
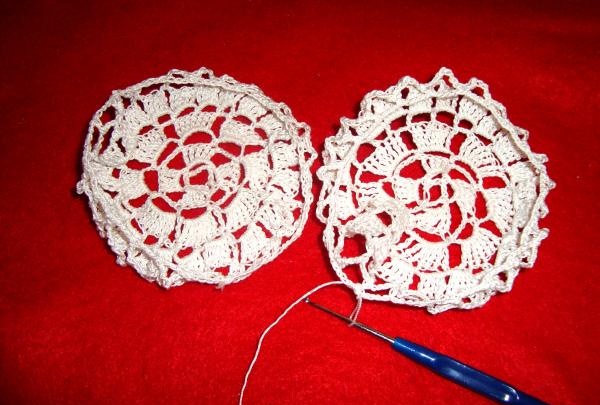
The second half is knitted according to the first pattern, all the loops must match and you will get a similar piece.
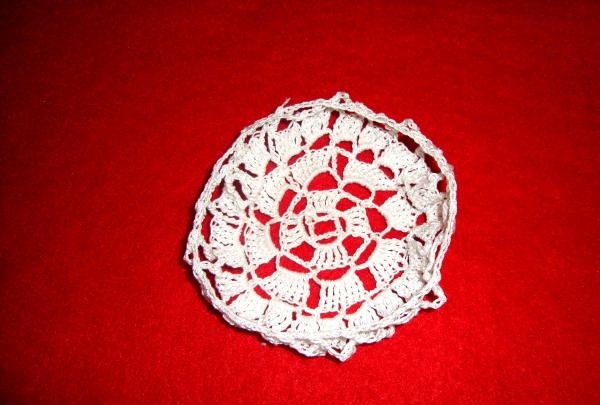
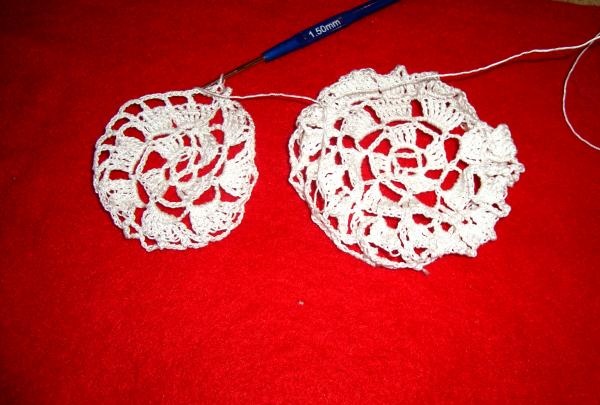
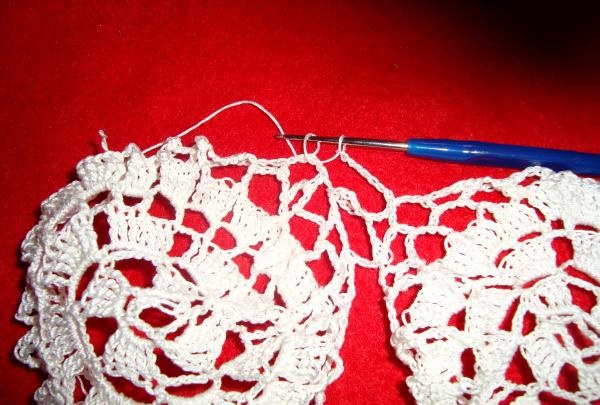
In the next step, tie two hemispheres together. In this case, you can use a binding of 3 air points. and hook first to the right edge, and the next knitted loops are fixed to the extreme row on the left.
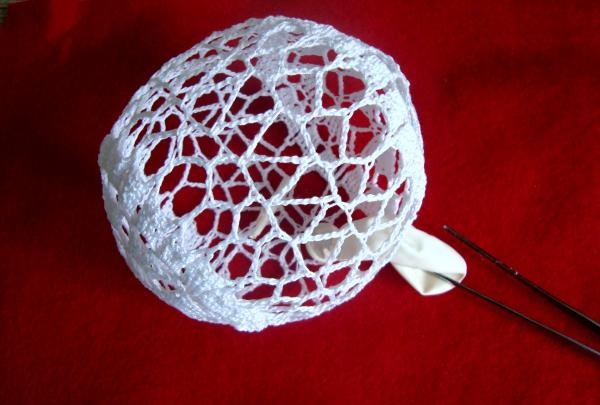
You will end up with such a shapeless thing that doesn’t look much like a ball.
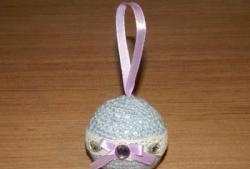
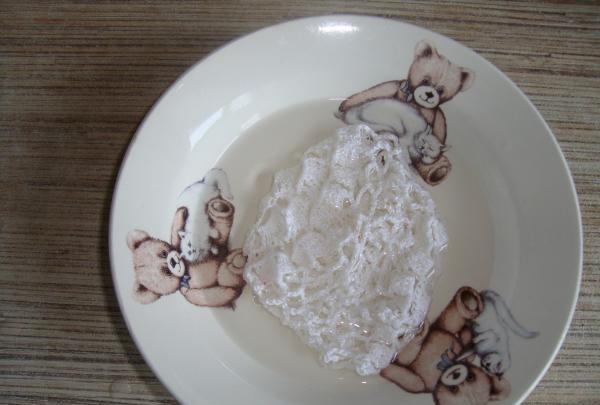
When the ball is knitted, we prepare a solution, thanks to which the knitted ball will “harden” into a round state. The solution can be of several types - for example, 30 ml of PVA glue can be dissolved in half a glass of warm water. Another way is to boil thick sugar syrup, but it must be stirred frequently so that it does not burn and take on a brown appearance. Immerse the entire ball in the warm solution for 1-2 minutes so that the threads are thoroughly soaked.
Next, take out the product, place it on a towel and inflate the balloon inside the sphere to the required size.
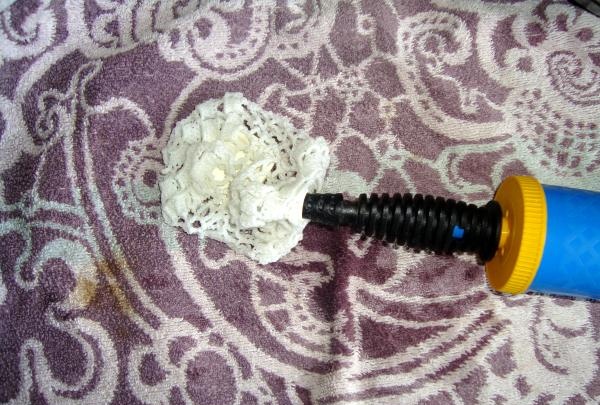
Tie the ball and leave the work to dry.

When the product has thoroughly dried and takes on a rounded shape, the balloon must be burst and carefully removed from the knitted ball.
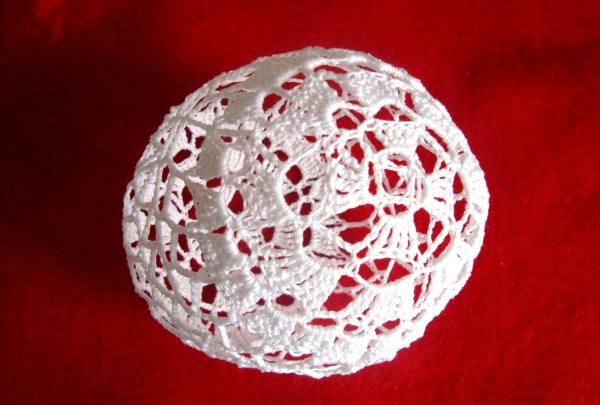
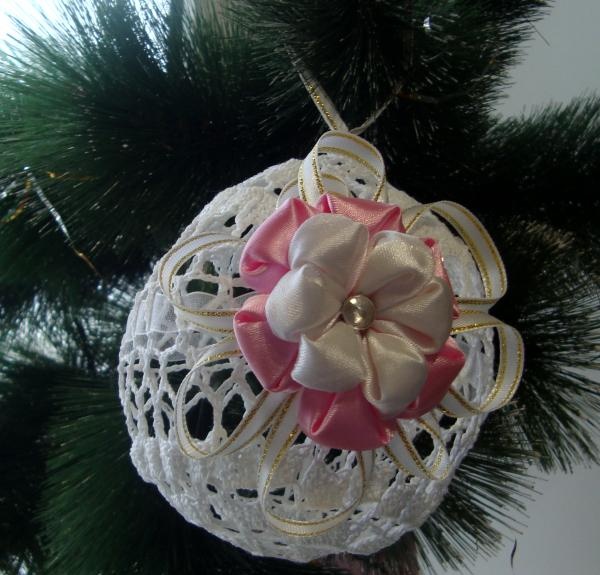
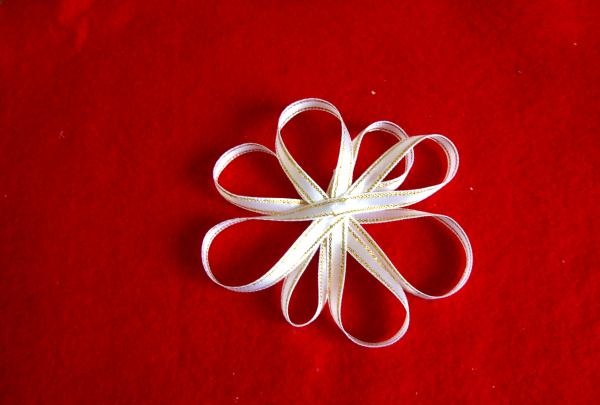
Decorate the “equator” of the product with a thin transparent ribbon.You need to thread it either under the thread or above the thread.

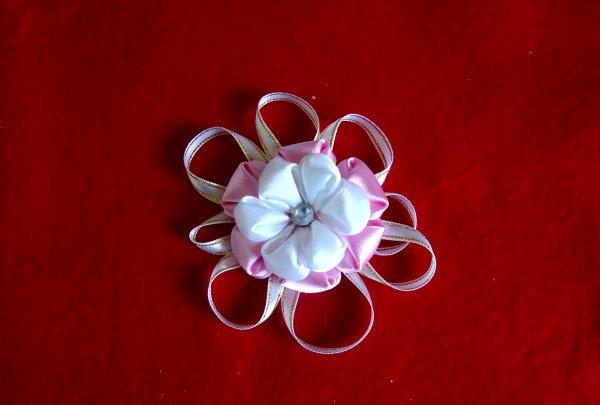
At the next stage, we begin making a satin flower using the technique kanzashi. Cut the tape into square pieces, the size of which is exactly 5 cm.
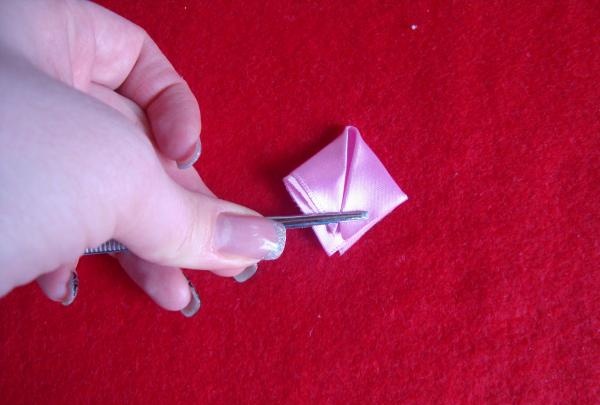
Bend each element several times as in the photo:
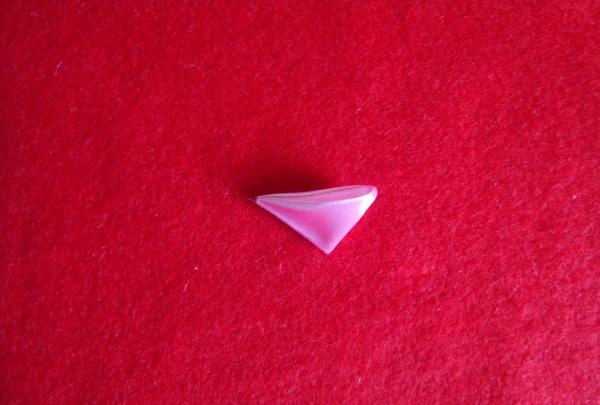
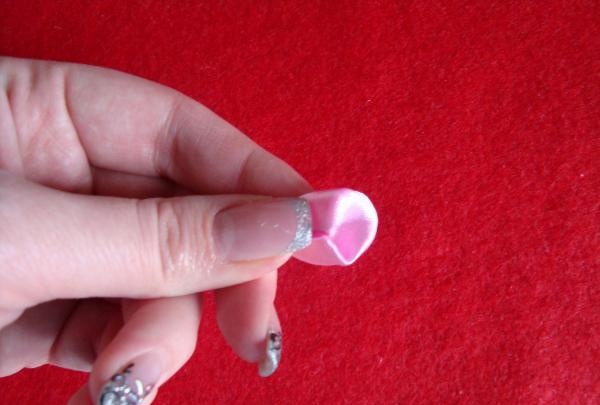
Burn the bottom of the product with a lighter, then turn the petal out and drop hot-melt glue into the “pocket” formed at the back and immediately squeeze the work.

First glue 6 pink petals onto a small circle of satin.
The second layer of the flower is formed from 6 white petals, but so that all the corners of the elements converge inside at one point, and the petals themselves are located between the elements of the lower tier. All that remains is to decorate the flower with thin curls of white ribbon, and glue a rhinestone into the middle of the product.
Use hot glue to secure the flower to the side of the ball.
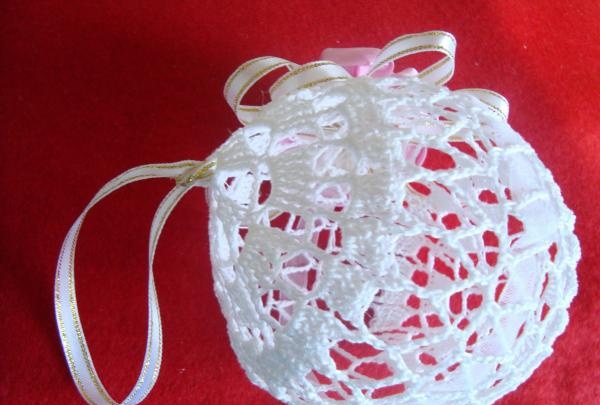
At the last stage, a rope is glued to the ball, by which the product can be hung on spruce branches. To ensure that the braid is attached firmly, pass it under one of the knitted rows.
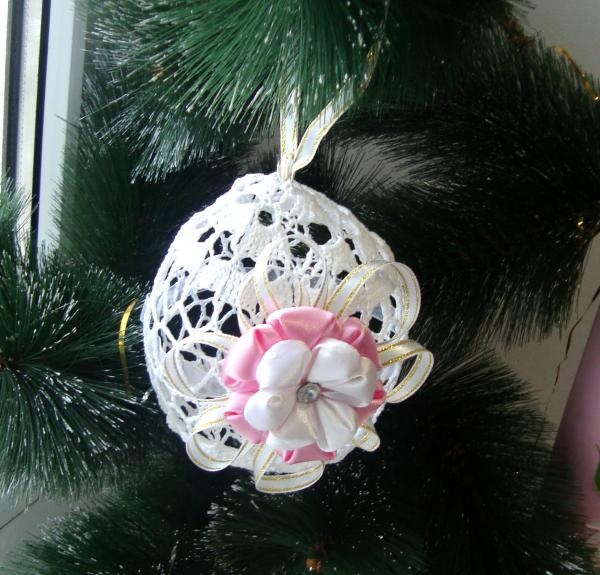
A DIY Christmas ball is ready to decorate your New Year's Eve.