Do it yourself
Life hacks, master classes, useful tips, recipes.
home » Handicraft techniques » Scrapbooking » Scrapbooking album » Album for a girl for the first year of life
Every mother dreams that her daughter will have the best from the first year, therefore, when she is just born, she tries to make sure that she has the most beautiful vests, the most beautiful diapers, the brightest rattles and everything to make it better than everyone has. Of course, there is just a huge selection and shopping, but nothing will be more beautiful and unusual than what a mother will make for her daughter with her own hands. Now we are not even talking about clothes and toys, but, for example, the first album of their child will be quite important and memorable for every family. So, in order for her daughter to have the best, most beautiful and unusual album, her mother needs to try. Buying the same album is not a problem, but the big problem is that it is very difficult to match the interior design of the album. Every mother wants to be able to not only paste photographs into an album, but also to keep notes on exactly how her little daughter grew and developed, how much weight she gained, how much she grew, what she learned to do, etc. And for this you already need special pages for the album.You can make them yourself if you know Photoshop. You can also purchase such interesting pages in electronic form on the Internet. So we will consider one of these master classes on making an album for the first year of life.

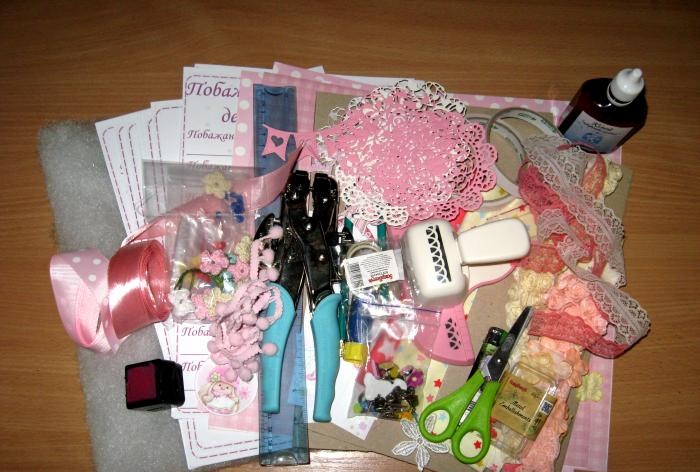
To make a notepad we take:
• Two binding cardboard A4 format;
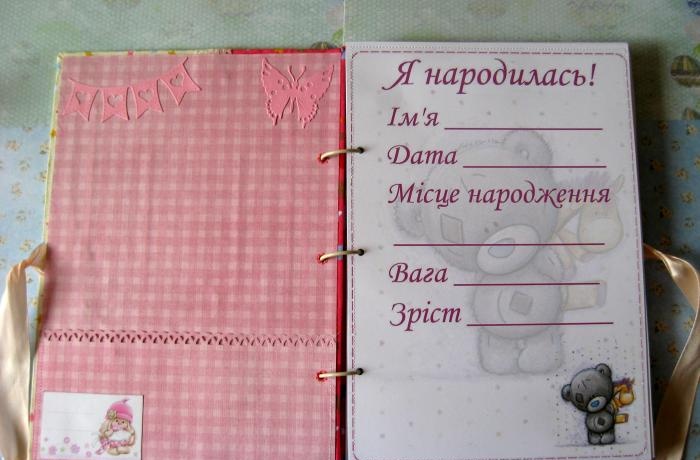
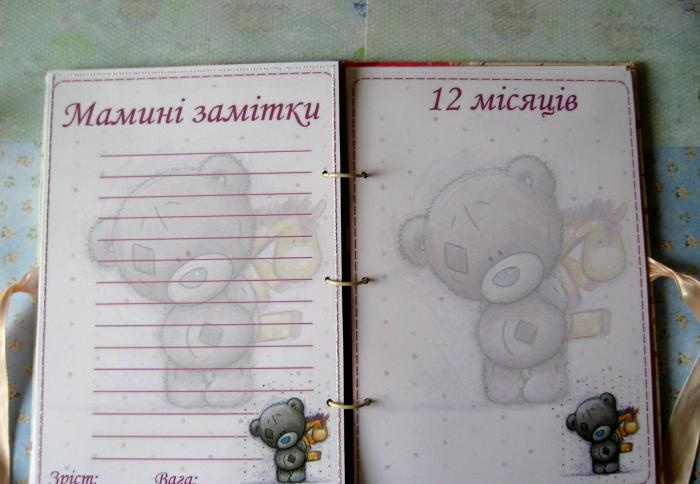
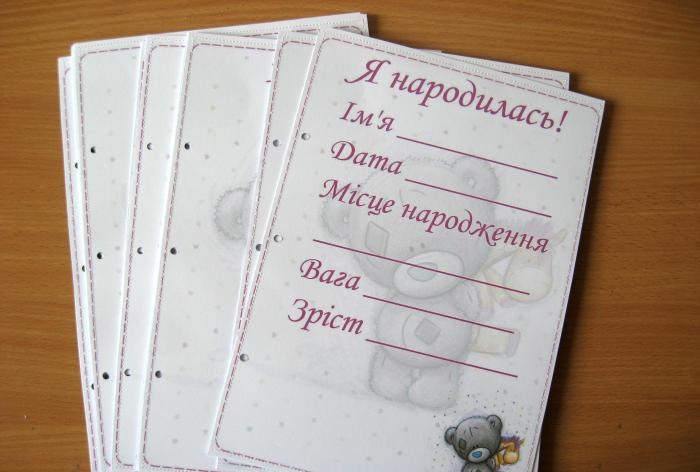
• Printed sheets A4 format with different pages;
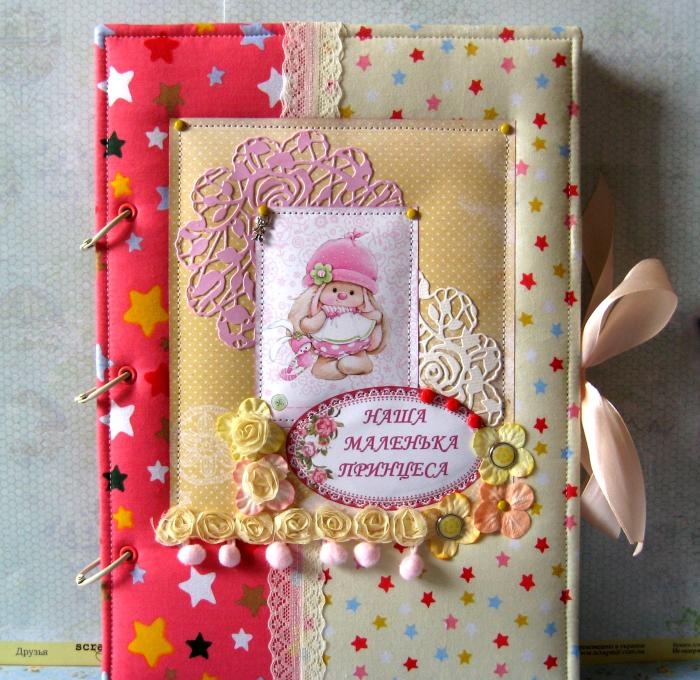
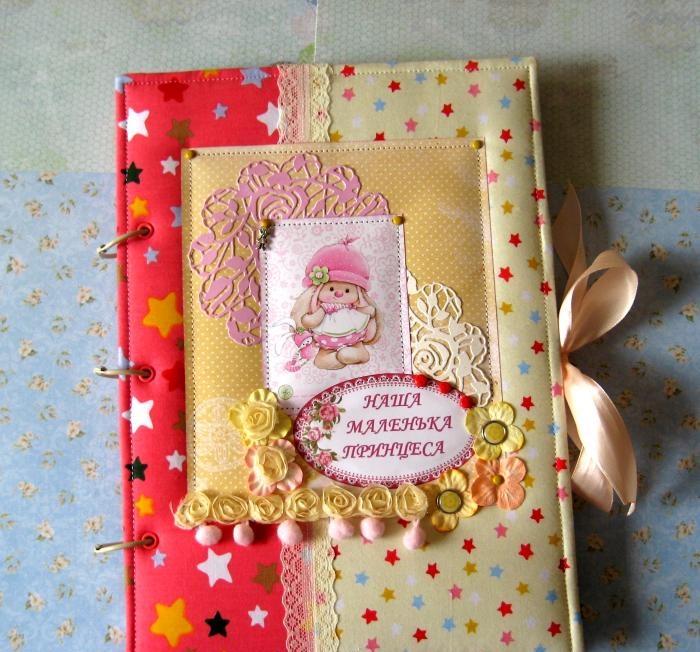
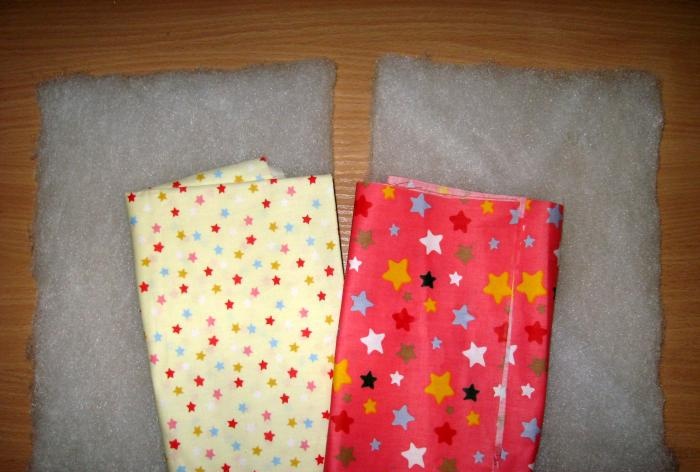
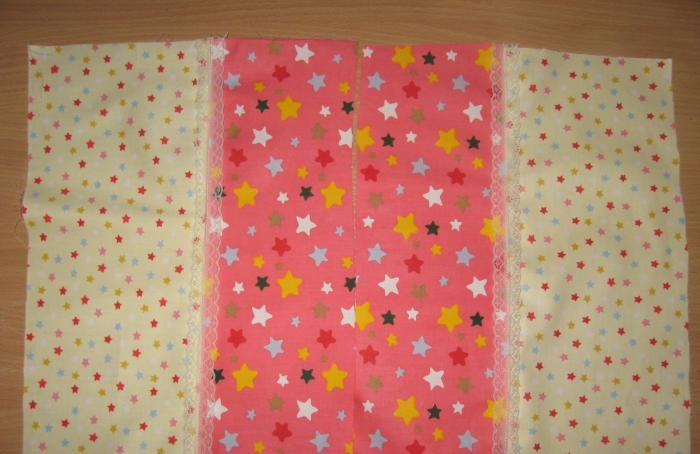
• Fabric with stars on a red and yellow background, thick cotton of good quality;
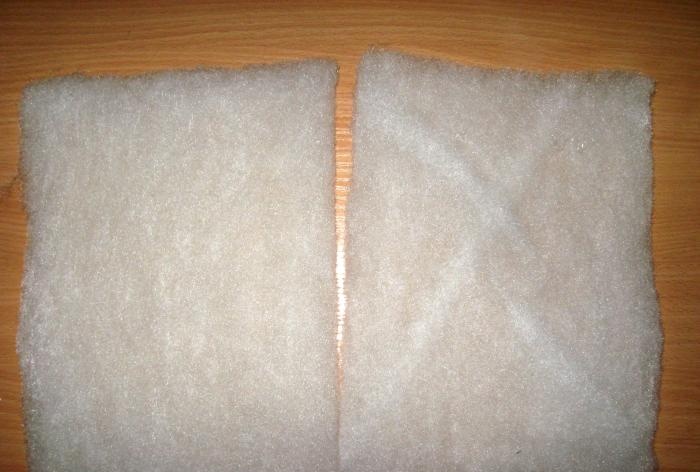
• Sintepon;
• Adhesive tape effect and double-sided tape;
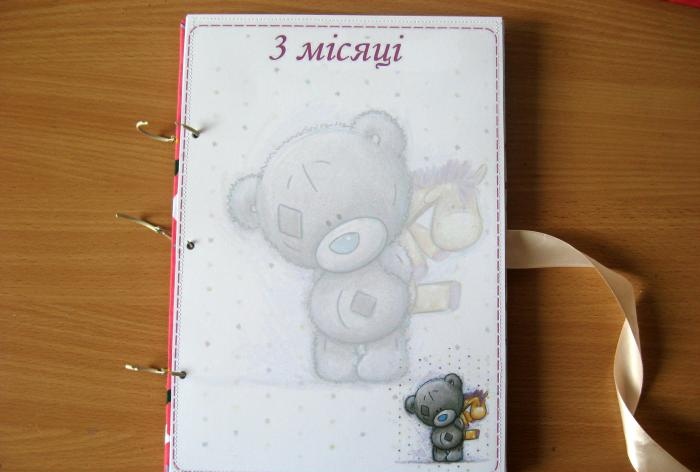
• Picture with Mi the bunny;
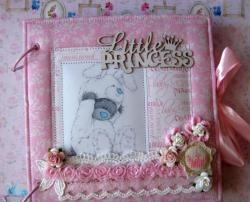
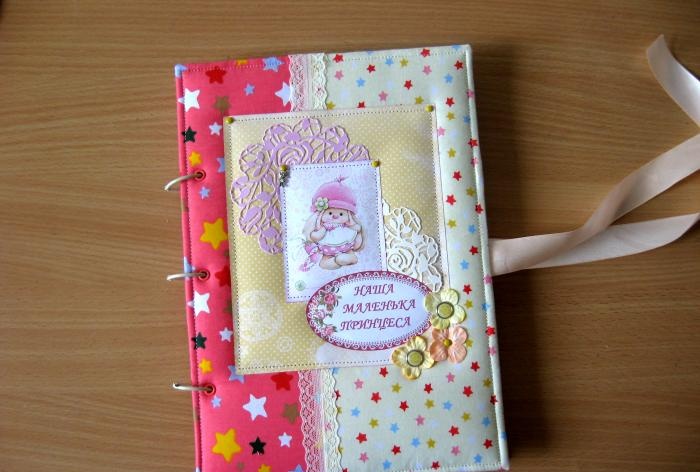
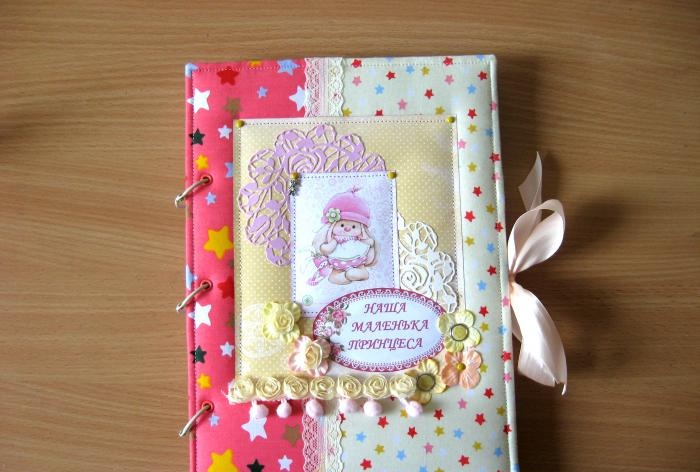
• Card with the inscription “Our little princess” (in Ukrainian);
• Pink and beige cut-out napkins, flags, pink butterflies;
• Scrappaper size 30*30 cm, three sheets: two in pink and one in yellow;
• Beige wide lace;
• Curb hole punch;
• Eyelets are red;
• Grommet installer;
• Scissors, ruler, simple pencil;
• Peach-colored satin ribbon, 25 mm wide;
• Glue stick;
• Beige ribbon with fabric roses;
• Metal brads, plain and epoxy, in a yellow frame;
• Ink pad.

Album for a girl

Album for a girl

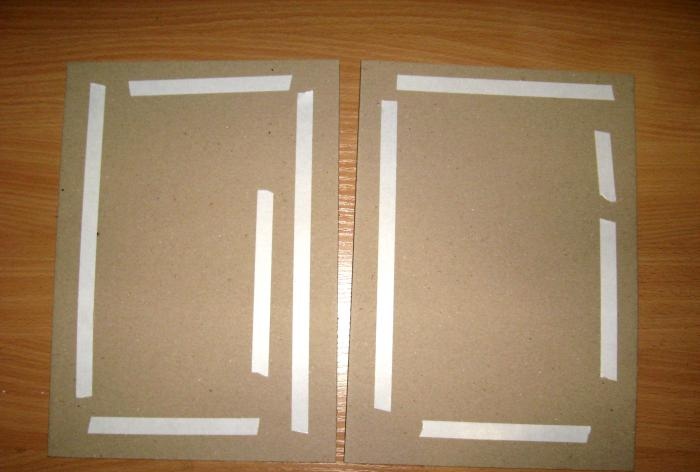
We start by making a soft cover for the album. To do this, take binding sheets of cardboard, glue strips of double-sided tape and glue sheets of padding polyester.
Album for a girl

Album for a girl

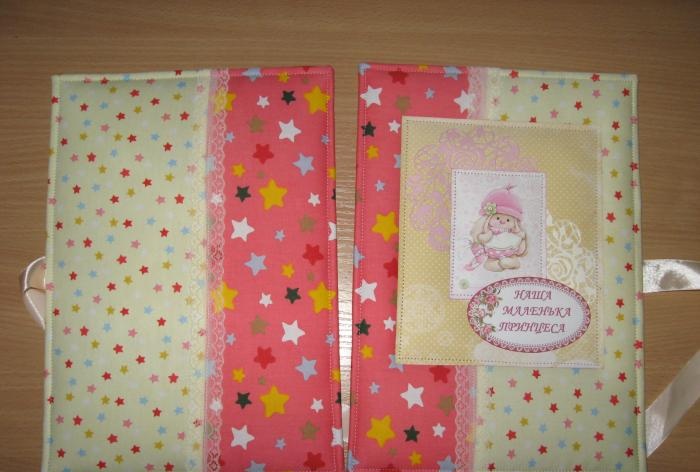
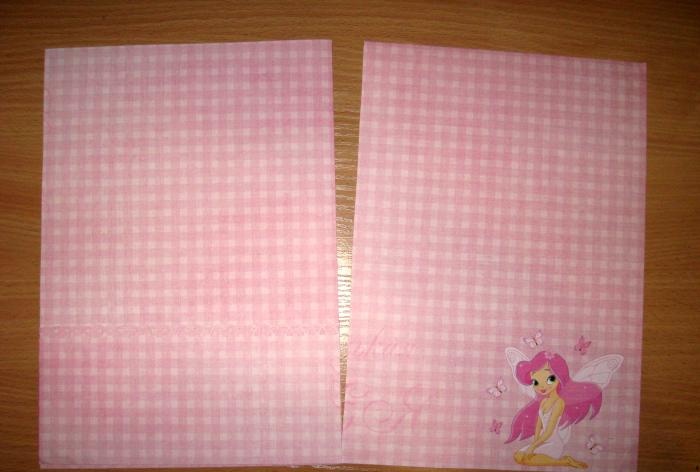
Now we need to wrap both blanks with cloth. To do this, cut two pieces of red fabric with stars and two pieces of yellow fabric.
Album for a girl

Album for a girl

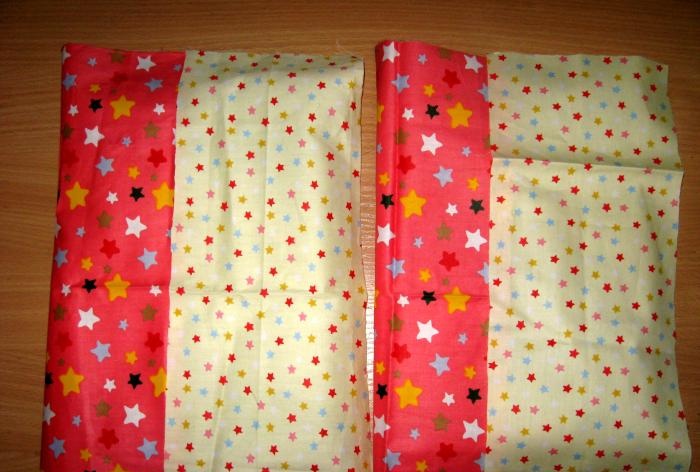
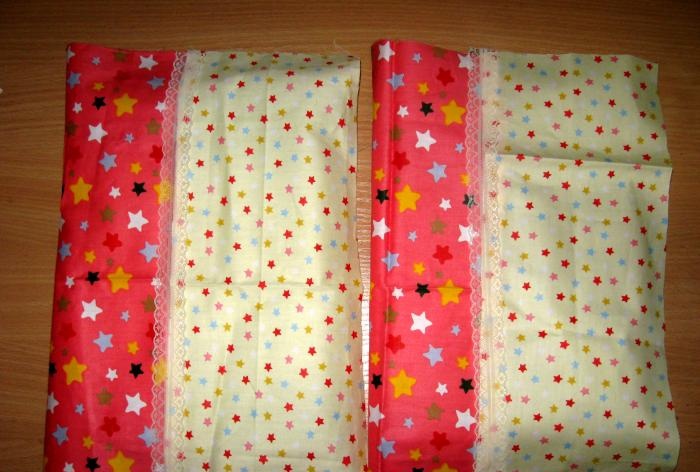
The fabric should be ironed well under steam. We will sew a strip of lace to the places where the fabrics are sewn together. Now that we're done with the fabric, let's prepare the album sheets.
Album for a girl

Album for a girl

We cut the sheets, they should be slightly smaller than the cover. We get a size of 20*29 cm. We take two sheets.
Album for a girl

Album for a girl

We glue strips of double-sided tape to the back of one, put another sheet on top and glue it.We immediately fold the sheets and glue them one by one in the sequence in which it is needed. Now we sew all the sheets together in pairs as they were glued together.
Album for a girl

Album for a girl

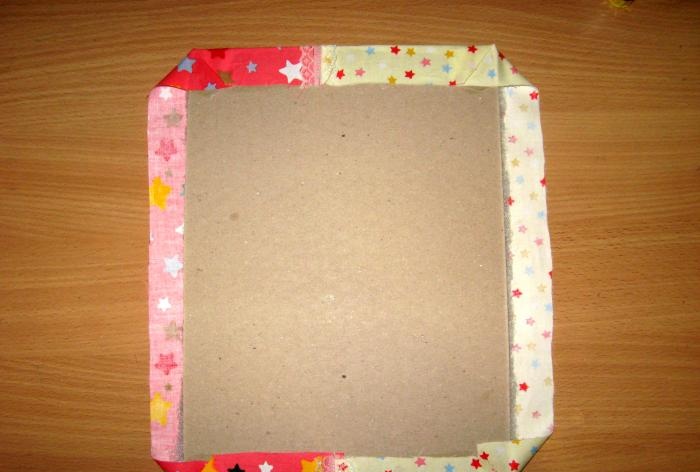
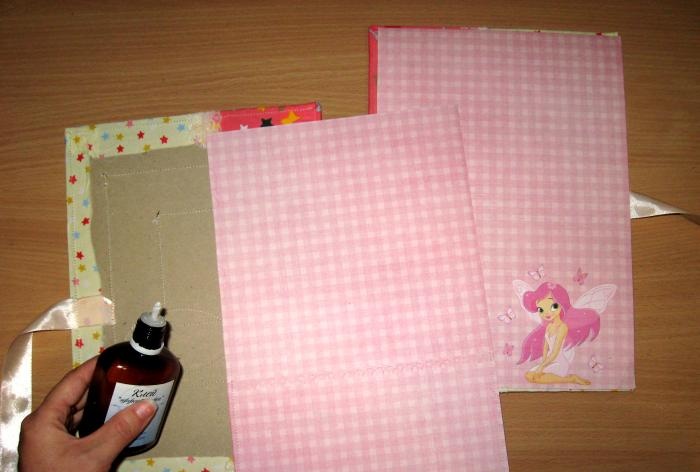
We sew the fabric and sew wide lace onto the seams. Now we put the fabric, the workpiece on it and smear the corners.
Album for a girl

Album for a girl

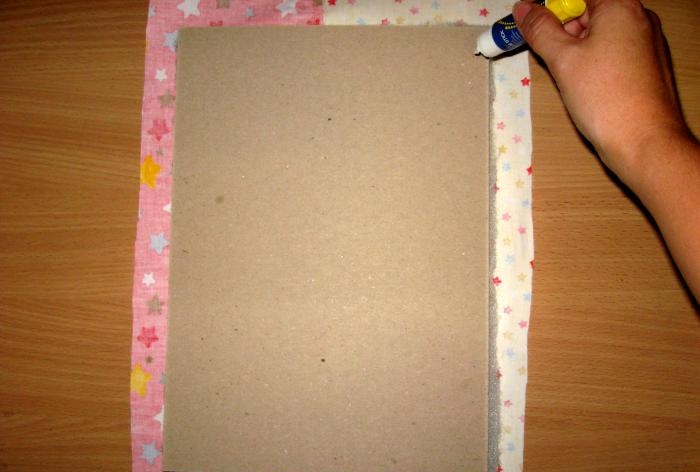
Fold the corners and glue them.
Album for a girl

Album for a girl

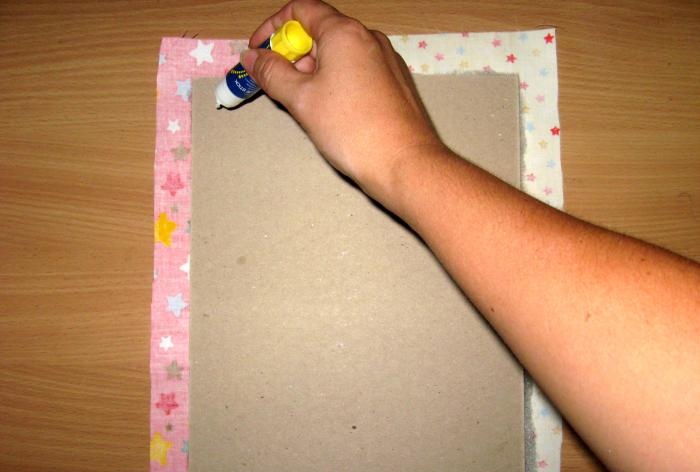
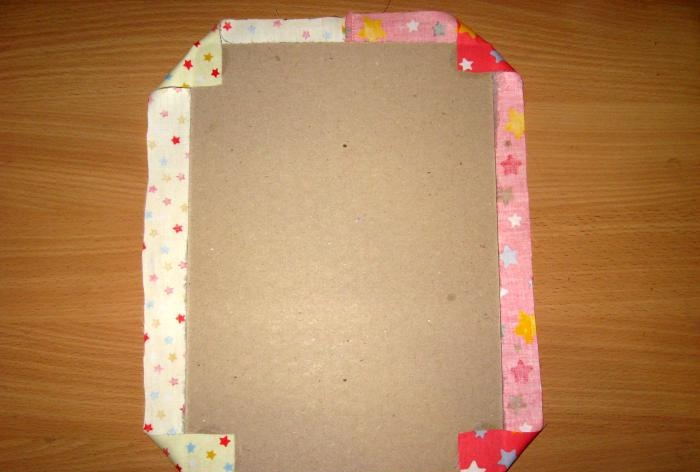
Now spread it on top and bottom, and then on the sides. We carefully wrap everything, stretch it slightly and glue it.
Album for a girl

Album for a girl

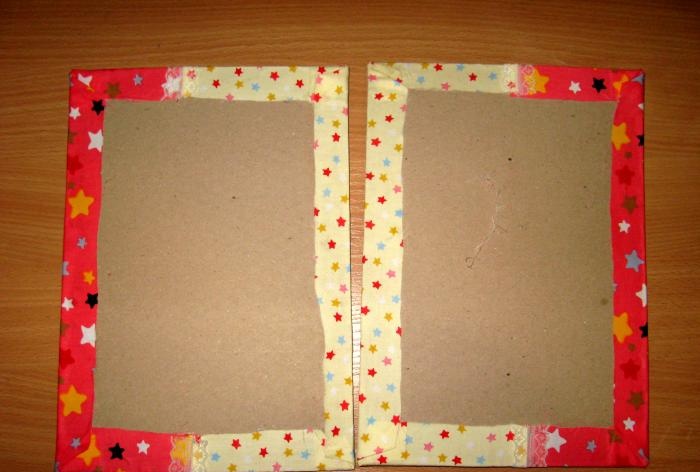
We glue strips of tape from the inside in the center of both blanks. This will be the bow with which we will tie the album.
Album for a girl

Album for a girl

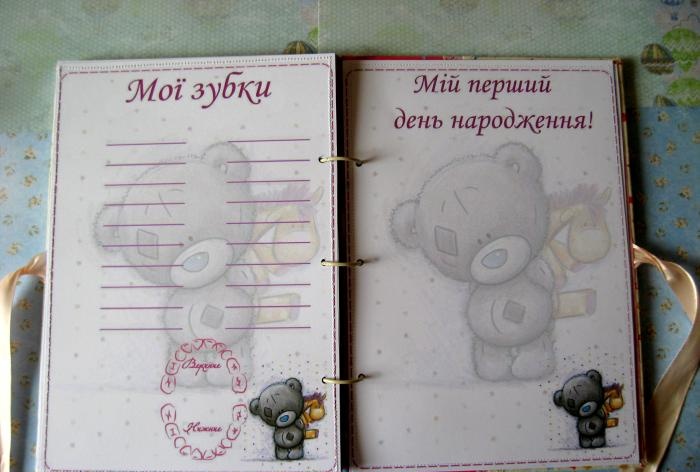
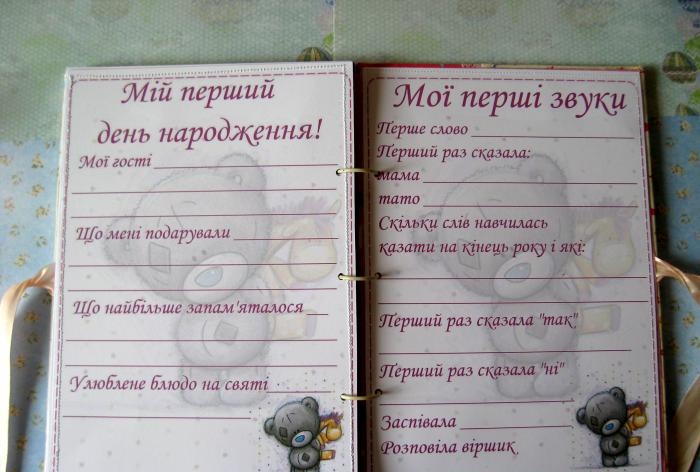
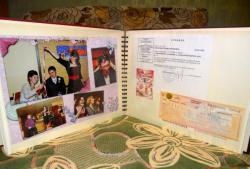
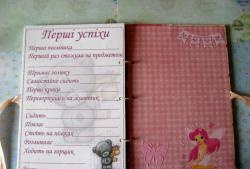
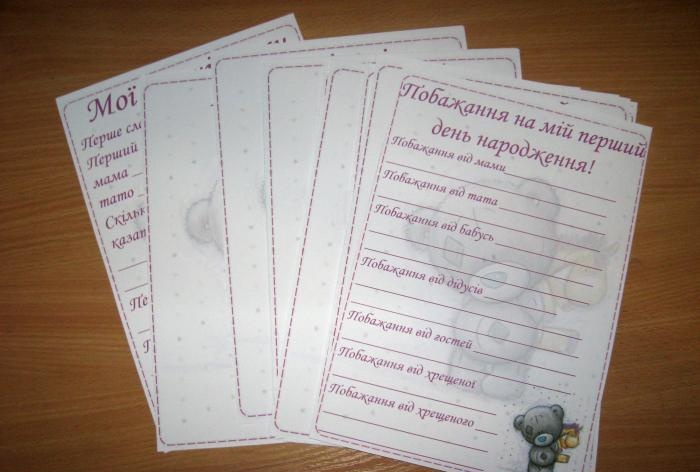
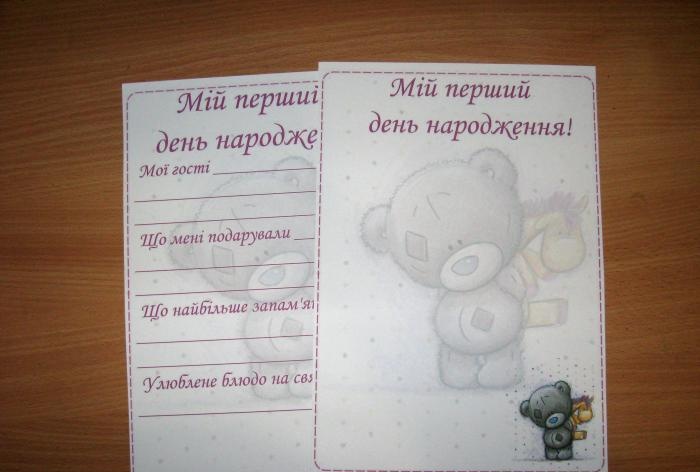
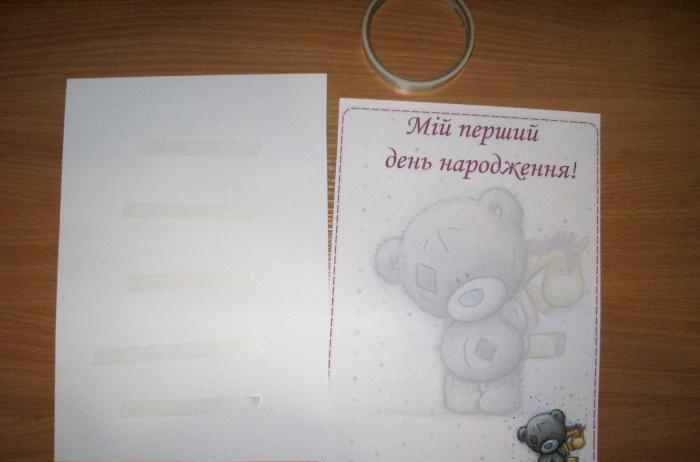
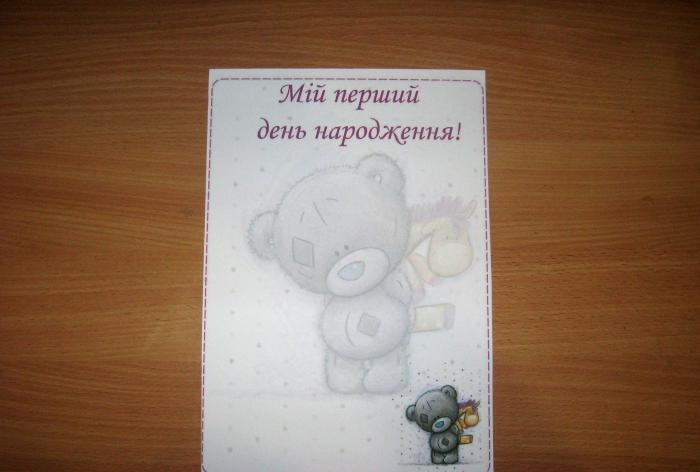
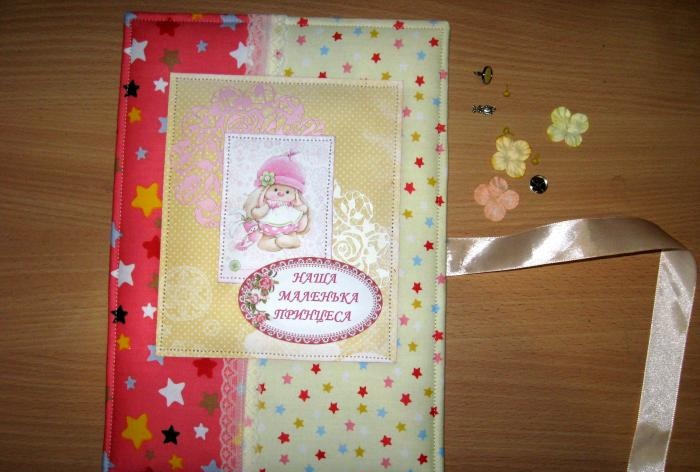
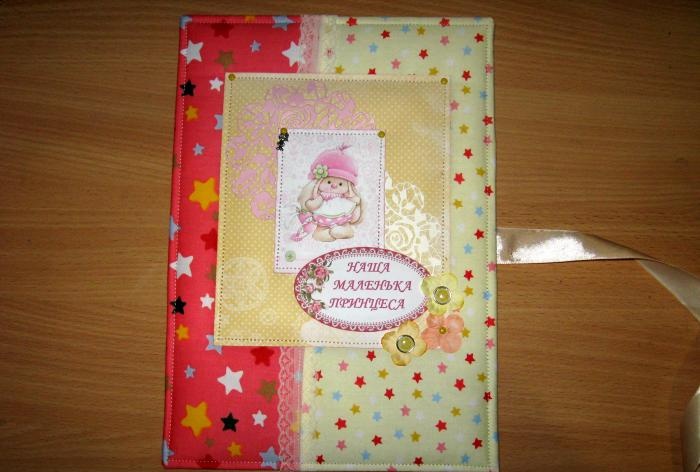
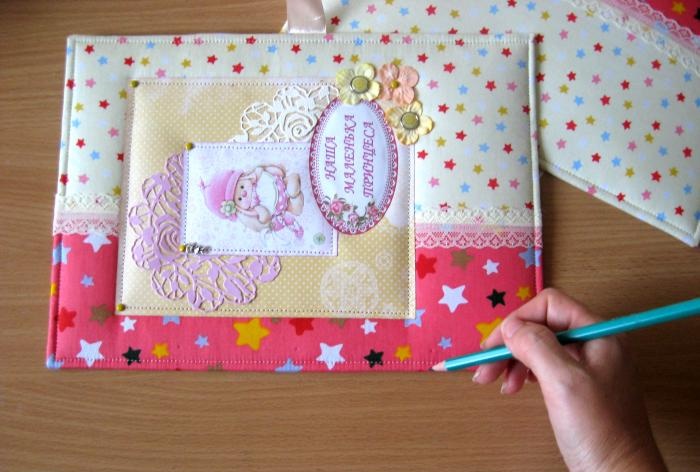
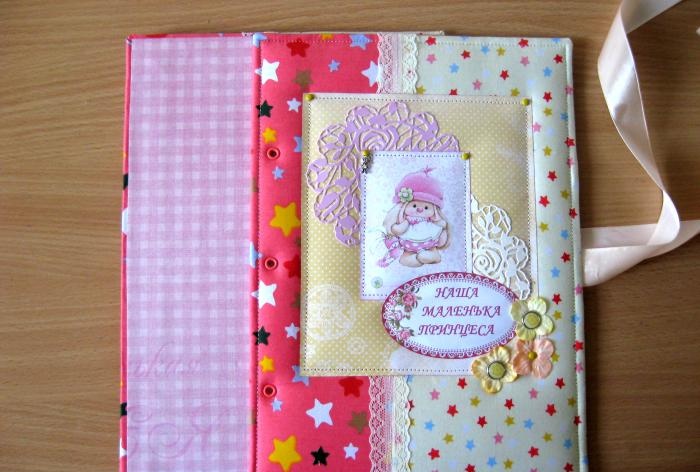
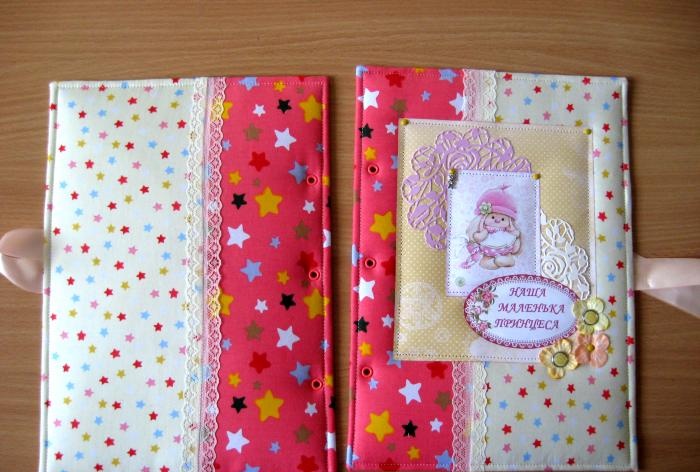
We cut yellow paper measuring 14*20 cm, take two napkins, a picture and a card. We tint the card and picture with a pad.
Album for a girl

Album for a girl

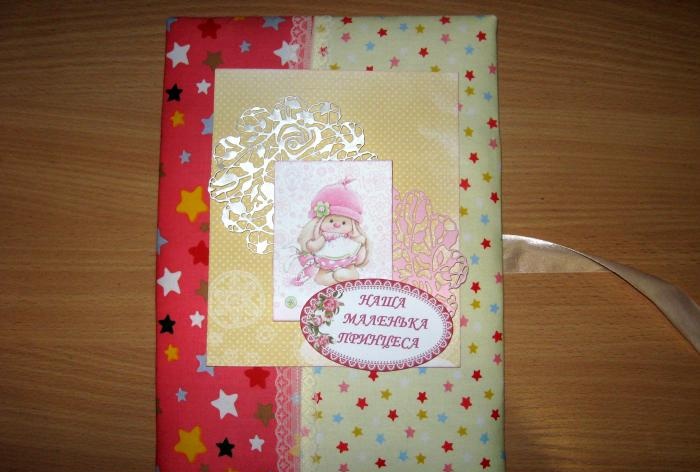
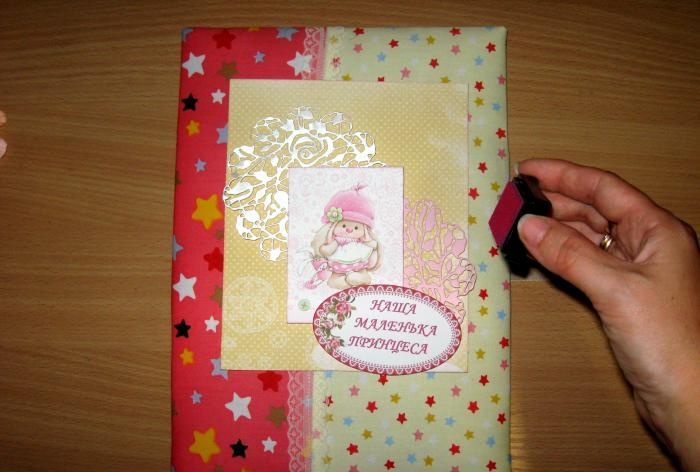
We sew the edges of both blanks along the edge, sew on the paper, then glue the napkins and sew on the picture with the card. Now we insert flowers with brads.
Album for a girl

Album for a girl

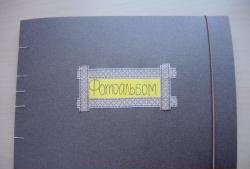
Now the inside sides of the covers need to be covered with scrap paper.
Album for a girl

Album for a girl

We cut two rectangles 20.5*29 cm. Glue a pocket onto one piece and sew it on. Now we glue both rectangles with glue from the inside of both covers.
Album for a girl

Album for a girl

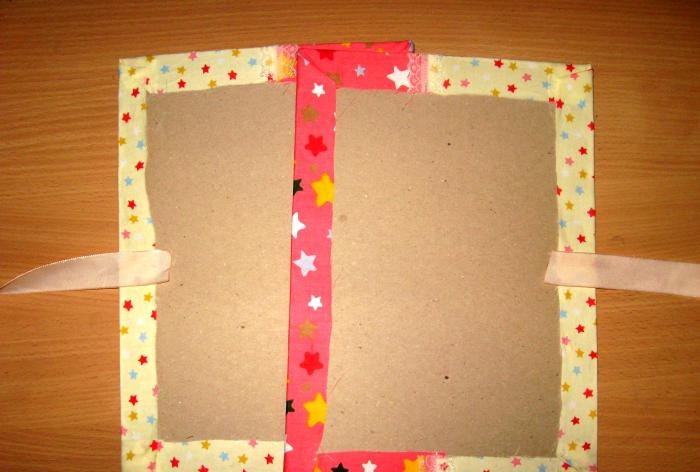
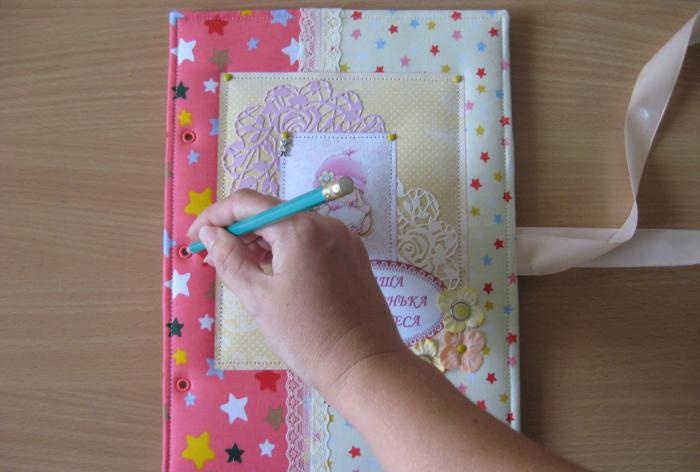
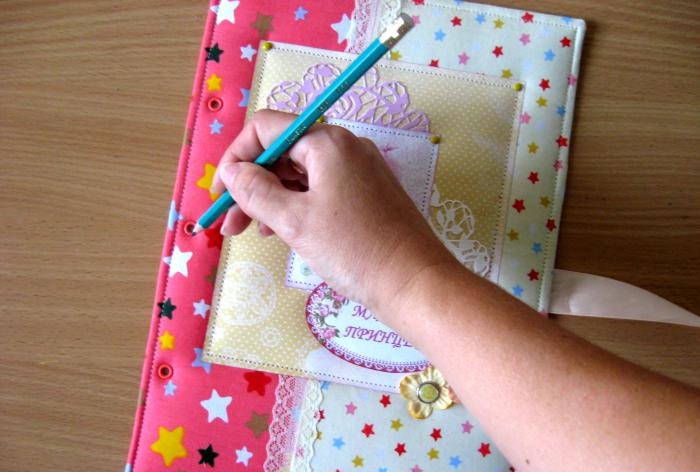
Now we put three marks.
Album for a girl

Album for a girl

With the help of the installer, we make three holes and install eyelets with them.
Album for a girl

Album for a girl

Now we attach this cover to another, also put marks in the same places and also put eyelets.
Album for a girl

Album for a girl

Now we need to guess with the holes and on the sheets. We take one sheet, place the cover on it and mark it, then make holes on the sheet. And using this sheet we make marks on the rest and the corresponding holes.
Album for a girl

Album for a girl

Now you need to string everything onto the rings. We put the rings on the bottom of the cover, then put on the sheets one by one.
Album for a girl

Album for a girl

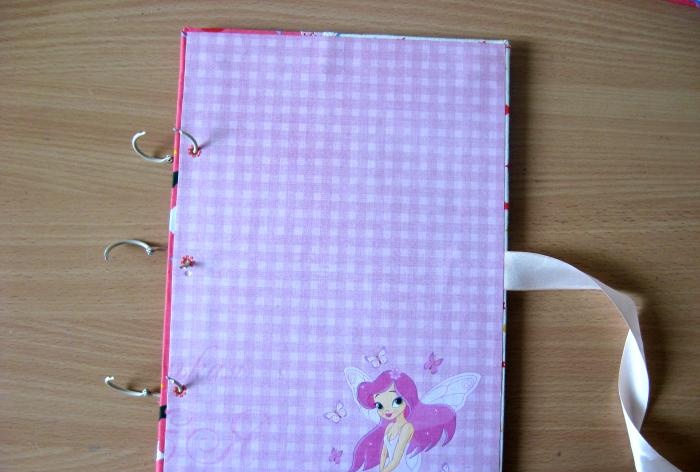
We put the cover on top and fasten the rings.
Album for a girl

Album for a girl

Now we tie the album with a bow and decorate it.
Album for a girl

Album for a girl

We ended up with such a juicy and bright album for a girl’s first year of life.Thank you for your attention and good luck!
Album for a girl

Album for a girl

Album for a girl

Album for a girl

Album for a girl

Album for a girl

Album for a girl

Album for a girl
come back
Comment
  • bowtiesmilelaughingblushsmileyrelaxed relaxedsmirk
    heart_eyeskissing_heartkissing_closed_eyesflushedrelievedsatisfiedgrin
    winkstuck_out_tongue_winking_eyestuck_out_tongue_closed_eyesgrinningkissingstuck_out_tonguesleeping
    worriedfrowninganguishedopen_mouthgrimacingconfusedhushed
    expressionlessunamusedsweat_smilesweatdisappointed_relievedwearypassive
    disappointedconfoundedfearfulcold_sweatperseverecrysob
    joyastonishedscreamtired_faceangryragetriumph
    sleepyyummasksunglassesdizzy_faceimpsmiling_imp
    neutral_faceno_mouthinnocent
5+two=
Comments (0)

A delicious recipe for any fish

We make a mini Power Bank for an honest 3400 mAh from a syringe and an 18650 battery with our own hands

The most powerful DIY penetrating lubricant

Chocolate | Do it yourself

«Do it yourself - with your own hands» - a site of interesting homemade products made from scrap materials and items at home. Step-by-step master classes with photos and descriptions, technologies, life hacks - everything a real master or just a craftsman needs for needlework. Crafts of any complexity, a large selection of directions and ideas for creativity.

We recommend reading

Washing machine error codes