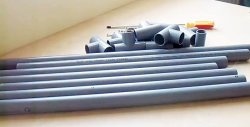
Do it yourself
Life hacks, master classes, useful tips, recipes.
home » Computer homemade products » Simple computer desk
I'm very tired of the monotonous computer desks that are like carbon copies in everyone's home. And I decided to make a completely original, exclusive computer desk for my beloved, with dimensions that would be convenient for me personally. In addition, a homemade computer desk is not only very healthy, but also very cheap, since all the materials can be purchased at your local hardware and plumbing store.
Simple computer desk

Table materials:
  • Threaded steel pipe (diameter 3/4 inch) 610 mm – 4 pieces.
  • Threaded steel pipe (diameter 3/4 inch) 457 mm – 5 pieces.
  • Threaded steel pipe (diameter 3/4 inch) 152 mm – 2 pieces.
  • Threaded steel pipe (diameter 3/4 inch) 51 mm - 3 pieces.
  • Threaded steel pipe (diameter 3/4 inch) 25 mm - 2 pieces.
  • Tees for pipes with a diameter of 3/4 inches - 7 pieces.
  • Flange for steel pipe with thread (diameter 3/4 inch) – 5 pieces.
  • End cap for threaded steel pipe (3/4 inch diameter) - 4 pieces.
  • Plywood sheet – 1 piece.
  • Tape for gluing plywood edges – 1 roll.

I adjusted the dimensions of the pipes to suit my parameters, but you can make a table for your height and width.

Let's start assembling the table.


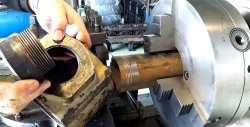
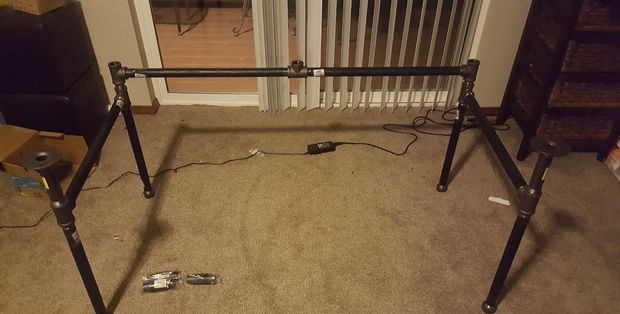
Let's start with the easiest thing - assembling the base from pipes. To start, I assembled the first two legs.
Then I twisted everything else. Nothing complicated, everything is quite simple and banal - see the picture. After assembly, it is advisable to paint the base with nitro spray paint, but personally I left it as is. Everything turned out very neatly, without any burrs.
Simple computer desk

Simple computer desk

Now let's move on to the most difficult part - the countertop.
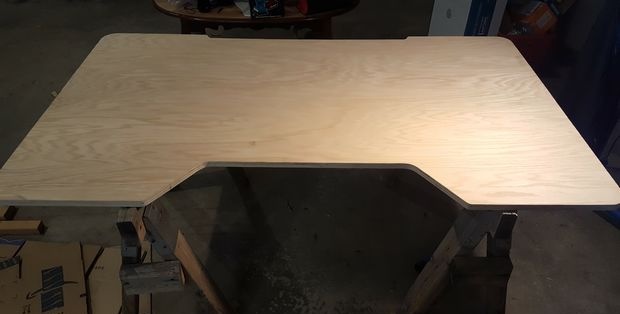
First of all, cut out a rectangle of the required size. Next, if you make a cutout (you can leave the table without cutouts), you need to draw them out with a pencil. Having previously remembered geometry for 7th grade and calculated the cutouts.
Simple computer desk

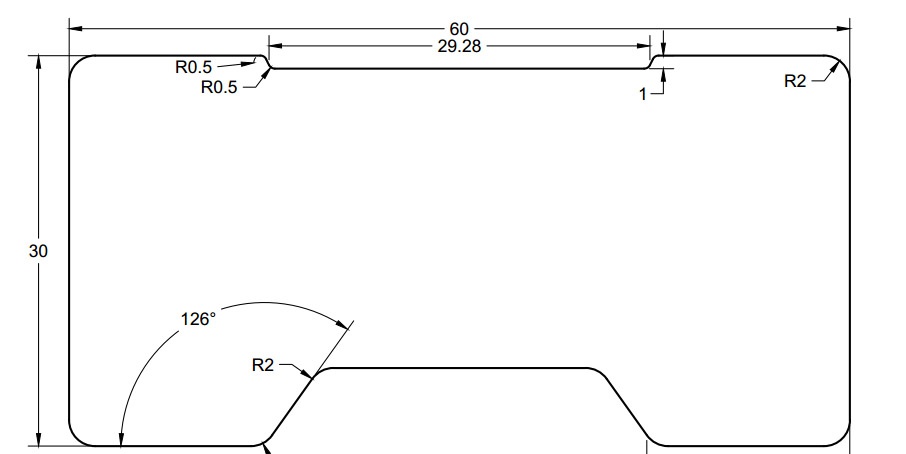
Using a jigsaw, we cut out our cutouts along the contour. Then, using fine sandpaper, we clean the edges from burrs. Make sure there are no large cracks or chips. A little trick: so that when sawing out the edge does not “tear” too much with a jigsaw, glue electrical tape along the edge, this way you will protect the edges of the tabletop.
Simple computer desk

Simple computer desk

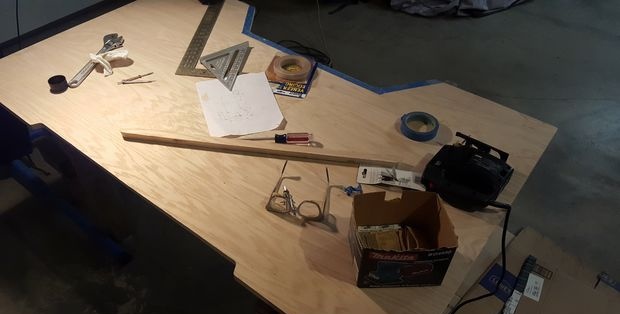
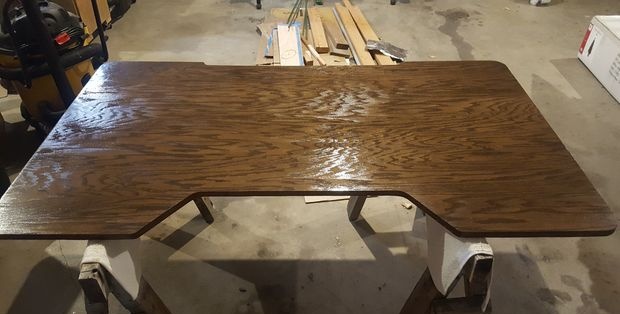
We take the border adhesive tape and glue it to the ends of the tabletop using an iron. After the tape has stuck, we carefully cut off the excess parts with a sharp stationery knife.
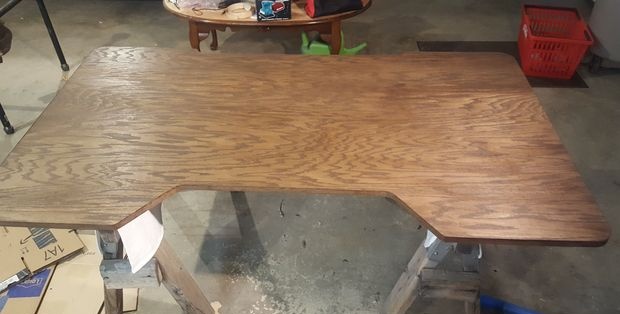
If desired (as I did), you can cover it with several layers of stain and wood varnish. There is an alternative - you can use a ready-made varnish with a woody tint. Be sure to use varnish in a well-ventilated area, or better yet, in the open air.
Simple computer desk

Simple computer desk

Final assembly.
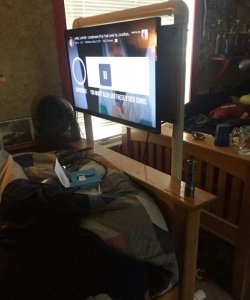
We place the tabletop on the base, screw it from the bottom with self-tapping screws using a screwdriver. That's all. Very beautiful. It turned out just amazing. I am personally very pleased with the result and the money saved.
Simple computer desk

Simple computer desk

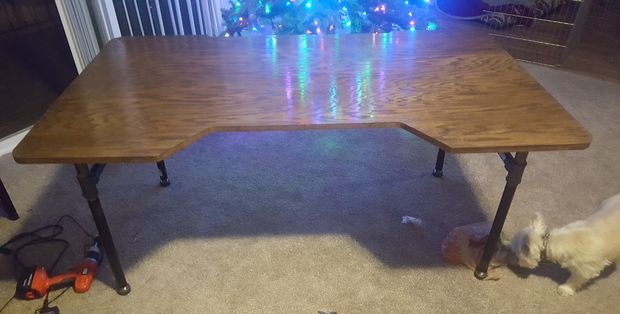
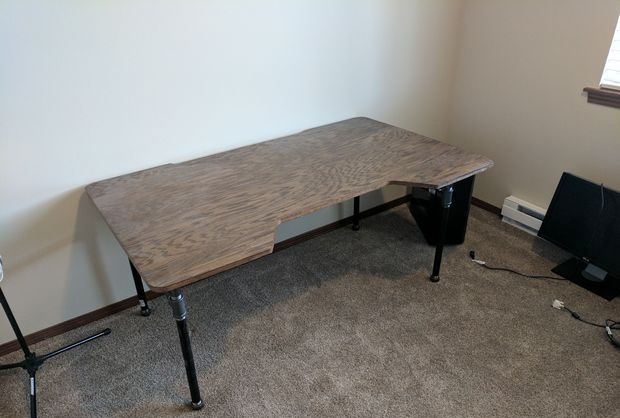
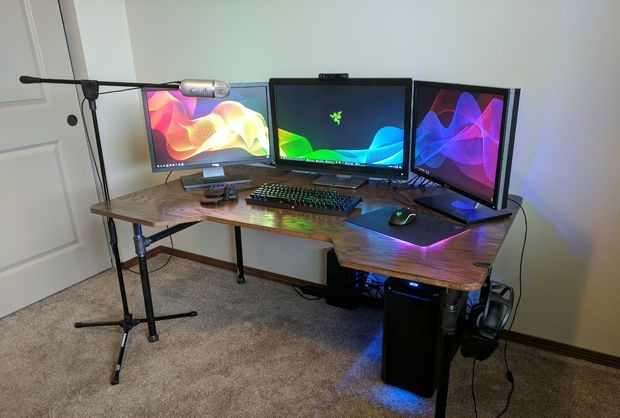
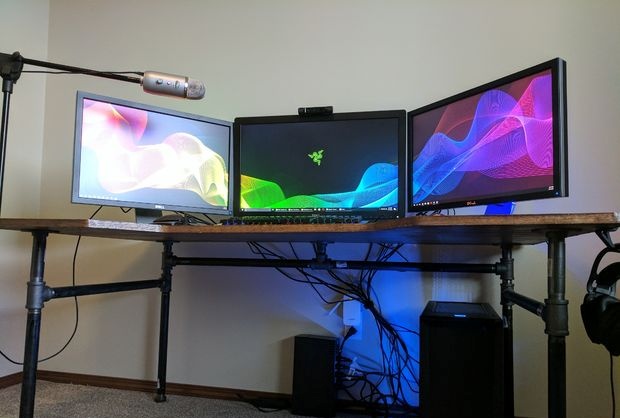
The steel pipe base is very reliable and ensures the reliability of the entire structure and greater stability.
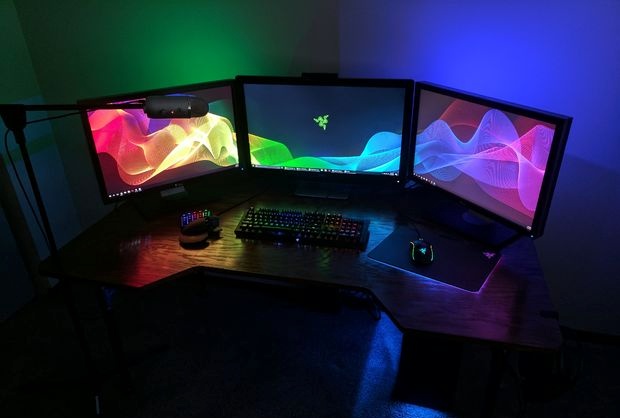
I'll arrange my computer equipment. It looks very nice.
Simple computer desk

Simple computer desk

Simple computer desk

PS: There was an idea to use PVC pipes, but to make the structure stable and reliable, you need to use pipes of a wider diameter, which I think would not be very beautiful and aesthetically pleasing. So, keep this in mind.
I hope my budget project will inspire you to more interesting ideas.
Original article in English
come back
Comment
  • bowtiesmilelaughingblushsmileyrelaxed relaxedsmirk
    heart_eyeskissing_heartkissing_closed_eyesflushedrelievedsatisfiedgrin
    winkstuck_out_tongue_winking_eyestuck_out_tongue_closed_eyesgrinningkissingstuck_out_tonguesleeping
    worriedfrowninganguishedopen_mouthgrimacingconfusedhushed
    expressionlessunamusedsweat_smilesweatdisappointed_relievedwearypassive
    disappointedconfoundedfearfulcold_sweatperseverecrysob
    joyastonishedscreamtired_faceangryragetriumph
    sleepyyummasksunglassesdizzy_faceimpsmiling_imp
    neutral_faceno_mouthinnocent
3+three=
Comments (9)
  1. Maksim
    #1 Maksim Guests 15 August 2017 13:44
    4
    Cool!!! Just a wonderful table!
  2. Den
    #2 Den Guests 20 August 2017 17:00
    1
    I agree - the table is cool. Ran to the store for plumbing supplies)
  3. N1tro
    #3 N1tro Guests August 22, 2017 09:28
    0
    An excellent option, the main thing is that you like it yourself, and not so expensive.
  4. anonymous
    #4 anonymous Guests 10 June 2018 09:07
    1
    I made one like this, only instead of legs there was chipboard; it cost 2000 rubles. Since I did it for myself, I reduced the width to 110 cm
    The most important thing here is the height and depth of the table
  5. Sergey
    #5 Sergey Guests November 13, 2018 01:18
    0
    No, it's just space
  6. Nikita Popov
    #6 Nikita Popov Guests February 4, 2019 06:14
    0
    Probably not PVC pipes, but polypropylene? And the table turned out just gorgeous!
  7. Ilya
    #7 Ilya Guests 31 March 2019 20:46
    2
    Don't strictly follow the sizes.It is better to make the front neckline based on the width of your shoulders, so that you do not have to spread your arms too far apart. My shoulder width is about 47, and the front neckline is 60 wide, which is a lot for me. I think around 53 would be optimal. If you want to lean on your elbow in order to support your head with your hand, you have to shift your body or move with the chair to the side so as not to be pulled by your elbow, and your back will not warp so much. The cutout for the wires is 15 cm, not 60, and everything fits in there with a huge margin.

    If space in the room allows, then it is better to make the tabletop depth 800. In this case, you can easily stretch your legs if the table is standing close to the wall. Instead of plywood, you can take pine board with a thickness of 28-30. You won’t find normal first or even second grade plywood in stores like Leroy. This can only be ordered from specialized offices, and more than half of the sheet will be wasted, because The sheets are huge.

    I took such a shield, sawed it out, sanded it (it’s better to use 120 or 140 sandpaper, sand only along the grain or in a circle. I covered it with white acrylic paint 3 layers and 3 layers with acrylic varnish, it turned out very well, the texture of the wood was preserved. Pay attention to processing the ends, rounded corners so that they don’t cut your hands later.
    Instead of pipes, use two furniture supports, it’s easier to assemble and looks good. Attach the back part to the corners of the wall, the table will be much more stable.
  8. Novel
    #8 Novel Guests 26 February 2020 23:49
    0
    I added one 2.5 x 10cm cutout to the sides and 2 cutouts to the back. The table is in the corner, on the table is a laptop and a large monitor. There is no system unit, video output from the laptop to the monitor. Since the monitor is in the center, the notch in the center is blocked with a leg.The cables from the laptop run from the side, so I added cutouts on the left and right.
    |----_----_----|
    \Mon Note/
    / \
    |______________|

    I don’t know if the pseudographics will be visible.
  9. A
    #9 A Guests June 8, 2022 10:09
    0
    I didn’t immediately understand, the tabletop dimensions are indicated in inches.

How to build an outdoor toilet from blocks

Do it yourself - crafts and master classes | Page 34

Luxury vintage card | Do it yourself

How to make a strong blind area yourself

«Do it yourself - with your own hands» - a site of interesting homemade products made from scrap materials and items at home. Step-by-step master classes with photos and descriptions, technologies, life hacks - everything a real master or just a craftsman needs for needlework. Crafts of any complexity, a large selection of directions and ideas for creativity.

We recommend reading

Washing machine error codes