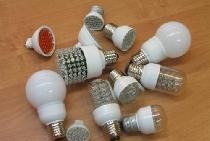
Gradually, lighting devices are switching to LED lamps. This did not happen immediately; there was a protracted transition period with the use of so-called housekeepers - compact gas-discharge light bulbs with a built-in power supply (driver) and a standard E27 or E14 socket.
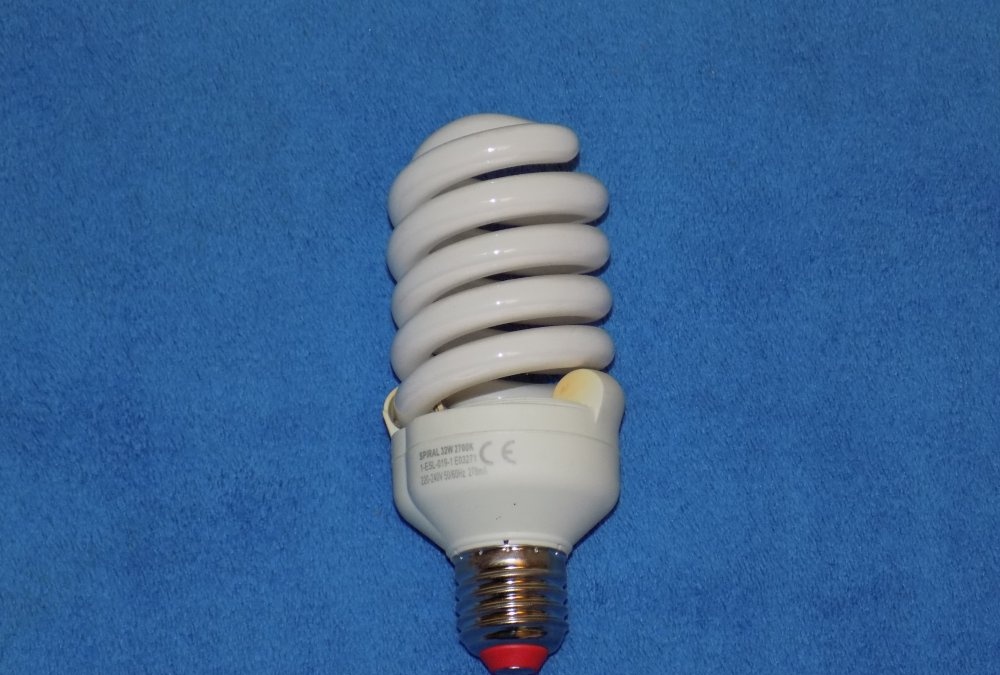
Such lamps are still widely used today, since their cost in comparison with LED light sources is not so “biting”.
While there is a good balance between price and efficiency (the difference in price with conventional incandescent lamps pays off over time due to energy savings), gas-discharge light sources have a number of disadvantages:
- Service life is lower than that of incandescent lamps.
- High frequency noise from the power supply.
- Lamps do not like frequent switching on and off.
- Gradual decrease in brightness.
- Impact on nearby surfaces: a dark spot appears on the surface of the ceiling (above the lamp) over time.
- And in general, I don’t really want to have a flask with a certain amount of mercury in my house.
An excellent alternative is LED lamps. The list of advantages is significant:
- Amazing efficiency (up to 10 times compared to incandescent lamps).
- Huge service life.
- Perfect and safe power supplies (drivers).
- Absolutely independent of the number of inclusions.
- With normal cooling, they do not lose brightness for almost the entire period of operation.
- Complete mechanical safety (even if the decorative diffuser is broken, no harmful substances will enter the room).
Two disadvantages:
- The direction of the light flux places high demands on the design of the diffuser.
- Still, they are expensive (we are talking about high-quality brands, nameless mid-level products are quite affordable).
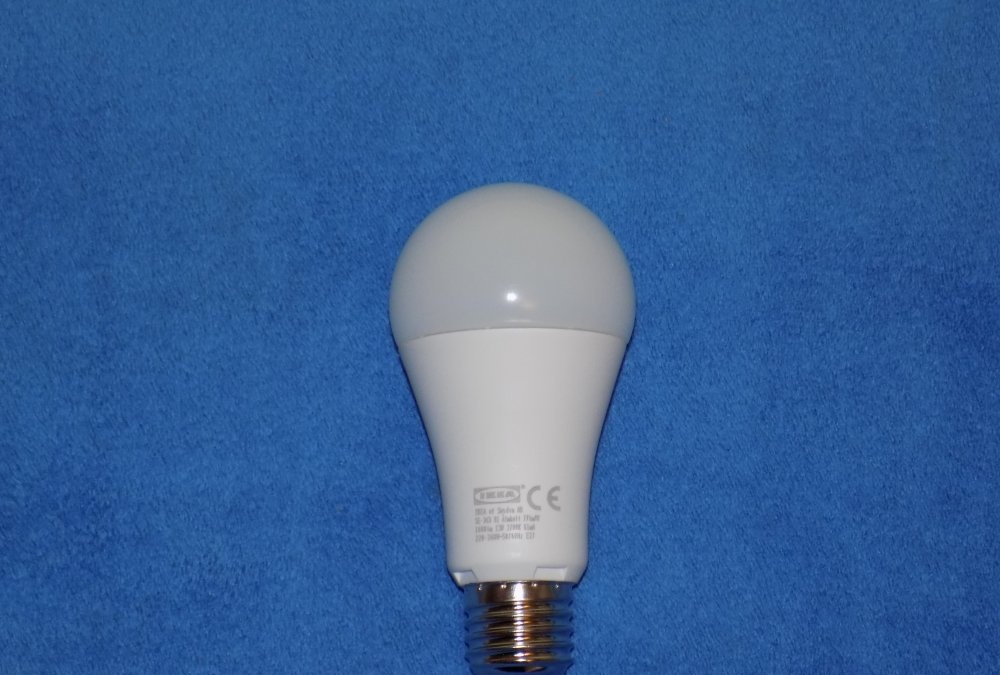
If the price issue is regulated by the selection of the manufacturer, then the design features do not always allow you to simply replace the lamp in your favorite chandelier. Of course, there is a wide selection of classic pear-shaped LED lamps that fit any size.
But it is precisely in this design that the “ambush” lies.
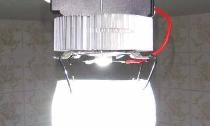
We have before us a high-quality (at the same time relatively inexpensive) lamp with a brightness of 1000 Lm (equivalent to a 100-watt incandescent lamp) and a power consumption of 13 W. These LED light sources have been working for me for many years, they shine with a pleasant warm light (temperature 2700 K), and no degradation of brightness is observed over time.
But for powerful light, serious cooling is required. Therefore, 2/3 of the body of this lamp consists of a radiator. It is plastic, does not spoil the appearance, and is quite effective. The main drawback follows from the design - the real light source is the hemisphere at the top of the lamp. This makes it difficult to select a lamp - not every horn chandelier will have such a lamp look harmonious.
There is only one way out - to buy ready-made LED lamps, the configuration of which was initially designed for specific light sources.
The key word is buy. What should you do with your favorite floor lamps, chandeliers and other lamps in your apartment?
Therefore, it was decided to design LED lamps ourselves.
The main criterion is cost minimization.
There are two main directions in the development of LED light sources:
1. Use of low-power (up to 0.5 W) LEDs. You need a lot of them, you can configure any shape. No need for a powerful radiator (they heat up little). A significant drawback is more painstaking assembly.
2. Use of powerful (1 W - 5 W) LED elements. Efficiency is high, labor costs are several times less. But point radiation requires the selection of a diffuser, and good radiators are needed to implement the project.
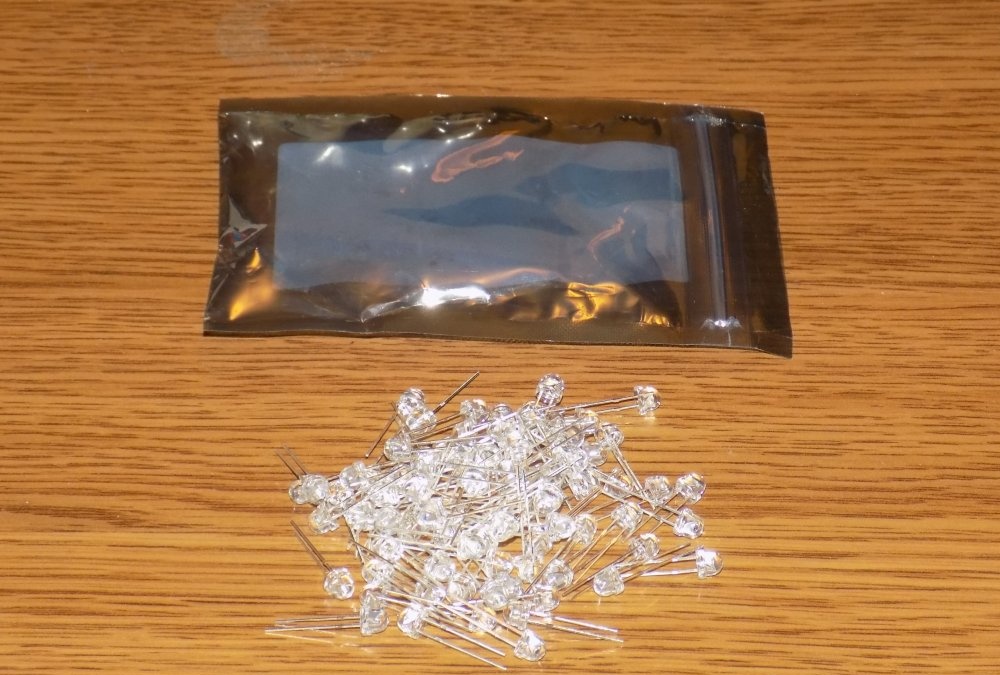
For experimental designs, I chose the first option. The most inexpensive “raw material”: 5 mm LEDs with 120° dispersion in a transparent case. They are called "straw hats".
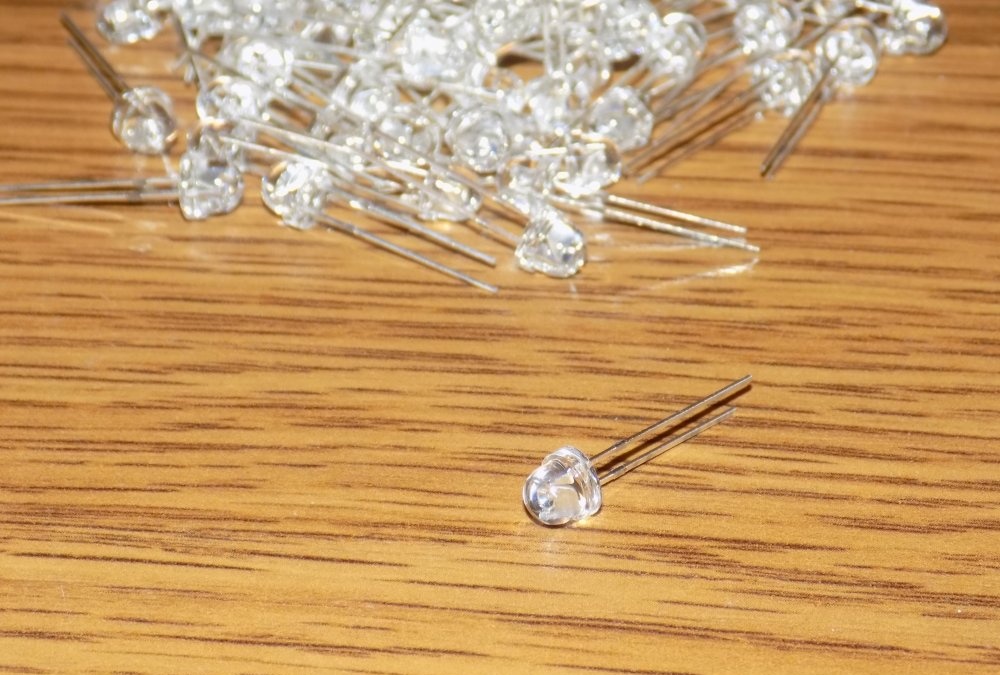
- forward current = 20 mA (0.02 A)
- voltage drop across 1 diode = 3.2-3.4 volts
- color – warm white
Such goodness is sold for 3 rubles a bunch on any radio market.
I bought several packs 100 pcs. on aliexpress (link to purchase). It cost a little less than 1 rub. a piece.
As power supplies (more precisely, current sources), I decided to use a proven circuit with a quenching (ballast) capacitor. The advantages of such a driver are extreme low cost and minimal energy consumption. Since there is no PWM controller or linear current stabilizer, excess energy does not go into the atmosphere: in this circuit there are no elements with a heat-dissipating radiator.
Disadvantage: lack of current stabilization. That is, if the mains voltage is unstable, the brightness of the glow will change.My outlet has exactly 220 (+/- 2 volts), so this circuit is just right.
The element base is also not expensive.
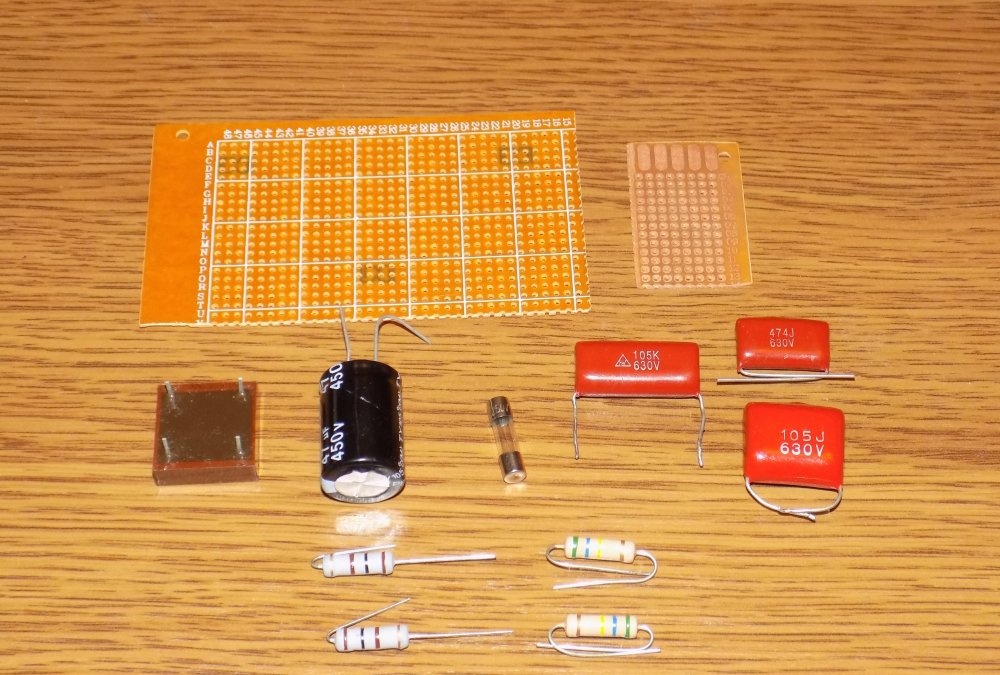
- diode bridges of the KTs405A series (any diodes can be used, even Schottky ones)
- film capacitors with a voltage of 630 volts (with a reserve)
- 1-2 watt resistors
- electrolytic capacitors 47 mF at 400 volts (you can take a larger capacity, but this goes beyond the scope of economy)
- little things like a breadboard and fuses are usually in the arsenal of any radio amateur
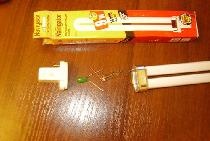
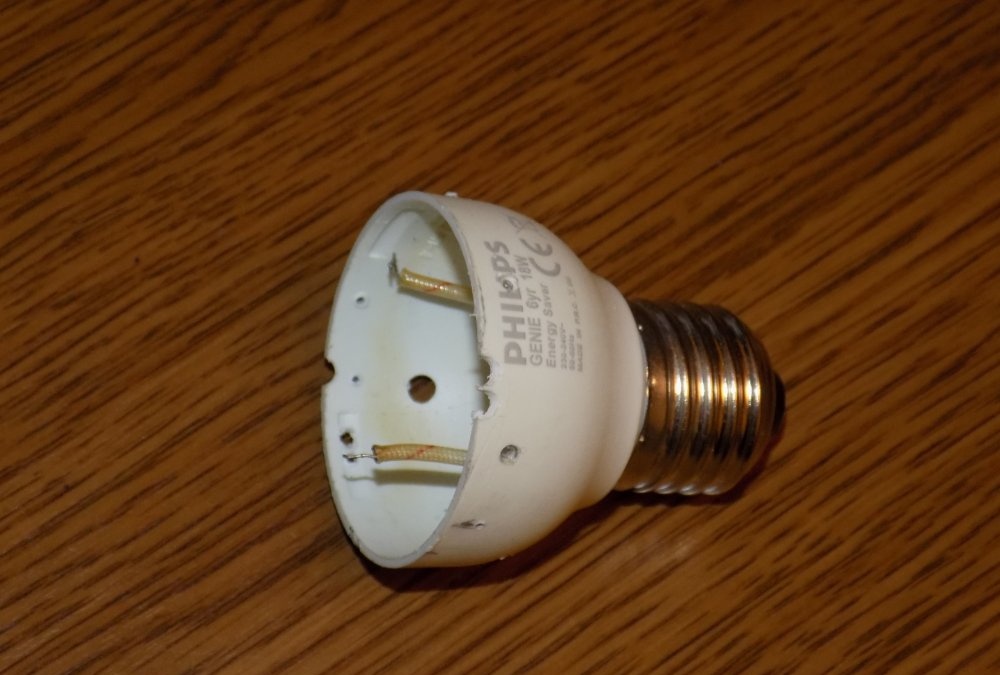
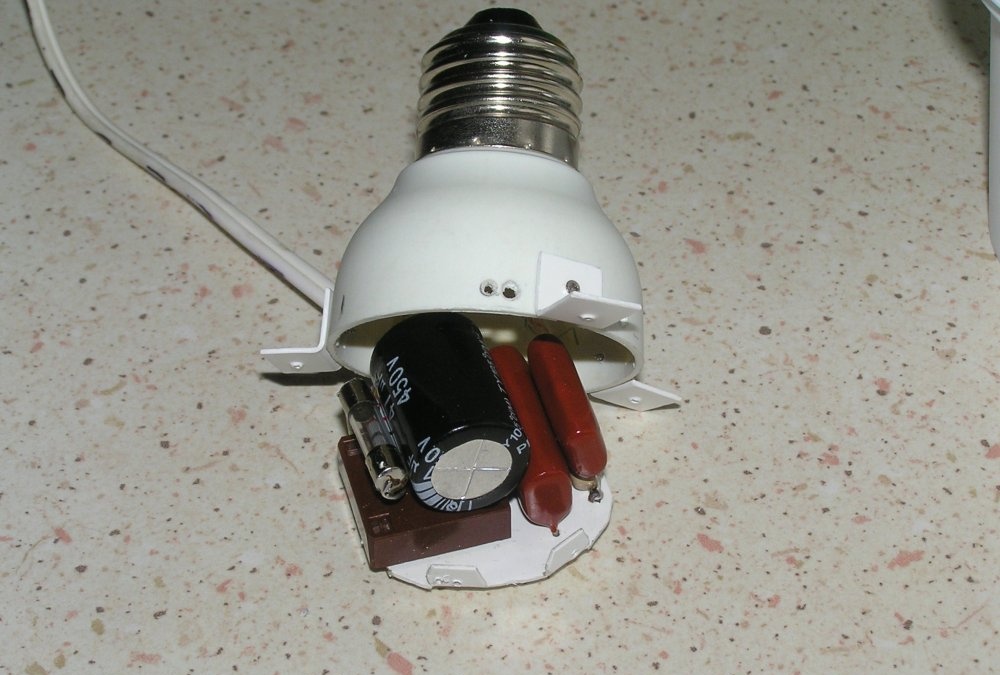
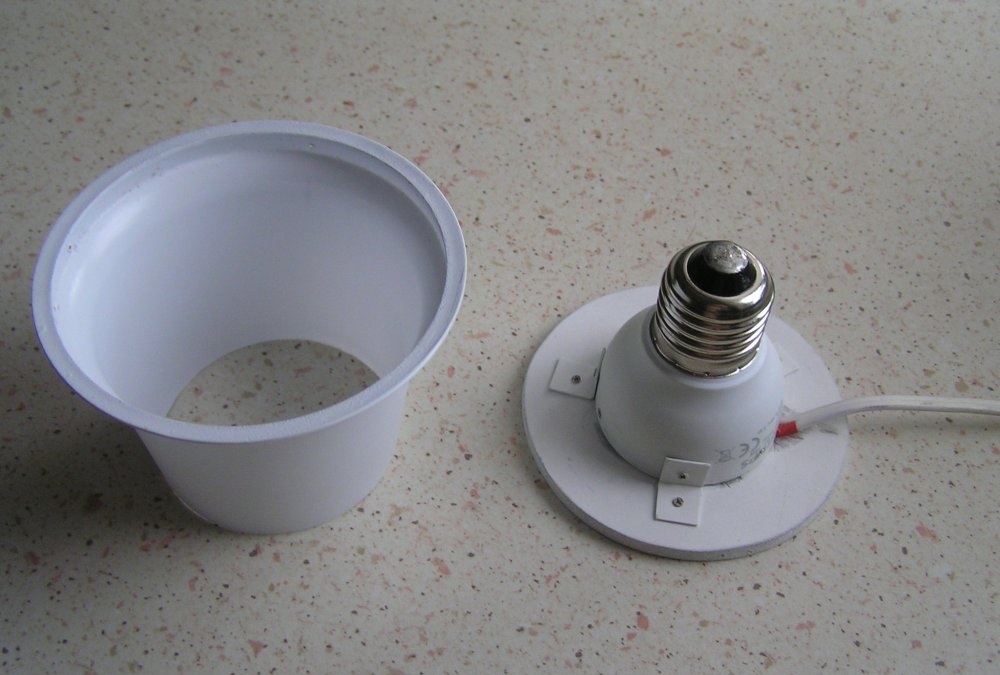
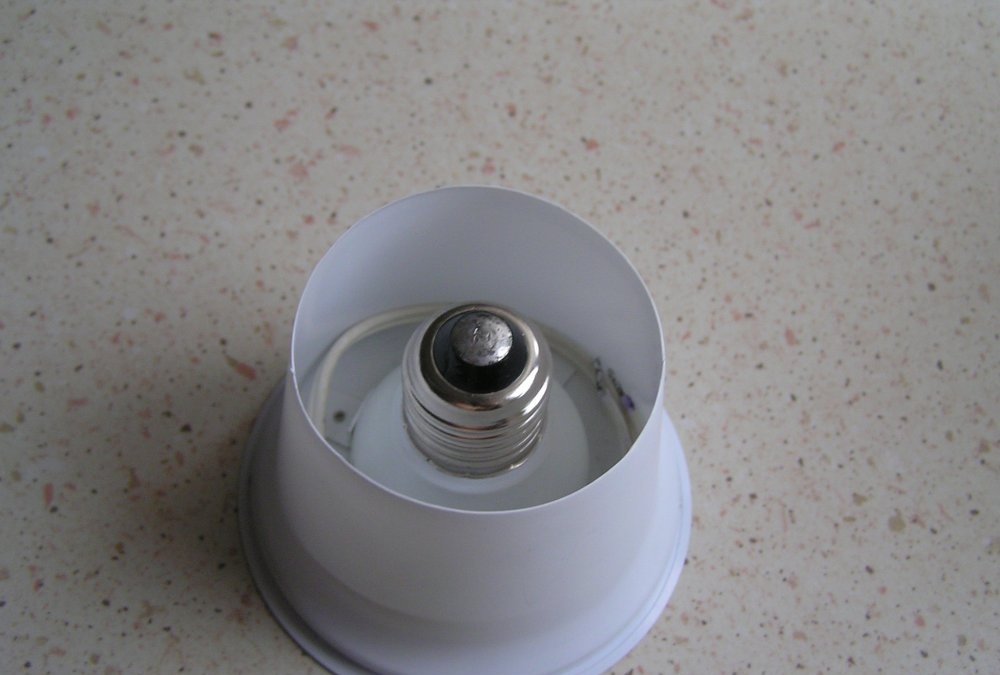
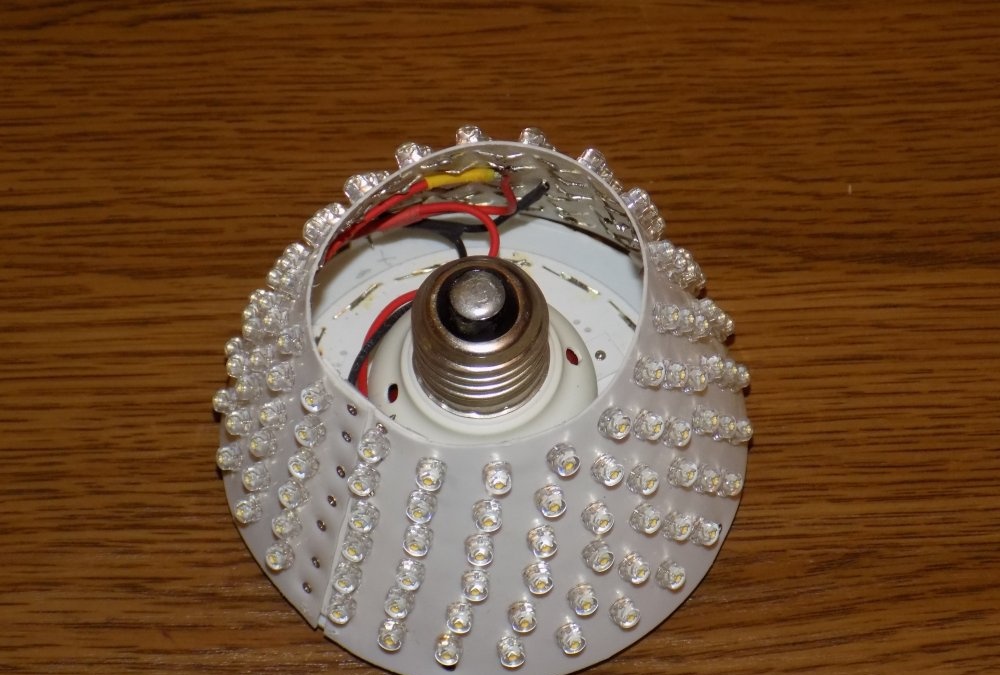
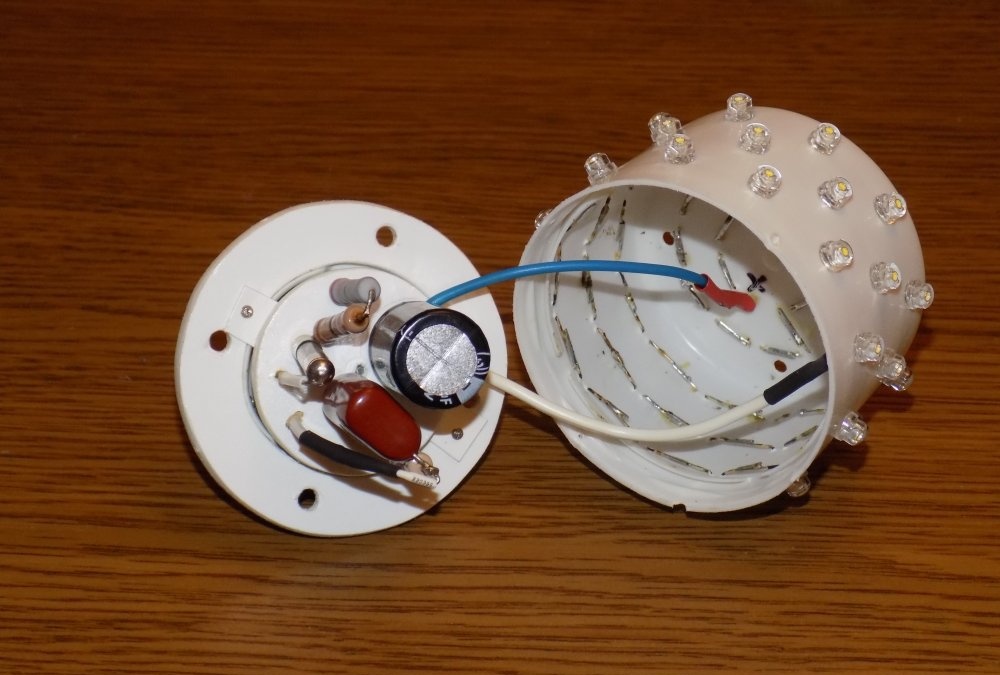
In order not to invent a housing with an E27 cartridge, we use burnt-out (another reason to abandon them) housekeepers.
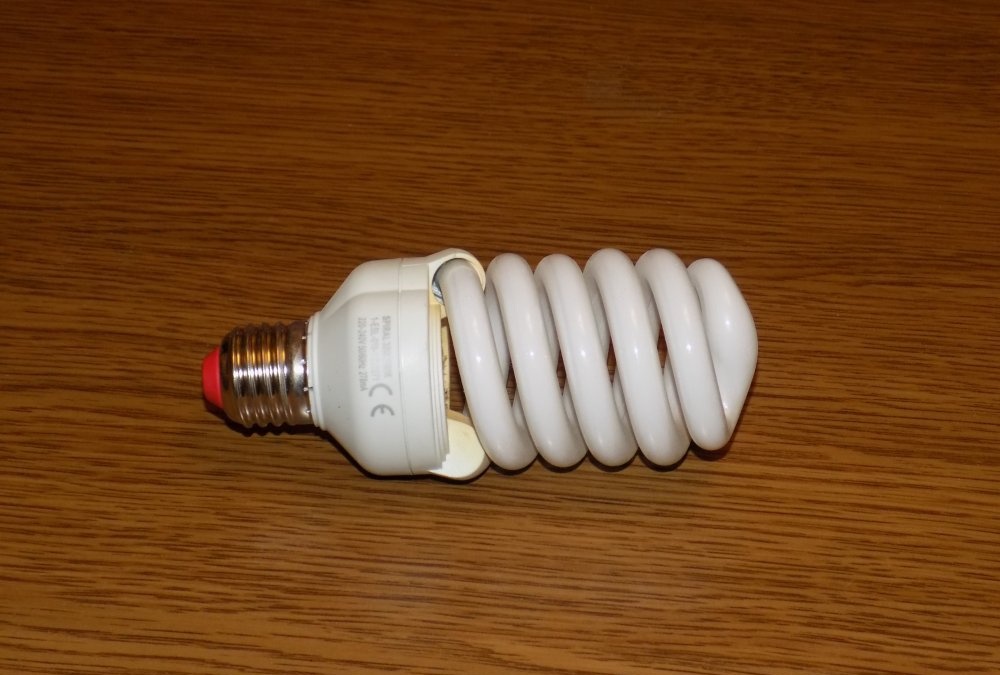
After carefully (on the street!) removing the flask with mercury vapor, you are left with an excellent workpiece for creativity.
The basis of the basics is the calculation and principle of operation of a current driver with a quenching capacitor
A typical diagram is shown in the illustration:
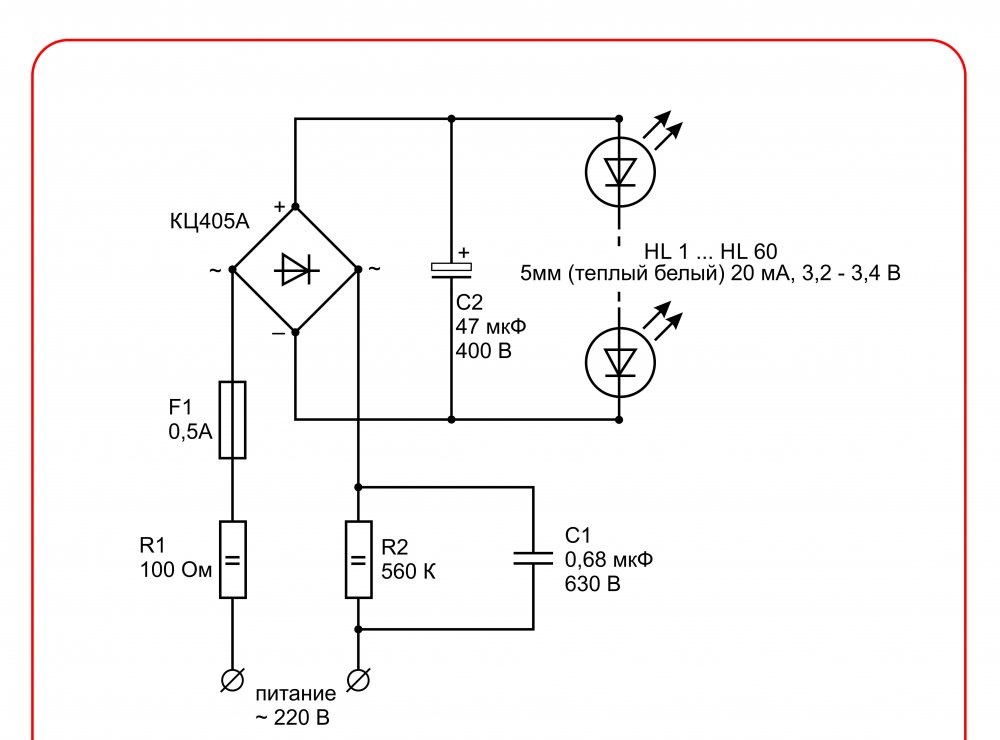
How the scheme works:
Resistor R1 limits the current surge when power is applied until the circuit stabilizes (about 1 second). Value from 50 to 150 Ohm. Power 2 W.
Resistor R2 ensures the operation of the ballast capacitor. Firstly, it discharges it when the power is turned off. At a minimum, to prevent you from being shocked when unscrewing the light bulb. The second task is to prevent a current surge in the case when the polarity of the charged capacitor and the first half-wave of 220 volts do not coincide.
Actually, the damping capacitor C1 is the basis of the circuit. It is a kind of current filter. By selecting the capacitance, you can set any current in the circuit. For our diodes it should not exceed 20 mA at peak mains voltage.
Then the diode bridge works (after all LEDs - these are elements with polarity).
Electrolytic capacitor C2 is needed to prevent the lamp from flickering. LEDs have no inertia when switching on and off. Therefore, the eye will see a flicker with a frequency of 50 Hz. By the way, cheap Chinese lamps are guilty of this. The quality of the capacitor is checked using any digital camera, even a smartphone. Looking at the burning diodes through a digital matrix, you can see blinking, indistinguishable to the human eye.
In addition, this electrolyte provides an unexpected bonus: the lamps do not turn off immediately, but with a noble slow attenuation until the capacity is discharged.
The quenching capacitor is calculated using the formula:I = 200*C*(1.41*U network - U led)
I – resulting circuit current in amperes
200 is a constant (network frequency 50Hz * 4)
1.41 – constant
C – capacitance of capacitor C1 (quenching) in farads
U network - estimated network voltage (ideally 220 volts)
U led – total voltage drop across LEDs (in our case – 3.3 volts, multiplied by the number of LED elements)
Selecting the quantity LEDs (with a known voltage drop) and the capacity of the quenching capacitor, it is necessary to achieve the required current. It should not be higher than specified in the specifications LEDs. It is the strength of the current that you regulate the brightness of the glow, and inversely proportional to the lifespan of the LEDs.
For convenience, you can create a formula in Excel.

The circuit has been tested several times, the first copy was assembled almost 3 years ago, it works in a kitchen lamp, there have been no malfunctions.
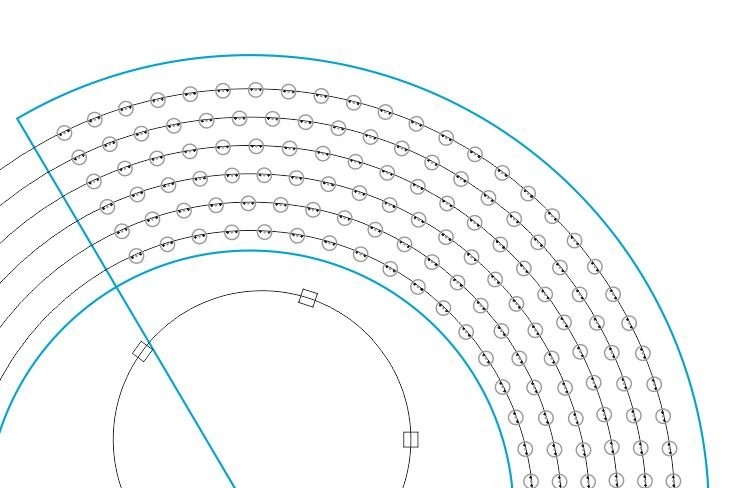
Let's move on to the practical implementation of projects. There is no point in discussing the number of LED elements and capacitor capacity in individual circuits: the projects are individual for each lamp. Calculated strictly according to the formula.The above circuit for 60 LEDs with a 68 microfarad capacitor is not just an example, but a real calculation for a current in the circuit of 15 mA (to extend the life of the lights).
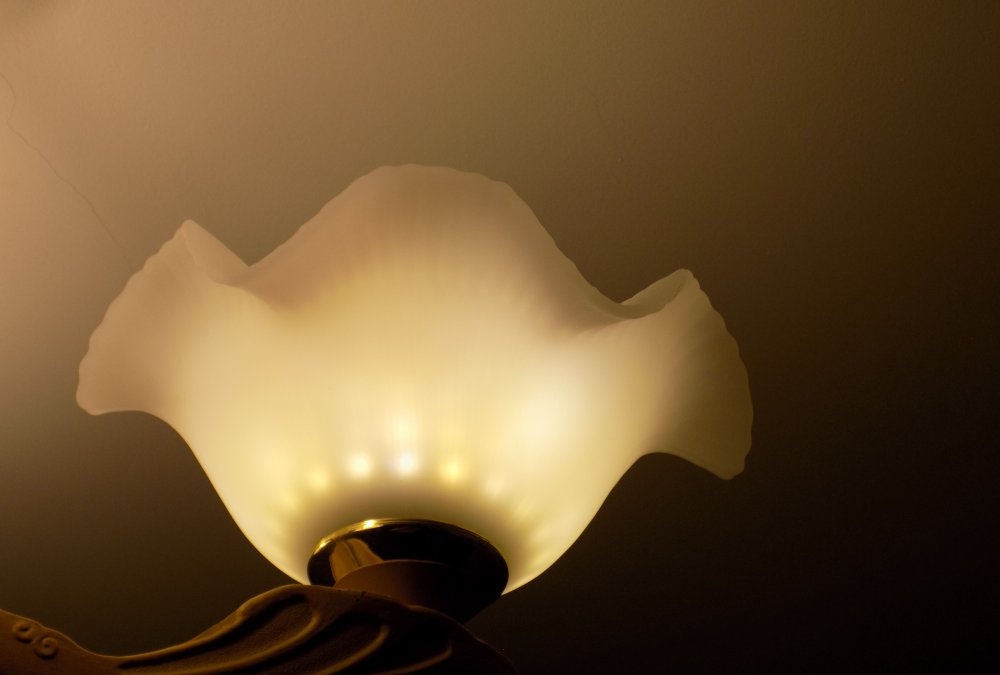
LED lamp in a chandelier
We use the gutted cartridge from the housekeeper as a housing for the circuit and supporting structure. In this project I did not use a breadboard; I assembled the driver on a 1 mm thick PVC roundel. It turned out to be just the right size. Two capacitors - due to the selection of capacitance: the required number of microfarads was not found in one element.
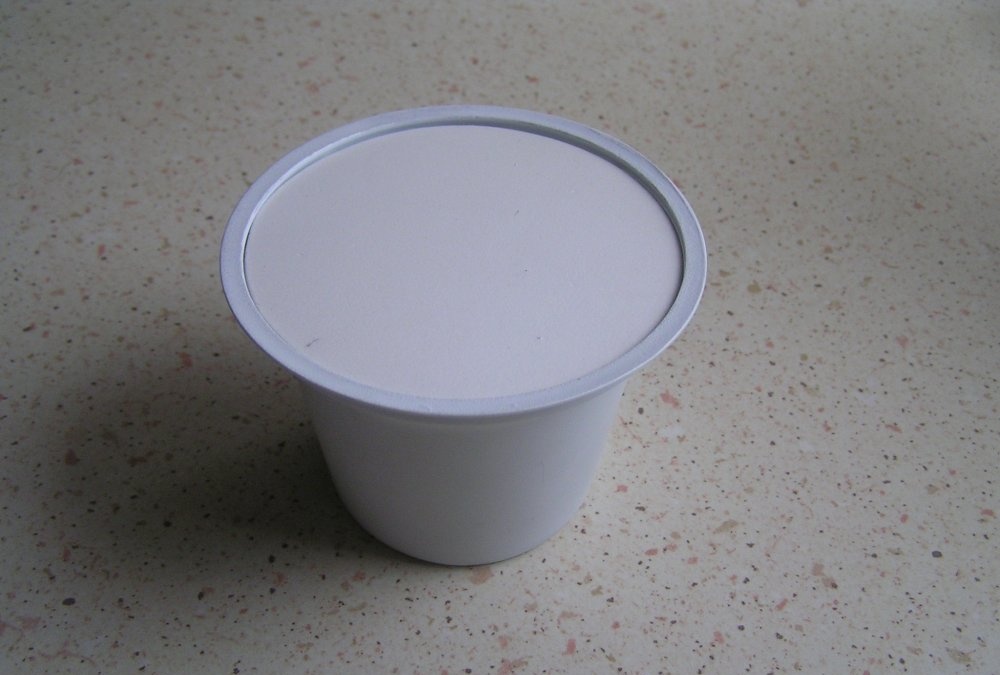
A yogurt jar was used as a housing to house the LED elements. In the design I also used scraps of 3 mm foamed PVC sheets.
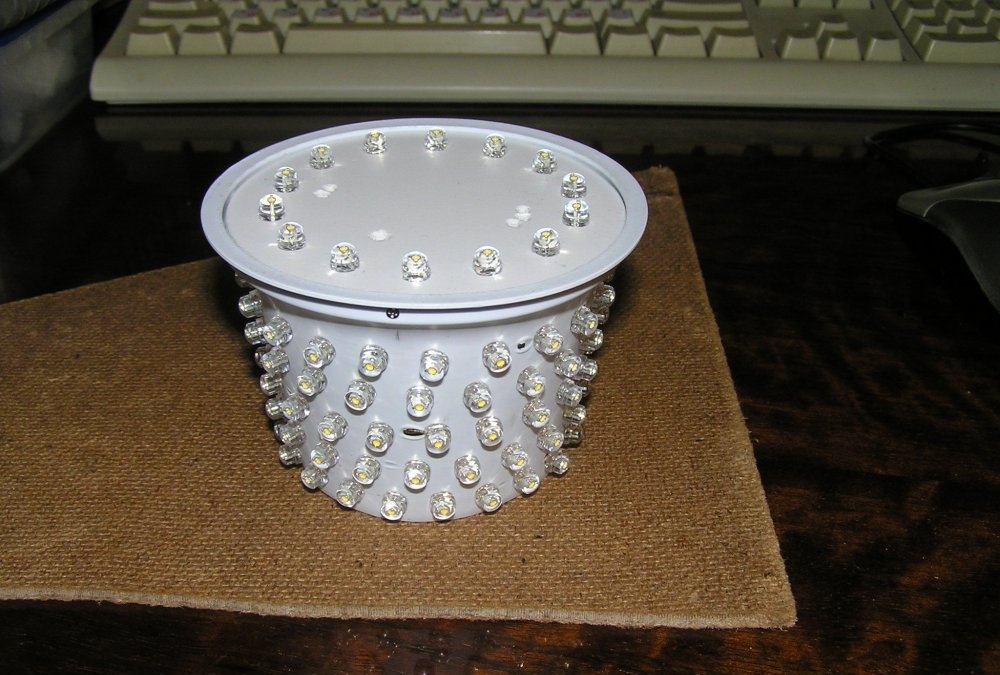
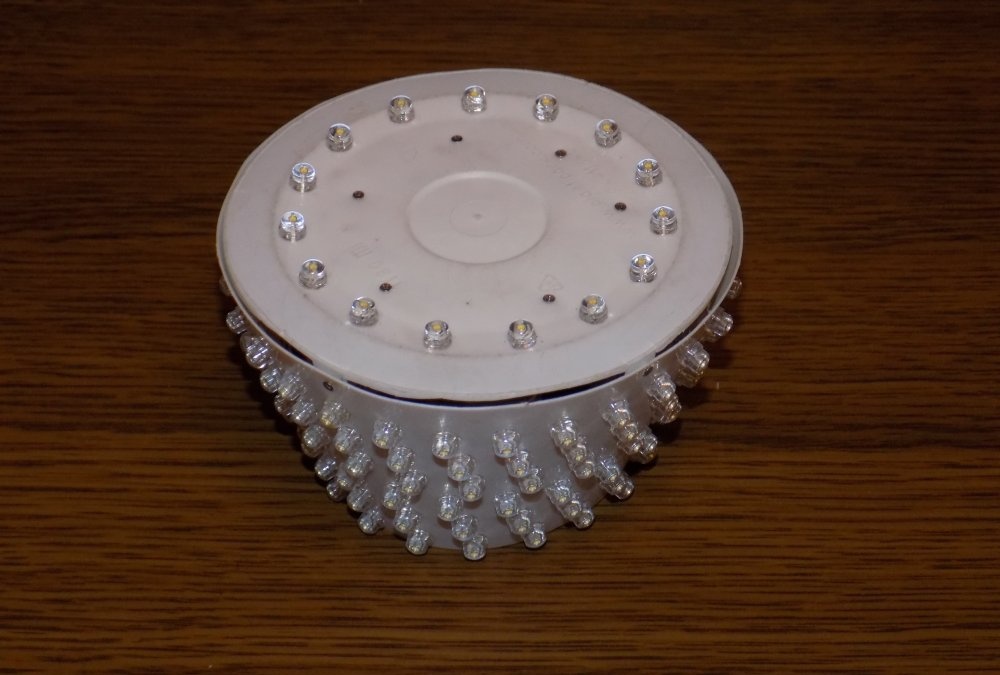
After assembly it turned out neat and even beautiful. This arrangement of the socket is associated with the shape of the chandelier: the horns are directed upward, towards the ceiling.
Next we place the LEDs: according to the scheme, 150 pcs. We pierce the plastic with an awl, labor costs: one full evening.
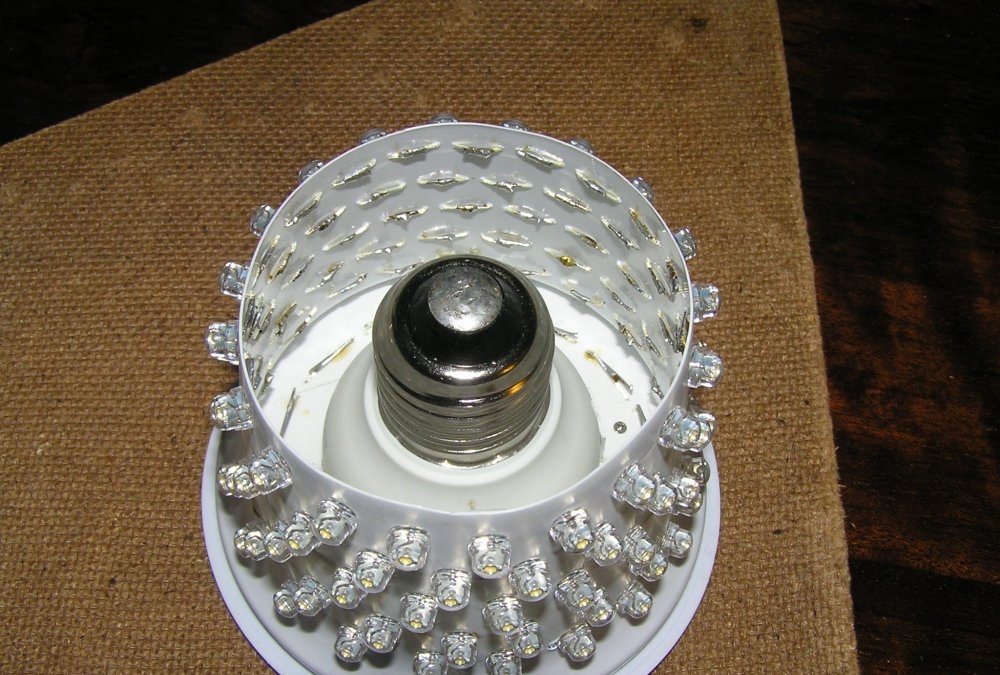
Looking ahead, I will say: the material of the case did not justify itself, it is too thin. The next lamp was made from 1 mm PVC sheet. To give it a shape, I calculated the cone scan for the same 150 diodes.
It turned out not so elegant, but reliable, and holds its shape perfectly. The lamp is completely hidden in the chandelier arm, so appearance is not so important.
Actually, installation.
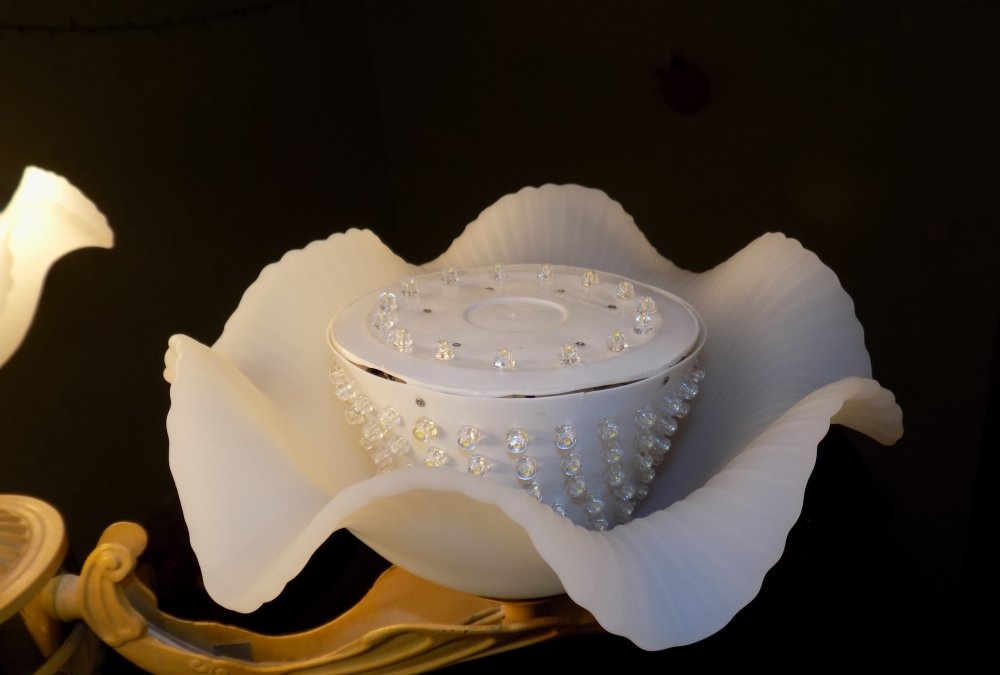
It shines evenly and doesn’t hurt your eyes.
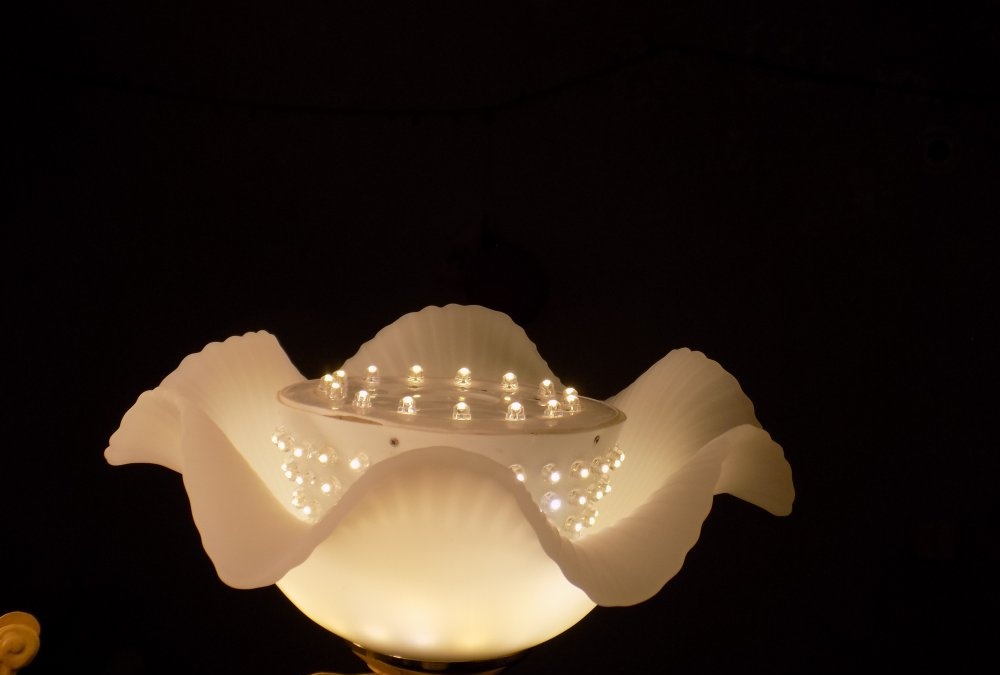
I didn’t measure the lumens, but it felt brighter than a 40 W incandescent lamp, a little weaker than 60 W.

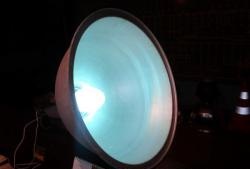
LED lamp in a flat ceiling lamp for the kitchen
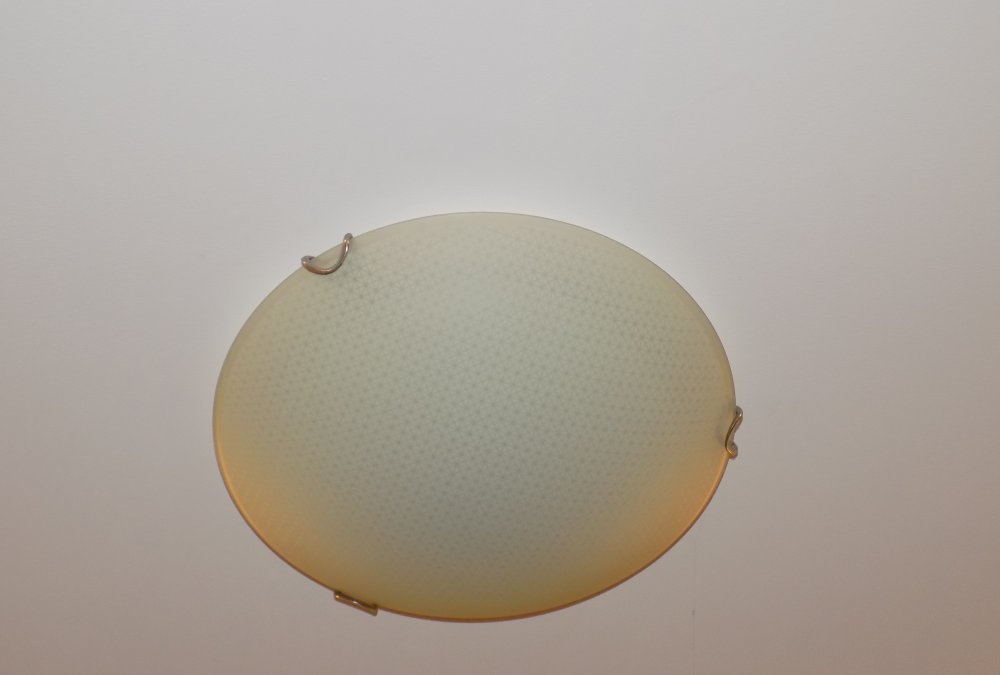
An ideal donor for such a project. All LEDs will be located in the same plane.
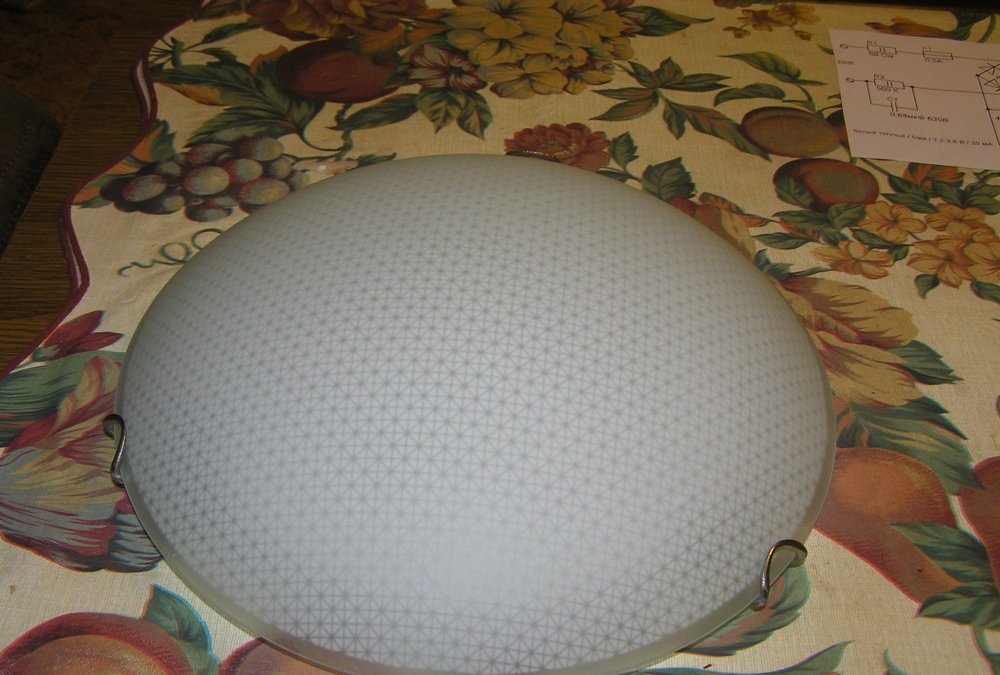
We draw a template and cut out a matrix to accommodate the LED elements. With this diameter, a flat PVC sheet will be deformed. So I used the bottom of a plastic bucket of construction mixtures.There is a stiffening rib along the outer contour.
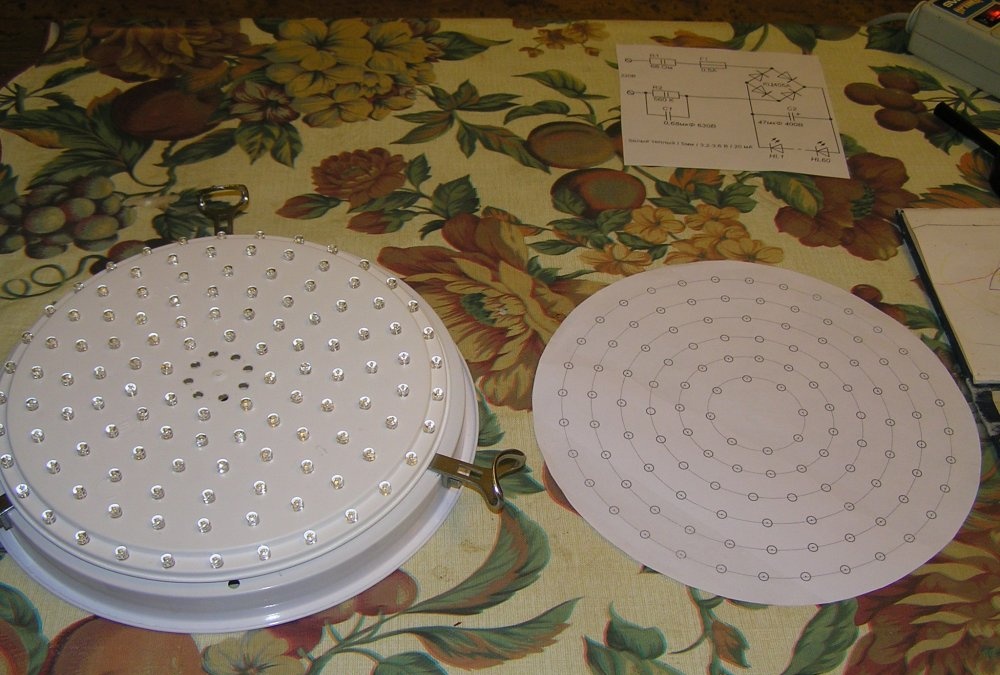
The diodes are installed using the usual awl: 2 holes according to the markings.
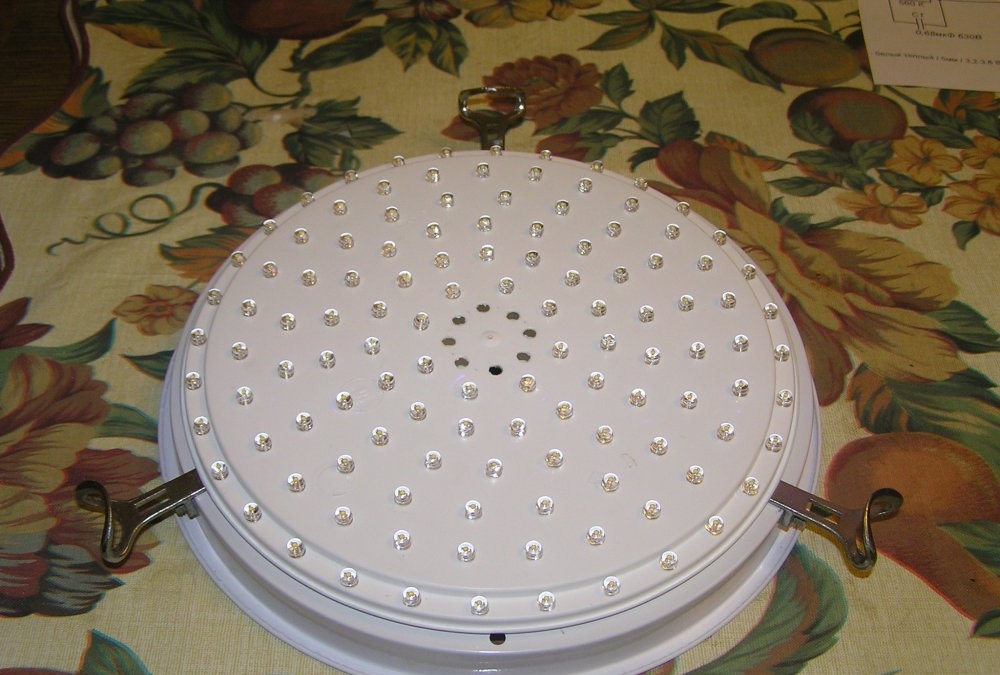
The lamp is designed for 120 LED elements, divided into 2 groups of 60 pieces, for the reliability of the circuit. We make 2 identical drivers.
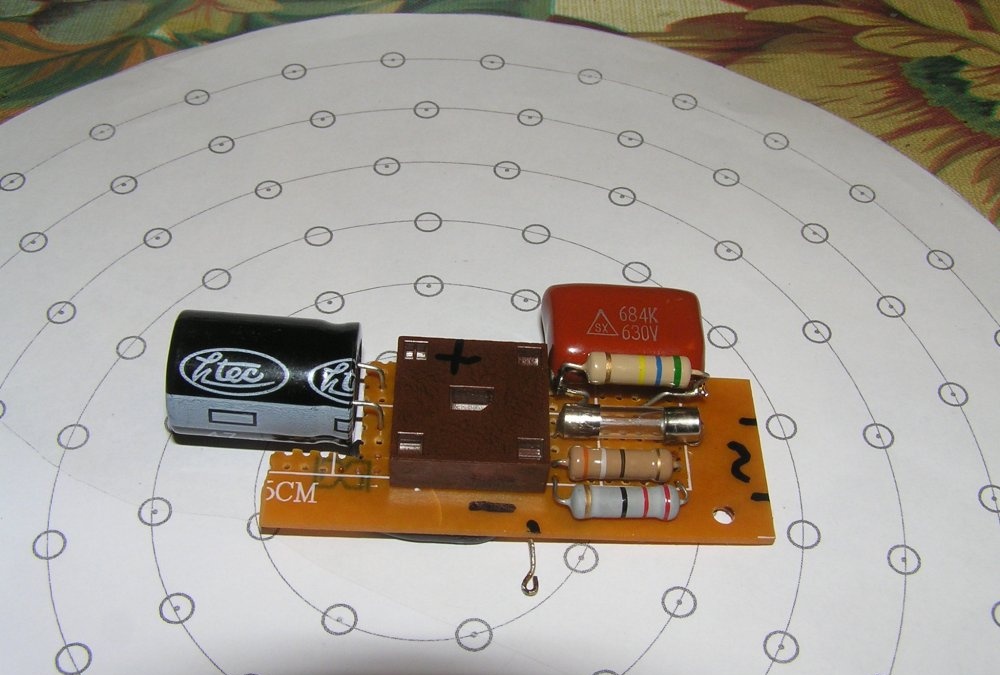
We mount them on dielectric spacers on the reverse side.
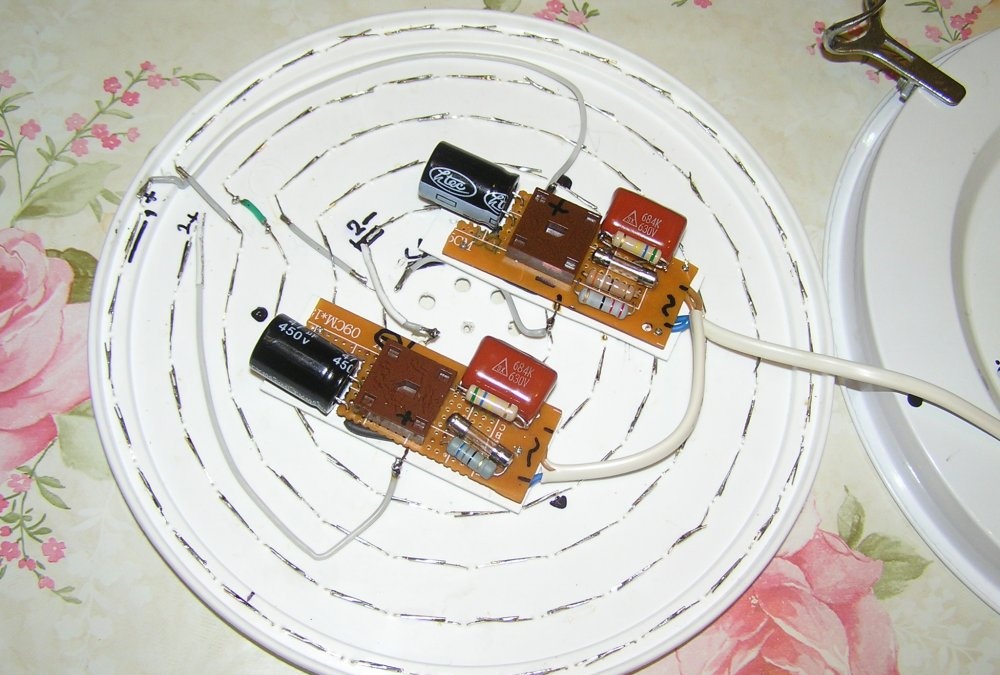
To attach the disk, we install a PVC podium in the center.
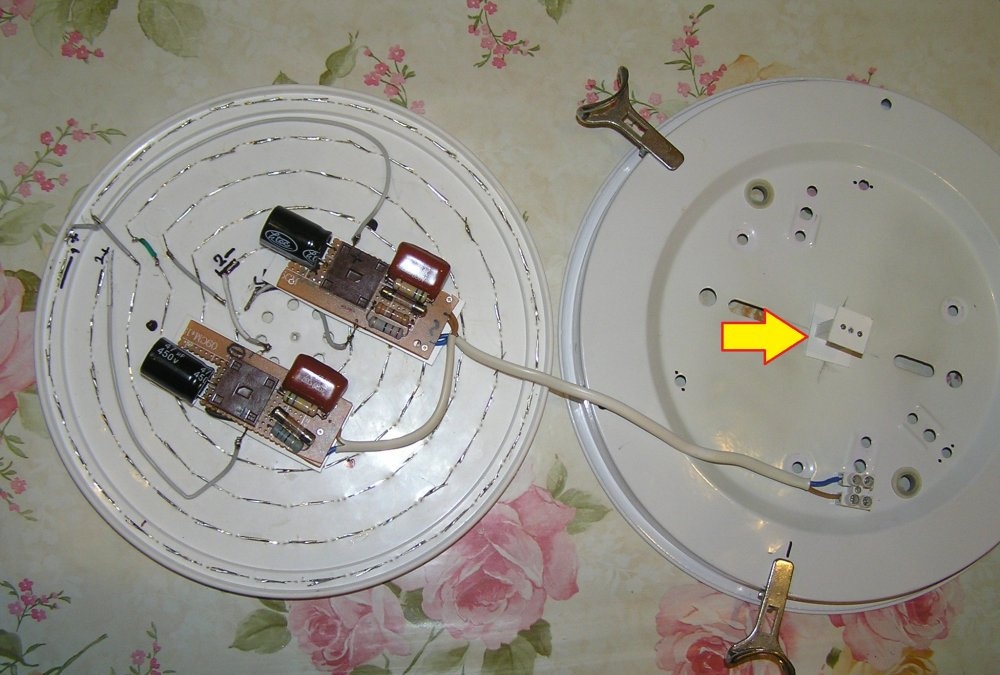
We hang the lamp on the ceiling, turn it on - everything works.
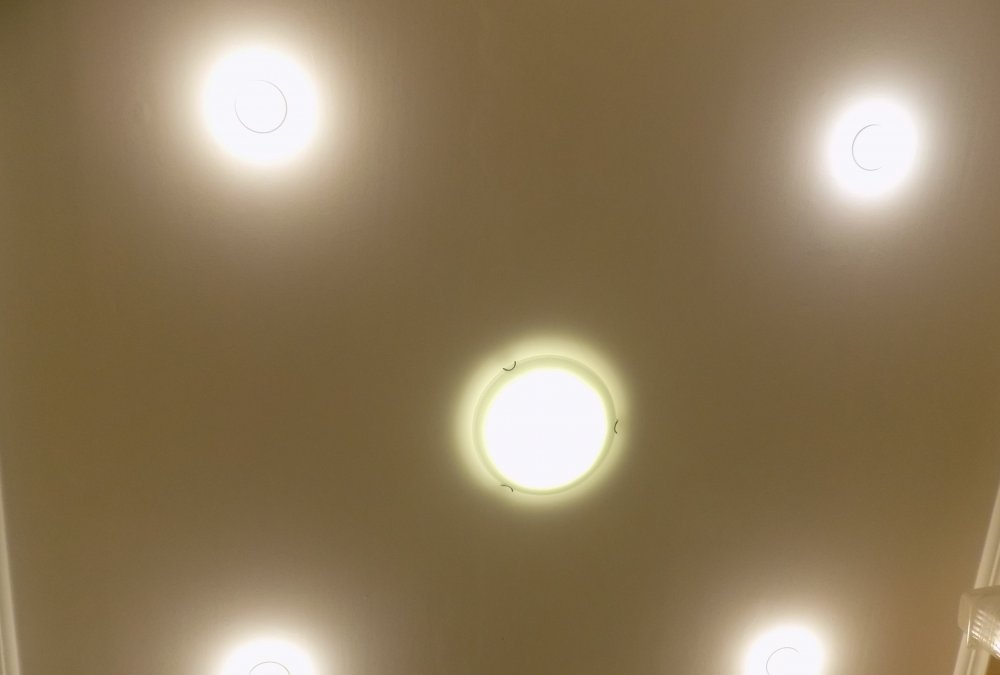
To assess the brightness: in the corners there are 4 branded LED lamps from IKEA, with a light output of 400 Lm each.
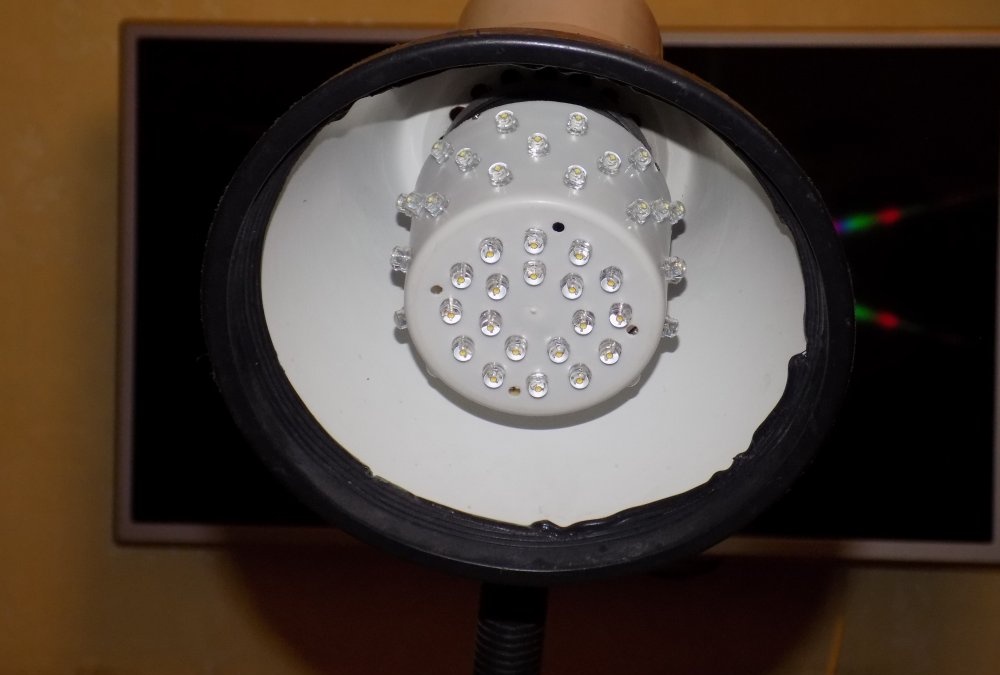
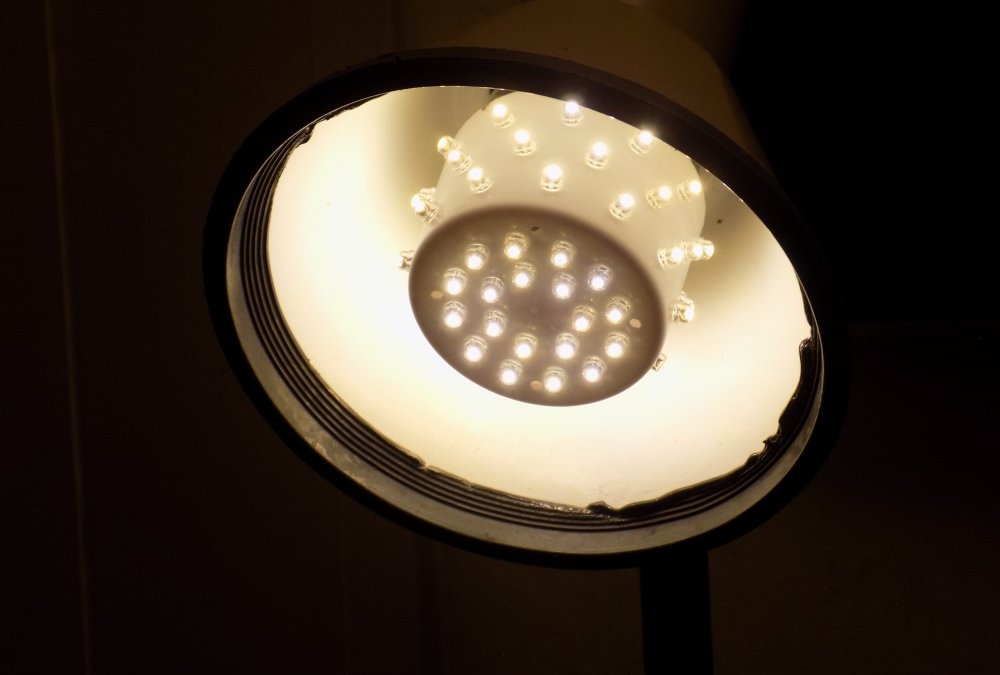
LED lamp for the bathroom
Also an easy to implement project. We extract the contents of the lamp, install a matrix of 30 LEDs, and the corresponding driver.
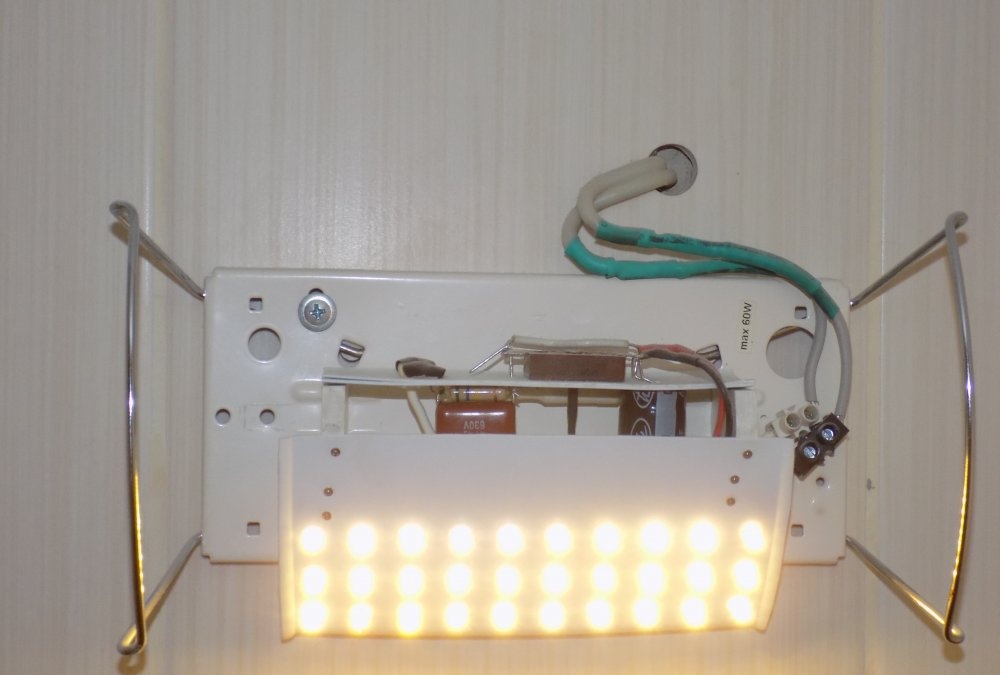
The light is soft, uniform, more than enough for this “room”.
Desk lamp
A deodorant cap is used as a body.
The E27 cartridge is traditionally from a burnt housekeeper.
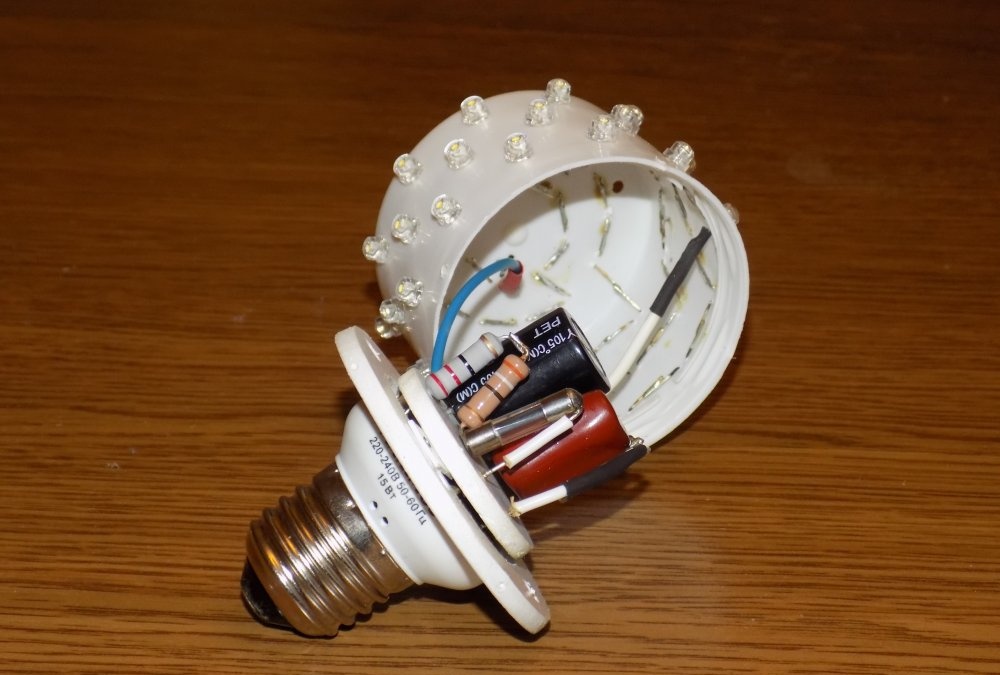
The case accommodates 55 LEDs.

It turned out compact and neat.
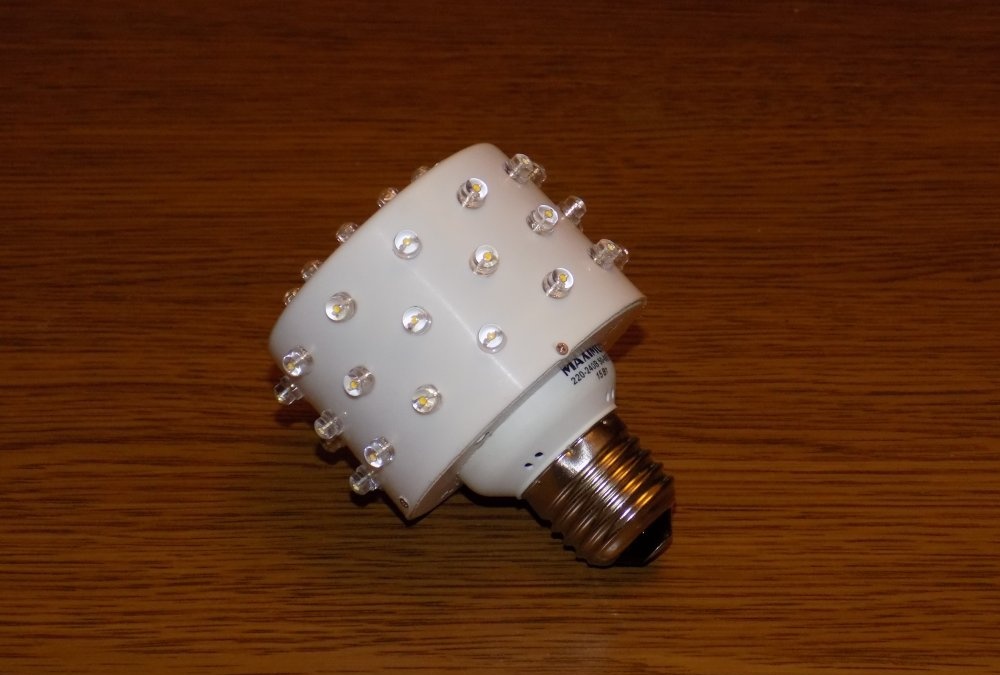
In the table lamp, the “installation” looks like its own.
And it shines quite confidently.
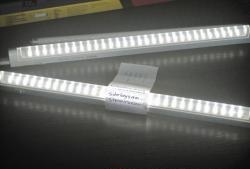
The child, inspired by his dad's success, asked for a backlight for his computer desk. Some kind of elegant box was found in which the driver fit.

I used a cable box as a housing. Profile size: 10*10 mm.
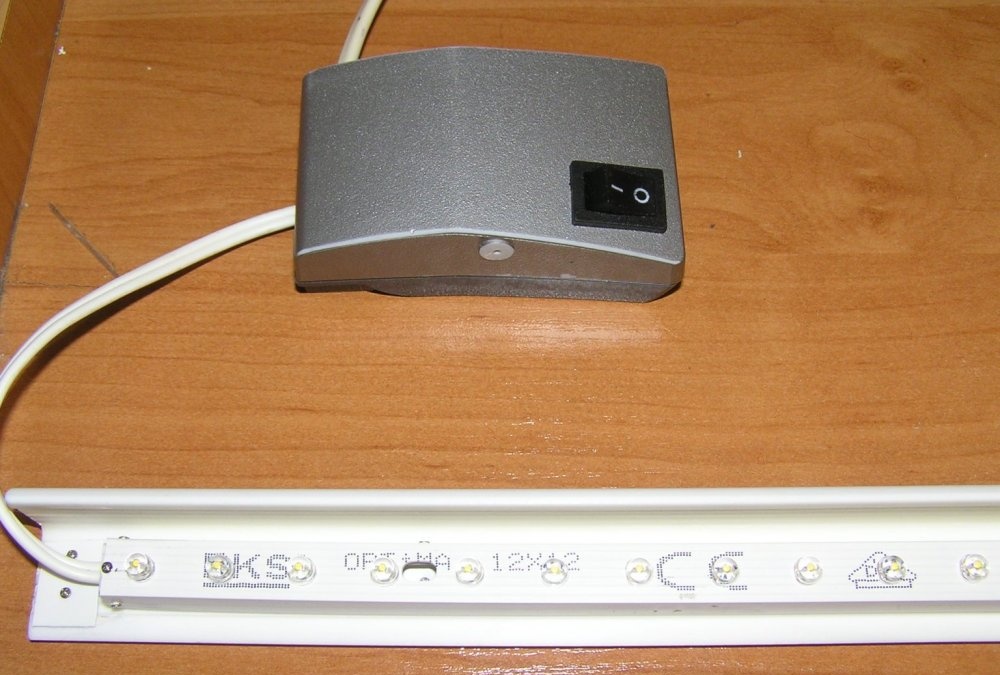
So that the light does not hit the eyes, but is directed from top to bottom, the structure is placed on a corner with a side of 25 mm, made of white PVC.
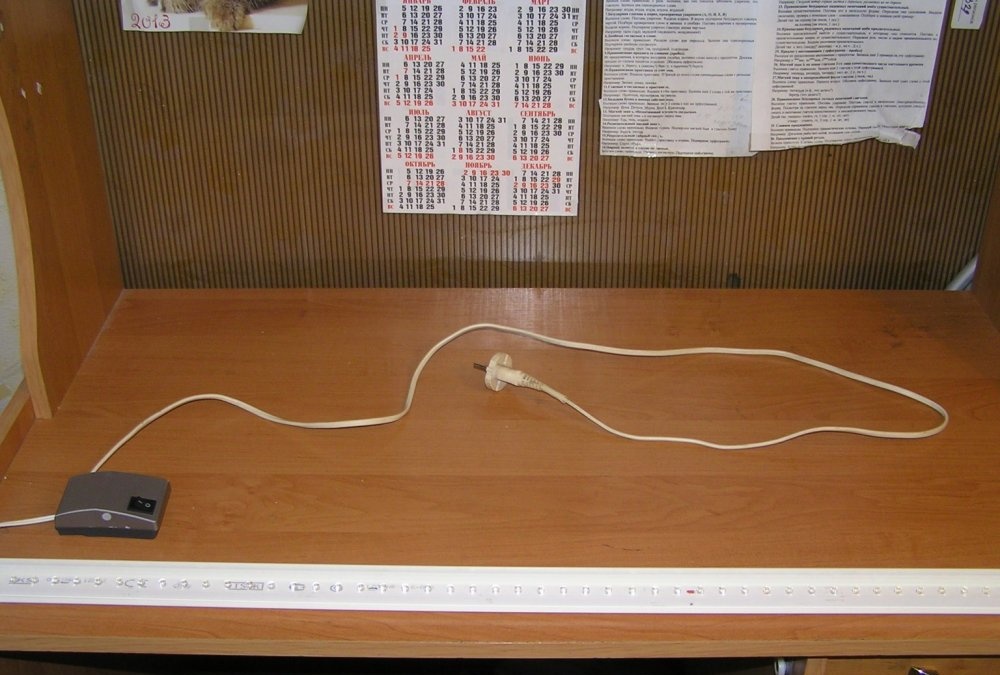
Result:
All work is made from components that cost practically nothing. In addition, this is a great opportunity to practice your radio skills.