When a laser printer is available, radio amateurs use a printed circuit board manufacturing technology called LUT. However, such a device is not available in every home, since even in our time it is quite expensive. There is also a manufacturing technology using photoresist film. However, to work with it you also need a printer, but an inkjet one. It’s already simpler, but the film itself is quite expensive, and at first it’s better for a novice radio amateur to spend the available funds on a good soldering station and other accessories.
Is it possible to make a printed circuit board of acceptable quality at home without a printer? Yes. Can. Moreover, if everything is done as described in the material, you will need very little money and time, and the quality will be at a very high level. In any case, the electric current will “run” along such paths with great pleasure.
List of necessary tools and consumables
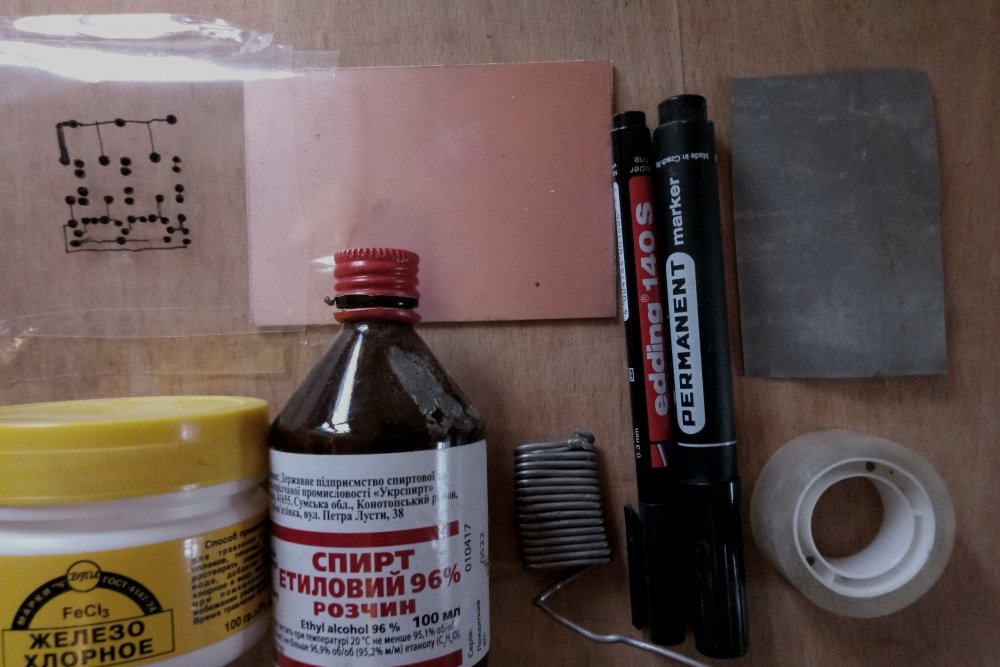
You should start by preparing the tools, devices and consumables that you simply cannot do without.To implement the most budget-friendly method for manufacturing printed circuit boards at home, you will need the following:
- Software for drawing design.
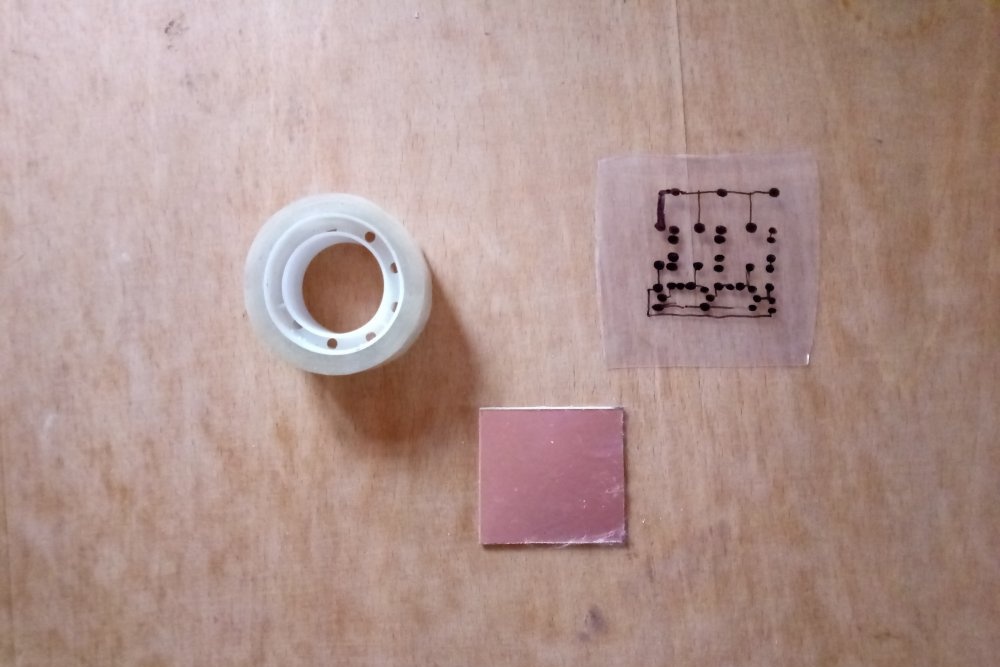
- Transparent polyethylene film.
- Narrow tape.
- Marker.
- Foil fiberglass.
- Sandpaper.
- Alcohol.
- Unnecessary toothbrush.
- Tool for drilling holes with a diameter of 0.7 to 1.2 mm.
- Ferric chloride.
- Plastic container for etching.
- Brush for painting with paints.
- Soldering iron.
- Solder.
- Liquid flux.
Let’s go through each point briefly, since there are some nuances that can only be reached through experience.
There are a huge number of programs for developing printed circuit boards today, but for a novice radio amateur, the simplest option would be Sprint Layout. The interface is easy to master, it is free to use, and there is a huge library of common radio components.
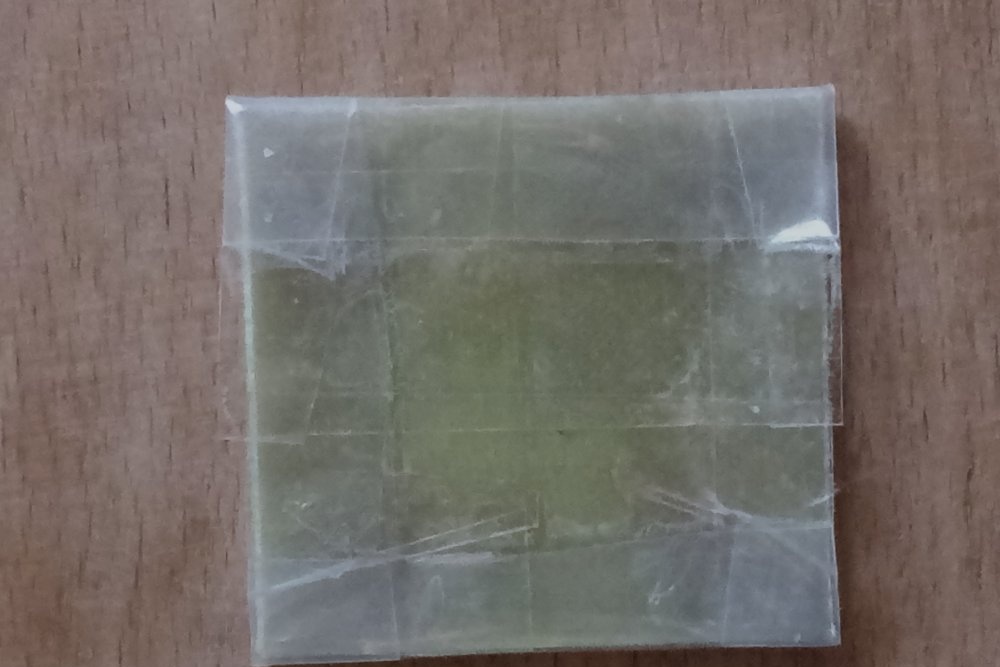
Polyethylene is needed to transfer the pattern from the monitor. It is better to take a stiffer film, for example, from old covers for school books. Any tape will be suitable for attaching it to the monitor. It’s better to take a narrow one - it will be easier to peel off (this procedure does not harm the monitor).
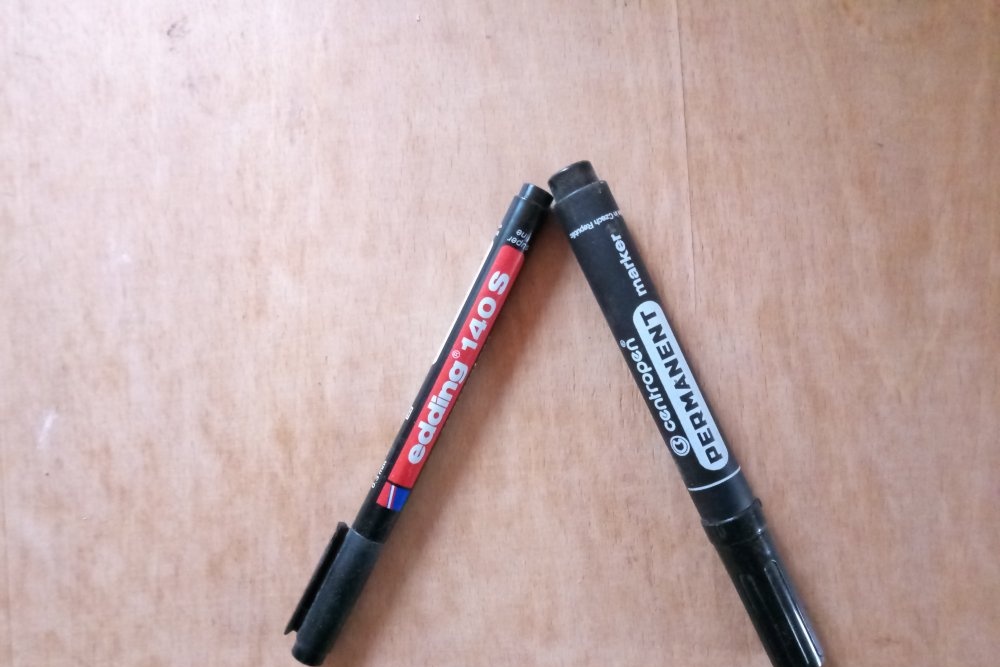
It’s worth looking at markers in more detail, as this is a sore subject. In principle, any option is suitable for transferring a design onto polyethylene. But to draw on foil fiberglass, you need a special marker. But there is a little trick to save money and not buy quite expensive “special” markers for drawing printed circuit boards.The fact is that these products are absolutely no different in their properties from ordinary permanent markers, which are sold 5-6 times cheaper in any office supply store. But the marker must have the inscription “Permanent”. Otherwise nothing will work.
You can take any foiled fiberglass laminate. It's better if it's thicker. For beginners, working with such material is much easier. To clean it, you will need sandpaper with a grit size of about 1000 units, as well as alcohol (available at any pharmacy). The last consumable can be replaced with nail polish mixing liquid, which is available in any house where a woman lives. However, this product smells quite nasty and takes a long time to dissipate.
To drill the board, it is better to have a special mini-drill or engraver. However, you can go a cheaper route. It is enough to buy a collet or jaw chuck for small drills and adapt it to a regular household drill.
Ferric chloride can be replaced with other chemicals, including those you probably already have in your home. For example, a solution of citric acid in hydrogen peroxide is suitable. Information on how alternative compositions to ferric chloride are prepared for etching boards can be easily found on the Internet. The only thing worth paying attention to is the container for such chemicals - it should be plastic, acrylic, glass, but not metal.
There is no need to talk in more detail about the soldering iron, solder and liquid flux. If a radio amateur has come to the question of making a printed circuit board, then he is probably already familiar with these things.
Development and transfer of a board design to a template
When all of the above tools, devices and consumables are prepared, you can begin developing the board. If the device being manufactured is not unique, then it will be much easier to download its design from the Internet. Even a regular drawing in JPEG format will do.
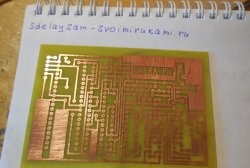
If you want to go a more complicated route, draw the board yourself. This option is often unavoidable, for example, in situations where you do not have exactly the same radio components that are needed to assemble the original board. Accordingly, when replacing components with analogues, you have to allocate space for them on fiberglass, adjust holes and tracks. If the project is unique, then the board will have to be developed from scratch. This is what the above-mentioned software is needed for.
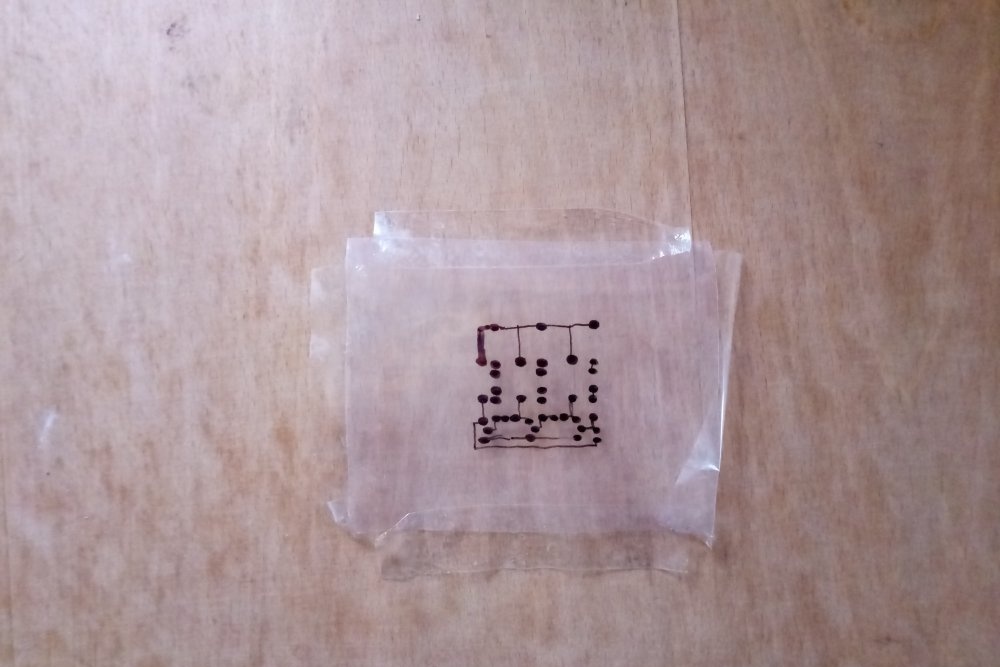
When the board layout is ready, all that remains is to transfer it to a transparent template. The polyethylene is fixed directly to the monitor using tape. Next, we simply translate the existing pattern - tracks, contact patches, and so on. For these purposes, it is best to use the same permanent marker. It does not wear off, does not smudge, and is clearly visible.
Preparation of foil fiberglass laminate
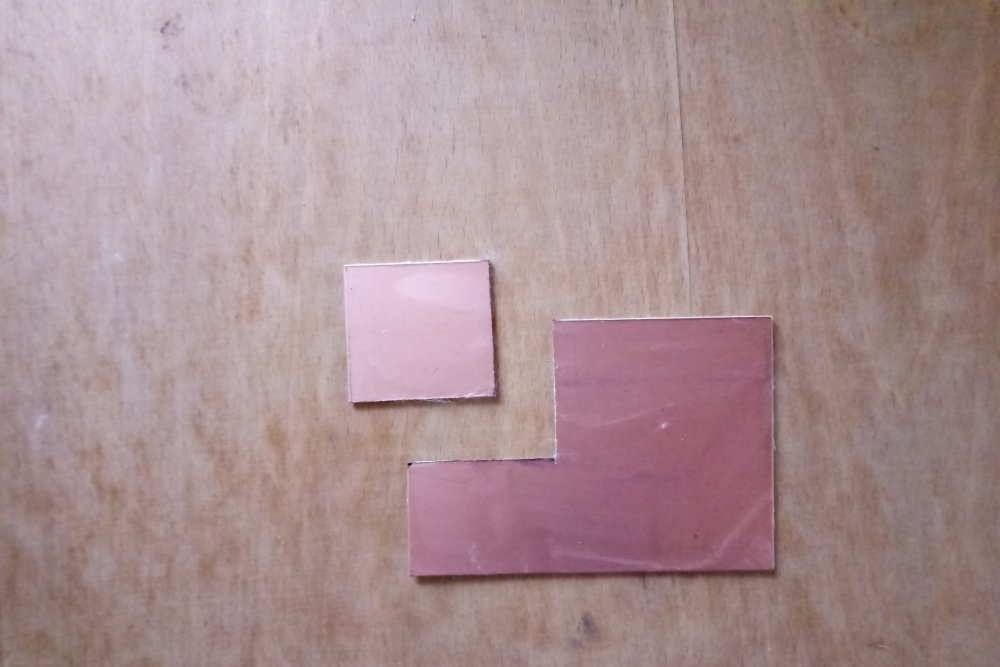
The next step is the preparation of fiberglass laminate. First you need to cut it to the size of the future board. It is better to do this with a small margin. To cut foil fiberglass laminate, you can use one of several methods.
Firstly, the material can be cut perfectly using a hacksaw. Secondly, if you have an engraver with cutting wheels, it will be convenient to use it. Thirdly, fiberglass can be cut to size using a utility knife.The principle of cutting is the same as when working with a glass cutter - a cutting line is applied in several passes, then the material is simply broken off.
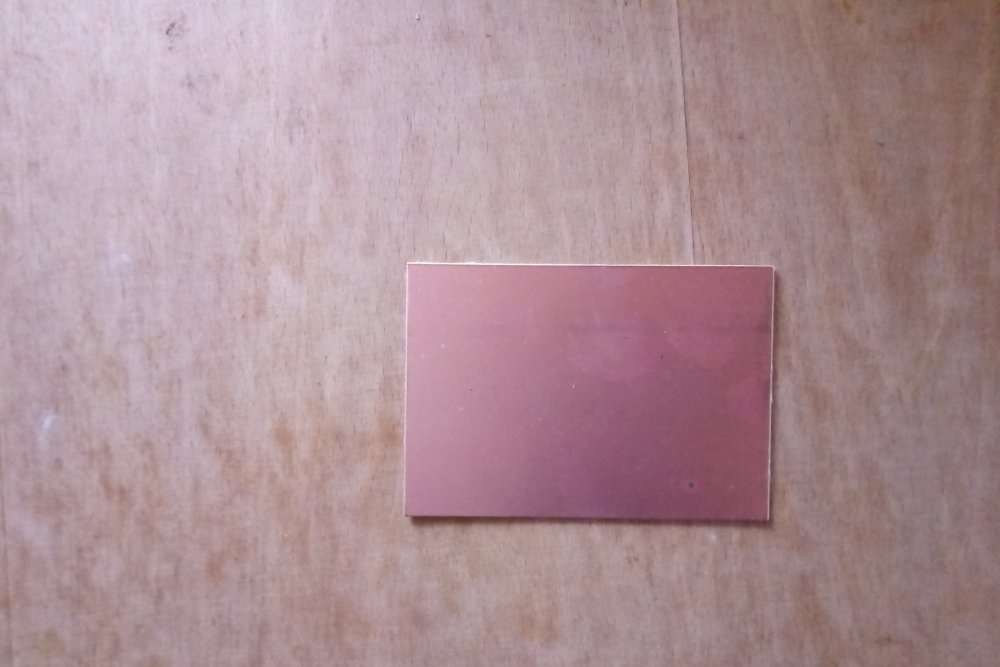
Now it is imperative to clean the copper layer of fiberglass from the protective coating and oxide. There is no better way than sandpaper to solve this problem. The grain size is taken from 1000 to 1500 units. The goal is to obtain a clean, shiny surface. It is not worth sanding the copper layer to a mirror shine, since small scratches from sandpaper increase the adhesion of the surface, which will be needed later.
Finally, all that remains is to clean the foil from dust and fingerprints. To do this, use alcohol or acetone (nail polish remover). After processing, we do not touch the copper surface with our hands. For subsequent manipulations, we grab the fiberglass by the edges.
Combination of template and fiberglass
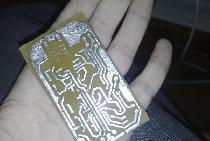
Now our task is to combine the pattern obtained on polyethylene with the prepared fiberglass laminate. To do this, the film is applied to the desired location and positioned. The remains are wrapped on the reverse side and secured with the same tape.
Drilling holes
Before drilling, it is recommended to secure the fiberglass laminate with the template to the surface in some way. This will allow for greater accuracy and will also prevent sudden rotation of the material as the drill passes through. If you have a drilling machine for such work, then the problem described will not arise at all.
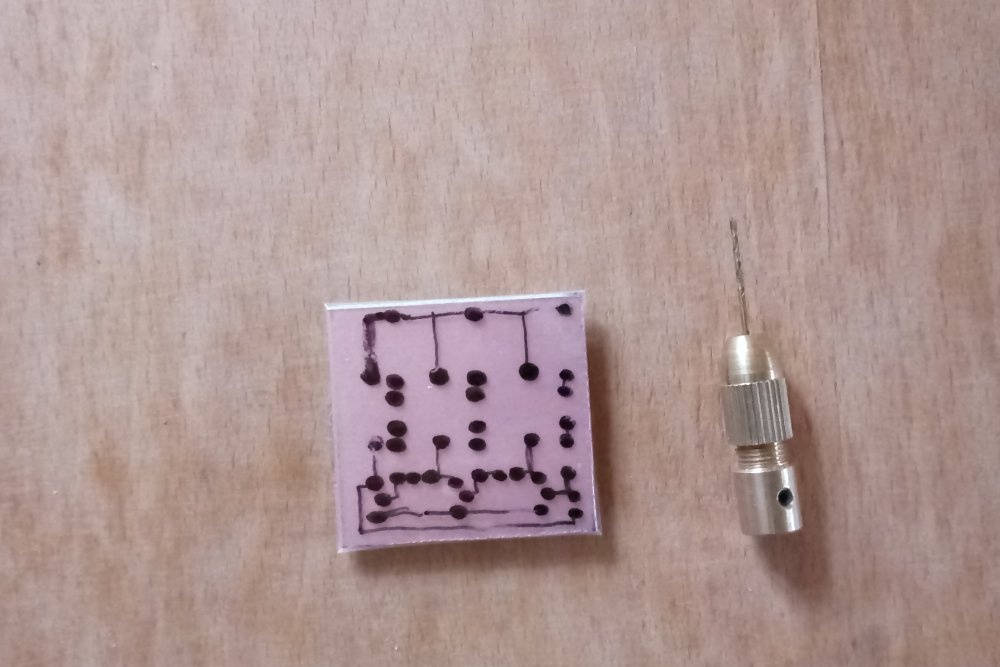
You can drill holes in fiberglass at any speed. Some work at low speeds, others at high speeds. Experience shows that the drills themselves last much longer if operated at low speeds.This makes them more difficult to break, bend and damage the sharpening.
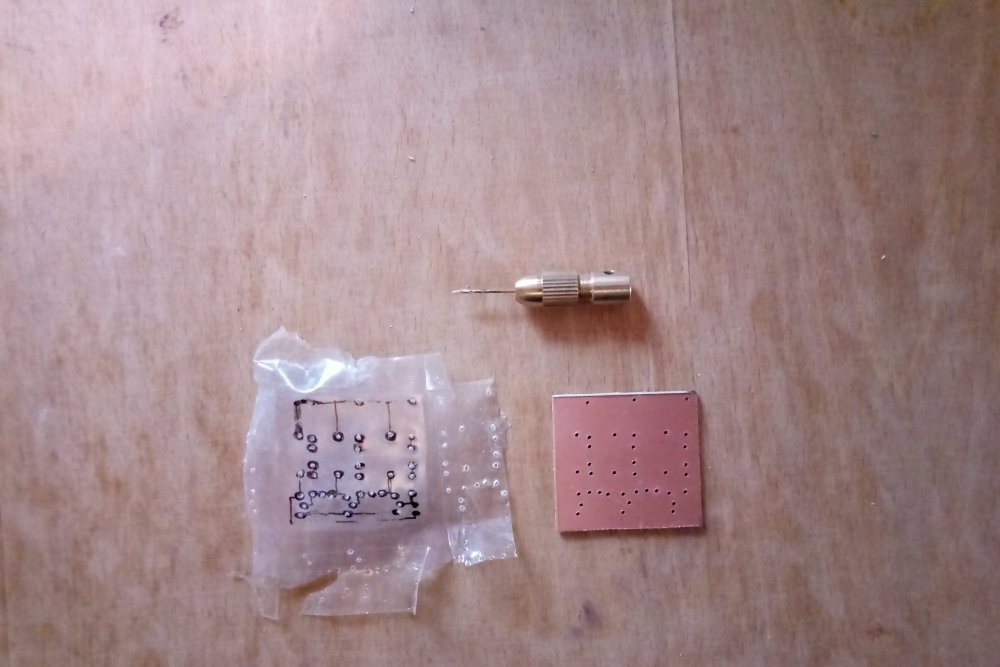
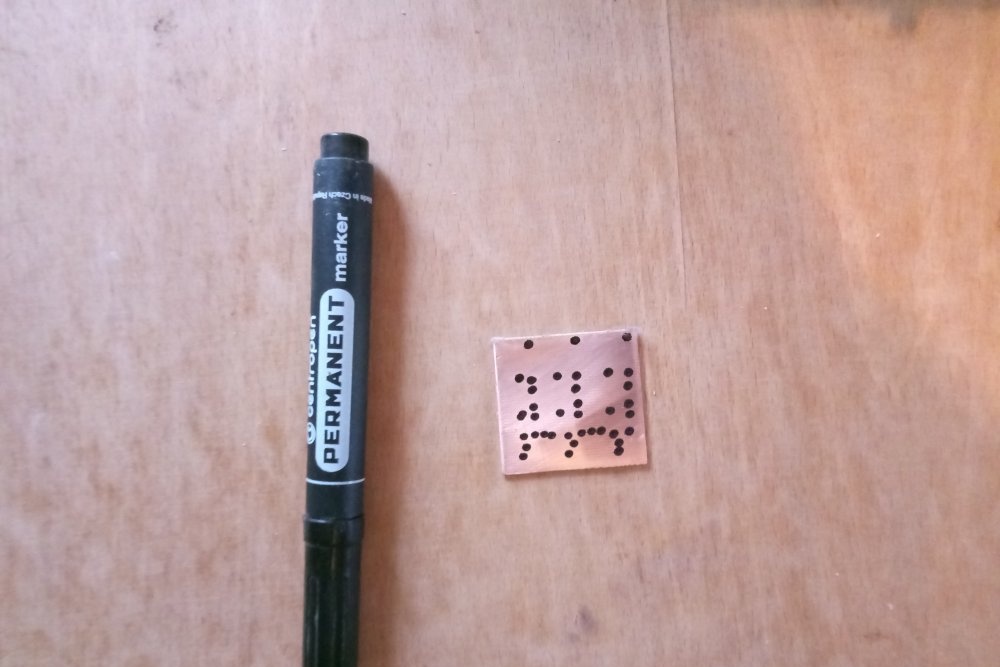
The holes are drilled directly through the polyethylene. Future contact patches drawn on the template will serve as reference points. If the project requires it, we promptly change drills to the required diameter.
Drawing tracks
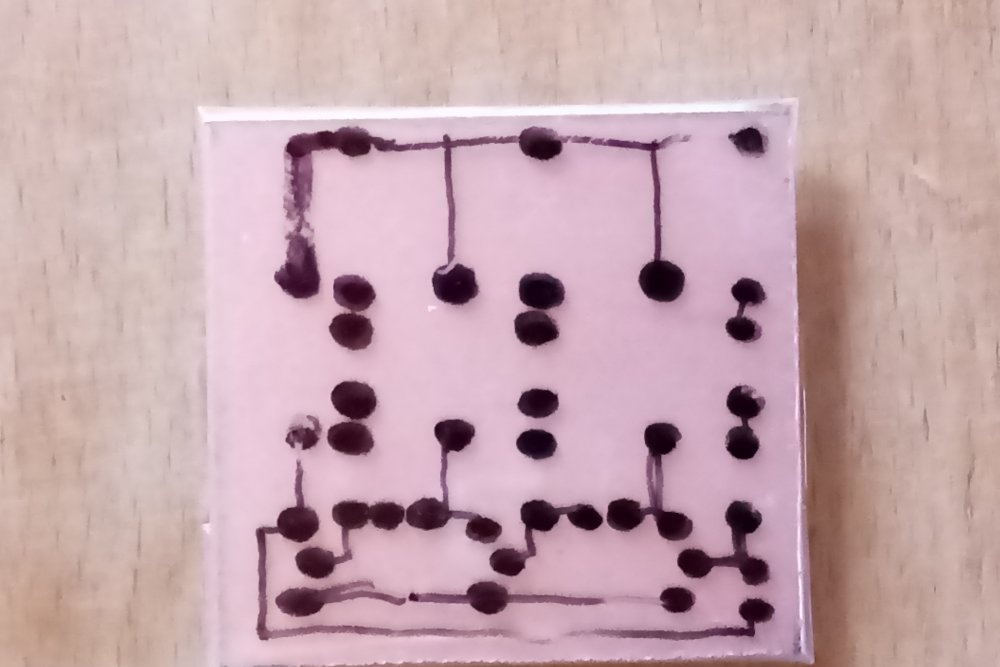
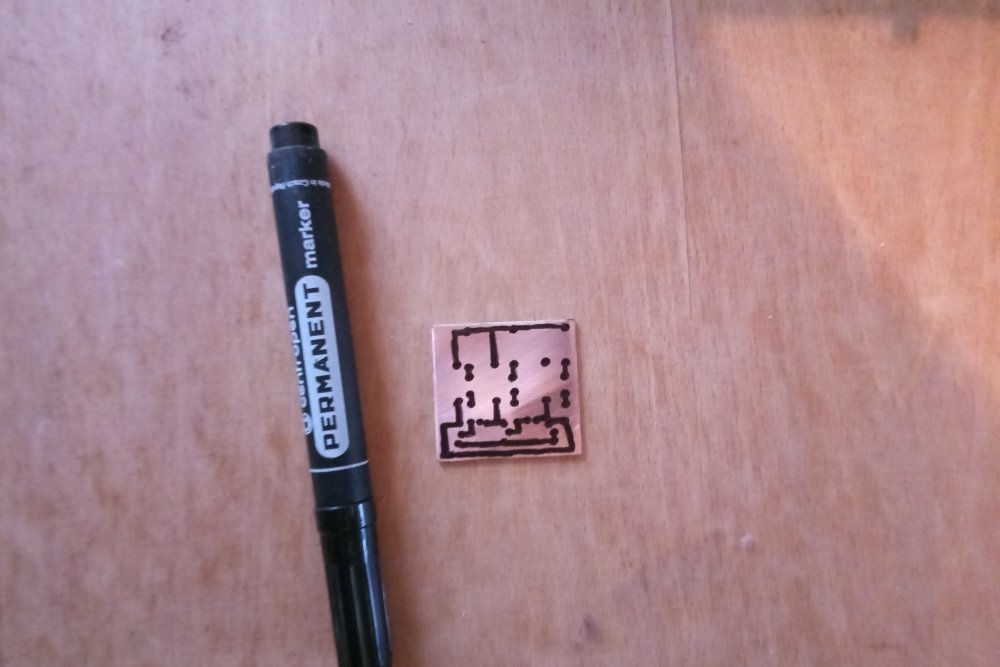
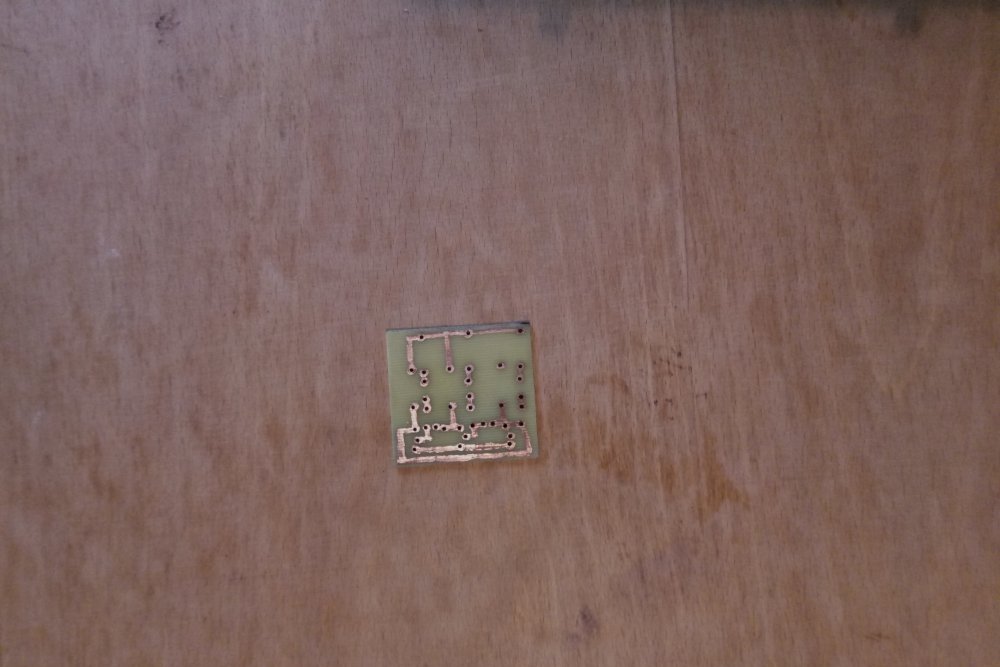
Next, the template is removed, but not thrown away. We still try not to touch the copper coating with our hands. To draw paths we use a marker, always permanent. It is clearly visible from the trail it leaves. It is better to draw in one pass, since after the varnish, which is included in the permanent marker, has hardened, it will be very difficult to make edits.
We use the same polyethylene template as a guide. You can also draw in front of the computer, checking the original layout, where there are markings and other notes. If possible, it is better to use several markers with tips of different thicknesses. This will allow you to draw both thin paths and extensive polygons more efficiently.

After applying the drawing, be sure to wait some time necessary for the final hardening of the varnish. You can even dry it with a hairdryer. The quality of future tracks will depend on this.
Etching and cleaning marker tracks
Now comes the fun part - etching the board. There are several nuances here that few people mention, but they significantly affect the quality of the result. First of all, prepare the ferric chloride solution according to the recommendations on the package. Usually the powder is diluted with water in a ratio of 1:3. And here's the first piece of advice. Make the solution more saturated. This will help speed up the process, and the drawn paths will not fall off before everything necessary is etched out.
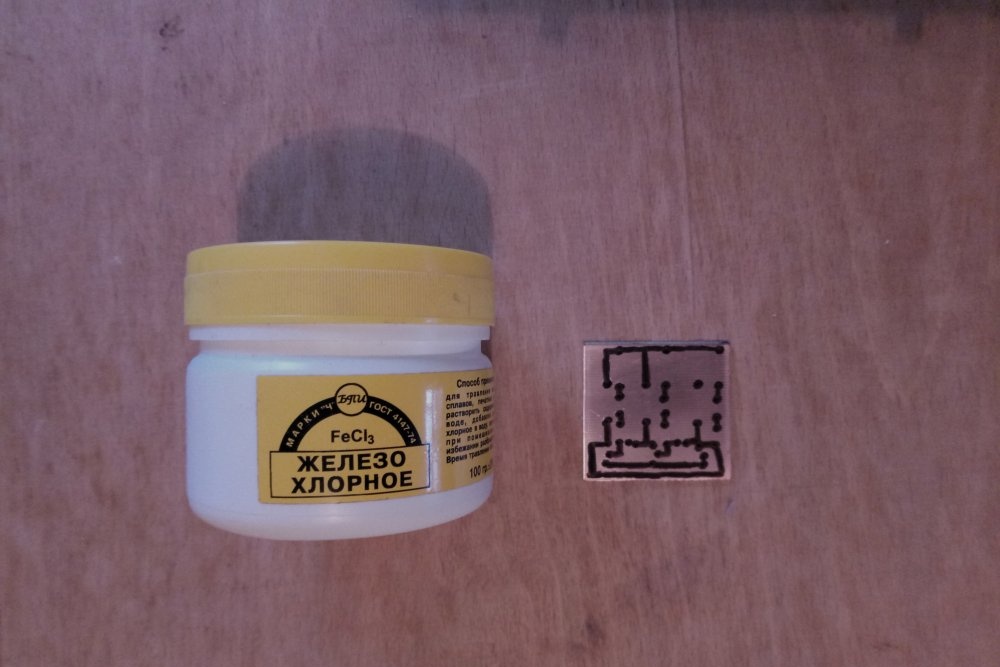
Immediately the second tip.It is recommended to immerse the bath with the solution in hot water. You can heat it in a metal bowl. Increasing the temperature, as has been known since school, significantly accelerates the chemical reaction, which is what etching our board is. Reducing the procedure time is to our advantage. The tracks made with a marker are quite unstable, and the less they sour in the liquid, the better. If at room temperature the board is etched in ferric chloride for about an hour, then in warm water this process is reduced to 10 minutes.
In conclusion, one more piece of advice. During the etching process, although it is already accelerated due to heating, it is recommended to constantly move the board, as well as clean off the reaction products with a drawing brush. By combining all the manipulations described above, it is quite possible to etch out excess copper in just 5-7 minutes, which is simply an excellent result for this technology.
At the end of the procedure, the board must be thoroughly rinsed under running water. Then we dry it. All that remains is to wash away the traces of the marker that are still covering our paths and patches. This is done with the same alcohol or acetone.
Tinning of printed circuit boards
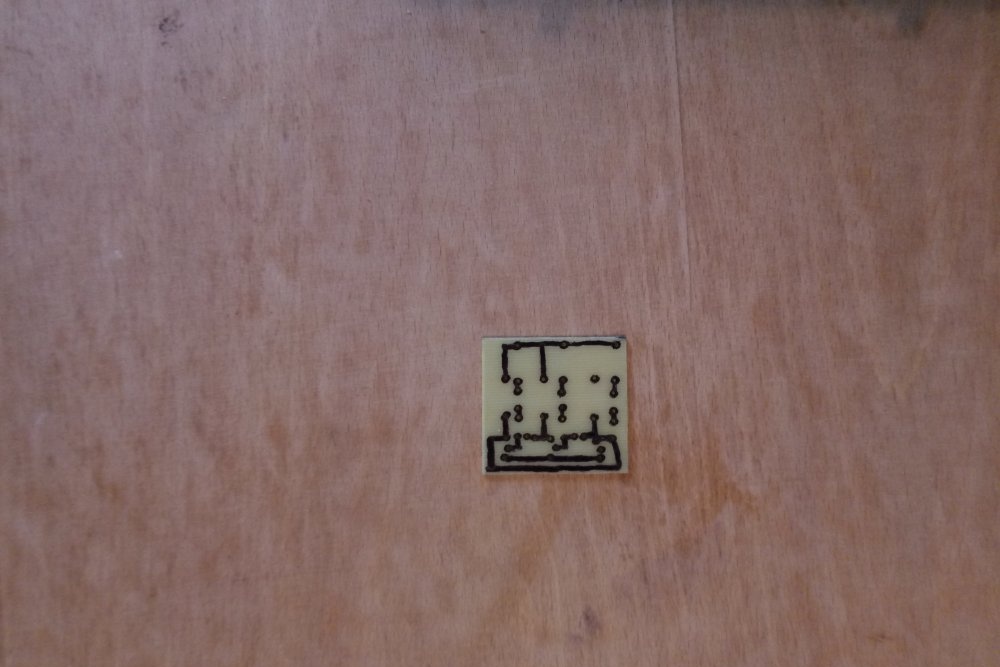
Before tinning, be sure to go over the copper layer again with sandpaper. But now we do it extremely carefully so as not to damage the tracks. The simplest and most accessible method of tinning is the traditional one, using a soldering iron, flux and solder. Rose or Wood alloys can also be used. There is also so-called liquid tin on the market, which can greatly simplify the task.
But all these new technologies require additional costs and some experience, so the classic tinning method is also suitable for the first time. Liquid flux is applied to the cleaned tracks.Next, solder is collected onto the soldering iron tip and distributed over the copper remaining after etching. It is important to warm up the traces here, otherwise the solder may not “stick”.
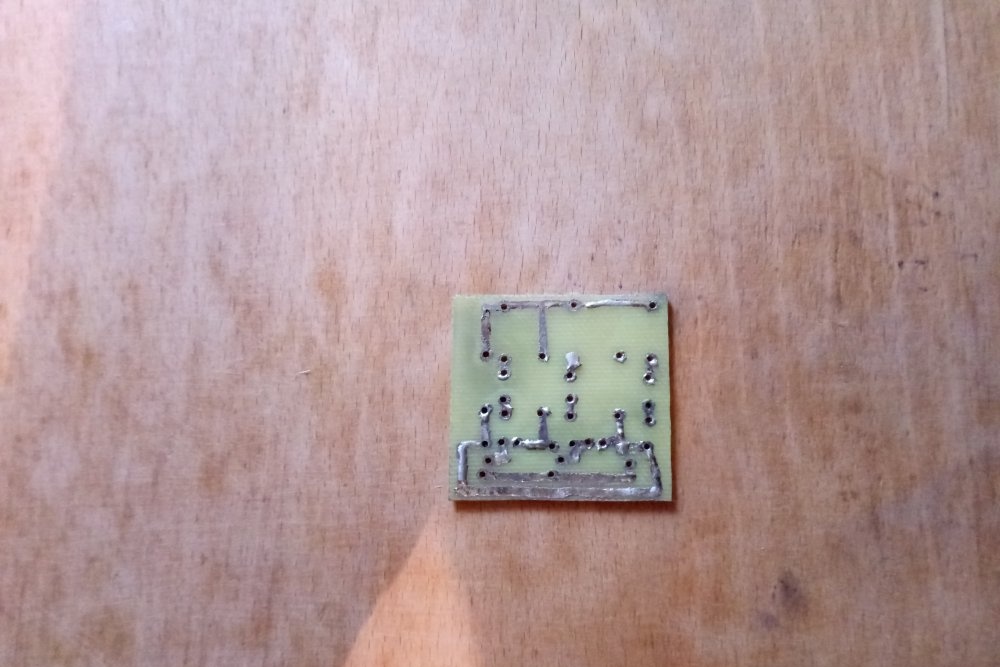
If you still have Rose or Wood alloys, then they can be used outside the technology. They melt just fine with a soldering iron, are easily distributed along the tracks, and do not bunch up into lumps, which will only be a plus for a beginning radio amateur.
Conclusion
As can be seen from the above, the budget technology for manufacturing printed circuit boards at home is truly accessible and inexpensive. You don't need a printer, an iron, or expensive photoresist film. Using all the tips described above, you can easily make simple electronic craftswithout investing a lot of money in it, which is very important in the first stages of amateur radio.