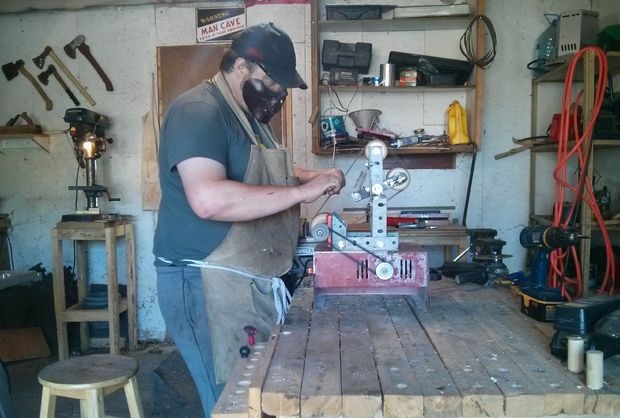
I have been making knives for several years now and always use 2.5 x 60 cm and 10 x 90 cm belt sanders in my work. For a long time I wanted to buy another one, with a tape width of 5 cm, as this would simplify my work. Since such a purchase would be expensive, I decided to make it myself.
Problems when designing a future machine:
Three limitations had to be overcome. Firstly, there was no 10 cm wide tape available locally; it could only be ordered online. This didn't seem like a very viable option to me, as there is no greater disappointment than finding out that the tape has worn out and needs to be replaced, and you have to wait a week or two for a new one to arrive. Secondly, there was a problem with the rollers. I searched but couldn't find any tape suitable for 10cm. Thirdly, the motor. A belt sander requires a fairly powerful electric motor, and I didn't want to spend too much money on this project. The best option for me was to use a used motor.
Solutions to design problems:
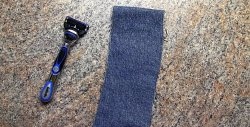
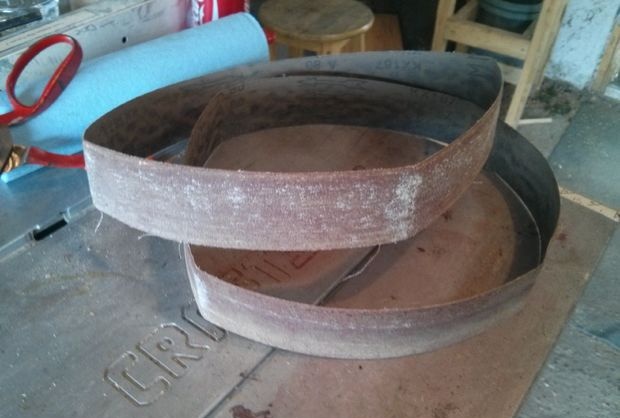
The first problem with the tape had a simple solution.Since a 20 x 90 cm belt was available for sale in hardware stores at a reasonable price, I could make two 10 cm ones from it. This imposed restrictions on the size of my machine, but due to price efficiency, this option was the best. The second problem was solved using a lathe. To do this, I watched a video on the Internet and realized that I could make the videos I needed myself. With the engine the task was more difficult. I had several electric motors in the garage, but for some reason I had to give them up. Finally, I decided on an old tile cutting machine that had a 6-amp electric motor. At that time, I realized that this power might not be enough. But since the work was at the experimental stage, I decided to first achieve a working version of the machine, and the motor could be replaced later. In fact, the motor is suitable for small amounts of work. But if you're going to be doing more intensive sanding on it, I'd recommend the 12 amp minimum.
In the end it was fun to experiment. So I thought it would be useful to share a knife making machine without spending a lot of money.
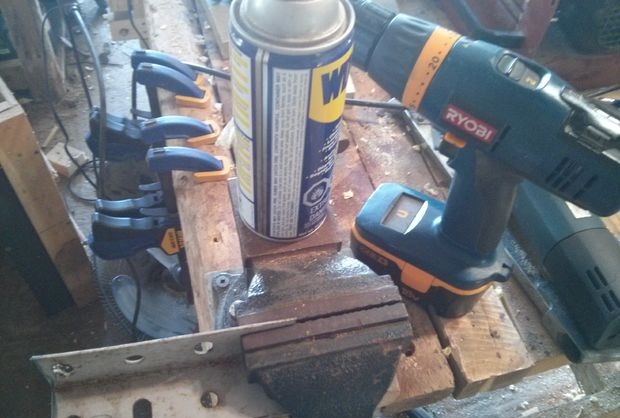
Tools and materials
Tools:
- Angle grinder with cutting discs.
- Drill and drill bits.
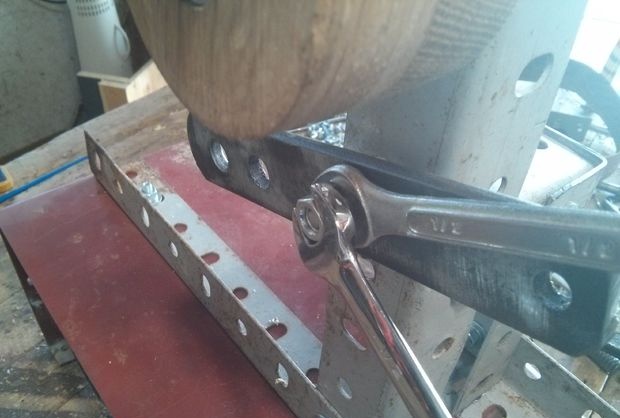
- Wrenches for 11, 12 and 19.
- Lathe.
- Vise.
Materials:
- Electric motor (6 A minimum, or 12 A recommended).
- Various bearings.
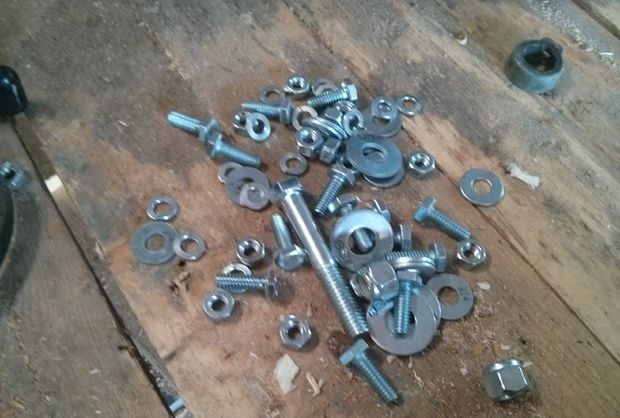
- Nuts, bolts, washers, lock washers of various sizes.
- Metal corner.
- Sanding belt 20 cm.
- 10 cm pulleys.
- Powerful spring.
- Steel strip 4 x 20 cm.
- Beam 2.5 x 10 x 10 cm made of wood or MDF.
Electric motor for machine
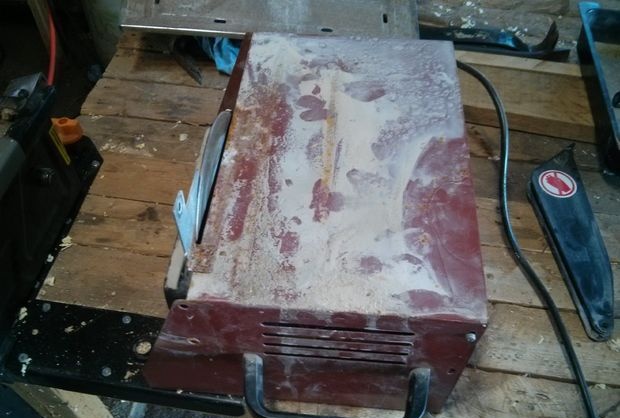
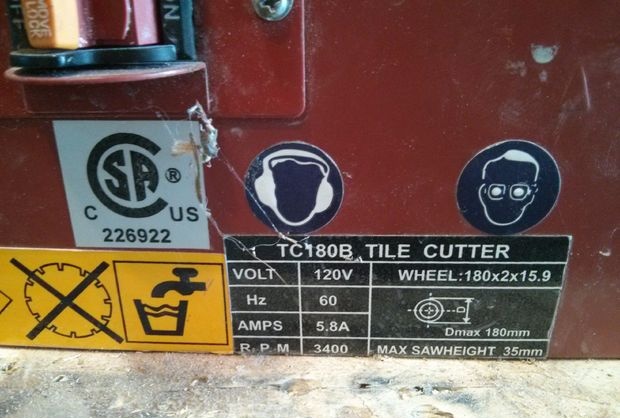
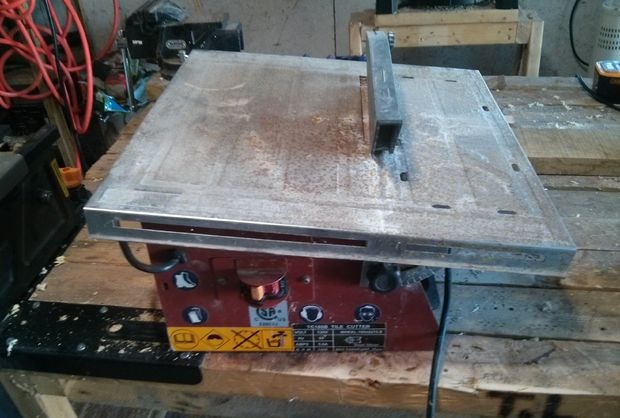
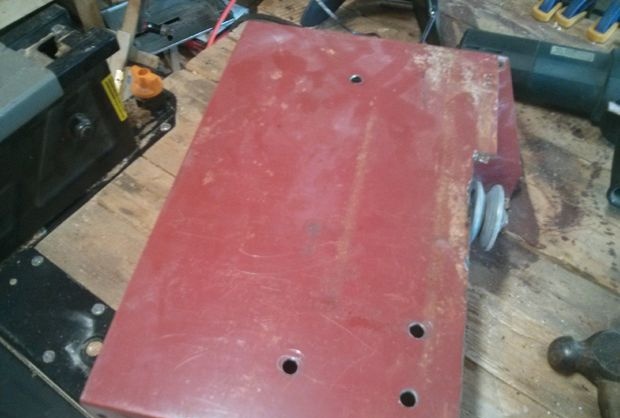
I had a choice of several motors, but the electric motor that was on the tile cutting machine had a more suitable casing. To some extent, working on the machine was like an experiment, because I was not sure that the motor had enough power. Therefore, I settled on a modular solution with the frame for the belt mechanism as a single element, which can be removed and rearranged on a more powerful base. The rotation speed of the motor suited me quite well, but I was worried that 6 A would provide weak power. After a little testing, I saw that this electric motor was suitable for simple work, but for more intensive work, you need to choose something more powerful. When designing your machine, pay attention to this point.
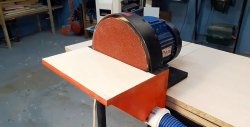
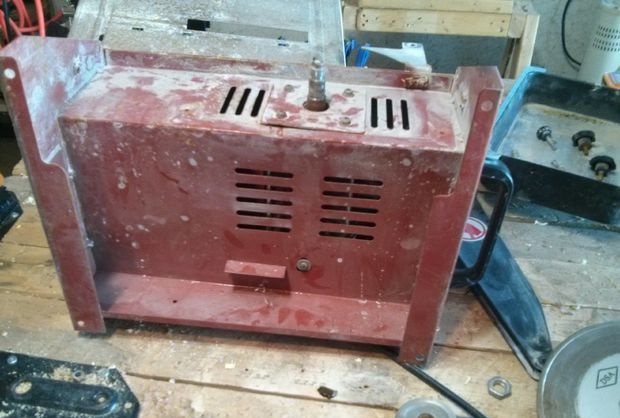
As I mentioned, the motor housing was very suitable as it allowed us to create a vertical machine that would be easy to move.
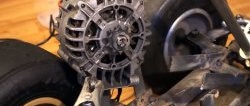
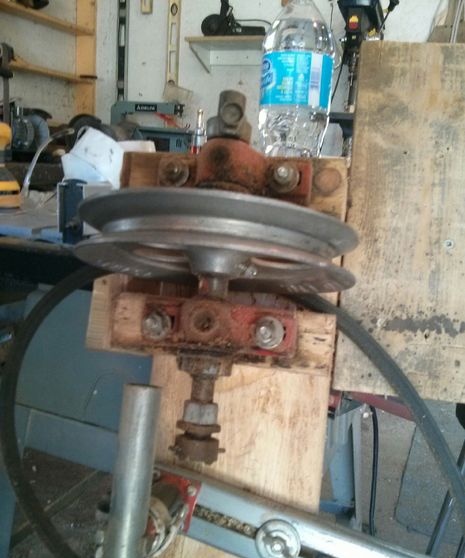
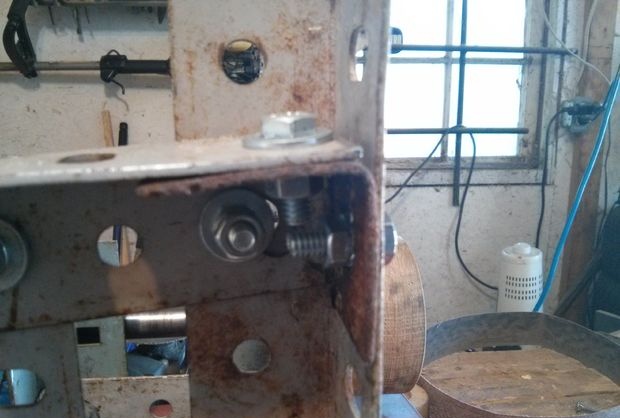
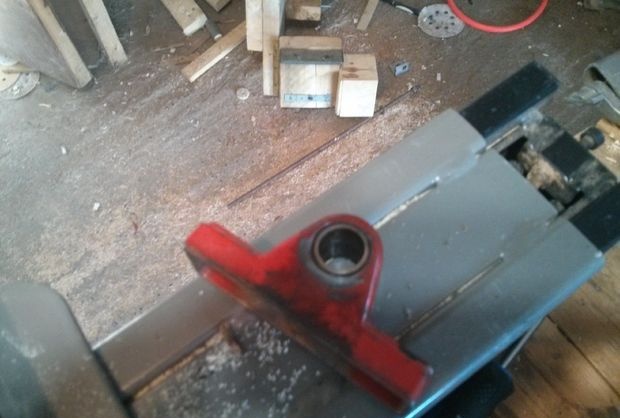
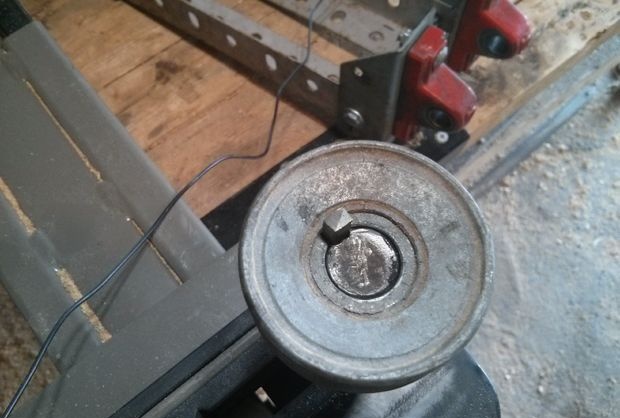
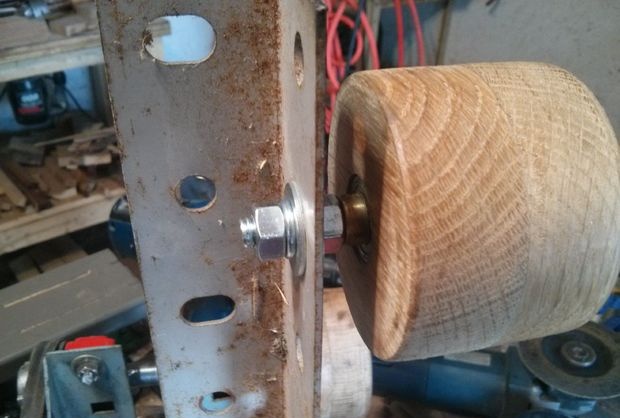
First you need to free it by removing the work table, saw, protection, water tray, leaving only the electric motor. Another benefit of using this motor was that it had a threaded core with a nut to hold the saw in place, allowing the pulley to be installed without using a key (I'll explain what a key is later).
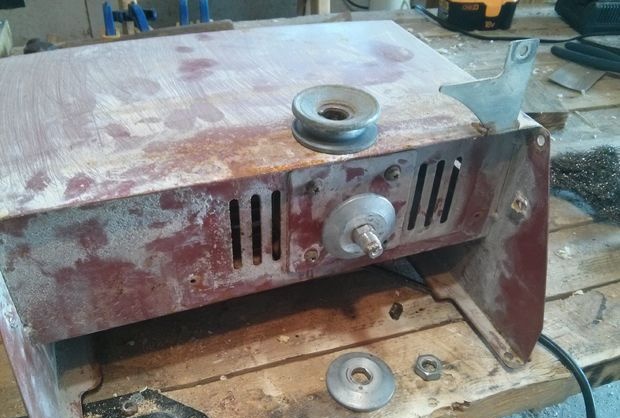
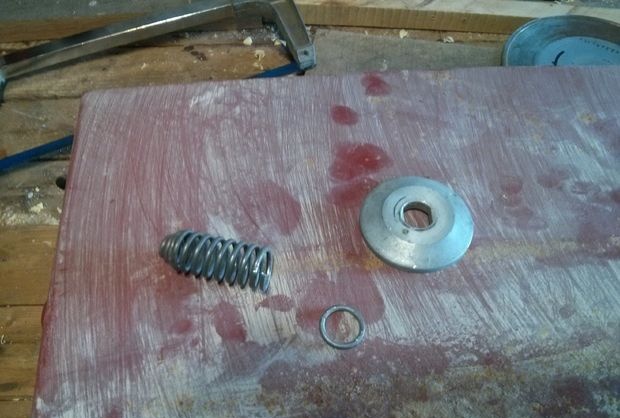
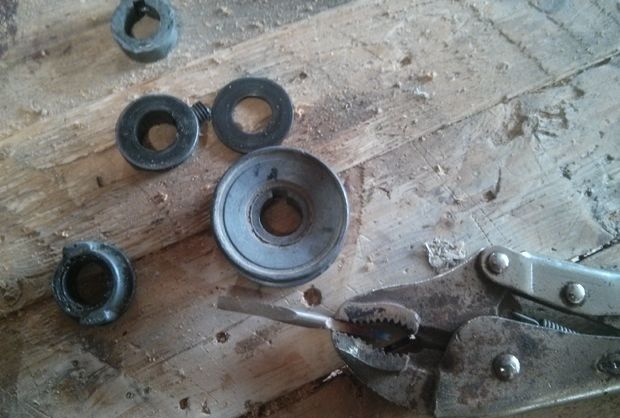
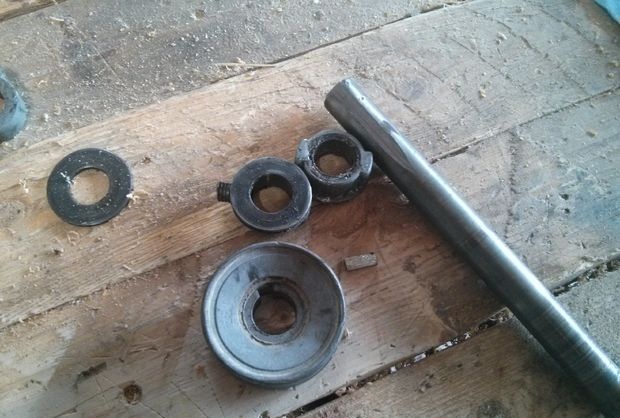
Since I had a pulley that was too wide, I decided to use the large clamp washers that are usually used to secure the saw, turning one over so that there was a wedge-shaped groove between them. I found the space between them to be too narrow, so I put a lock washer between them to widen it. The advantage of this method is that the pinch washers have a flat edge that locks with the flat edge to rotate with the core.
Belt
I used a 7 x 500 mm drive belt.You can use a standard 12 mm, but a thin one is more flexible and will put less strain on the motor. He doesn't need to rotate the grinding wheel.
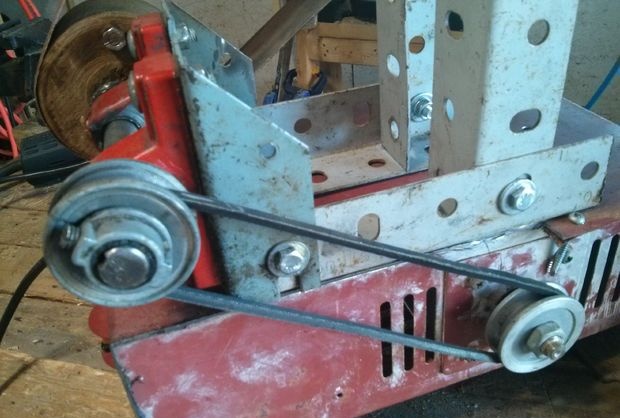
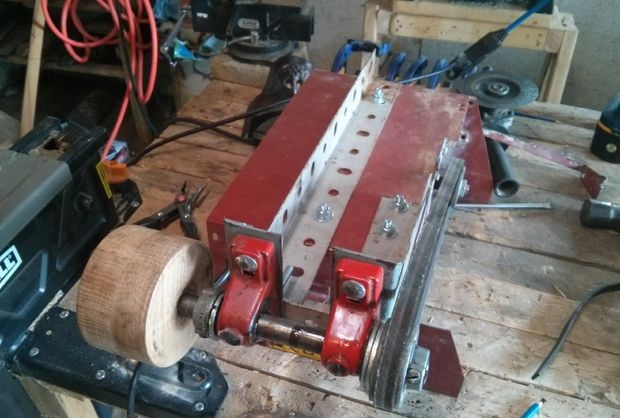
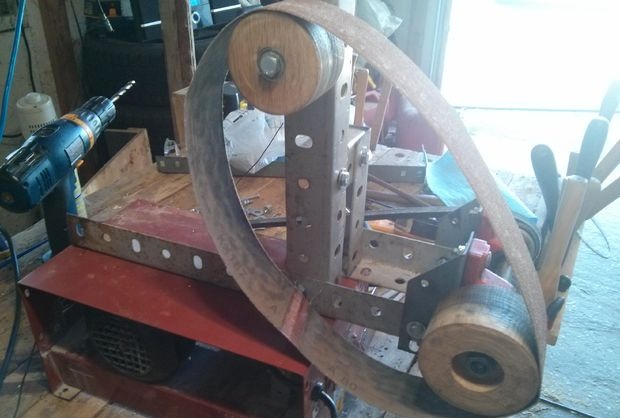
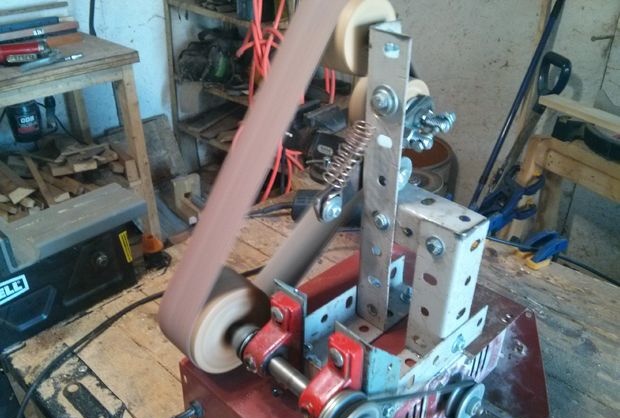
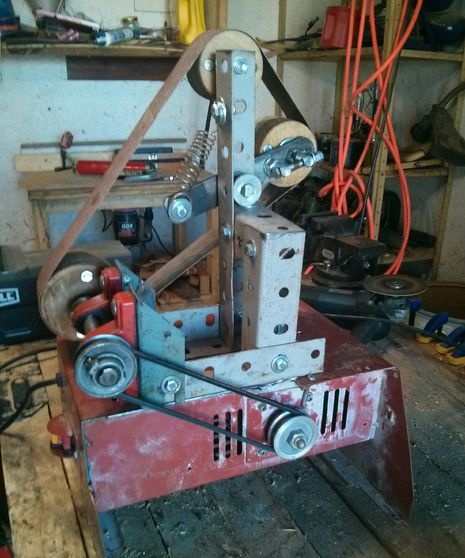
Device of a belt grinding machine

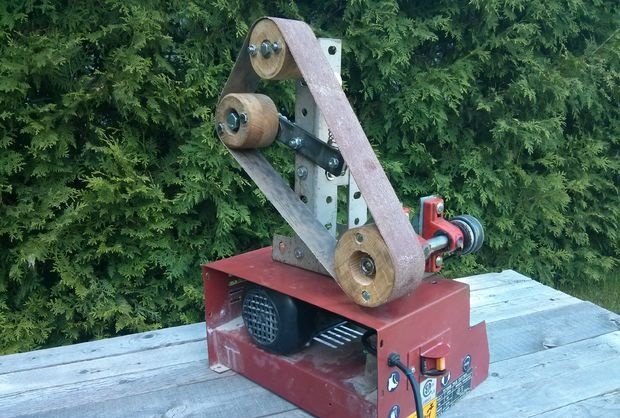
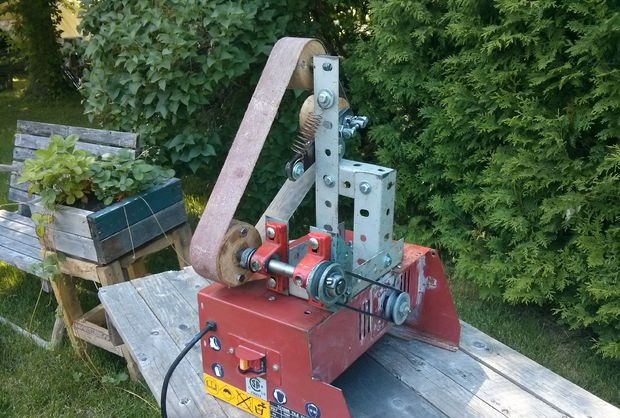
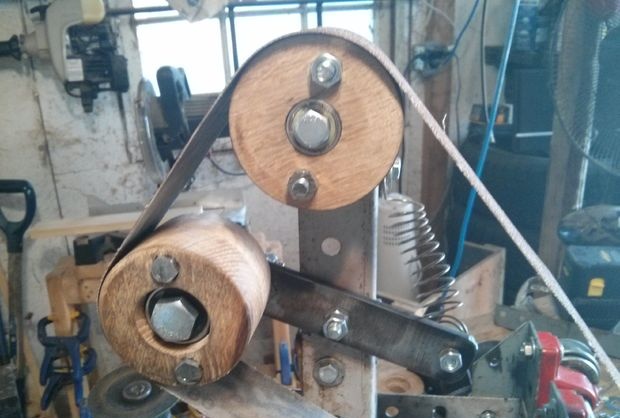
The device is simple. An electric motor drives a belt, which rotates a 10 x 5 cm “main” pulley, which drives the abrasive belt. Another pulley 8 x 5 cm is located 40 cm above the main one and 15 cm behind it and is mounted on a bearing. The third 8 x 5 cm pulley rotates on a lever and acts as a tension roller, holding the abrasive belt tightly. On the other side, the lever is attached to the frame by a spring.
Determining the drive type
The main question was to rotate the main pulley directly with an electric motor or with the help of an additional pulley and drive belt. First of all, I chose a belt drive because I wanted to have the option of replacing the engine with a more powerful one, however, there was another reason. When you do intensive metal processing, there is a risk of encountering some problems. A belt drive will slip in such cases, while a direct drive will create big problems. With a belt, the device will be more secure.
Frame manufacturing and installation
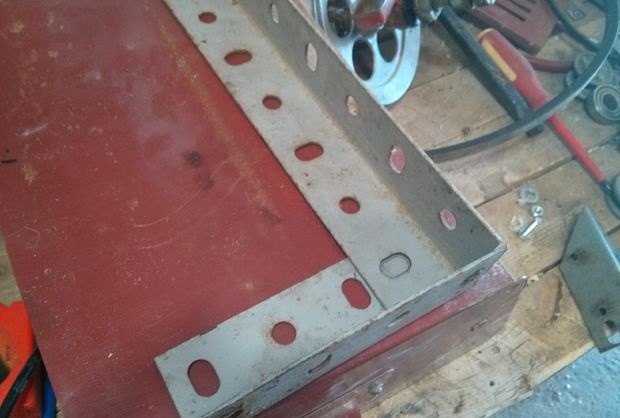
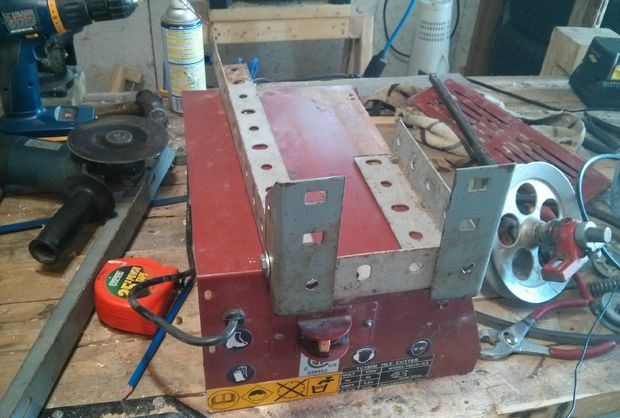
It is important to mention that using a metal corner as a frame can have both advantages and disadvantages. The obvious advantage is that it is convenient to assemble, like a construction set in childhood. But the main drawback is that it is strong only in two directions, but weak when twisted. This means that we need to take this weakness into account and calculate what torque can be transmitted from the pulleys to the frame, and compensate for it using additional jumpers.
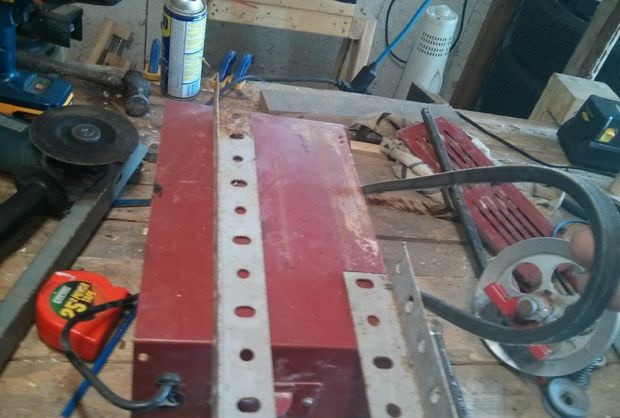
Cutting:
You can use a hacksaw to cut the corner, but an angle grinder with a cutting disc will make the job faster. After cutting all the pieces, I would recommend sanding down all the sharp edges to avoid cutting yourself during assembly. The holes can be drilled using a conventional drill and cutting fluid.
Main video
The main roller is the most important part of the project, as it receives torque from the motor and transmits it to the belt. I used an old bushing to secure it, but I recommend using a bearing instead. The bushings do their job, but they constantly overheat and require regular lubrication. Moreover, they can scatter dirty lubricant, which can be annoying during operation.
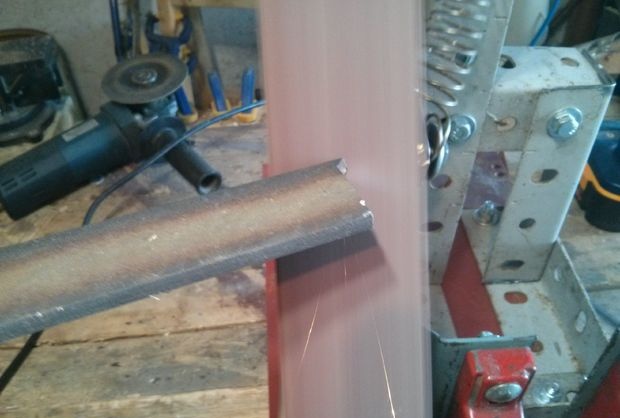
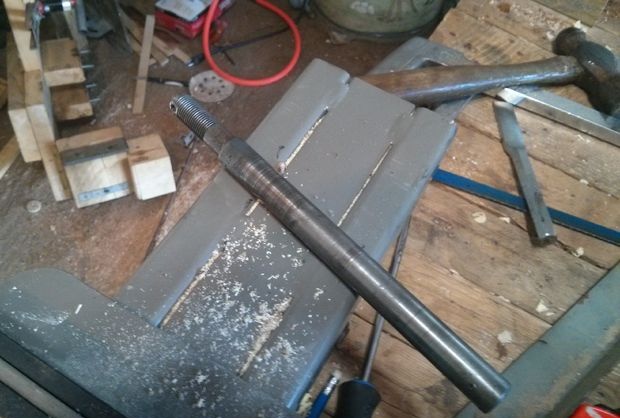
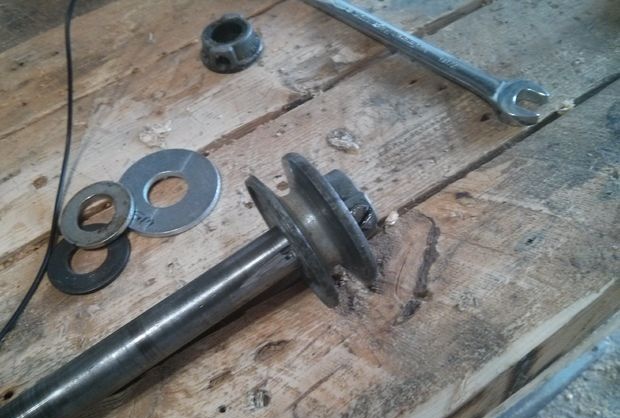
Shaft:
There are threads on the sides of the shaft with different directions so that the mounting bolts do not unscrew when rotating. If you cut off one threaded side like I did, leave the one that goes counterclockwise, otherwise you'll have to make a locking bolt (I'll describe how to make that later) and a cotter pin. The main pulley will be placed on the cut edge.
Pulley:
Continuing with the theme of reuse, I found an old pulley from another project. Unfortunately, I prepared it for the threaded pin that it was supposed to be held on, but, in fact, this is not a problem. I made a rectangular cutout in this pulley. I then used an angle grinder to cut a groove on the end of the shaft. By placing the key in the hole formed by the shaft groove and the rectangular cutout of the pulley, I securely fixed them relative to each other.
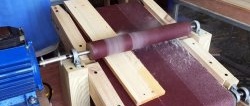
Making rollers for a grinding machine
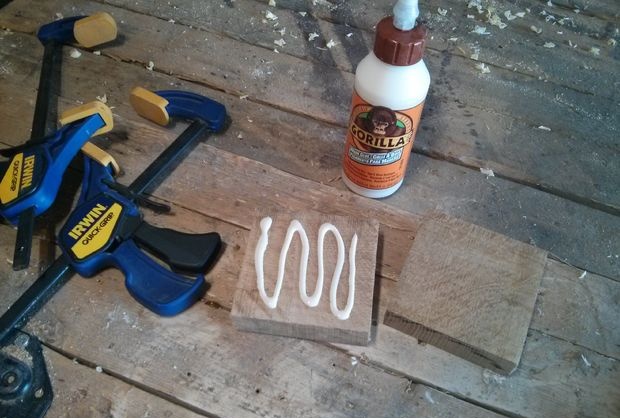
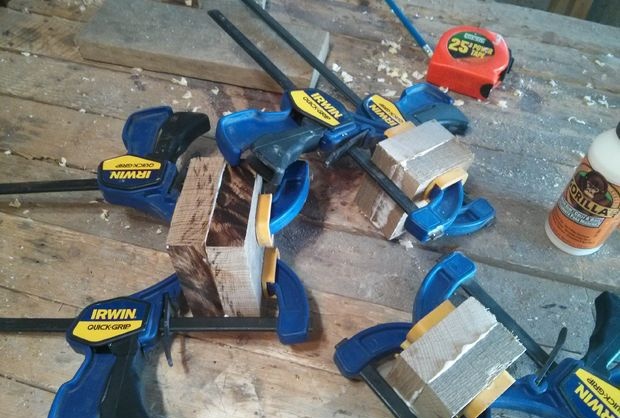
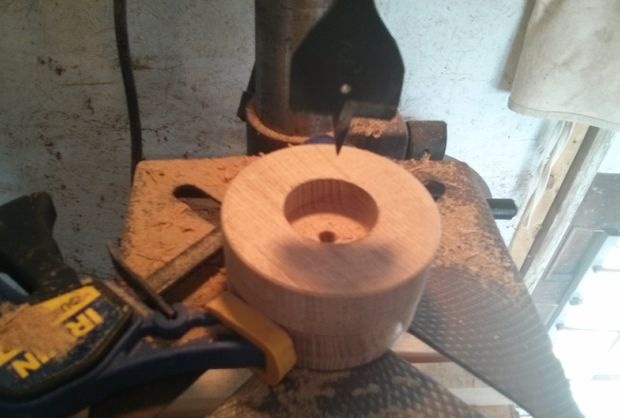
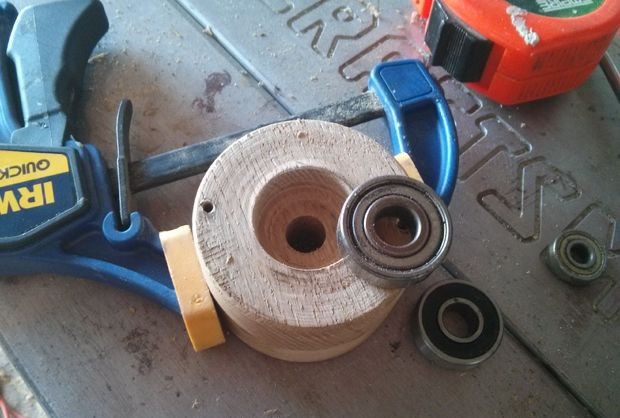
I made the rollers from several pieces of 2.5 cm thick hardwood. But you can use MDF, plywood or other material.When laying layers, you need to make sure that the fibers are perpendicular, this will give the rollers additional strength and the layers will not crack.
It is necessary to make three rollers: the main roller, the top roller and the tension roller. The main roller is made of two 13 x 13 cm pieces of 2.5 cm thickness. The top and tension rollers are made of two pieces of wood measuring 10 x 10 cm.
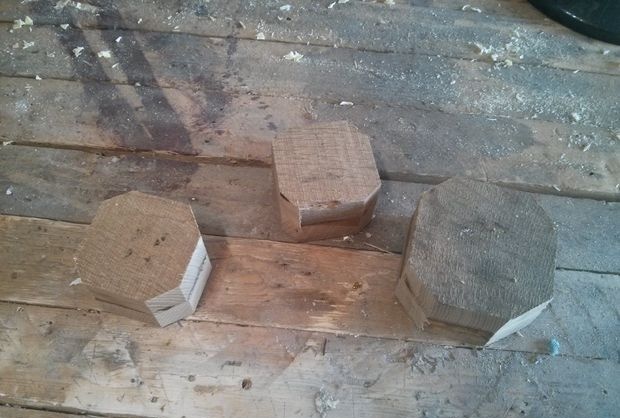
Process:
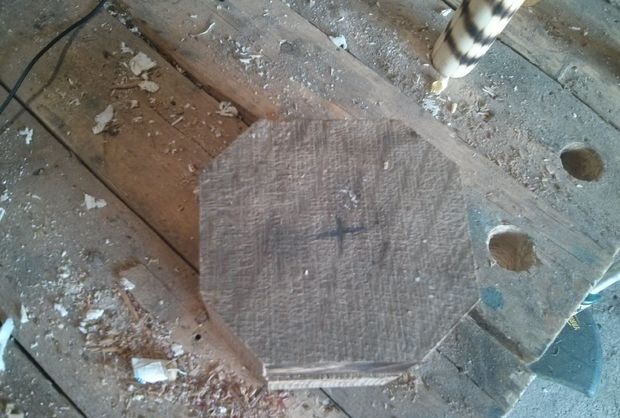
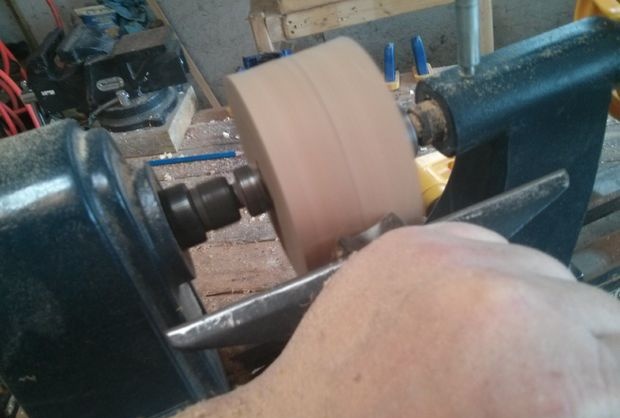
Start by gluing together pairs of 13 cm and 10 cm pieces of wood, clamping them together with clamps. After the glue has dried, trim the corners with a miter saw, then find the center of each piece. Mount them in the lathe and turn them until they measure 5 x 10 cm and 5 x 8 cm.
Upper and tension rollers:
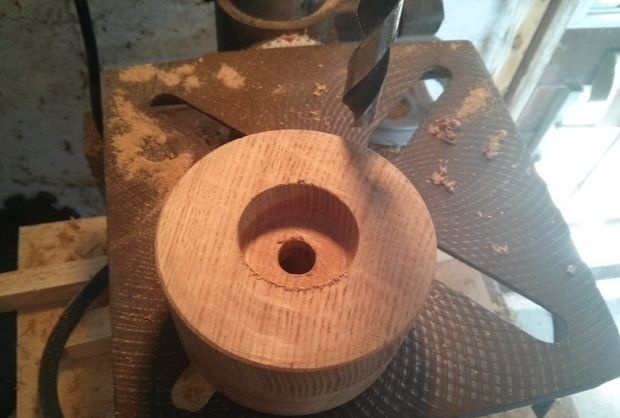
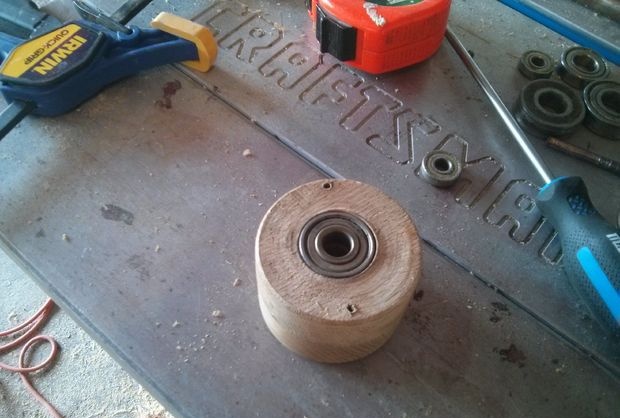
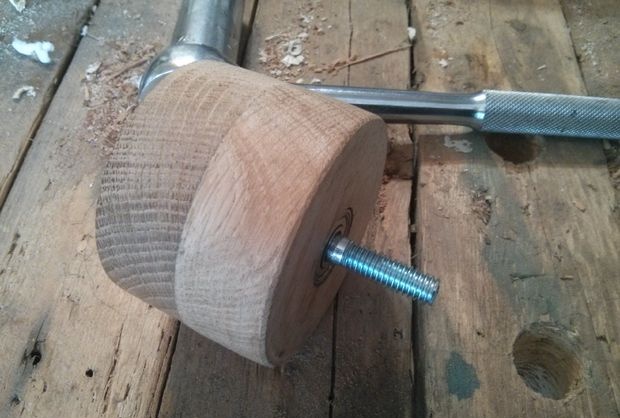
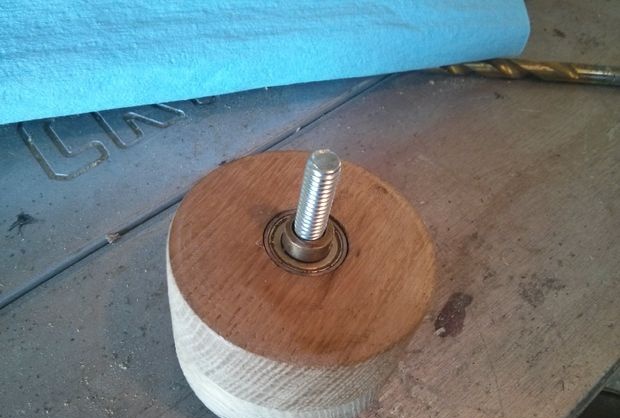
Next, you need to install bearings in rollers measuring 5 x 8 cm. Choose a core or spade drill, and drill a recess in the center to the width of the bearing. The inner race of the bearing must rotate freely, so you need to drill a hole that goes through the roller through the inner race of the bearing. This will allow the bolt to go through with a minimal hole.
Main video:
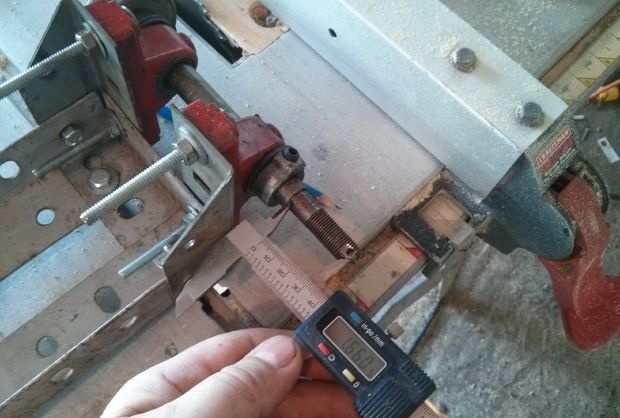
This part is done a little differently. There are no bearings on it, but if the shaft extends less than 5 cm from the roller, you will need to grind the roller down to width. Measure the diameter of the shaft and drill the same hole in the center of the roller. Try to insert the shaft, it must hold tightly, otherwise the roller will shake.
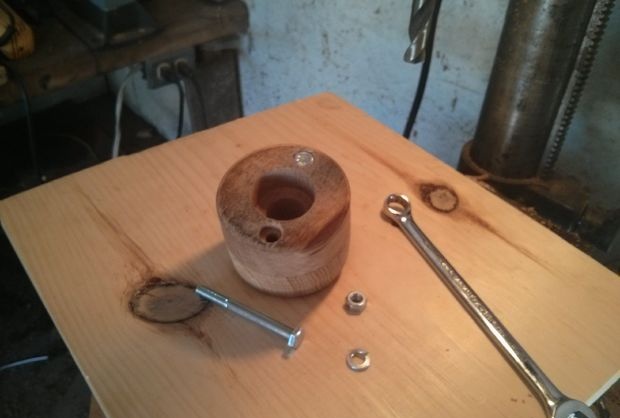
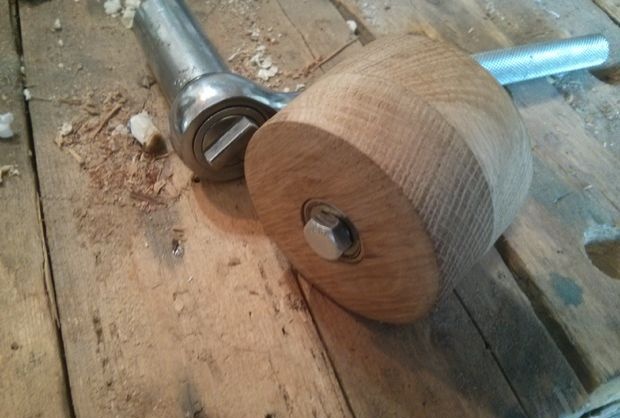
Bolting the rollers
Next, you should fasten the two halves of the rollers with bolts; do not rely only on glue. Remember that the bolt heads need to be recessed into the wood, since the roller rotates in close proximity to the frame.
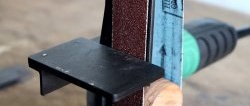
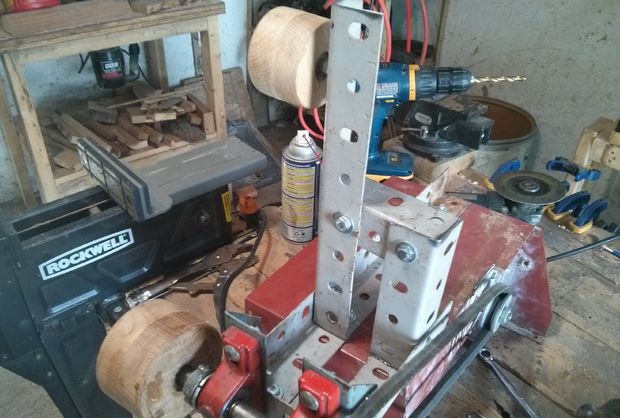
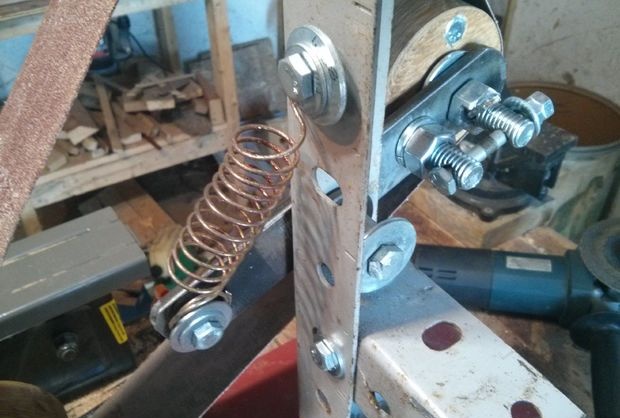
Tension lever
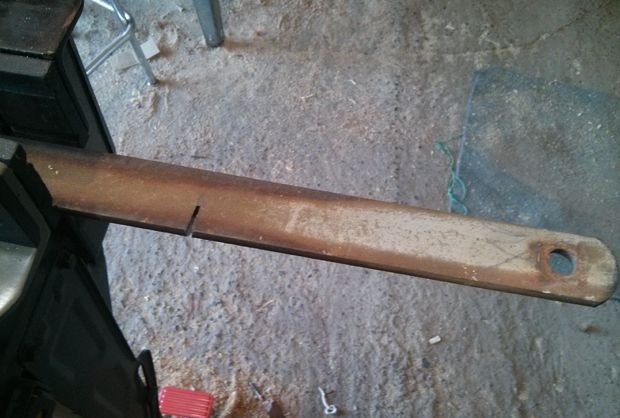
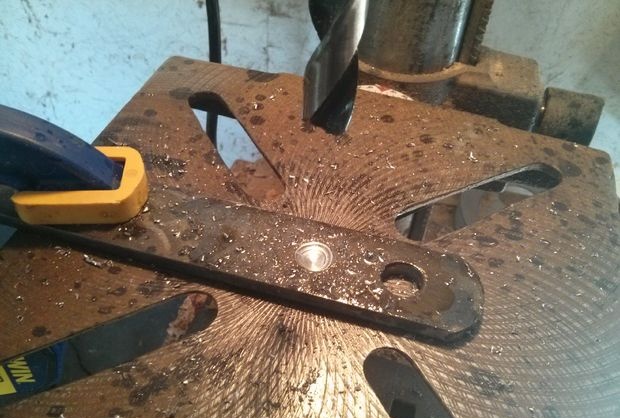
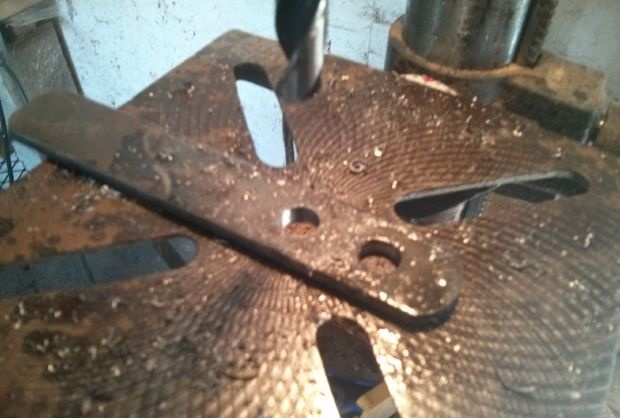
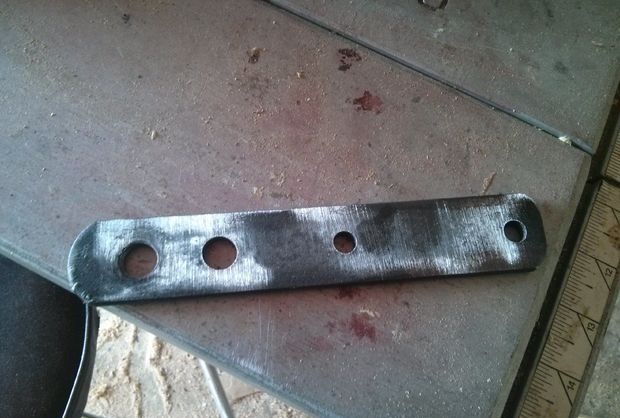
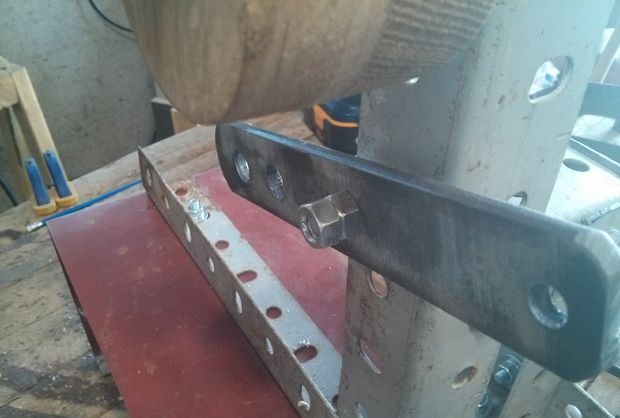
The lever is made of a metal strip measuring 10 x 30 x 200 mm with rounded edges.It requires some pretty large holes to be drilled, so I recommend using a drill press and lots of lube for this. A total of 4 holes are needed. The first is at the pivot point. It is not in the center of the bar, but 8 cm from its edge. The second hole will be located on the edge closest to the rotation point. It will serve to attach the spring. Two additional holes need to be drilled at the opposite end, approximately 5 cm apart. They need to be a little wider in diameter as they will be used for tuning, which I will talk about next.
When all the holes are made, you can attach the arm to the vertical angle between the top roller and the base. The end on which the spring will be attached is directed towards the main roller. It should rotate freely, so I recommend using two nuts for fastening, not tightening the main one completely, and using the second one as a locknut.
Installation of rollers
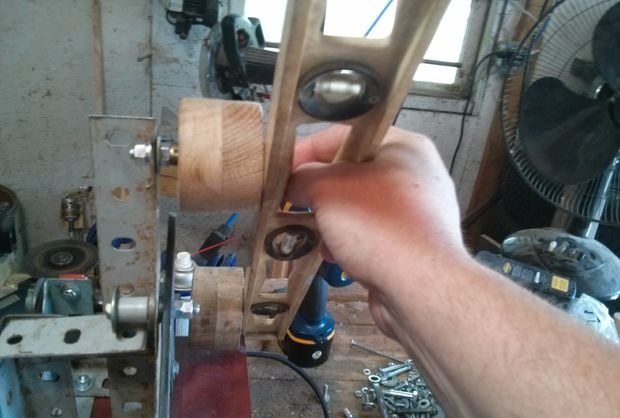
The upper roller is attached statically and must be clearly in the same plane along with the tension roller and the main roller. You can do everything by eye, but I recommend checking everything well with a level. To align the roller, you can add a washer, or, if it is not enough, a bolt. They are inserted between the frame and the roller.
There is no need to install the tension roller completely. We still need to make a stabilizing device.
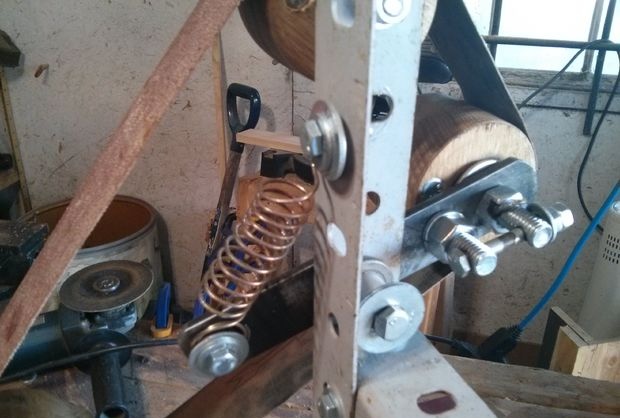
Belt stabilization
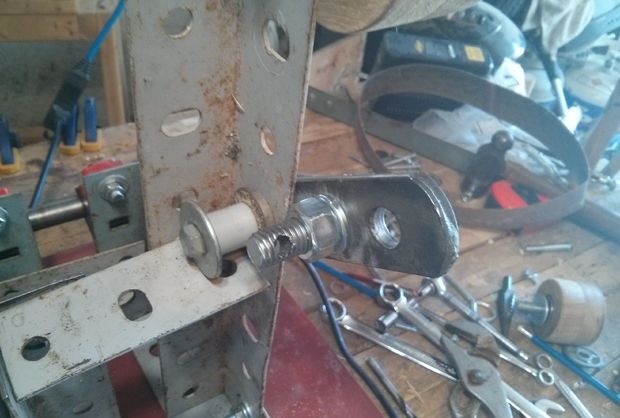
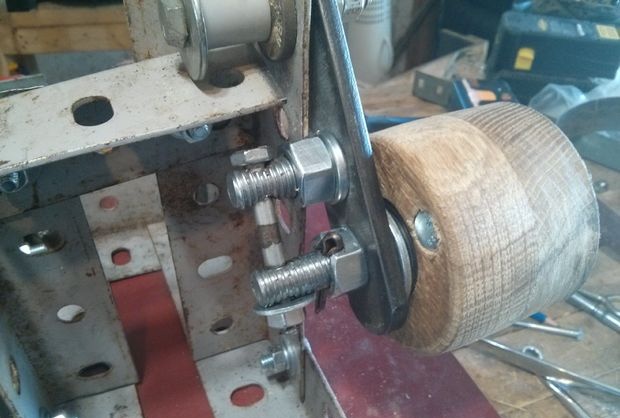
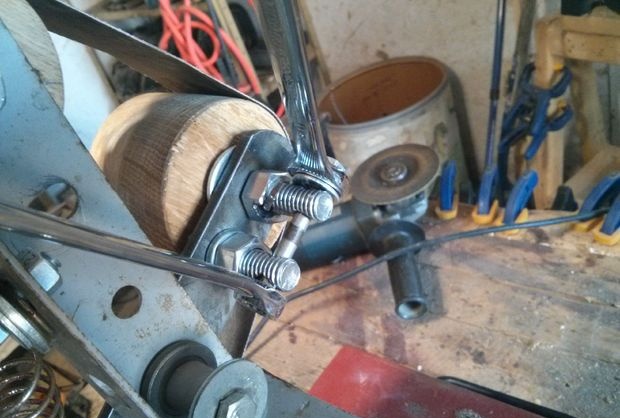
Wear on the rollers or uneven surfaces can cause the abrasive belt to gradually come off during operation. The stabilizing device is a device on the tension roller that allows it to be at an angle that keeps the abrasive belt centered.Its design is much simpler than it looks and consists of a locking bolt, a slightly free-playing tension roller and an adjusting bolt.
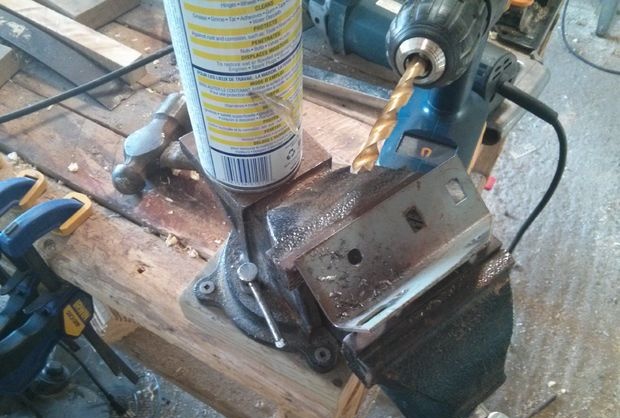
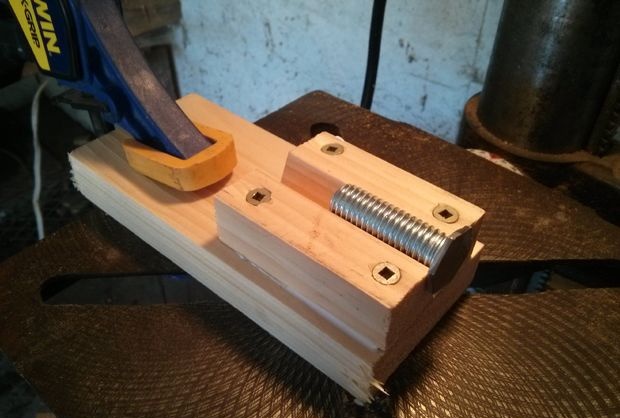
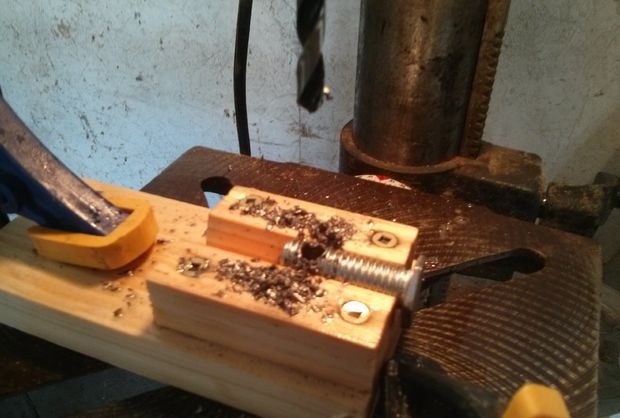
Drilling holes in bolts:
For this purpose, I made a device in the form of a wedge-shaped cutout in the board, which will help hold the bolt in place during drilling. You can do this manually, but I don't recommend it.
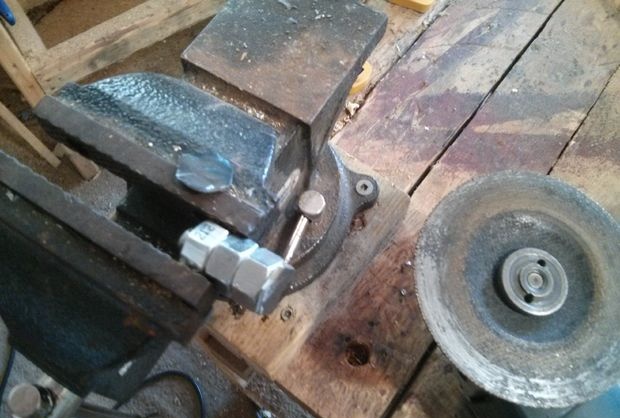
Fixing bolt
The retaining bolt is a simple bolt with a hole drilled in it and is installed on the bar through a wide hole that is located closer to the pivot point of the lever. Since it is located between the lever and the roller, its head must be ground off so that the roller does not catch it. The bolt must be secured as shown in the picture.
The bolt on which the roller is attached
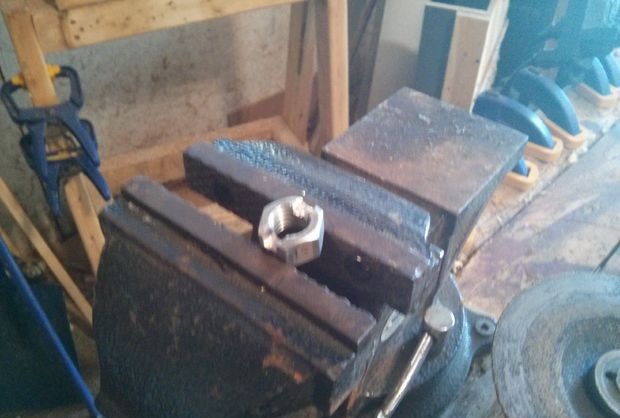
It needs to be loosened a little so that the tension roller has a slight play. But to prevent it from unwinding, you need to make a castle nut. To do this, you just need to make cuts on the edges of a regular nut so that it looks like a crown. There will be two drilled holes in the bolt itself: one for the adjustment bolt and it will be lined up with the locking bolt hole, and another for securing the castle nut with a cotter pin.
Bolt for setting:
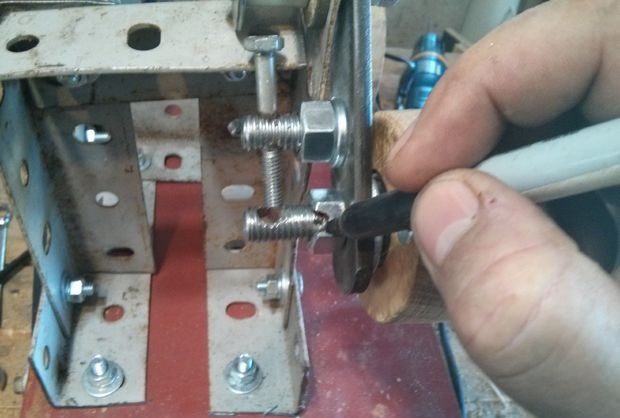
Once the tension roller is in place, you can install the adjusting bolt, which will pass through the holes of the retaining bolt and the bolt on which the tension roller rotates. The system works when you tighten the adjusting bolt, causing the axis of rotation of the tension roller to shift its rotation angle outward, thus causing the belt to move closer to the mechanism. A spring at the other end of the lever adjusts the tension in the opposite direction.I recommend securing the adjusting bolt with a locknut as vibrations can loosen it.
Note: It is possible to add a spring to the back of the idler pulley, but I have found no reason why this should be done. A small advantage will be that in this way the roller will have less play. But I will add that I did not do this, and I did not have any problems.
Completing the work of making the machine yourself


When everything is done, you need to check all the bolts again and make sure that the stabilization mechanism is assembled correctly. Then you have to turn the device on for the first time, which can be scary. It's like driving a car where the steering wheel and transmission don't work. I recommend turning the motor on and off for very short periods of time to prevent the machine from spinning at full speed.
In fact, the hardest part for me was adjusting the spring. If it is pulled too tightly, the tape will not be able to rotate... Too loosely and it cannot be held, it will fly off, which in itself is dangerous.
Ready!
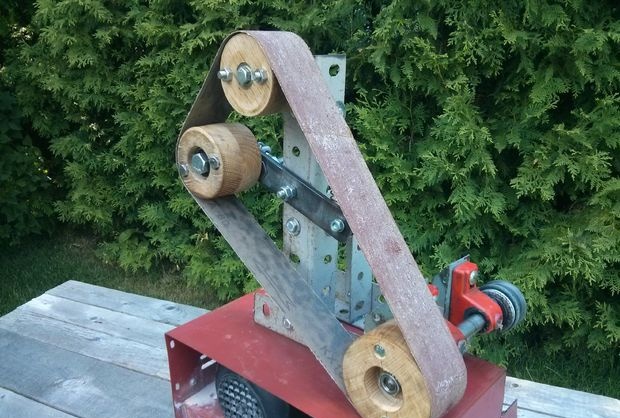

That's all. You should end up with a decent, medium-power belt sander that can be converted to a more powerful one if desired.
I hope you enjoyed this master class. Thank you for your attention.
Original article in English