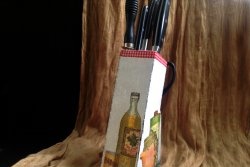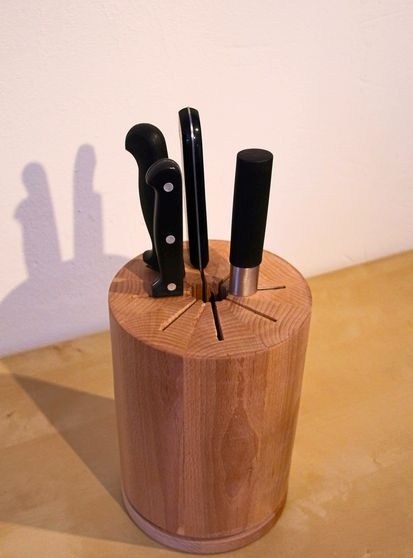

We will not talk about rotating knives and jugglers in this instruction, but one way or another you will find it interesting. Here I will describe the process of creating a rotating knife stand with a homemade bearing.
The stand has the shape of a cylinder, the diameter of its base is about 18 cm, and its height is approximately 25 cm.
Tools and materials
You will need the following tools:
- A circular saw with a cutting depth of at least 6 cm (a hand-held circular saw will most likely not cope with the task).
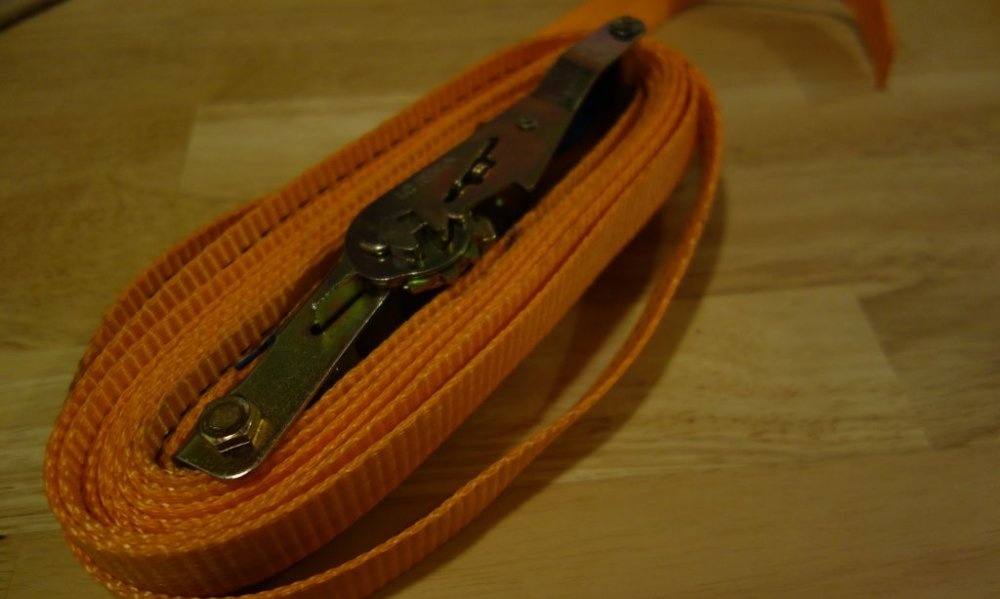
- Tightening straps.
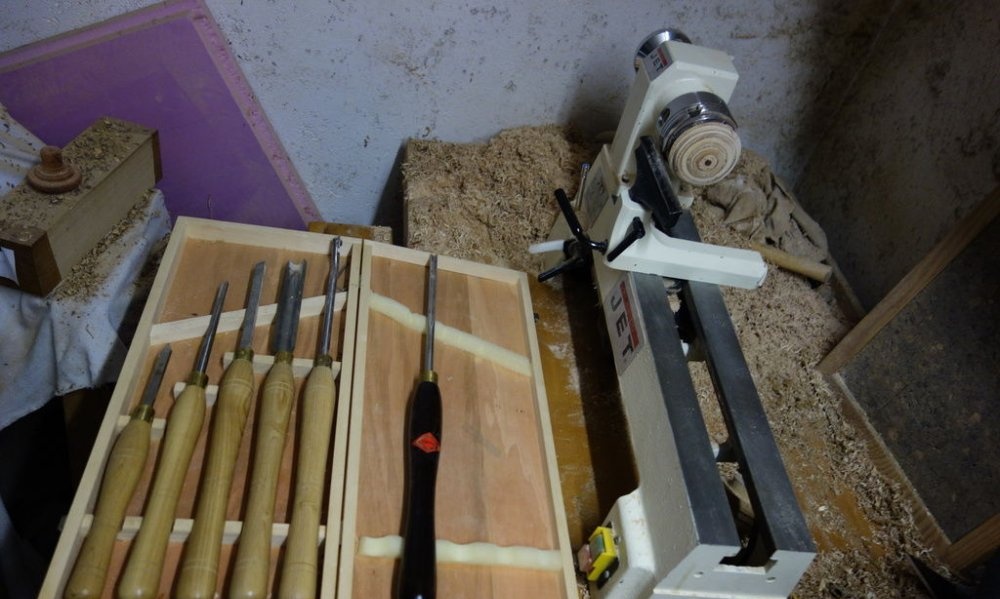
- Wood lathe (with a spindle height of at least 10 cm).
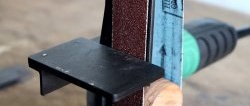
- Belt sanding machine.
- Rasp (or well-sharpened turning chisels).
And the following materials:
- Bars from any hard hardwood - at least 8 pieces measuring 6 cm x 6 cm x 20 cm (I had 2 beech bars 1.9 m long).
- A board of the same type of wood (measuring approximately 20 cm x 20 cm x 1.9 cm).
- Wood glue.
- Adhesive tape.
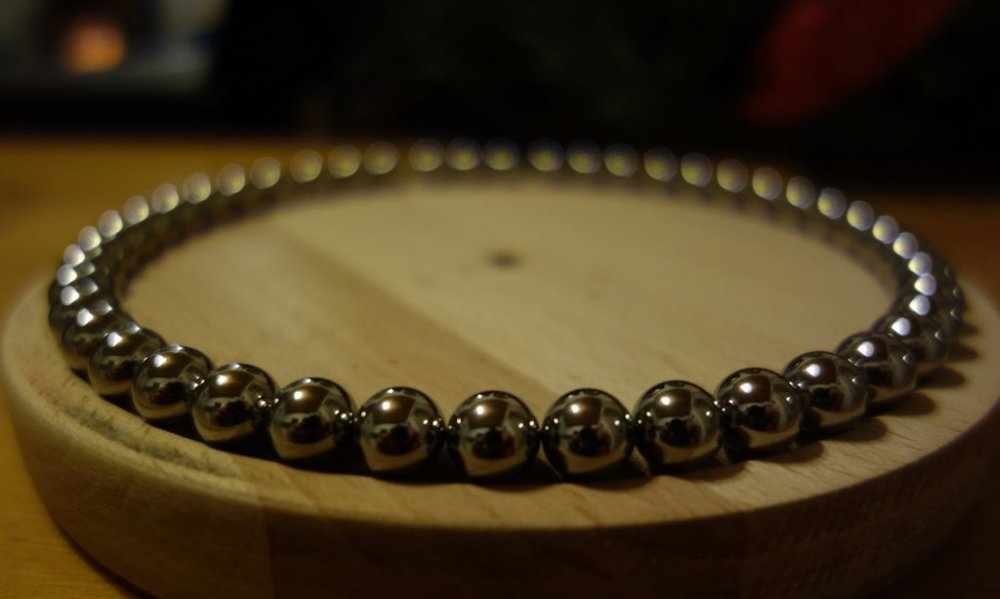
- About 50 steel balls with a diameter of 1 cm.
- Varnish for wood.
Design and calculations
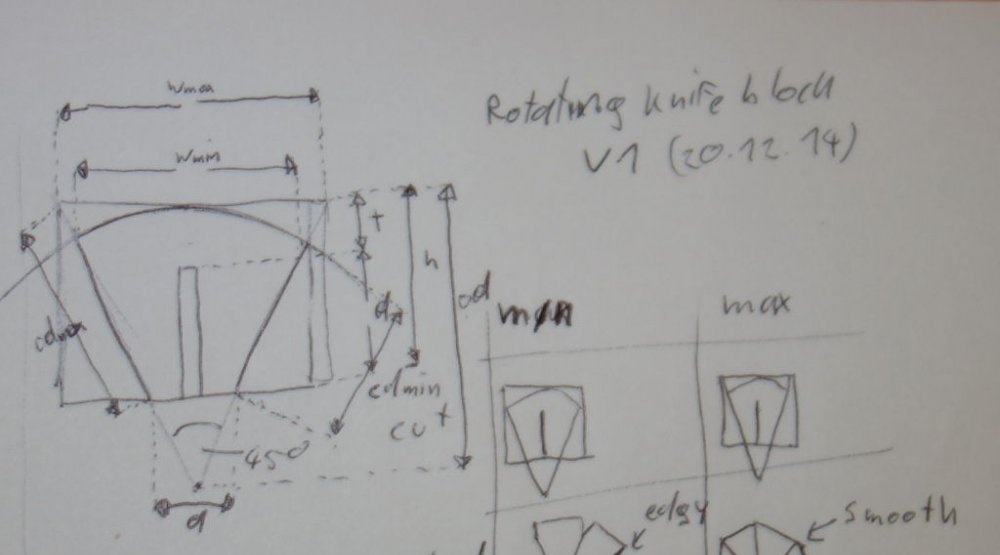
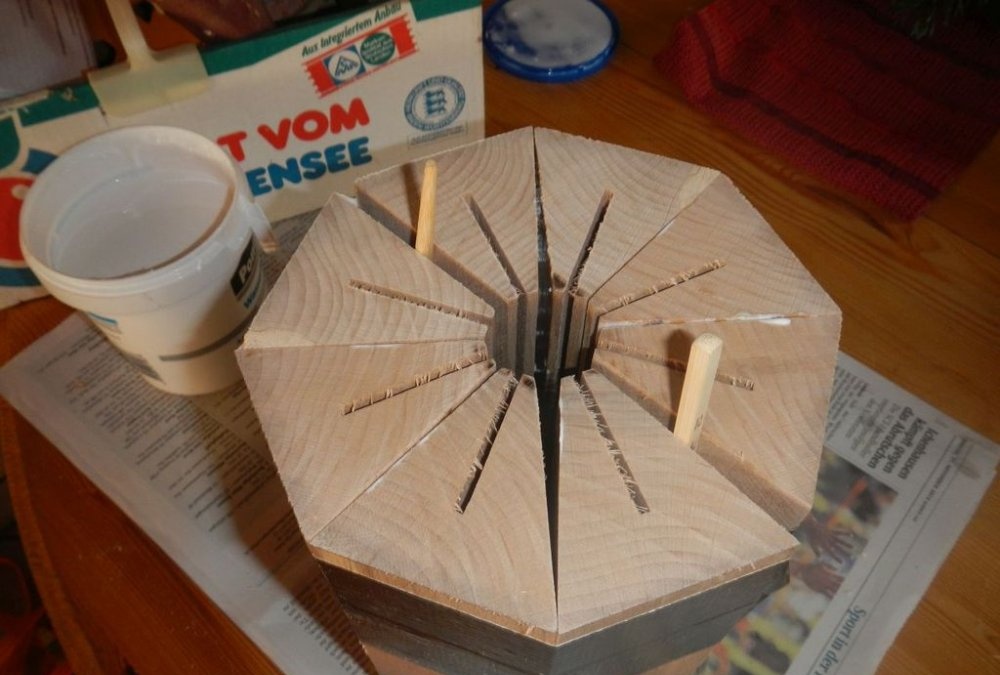
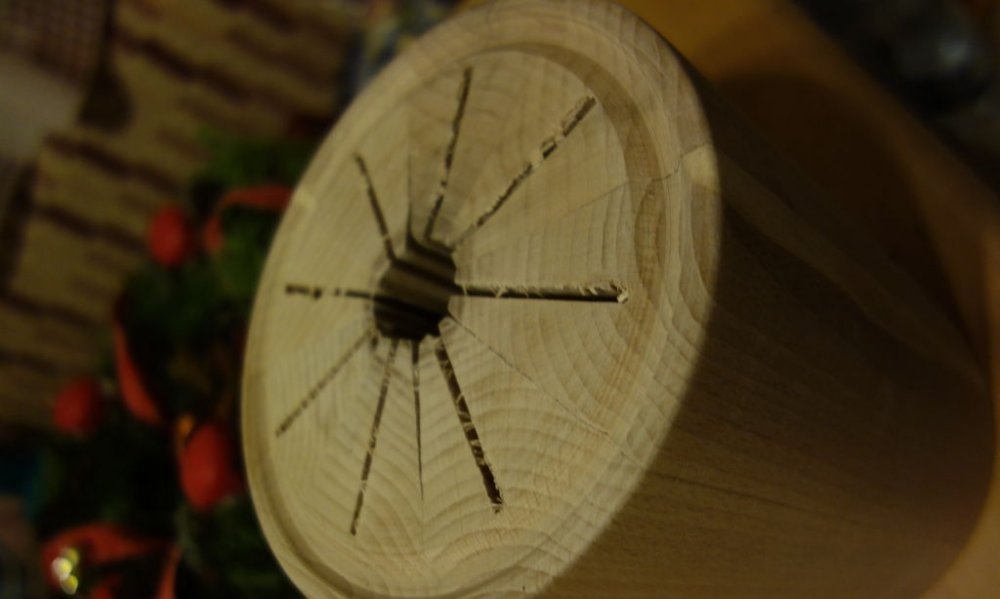
To create the knife holder, you will need to cut grooves into the blocks and then make diagonal cuts so that the 8 pieces glued together create a circle.
The figure above shows diagrams for bars.
The width of the bars and the depth of the cuts are presented for different options: for the ideal octagonal version and the minimal version (their differences can be seen in my drawing). It is easier to glue a full octagon, since its parts can be adjusted along common edges, but this option requires more material and a deeper cut.
The distance between the oblique cuts is very important for the final diameter of the stand.
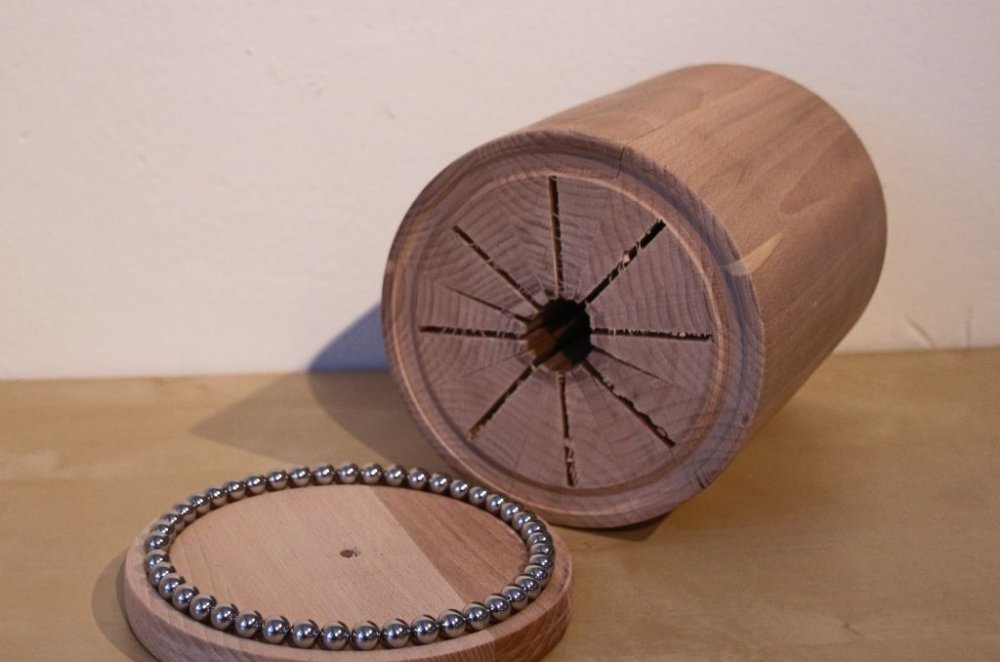
To create the bearing, it will be necessary to make 2 identical V-shaped grooves in the base and in the stand block using a lathe. Then steel balls will be inserted into the space between the base and the block.
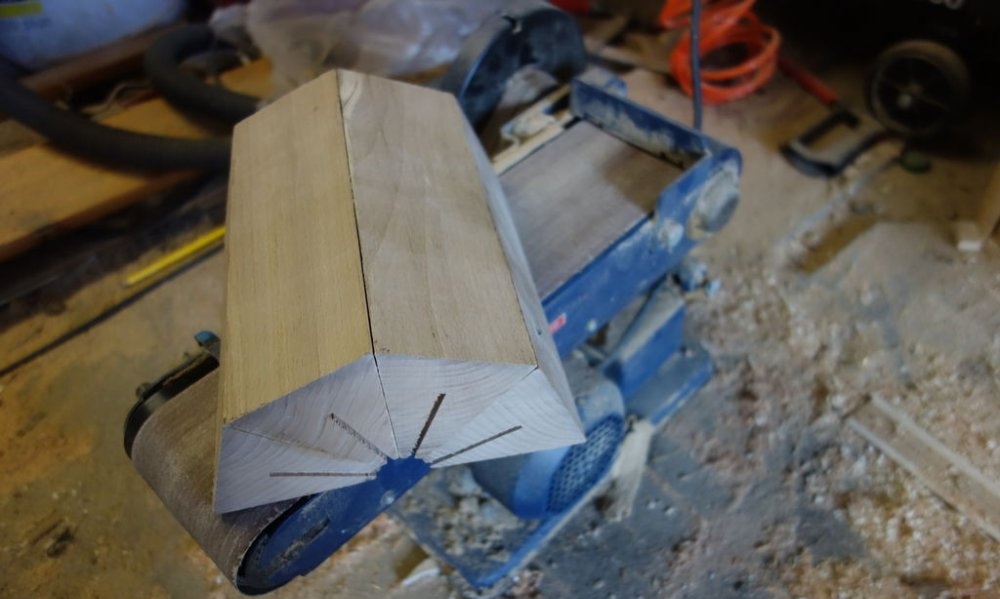
Sawing material

At this stage, you will need to adjust the bars to exactly the same size and sand them so that they can be glued together tightly.
First of all, create a groove for the groove of the required depth (d) exactly in the middle of the block.
Then turn the block over and make miter cuts at a 22.5 degree angle. The center of the gutter should be equally in the middle of the space between the oblique cuts.
Now you need to cut the bars to the same length (mine were 22 cm long).
The base is a regular board that you need to drill a hole in the center of to place it in the lathe and turn it into a rough circle (1cm wider than the desired radius of the finished knife stand).
Gluing
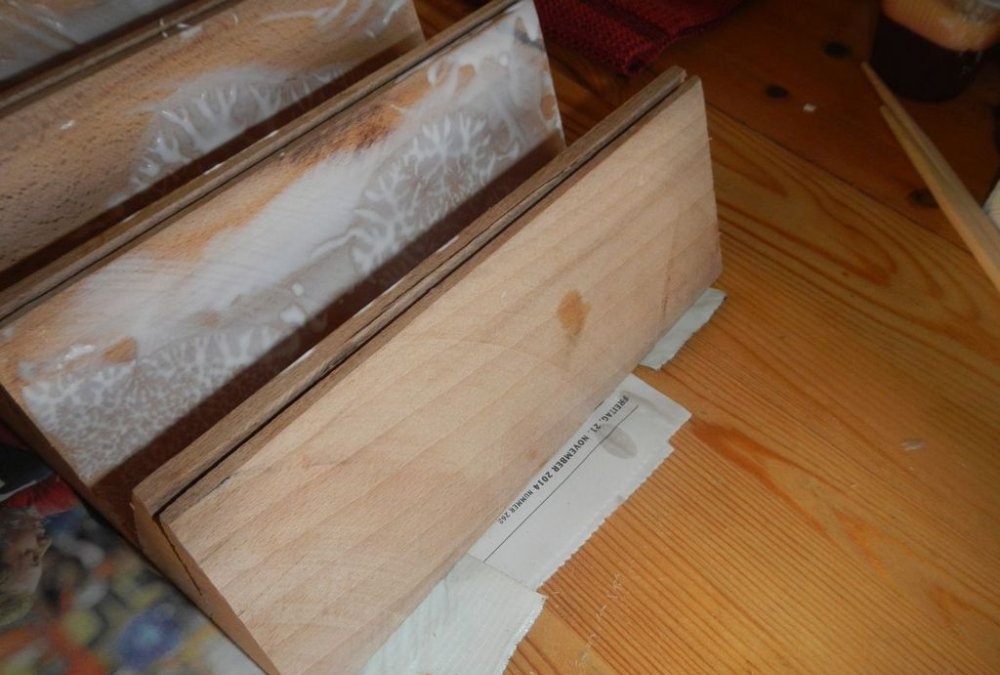
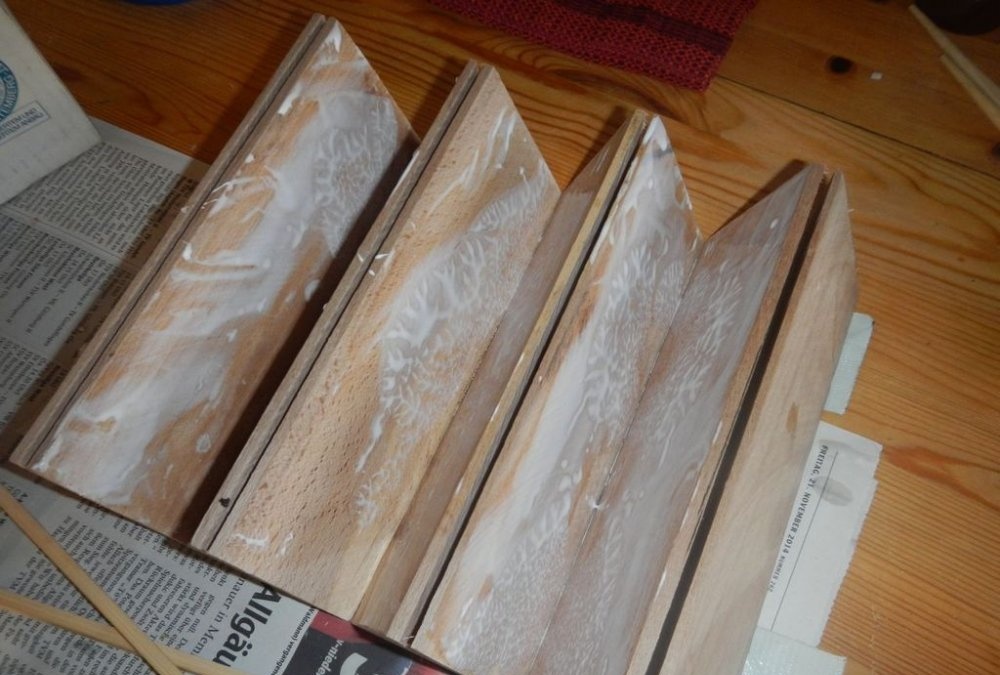
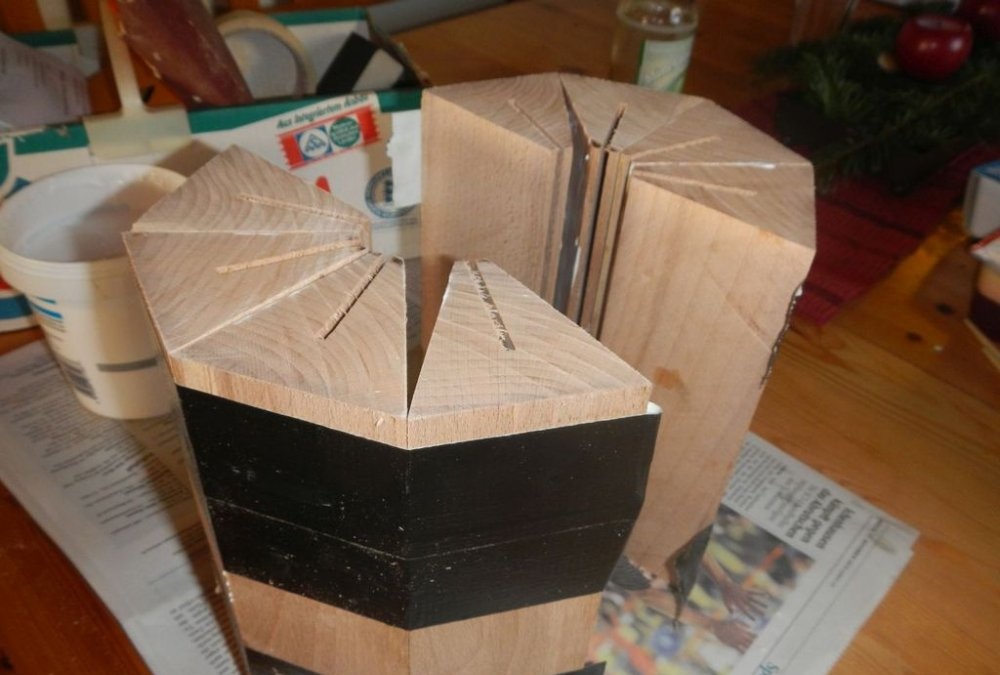
Apply a generous amount of glue to all prepared bars and place them next to each other, securing them with adhesive tape.
Since miter cuts are unlikely to come out perfect, you'll have to glue the two halves together separately, then sand them down to get a smooth surface before starting gluing. This way you can avoid gaps between parts.
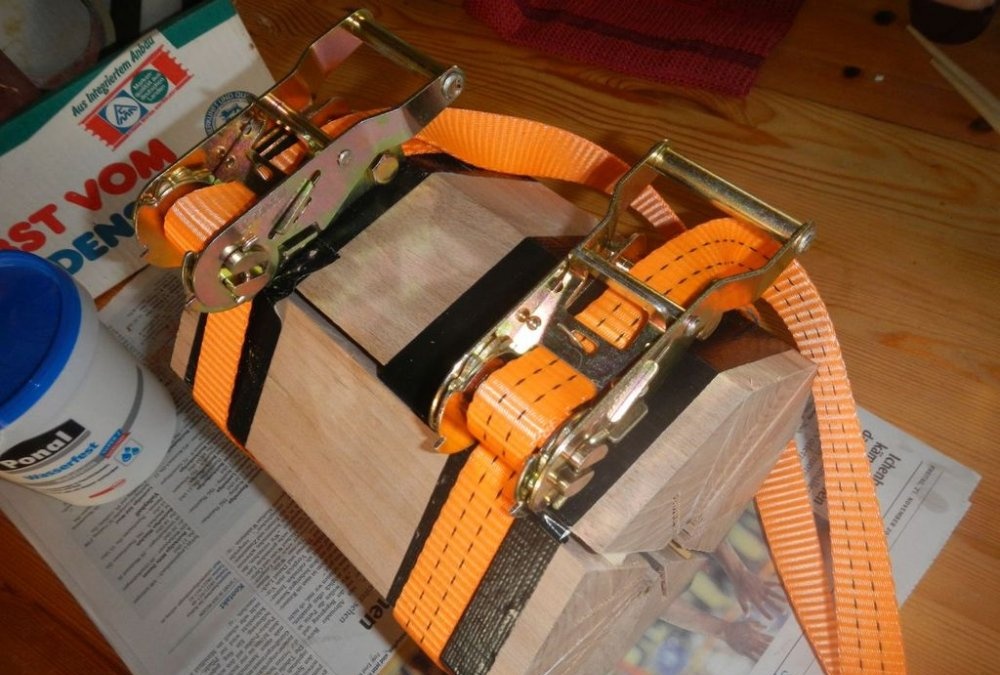
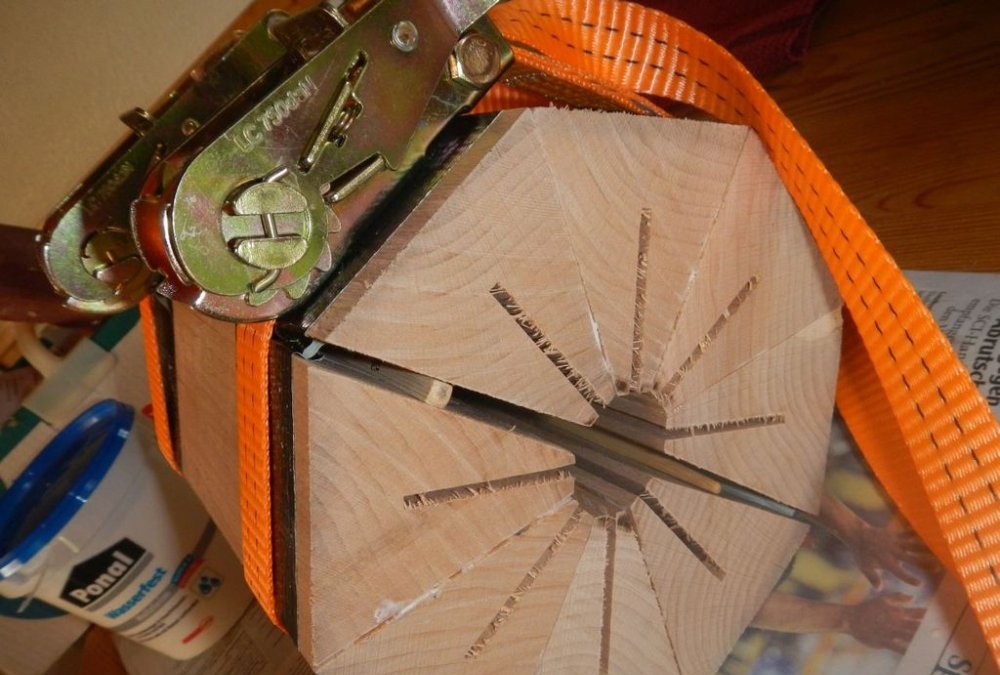
After applying the glue, take the two resulting halves, place several sticks between them and tie them together with straps.
Once the glue is dry, sand both halves using a sander and glue them together, again using the straps.
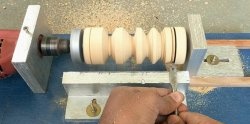
Processing the block and base of the stand
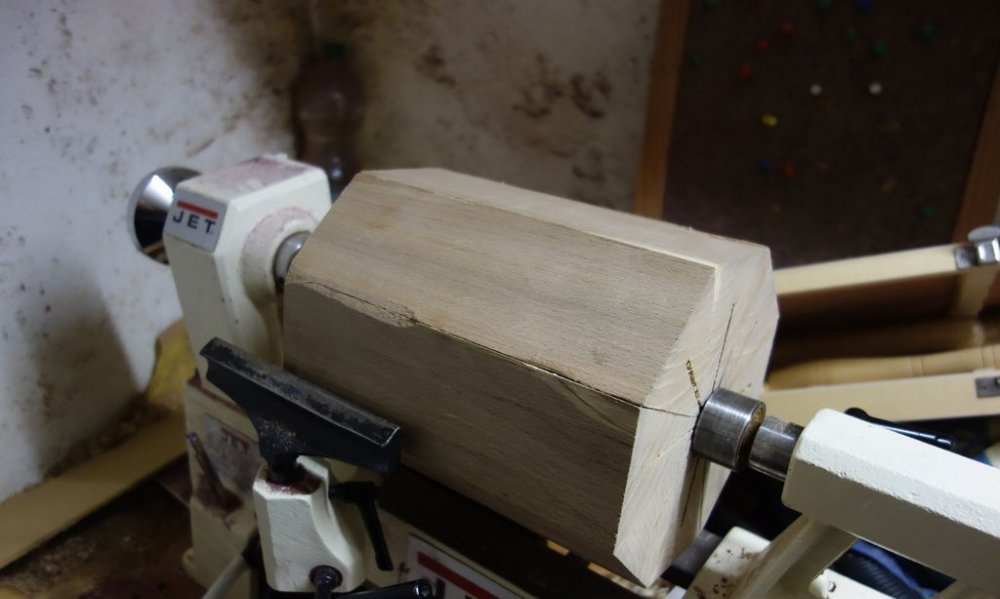

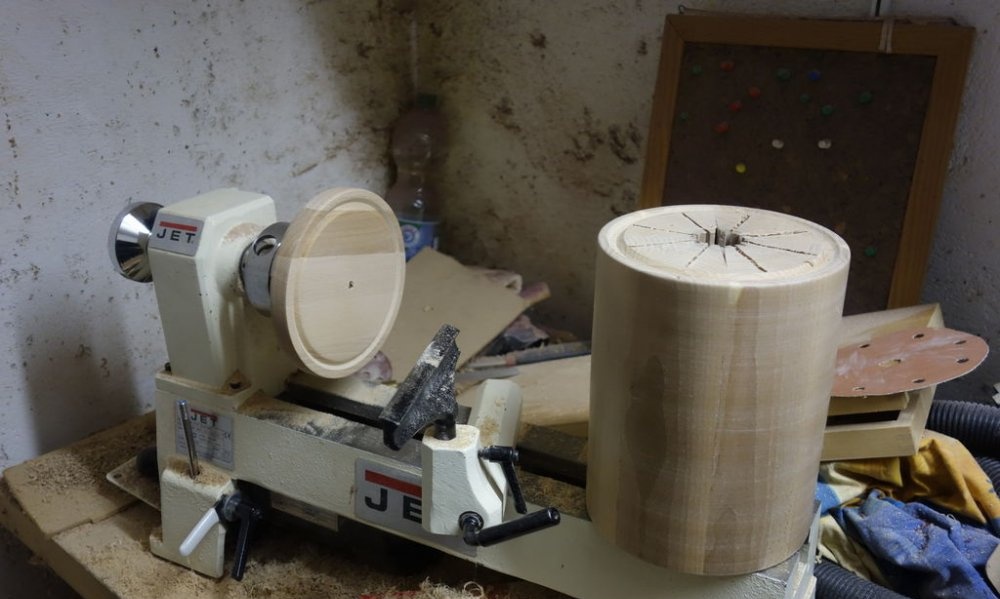
Placing the resulting block on the lathe can be difficult. To make things easier, I took a small piece of wood and placed it in the hole on one side of the block.
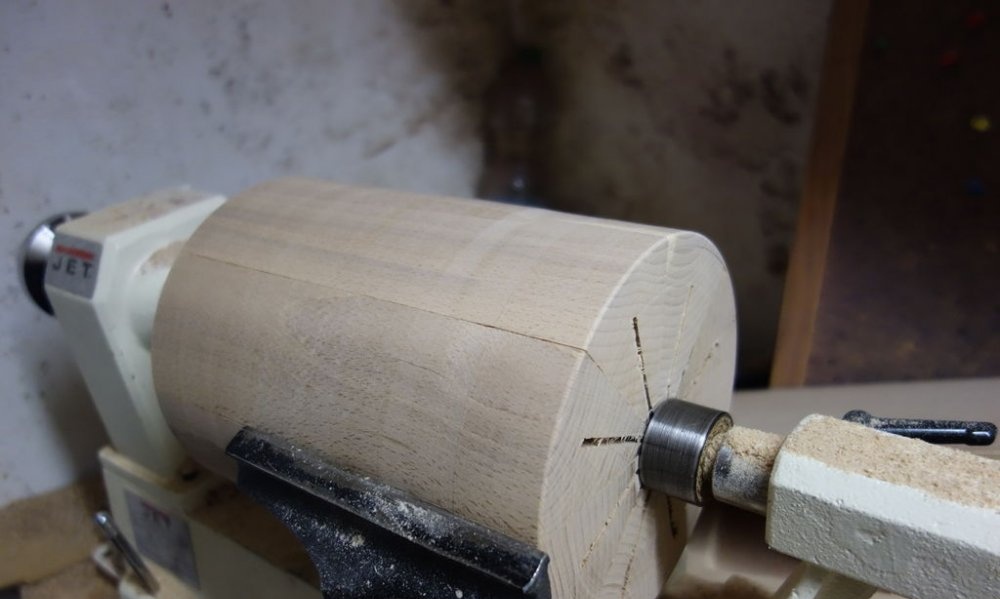
After this, you can begin processing, using a large semi-circular chisel at the beginning of the work and a finishing chisel at the end.
Sand the top and bottom of the block as well so that these surfaces are completely smooth and you don't have to fuss with sanding later.
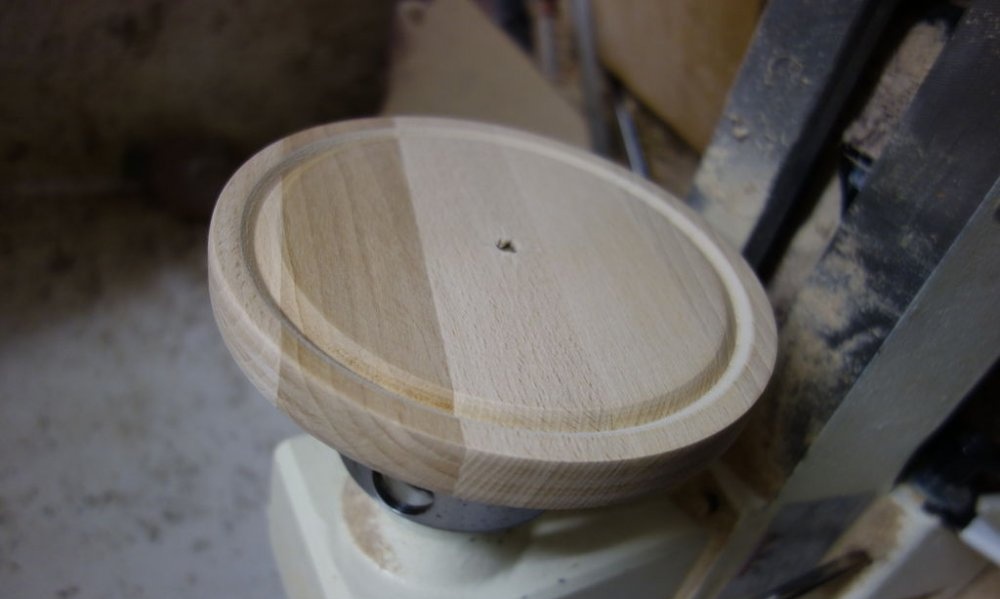
At the bottom of the supply block, cut a small V-shaped groove (about 5 mm deep) to contain the steel balls.
After processing the base of the stand, cut a groove in it with exactly the same diameter as on the block (also about 5 mm deep).
Final touches and further plans

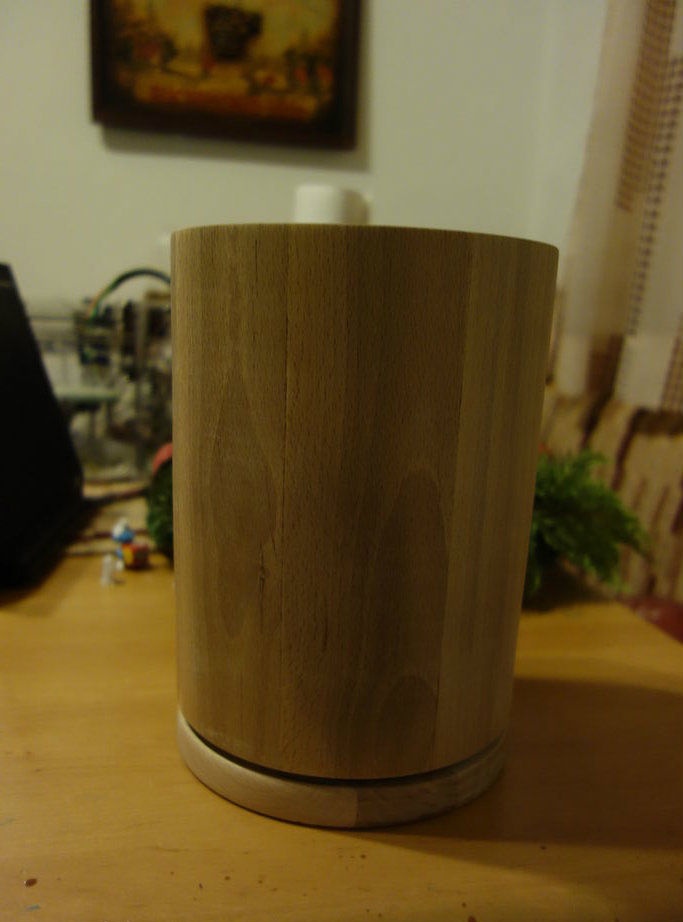
It is likely that while aligning the top and bottom of the block, small rough spots will remain in the grooves. To remove them I used a small file. After sanding the top, I spray coated the block and base of the stand with several coats of varnish.
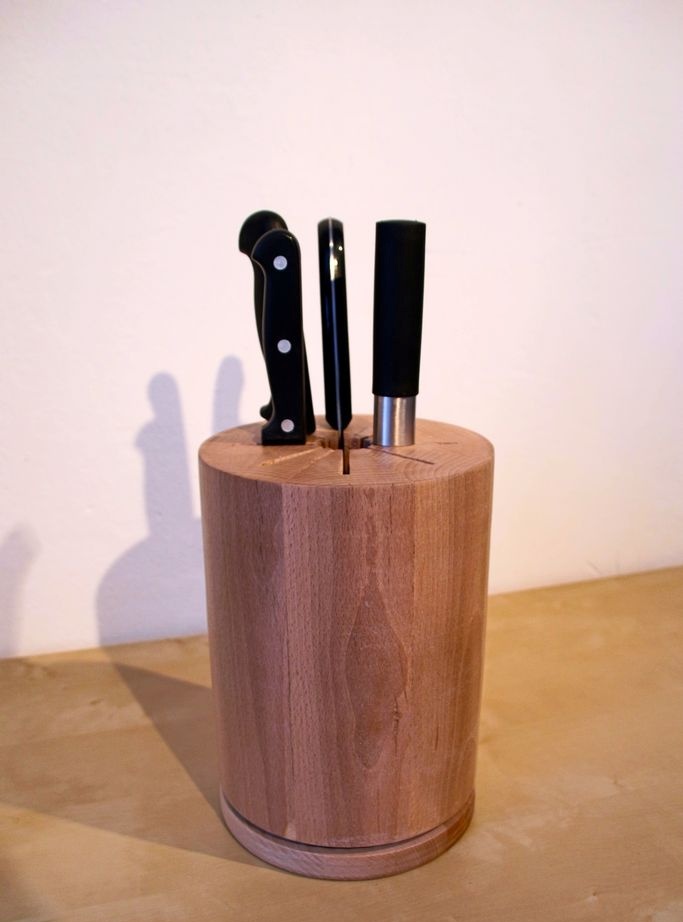
Then all you have to do is place the steel balls into the groove in the base, place a block on top, insert the knives - and voila: you have a rotating stand for knives of your own making.
Future plans.
Watch the video
If I ever decide to make another stand, I'll try to make it convex so the knives in the slots will be visible. This time I just didn't want to experiment as I did present for friend.
Original article in English