Required Tools
The most important tools in doing your job will be:
- jigsaw (you can use a high quality steel knife or grinder);
- drill (even a hand drill will do);
- blowtorch (soldering iron);
- rivets;
- screwdriver;
- sandpaper;
- wooden meter;
- a bucket of water and a clean rag.
Preparing for work
The first step that needs to be performed is to thoroughly wash the barrel so that you will be pleased to work with it. Having previously prepared all the necessary tools, you can begin work, which will not take much work and time if you study everything carefully and follow the sequence of actions correctly.
Measuring and cutting the barrel
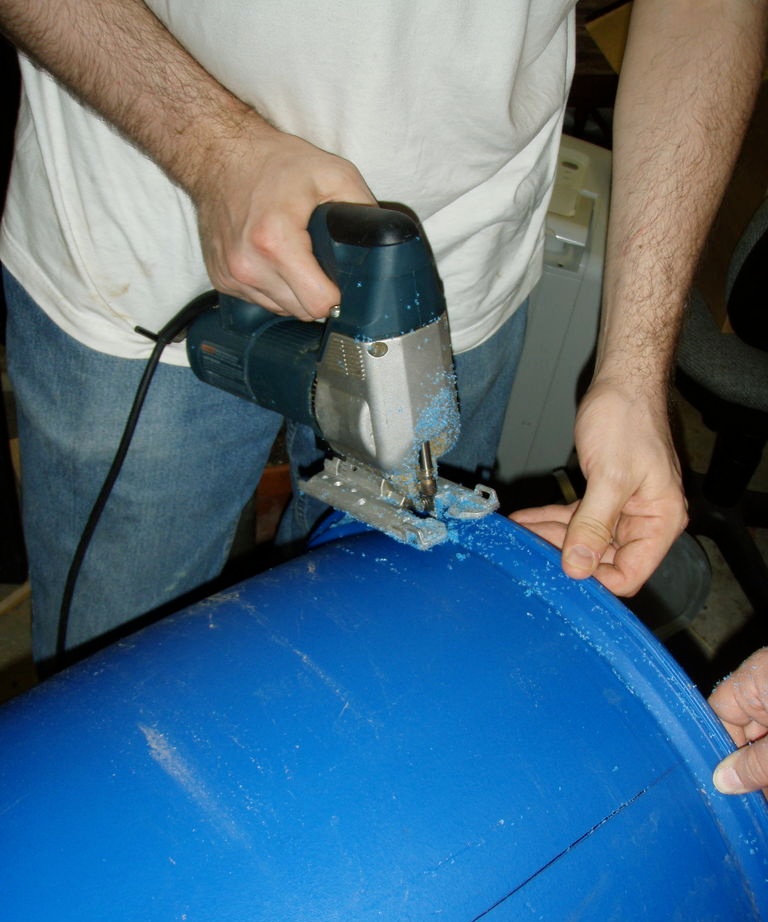
When doing this work, do not forget that it is better to measure seven times and cut once and not vice versa. Also, do not forget about safety precautions, since electrical and sharp devices will be used.
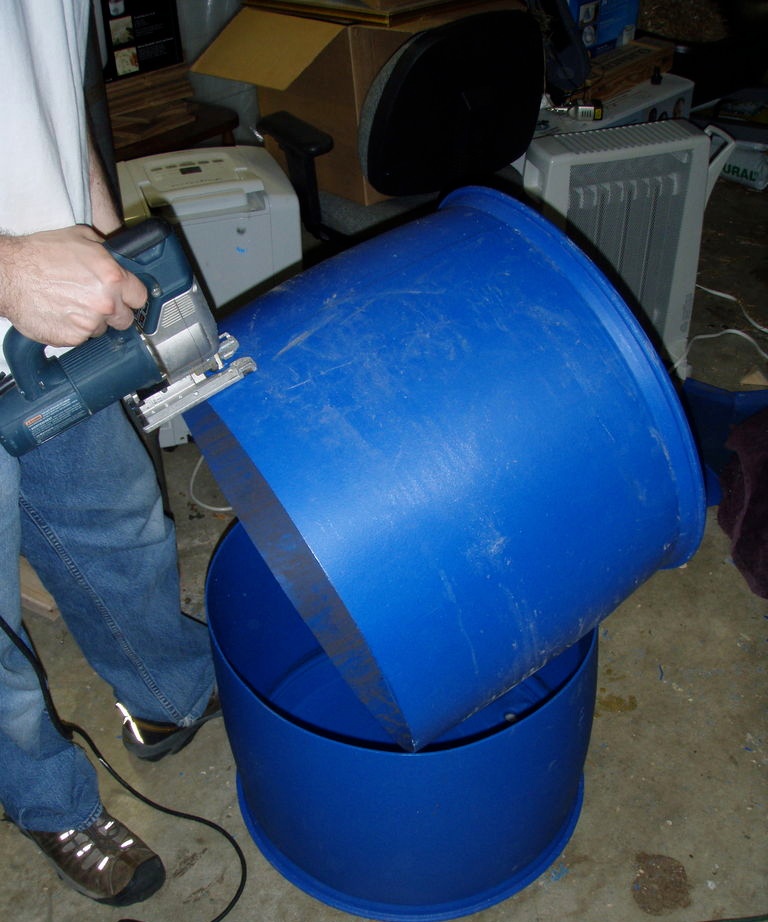
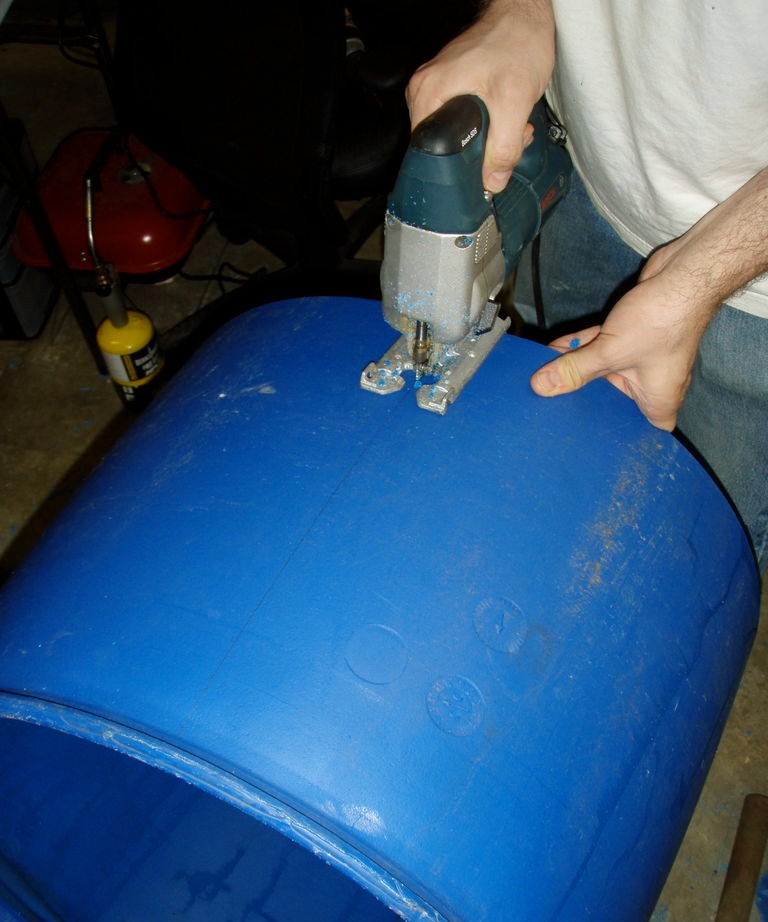
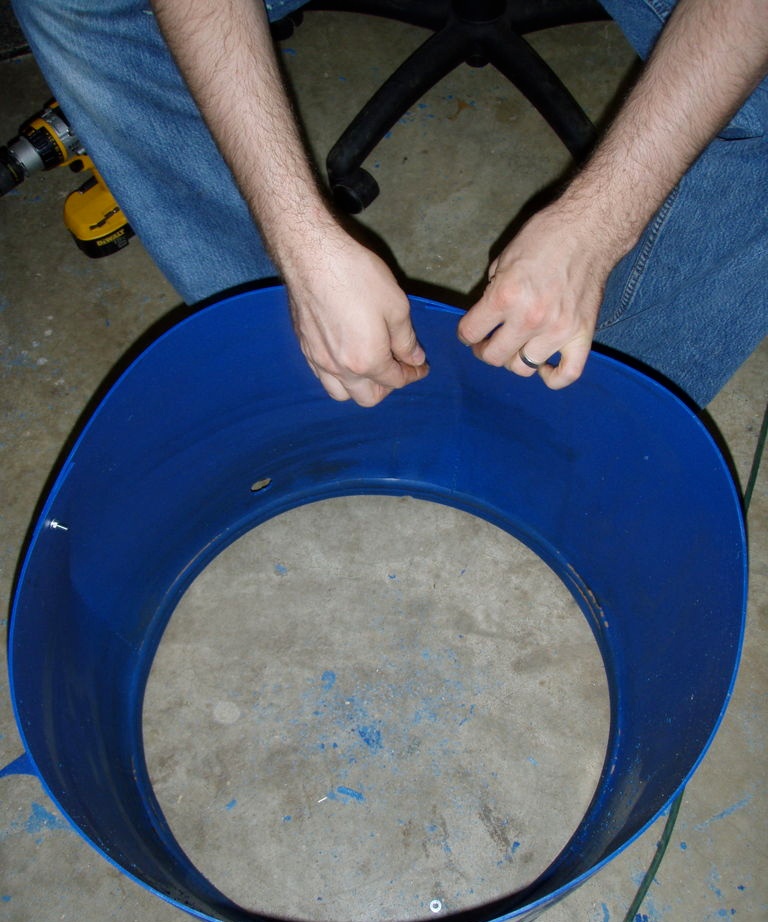
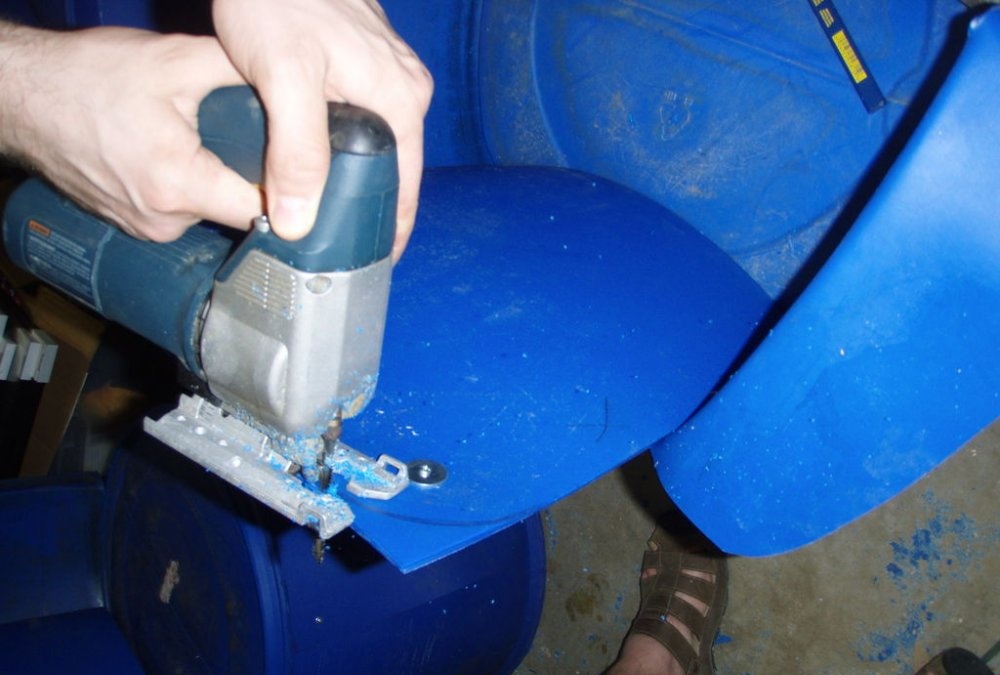
Measure the height of the barrel and divide it in half. Then you should put points in at least six places along the circumference of the middle of the barrel at approximately equal distances from each other, this will ensure that you draw an even line and cut the barrel exactly in the middle. A jigsaw is ideal for cutting, but if you don’t have one, use a tool that can perform this action.
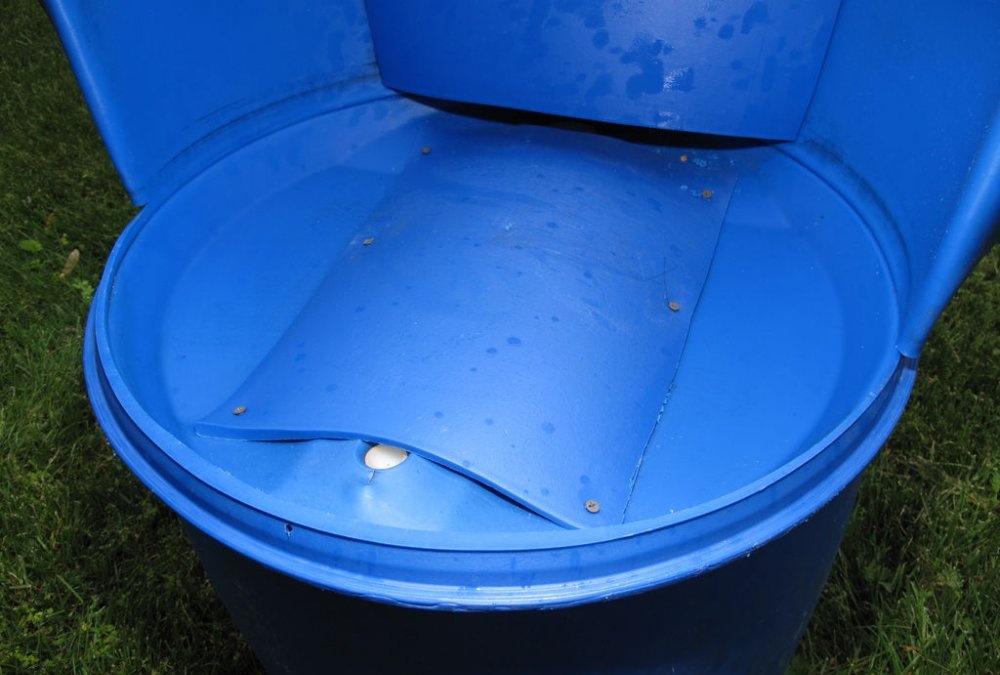
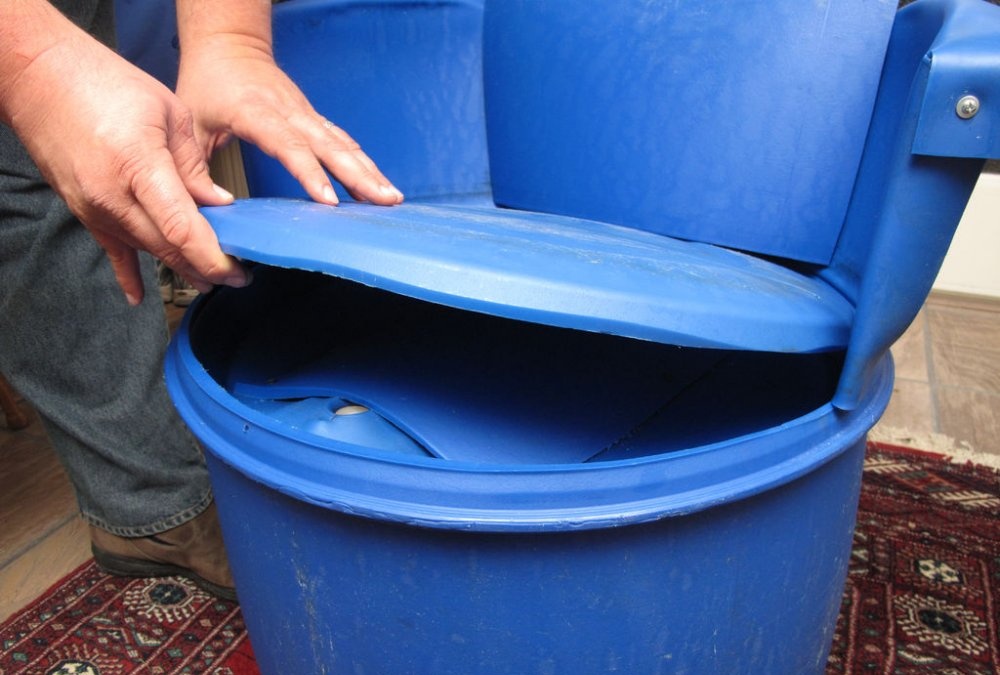
Next, you begin measuring the top of the barrel you have cut. You need to trim the top of the barrel without any unevenness. If you are using a barrel with a lid, then you just need to cut the threads or the place where the lid is fixed.
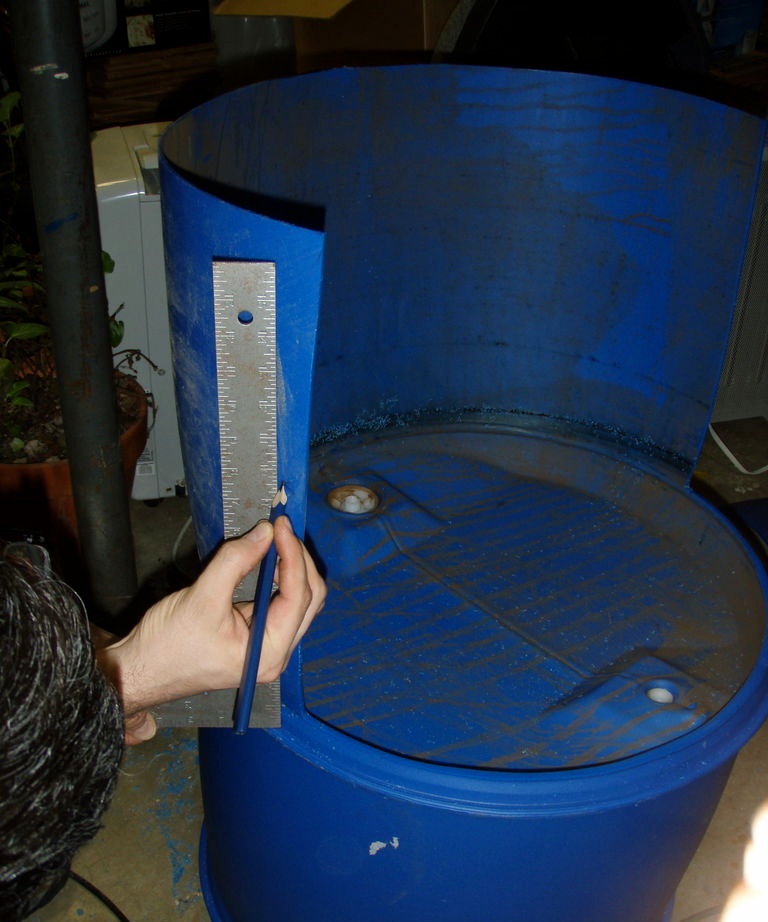
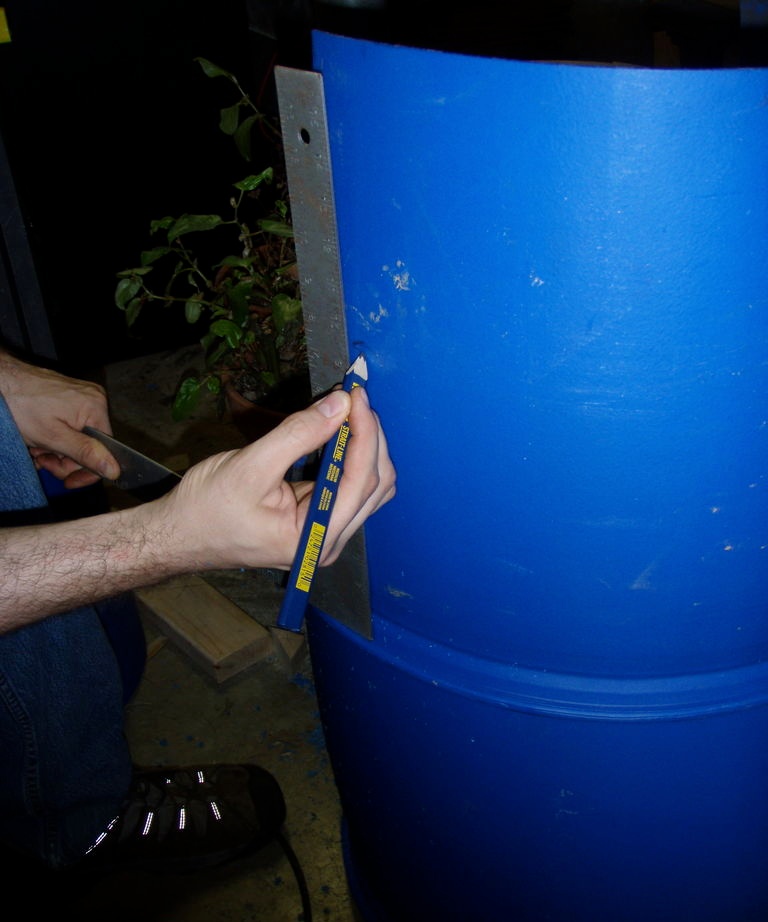
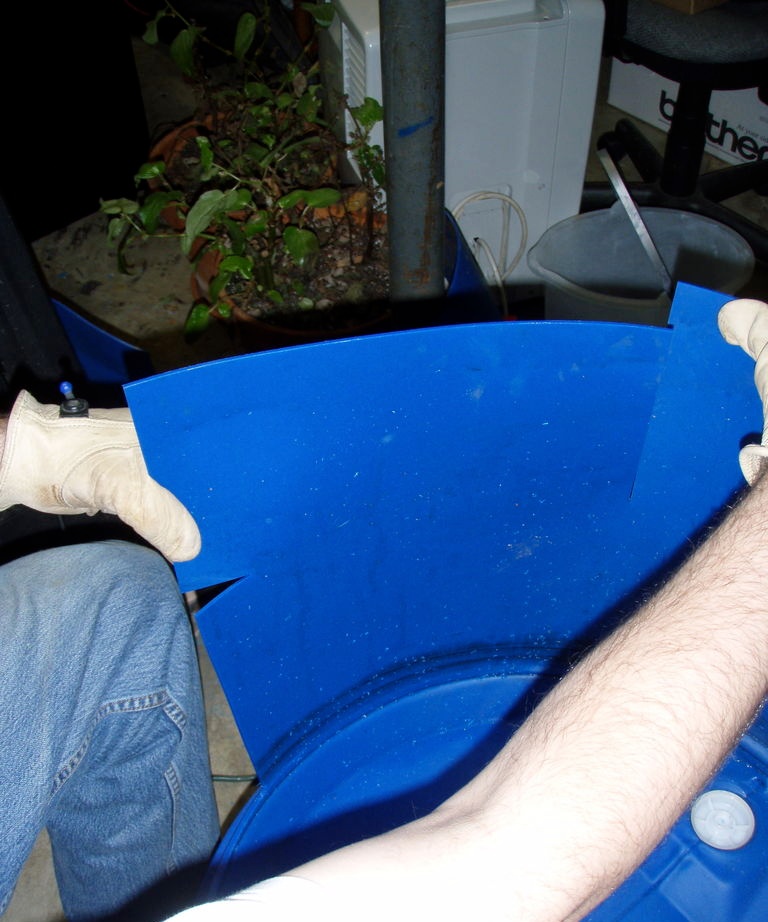

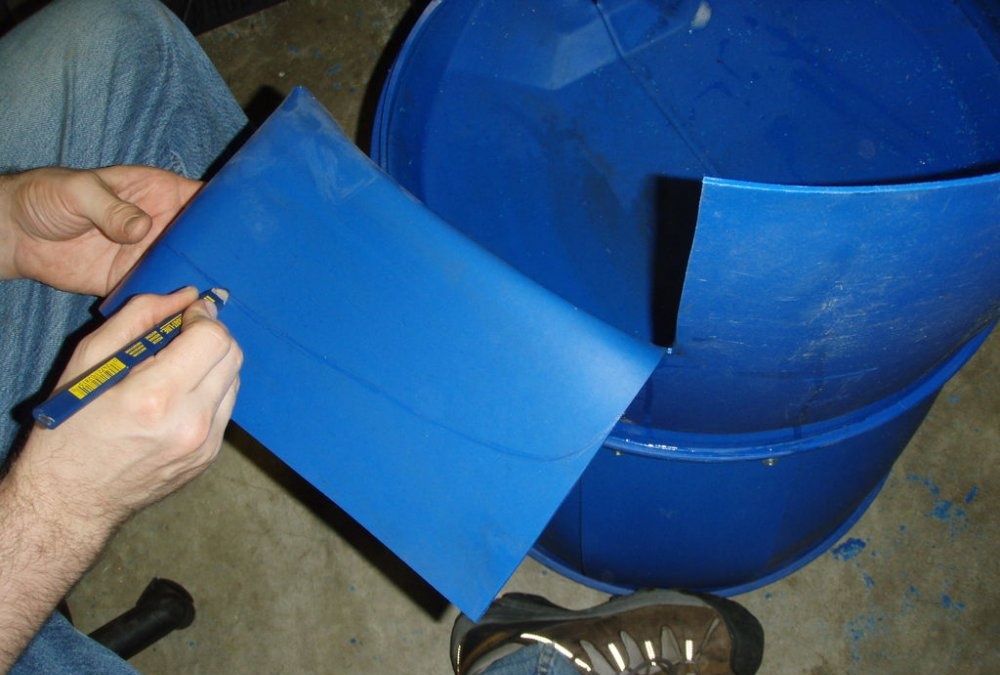
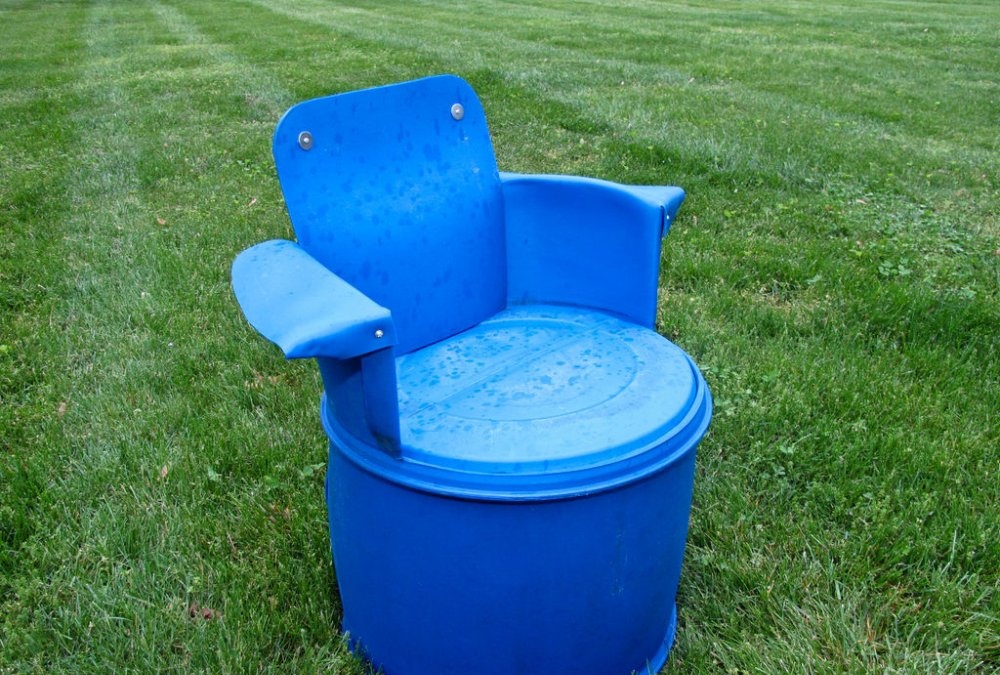
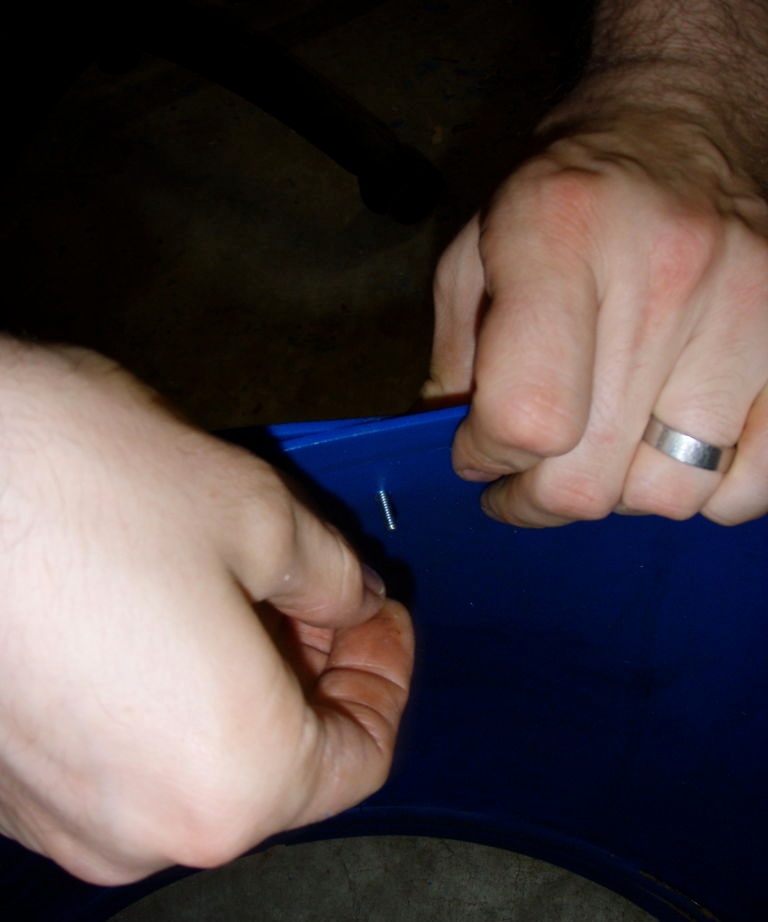
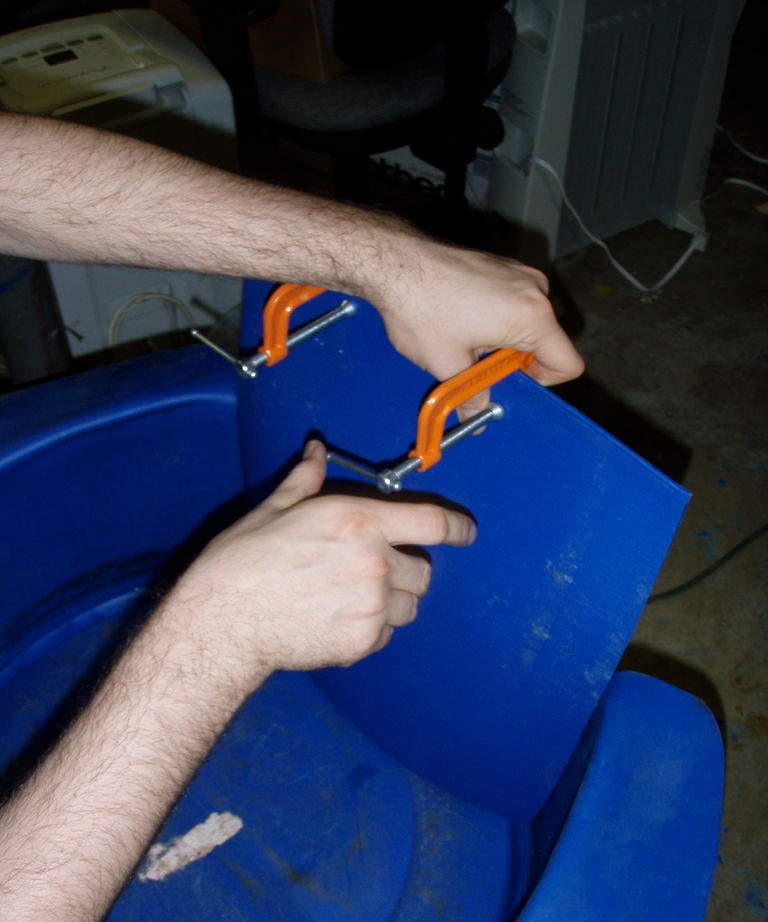
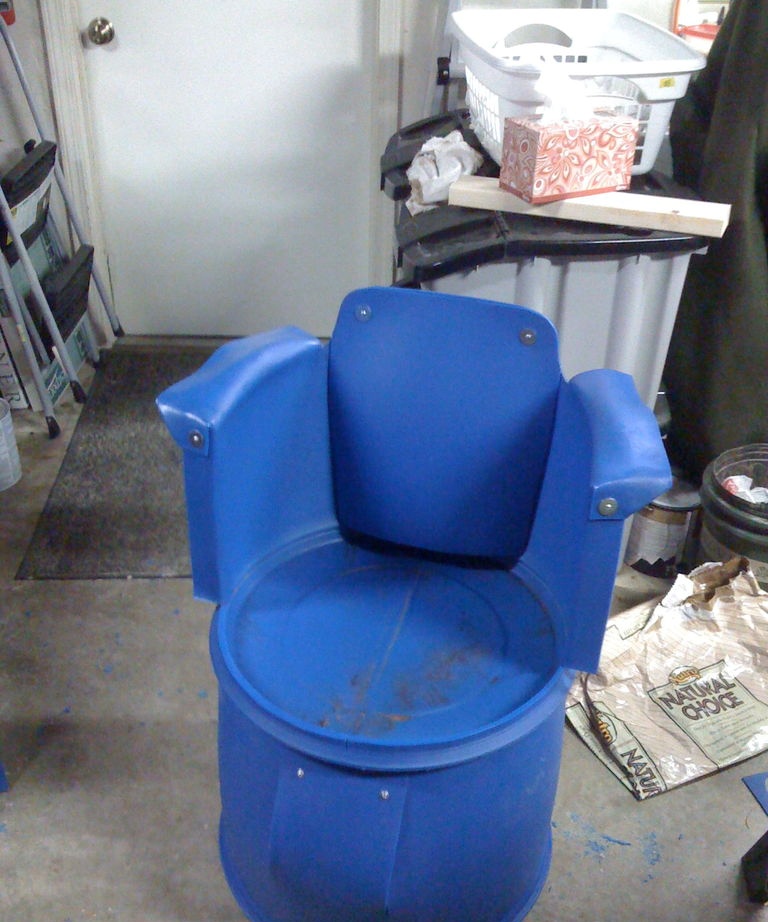
When you have a cylinder, you also need to cut it in half, but not vertically, but horizontally. In order to do all this smoothly, ensure that the measurements are correct. Place a wooden meter on top of the cylinder, which must be even and without any defects. Measure the distance to it on both sides of the meter, it should be the same. When you have thus determined the middle, you make marks on the barrel at both ends of the meter.Then you measure the distance between the points along the circle and transfer the notes to the bottom of the cylinder, after which you can connect them and you will get straight lines. Then you cut, and you get two semicircular plates, one of which should be put aside for now. Next, one plate will play the role of the back of the chair and armrests, on which you need to bend them correctly. To do this, take a ruler, measure horizontally in the middle (at the ends of the plate) and mark it with dots, then put 20 cm marks along the circle at the level of the middle. Draw a line from point to point, then draw it up and you will get something like a square. Cut from top to bottom along a line on both sides and the preparation for soldering this element is ready. But for more comfortable armrests, you will need to once again divide these squares in half and bend them, then solder them, or fix them with screws or rivets. To fasten, you just need to drill holes in the planes at the desired connection points. You can make a slightly different shape and size in contrast to the above example, just keep in mind that the back must be strong.
The second plate will serve as a reinforcement for the backrest and armrests. To do this, you will need to cut out small plates from it, which will be attached to the main structure of the back in the form of overlays. It is advisable to secure them together with rivets. There will be enough material for you, there will even be some elements left after cutting the secondary plate, and the pieces that may seem unnecessary will still be useful to you if you want to add individuality to your chair and decorate it by additionally cutting out figures at your discretion and attaching them to the structure.


Assembly of the structure
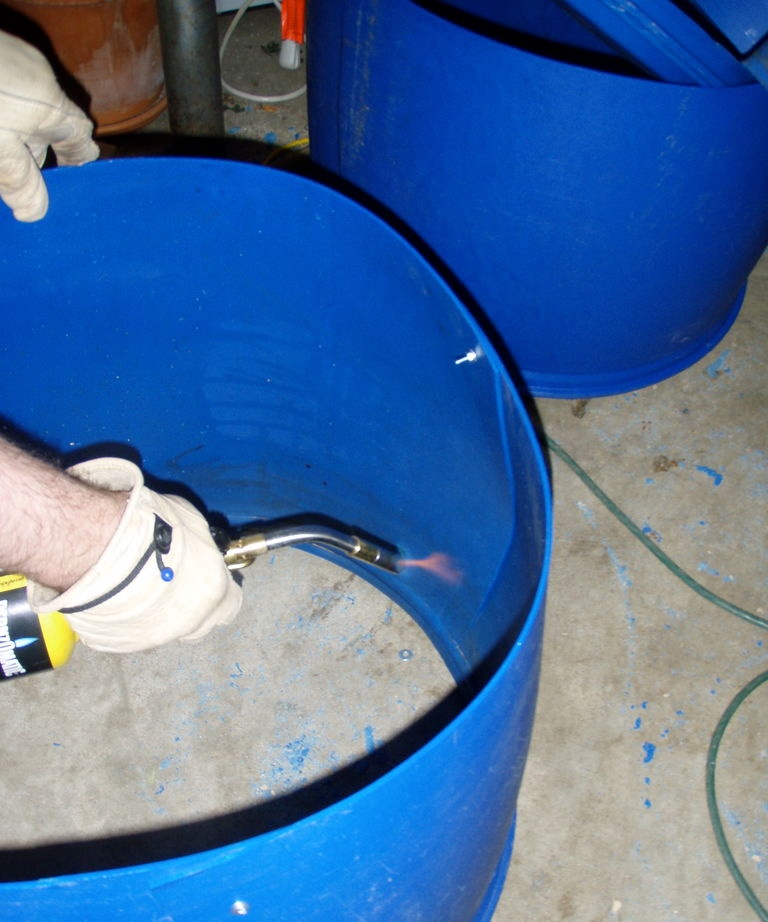
This action is performed directly using a soldering iron or blowtorch. The chair will be much better and neater when working with a blowtorch. If you are going to do everything with a soldering iron, then do not forget that for a strong structure you need to solder the joints on both sides.
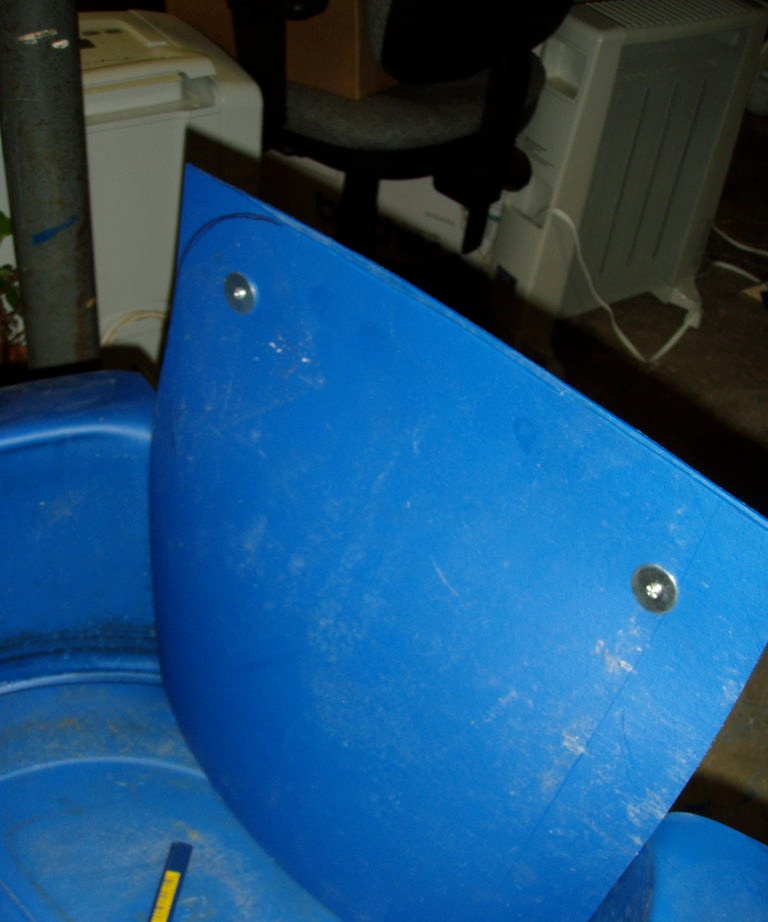
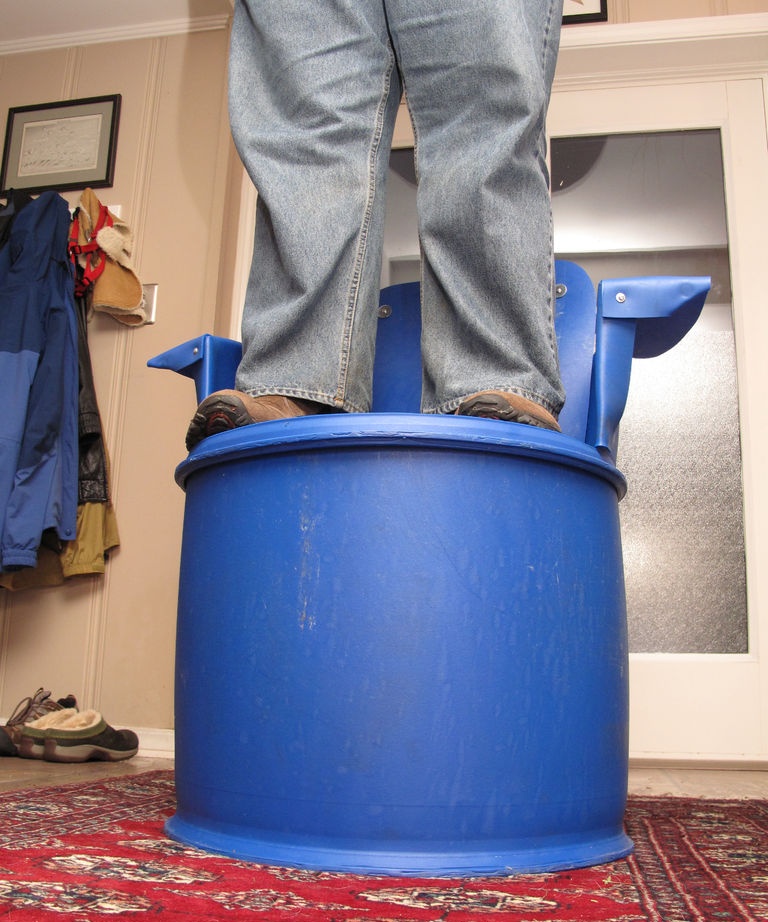
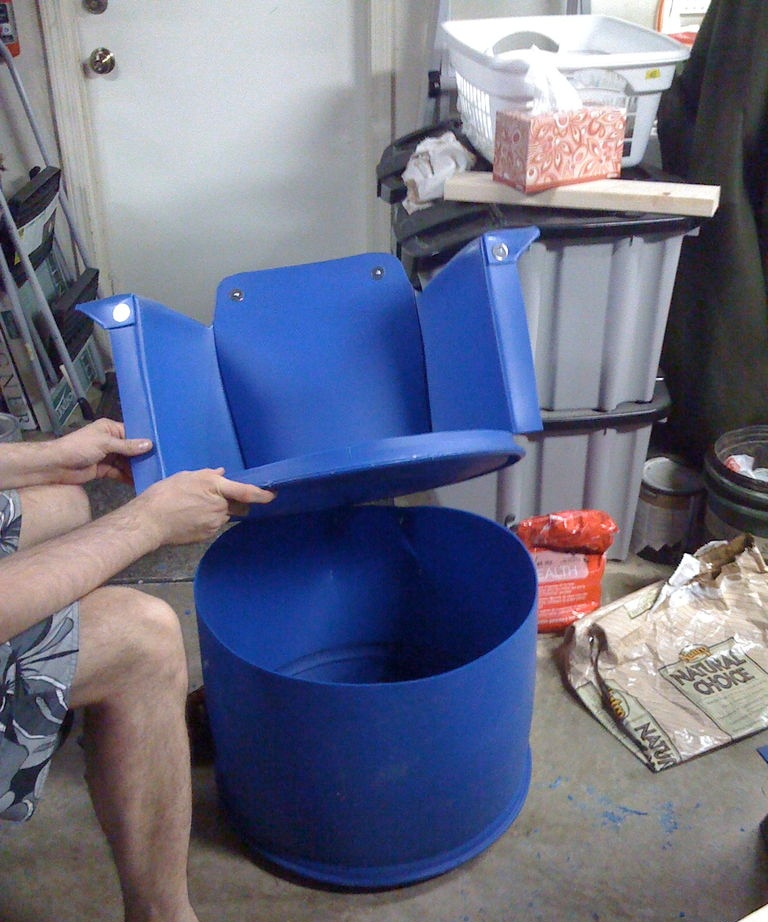
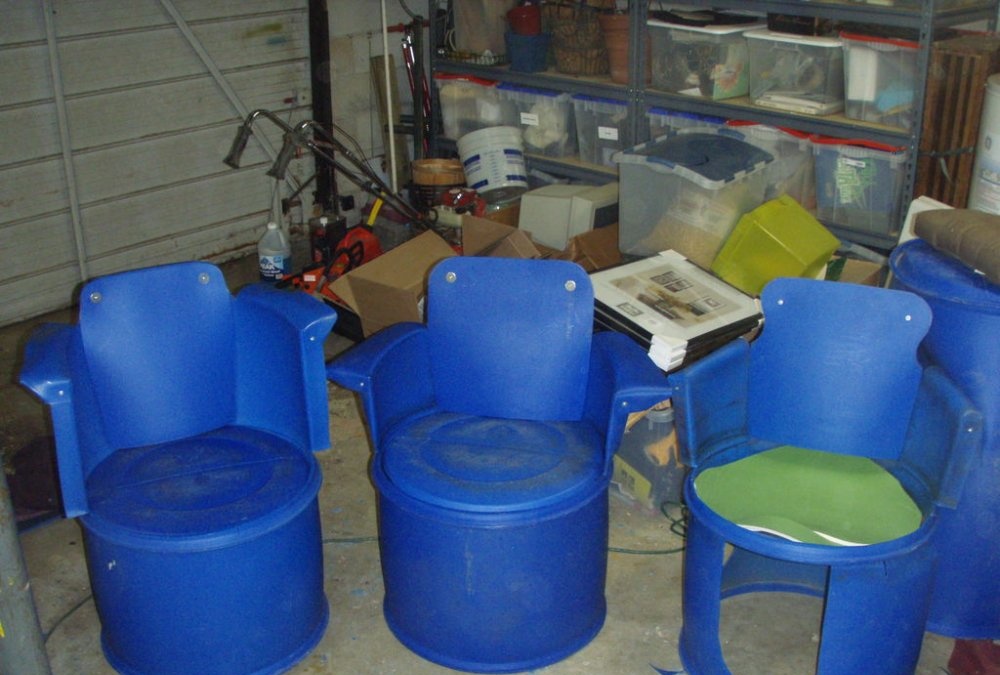

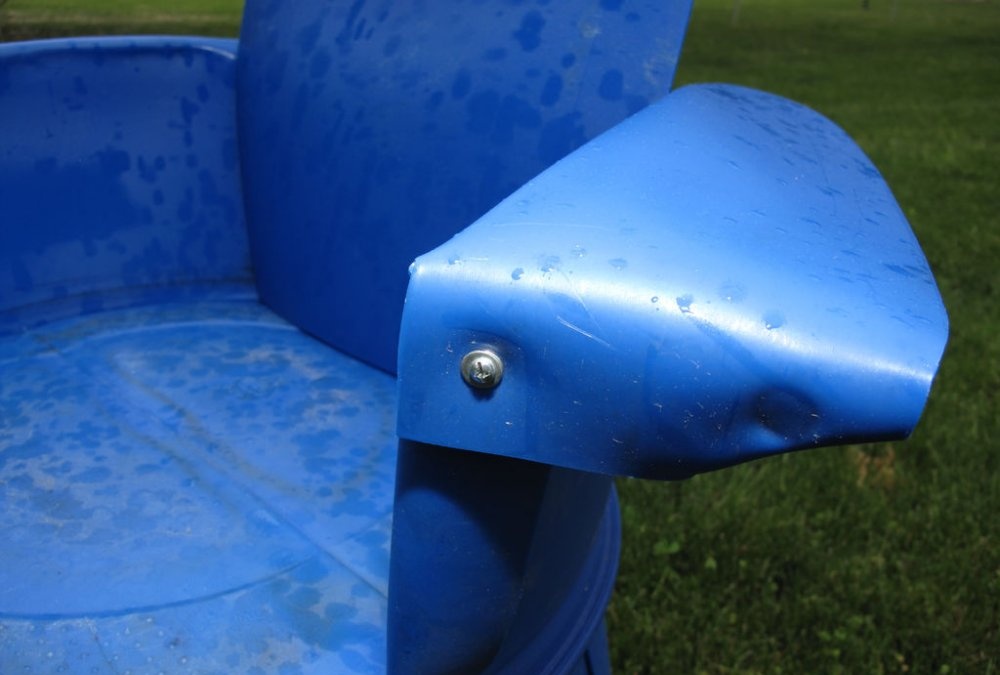
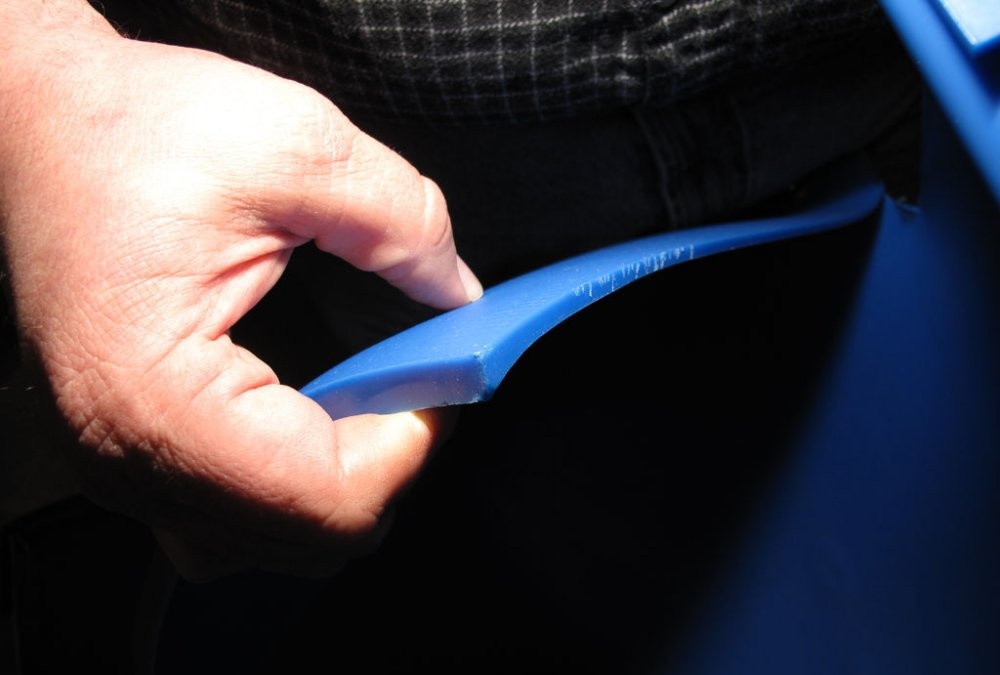
In general, you put a base, which consists of the bottom of the barrel, the lid or the cut off top of the barrel is placed on it and carefully soldered in a circle, after which you will have a strong base on which you can sit. Without doing this, you will end up with a chair with an opening top, but this will have a detrimental effect on the strength and reliability. We place the manufactured backrest on top and also carefully solder at the joints. If you worked with a soldering iron, you may end up with uneven seams that should be smoothed out with sandpaper. After this, the chair is almost ready, all that remains is to strengthen the back and armrests with pre-cut pieces of plastic. You can also cut out a comfortable plate on which you will sit more comfortably. Fasten them in the right places on the studs and your chair is completely ready for use. If desired, the chair can be painted, after which it will look much better, and you can use it wherever you want.
And so, without spending a lot of time and effort, you will have an original chair for everyday use. Any person can do this kind of work without any special skills.
Original article in English