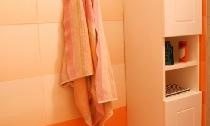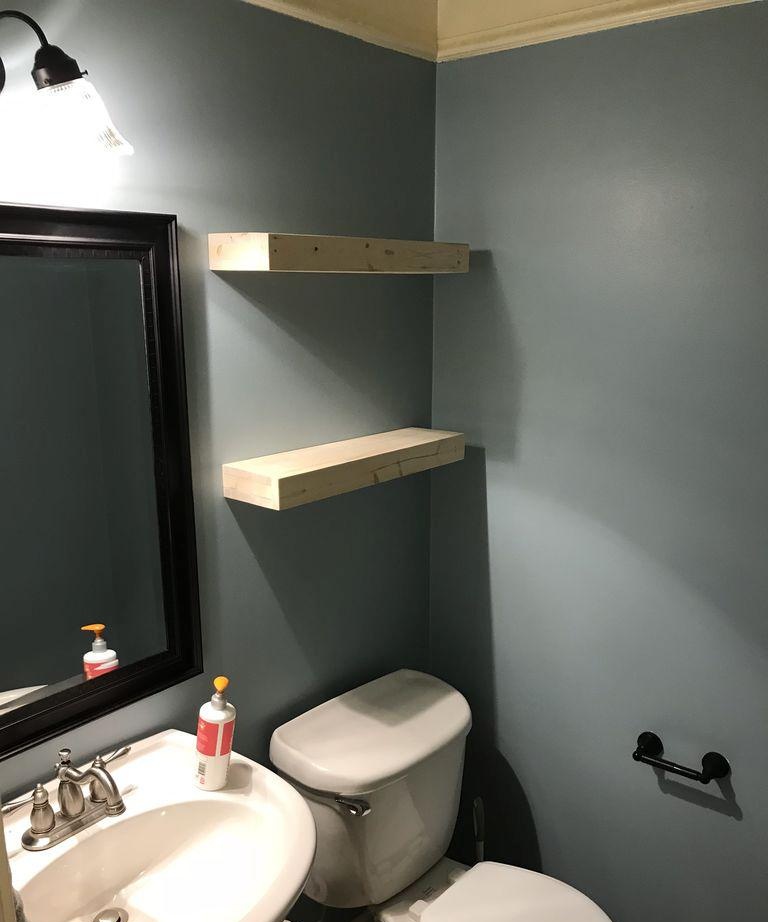
One day my wife needed shelves in her combined bathroom. I didn't particularly like the plastic and metal products that were offered in the stores, so I decided to rummage through my stash in the garage. I liked a few scraps of wood, which were quite useful for simple work. The material was well dried and strong enough for the manufacture of a supporting structure. A little ingenuity and imagination, a good tool and hands accustomed to carpentry work were all that was required to fulfill the request.
Making shelves
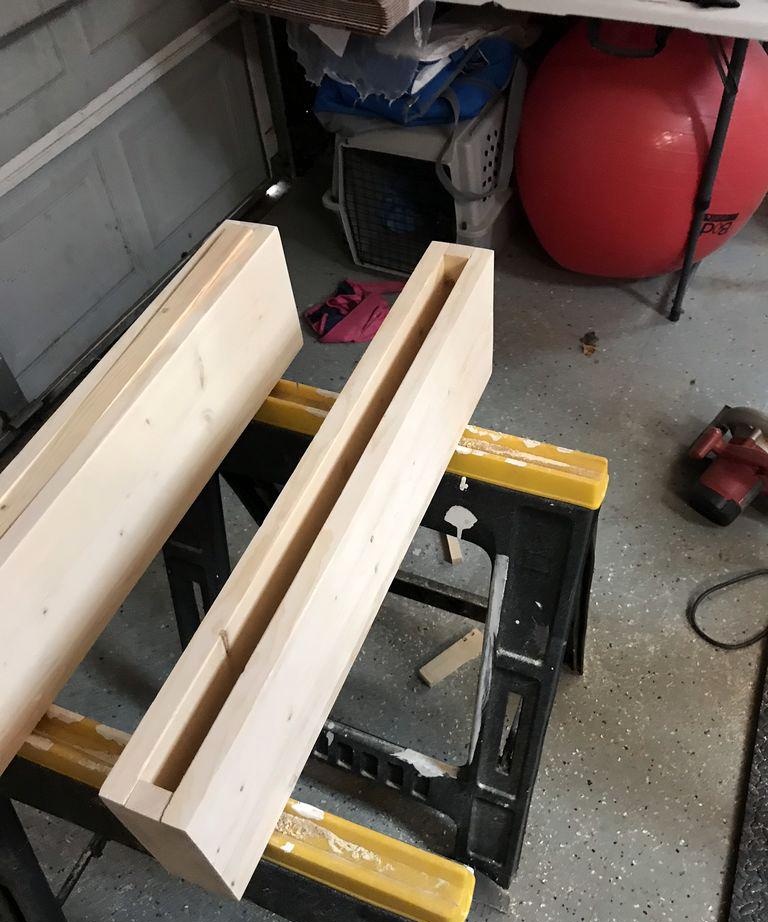
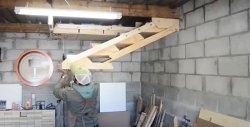
According to my idea, I needed something like a narrow hollow box, which needed to be securely attached to the concrete wall. To do this, I took two identical boards for the sides of the box, which were supposed to play the role of the upper and lower surfaces of the shelf. I inserted two blocks on the sides, and closed the structure at the end with a suitable strip.
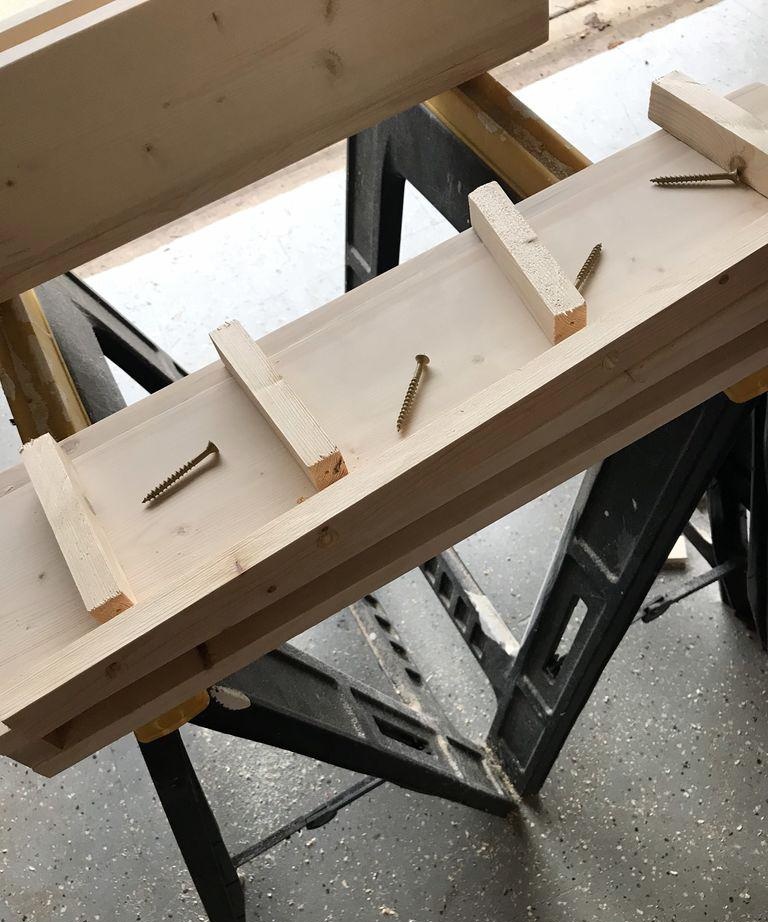
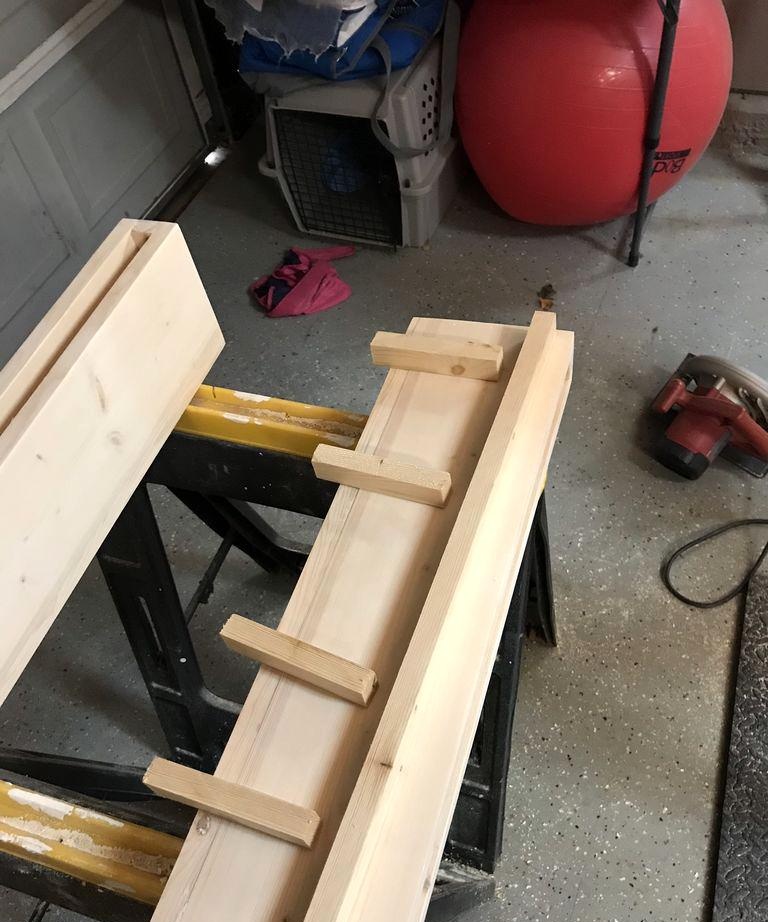
Then I needed a reliable mount to the wall. To do this, a long block came up, which needed to be attached to the wall. I screwed four blocks to this part, which played the role of small consoles. To prevent the blocks from splitting, I drilled guide holes in them for self-tapping screws.
Wall Mount Installation
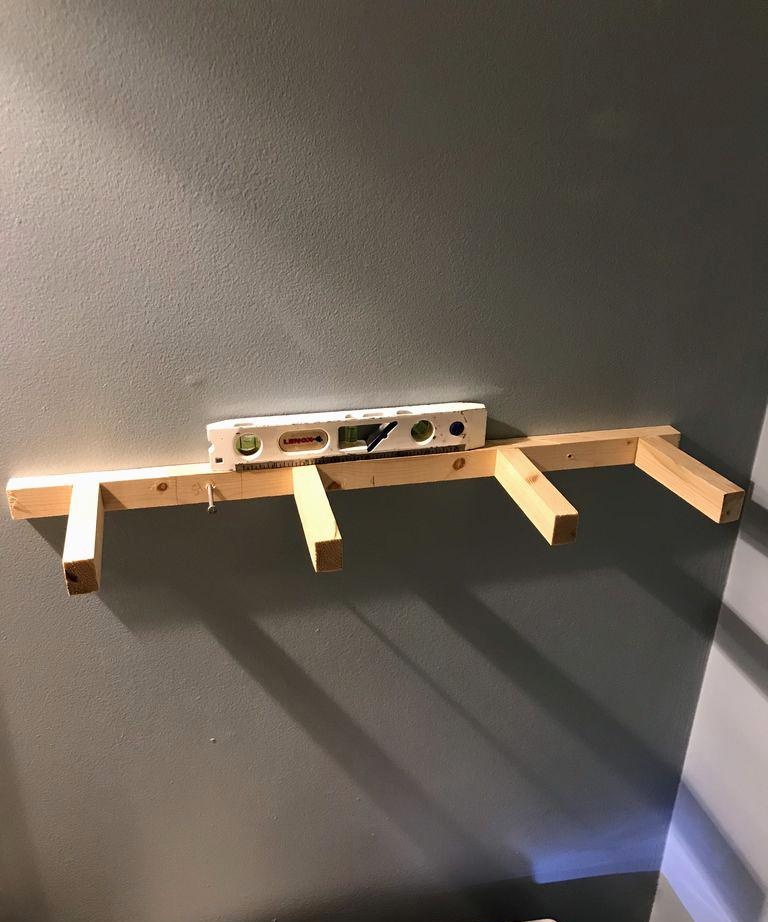
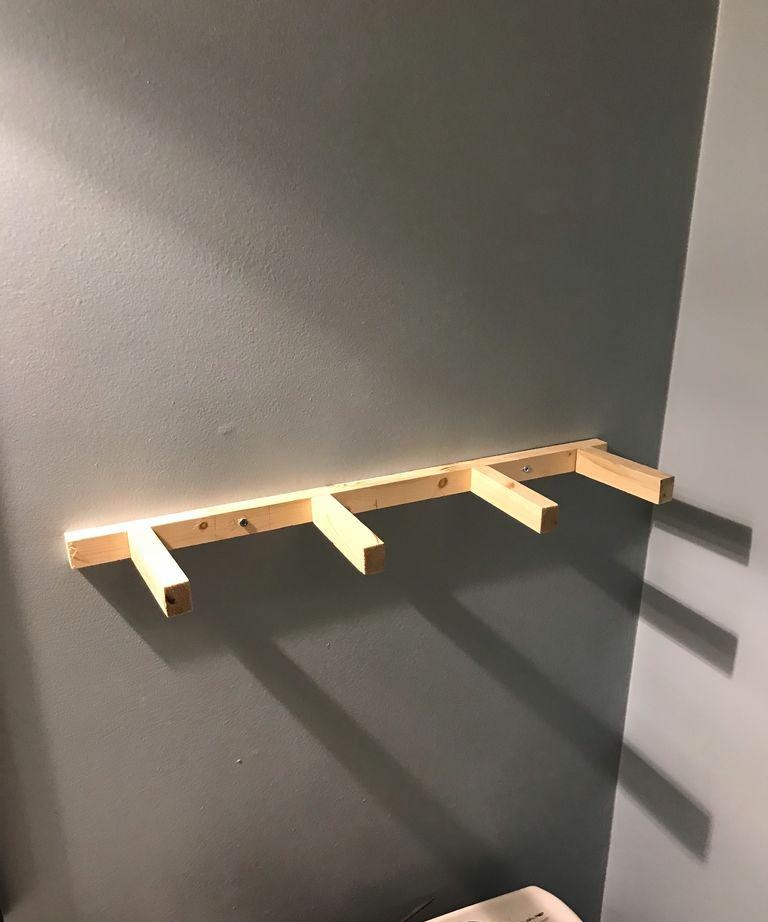
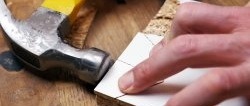
The next stage required a hammer drill with a concrete drill and a screwdriver. I made marks on the wall for drilling holes for the dowels. First, I drilled the guides so that the tool would not move to the side. After securing one side, I used a level to make sure the hole for the second dowel would be drilled in exactly the right place. Important! The dowel must be paired with a screw, and the diameter of the drill is such that the plastic enters the hole flush with its edges after a gentle blow with a hammer. Don’t forget about the depth of the hole, which should be a couple of millimeters deeper than the length of the dowel.
Shelf installation
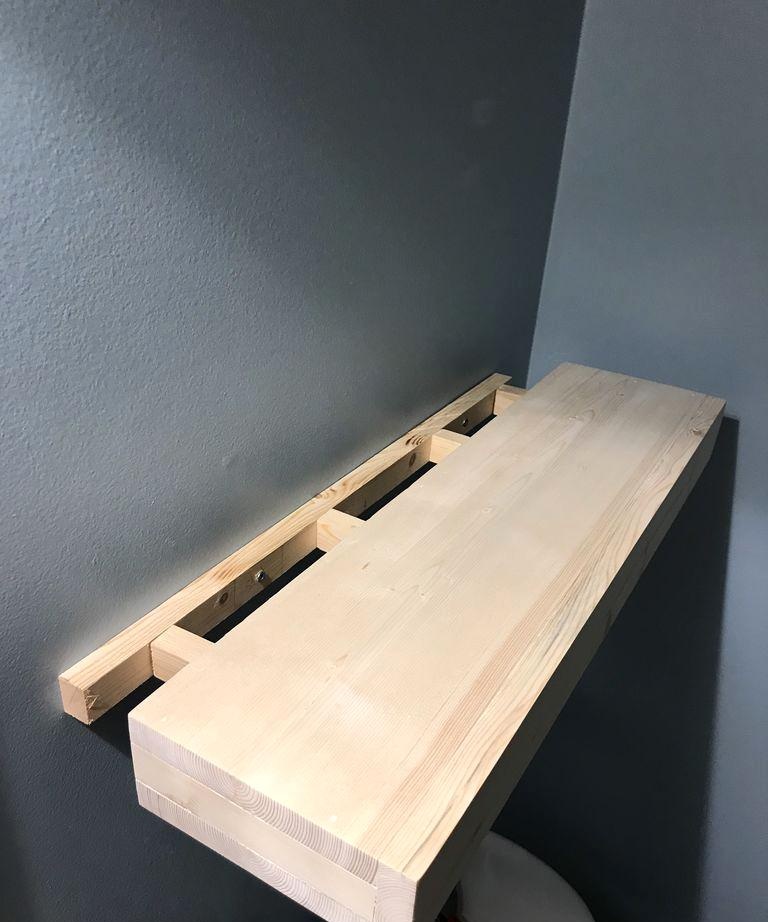
All that remains is to put this long thin box on the mounting structure. The shelf should fit onto the frame fairly tightly, but without excessive force. When the structure fits onto the frame with difficulty, carefully trim the consoles and horizontal strip with sandpaper or a file. If possible, this can also be done with the inner surface of the box. If any of the consoles turns out to be too long, you will have to remove the excess, and when the wall in the bathroom is fairly even, the edge of the shelf will align with it very tightly. To hide the heads of the finishing nails that were used to hold the main boards and the rest of the pieces together, I used a special wood glue mixed with fine wood dust. So I made two shelves and placed them one above the other. My wife and I previously discussed the distance between the shelves so that it would be optimal. All that remains is to screw the lower shelf to the mount from below, and the upper one from above, so that the heads of the screws are not visible.As a result, the shelves turned out to be exactly the same in size, and the arrangement turned out to be symmetrical.
Finishing touches
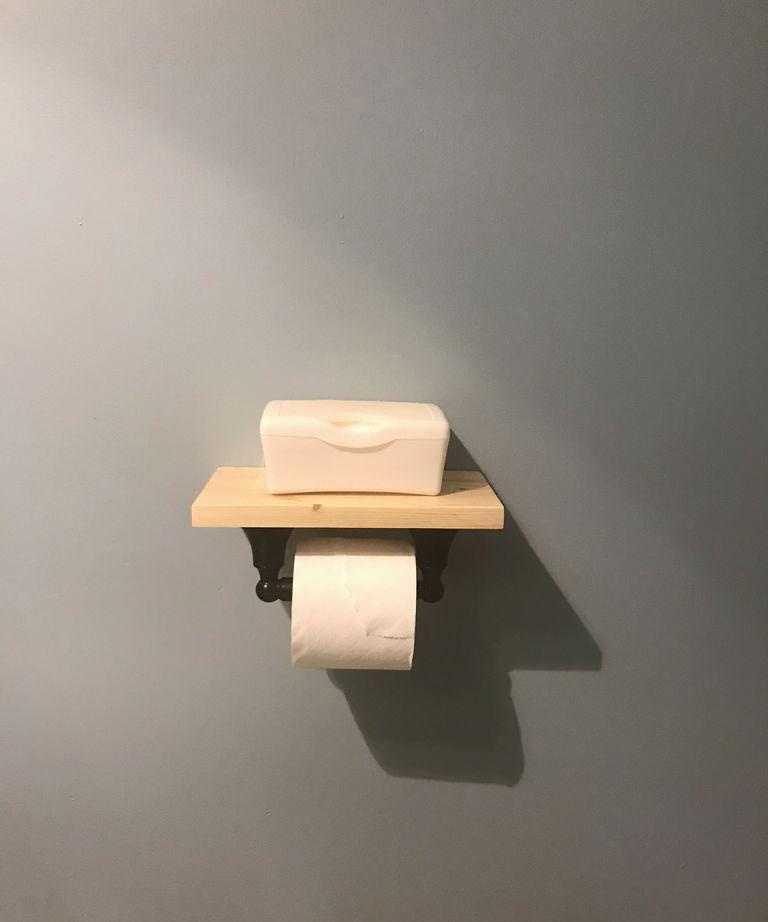
Before installing the shelves, I sanded them and then polished them with a special beeswax-based compound. This gave the products the most natural look. There was some wood left over, so using L-shaped brackets, I attached one piece above the toilet paper holder to prevent it from unraveling on its own.
A minimum of time and materials wasted - and a completely acceptable result was obtained. Of course, it’s not a masterpiece, but I know for sure that my wife was satisfied.
Original article in English