A micro memory card is a tiny and fragile thing. It can be lost quite easily. Or it will be a long and tedious search in your pocket, where it will hide in some nook. It often happens that despite the considerable amounts of memory in modern smartphones, we nevertheless sometimes have to use these additional drives. Regardless of the capacity of the memory card installed in the device, or the internal memory of the device itself, sooner or later it will run out. Moreover, every smartphone has a good camera - the better the camera, the more memory the photos and videos taken with it take up. And sometimes we want to listen to our favorite music or watch movies saved on a memory card in good quality. All this also takes up a lot of space! Of course, you can listen to music and watch movies on the Internet, online, but the connection is not available everywhere. In the city it’s clear that the connection is stable and fast, but what if we go out of town? To some distant recreation center, or fishing?
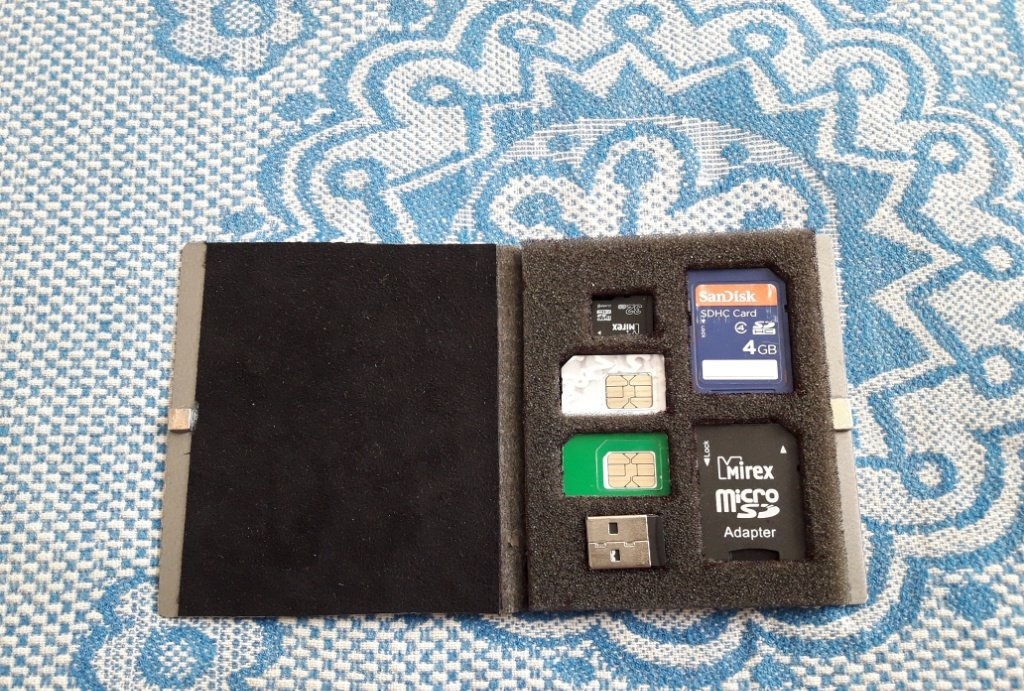
Not everywhere there is a good and stable Internet.Moreover, even basic cellular communication does not have good reception everywhere! So the idea of watching a movie or listening to music online can turn into a complete torment that can ruin your entire mood, and with it your entire vacation! Therefore, I propose to make a small, thin box for storing and transporting micro SD cards, various adapters (adapters), and at the same time SIM cards (signals from different operators, in one device or another, are received better or worse).
Will need
- A small sheet of foam sponge, 3-4 millimeters thick.
- A sheet of aluminum, 1 millimeter thick.
- A sheet of thin cardboard.
- Velvet paper or fabric.
- Glue.
- Double tape.
- Scissors.
- Metal ruler.
- Marker.
- Stationery knife.
- A strip of leather, or leather substitute.
- Two neodymium flat magnets.
Making a card box
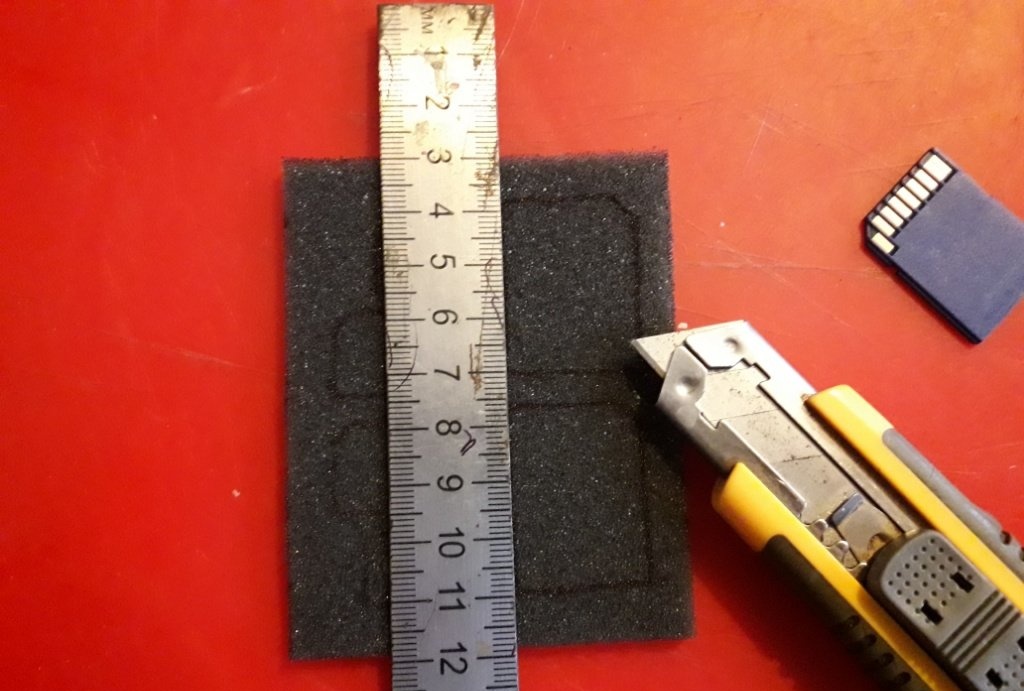
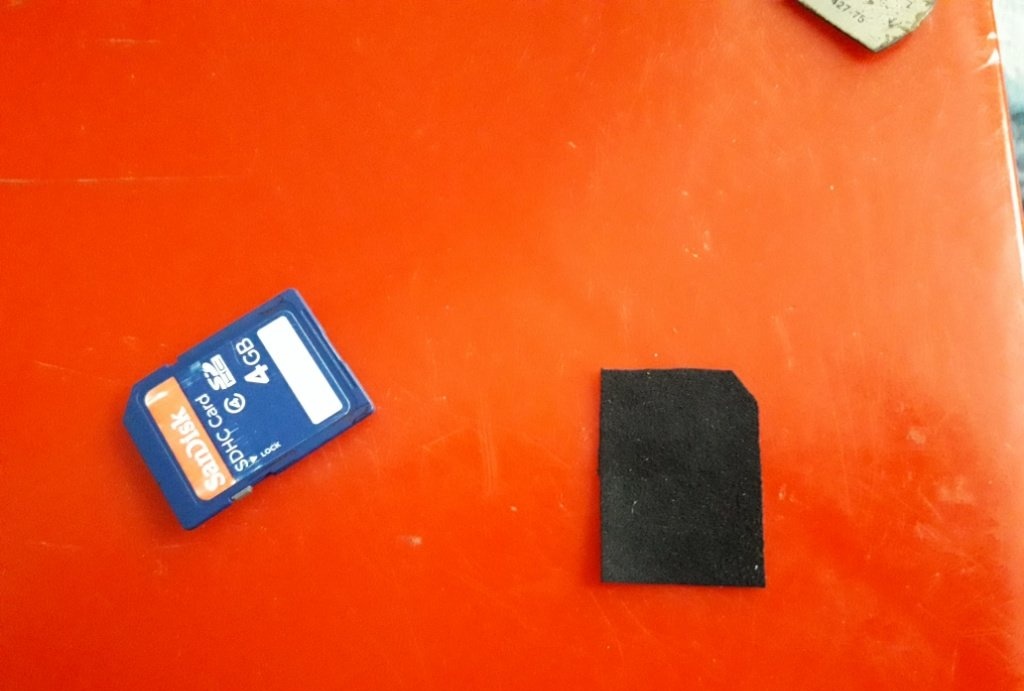
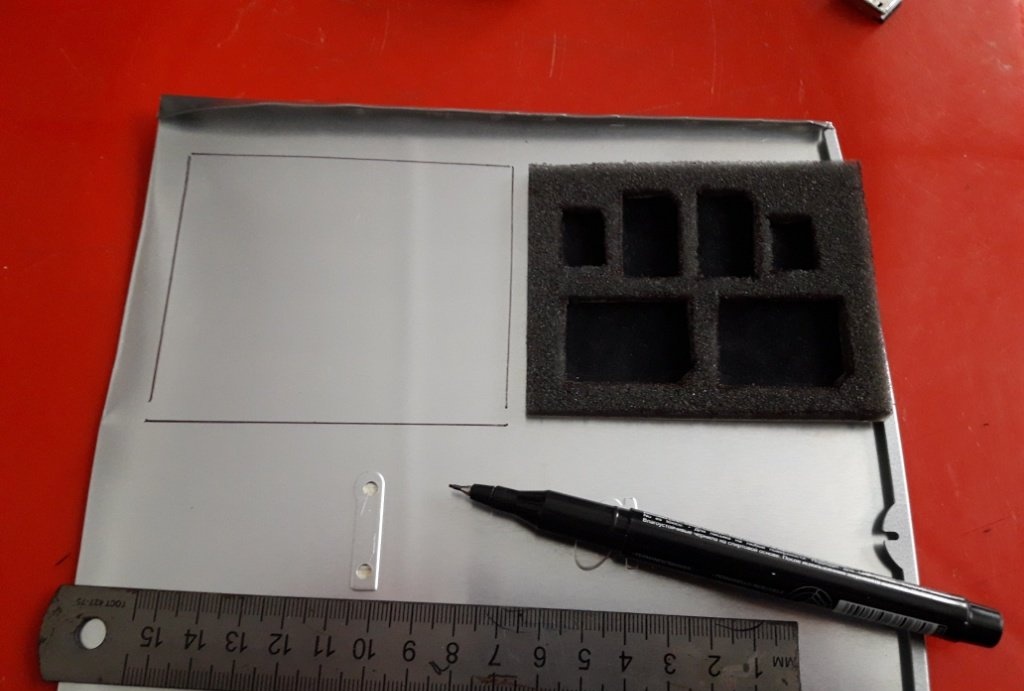
Having disassembled the broken scanner, I got hold of the basic materials for manufacturing; there was a sponge of suitable thickness, and aluminum from which the scanner body was made. Moreover, the sponge from the scanner was already glued to a sheet of thin cardboard, which reduced my work time... But I think everyone has such simple materials in their household even without a broken scanner. First, cut out the required rectangle from the sponge. To do this, you need to carefully and evenly lay out on a sponge all the cards and adapters that you want to take with you on the road, thus indicating the approximate area of the workpiece.
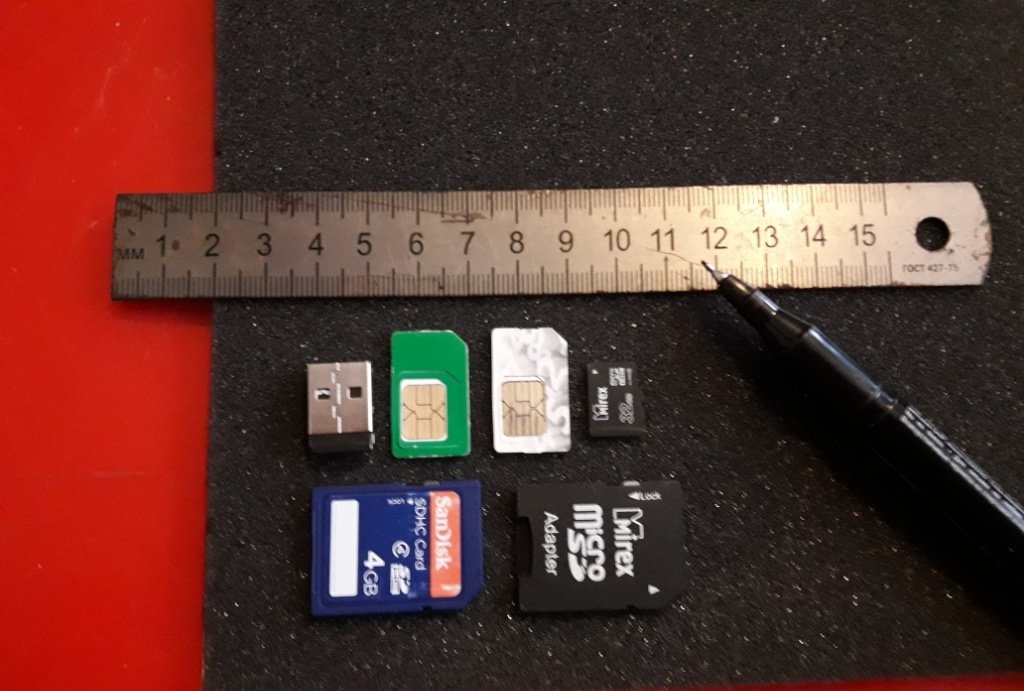
We outline each card with a marker, and cut out according to these marks, not forgetting about the margins (8-10 millimeters), cut out the marked rectangle (or square - as you wish!) with scissors.
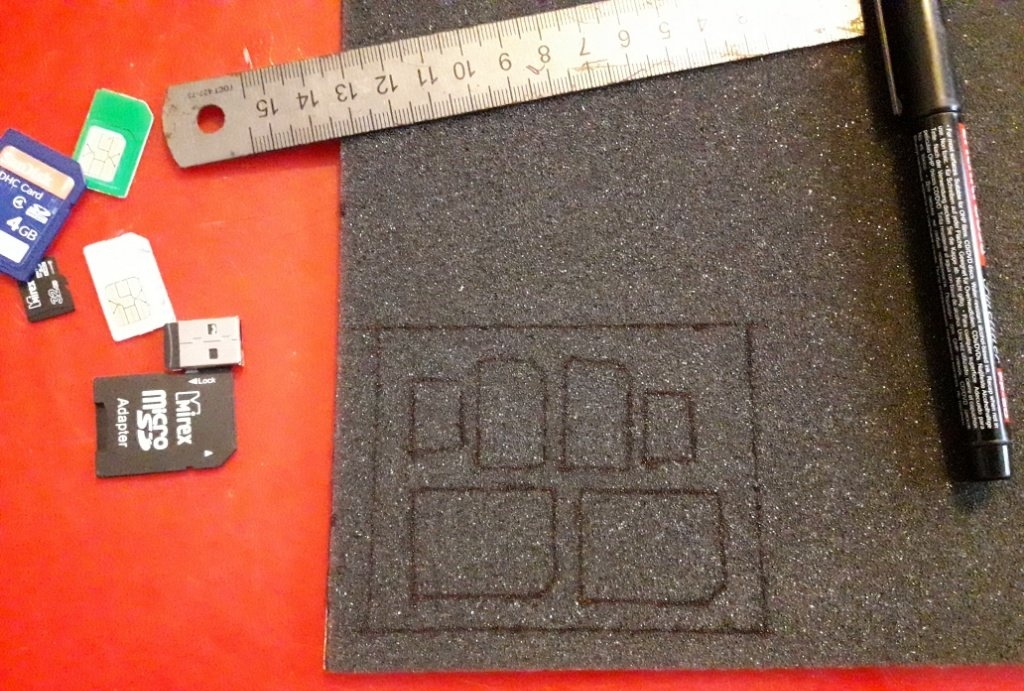
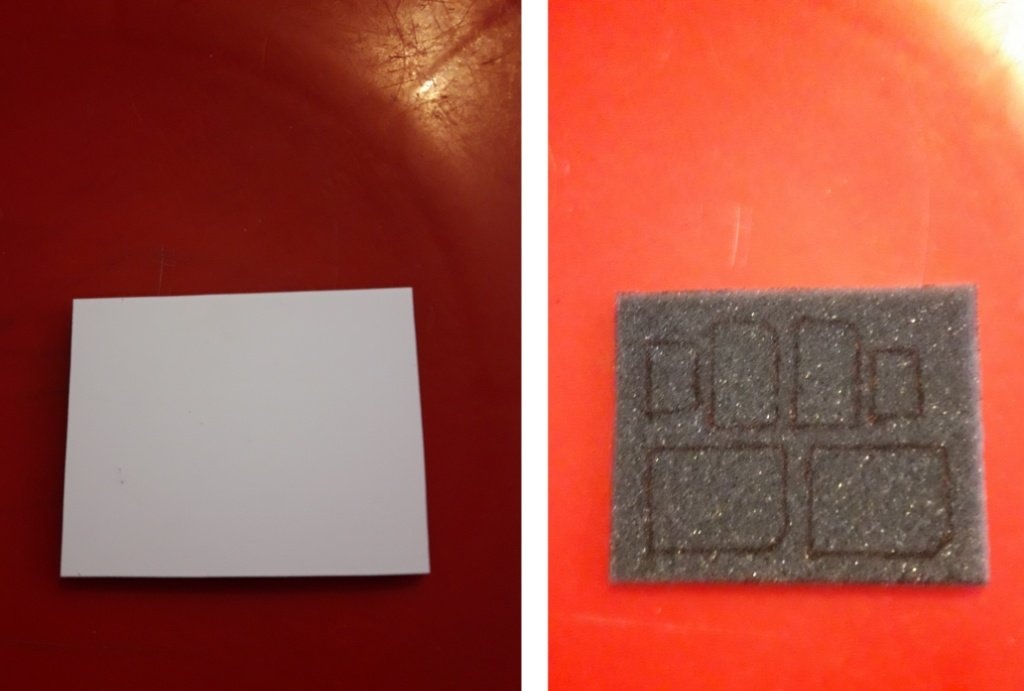
Next, apply glue to a sheet of cardboard and glue the rectangle obtained from the sponge to it. Cut off the excess cardboard around the perimeter of the sponge.Using a metal ruler and a utility knife, cut out the areas outlined with a marker.
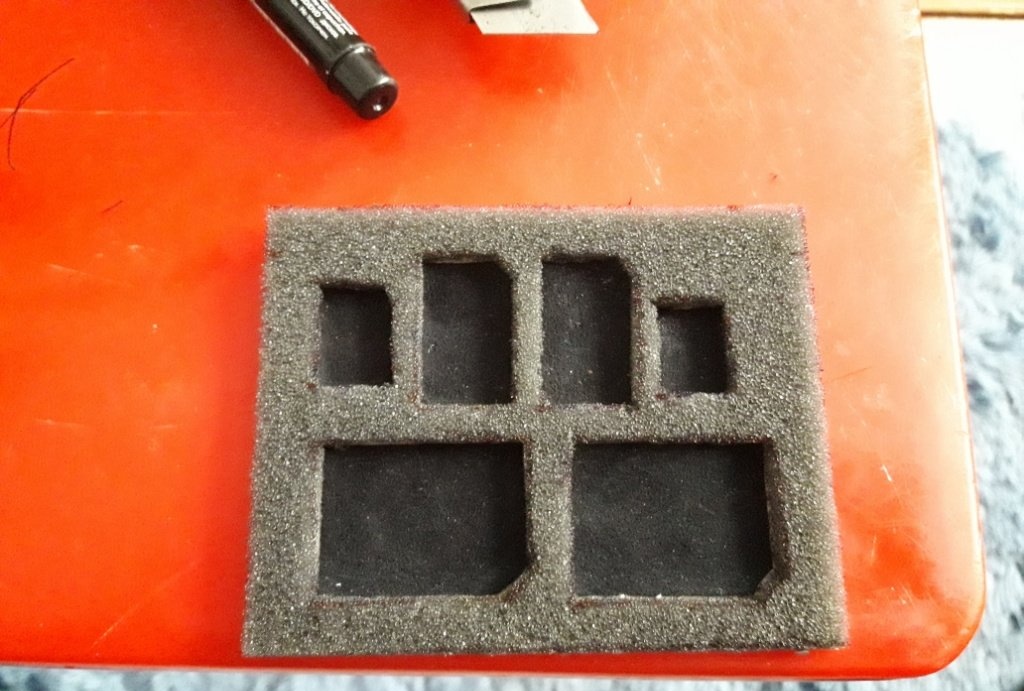
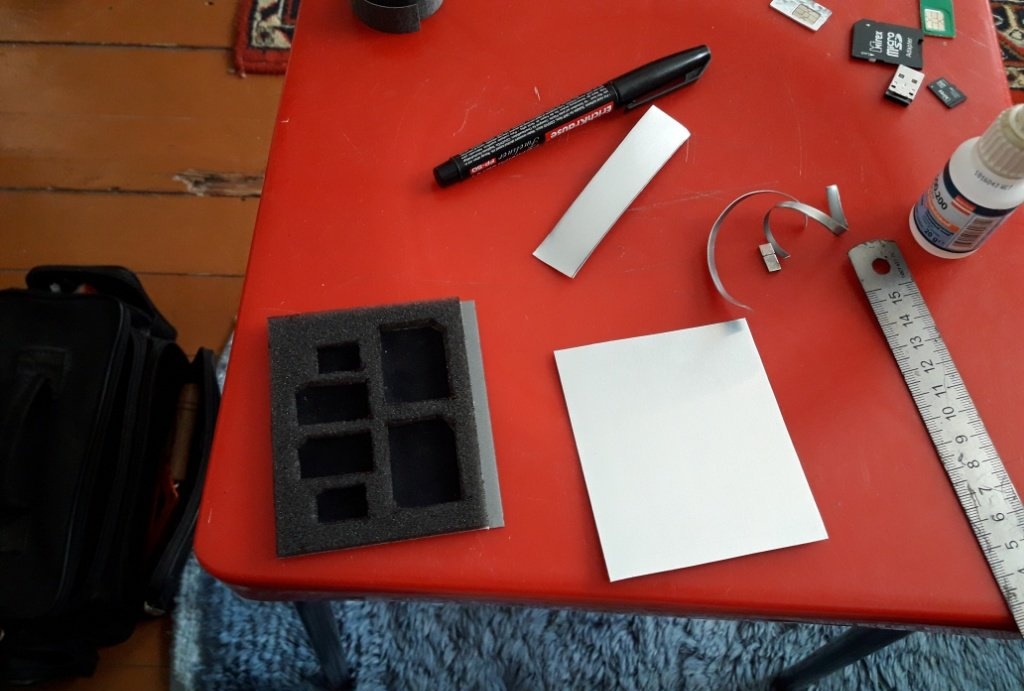
Take out the cut out pieces of sponge. We ended up with these recesses for storing cards, individually for each one.
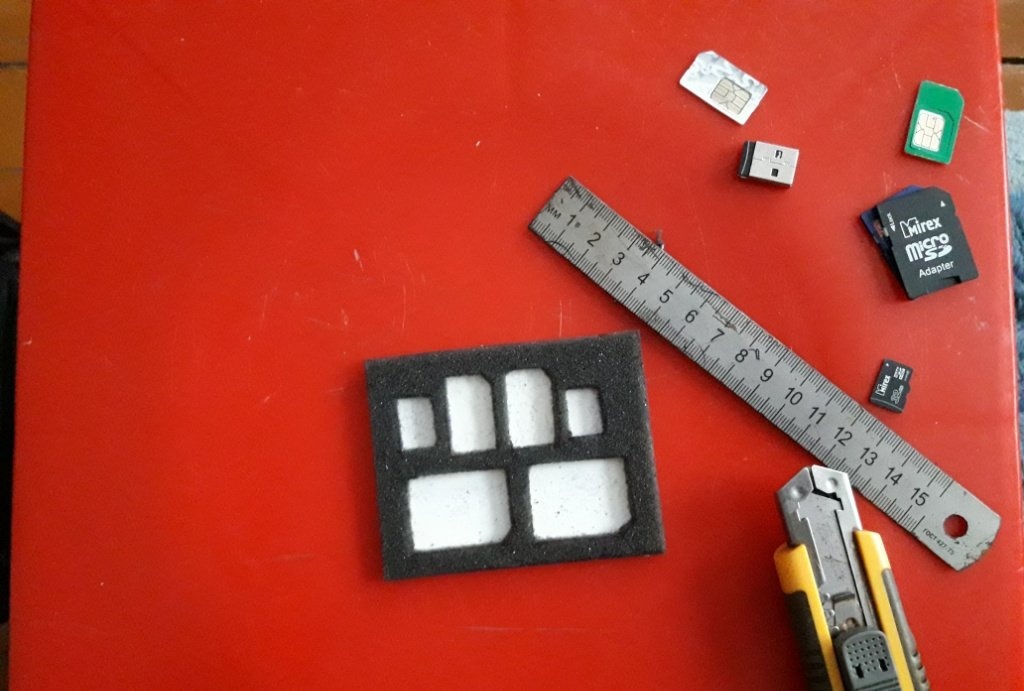
You can make a small indentation for a nail on the side of each recess to make it more convenient to take out one or another card, but I think this is unnecessary; The sponge itself is not very elastic, so you can get a piece of plastic out of it simply by pressing on the edge of the recess. Using double tape, we glue linings cut from velvet fabric to the bottom of each recess.
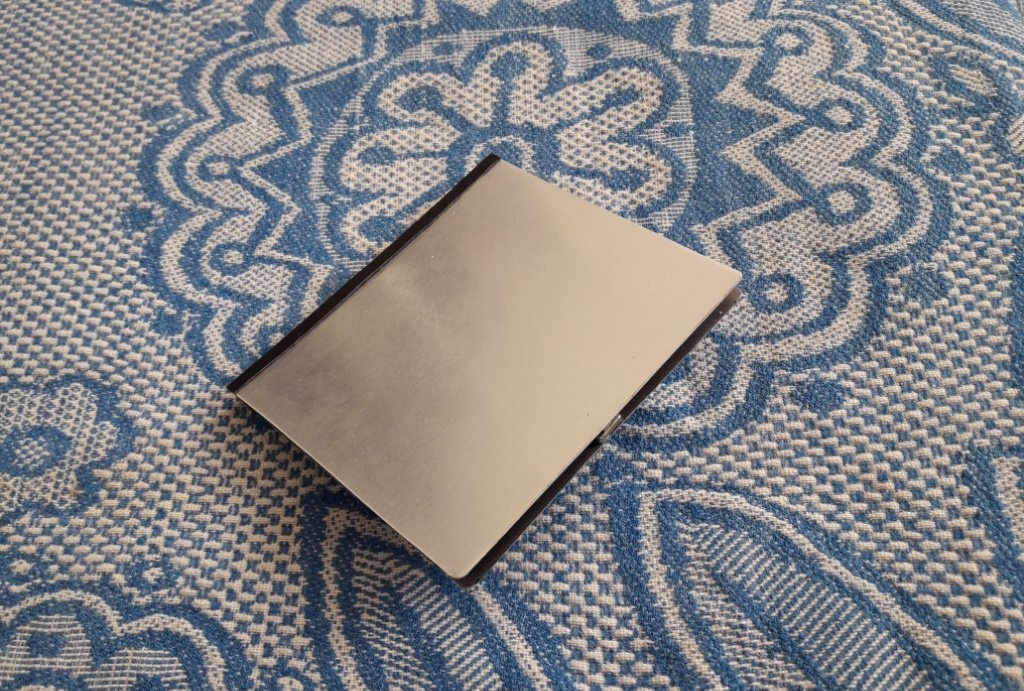
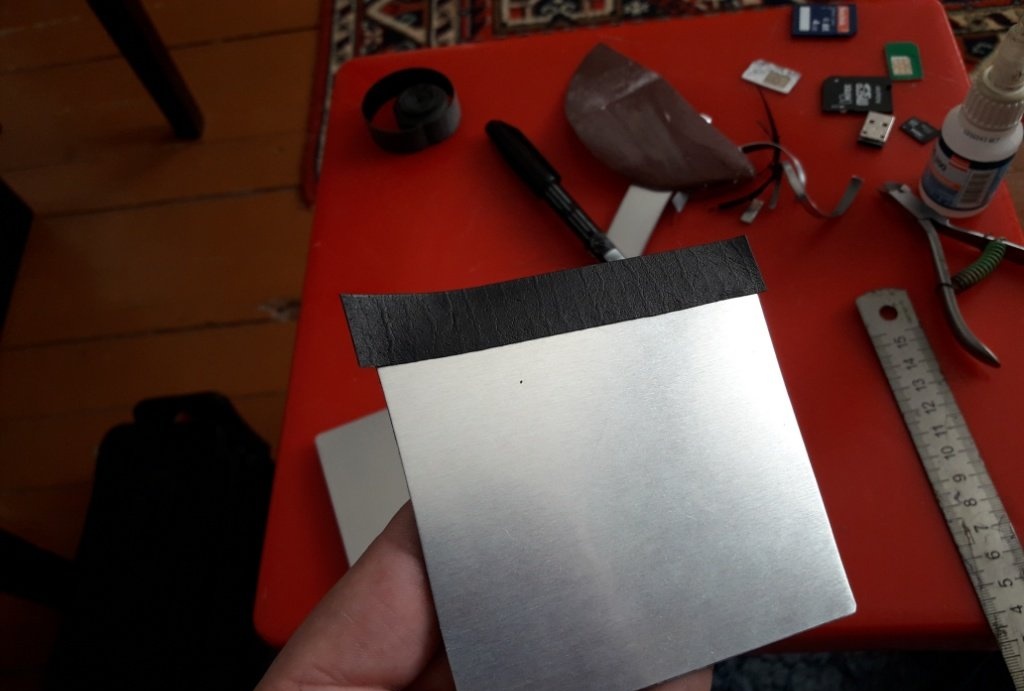
Now let's move on to the body. We cut out a sheet from the prepared aluminum according to the template of our blank made of sponge and cardboard, but taking into account the fields at the front end - neodymium magnets will be attached to these fields. You need two such aluminum blanks.
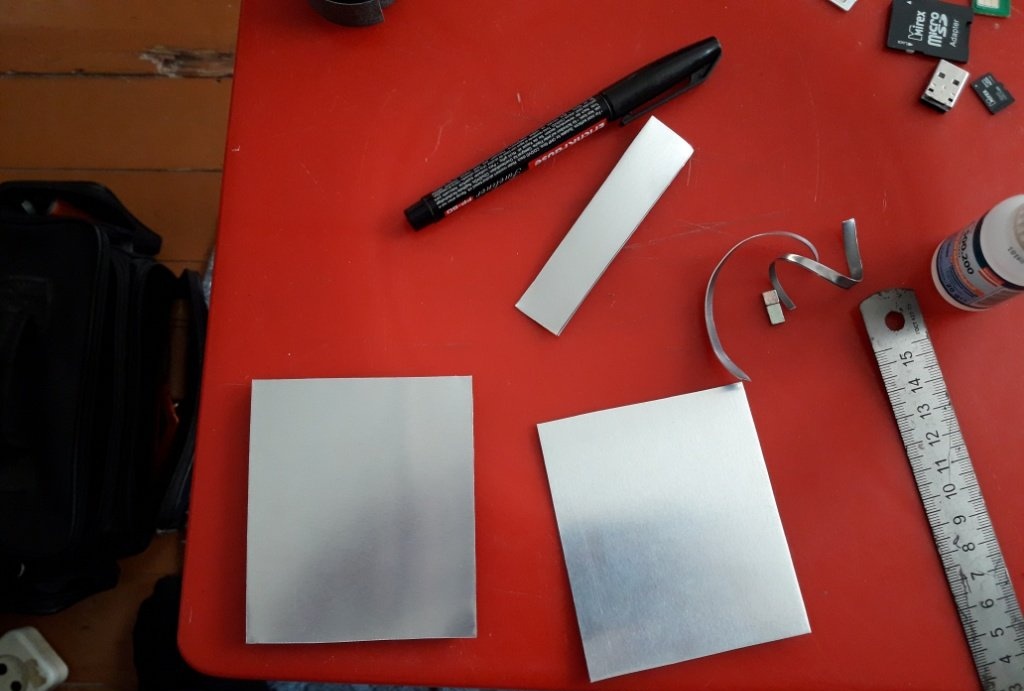
Absolutely identical! We coat one of the aluminum blanks with glue, and glue our cardboard-foam rubber blank to it (cardboard to aluminum).
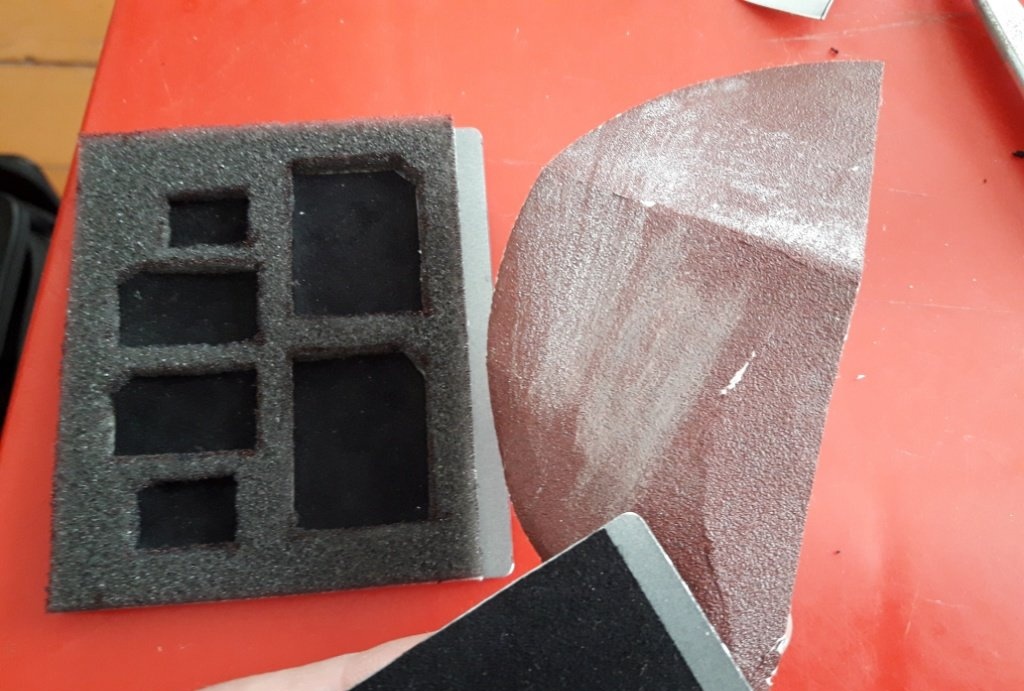
We cover the second (top) sheet of aluminum with velvet fabric from the inside, also leaving a field for the magnet. After this, you can sand the edges and corners of the aluminum with zero sandpaper so that in the future they will not scratch the inside of the pocket.
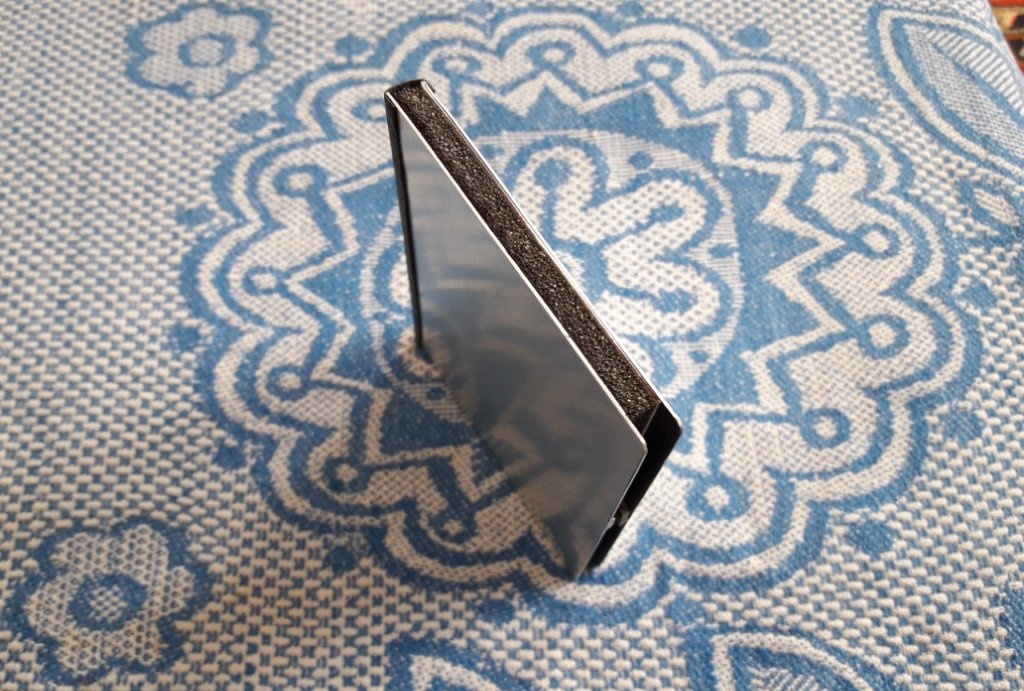
Next, placing a second aluminum blank on top, with the fabric inside, align the edges as evenly as possible (you can even fix it all with an elastic band!), and glue a strip of leather to both rear ends of the aluminum blanks with instant glue.
Along the entire length. The result was a book-like blank, only instead of paper pages there was foam filling inside.
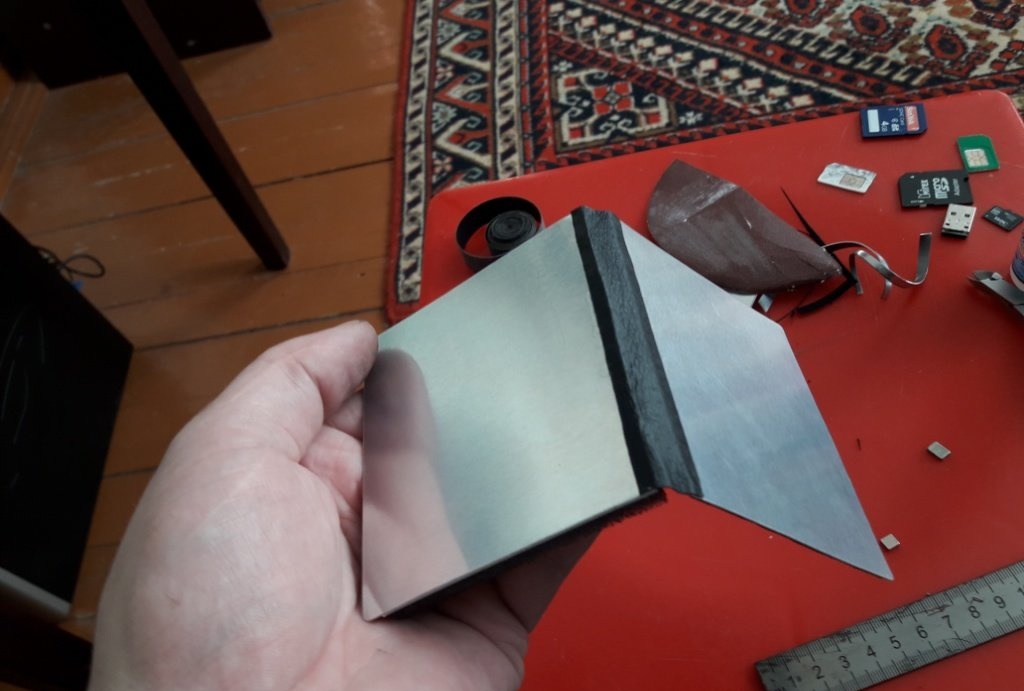
And finally, we glue neodymium magnets onto the remaining fields of the aluminum case, which will serve as locks holding the box closed.
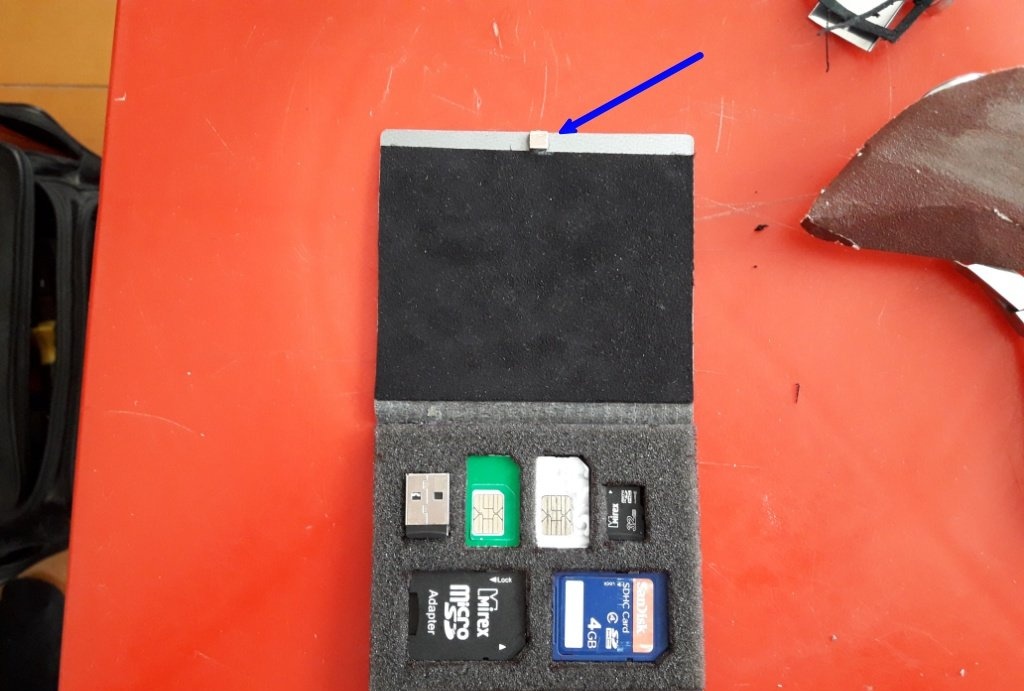
There you go.The whole job took about an hour. We put everything we collected it for into the box and use it with pleasure!