As experience in operating gas trimmers, in particular those made in China, shows, they often have problems with the starting system, so they are often difficult to start. Problems are usually related to the magneto flywheel.
For those unfamiliar with this unit, we remind you that this system consists of an ignition coil, a spark plug and a flywheel with magnets.
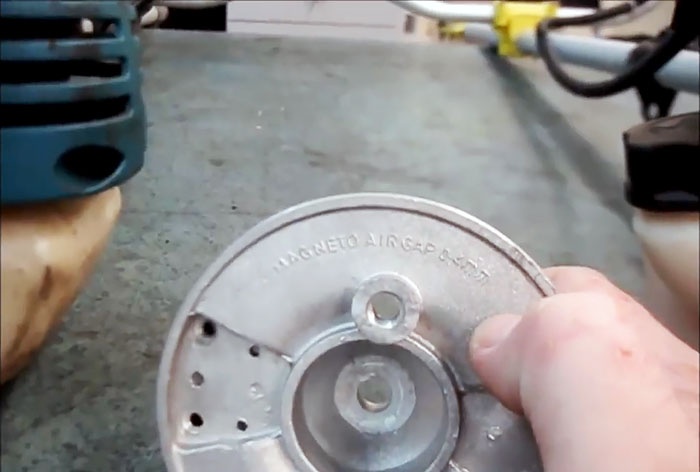
We have to deal with the magneto gap, or more precisely, with the ignition coil gap and its guaranteed alignment. It is because of this that problems arise in Chinese units that have been operated for several years in domestic conditions or in housing office conditions.
But it happens that even new products have difficulty starting, especially when cold. And in this case, starting problems are usually associated with magneto clearance. Most people who operate lawn mowers set the magneto gap to 0.4 mm, as many manufacturers recommend.
What happens if this gap is corrected and set to 0.25 mm? It turns out that when it decreases, the electric spark becomes thinner, smaller and works out every stroke even at slow speeds of the magneto flywheel.
That is, by deliberately reducing the gap, we thereby increase the likelihood of the lawn mower starting normally without any unnecessary physical exertion or shortness of breath, even when starting a cold engine.
The gap and the procedure for setting it in different cases
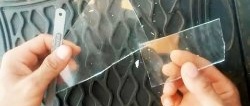
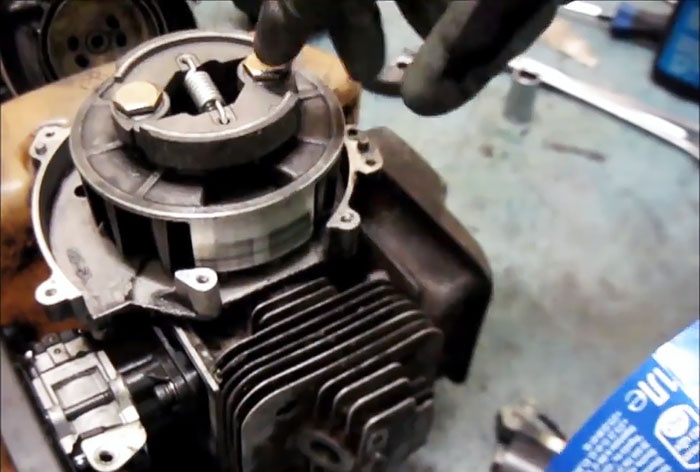
As a template for setting the magneto gap, you can successfully use a strip of the required width and length, cut from an ordinary plastic bottle, for example, a Pepsi-Cola bottle.

It is only necessary to install it last, so as not to damage it during repair work, using the same hair dryer for any purpose. After all, if it warps from exposure to hot air, then there is no need to talk about the accuracy of setting the magneto gap.
It is with the help of a spacer cut from a plastic bottle that you can accurately set the magneto gap to 0.25 mm, since its thickness is exactly the same. To verify this, just fold the strip in four and measure its total thickness with a caliper, which will be exactly 1.0 mm.
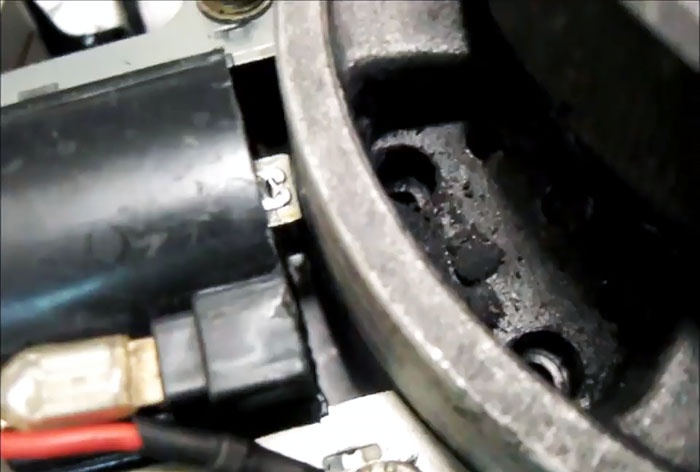
We place a spacer cut from a plastic bottle onto the flywheel magnets of the magneto, install the ignition coil in place and fix it with strong 8 by 8 bolts, having first filled the threaded holes on the body with a threaded lock.
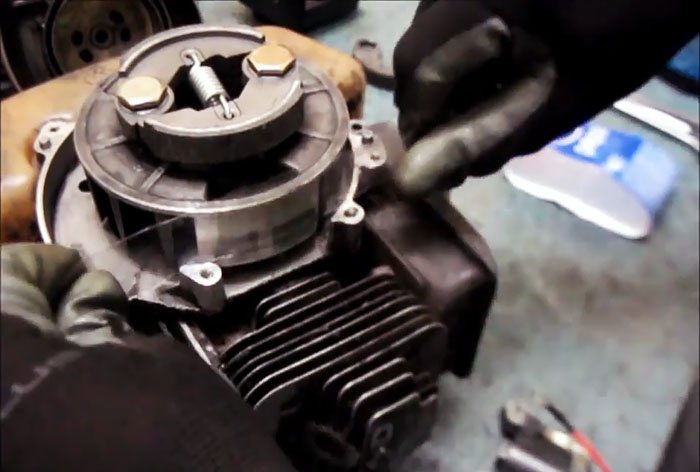

We apply it to the bolts; when tightening them, you must remember to secure the ground terminal. It is better to use a screwdriver.We press the bolts to the limit by hand using a regular hand screwdriver with a hex bit, since using an L-shaped hex can lead to the edges of the bolt heads breaking off.
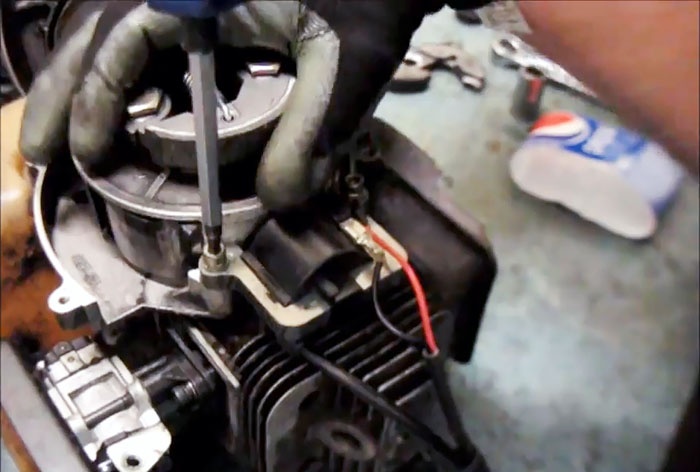
All that remains is to turn the flywheel with magnets, remove the plastic spacer and, continuing to rotate it, check the quality (uniformity) of the gap when turning it from 0 to 360 degrees, which is ideal with this approach.
When setting the magneto gap, some people use a xerox sheet folded in half, which is also acceptable, but using a spacer from a plastic bottle gives a better result. Moreover, it can be reused dozens of times.
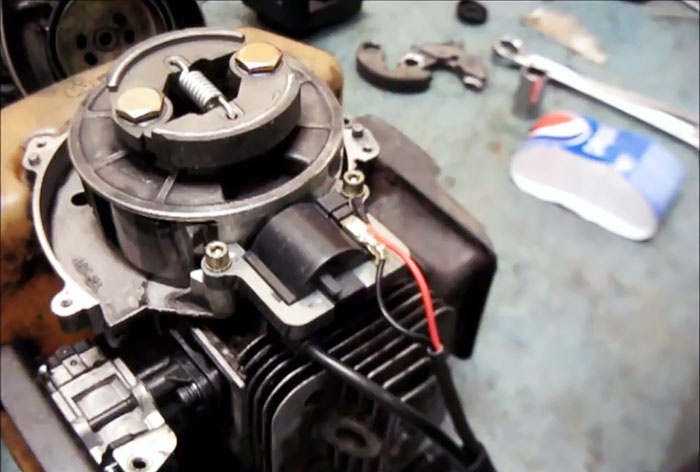
All that remains is to install the body parts and you can start the engine to test how it starts and works.
Sometimes, during operation, the attachment points of the ignition coil to the magneto housing become deformed, which does not allow it to be installed reliably, since the holes in the coil and on the engine housing do not match.
You can, of course, try to correct the defect, but it will be safer to install a new coil, especially since it is not too expensive.
All further actions are similar to the case described above, except that the mounting heads of the ignition coil bolts may not be for a hexagon, but for a wrench and a Phillips screwdriver. But this does not change the essence of the matter: the tightening of these bolts must be guaranteed to be reliable, as in the first case.
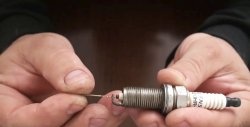
To evaluate the quality of the work done, it is necessary to visually verify the presence of a spark between the electrodes of the spark plug after final assembly of the engine. To do this, we connect it to ground and begin to crank the engine using a manual or electric starting device.
The spark test has one caveat.If you sharply pull the kick starter, a spark will appear even with slightly faulty magneto magnets and even completely inoperative ignition coils. In this case, the presence of a spark is not yet an indicator of the serviceability of the ignition system.
The quality of spark formation can be judged only when it appears, when the magneto flywheel does not rotate too quickly, for which the kick starter should not be pulled, but pulled evenly and slowly.
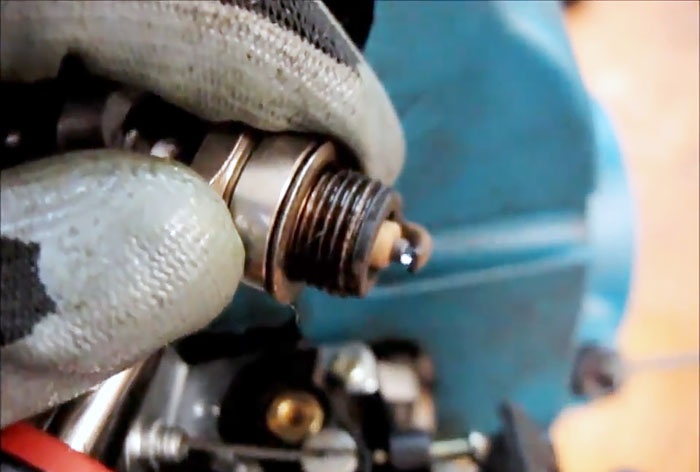
Only in this case will the engine of a gas trimmer or chainsaw start without problems, both for the first time in the morning and throughout the working day (respectively, the so-called hot or cold start).
If, when the starting device moves slowly, no spark is observed, then, most likely, you will have to change the ignition coil, set the magneto gap, or change the spark plug.
The above-described practice of setting the gap on lawn mowers and chainsaws has been fully justified for the past five years. There have never been any complaints from users after such repairs. This really helps when launching not only Chinese lawn mowers, but also European ones, and even branded ones.
On all units, regardless of manufacturer, setting the magneto gap to 0.25 mm instead of 0.40 mm recommended by manufacturers gives excellent results. Some people suggest gaps of 0.10-0.15mm, but this is too small. After all, there is a certain thermal expansion of the parts of the ignition system, the housing itself, the crankcase of a lawn mower or chainsaw, and such a small gap may disappear altogether, which can lead to breakdown (burnout), first of all, of the ignition coils. Therefore, a gap of 0.25 mm is optimal from all points of view.