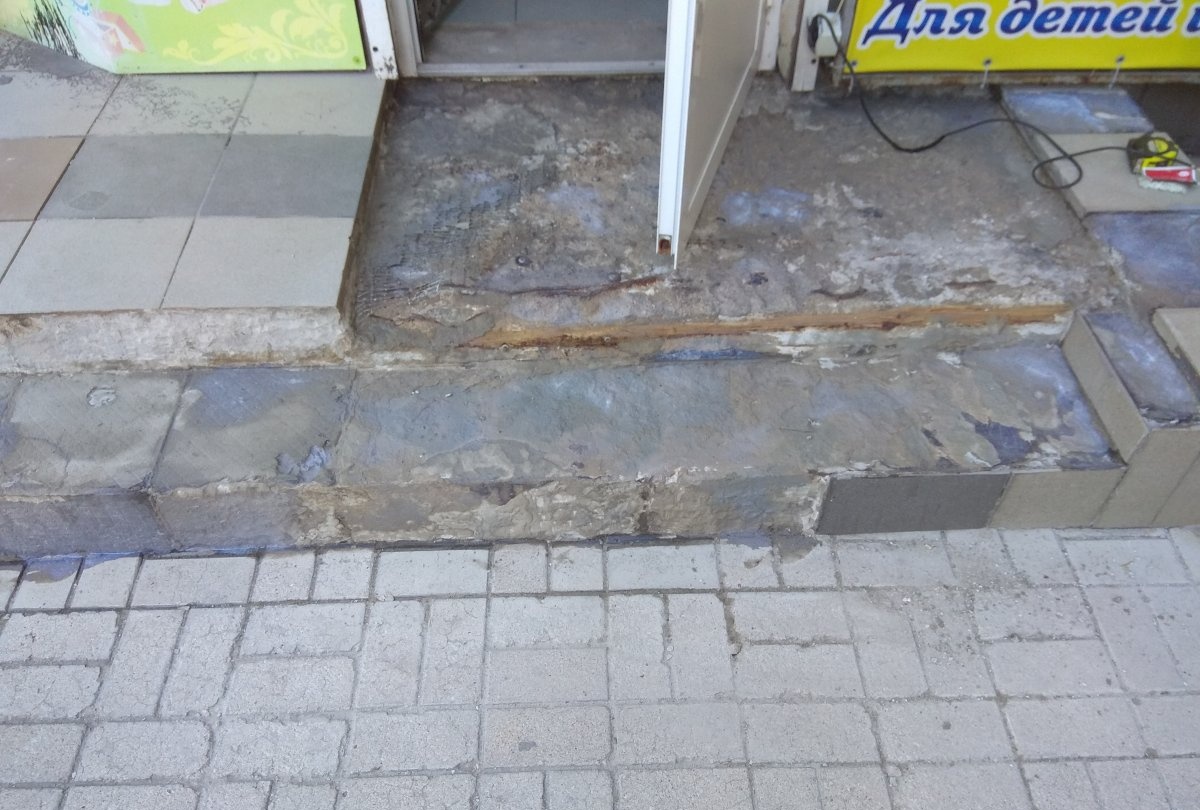
Do it yourself
Life hacks, master classes, useful tips, recipes.
home » Construction and repair » Removing old tiles and laying new tiles on the threshold steps
One of the common methods of tiling steps is laying tiles. Although this material is not the most practical for exterior cladding, since weather conditions quickly lead to damage to the tiles due to sudden temperature changes in winter, it is still one of the most economical options. Now we will look at how to dismantle damaged tiles and replace them with new ones.

Removing tiles


The first stage of work is dismantling tiles that have cracks or voids underneath.
Removing old tiles and laying new tiles on threshold steps

Removing old tiles and laying new tiles on threshold steps

Removing old tiles and laying new tiles on threshold steps

Removing old tiles and laying new tiles on threshold steps

Removing old tiles and laying new tiles on threshold steps

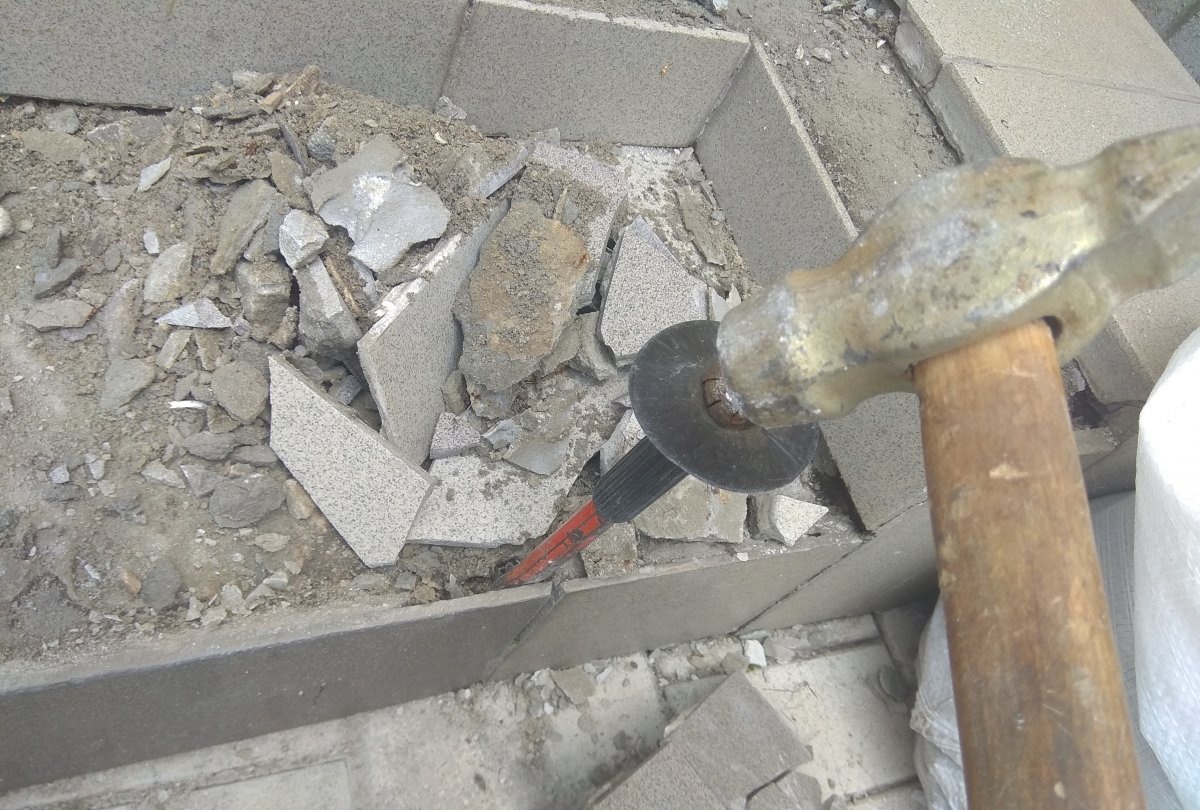
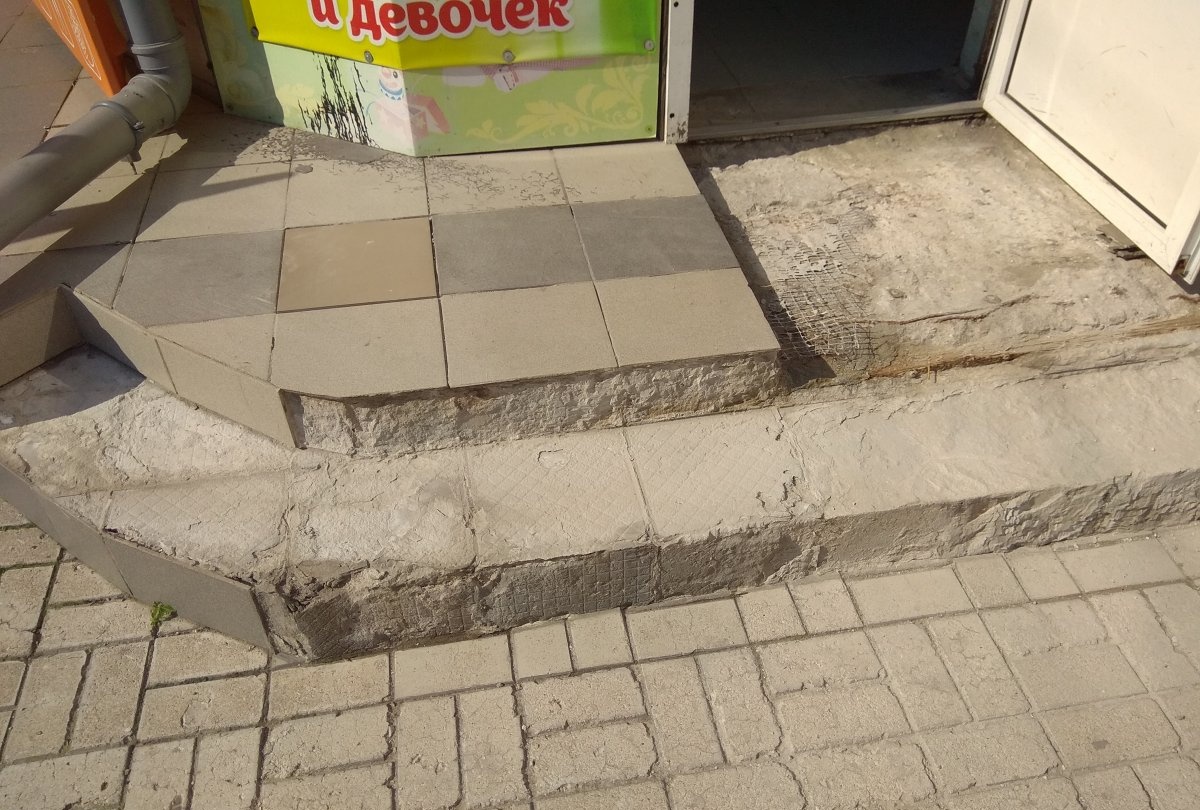
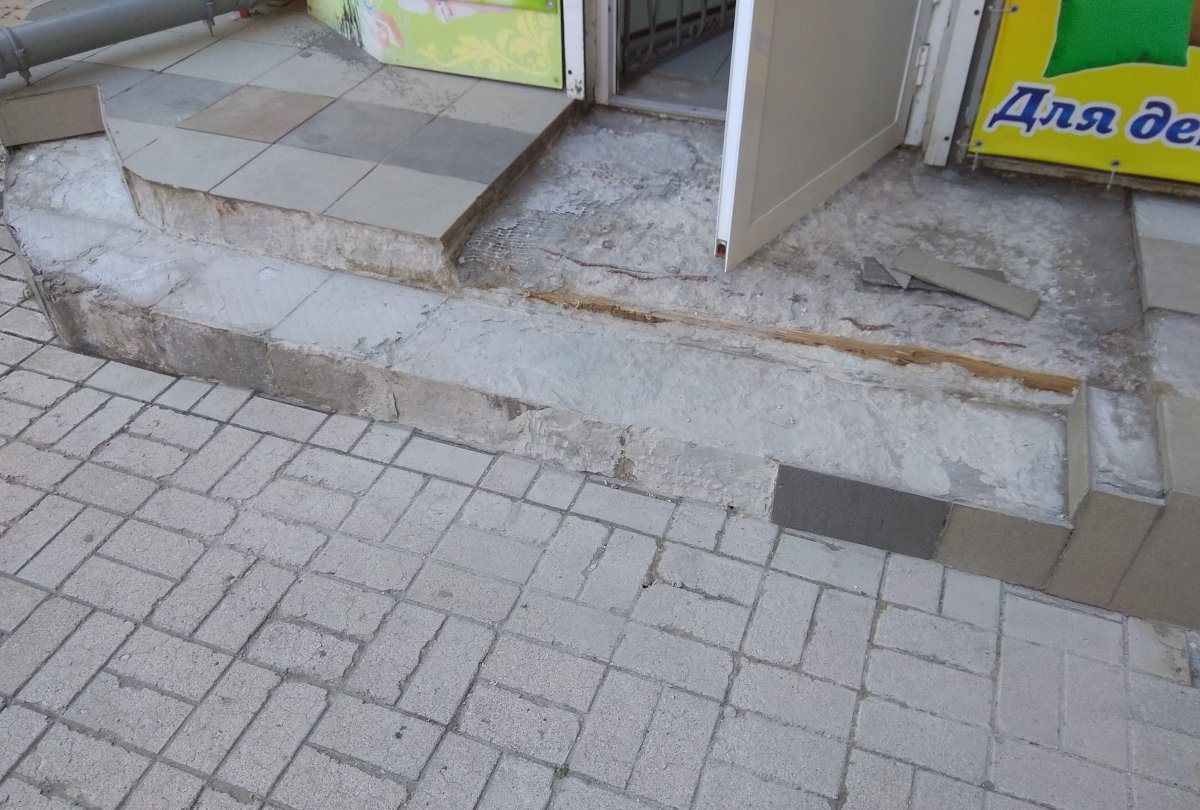
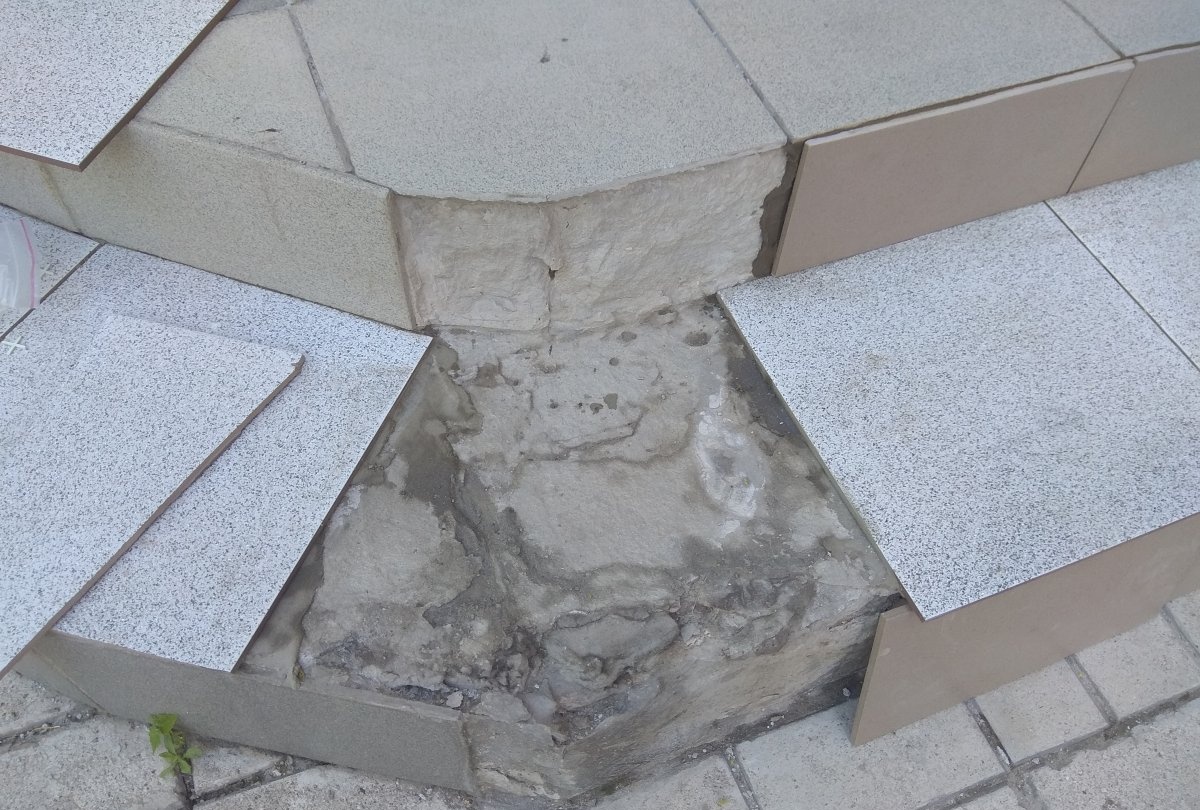
Often, careless dismantling can damage adjacent tiles, so this work must be done carefully. It is necessary to leave only those tiles that are securely glued to the surface. For dismantling work, you will need a chisel and a hammer. You can also use small chisels to knock out old mortar along the edges of the tiles. Any concrete underneath the removed tiles that comes off easily must also be cleaned.When the surface is prepared for laying tiles, immediately before doing this, you need to carefully sweep up the debris with a broom, and then prime the area where the tiles will be laid.
Removing old tiles and laying new tiles on threshold steps

Removing old tiles and laying new tiles on threshold steps

Laying tiles


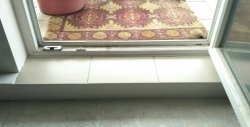
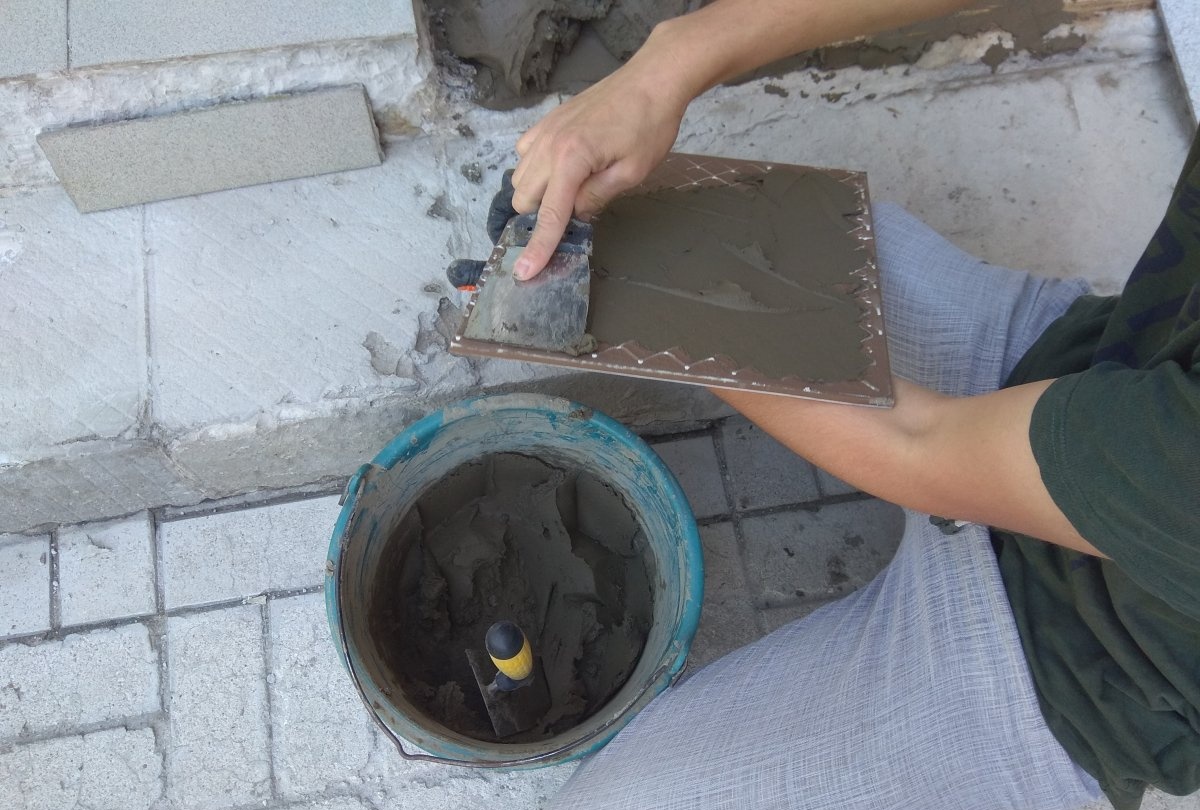
Laying the tiles begins at the top of the steps. It is best to use non-slippery tiles for exterior decoration, since ordinary floor tiles are slippery and can complicate movement in winter, and climbing stairs is an area of ​​increased risk of injury. For installation, an adhesive solution mixed with water is used. If the layer is too large, then it is best to first pour a screed from ordinary cement mortar, and only after that lay the tiles on a thin layer of glue.
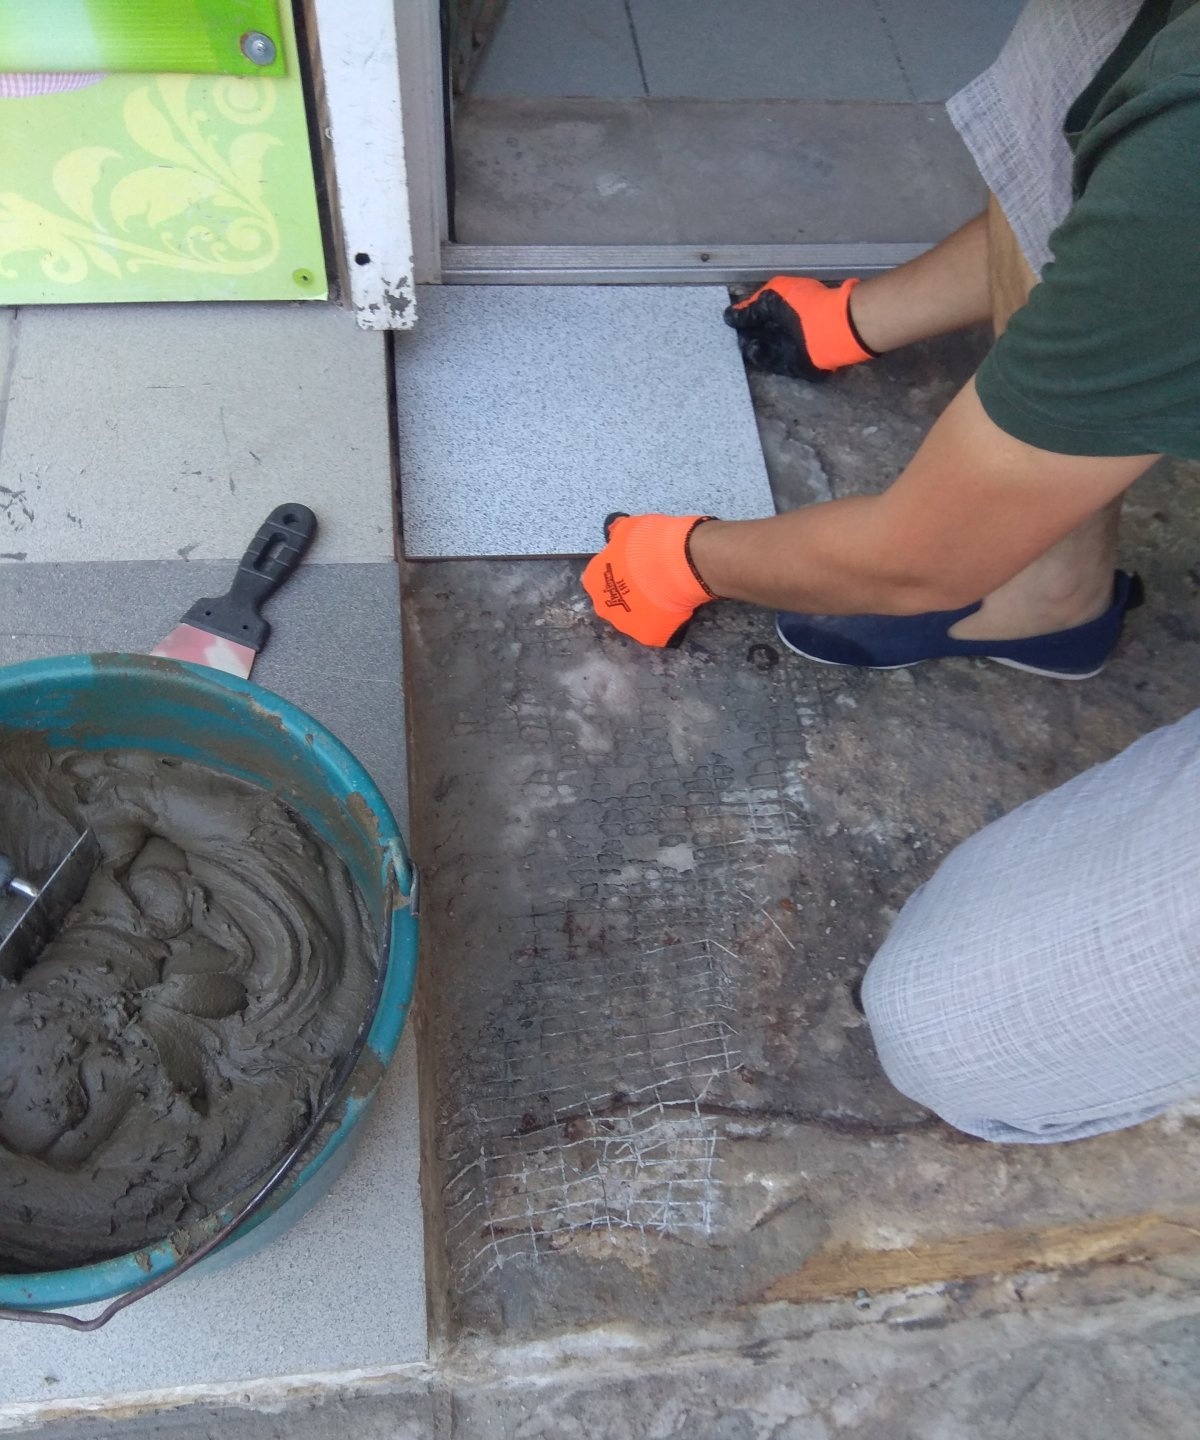
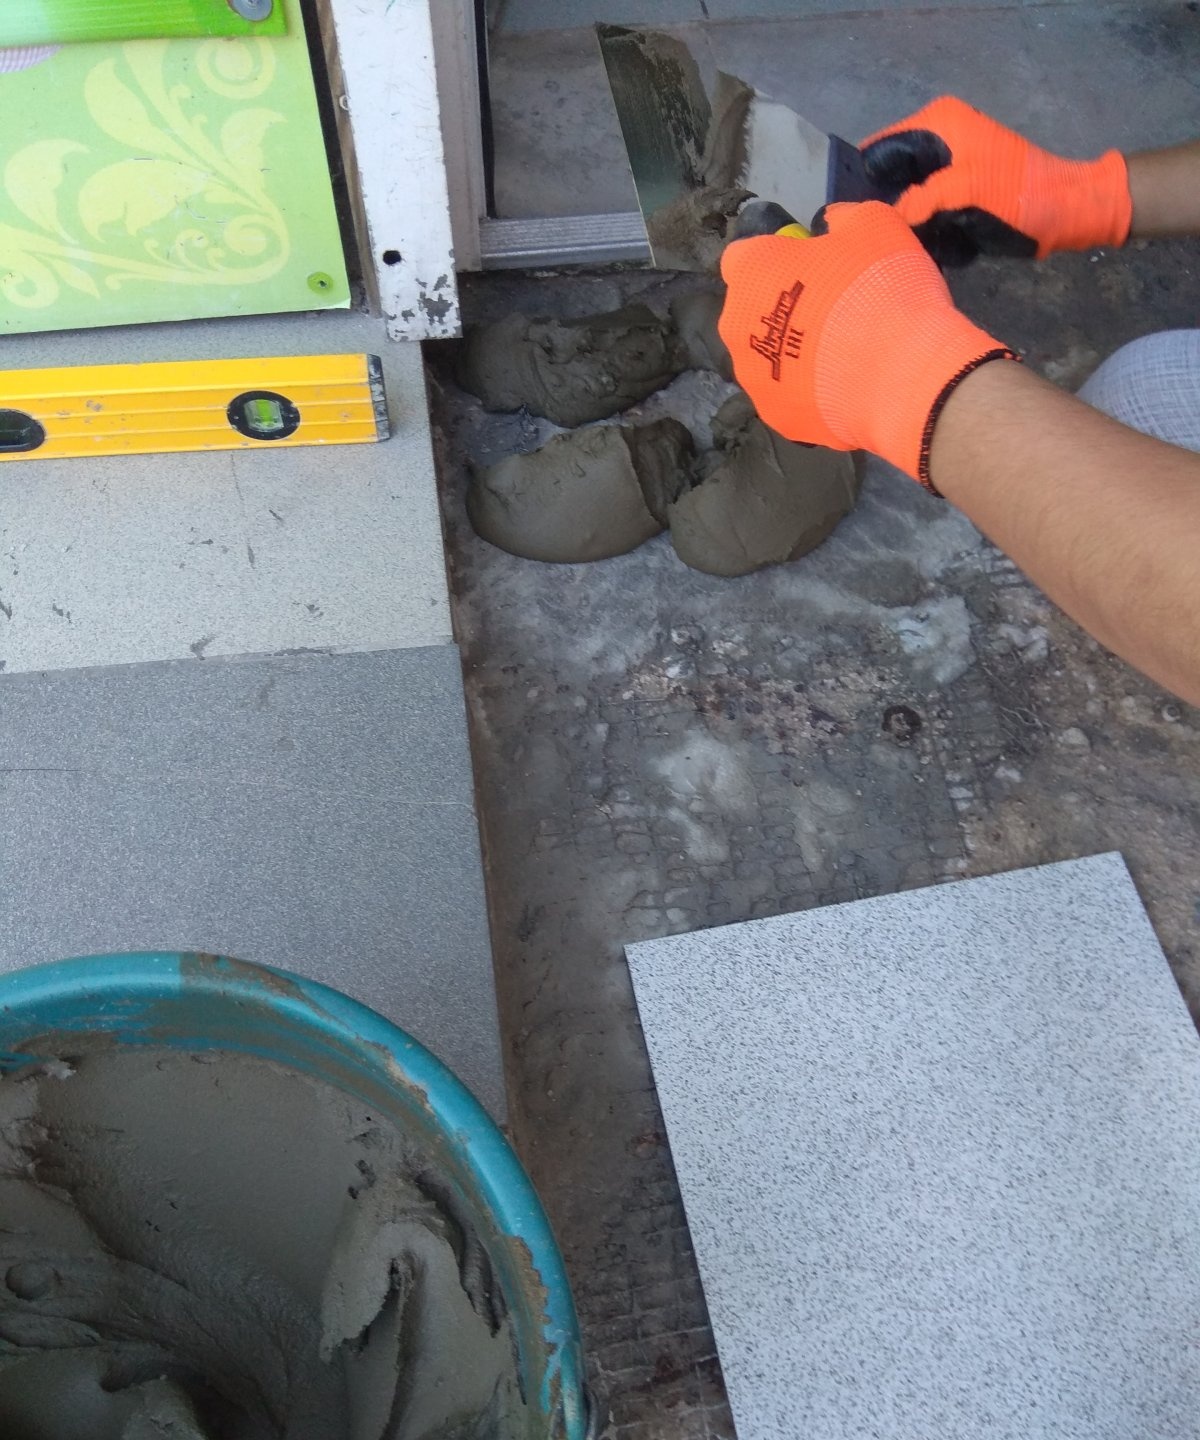
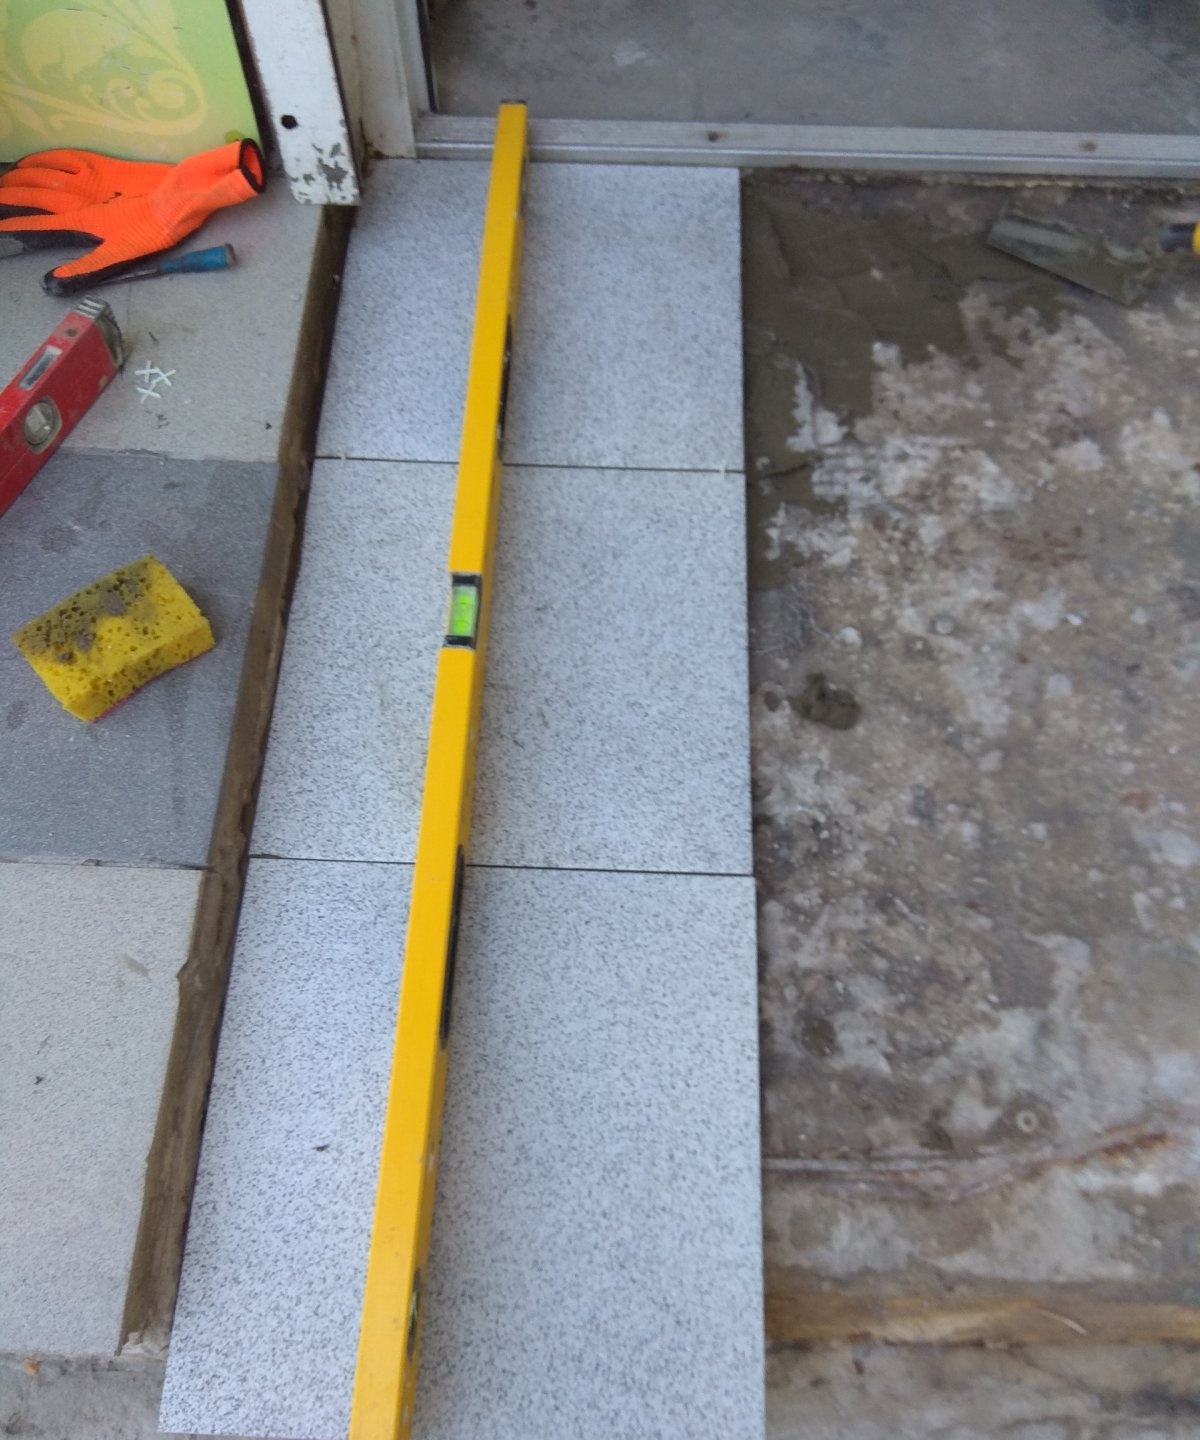
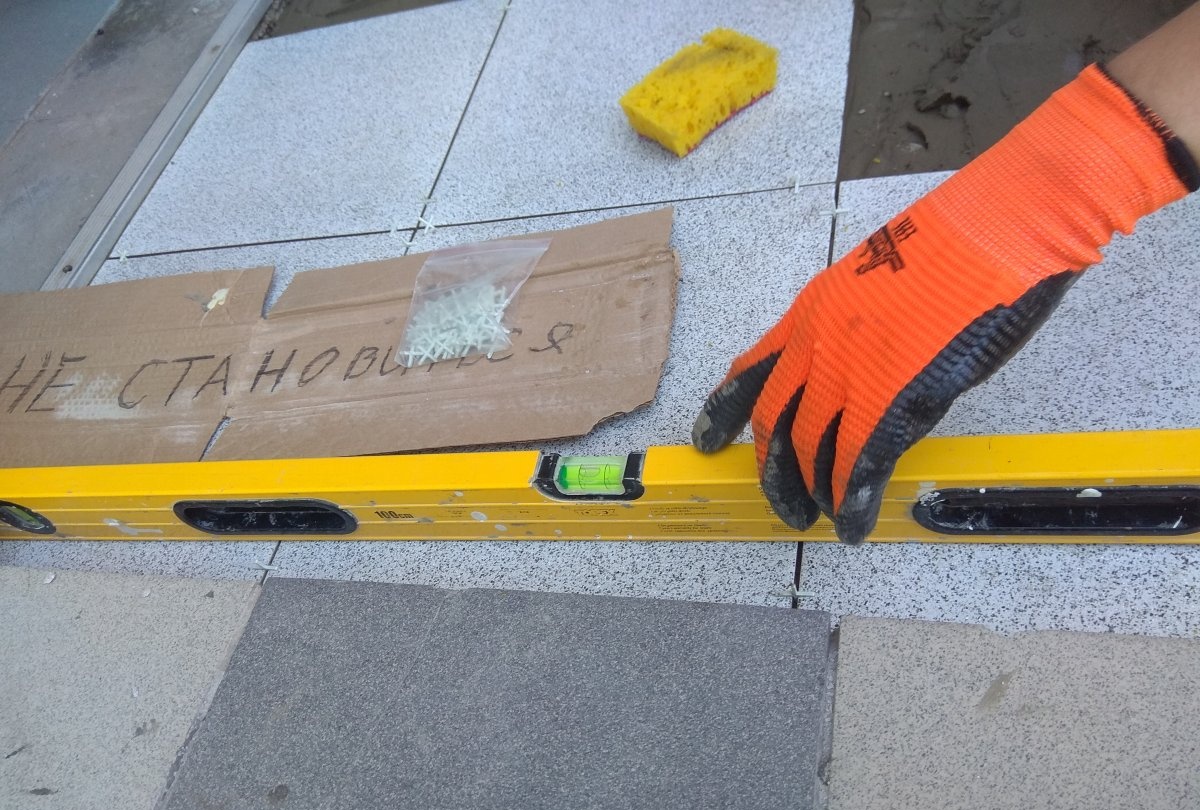
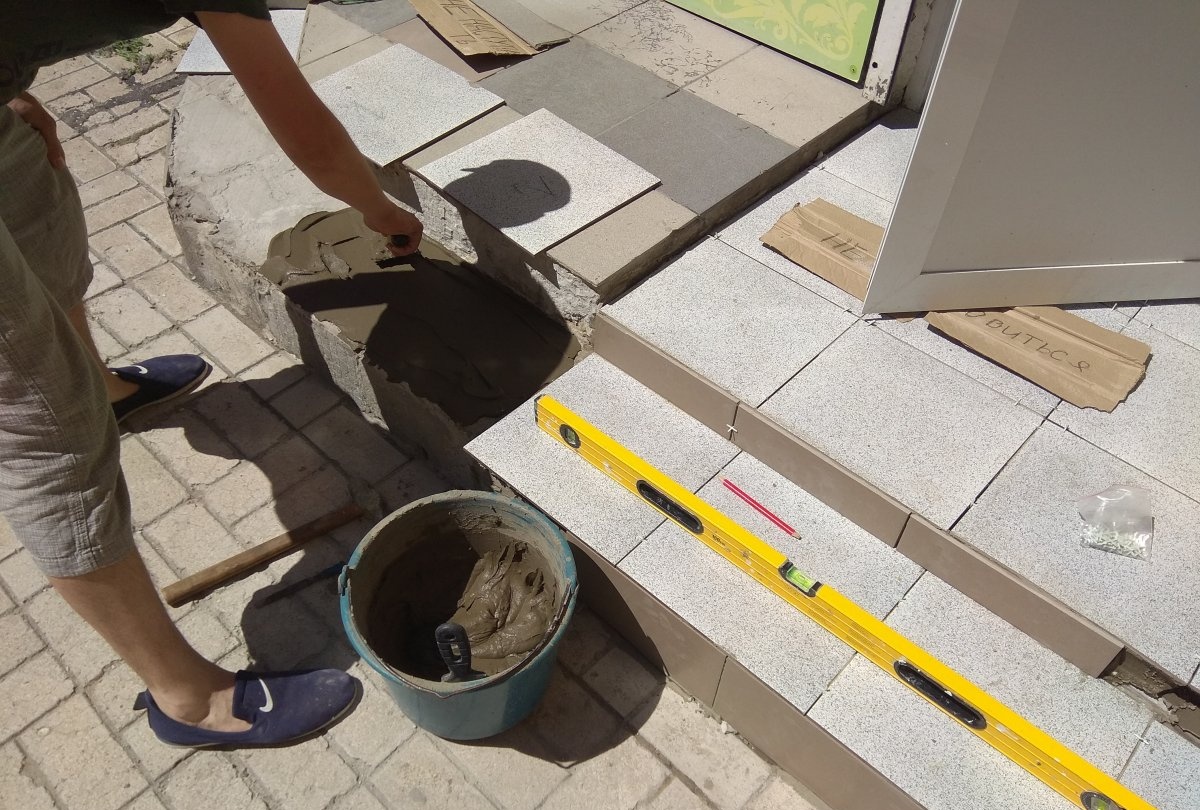
Laying tiles begins at the threshold. The glue is applied to the surface and also in a thin layer to the tile. It is necessary to make a slight slope towards the steps so that the water flows away from the building. To do this, use a building level. Choose a certain degree of slope and stick to it on each row of tiles.
Removing old tiles and laying new tiles on threshold steps

Removing old tiles and laying new tiles on threshold steps

Removing old tiles and laying new tiles on threshold steps

Removing old tiles and laying new tiles on threshold steps

Removing old tiles and laying new tiles on threshold steps

Removing old tiles and laying new tiles on threshold steps

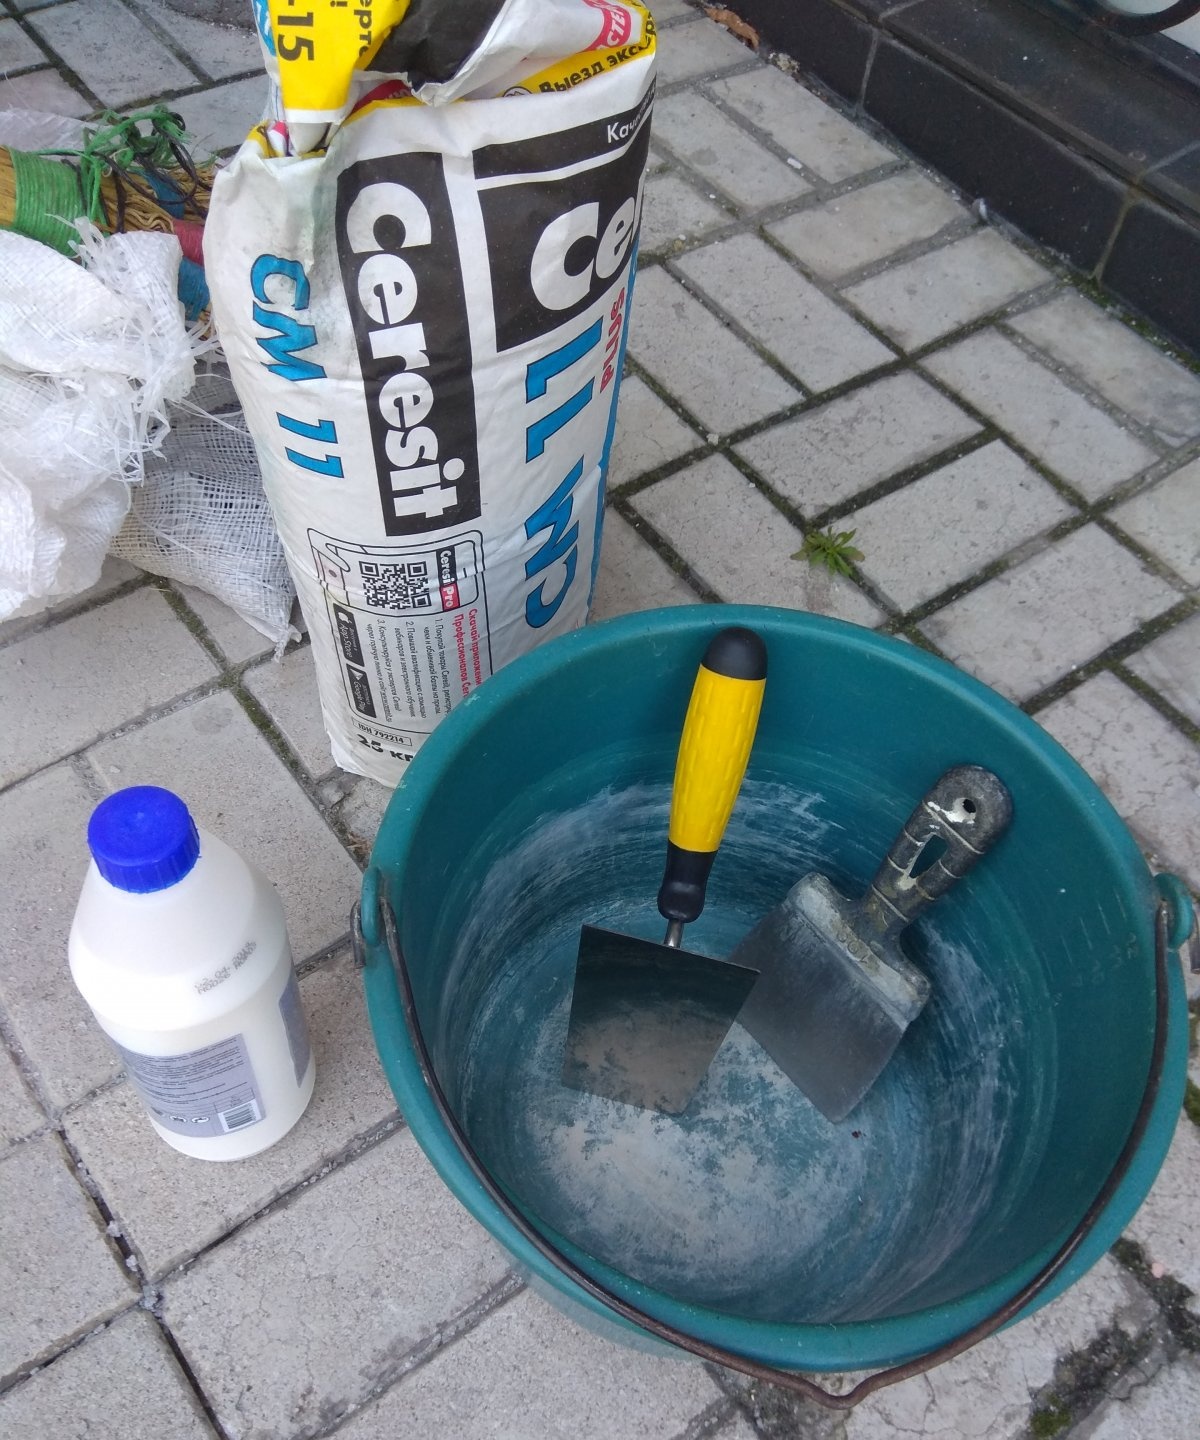
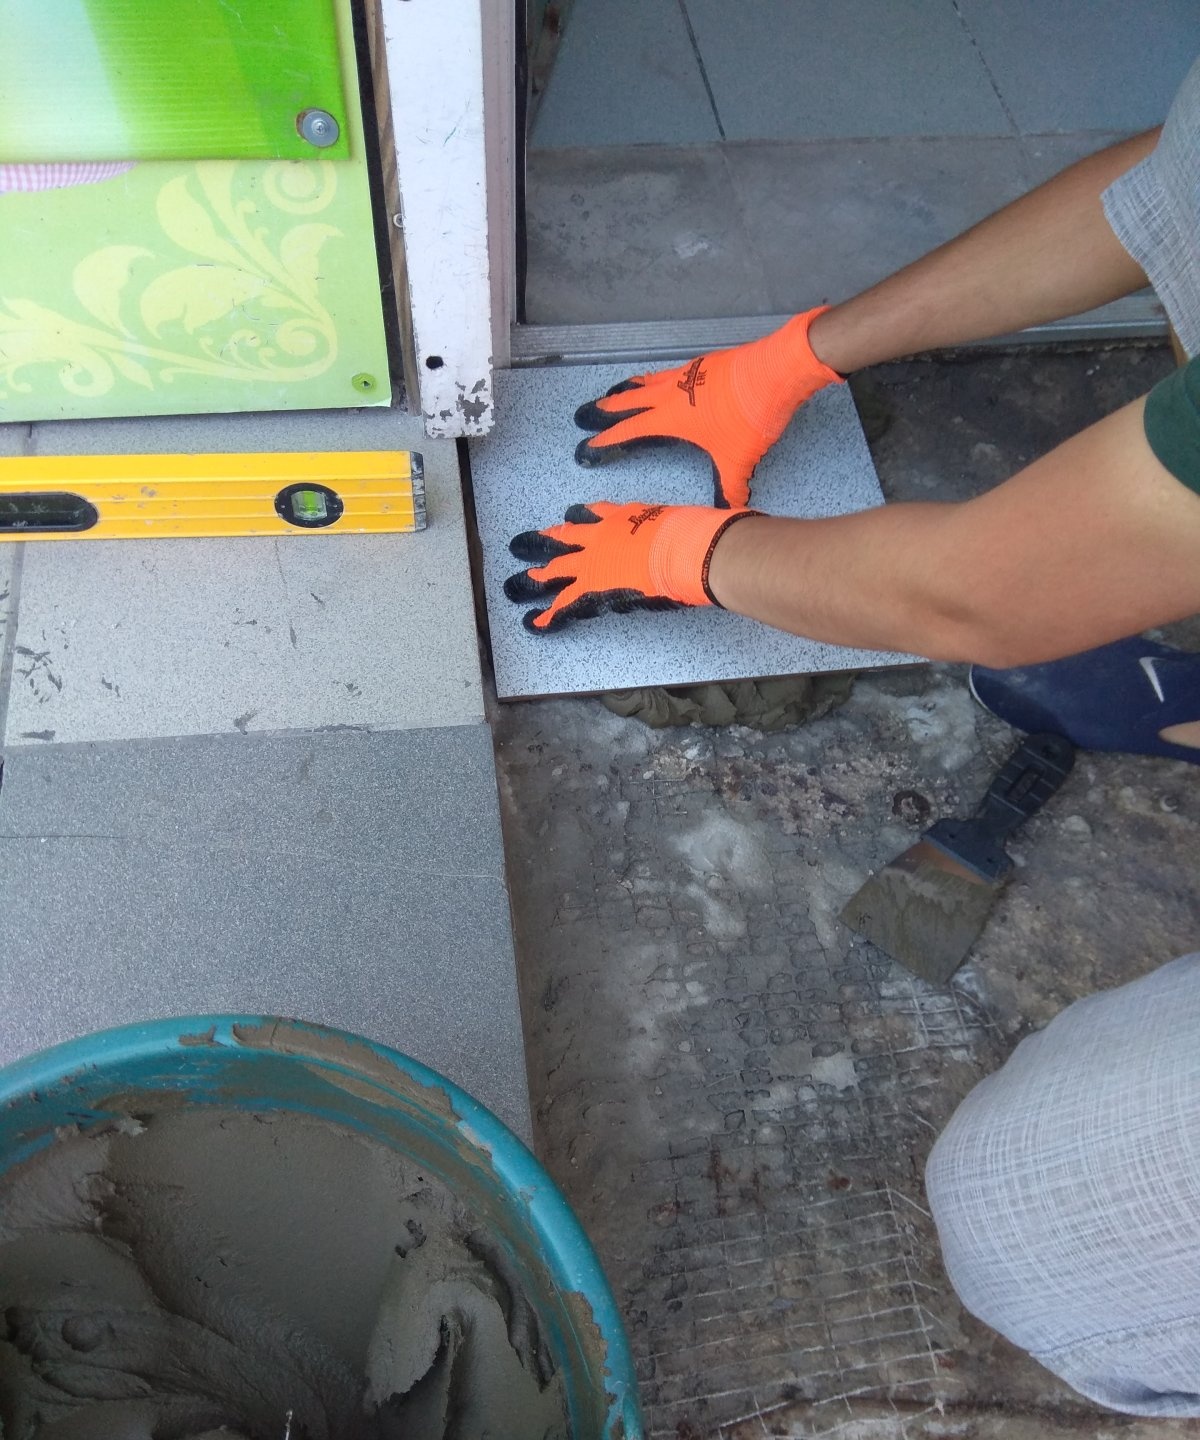
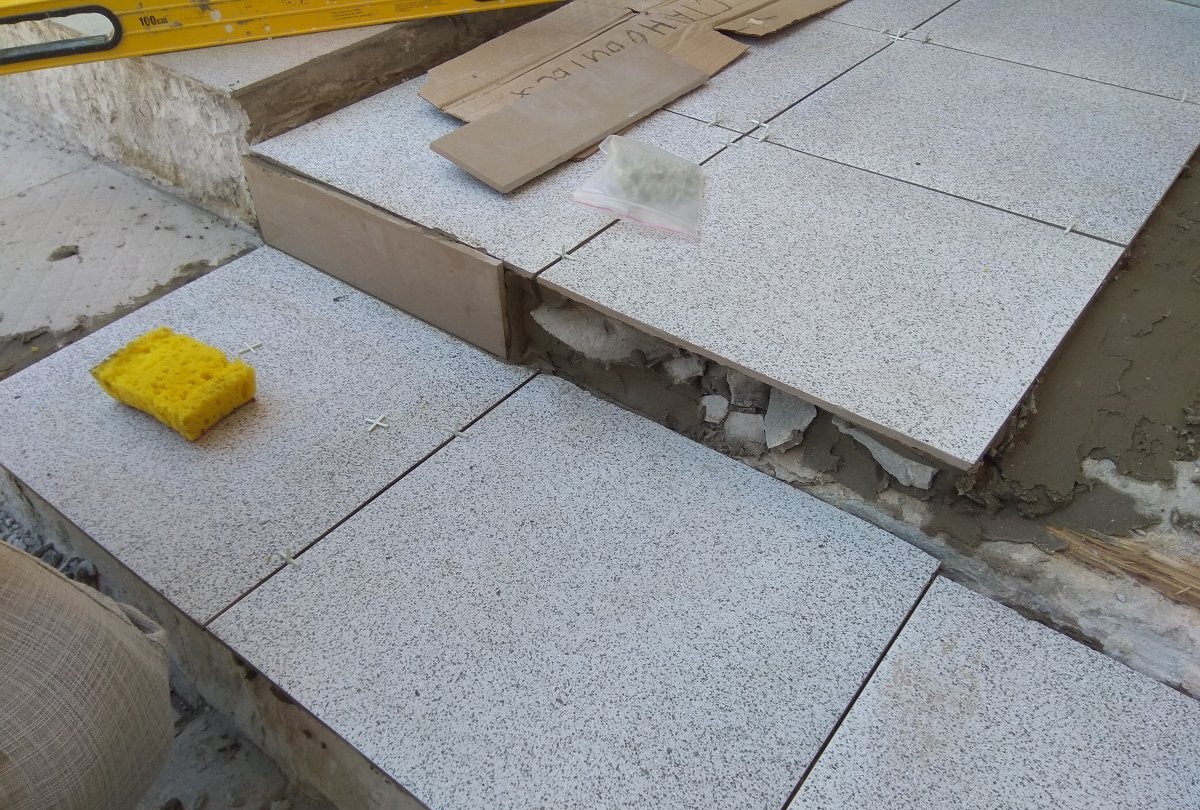
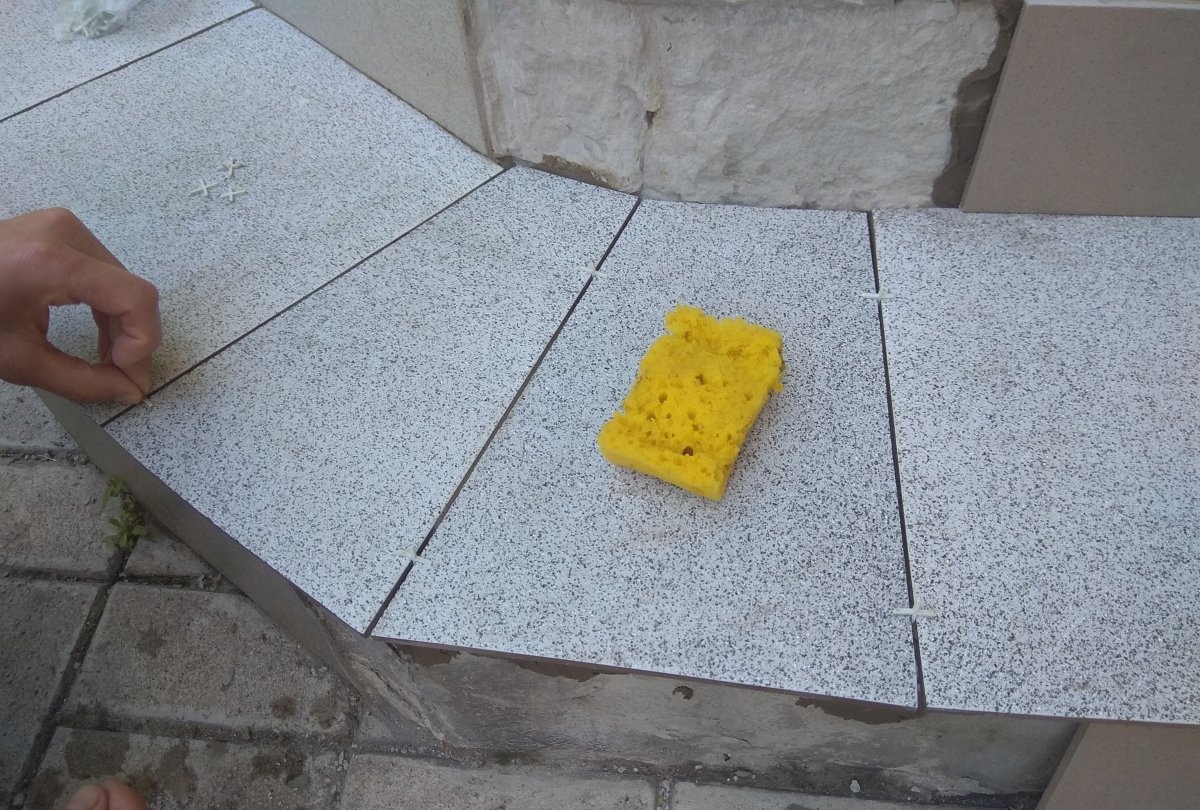
You can tap the tiles with a rubber mallet or by hand. The solution that will protrude between the seams is wiped off with a damp sponge.
Removing old tiles and laying new tiles on threshold steps

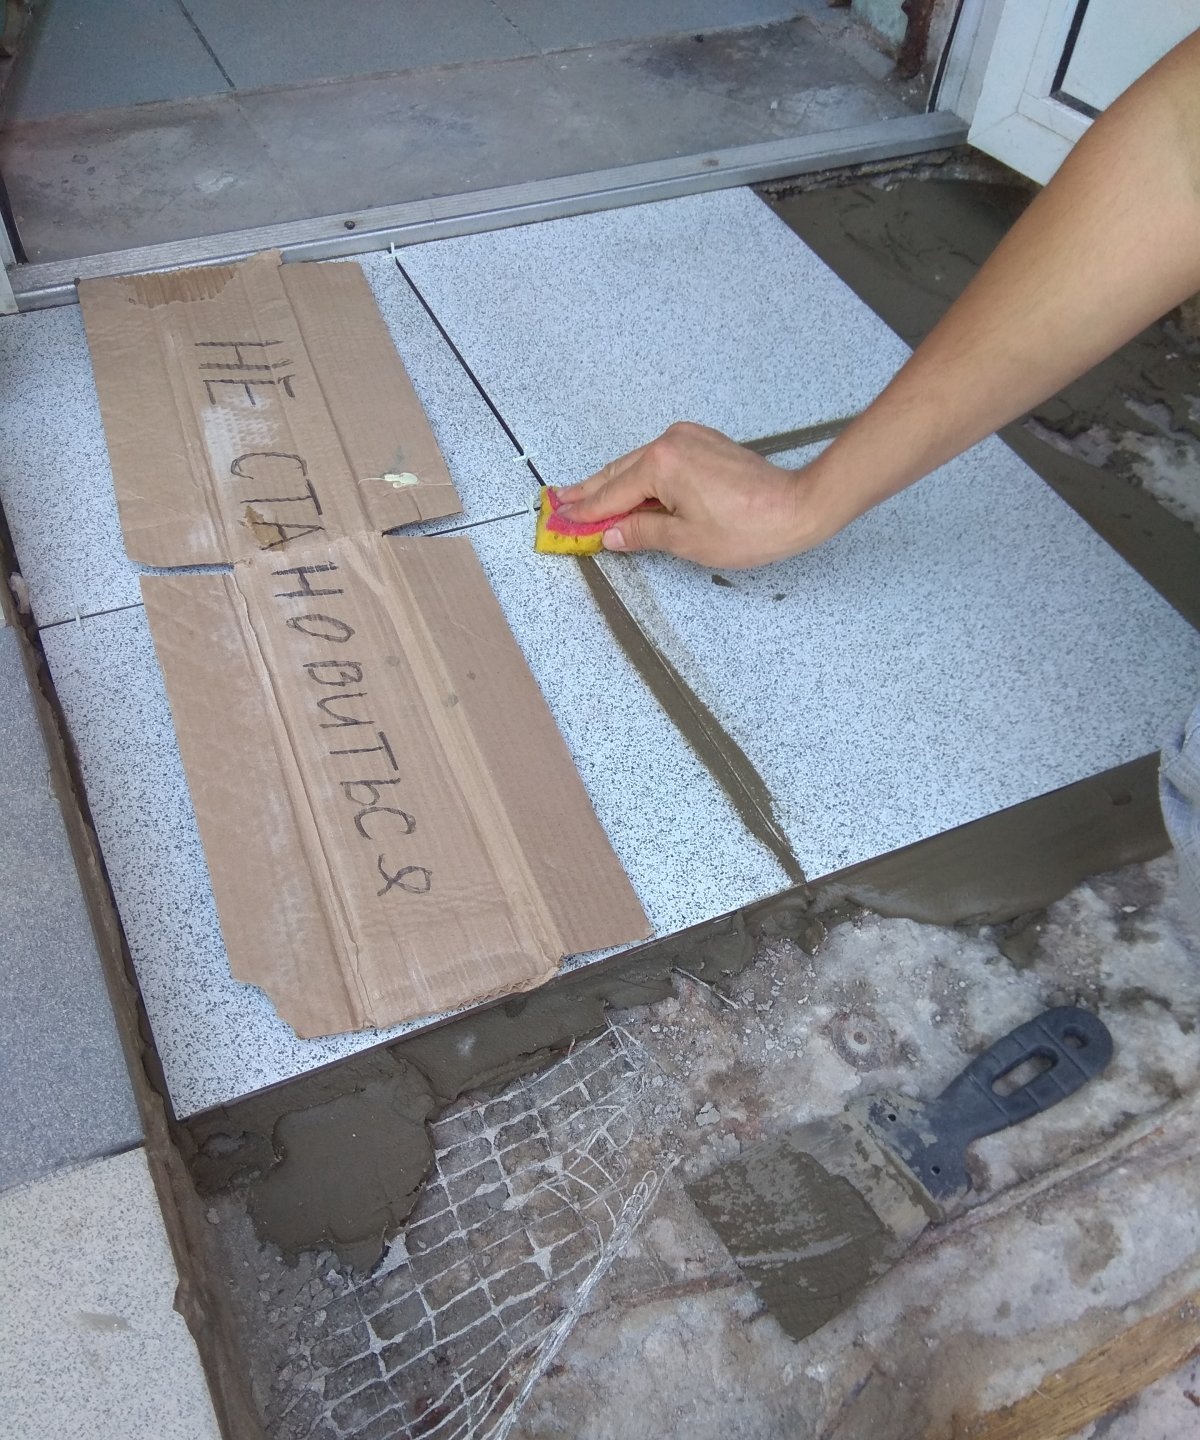
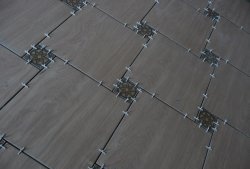
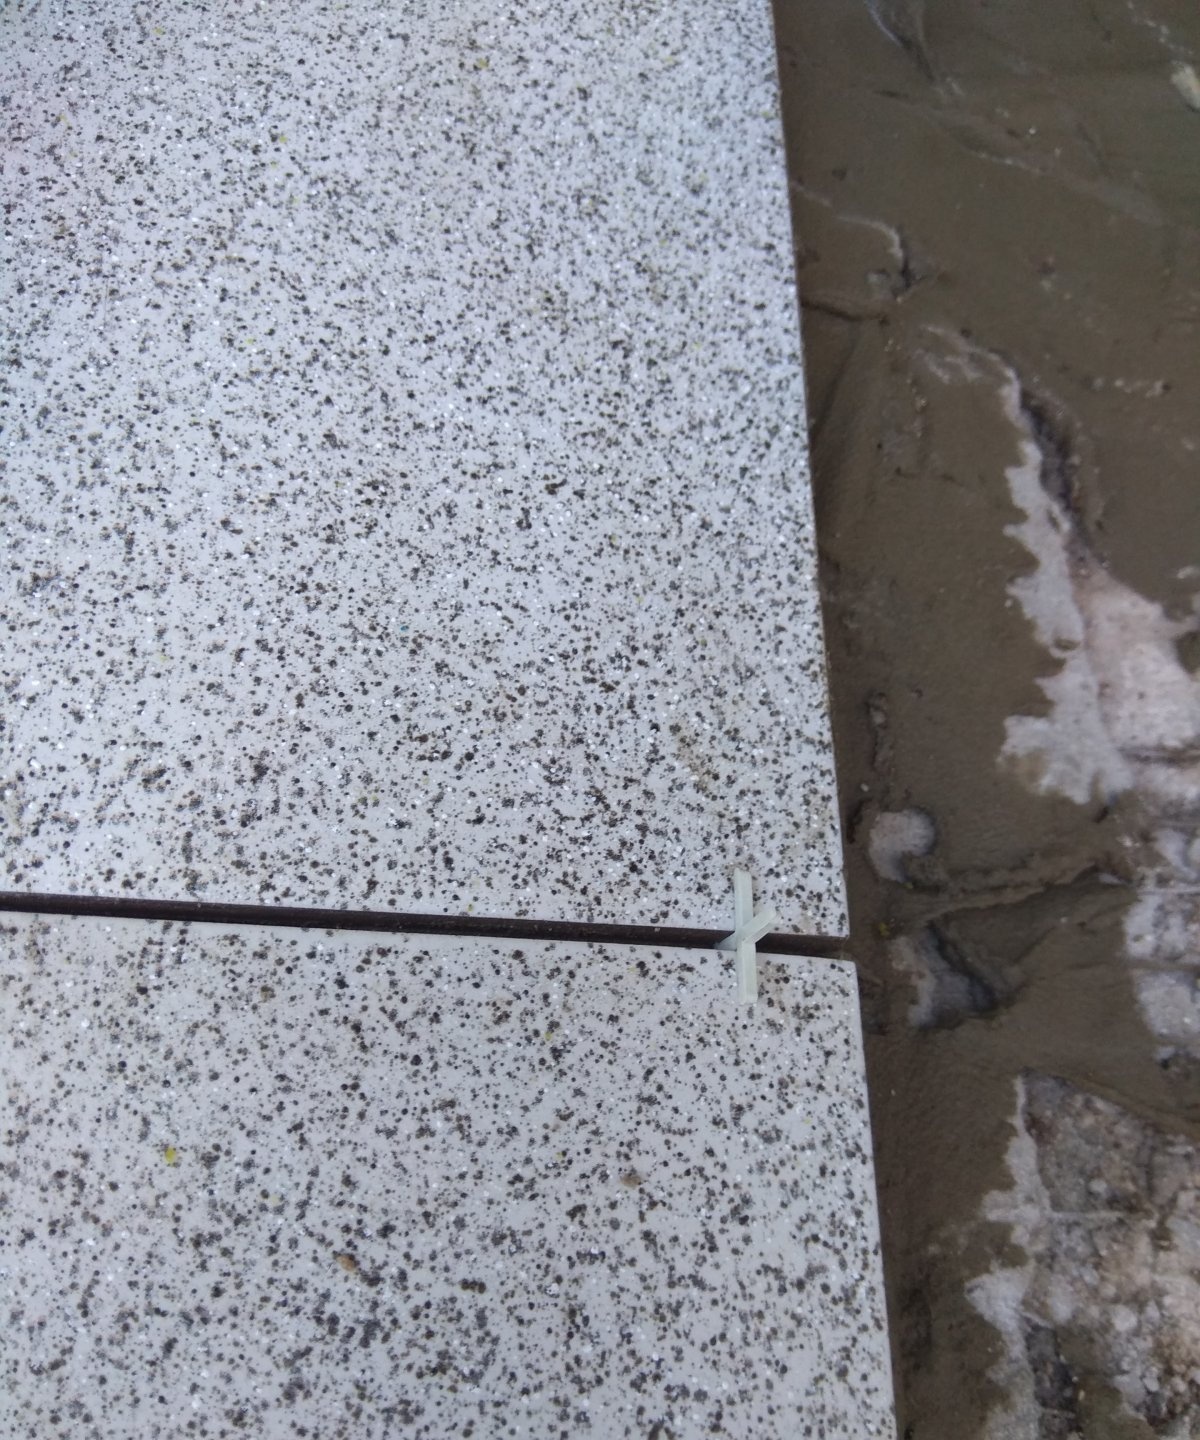
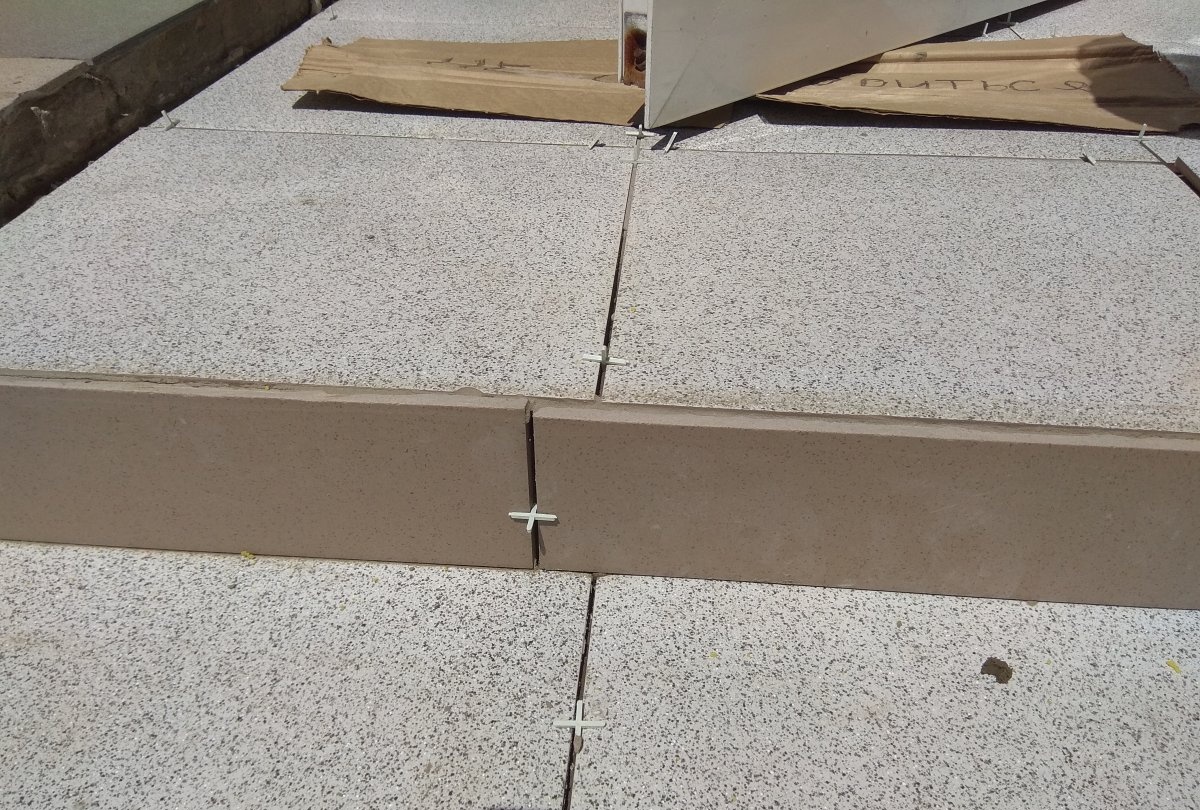
Therefore, it is necessary to have a bucket of water and a sponge with you. When laying subsequent slabs, it is necessary to use special crosses and wedges so that the seam is the same and there is no displacement. Install two crosses on each side of the tile.
Removing old tiles and laying new tiles on threshold steps

Removing old tiles and laying new tiles on threshold steps

Removing old tiles and laying new tiles on threshold steps

Removing old tiles and laying new tiles on threshold steps

Removing old tiles and laying new tiles on threshold steps

Removing old tiles and laying new tiles on threshold steps

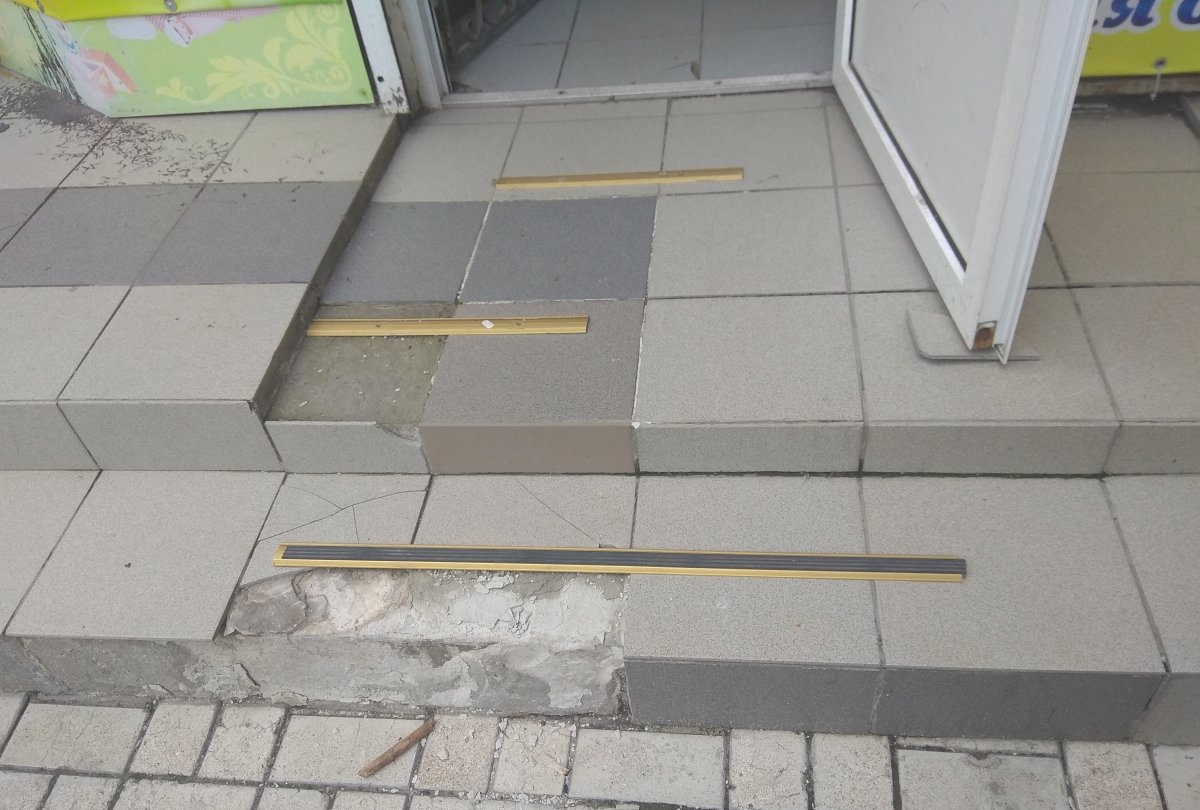
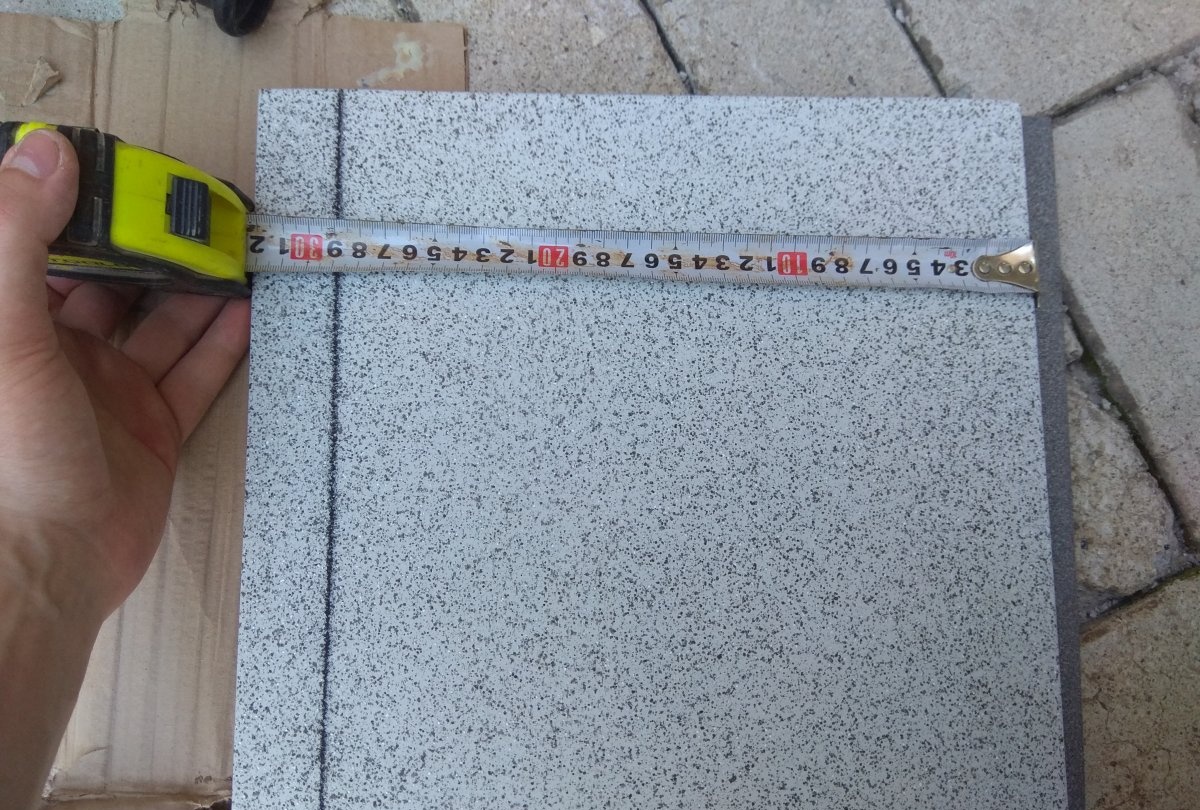
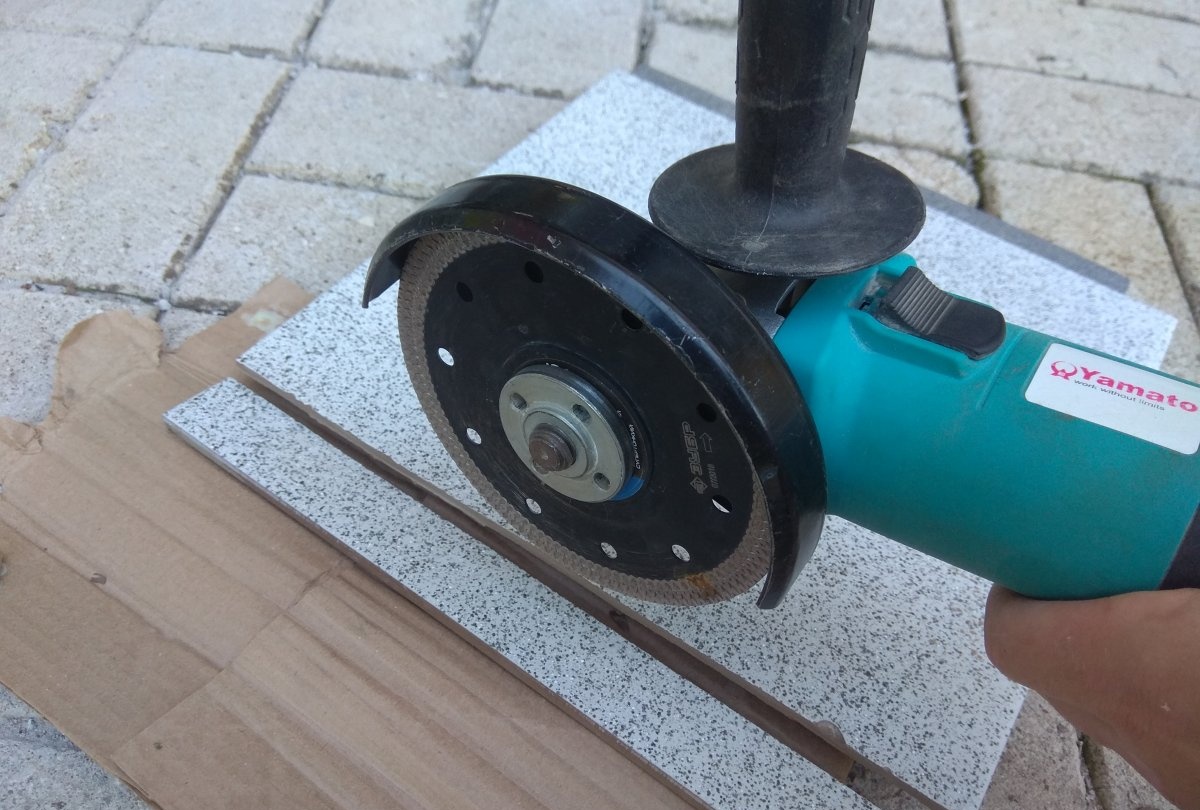
Trimming the tiles is carried out with a grinder or a special machine. Try to mark the cutting dimensions as accurately as possible so as not to damage the tiles.
Removing old tiles and laying new tiles on threshold steps

Removing old tiles and laying new tiles on threshold steps

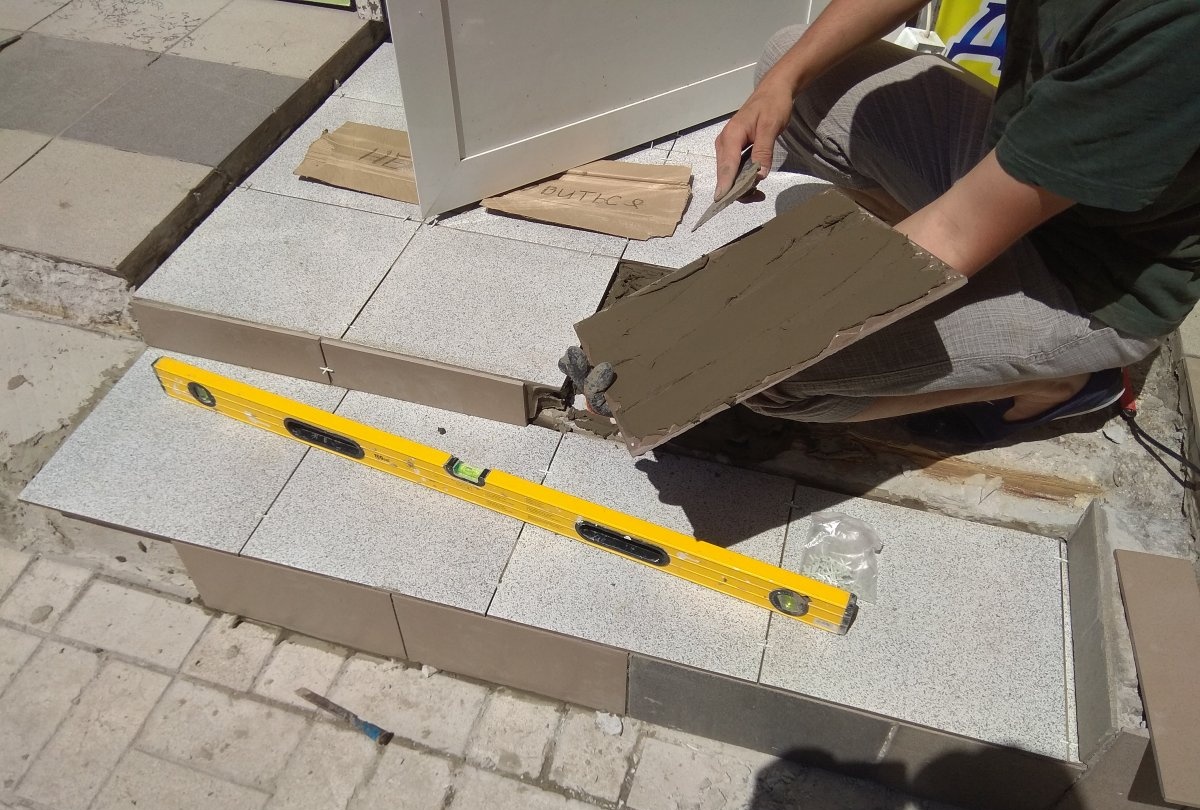
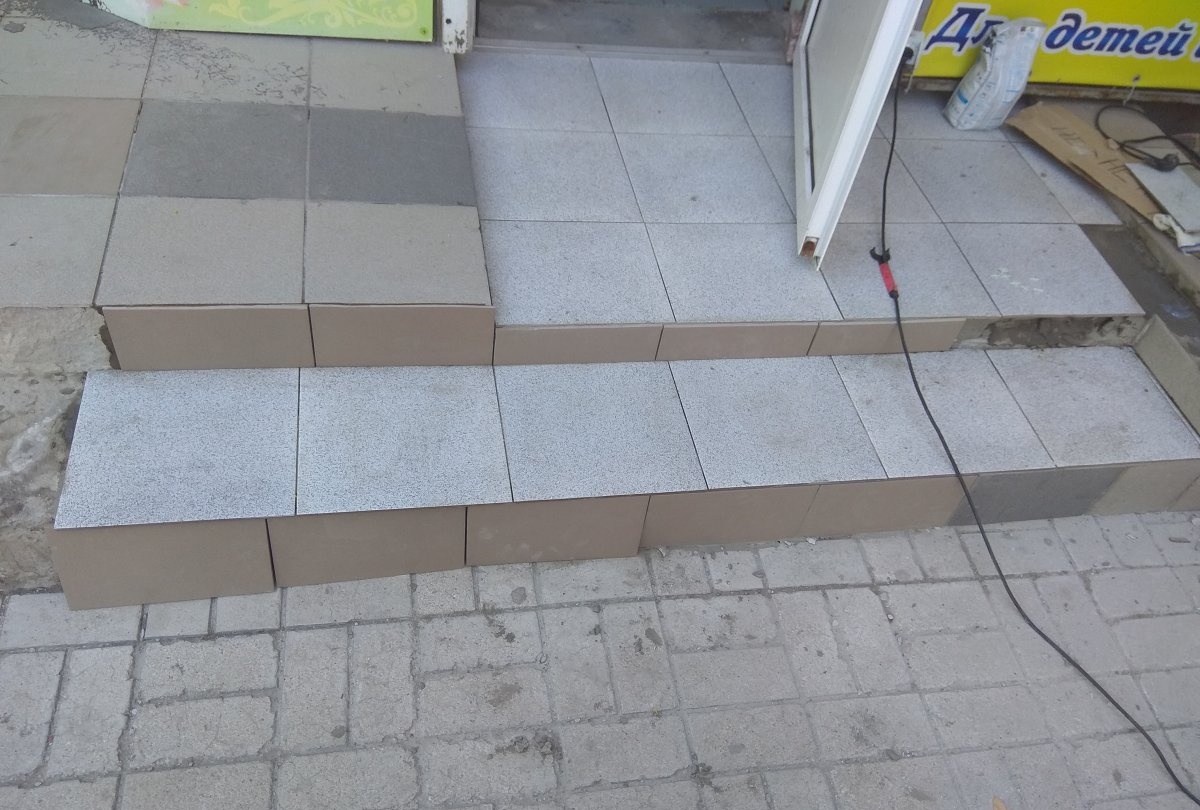
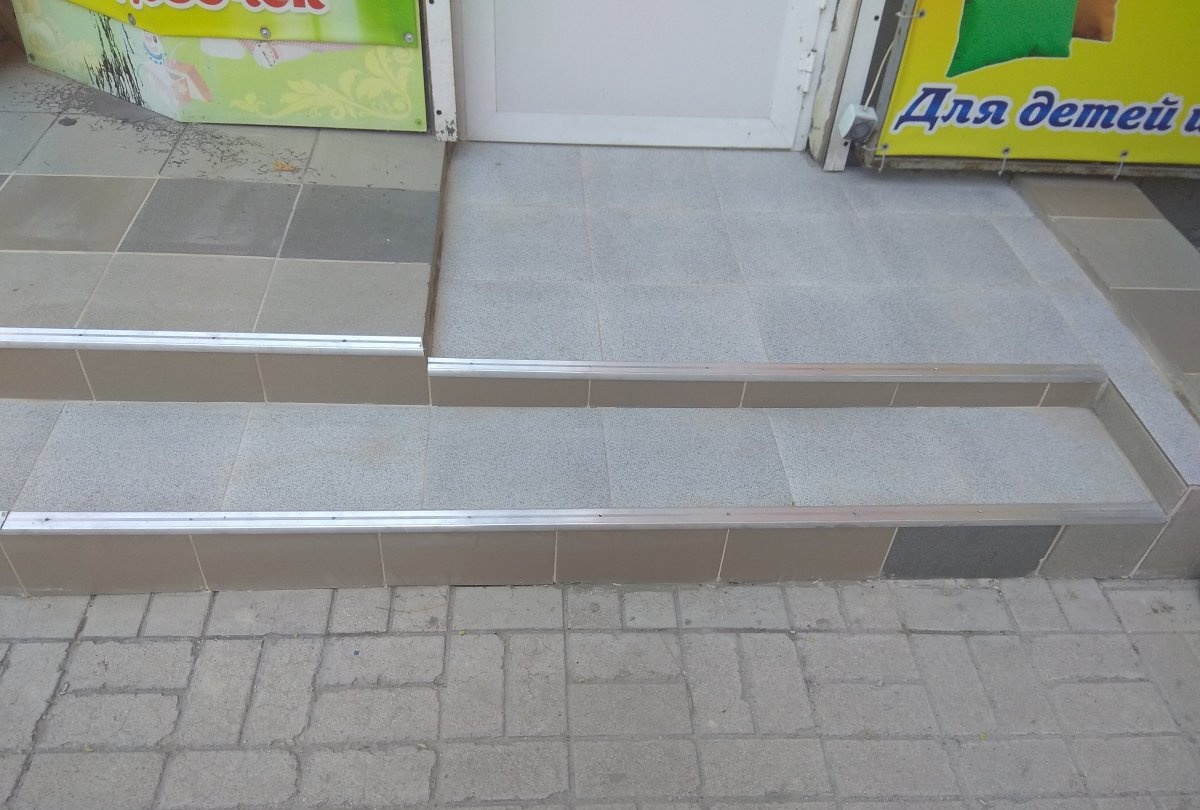
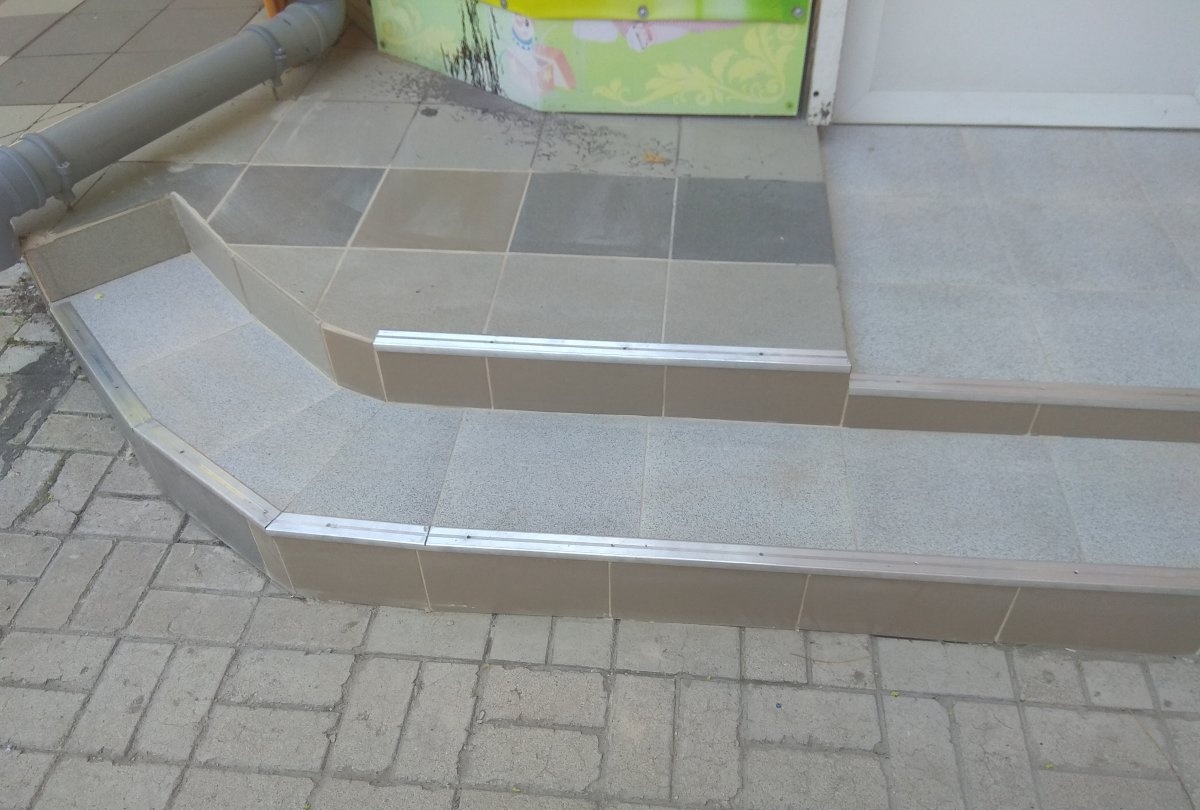
Once the cladding of all horizontal surfaces of the threshold and steps is completed, you can begin laying the vertical surfaces (risers).
Removing old tiles and laying new tiles on threshold steps

Removing old tiles and laying new tiles on threshold steps

Removing old tiles and laying new tiles on threshold steps

Removing old tiles and laying new tiles on threshold steps

Removing old tiles and laying new tiles on threshold steps

Removing old tiles and laying new tiles on threshold steps

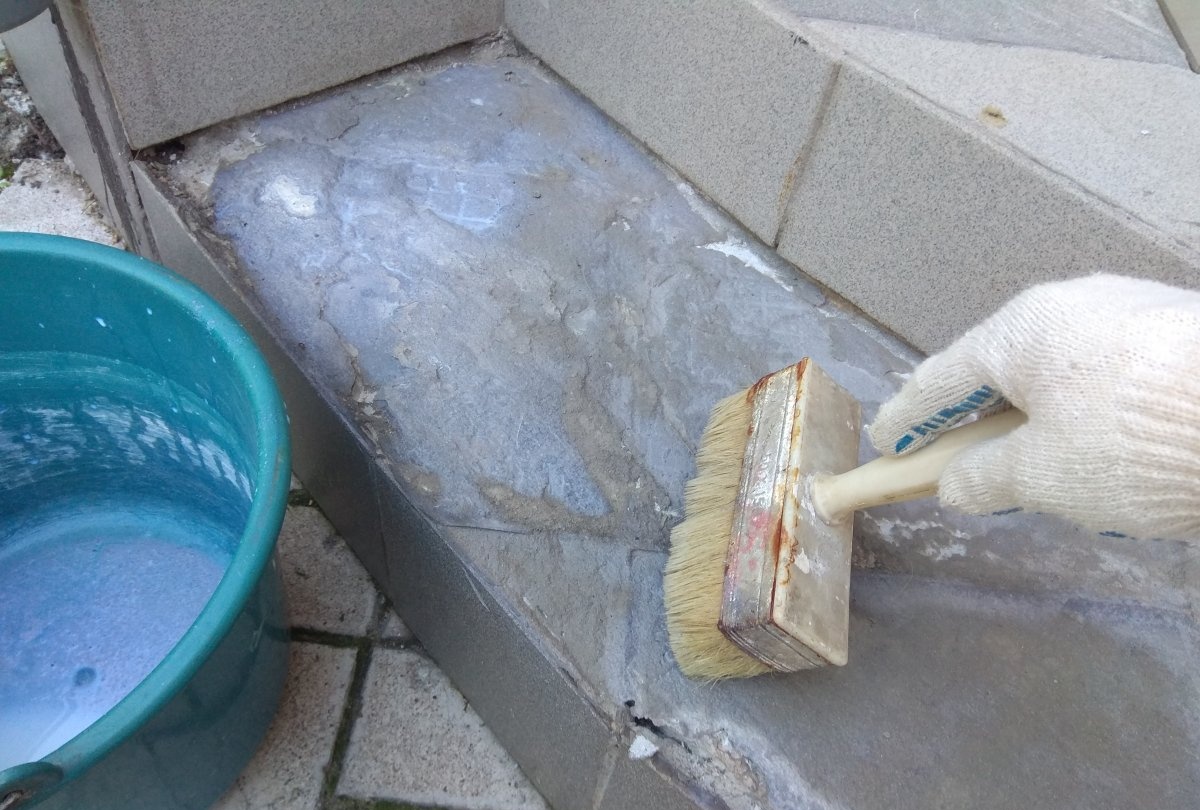
After you finish facing the steps, all seams must be covered with a special putty. It is also diluted with water and rubbed into the seams using a spatula. When performing this step, you also need to have a bucket of water and a sponge with you to immediately wipe off any grout that stains the tiles. It is better to do this right away, as it will be more difficult after it dries.
Removing old tiles and laying new tiles on threshold steps

Removing old tiles and laying new tiles on threshold steps

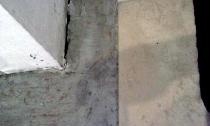
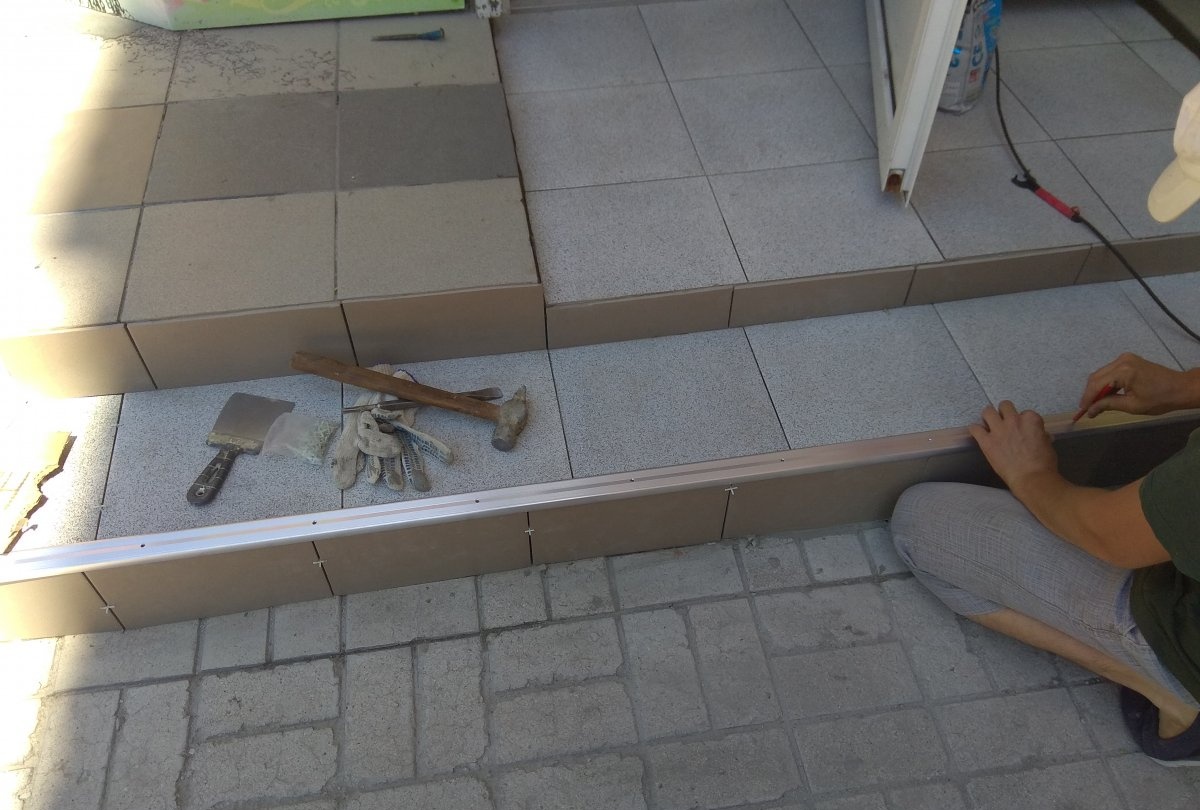
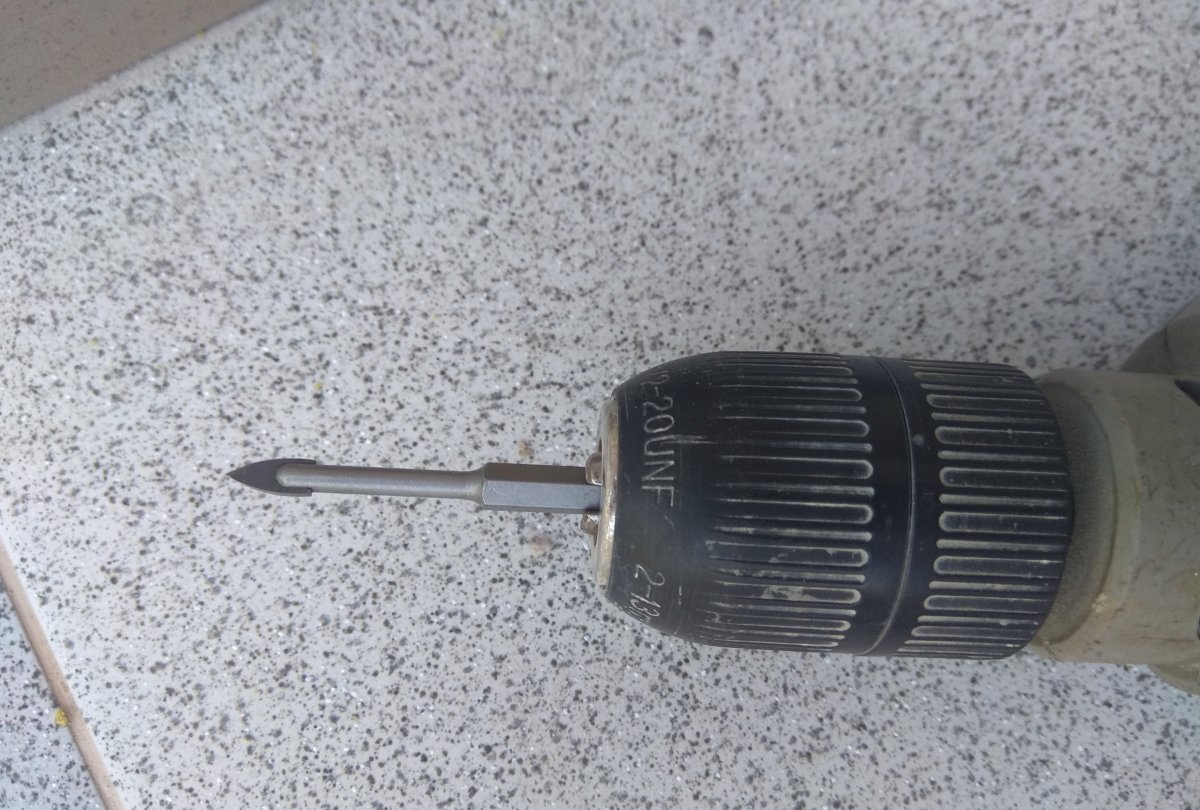
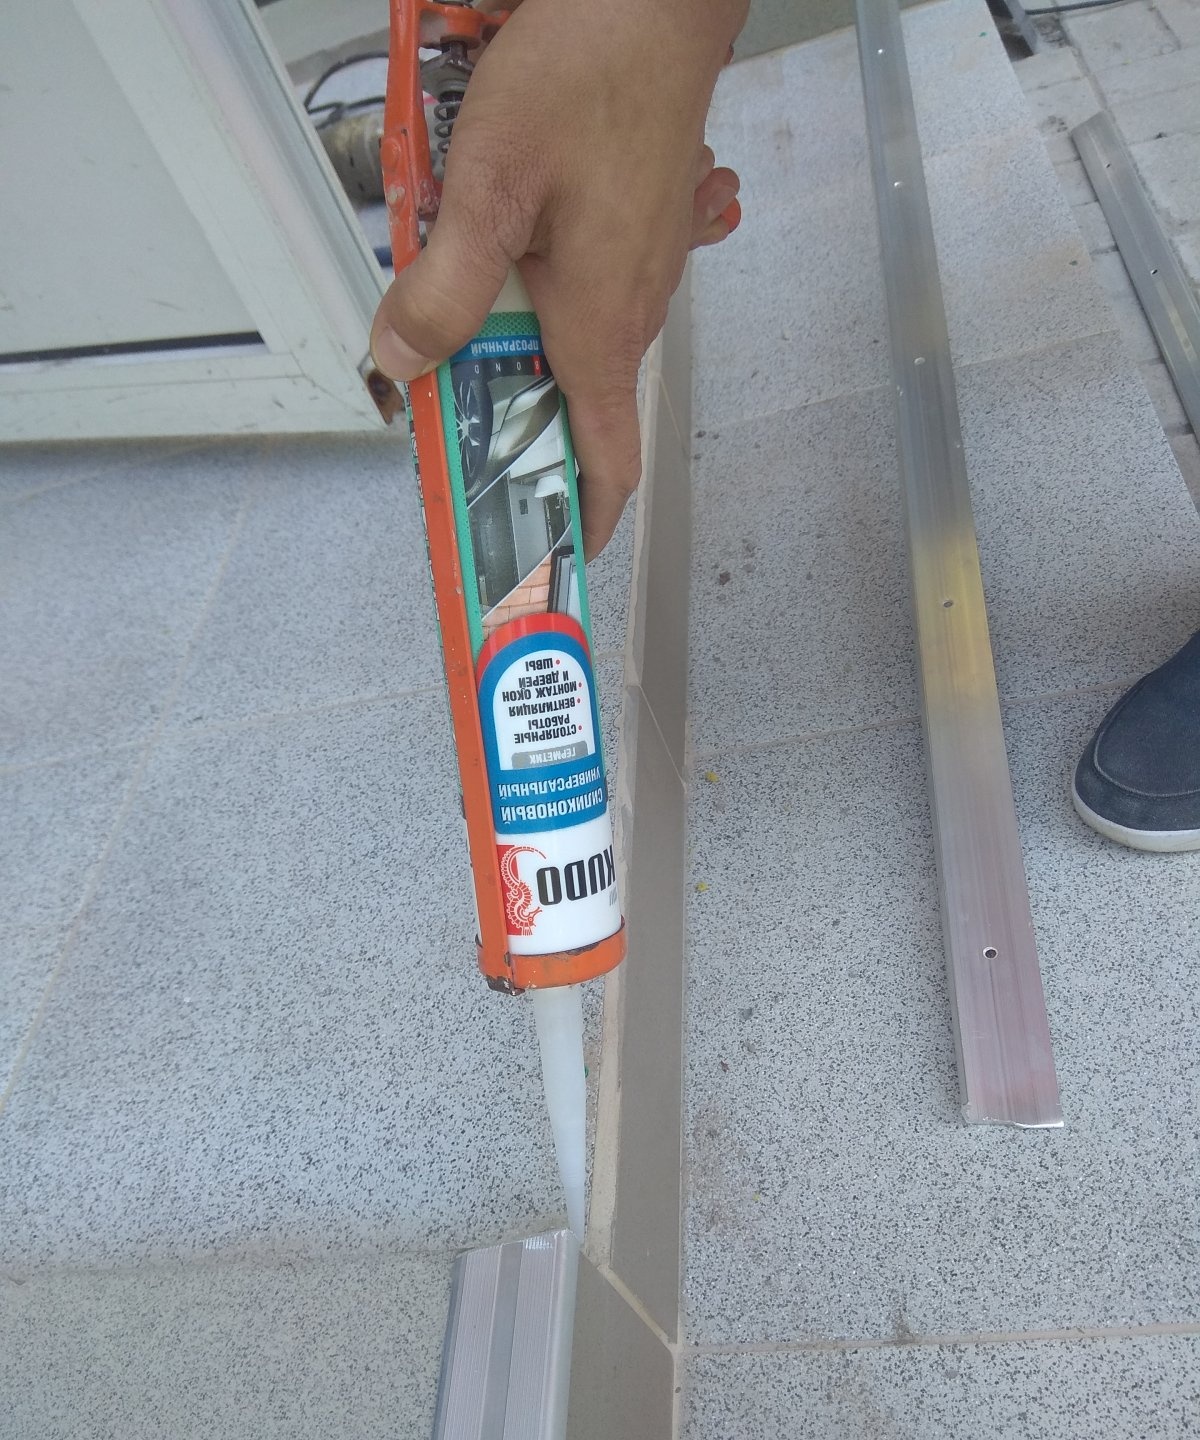
In order to strengthen the front corners of the steps, you can attach a metal corner. This is important, since this area is most susceptible to damage, and most often the peeling of tiles begins in the corners. Therefore, it is necessary to measure the appropriate length of the corner and cut it with a grinder. Then a hole is drilled with a special drill for tiles, and with the help of quick installation it is attached to the bottom surface. In addition, in order to better secure the corner, you can additionally coat it with silicone.
Removing old tiles and laying new tiles on threshold steps

Removing old tiles and laying new tiles on threshold steps

Removing old tiles and laying new tiles on threshold steps

Removing old tiles and laying new tiles on threshold steps

Removing old tiles and laying new tiles on threshold steps

Removing old tiles and laying new tiles on threshold steps

Tiling a staircase is not a complicated process. Its main difficulty is that it requires a lot of pruning. However, this requires no longer skill, but accuracy and precision in size.
come back
Comment
  • bowtiesmilelaughingblushsmileyrelaxed relaxedsmirk
    heart_eyeskissing_heartkissing_closed_eyesflushedrelievedsatisfiedgrin
    winkstuck_out_tongue_winking_eyestuck_out_tongue_closed_eyesgrinningkissingstuck_out_tonguesleeping
    worriedfrowninganguishedopen_mouthgrimacingconfusedhushed
    expressionlessunamusedsweat_smilesweatdisappointed_relievedwearypassive
    disappointedconfoundedfearfulcold_sweatperseverecrysob
    joyastonishedscreamtired_faceangryragetriumph
    sleepyyummasksunglassesdizzy_faceimpsmiling_imp
    neutral_faceno_mouthinnocent
5+two=
Comments (0)

A simple antenna for digital TV with your own hands based on a splitter

Hank Moody Bracelet | Do it yourself

Diagnostics and repair of boiler pressure switch | Do it yourself

Do it yourself - crafts and master classes | Page 83

«Do it yourself - with your own hands» - a site of interesting homemade products made from scrap materials and items at home. Step-by-step master classes with photos and descriptions, technologies, life hacks - everything a real master or just a craftsman needs for needlework. Crafts of any complexity, a large selection of directions and ideas for creativity.

We recommend reading

Washing machine error codes