Do it yourself
Life hacks, master classes, useful tips, recipes.
home » Present » DIY gifts » Bottle with colored salt
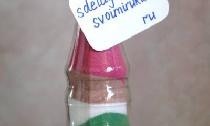
A bottle of colored salt is a bright and unusual souvenir for the kitchen, almost made from an axe.

To make it we will need: a bottle with a cap/stopper (preferably an original shape), Extra finely ground salt, gouache paints of different colors.


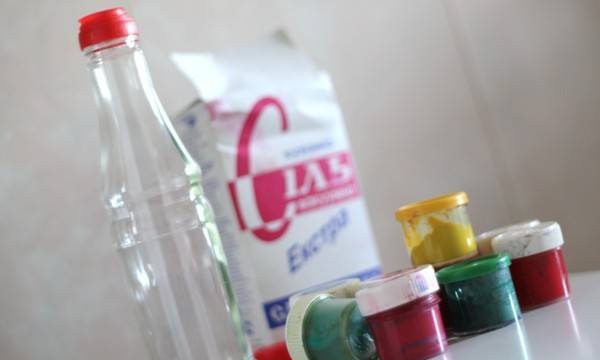
Wash the bottle of all labels: it should be clean and dry.


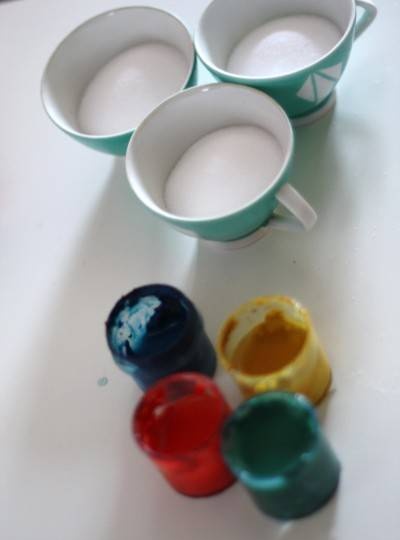
Fill the paints (you can also use dried ones) with water and, to make the water better colored, stir with a stick or spoon.


Pour salt into small containers (cups, jars). Pour water colored in a certain color into each container. The intensity of the color will depend on the proportions of paint and water: more water - a pale color, more paint - a bright color.


Mix salt with paint and dry in the oven or microwave. Salt dries faster in the microwave. This will take from 2 to 5 minutes at maximum power (depending on the amount of salt). The salt should dry out, but not dry out.


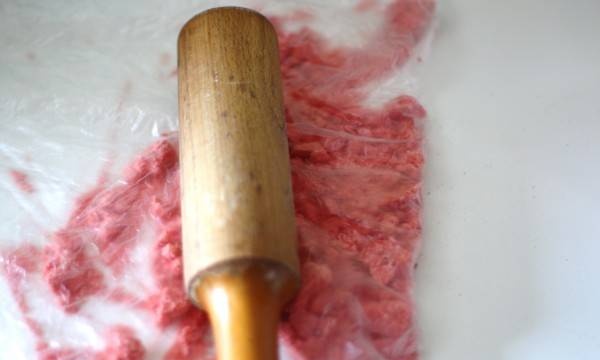
The dried salt is set in one piece. It needs to be ground and then sifted. The simplest option is a bag, a rolling pin and a small sieve. If the salt is still wet, it needs to be dried.


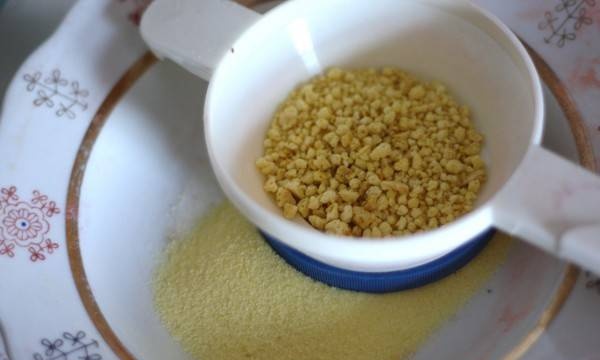
Pour the sifted colored salt into separate containers.
 

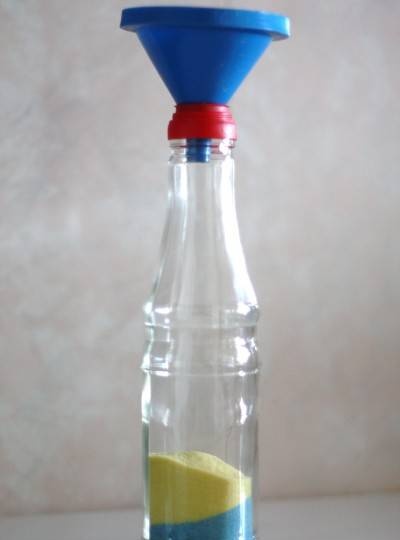
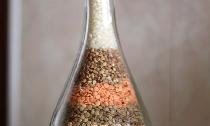
It is convenient to pour salt into the bottle using a watering can. To create a wave effect, tilt the bottle in different directions. The width of the layers is arbitrary, as is the sequence of colors. A full bottle needs to be hit on the table several times to compact the salt. Then add it all the way to the neck and close the lid.


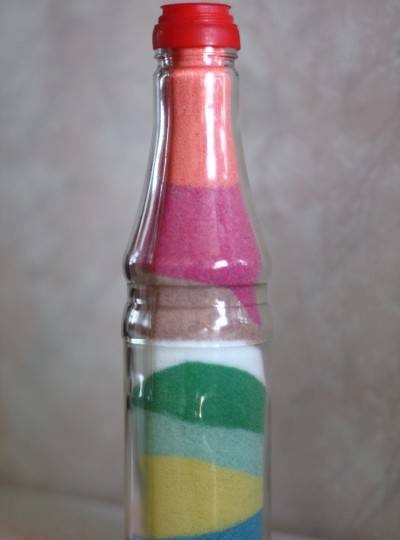
In a bottle tilted to one side you can depict a rainbow, in a wide bottle - a landscape. For more detailed work, you will need tubes of different diameters and patience.


Is it possible to eat colored salt? It is possible if it is painted not with gouache, but with the help of natural ingredients (orange peel, dried herbs, ground paprika, black or red pepper, etc.).

come back
Comment
  • bowtiesmilelaughingblushsmileyrelaxed relaxedsmirk
    heart_eyeskissing_heartkissing_closed_eyesflushedrelievedsatisfiedgrin
    winkstuck_out_tongue_winking_eyestuck_out_tongue_closed_eyesgrinningkissingstuck_out_tonguesleeping
    worriedfrowninganguishedopen_mouthgrimacingconfusedhushed
    expressionlessunamusedsweat_smilesweatdisappointed_relievedwearypassive
    disappointedconfoundedfearfulcold_sweatperseverecrysob
    joyastonishedscreamtired_faceangryragetriumph
    sleepyyummasksunglassesdizzy_faceimpsmiling_imp
    neutral_faceno_mouthinnocent
4 minus one =
Comments (3)
  1. ZootteesonO
    #1 ZootteesonO Guests February 24, 2012 04:58
    1
    For the sake of a test, a student will do anything - even take a test. (April 29, 1998).
  2. Danish
    #2 Danish Guests 7 March 2012 23:18
    2
    For the second time, a huge thank you to the authors of the site. On March 8th I had already given away almost everything, everyone liked it.
    I took 0.3 bottles from children's juices. I dried the salt in the microwave. It is better to dry not in a plastic container, but in a porcelain one (personally, I killed 2 plastic containers). When I painted for the first time, I diluted pieces of gouache in water.This was not enough, and the color came out close to pastel. The second time I poured water into a jar of gouache with a spoon, shook it, and then poured it into a container and poured it again. I did this 4-5 times. The color came out more saturated. During transportation, the salt settled, unfortunately, even more than during production, so be prepared for this (I had to pad it with paper, unfortunately). After making it, the salt remained and I decided to make a couple more products: I took a transparent toothpick jar, poured the salt in layers, and put a layer of gauze and paper on top. Then I took a couple of syringes, filled them and stuck them into the toothpick holes in the lid. It also turned out very original. Everyone was happy with the gifts. Thank you for the idea!
  3. V.A.L.E.K.
    #3 V.A.L.E.K. Guests December 13, 2012 16:50
    0
    cool gift idea

Master class of clamp “Orchid” | Do it yourself

How to make a base for a gazebo or terrace with your own hands

Christmas tree made from salt dough | Do it yourself

How to make an original lamp with your own hands from PET bottles and veneer strips

«Do it yourself - with your own hands» - a site of interesting homemade products made from scrap materials and items at home. Step-by-step master classes with photos and descriptions, technologies, life hacks - everything a real master or just a craftsman needs for needlework. Crafts of any complexity, a large selection of directions and ideas for creativity.

We recommend reading

Washing machine error codes