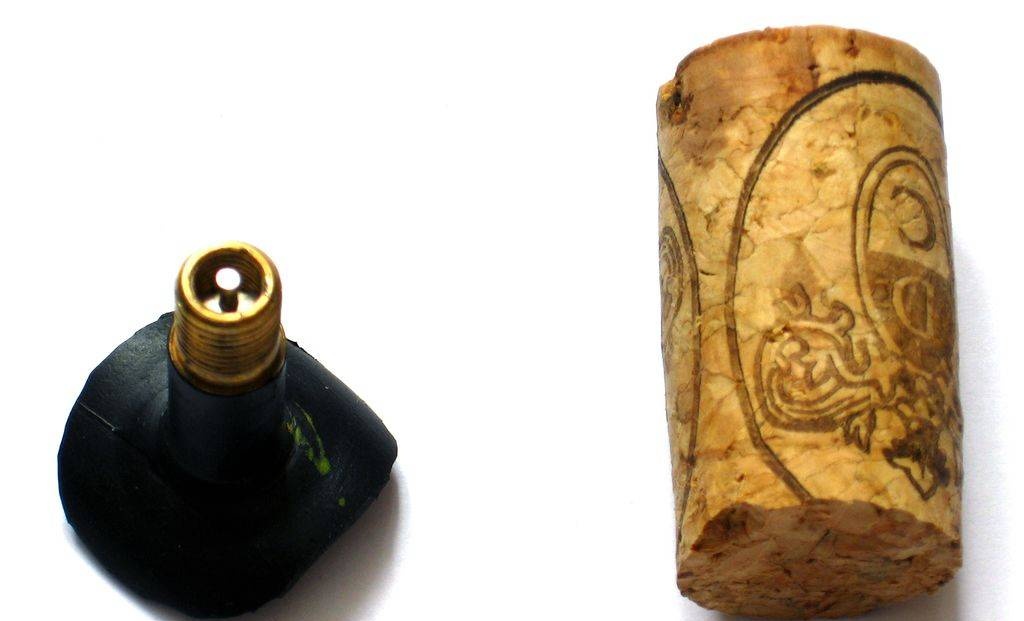
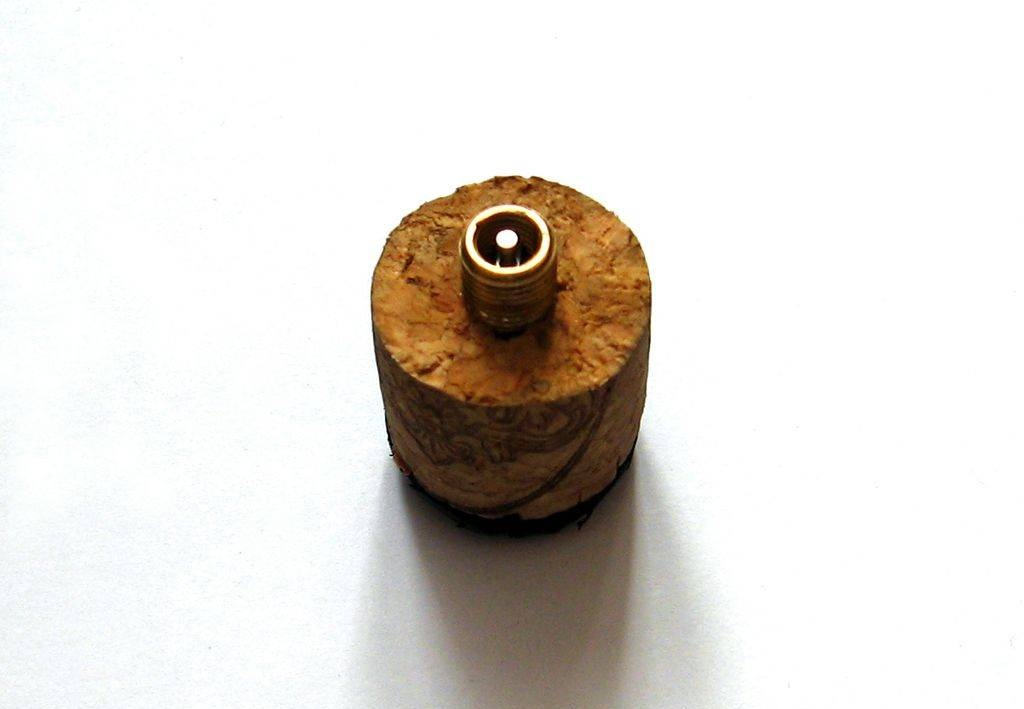


The main component in the rocket will be the valve, the effectiveness of our entire rocket will depend on it.With its help, air is pumped into the bottle and retained. Let’s take a punctured or perhaps working chamber from any bicycle and cut out the “nipple” from it, the part to which we connect the pump. You will also need a regular stopper from bottles of wine or champagne, but since there are so many of them in different shapes and sizes, the main selection criterion for us there will be a length of at least 30 mm and a diameter so that the cork fits into the neck of the bottle with an interference fit of 2/3 of its length. Now in the found cork you should make a hole of such a diameter that the “nipple” fits into it with force. It is better to drill a hole in two steps, first with a thin drill, and then with a drill of the required diameter, and the main thing is to do this gently with little effort. Next, we connect the “nipple” and the stopper together, after dropping a little “super glue” into the hole of the stopper to prevent air from leaking out of the bottle. The last piece in the valve will be the pad, which is used to secure the valve to the launch pad. It needs to be made of durable material, for example metal or fiberglass with a thickness of 2-3 mm and dimensions of 100x20 mm. After making 3 holes for fastening and nipples, you can glue the plug to it, but it is better to use epoxy glue for a more durable connection. In the end, the main thing is that part of the nipple protrudes above the platform by about 8-11 mm, otherwise there will be nothing to connect the pump to.
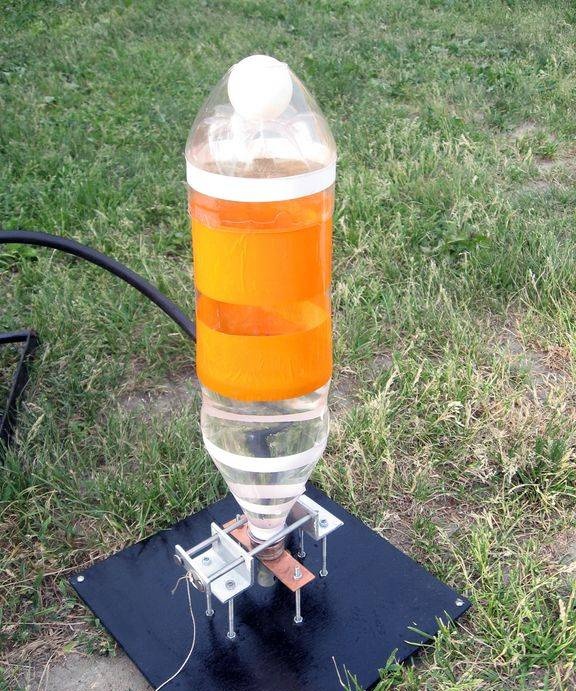
I started on the rocket itself. To make it you will need two 1.5 liter bottles, a table tennis ball, and colored tape. You can put one bottle aside for now, and let’s perform the operation with the second. You need to carefully cut off the top of the bottle so that the total length is approximately 100 mm.Next, we saw off the threaded head from this part. As a result, we got a head fairing, but that’s not all. Since there is a hole left in the middle, it needs to be closed and in this case you will need a prepared ball. Let's take a whole bottle, turn it upside down, put a ball on top and put on the head fairing. In total, it turned out that the ball protrudes slightly beyond the circumference of the bottle; it will serve as an element that softens the impact on the ground during descent from orbit. Now the rockets need to be decorated a little, since the bottles are transparent, the rocket will be difficult to see in flight, and for this, where there is a smooth cylindrical surface, we wrap it with colored tape. So, in the end, the treasured missile turned out, although it looks more like a ballistic intercontinental missile. You can, of course, make stabilizers to make it look like a standard rocket, but they will not affect the flight of this projectile in any way. Stabilizers in the amount of four can be easily made from cardboard from household appliances by cutting them into a small area. You can glue them to the rocket body using liquid nail glue or something similar.
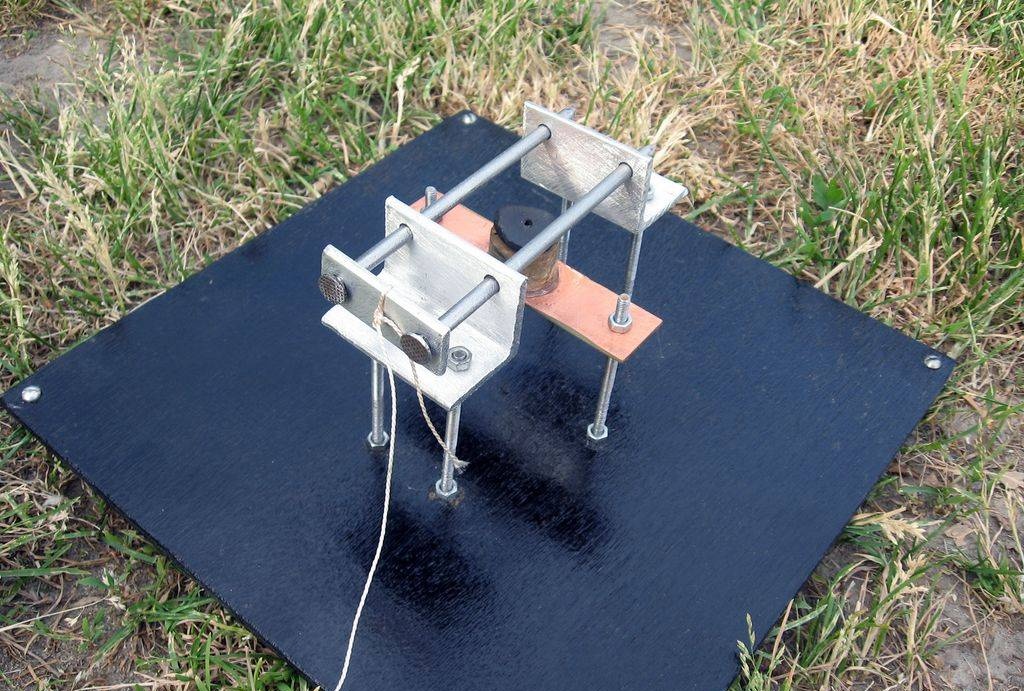
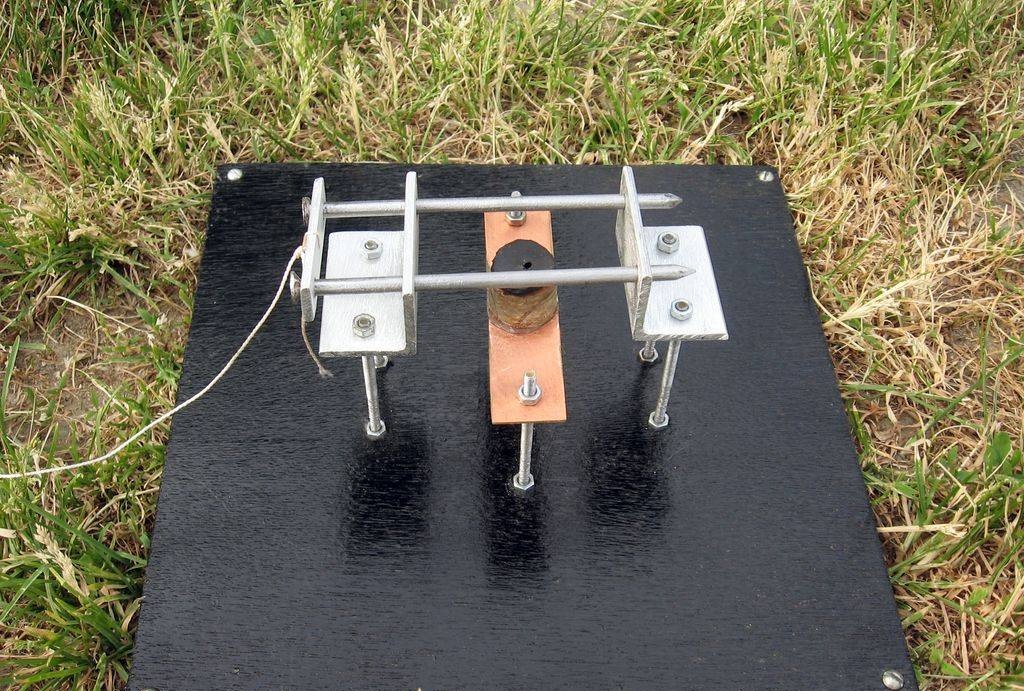
Now let's start making the launch pad. To do this, we need a flat plywood sheet 5-7 mm thick, cut into squares with sides 250 mm long. In the center, we first fix the previously made platform with the valve, choose the distance between the holes arbitrarily, the distance between the two platforms must be at least 60 mm, and for this we use bolts with a diameter of 4 or 5 mm and a length of at least 80 mm as fastening.Next, in order to fix the rocket on the launch pad, you will need to make a holder with a launching device, which consists of two corners, two nails and 4 bolts with fastening. At the corner, on one side, we drill two holes for fastening to the launch pad; the distance between the holes, both in the corner and in the main platform, should be the same, for example 30 mm. On the other side of both corners, you also need to make two holes with a diameter of 5 mm for two large nails of the same diameter, but the distance between the holes should be such that the distance between the nails themselves is from 28 to 30 mm. When everything is assembled, you should adjust the height of the fixing nails. To do this, we will install the bottle on the valve, as in combat mode, with great effort, and after that we need to select the height of the corners so that the nails slide easily in the holes themselves and between the neck of the bottle. The nails also serve as a release mechanism, but we will also need to make a special plate connecting them and for the rope that we will pull to launch the rocket. The final elements in the launch pad will be the legs, for which you need to drill 4 holes in all corners of the pad and screw 4 small bolts from 30 to 50 mm long; they serve to fix the launch pad in the ground.
The rocket must be filled with water in a strictly specified amount, this is 1/3 of the total length of the entire bottle. It is easy to verify experimentally that you should not pour too much water or too little, since in the first case there is too little space left for air, and in the second there is too much. The engine thrust in these cases will be very weak, and the operating time will be short.When the valve opens, the compressed air begins to eject water through the nozzle, resulting in thrust, and the rocket develops an appropriate speed (about 12 m/s). It should be borne in mind that the amount of thrust is also affected by the cross-sectional area of the nozzle. The thrust, which decreases as water is thrown out, will allow the rocket to reach a height of 30 - 50 m.
Several test launches in light or moderate winds lead to the conclusion that with a sealed connection between the valve and the bottle, proper filling with water and with the model mounted vertically at launch, it can reach a height of about 50 m. Installing the rocket at an angle of 60° leads to a decrease in height lifting, but the flight range increases. With flatter trajectories, either the model’s launches will be unsuccessful or the flight range will be short. A model launched without water will be very light and will rise only 2 - 5 m. Air-hydraulic models are best launched in calm weather. As a result of the tests, it is easy to notice that the model has good stability and a tendency to orient itself against the wind, both in the presence of traction and after the engine has stopped running. The flight time of the model from start to landing, depending on the height reached, is 5 - 7 seconds.
By the way, air-hydraulic rockets can be multi-stage, that is, they can consist of several bottles or even five or more. In general, the record for the flight altitude of such a rocket is as much as 600 meters; not every standard rocket model can reach such a height. At the same time, they can lift a significant payload, for example, some testers install cameras or mini video cameras and successfully conduct aerial photography.
So, when everything is ready, you can go out and make the first launches. Along with the rocket and equipment, you also need to take additional fuel - several bottles of water. Such missiles can be launched anywhere, in a schoolyard, in a forest clearing, the main thing is that within a radius of 20 meters there are no buildings that would impede a combat flight. In the center of our test site, install the launch pad so that the installed rocket is strictly vertical. Next, we connect the pump to the valve, fill the rocket with water of the required volume and quickly install it on the launch pad, so that the valve fits very tightly into the neck of the bottle. Now we cock the trigger mechanism, insert two nails into the holes, fixing them. It is better to launch an air-hydraulic rocket together, one will pull the string to make the launch, and the other will pump air into the bottle. The length of the rope should be approximately 10 - 15 meters, this distance is enough so that the launcher is not splashed with a fountain of water from the rocket, but you won’t envy the one who will work with the pump, he has a very good chance of taking a cool shower during a non-standard flight of the rocket. Since our rocket consists of a 1.5 liter bottle, it should be inflated to a pressure of 4 - 5 atmospheres, you can try more, but the valve itself and the connection to the pump will not withstand such a high pressure, and a leak will occur. When inflating, you don’t have to be afraid that something might happen to the bottle, because according to technical data, it can withstand 30–40 atmospheres. Air injection lasts approximately 30 seconds.When the required pressure in the bottle is reached, the launcher is given the command “Start”, who with a sharp movement pulls the string and a moment later the rocket rushes into the sky, performing a combat mission. To decorate the flight, you can tint the water, for example, with paints or potassium permanganate, this way you can accurately trace the jet stream and trajectory of the rocket. For the next launch, all that remains is to add fuel from the reserve and again pump air into the engine compartment. Such a rocket can be good fun on a sunny summer day.